



need help replacing ignition wires
Thread Starter
Racer


Joined: Oct 2010
Posts: 373
Likes: 2
 need help replacing ignition wires
hi,
I need some help with replacing ignition wires on my 70 350,
I really don't know where to start can someone post a step by step instructions I have a stock setup and i'm keeping that way. really could use some expert advice.
thanks in advance
Frank


I need some help with replacing ignition wires on my 70 350,
I really don't know where to start can someone post a step by step instructions I have a stock setup and i'm keeping that way. really could use some expert advice.
thanks in advance
Frank

Team Owner


Joined: Sep 2006
Posts: 31,316
Likes: 4,421
From: Westminster Maryland
Hi Frank,
First a few questions... what makes you think they need to be replaced ... have you bought a new set yet... and if so are they pre-cut to the proper lengths?
Regards,
Alan
NICE PICTURES!
First a few questions... what makes you think they need to be replaced ... have you bought a new set yet... and if so are they pre-cut to the proper lengths?
Regards,
Alan
NICE PICTURES!

Team Owner
Joined: Aug 1999
Posts: 30,995
Likes: 99
From: Ontario
Race Director


Joined: Aug 2004
Posts: 10,628
Likes: 132
From: Duvall, WA
The wires for the front plugs route through the motor mounts. When I did mine, I got cut-to-length wires, fed them through the motor mounts and then attached the ends. It's a tight fit through the mounts.
Corvette Stories
The Best of Corvette for Corvette Enthusiasts

5 Best & 5 Worst Corvette Daily Drivers
Joe Kucinski
The Headlights of Every Corvette Generation Explained
Joe Kucinski
5 Best & 5 Most Overrated Corvette Track Packages of All Time!
Joe Kucinski
Every 2027 Corvette Engine Explained
Joe Kucinski
Designer Imagines A Corvette That Looks More Like a Corvette Than the Corvette
Verdad Gallardo
10 Ugly Corvettes That We Still Kinda Love
Joe Kucinski
Top 10 Most Expensive Corvettes Ever Sold on Bring A Trailer
Brett Foote
10 Things Every Corvette Owner Needs (2026 Edition)
Michael S. Palmer
8 Most "Only Corvette Owners Understand" Quirks and Problems
Pouria Savadkouei
Team Owner
Joined: Sep 2006
Posts: 31,316
Likes: 4,421
From: Westminster Maryland
Hi Frank,
The rubber grommets slip up out of the shield support. You'll then see they're split to allow the wires to be inserted.
Run the wires one at a time starting with the front. Take the #1 wire loose at the distributor and pull it from the spark-plug end until the distributor-end passes through the front engine mount. It WILL fit. Put the new one in by pushing it through the engine mount and pulling it to the distributor. This works for the front 2 wires on each side.
As you begin to work you'll see there is a wire holder at the rear of the block on each side that holds all four wires on each side. There is also a small clip on each side that is fastened to an oil pan bolt and hold 2 wires.
You may also find a boomerang shaped heat shield on each side behind the exhaust manifolds on each side. (sometimes they're missing).
The rear four wires are much easier.
Be very careful because it's easy to put the wrong wire on a plug or distributor tower.
It's not an 'easy' job but not too difficult either.
Good Luck!
Regards,
Alan
PS: I mark each wire with number to be sure.
PSS: Other posts with good suggestions while I was typing.

The rubber grommets slip up out of the shield support. You'll then see they're split to allow the wires to be inserted.
Run the wires one at a time starting with the front. Take the #1 wire loose at the distributor and pull it from the spark-plug end until the distributor-end passes through the front engine mount. It WILL fit. Put the new one in by pushing it through the engine mount and pulling it to the distributor. This works for the front 2 wires on each side.
As you begin to work you'll see there is a wire holder at the rear of the block on each side that holds all four wires on each side. There is also a small clip on each side that is fastened to an oil pan bolt and hold 2 wires.
You may also find a boomerang shaped heat shield on each side behind the exhaust manifolds on each side. (sometimes they're missing).
The rear four wires are much easier.
Be very careful because it's easy to put the wrong wire on a plug or distributor tower.
It's not an 'easy' job but not too difficult either.
Good Luck!
Regards,
Alan
PS: I mark each wire with number to be sure.
PSS: Other posts with good suggestions while I was typing.
Last edited by Alan 71; Jul 23, 2011 at 03:30 PM.

Melting Slicks


Joined: Mar 2009
Posts: 3,126
Likes: 15

I believe #2 will be the longest with the Corvette shielding. This diagram just shows proper firing order but you can see when the wires are run through the shielding the general length of each wire in relation to the others. Hope it helps. mike...
Last edited by mds3013; Jul 23, 2011 at 03:41 PM.
Thread Starter
Racer
Joined: Oct 2010
Posts: 373
Likes: 2
Hi Frank,
The rubber grommets slip up out of the shield support. You'll then see they're split to allow the wires to be inserted.
Run the wires one at a time starting with the front. Take the #1 wire loose at the distributor and pull it from the spark-plug end until the distributor-end passes through the front engine mount. It WILL fit. Put the new one in by pushing it through the engine mount and pulling it to the distributor. This works for the front 2 wires on each side.
As you begin to work you'll see there is a wire holder at the rear of the block on each side that holds all four wires on each side. There is also a small clip on each side that is fastened to an oil pan bolt and hold 2 wires.
You may also find a boomerang shaped heat shield on each side behind the exhaust manifolds on each side. (sometimes they're missing).
The rear four wires are much easier.
Be very careful because it's easy to put the wrong wire on a plug or distributor tower.
It's not an 'easy' job but not too difficult either.
Good Luck!
Regards,
Alan
PS: I mark each wire with number to be sure.
PSS: Other posts with good suggestions while I was typing.
The rubber grommets slip up out of the shield support. You'll then see they're split to allow the wires to be inserted.
Run the wires one at a time starting with the front. Take the #1 wire loose at the distributor and pull it from the spark-plug end until the distributor-end passes through the front engine mount. It WILL fit. Put the new one in by pushing it through the engine mount and pulling it to the distributor. This works for the front 2 wires on each side.
As you begin to work you'll see there is a wire holder at the rear of the block on each side that holds all four wires on each side. There is also a small clip on each side that is fastened to an oil pan bolt and hold 2 wires.
You may also find a boomerang shaped heat shield on each side behind the exhaust manifolds on each side. (sometimes they're missing).
The rear four wires are much easier.
Be very careful because it's easy to put the wrong wire on a plug or distributor tower.
It's not an 'easy' job but not too difficult either.
Good Luck!
Regards,
Alan
PS: I mark each wire with number to be sure.
PSS: Other posts with good suggestions while I was typing.
very helpful info
Peace
Frank
Thread Starter
Racer
Joined: Oct 2010
Posts: 373
Likes: 2
I believe your right!!
I just started to taking off all the shielding & i'm on the hardest side passenger AC on r/h side..
Thanks for the info..
Peace
Frank
Thread Starter
Racer
Joined: Oct 2010
Posts: 373
Likes: 2
tough job
well I slit (cut) a new wire on the first try plug wire! #2 all others are in.. I've got to get another wire from the auto parts... It was a bitch the r/h side metal shield is much harder it has a bigger bend the plug wire caught up on the shield just when it came out. my hands are so cut up and not to mention sweating may *** off..
Peace
Frank
Peace
Frank


 Not a job for the 'faint of heart'.

Team Owner

Joined: Jun 2000
Posts: 38,923
Likes: 1,482
From: Southbound
Cruise-In II Veteran

Thread Starter
Racer
Joined: Oct 2010
Posts: 373
Likes: 2
I bought my car 8 months ago didn't really know when the last tune up was done, & I just had to know what was installed and to try to determine how long they where in the car.
It's kind of a thing I came accustomed to when purchasing a new car (old) having sad all that!! Parts installed previously were much better quality!!!
OEM ignition wires & cap with Blue Streak Rotor points looked pretty good not much wear also looked OEM.
I replaced plugs with ACDelco R43S installed where AC R44 with Accel points & condenser.
All ACDelco parts are all made in mexico I will never use ACDelco again
very cheep quality.
well I'm still not done, hear are some pictures You can see the original spark plug wire hear it's #4 cylinder it should be easyer to do #4 then #2 cylinder
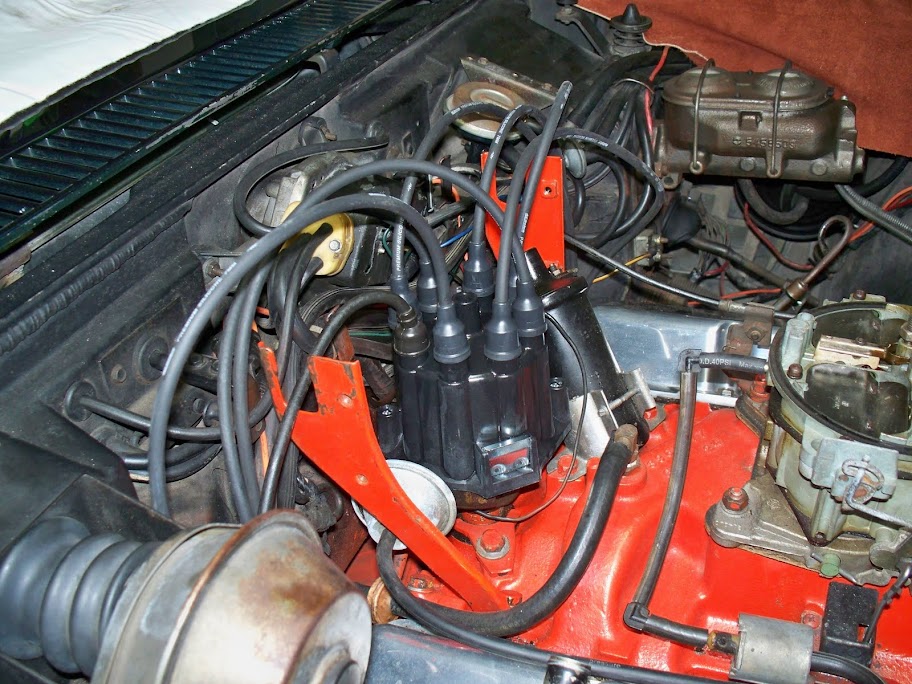
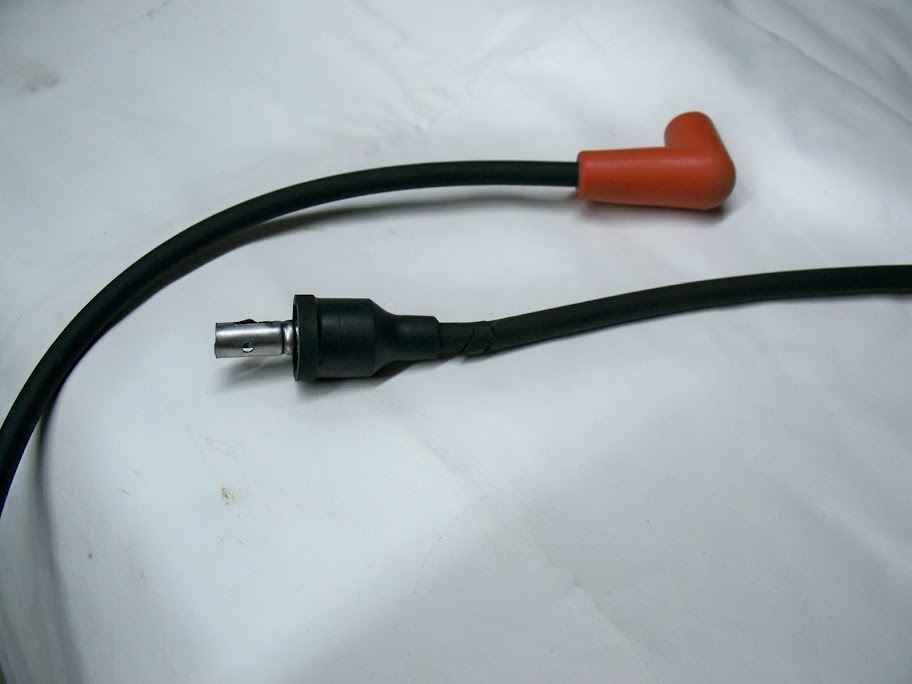
Hear is the cut wire.. BTW The Auto parts store will have a new replacement wire for me tomorrow afternoon
old spark plug
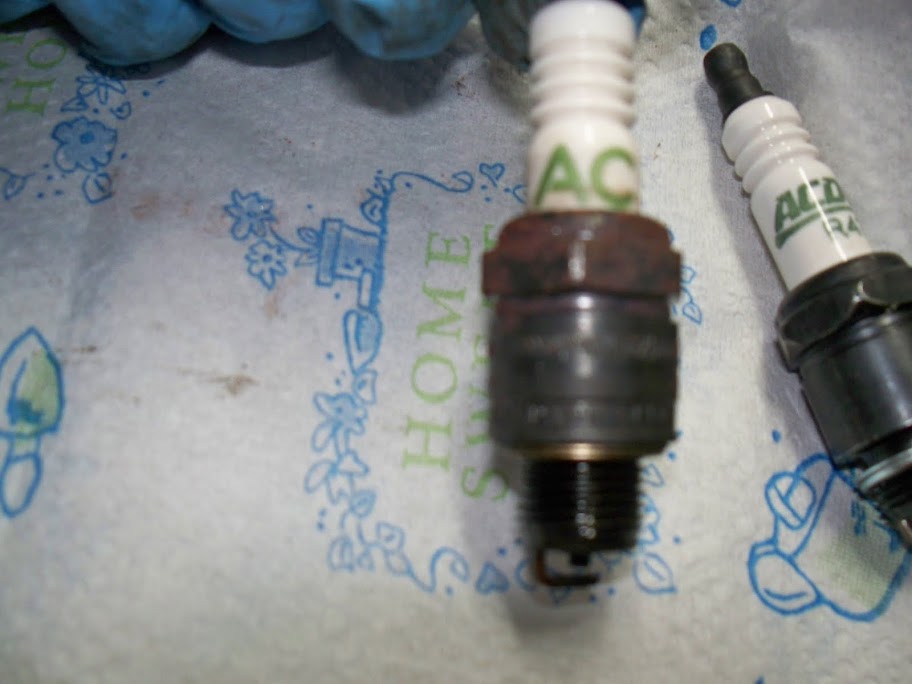

It's kind of a thing I came accustomed to when purchasing a new car (old) having sad all that!! Parts installed previously were much better quality!!!
OEM ignition wires & cap with Blue Streak Rotor points looked pretty good not much wear also looked OEM.
I replaced plugs with ACDelco R43S installed where AC R44 with Accel points & condenser.
All ACDelco parts are all made in mexico I will never use ACDelco again
very cheep quality.
well I'm still not done, hear are some pictures You can see the original spark plug wire hear it's #4 cylinder it should be easyer to do #4 then #2 cylinder
Hear is the cut wire.. BTW The Auto parts store will have a new replacement wire for me tomorrow afternoon
old spark plug
Thread Starter
Racer
Joined: Oct 2010
Posts: 373
Likes: 2
hi,
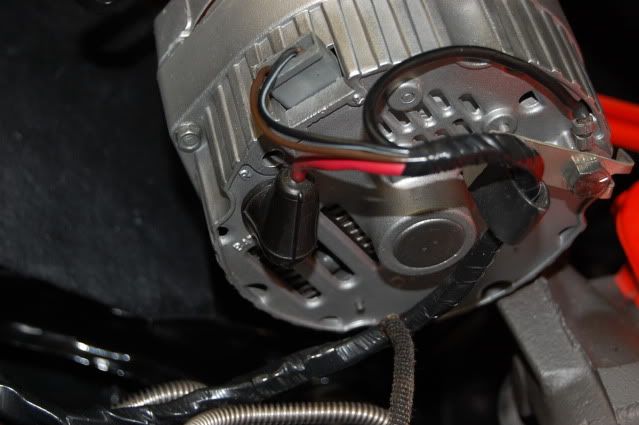
buy any chance this my sound pretty stupid but how can I hook up my engine analyzer if the battery is behind the seat.
hear is a master hookup Diagram of my analyzer
Can anybody suggest what would be a safe hookup without using the battery?
Thanks
Peace
Frank

buy any chance this my sound pretty stupid but how can I hook up my engine analyzer if the battery is behind the seat.
hear is a master hookup Diagram of my analyzer
Can anybody suggest what would be a safe hookup without using the battery?
Thanks
Peace
Frank
Thread Starter
Racer
Joined: Oct 2010
Posts: 373
Likes: 2