


It's in....
Thread Starter
Melting Slicks


Joined: Jul 2001
Posts: 2,609
Likes: 12
From: Massapequa Park NY
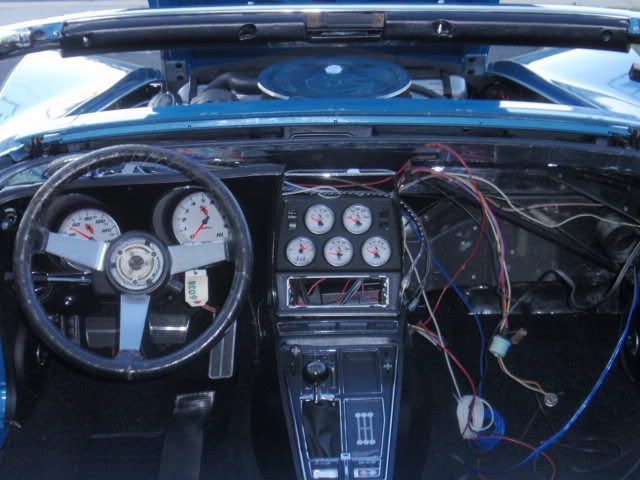
for now  Spent more time than I care to admit fitting everything, getting hoses routed, and modifying the harness for the Auto Meter gauges. But it's in and attached to the D/S dash pad. Now I just need to get the nuts on the bottom studs started
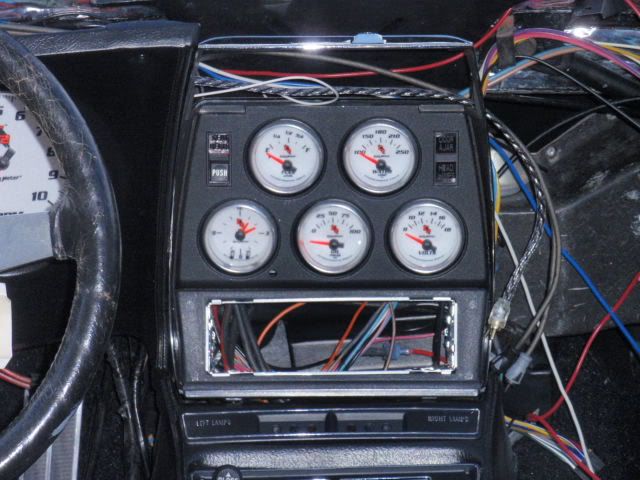
It's a repo console & the center gauge panel has the single DIN adapter which wraps around the bottom. The studs are barely long enough
And with the lights on
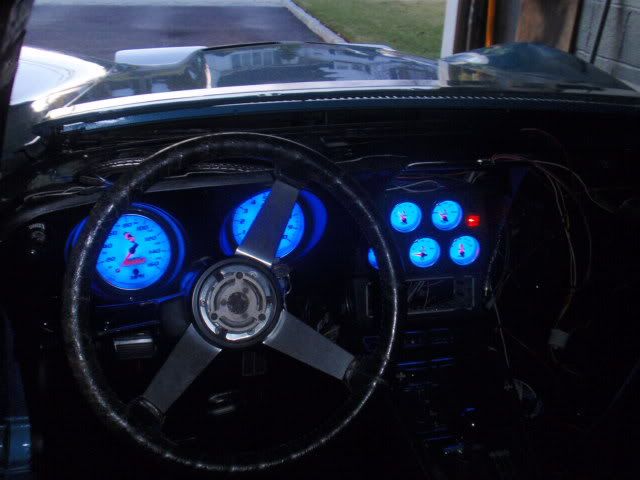
Next weekend I'll test everything & work on getting the top dash pad in.
Thanks for all the tips
Jim
Spent more time than I care to admit fitting everything, getting hoses routed, and modifying the harness for the Auto Meter gauges. But it's in and attached to the D/S dash pad. Now I just need to get the nuts on the bottom studs started It's a repo console & the center gauge panel has the single DIN adapter which wraps around the bottom. The studs are barely long enough
And with the lights on
Next weekend I'll test everything & work on getting the top dash pad in.
Thanks for all the tips
Jim
Team Owner


Joined: Jan 2006
Posts: 37,637
Likes: 3,118
From: Crossville TN
Instead of those studs being "short", could it be that the lower console is not moved fully into proper position? Also, if the bracket/brace to which those studs attach has slotted holes, just start the nuts onto those studs, THEN slide the lower console over them. With those nuts started already, it is much easier to get a 1/4" ratchet/socket on them to tighten. Remember to just snug those nuts up; if you try to lock them down, the studs will break off of that flimsy pot-metal bezel.
Thread Starter
Melting Slicks
Joined: Jul 2001
Posts: 2,609
Likes: 12
From: Massapequa Park NY
Instead of those studs being "short", could it be that the lower console is not moved fully into proper position? Also, if the bracket/brace to which those studs attach has slotted holes, just start the nuts onto those studs, THEN slide the lower console over them. With those nuts started already, it is much easier to get a 1/4" ratchet/socket on them to tighten. Remember to just snug those nuts up; if you try to lock them down, the studs will break off of that flimsy pot-metal bezel.
The radio plate wraps around the bottom adding a 1/16" or so plus the repo console is pretty thick, much more than an original. Tried to install with the nuts just started, but had no luck. Are the studs pressed in or are they threaded in? Toyed with the idea of replacing them with a longer stud but was afraid to break it, cause then I'd be

blueray72 - The gauges are Auto Meter C2's and I did install their dimmer also. Using the headlight switch the dash lights were either on or off, no dimming.
Twinray -
 I was outside most of the day in a Tee shirt. Big difference from last year at this time. Hoping it stays in the the high 30's low 40's a little while longer. Of course my hands are a little beat up from working on the dash for two days
Thanks
Jim
Corvette Stories
The Best of Corvette for Corvette Enthusiasts

Top 10 Most Expensive Corvettes Ever Sold on Bring A Trailer
Brett Foote
10 Things Every Corvette Owner Needs (2026 Edition)
Michael S. Palmer
8 Most "Only Corvette Owners Understand" Quirks and Problems
Pouria Savadkouei
10 Reasons the C6 Z06 is Still A Performance Benchmark After 20 Years
Joe Kucinski
How Much Horsepower Every Corvette Engine "LOST" in 1972
Joe Kucinski
Top 10 DOs and DON'Ts for Protecting Your Convertible Top!
Michael S. Palmer
Top 10 Most Explosive Corvettes Ever Made: Power-to-Weight Ratio Ranked!
Joe Kucinski
150 hp to 1,250 hp: Every Corvette Generation Compared by the Specs That Matter
Joe Kucinski
8 Coolest Corvette Pace Cars (and Replicas) of All Time
Verdad Gallardo

Melting Slicks


Joined: Jun 2005
Posts: 2,239
Likes: 74
From: Palatine, Peoples Republic of Illinois
St. Jude Donor '09-'10-'11-12-'13-'14-'15-'16-'17-�18
NCM Sinkhole Donor
I replaced the nuts with a couple of rod couplers from the hardware store. Makes installation much easier.

Team Owner
Joined: Jan 2006
Posts: 37,637
Likes: 3,118
From: Crossville TN
The studs are part of the bezel casting. I do not know whether the threads are cast with the part or if they are chased after the bezel is cast; I suspect the latter.
I suggest that you do what you can [or need to] to make the lower console fit flush with the bottom of the bezel, so that there is no gap left between them. You may have to shim, or install spacers or extend the mounting brackets from tranny tunnel to lift the console a bit more. Otherwise, you will have an unsightly and weakly supported console/bezel assembly.
Good luck.


Thread Starter
Melting Slicks
Joined: Jul 2001
Posts: 2,609
Likes: 12
From: Massapequa Park NY
The studs are part of the bezel casting. I do not know whether the threads are cast with the part or if they are chased after the bezel is cast; I suspect the latter.
I suggest that you do what you can [or need to] to make the lower console fit flush with the bottom of the bezel, so that there is no gap left between them. You may have to shim, or install spacers or extend the mounting brackets from tranny tunnel to lift the console a bit more. Otherwise, you will have an unsightly and weakly supported console/bezel assembly.
Good luck.
I suggest that you do what you can [or need to] to make the lower console fit flush with the bottom of the bezel, so that there is no gap left between them. You may have to shim, or install spacers or extend the mounting brackets from tranny tunnel to lift the console a bit more. Otherwise, you will have an unsightly and weakly supported console/bezel assembly.
Good luck.
The console & the reinforcing bracket are loose so they can come up to the gauge panel. Also needs to shift toward the back of the car about 1/4"
Jim
Thread Starter
Melting Slicks
Joined: Jul 2001
Posts: 2,609
Likes: 12
From: Massapequa Park NY
 Don't think I ever realized that
