

68 cowl drain


Thread Starter
Intermediate


Joined: Oct 2011
Posts: 43
Likes: 3
From: Indian Head MD
I have found some areas of rust damage on the driver side lower windshield frame area of the 68 I am restoring that i plan to address. During the process of uncovering the rust, I noticed that the area between the lower outer windshield bonding strip (the piece that rivets to the birdcage and bonds to the upper surround/clip) and the birdcage frame lower outer corner was filled with a hard material similar to panel adhesive. I removed the material on the drivers side and left the material in place on the passenger side as can be seen in the photos. The AIM shows a piece of weatherstrip (3938145-6) in what I think is that area, however if I am reading the revision record correctly, that part was added 10-16-67. Since my car was built on 10-19-67, I doubt that the weatherstrip was originally on the car. Since the car had been "restored" sometime in the late 80's, the wiper door removed and a long style hood fitted, my assumption is that this area was filled at that time. I was able to pull some soft seam sealing type material from that area after I removed the hard material. My question is should the area be filled with bonding adhesive or seam sealer or left open to allow water to drain down the trough formed in the birdcage lower outer frame corner, past the hinge support, and out by the bottom of the door/fender/ rocker panel?
Thanks in advance,
John

[
Thanks in advance,
John
[
Team Owner


Joined: Sep 2006
Posts: 31,273
Likes: 4,366
From: Westminster Maryland
Hi bj,
I saw your post on the TDB but didn't reply in hopes that a 68 person would answer.
I can only speak to what was on my 71.
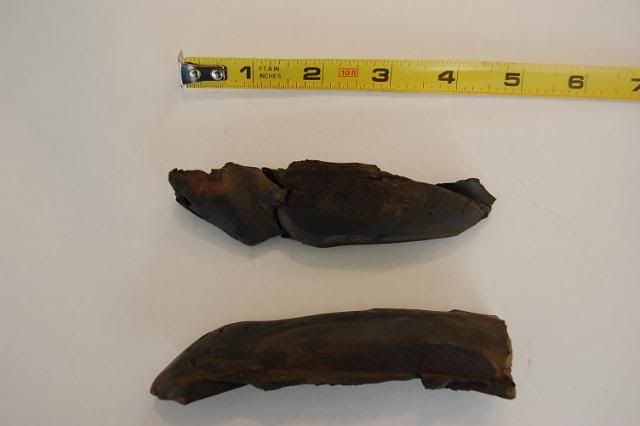
There was semi-hard black rubber like material in that area. It appeared that it was soft when applied (maybe from something like a caulking gun and then 'set-up' firmer. Dr. Rebuild use to sell a preformed piece of rubber with a mounting clip for that location, but I think they're o/s now.
It looked to me like the idea was to divert the water coming down the windshield right onto the hinges on the a-pillar. GREAT idea, right!?!
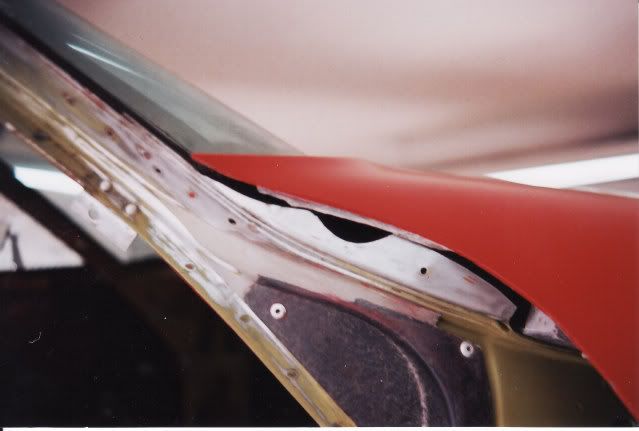
Here's a picture of the material, (one piece from each side), and also where I THINK the water ran.
Perhaps now a 68 owner will post.
Regards,
Alan
I saw your post on the TDB but didn't reply in hopes that a 68 person would answer.
I can only speak to what was on my 71.
There was semi-hard black rubber like material in that area. It appeared that it was soft when applied (maybe from something like a caulking gun and then 'set-up' firmer. Dr. Rebuild use to sell a preformed piece of rubber with a mounting clip for that location, but I think they're o/s now.
It looked to me like the idea was to divert the water coming down the windshield right onto the hinges on the a-pillar. GREAT idea, right!?!
Here's a picture of the material, (one piece from each side), and also where I THINK the water ran.
Perhaps now a 68 owner will post.
Regards,
Alan


Team Owner


Joined: Jun 2000
Posts: 38,923
Likes: 1,482
From: Southbound
Cruise-In II Veteran
I agree, the 10/16/67 AIM revision date probably missed your car, but never say never. Do the items you found appear to be factory installations?
There is almost certainly factory sealant of some type in that area - and lots of it. It can look like bonding compound smoothed over joints or can also be a type of black rubber.

There is almost certainly factory sealant of some type in that area - and lots of it. It can look like bonding compound smoothed over joints or can also be a type of black rubber.
Team Owner
Joined: Sep 2006
Posts: 31,273
Likes: 4,366
From: Westminster Maryland
Hi bj,
Mike's post made me think of something else.
On my 71 that black 'stuff' was added after the car was painted... it stayed black, WHILE all the 'glop' where the hinge pillar meets the windshield frame was there before the car was painted.
I'm mentioning this because the sequence might help you to figure out what you're going to do, what you're going to use, and when.
Regards,
Alan
Thread Starter
Intermediate
Joined: Oct 2011
Posts: 43
Likes: 3
From: Indian Head MD
Thanks for the responses. There was some black soft rubber like material below the hard material. I do not think that the hard material was installed at the factory. It was somewhat neatly sanded and finished. The black soft material may have been original to the car, but there was not enough of it to completely fill the area. It seems to me like if GM wanted the area between the birdcage and the bottom side of the fender to be sealed to force the water from the windshield back into the cowl area where the wiper mechanism resides, they would have designed the bonding strip to accomplish that without the need to fill a void with something. Also, from looking at how that area is designed, it appears as though GM intended the water to flow down the channel formed by the outer lip on the cowl birdcage (shown in Alan's photo) and the lower outer windshield bonding strip. Perhaps they learned quickly that diverting water onto the a-pillar hinge area created problems, so they designed a weatherstrip seal. Wonder why Alan's 71 would have some black rubber sealant rather than a weatherstrip. Alan, does the 1971 AIM show a weatherstrip in that area? I've attached a picture from the 68 AIM that shows the weatherstrip, part number 6. Appears to have been attached with a single pop rivet.
My questions are:
Should I remove the hard material from the passenger side?
Should the area be filled with some sealant?
Does anyone repop the weatherstrip?
Thanks,
John

My questions are:
Should I remove the hard material from the passenger side?
Should the area be filled with some sealant?
Does anyone repop the weatherstrip?
Thanks,
John


