


1971 Journey

Thread Starter
Melting Slicks


Joined: Apr 2010
Posts: 2,794
Likes: 1,195
From: Canberra Australia
2025 C3 of the Year Finalist - Modified
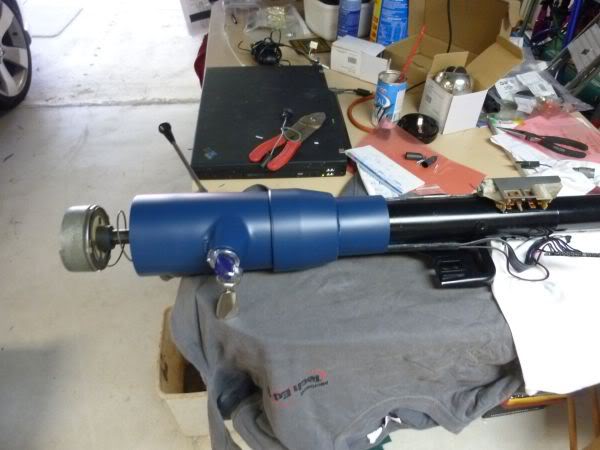
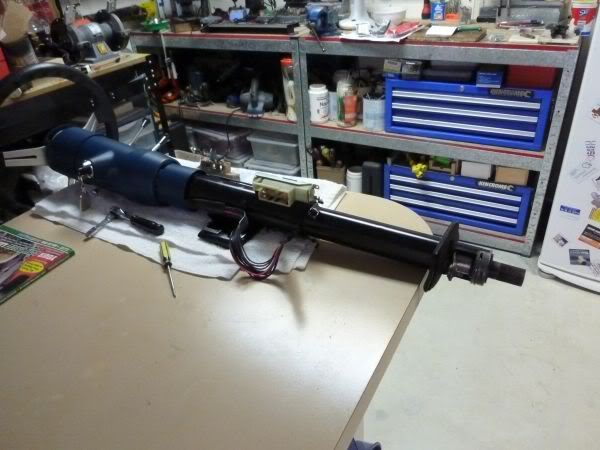
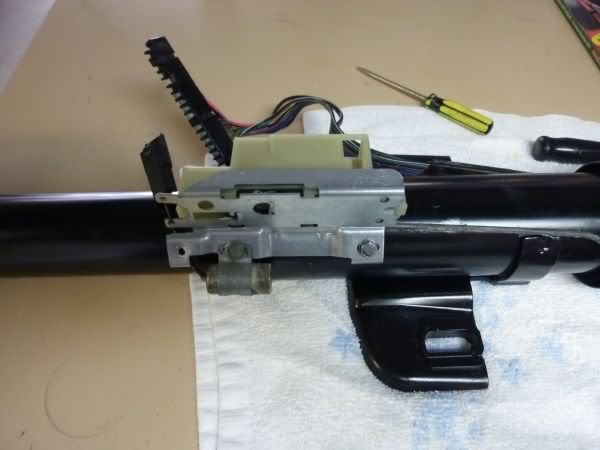
I had not discussed it on this forum but the upper yoke of my column is in 180 degrees out. Must have been repaired at some stage and put in upside down.
Plays havoc with indicator cancel etc etc.
So to resolve it
- the Rag Joint needed splitting and rotating of the column side 180 degrees (When centered flat edge is bottom).
- the upper part of the column needed removal and rotation 180 degrees so the chisel mark in the upper column points down but the upper case is in correct location.
Now blinkers cancel fine etc. Much simpler than pulling column apart to correct yoke.
Thread Starter
Melting Slicks
Joined: Apr 2010
Posts: 2,794
Likes: 1,195
From: Canberra Australia
2025 C3 of the Year Finalist - Modified
Fan control is now finished and installed.
Ralph did a great job.
The control panel in the ash tray.

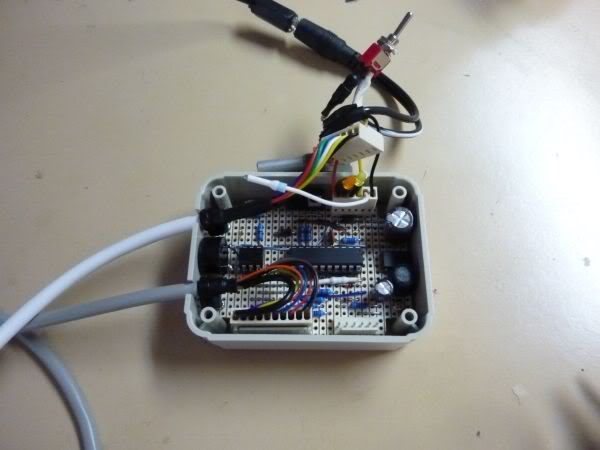
The control box.
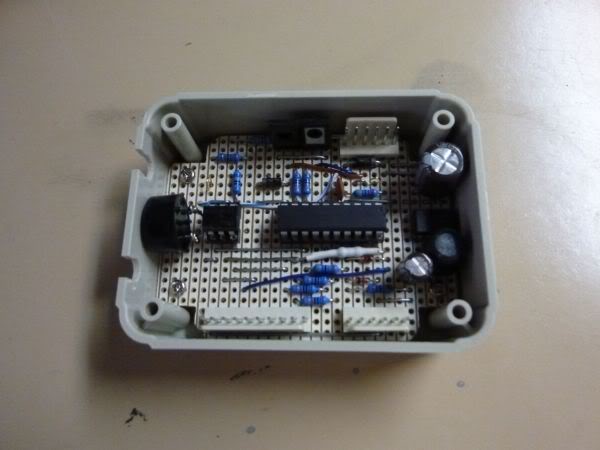
Test rig.
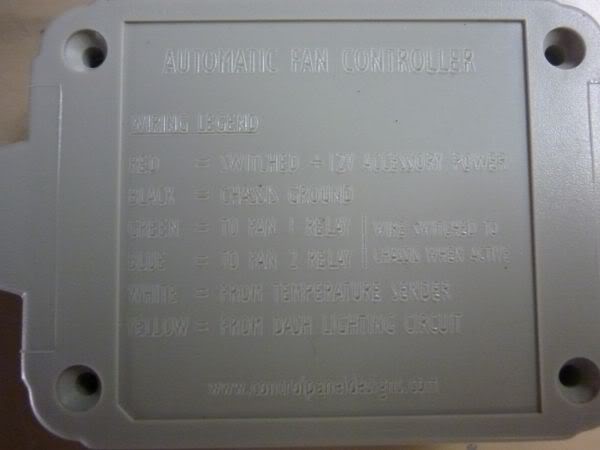
Wiring instructions laser etched on bottom of case.
Easy to use.
Press fan 1 or 2 button to manual control fans.
Set threshold for each fan by holding down button at desired temperature.
You can also control led brightness (it adapts for night day) and fan cut off points.
main led is blue as car warms up, green when at desired running temp, yellow when one fan on, red when 2 fans on, flashing when 10 degrees over 2 fan point and beep as well beyond that.
Ralph did a great job.
The control panel in the ash tray.
The control box.
Test rig.
Wiring instructions laser etched on bottom of case.
Easy to use.
Press fan 1 or 2 button to manual control fans.
Set threshold for each fan by holding down button at desired temperature.
You can also control led brightness (it adapts for night day) and fan cut off points.
main led is blue as car warms up, green when at desired running temp, yellow when one fan on, red when 2 fans on, flashing when 10 degrees over 2 fan point and beep as well beyond that.
Last edited by CraigH; Apr 10, 2023 at 03:05 AM.
Thread Starter
Melting Slicks
Joined: Apr 2010
Posts: 2,794
Likes: 1,195
From: Canberra Australia
2025 C3 of the Year Finalist - Modified
Note to self, dont get too smart !!!!
Was putting the column back together and i was about to mount the ignition switch.
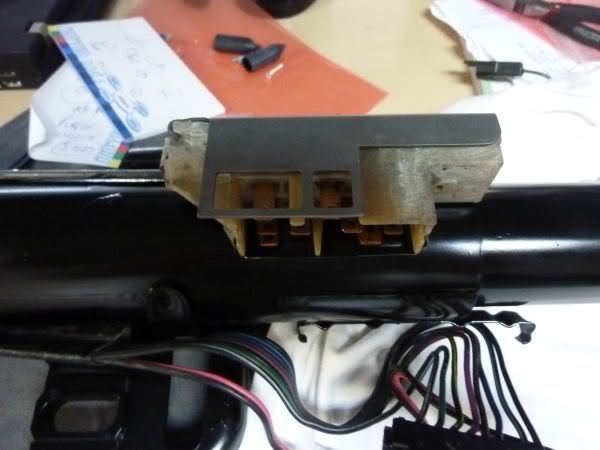
Thought it looked a bit crappy (even though it worked perfectly) so I decided to take it all apart and chemically treat it etc etc.
Bad idea, 12 small springs and bits and pieces later are all over the floor.
Got it all back together but i think I lost something as I have no accessory setting.
No problem will do for the moment and i will order another one to replace it later.
Was putting the column back together and i was about to mount the ignition switch.
Thought it looked a bit crappy (even though it worked perfectly) so I decided to take it all apart and chemically treat it etc etc.
Bad idea, 12 small springs and bits and pieces later are all over the floor.
Got it all back together but i think I lost something as I have no accessory setting.
No problem will do for the moment and i will order another one to replace it later.
Last edited by CraigH; Apr 10, 2023 at 03:05 AM.
Thread Starter
Melting Slicks
Joined: Apr 2010
Posts: 2,794
Likes: 1,195
From: Canberra Australia
2025 C3 of the Year Finalist - Modified
Originally Posted by sirfixalot
Are you sure its not just a matter of adjusting switch position on column have been caught before
I still think there is something missing in it :-)
But its too loose now, lost the distinct notches between settings.
Never mind its working ok till i get another one.
Pontiworld has one so will call tomorrow.
Thread Starter
Melting Slicks
Joined: Apr 2010
Posts: 2,794
Likes: 1,195
From: Canberra Australia
2025 C3 of the Year Finalist - Modified
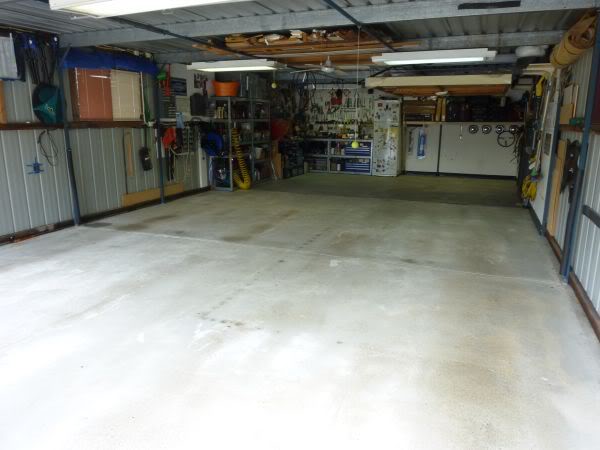
Got the vette flat bedded to the exhaust shop Monday.
Gave me a chance to clean the garage :-)
Got a 2.5" mandrel bent system made up. I did not want it to be too loud but have a nice sound. Seems to have hit the mark.
Tune was WAY off though and it ran like a PIG, by the time I got home it had fouled the plugs.
Turns out the springs I used in the advance were so weak they came all on at just over idle and a vacuum leak from a cap they popped off so the settings were off the mark.
Fixed those things up now and it runs nice.
Adjusted the semi coilovers a bit more to get it as level as possible.
Last edited by CraigH; Apr 10, 2023 at 03:04 AM.
Thread Starter
Melting Slicks
Joined: Apr 2010
Posts: 2,794
Likes: 1,195
From: Canberra Australia
2025 C3 of the Year Finalist - Modified
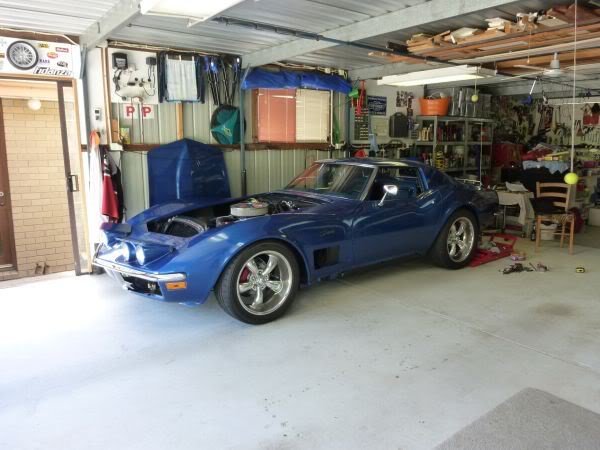
So the good and the bad.
The steering with the Borgeson box is fantastic, brings the car into current century.
Precise, smooth and feels like a different car - still dont have an alignment yet so can only get better.
The bad is the intake manifold is leaking oil from the rear GRRRRRRRR.
Will have to take it off and do it again. :evil: :evil: :evil: :evil: :evil: :evil:
Thread Starter
Melting Slicks
Joined: Apr 2010
Posts: 2,794
Likes: 1,195
From: Canberra Australia
2025 C3 of the Year Finalist - Modified
New ignition switch arrived from Ponti World
They got it out to me next day - great service.
Should get it mounted back in vette tonight.
They got it out to me next day - great service.
Should get it mounted back in vette tonight.
Last edited by CraigH; Apr 10, 2023 at 03:04 AM.
Corvette Stories
The Best of Corvette for Corvette Enthusiasts

Top 10 Most Expensive Corvettes Ever Sold on Bring A Trailer
Brett Foote
10 Things Every Corvette Owner Needs (2026 Edition)
Michael S. Palmer
8 Most "Only Corvette Owners Understand" Quirks and Problems
Pouria Savadkouei
10 Reasons the C6 Z06 is Still A Performance Benchmark After 20 Years
Joe Kucinski
How Much Horsepower Every Corvette Engine "LOST" in 1972
Joe Kucinski
Top 10 DOs and DON'Ts for Protecting Your Convertible Top!
Michael S. Palmer
Top 10 Most Explosive Corvettes Ever Made: Power-to-Weight Ratio Ranked!
Joe Kucinski
150 hp to 1,250 hp: Every Corvette Generation Compared by the Specs That Matter
Joe Kucinski
8 Coolest Corvette Pace Cars (and Replicas) of All Time
Verdad Gallardo
Thread Starter
Melting Slicks
Joined: Apr 2010
Posts: 2,794
Likes: 1,195
From: Canberra Australia
2025 C3 of the Year Finalist - Modified
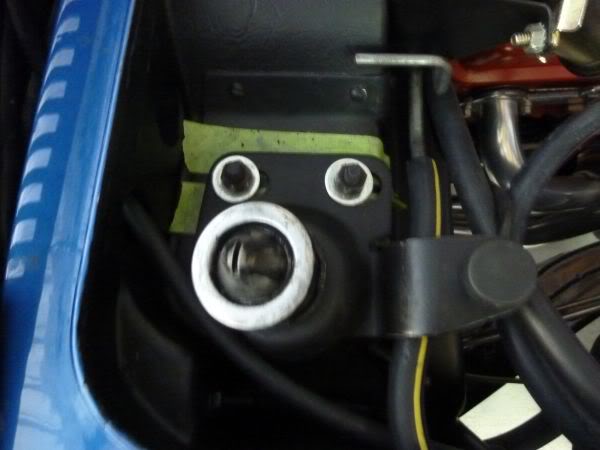
Column went back in with new seals and tightened into the rag joint.
Took it for another spin out on the highway and all I can say is wow - it drives like a different car.
The steering is so precise, certainly one of the best changes I have done.
Took it for another spin out on the highway and all I can say is wow - it drives like a different car.
The steering is so precise, certainly one of the best changes I have done.
Thread Starter
Melting Slicks
Joined: Apr 2010
Posts: 2,794
Likes: 1,195
From: Canberra Australia
2025 C3 of the Year Finalist - Modified
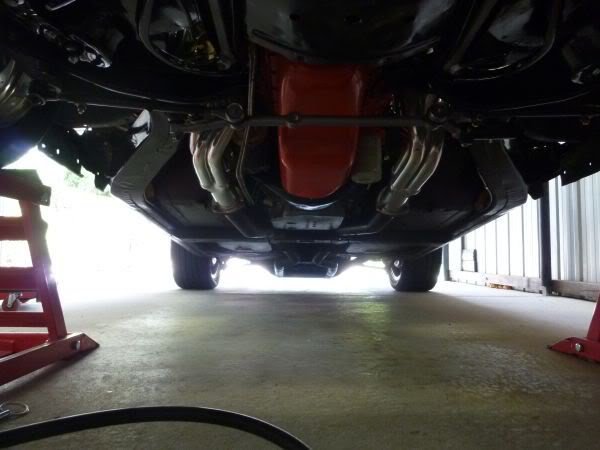
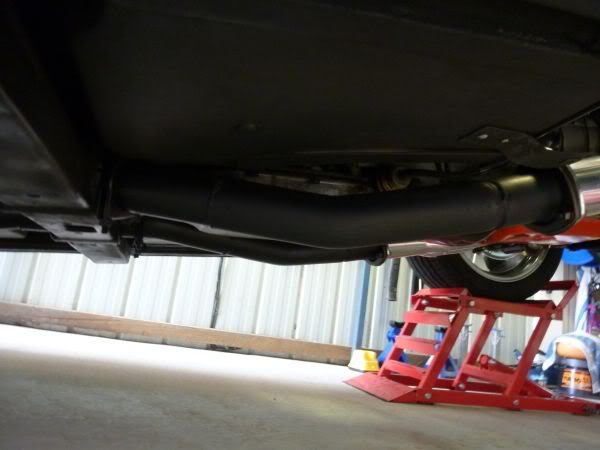
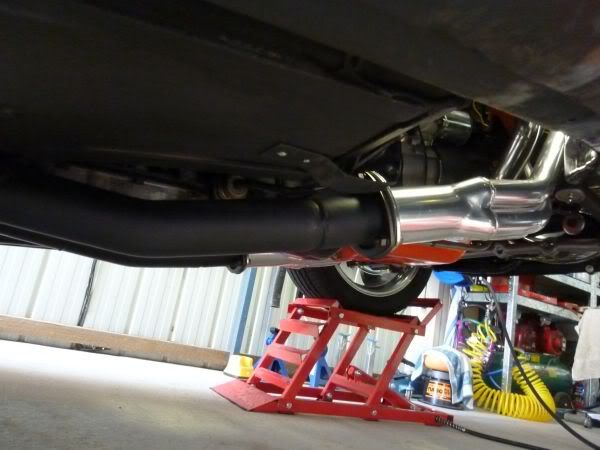
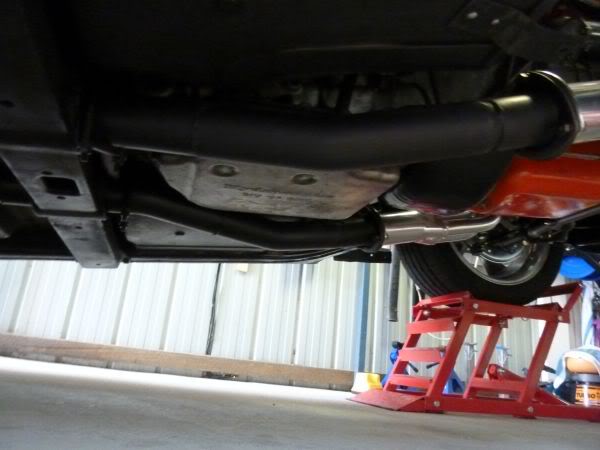
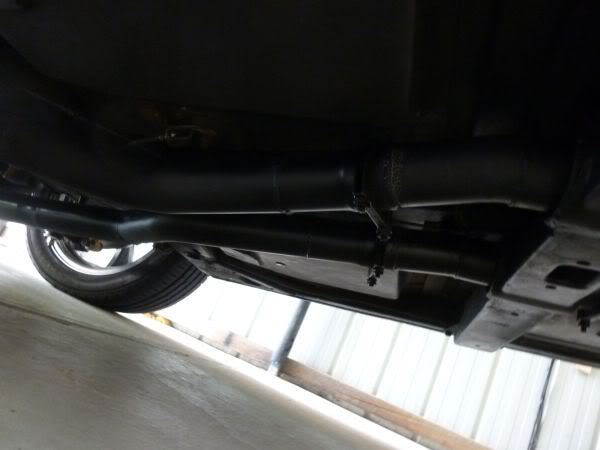
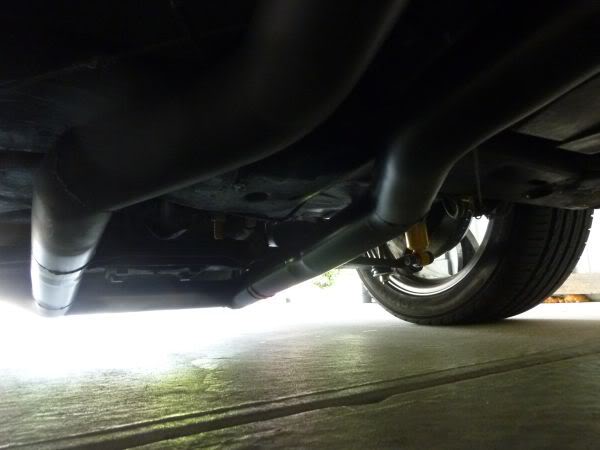
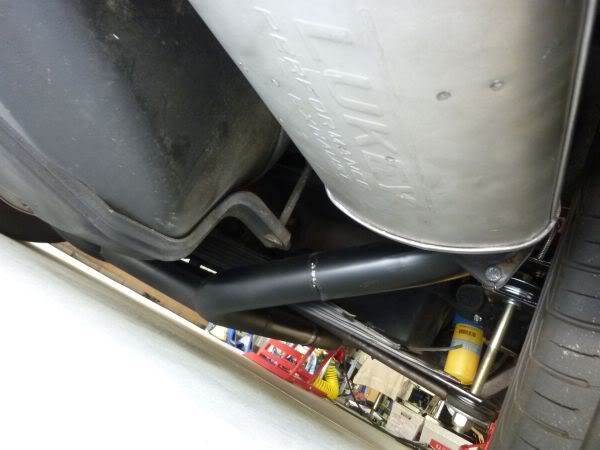
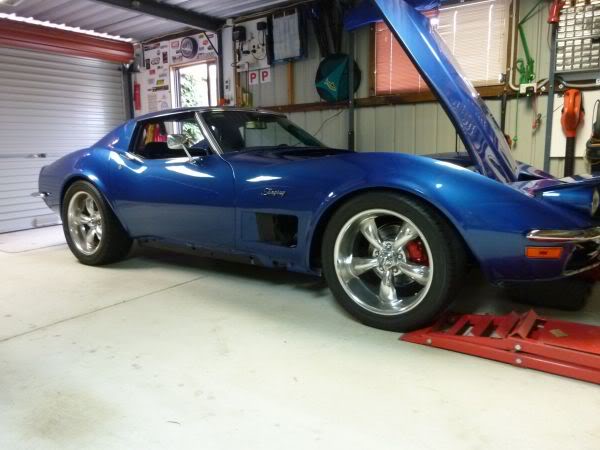
Ok so here are a few shots of the exhaust system.
2.5" mandrel bent with lukey mufflers at the rear.
2.5" mandrel bent with lukey mufflers at the rear.
Last edited by CraigH; Apr 10, 2023 at 03:04 AM.
Thread Starter
Melting Slicks
Joined: Apr 2010
Posts: 2,794
Likes: 1,195
From: Canberra Australia
2025 C3 of the Year Finalist - Modified
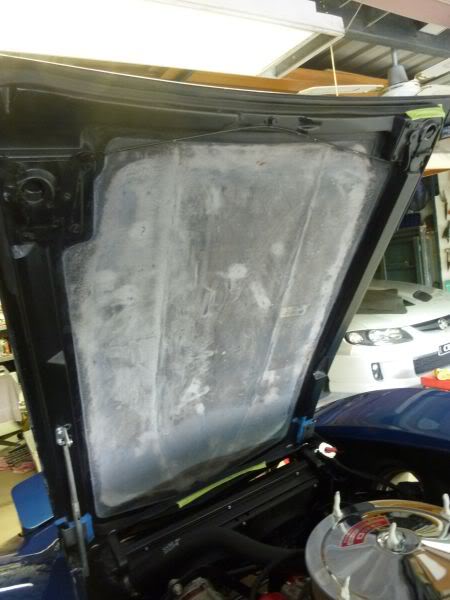
Underside of the hood had some bubbles in the paint so I started to give it a light sand.......
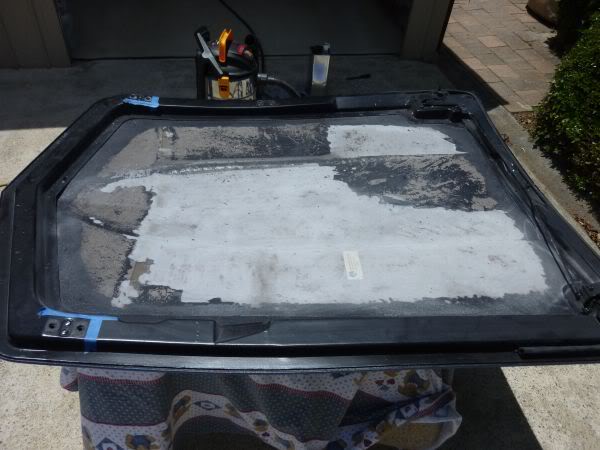
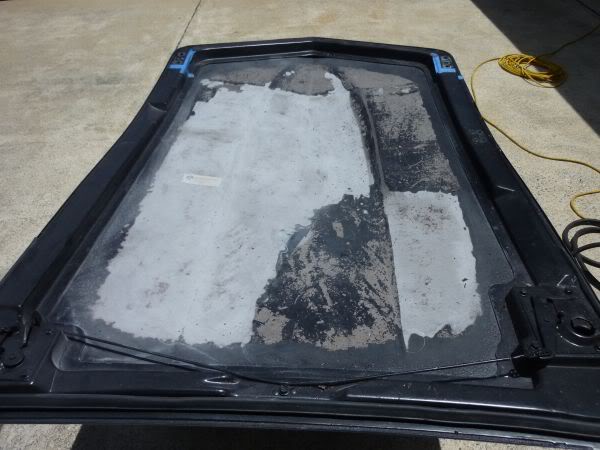
After these shots were taken it was all back to glass.
Not sure if i should give it a paint with fiberglass resin or some sort of gel coat primer before painting or not .... any ideas. ?
After these shots were taken it was all back to glass.
Not sure if i should give it a paint with fiberglass resin or some sort of gel coat primer before painting or not .... any ideas. ?
Last edited by CraigH; Apr 10, 2023 at 03:04 AM.
Thread Starter
Melting Slicks
Joined: Apr 2010
Posts: 2,794
Likes: 1,195
From: Canberra Australia
2025 C3 of the Year Finalist - Modified
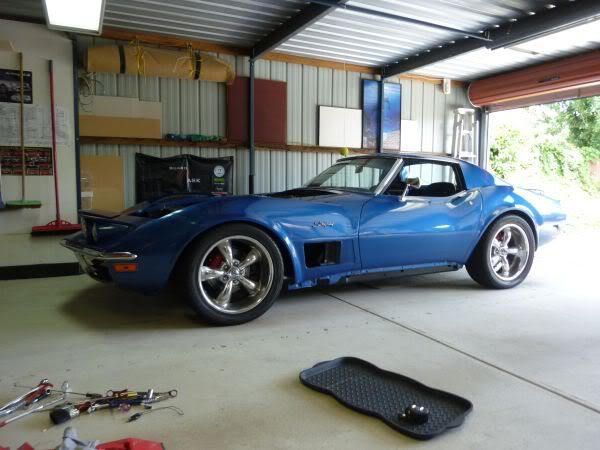
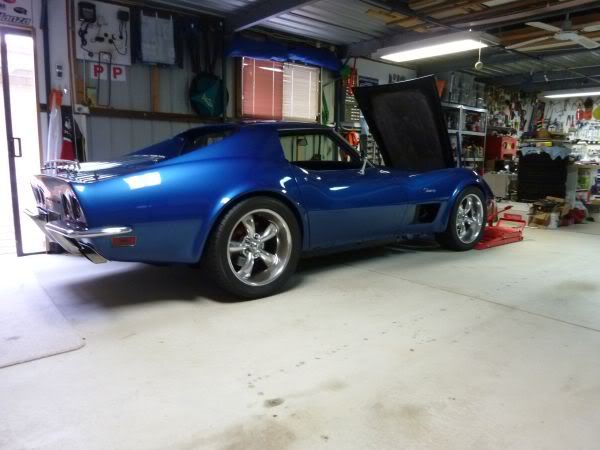
Need to take the vette for an alignment this week, either Monday morning or Thursday Friday as i am traveling for work in between.
Needed to get the hood fitted so I am less an issue for the Police.
Brackets back on.
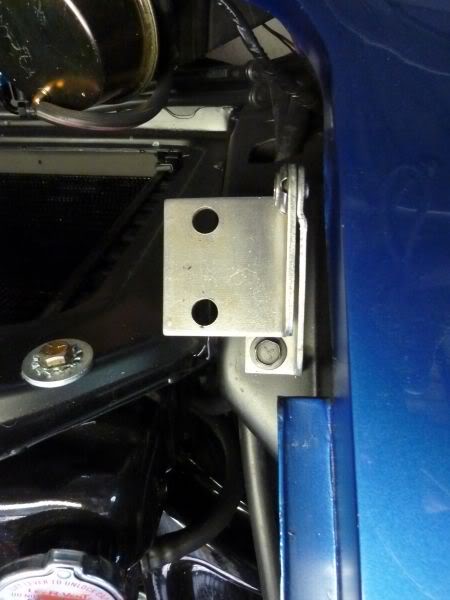
Hood fitted and lots of adjustments to get it almost correct.
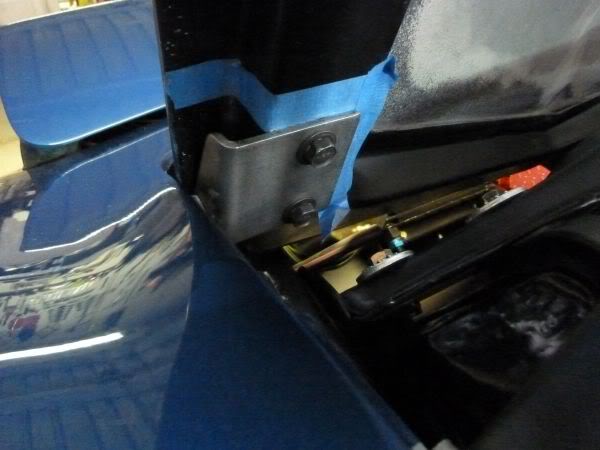
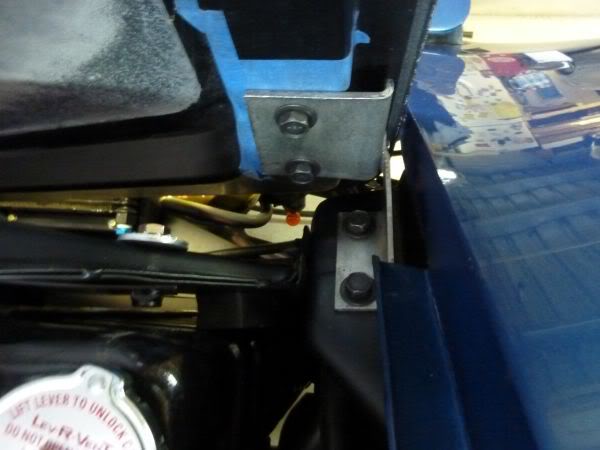
The hood latches have not been restored yet but they need to go back in.
Needed to get the hood fitted so I am less an issue for the Police.
Brackets back on.
Hood fitted and lots of adjustments to get it almost correct.
The hood latches have not been restored yet but they need to go back in.
Last edited by CraigH; Apr 10, 2023 at 03:04 AM.
Thread Starter
Melting Slicks
Joined: Apr 2010
Posts: 2,794
Likes: 1,195
From: Canberra Australia
2025 C3 of the Year Finalist - Modified
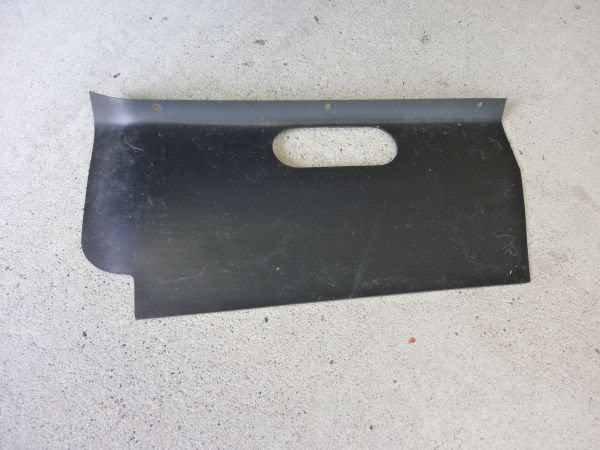
I had spend hours stripping the underside of the hood and repainted it yesterday.
Was not happy at all so stripped it back to glass again - what a pain.
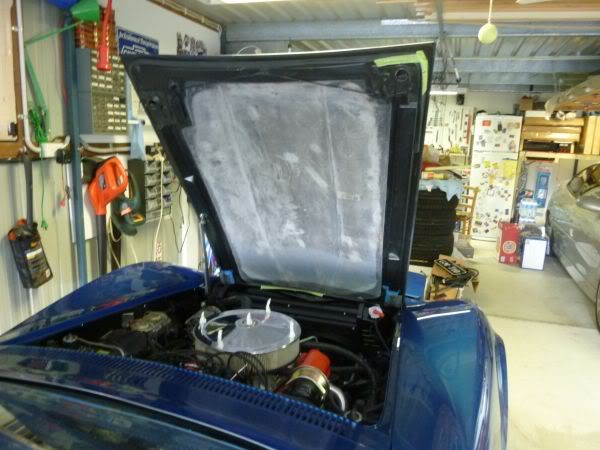
Have decided to use one of the under hood liners instead so ordered it yesterday.

Was not happy at all so stripped it back to glass again - what a pain.
Have decided to use one of the under hood liners instead so ordered it yesterday.
Last edited by CraigH; Apr 10, 2023 at 03:03 AM.
Thread Starter
Melting Slicks
Joined: Apr 2010
Posts: 2,794
Likes: 1,195
From: Canberra Australia
2025 C3 of the Year Finalist - Modified
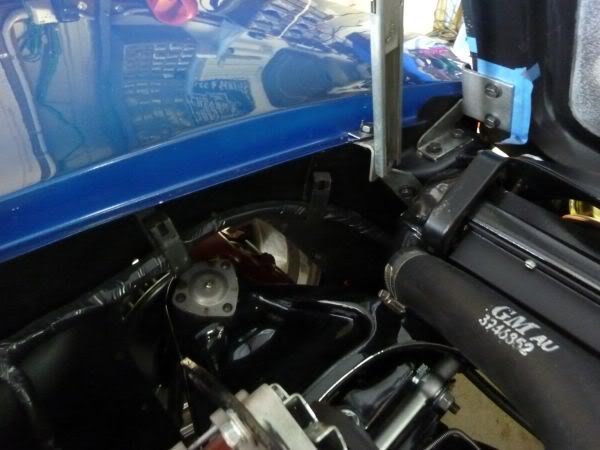
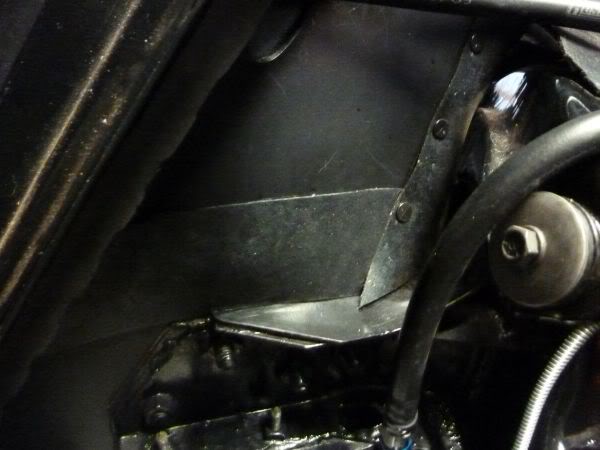
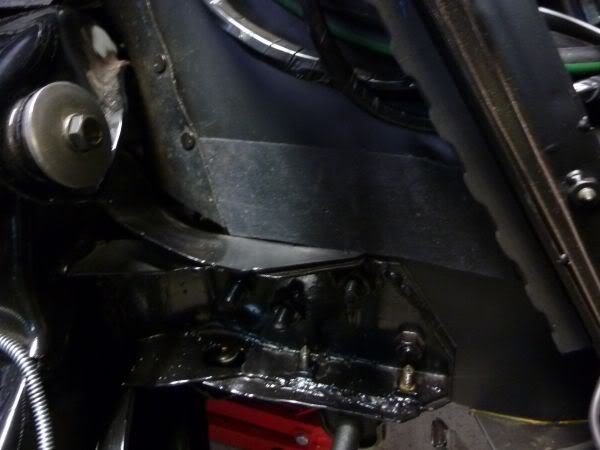
Wanted to see how much clearance I had with the new manifold to the hood.
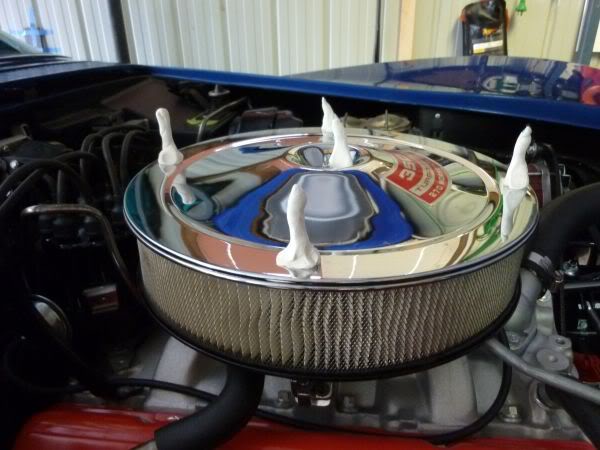
Heaps
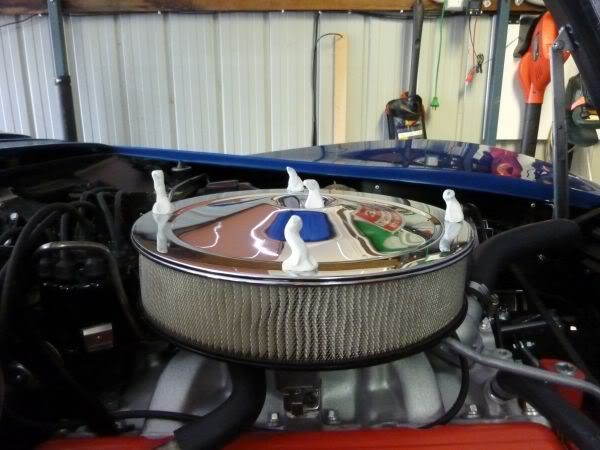
Heaps
Last edited by CraigH; Apr 10, 2023 at 03:03 AM.
Thread Starter
Melting Slicks
Joined: Apr 2010
Posts: 2,794
Likes: 1,195
From: Canberra Australia
2025 C3 of the Year Finalist - Modified
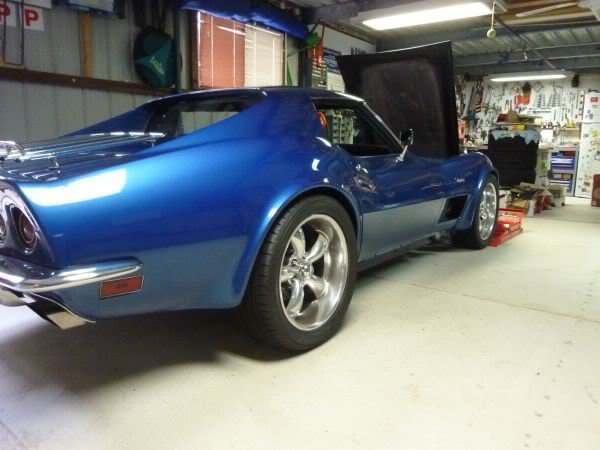
Did some final height adjustments.
Front is 60cm from bottom of rim lip to wheel arch lip
Rear is 61cm from bottom of rim lip to wheel arch lip.
Front is 60cm from bottom of rim lip to wheel arch lip
Rear is 61cm from bottom of rim lip to wheel arch lip.
Last edited by CraigH; Apr 10, 2023 at 03:03 AM.
Thread Starter
Melting Slicks
Joined: Apr 2010
Posts: 2,794
Likes: 1,195
From: Canberra Australia
2025 C3 of the Year Finalist - Modified
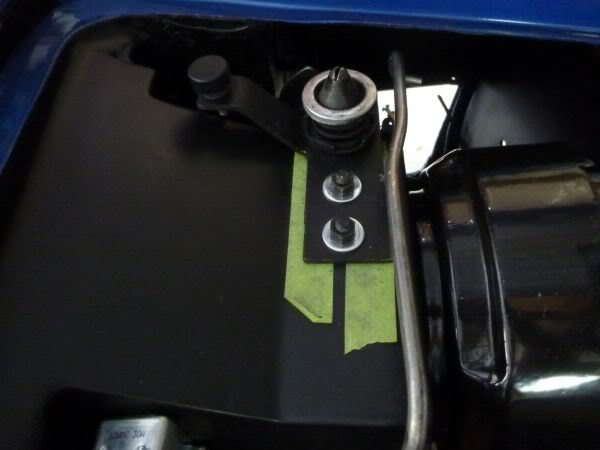
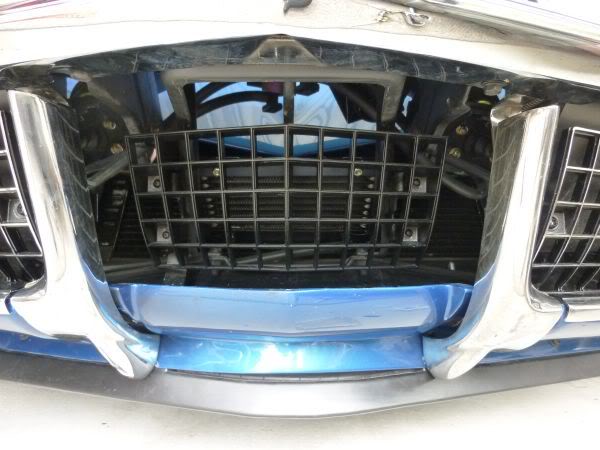
I went and got some rubber from Clark Rubber to fill the top area of the radiator to the support.
Then marked it for the hood seal and spread weatherstrip adhesive.
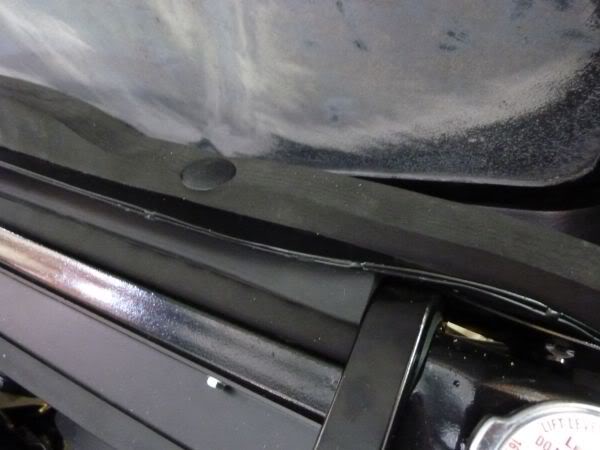
Then marked it for the hood seal and spread weatherstrip adhesive.
Last edited by CraigH; Apr 10, 2023 at 03:03 AM.
Thread Starter
Melting Slicks
Joined: Apr 2010
Posts: 2,794
Likes: 1,195
From: Canberra Australia
2025 C3 of the Year Finalist - Modified
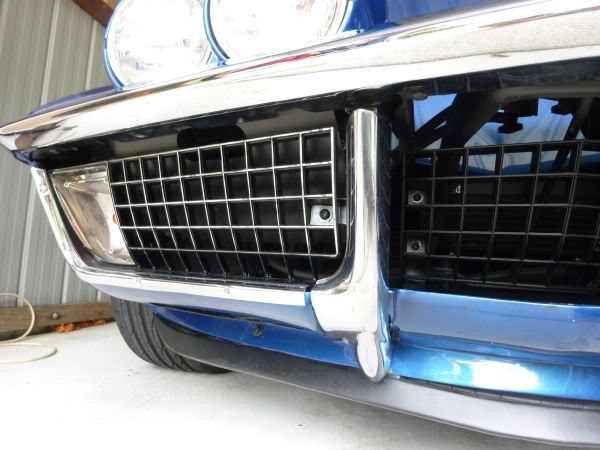
My front grills had seen better days, the chrome is starting to break up etc.
So I stripped and cleaned them up as good as i could then gave them a few coats of Satin black paint.
I wrapped the old lens covers in glad wrap as a masking method.
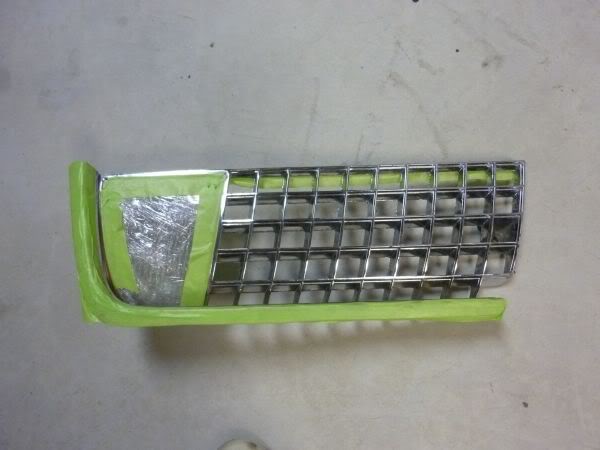
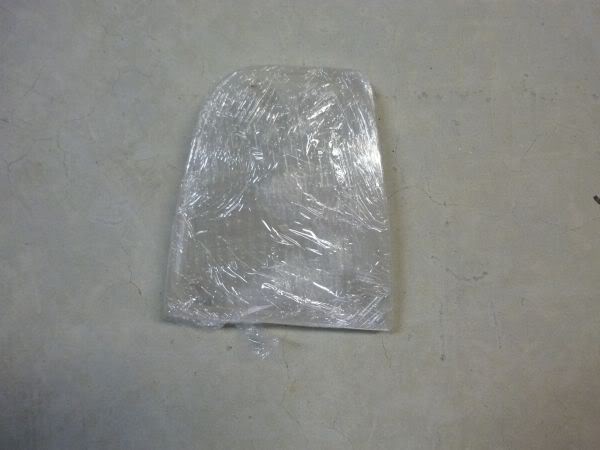

I know they should have been silvery grey but black looks good and it hides the problems much better than the grey.
May have to look to get them stripped and re chromed at some stage.
So I stripped and cleaned them up as good as i could then gave them a few coats of Satin black paint.
I wrapped the old lens covers in glad wrap as a masking method.
I know they should have been silvery grey but black looks good and it hides the problems much better than the grey.
May have to look to get them stripped and re chromed at some stage.
Last edited by CraigH; Apr 10, 2023 at 03:03 AM.
Thread Starter
Melting Slicks
Joined: Apr 2010
Posts: 2,794
Likes: 1,195
From: Canberra Australia
2025 C3 of the Year Finalist - Modified
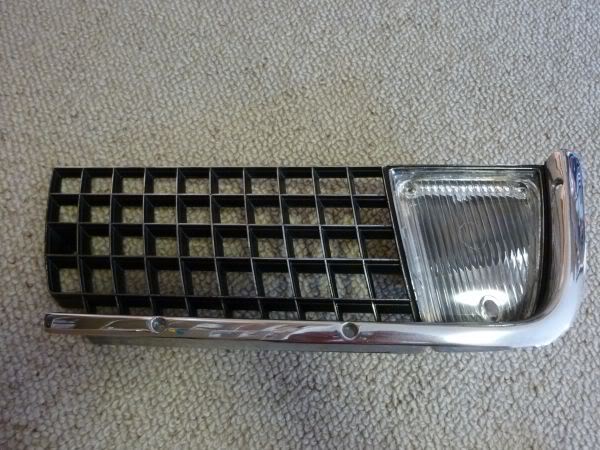
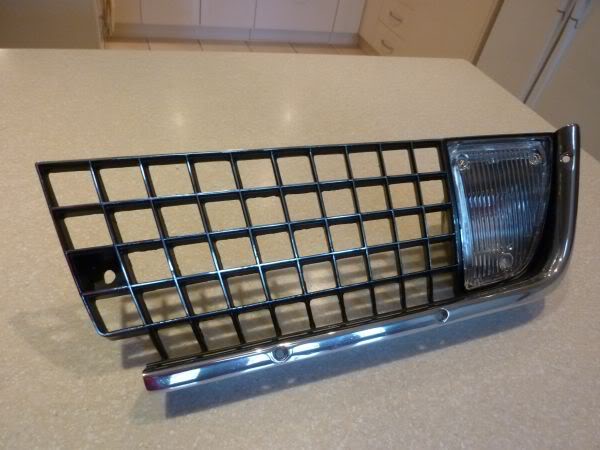
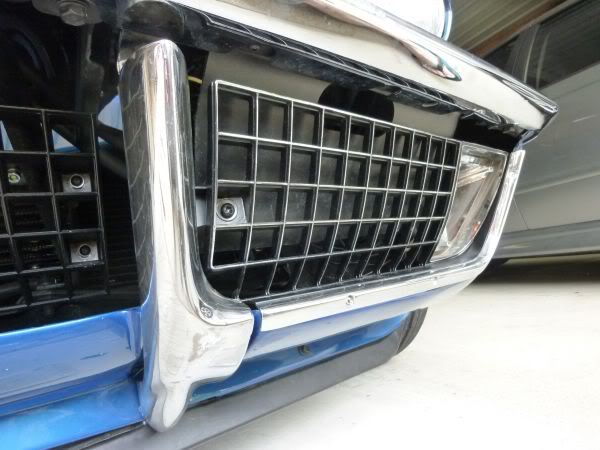
After some work with the razor blade they don't look too bad.
By using the satin black the areas where chrome has deteriorated don't stand out as much.
I think the grey would have offered less contrast so the issues would have been more obvious.
Very happy with them.
Re Chroming possibly in the future.
By using the satin black the areas where chrome has deteriorated don't stand out as much.
I think the grey would have offered less contrast so the issues would have been more obvious.
Very happy with them.
Re Chroming possibly in the future.
Last edited by CraigH; Apr 10, 2023 at 03:03 AM.
Thread Starter
Melting Slicks
Joined: Apr 2010
Posts: 2,794
Likes: 1,195
From: Canberra Australia
2025 C3 of the Year Finalist - Modified
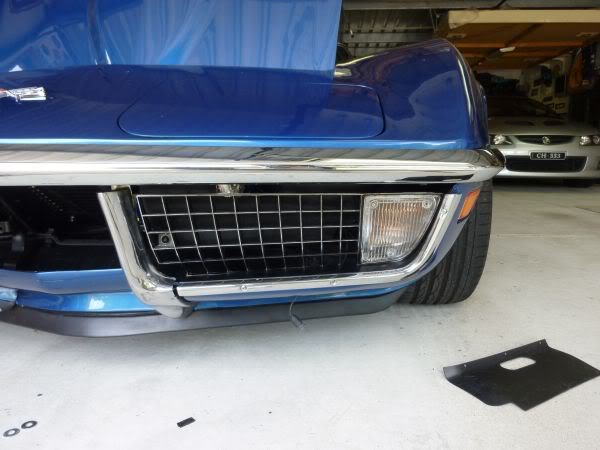
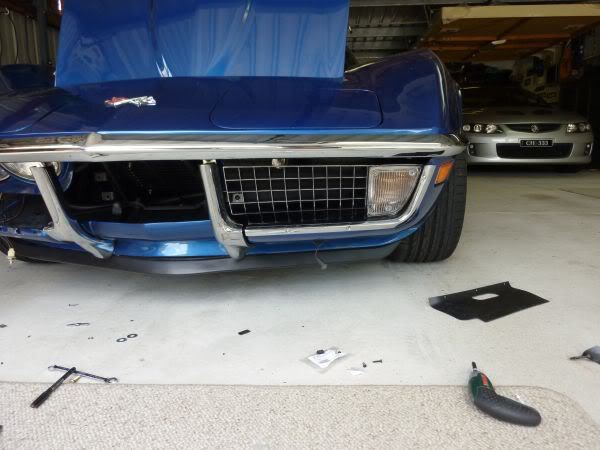
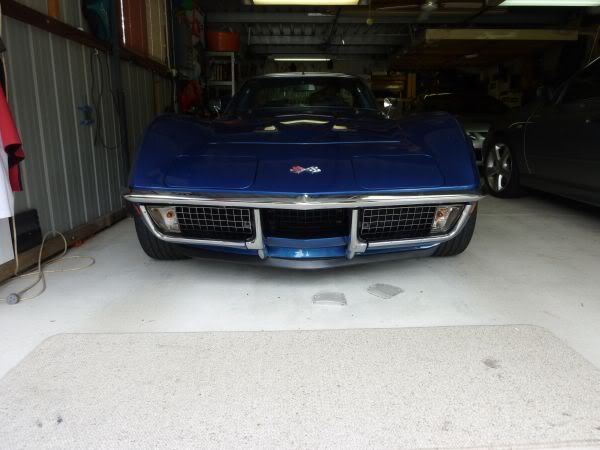
I built new brackets to mount the grills to the bumper tabs that gave more adjustment.
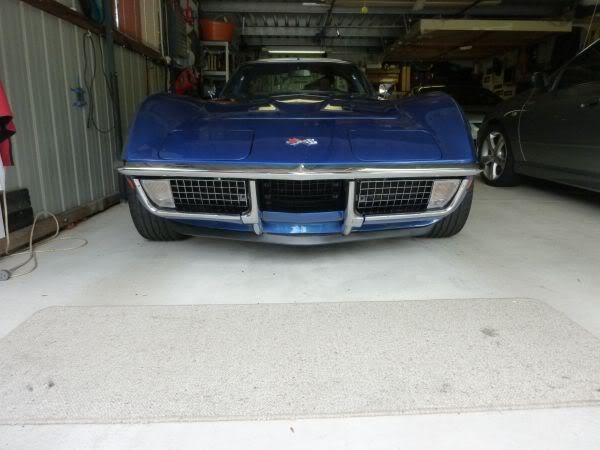
Final fit, first the headlight shields.
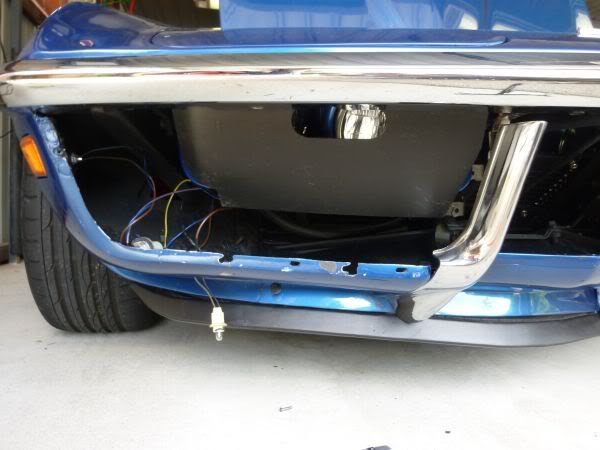
Then the grills and plenty of adjusting then some more :-)

Final fit, first the headlight shields.
Then the grills and plenty of adjusting then some more :-)
Last edited by CraigH; Apr 10, 2023 at 03:02 AM.
Thread Starter
Melting Slicks
Joined: Apr 2010
Posts: 2,794
Likes: 1,195
From: Canberra Australia
2025 C3 of the Year Finalist - Modified
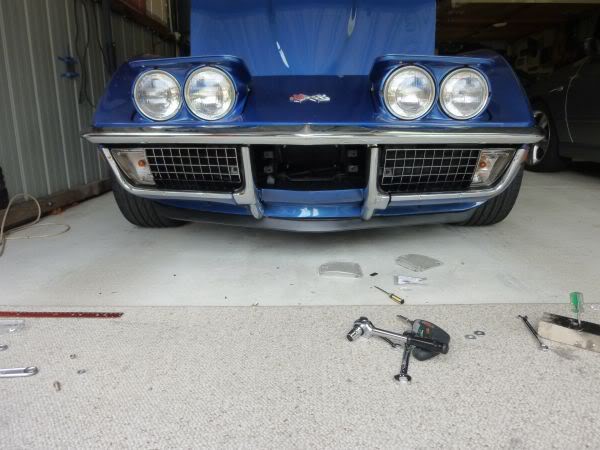
December 2011
Now the lens gaskets and lenses as well as the center grill
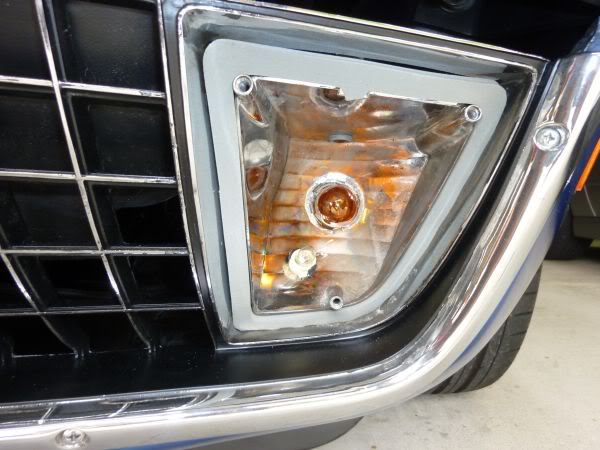
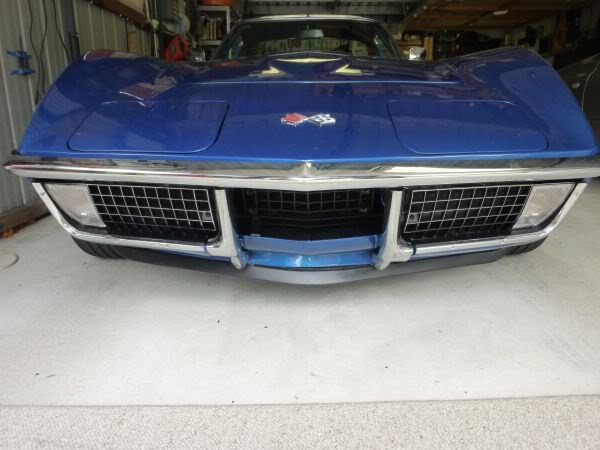
Just the Number plate to go.
Now the lens gaskets and lenses as well as the center grill
Just the Number plate to go.
Last edited by CraigH; Apr 10, 2023 at 03:02 AM.