


'71 door ajar switch
Thread Starter
Burning Brakes


Joined: Feb 2011
Posts: 850
Likes: 12
From: Shakopee MN
I nominate the C3 door ajar switch as one of the worst designed Corvette components. I've tried a couple times to make these switches:

and the corresponding terminals:

fit in there and stay, but I've had really bad luck, they just keep popping out. Has anyone come up with an alternative solution or a completely different switch that would work?
Damn these things are frustrating for such a simple component.
and the corresponding terminals:
fit in there and stay, but I've had really bad luck, they just keep popping out. Has anyone come up with an alternative solution or a completely different switch that would work?
Damn these things are frustrating for such a simple component.
Team Owner


Joined: Sep 2006
Posts: 31,230
Likes: 4,323
From: Westminster Maryland
Hi SL,
I understand your frustration.
I think in order to work with the switches you need to check:
How the wires are securely crimped (I solder the to them too) to the connectors.
How the connectors are slipped into the nylon switch body.
How the prong on the connector has to spring open to lock the connector in the switch body.
And how the ground works for the double and single wire switches.
Yes, a pretty 'iffy' system, but certainly workable.
Regards,
Alan
Last edited by Alan 71; May 13, 2013 at 03:49 PM.
Burning Brakes
Joined: Jan 2009
Posts: 766
Likes: 97
From: Lake Norman, NC
Are you "folding" the part of the tab that protrudes beyond the nylon barrel's surface after sticking them into the barrel? When folded over, they stay in place and make good elec contact. I replaced terminals in original "SX" stamped switches without problem. I folded mine outwards on the barrel. I DO agree, however, that the design AND the location of these switches are bad. When working at floor level in the car, you must be VERY careful when moving in and out of the car, so as not to break the little buggers off. Don't ask me how I know 
Thread Starter
Burning Brakes
Joined: Feb 2011
Posts: 850
Likes: 12
From: Shakopee MN
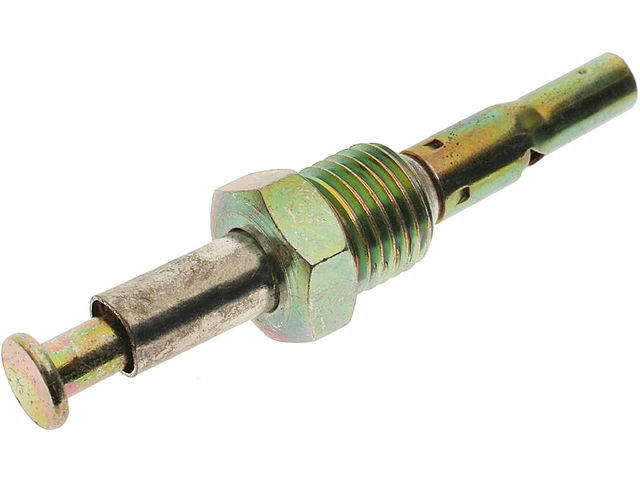
This is the switch from a 74-76 that C.A. says is for a "Door Jamb Switch Rear".

However I can't tell if the plunger goes all the way down like mine or if there's a metal outer shaft hidden under that black rubber bumper that would prevent the inner shaft from being pressed in?
I've tried filing down a nail to stick in my switch in replacement of those copper tabs. I seemed ok but I need to refine it a bit.
Redrdstr, so you rigged yours to work? That tab isn't supposed to be folded over is it?
Race Director

Joined: Apr 2011
Posts: 11,183
Likes: 3,335
From: North of Toronto - Ontario
Last time I did mine I brought the terminals all the way out and folded the end over onto the outside of the the plastic retainer. There's no way for them to slide out now.
Been working fine for several years now.
Mooser
Been working fine for several years now.
Mooser
Thread Starter
Burning Brakes
Joined: Feb 2011
Posts: 850
Likes: 12
From: Shakopee MN
Mooser, I had actually done that when I bought my first set of replacement switches. However, I quickly learned that you get basically one shot at it before the metal fatigues and breaks when you try to slip it over the outside of the plastic.
I've thought about just running down to the model store and pick up a thin sheet of copper and making my own tabs that slip over the outside. Then I would solder a stranded wire to that piece and have a blade connected at the end. I'll probably try this solution this weekend. The problem with going on the outside is that it can't be too thick otherwise it won't fit through the opening.
This is one place where I'd love to see a switch that looks just like mine but the plastic end has been replaced with one of the later blade connections. ahhh...wishing
Race Director
Joined: Apr 2011
Posts: 11,183
Likes: 3,335
From: North of Toronto - Ontario
Your right there, only bend once.
The other thing to try would be to insert the terminals and once they are in place (and all 3 touching the disc) put a dab of epoxy/cyano/rtv on the back to hold them in place
Yes it would be nice if it was a better switch but in reality, once it's working it pretty much causes no problems.
Mooser
The other thing to try would be to insert the terminals and once they are in place (and all 3 touching the disc) put a dab of epoxy/cyano/rtv on the back to hold them in place
Yes it would be nice if it was a better switch but in reality, once it's working it pretty much causes no problems.
Mooser
Corvette Stories
The Best of Corvette for Corvette Enthusiasts

How Much Horsepower Every Corvette Engine "LOST" in 1972
Joe Kucinski
Top 10 DOs and DON'Ts for Protecting Your Convertible Top!
Michael S. Palmer
Top 10 Most Explosive Corvettes Ever Made: Power-to-Weight Ratio Ranked!
Joe Kucinski
150 hp to 1,250 hp: Every Corvette Generation Compared by the Specs That Matter
Joe Kucinski
8 Coolest Corvette Pace Cars (and Replicas) of All Time
Verdad Gallardo
Top 10 Corvette Engines RANKED by Peak Torque (70+ Years of Muscle!)
Joe Kucinski
Corvette ZR1X Will Be Pacing the Indy 500, And Could Probably Race, Too!
Verdad Gallardo
Top 10 Corvettes Coming to Mecum Indy 2026!
Brett Foote
Top 10 C9 Corvette MUST-HAVES to Fix These C8 Generation Flaws!
Michael S. PalmerBurning Brakes
Joined: Jan 2009
Posts: 766
Likes: 97
From: Lake Norman, NC
Yep. Just like Mooser says, one try only. Maybe that's why there are 6 terminals on a strip when you only need 2 or 3 per switch???
Compress the plunger all the way. That will give you a gap between the top of the nylon barrel and the contact point on the switch's body. Insert the terminal in all the way in from the bottom - I think this will have approx 2mm extending above the top of the barrel in the gap. Use a small tool to fold the protruding end outward. This will lock the terminal in and it will create a nice contact surface for the metal disk to make contact and close the circuit when the plunger is extended.
I hope this helps!