


 Best of luck


1968 Corvette Coupe Restoration
Burning Brakes


Joined: Sep 2005
Posts: 769
Likes: 36
From: Goose Creek SC
Looking good! I am familiar with the water method for blasting. It can be adjusted to anything from removing graffiti from the bark off a tree without damaging the bark or it can cut the tree in two, depending on what you want. Sometimes they use a bit of glass bead to begin to break through whatever they are removing and then let the water lift it off. It is a very specialized process for sure. Keep us posted with progress and photo's!

Melting Slicks


Joined: May 2001
Posts: 2,131
Likes: 4
From: May help you? You can sure as hell try!
This must be a very late '68, judging from the braces on the rear kick-ups. Thanks for sharing the pics of your renovation.
While I bought my '68 for it's originality, I almost felt that my hands were tied as far as what I could do with it because I didn't want to mess with it too much.
I ended up buying another project later to do MY way.
Go nuts and have fun!!
While I bought my '68 for it's originality, I almost felt that my hands were tied as far as what I could do with it because I didn't want to mess with it too much.
I ended up buying another project later to do MY way.
Go nuts and have fun!!
Thread Starter
Advanced

Joined: Jul 2013
Posts: 94
Likes: 15
From: Detroit Michigan
This must be a very late '68, judging from the braces on the rear kick-ups. Thanks for sharing the pics of your renovation.
While I bought my '68 for it's originality, I almost felt that my hands were tied as far as what I could do with it because I didn't want to mess with it too much.
I ended up buying another project later to do MY way.
Go nuts and have fun!!
While I bought my '68 for it's originality, I almost felt that my hands were tied as far as what I could do with it because I didn't want to mess with it too much.
I ended up buying another project later to do MY way.
Go nuts and have fun!!
Corvette Stories
The Best of Corvette for Corvette Enthusiasts

Top 10 Most Expensive Corvettes Ever Sold on Bring A Trailer
Brett Foote
10 Things Every Corvette Owner Needs (2026 Edition)
Michael S. Palmer
8 Most "Only Corvette Owners Understand" Quirks and Problems
Pouria Savadkouei
10 Reasons the C6 Z06 is Still A Performance Benchmark After 20 Years
Joe Kucinski
How Much Horsepower Every Corvette Engine "LOST" in 1972
Joe Kucinski
Top 10 DOs and DON'Ts for Protecting Your Convertible Top!
Michael S. Palmer
Top 10 Most Explosive Corvettes Ever Made: Power-to-Weight Ratio Ranked!
Joe Kucinski
150 hp to 1,250 hp: Every Corvette Generation Compared by the Specs That Matter
Joe Kucinski
8 Coolest Corvette Pace Cars (and Replicas) of All Time
Verdad GallardoPro

Joined: Feb 2014
Posts: 692
Likes: 2
From: Seguin TX
Need some help identifying these items.
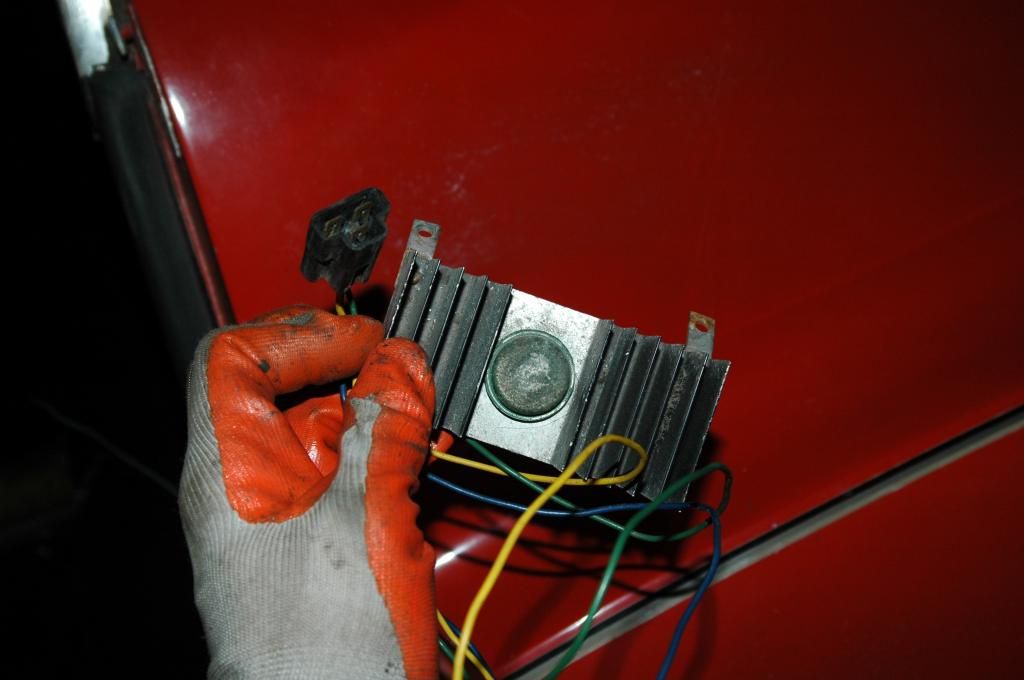
Found this with the wire harness wrapped around it (not plugged in) It lived under the top pad at the front of dash. Its a heatsink and resistor for something...
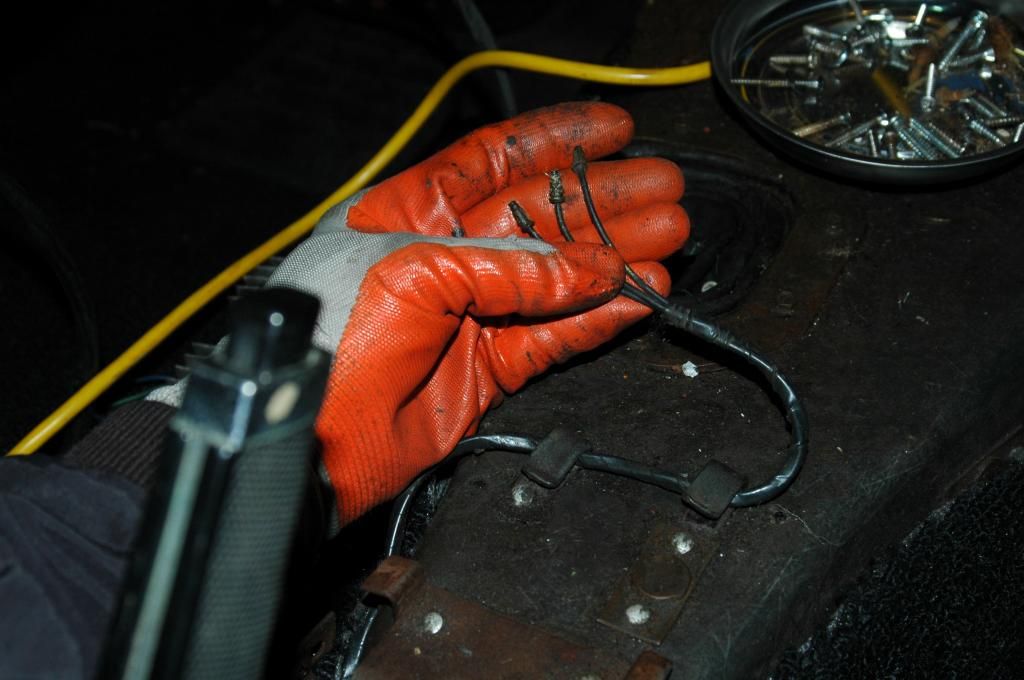
And found these wires under the center console, tucked in the passenger compartment in front of the part brake...
Any help is appreciated!
Found this with the wire harness wrapped around it (not plugged in) It lived under the top pad at the front of dash. Its a heatsink and resistor for something...

And found these wires under the center console, tucked in the passenger compartment in front of the part brake...

Any help is appreciated!
Pro
Joined: Feb 2014
Posts: 692
Likes: 2
From: Seguin TX
I recently inherited one also and have been diligently working on this one. I started with the engine (427) by turning it over on the lower pulley to make sure it wasn't locked up. After the crank turned I pulled the plugs and squirted some Marvel Mystery oil in the cylinders and turned it over by hand some more to free it up. I did notice then I pulled the number 6 plug some water came out. I pulled the intake and found the fuel rails on the heads had quiet a bit of rust scale build up. I pulled the heads and took them to the machine shop and had them run through them and put 6 new valves and Vi-ton valve seals and new brass guides in ( cost $600 with new complete gasket set). Had to replace the timing chain, fuel pump, gas tank sending unit gasket, starter, rebuild carbs and new battery. Put some fresh fuel in and she turned right over. Ran the valves and set the timing and she is purring again. I knew it had some electrical / wiring problems so that was my next step. It is easier to work on the electrical if you go ahead and just take out the interior trim pieces ( 28 screws) and then move forward trust me. The MAIN thing to check as you find stuff not working is the ground wires and connections test and check these first before buying new parts. Also do not be afraid to tug on the terminals to make sure the wire is still crimped in ( .15 connectors are cheaper that $50 parts). I am close now to putting everything on the interior back together but decided to paint the interior parts with Dupli-color vinyl dye. If you have more questions or want to chat just message me !
Pro
Joined: Feb 2014
Posts: 692
Likes: 2
From: Seguin TX
The first pic is the radio amplifier which mounts above the center guage bezel to the underside of the dash pad. The second picture is the fiber optic cables that go to the 3 light fiber optic display on rear side of your center console that is for the taillights and license plate light. I will take a few pics of mine and post them in the next few days.


Thread Starter
Advanced
Joined: Jul 2013
Posts: 94
Likes: 15
From: Detroit Michigan
Stripping with a razor. Works well. Buy razors in bulk!!!
My teenage son asked to work on the car by himself! Go right ahead, Sir!


My teenage son asked to work on the car by himself! Go right ahead, Sir!


