


Bob's 1969 Resto-Mod Build Thread

Safety Car


Joined: Jun 2013
Posts: 4,399
Likes: 793
Sorry, no progress pictures in-between layers of glass - I'm working alone, and no way am I risking getting resign on my iPhone. 
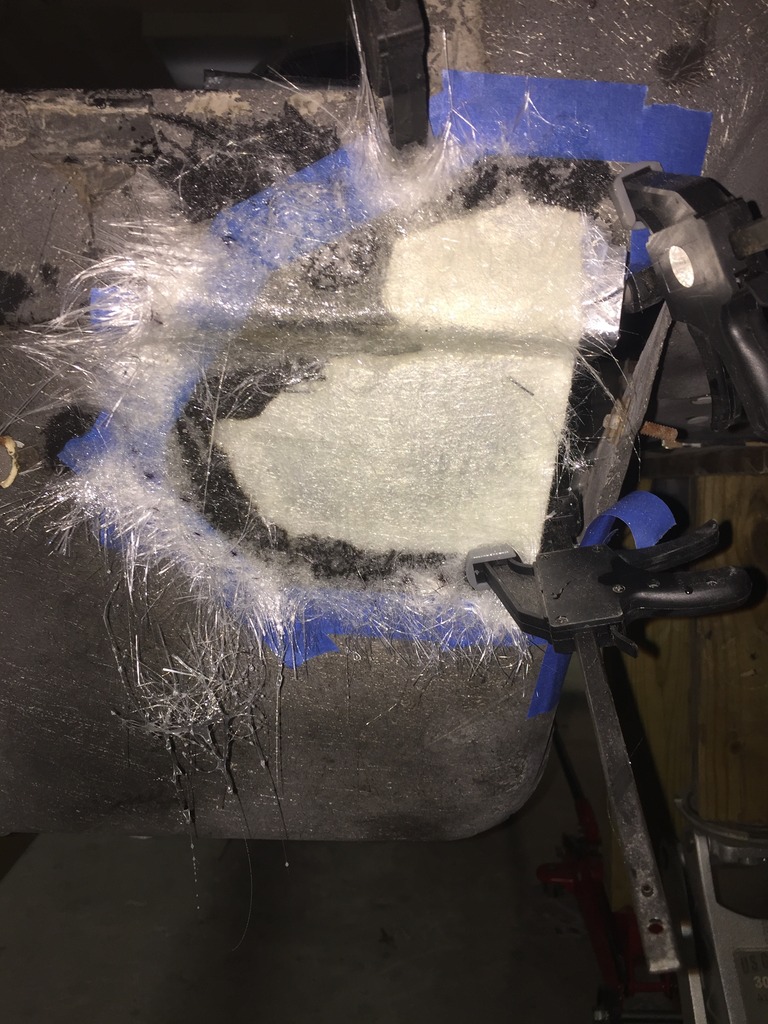
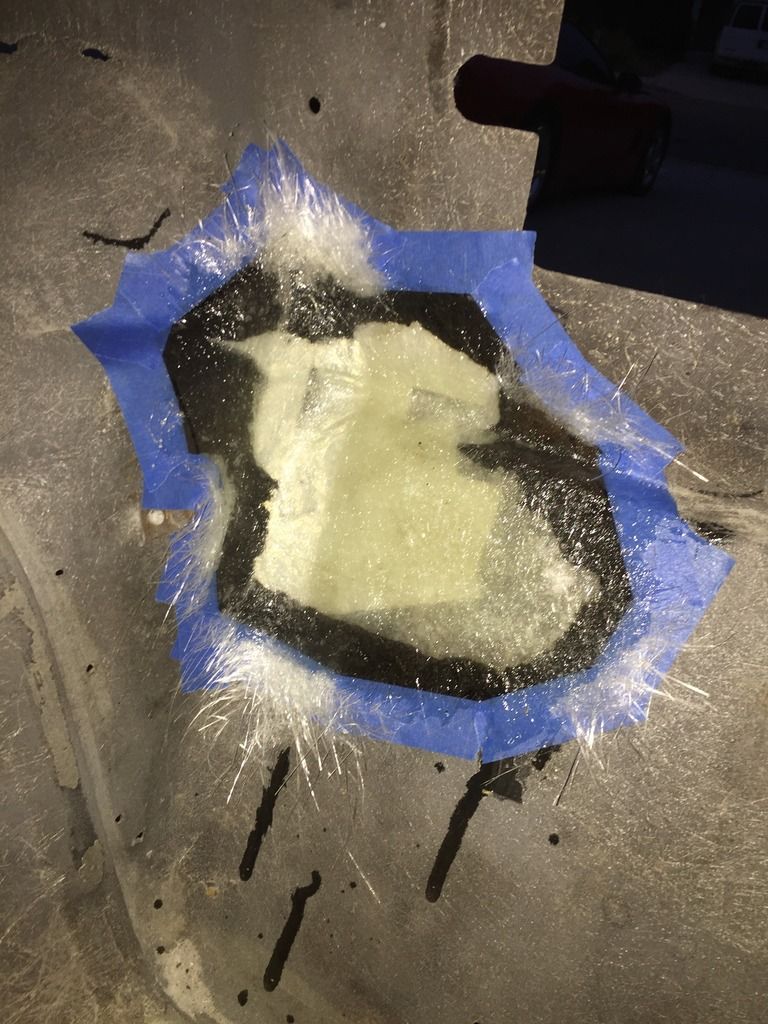
Here is how they looked wet - Two layers of Chopped strand mat.
And the final repair - All sanded smoothe...
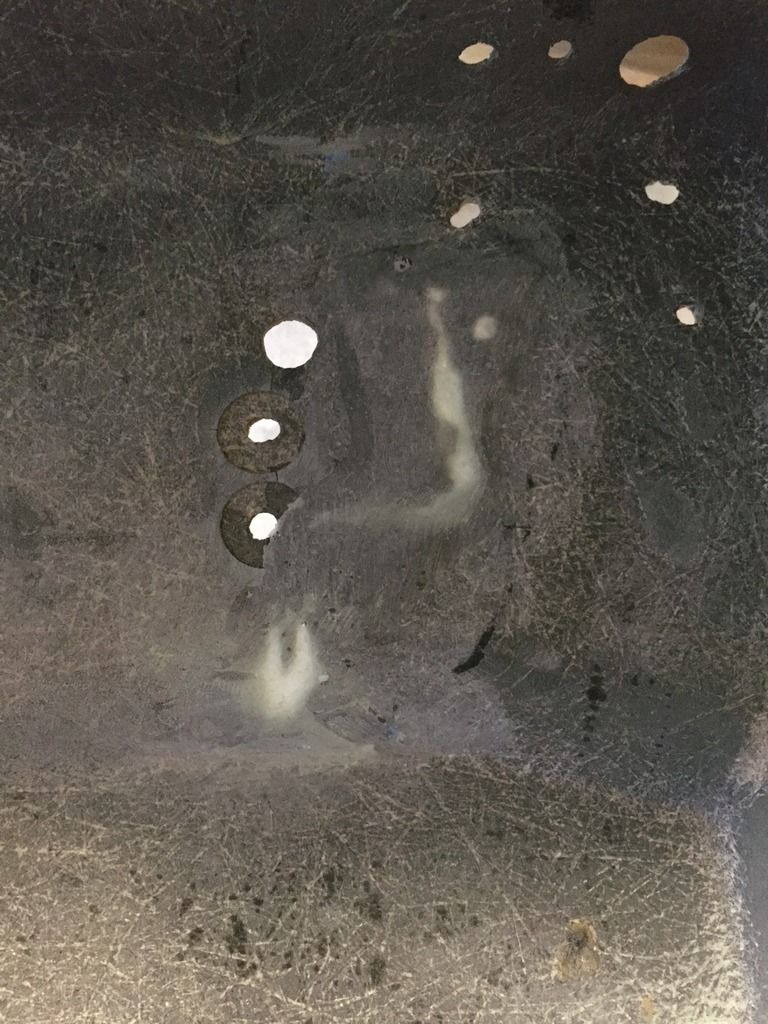
I was really surprised how clear the repaired sections were.
The back side of the repairs will be ground out, and filled out with VPA. That will all be cleaned up at the end. But the back side didn't look too bad - heres how it looked without sanding after the tape was removed.
Thats all for now.
Here is how they looked wet - Two layers of Chopped strand mat.


And the final repair - All sanded smoothe...


I was really surprised how clear the repaired sections were.
The back side of the repairs will be ground out, and filled out with VPA. That will all be cleaned up at the end. But the back side didn't look too bad - heres how it looked without sanding after the tape was removed.


Thats all for now.
RVZIO

Thread Starter
Race Director

Joined: Apr 2005
Posts: 11,556
Likes: 52
From: SoCal Twin Turbo, Any Questions?
St. Jude Donor '06-'07
Thread Starter
Race Director
Joined: Apr 2005
Posts: 11,556
Likes: 52
From: SoCal Twin Turbo, Any Questions?
St. Jude Donor '06-'07
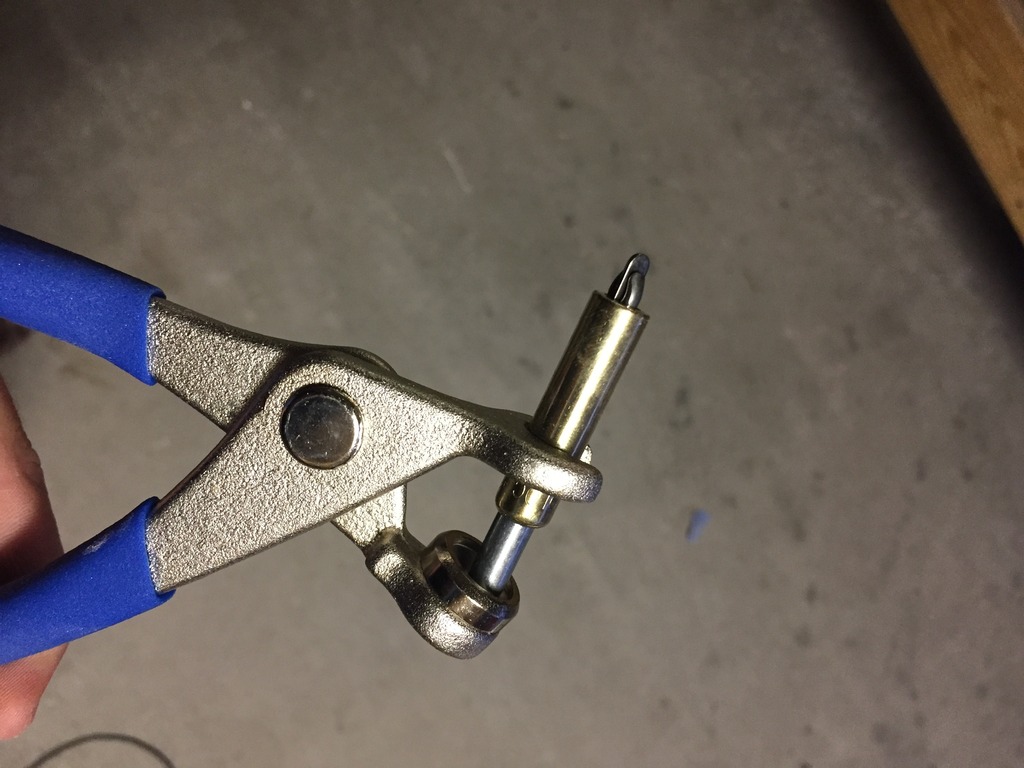
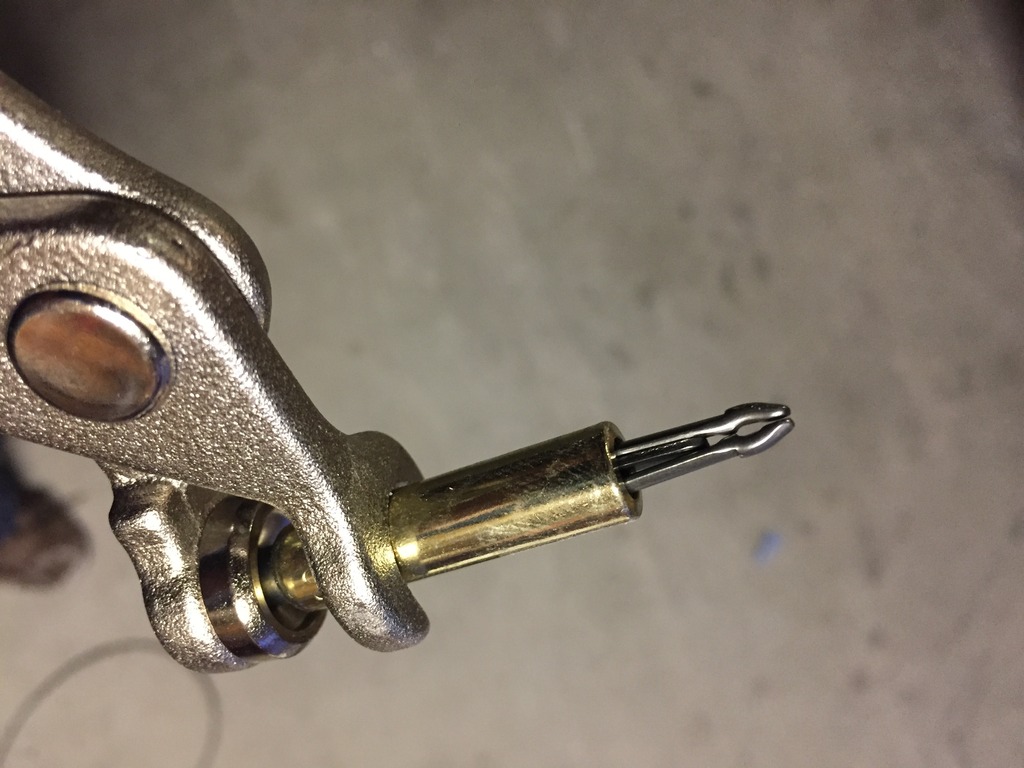
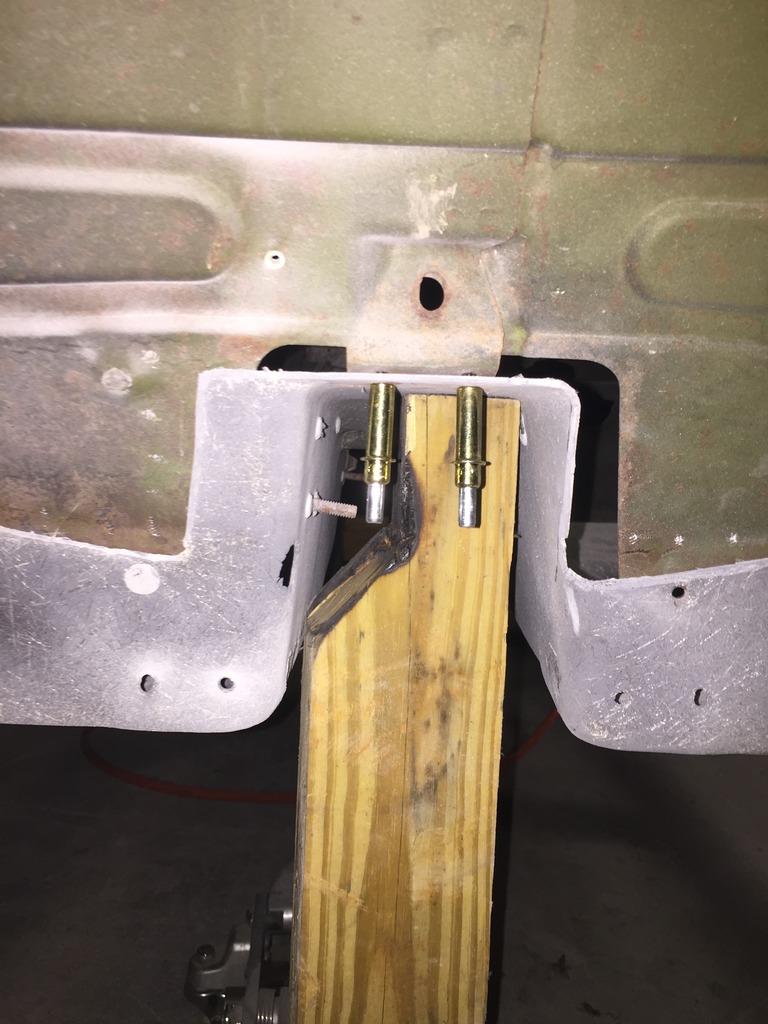
In order to ensure the floor pieces are in alignment before I started glassing repairs, I picked up a set of cleco fasteners. I didn't want to final rivet everything in place just yet, and I know several parts are going to go on and off more than a few times when I am doing final assembly.
I just saw the view count at over 35,000. That's pretty humbling. Thanks for watching!


I just saw the view count at over 35,000.
That's pretty humbling. Thanks for watching!
Safety Car
Joined: Jun 2013
Posts: 4,399
Likes: 793
Thread Starter
Race Director
Joined: Apr 2005
Posts: 11,556
Likes: 52
From: SoCal Twin Turbo, Any Questions?
St. Jude Donor '06-'07
Safety Car
Joined: Jun 2013
Posts: 4,399
Likes: 793
Thread Starter
Race Director
Joined: Apr 2005
Posts: 11,556
Likes: 52
From: SoCal Twin Turbo, Any Questions?
St. Jude Donor '06-'07
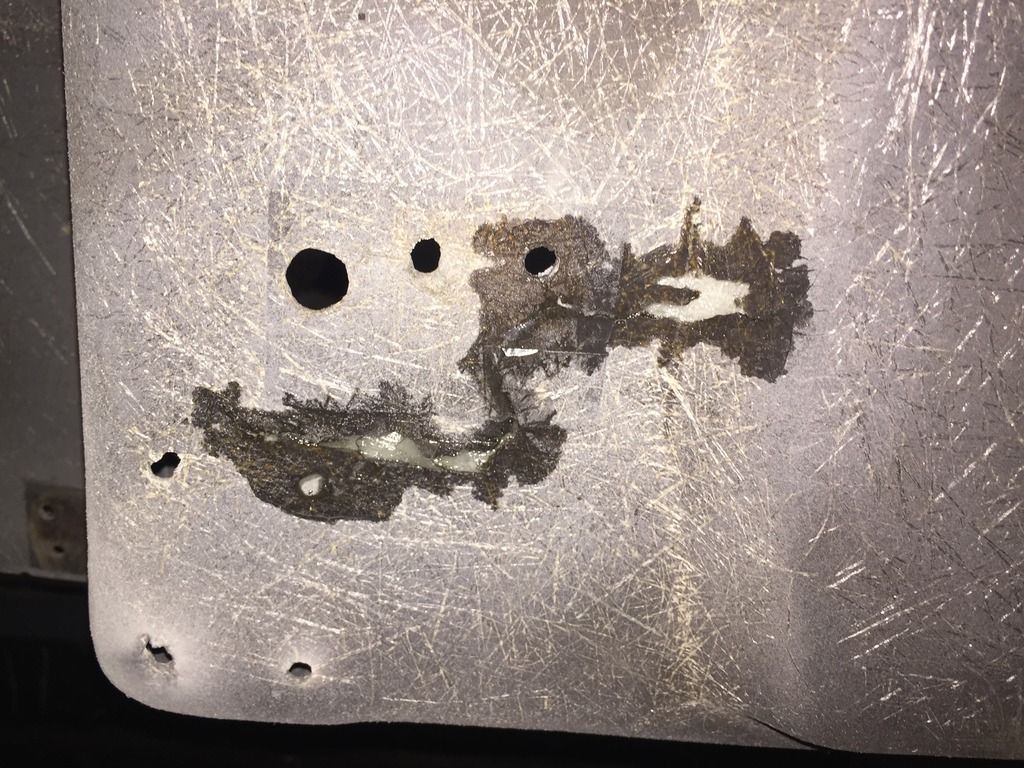
I was planning on glassing over and re-drilling the holes that are too big to re-rivet any reason you took this route?
Safety Car
Joined: Jun 2013
Posts: 4,399
Likes: 793
RVZIO


You get the idea. Actually pretty cool once you get the knack of it and the look.
Corvette Stories
The Best of Corvette for Corvette Enthusiasts

Every 2027 Corvette Engine Explained
Joe Kucinski
Designer Imagines A Corvette That Looks More Like a Corvette Than the Corvette
Verdad Gallardo
10 Ugly Corvettes That We Still Kinda Love
Joe Kucinski
Top 10 Most Expensive Corvettes Ever Sold on Bring A Trailer
Brett Foote
10 Things Every Corvette Owner Needs (2026 Edition)
Michael S. Palmer
8 Most "Only Corvette Owners Understand" Quirks and Problems
Pouria Savadkouei
10 Reasons the C6 Z06 is Still A Performance Benchmark After 20 Years
Joe Kucinski
How Much Horsepower Every Corvette Engine "LOST" in 1972
Joe Kucinski
Top 10 DOs and DON'Ts for Protecting Your Convertible Top!
Michael S. Palmer
Thread Starter
Race Director
Joined: Apr 2005
Posts: 11,556
Likes: 52
From: SoCal Twin Turbo, Any Questions?
St. Jude Donor '06-'07
Got it! Your underbody looks amazing! after working on mine, I can tell how many hours went into getting that look. Did you paint the glass?
Safety Car
Joined: Jun 2013
Posts: 4,399
Likes: 793
Thread Starter
Race Director
Joined: Apr 2005
Posts: 11,556
Likes: 52
From: SoCal Twin Turbo, Any Questions?
St. Jude Donor '06-'07
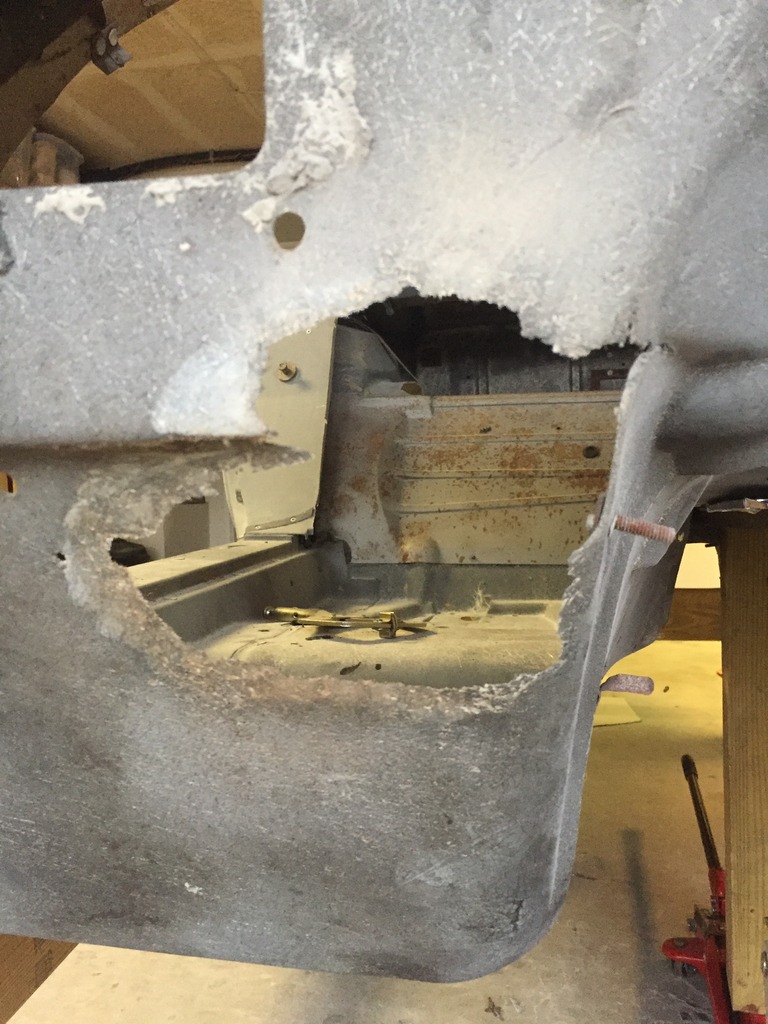
So, lets add fiberglass to the list of things I'm not awesome at. But here is a progress post for one specific repair that was a pretty big step.
Most of the center consul was missing when I got the car around where the shiftier should go.
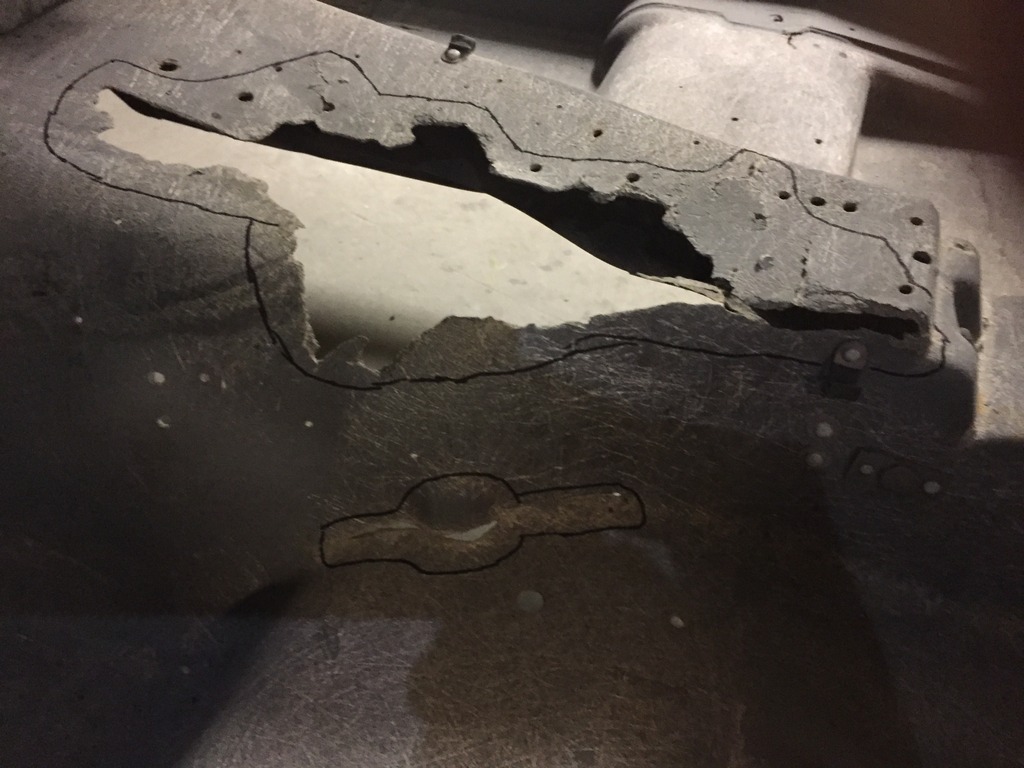
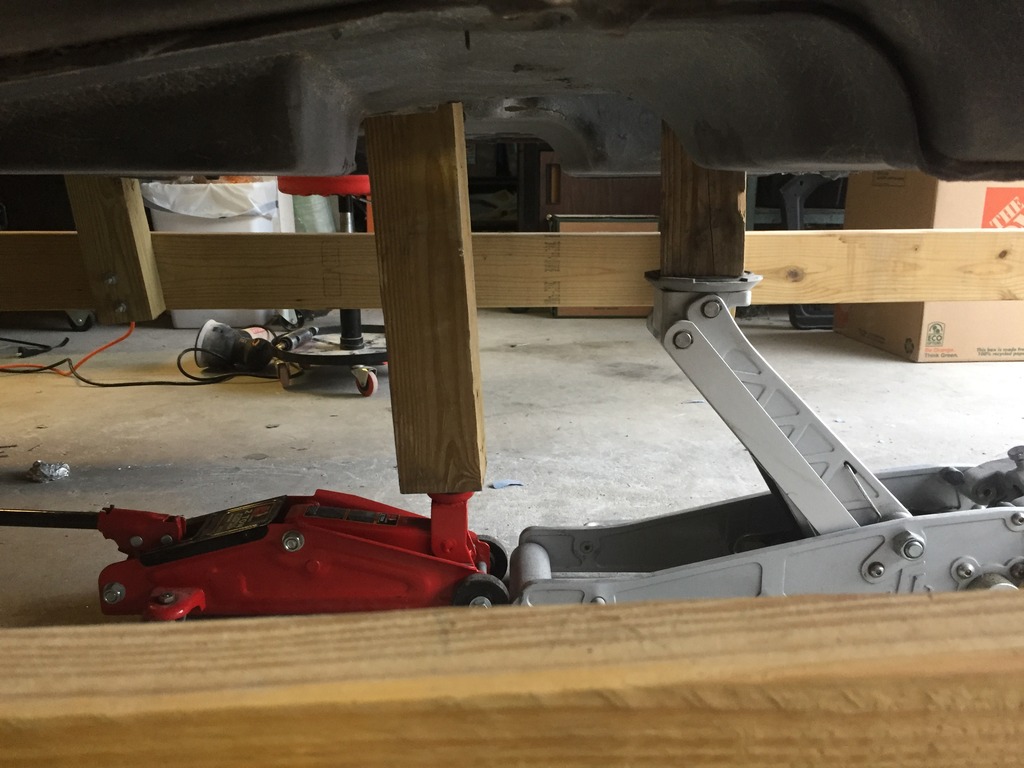
I started with a cardboard template and then made a fiberboard pattern to use as reinforcement from below to make sure it was in shape before the glass was laid.
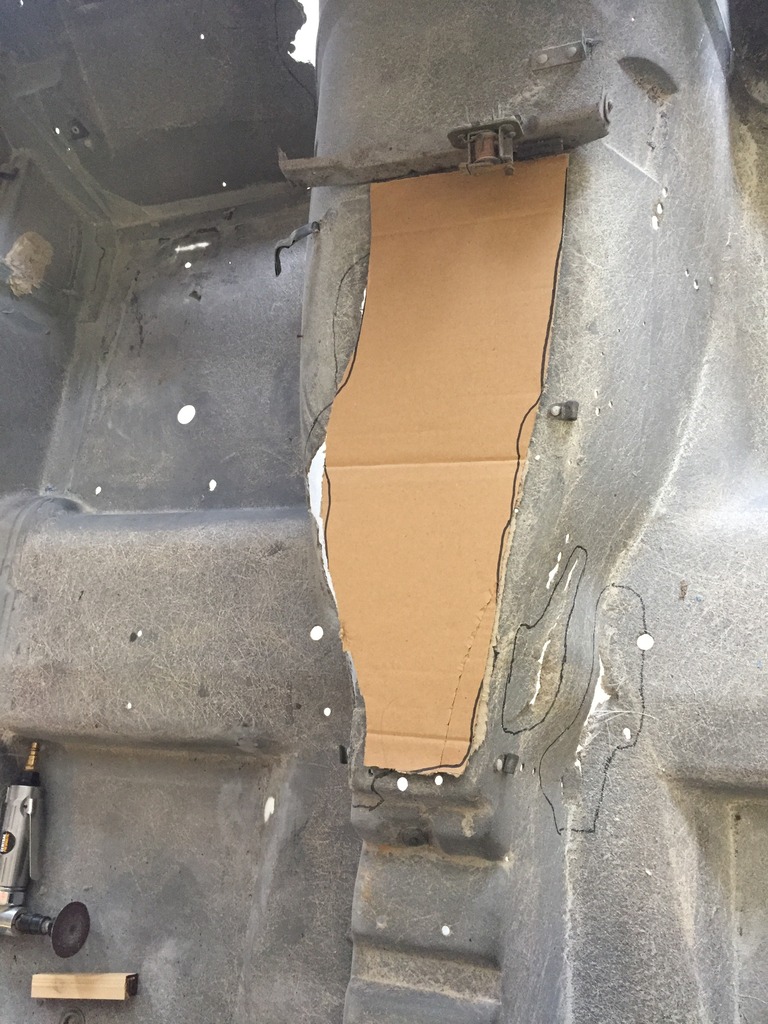
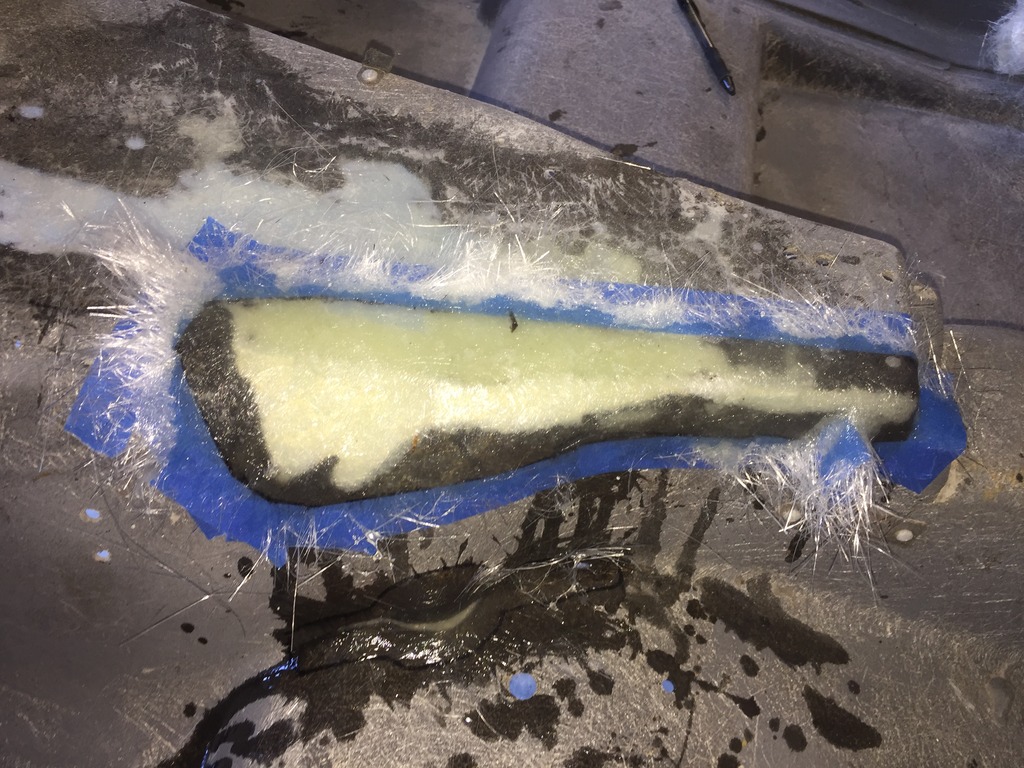
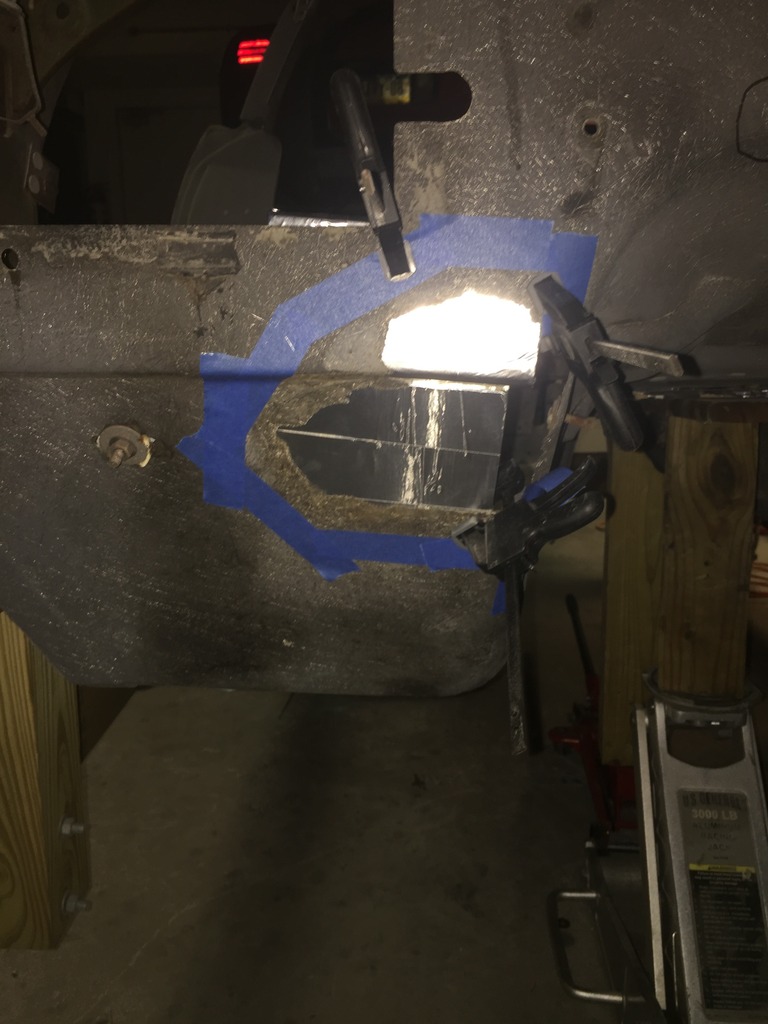
I did the repair in two parts (So far, I still need to add some more to a thin spot) The first was the rough flat top part:

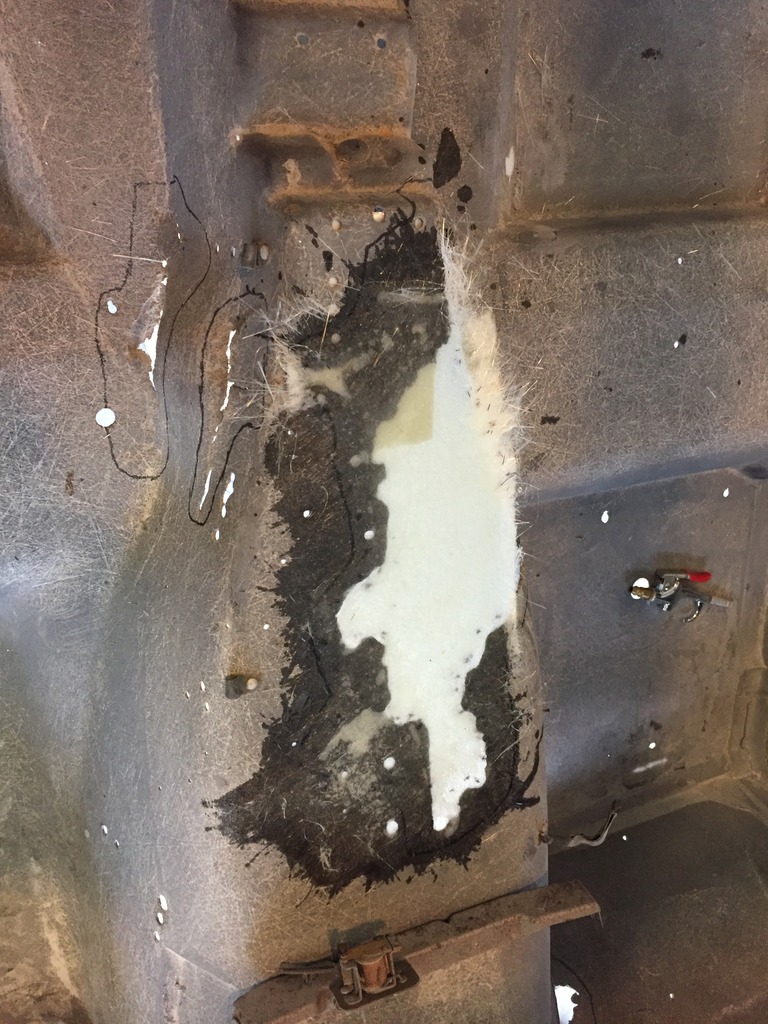

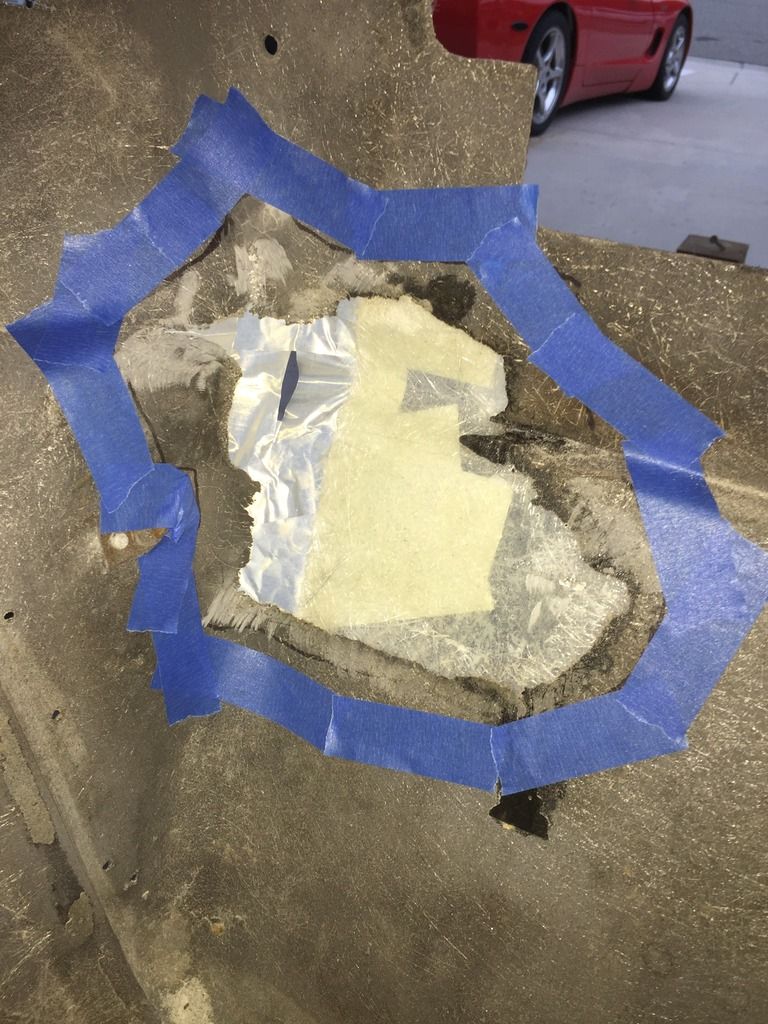
Then a rounded edge repair using the aluminum tape as a backing... its not exactly perfect, but should be close enough.
Thats a whole lot of work
Most of the center consul was missing when I got the car around where the shiftier should go.


I started with a cardboard template and then made a fiberboard pattern to use as reinforcement from below to make sure it was in shape before the glass was laid.


I did the repair in two parts (So far, I still need to add some more to a thin spot) The first was the rough flat top part:


Then a rounded edge repair using the aluminum tape as a backing... its not exactly perfect, but should be close enough.


Thats a whole lot of work
Thread Starter
Race Director
Joined: Apr 2005
Posts: 11,556
Likes: 52
From: SoCal Twin Turbo, Any Questions?
St. Jude Donor '06-'07
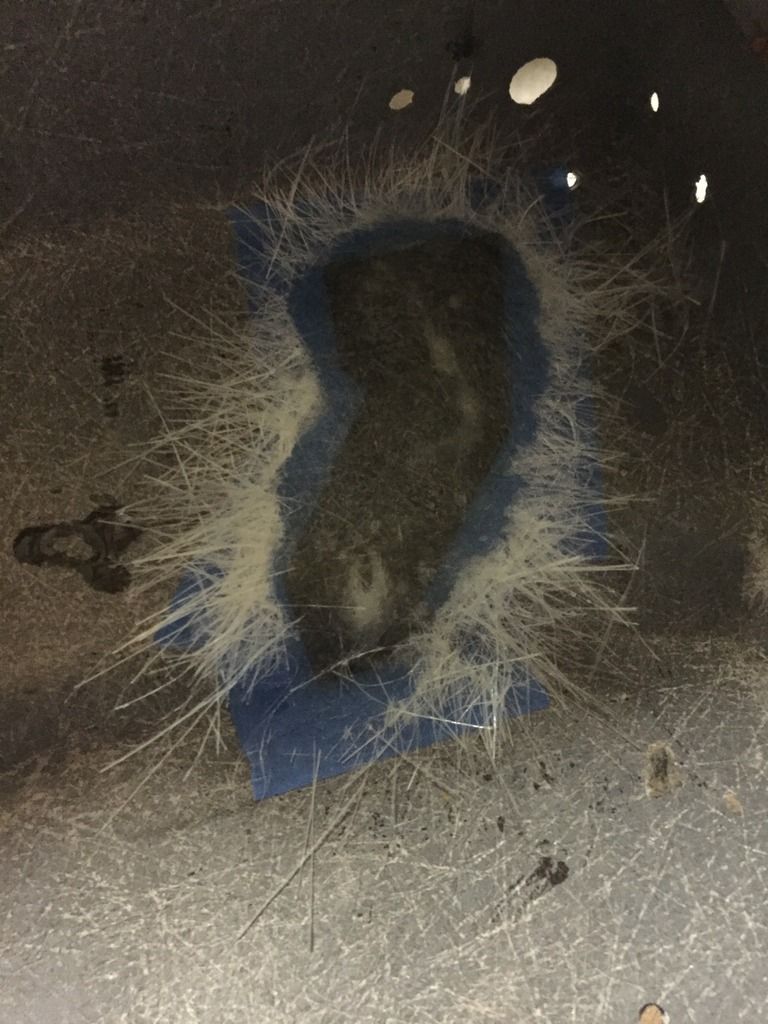
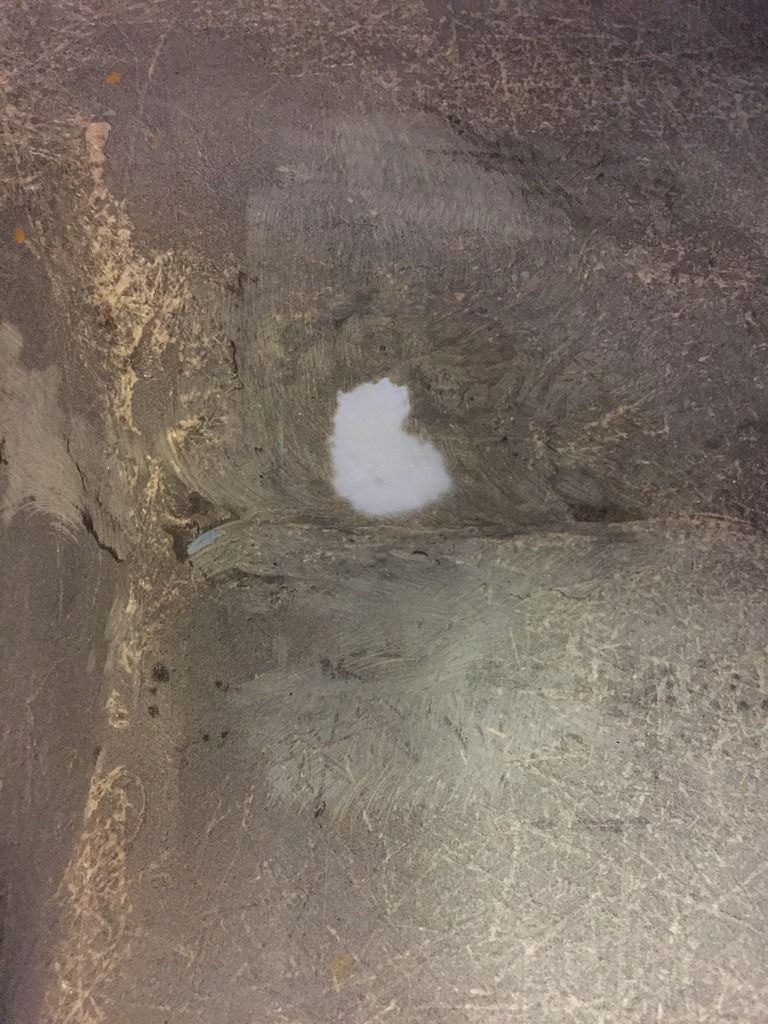
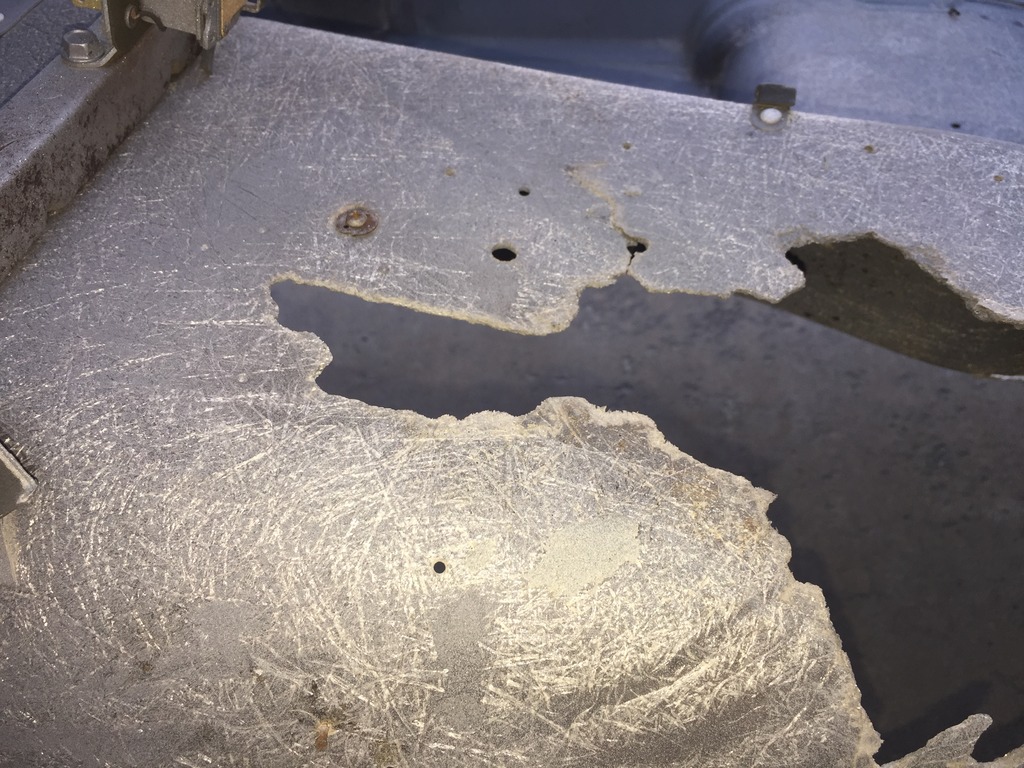
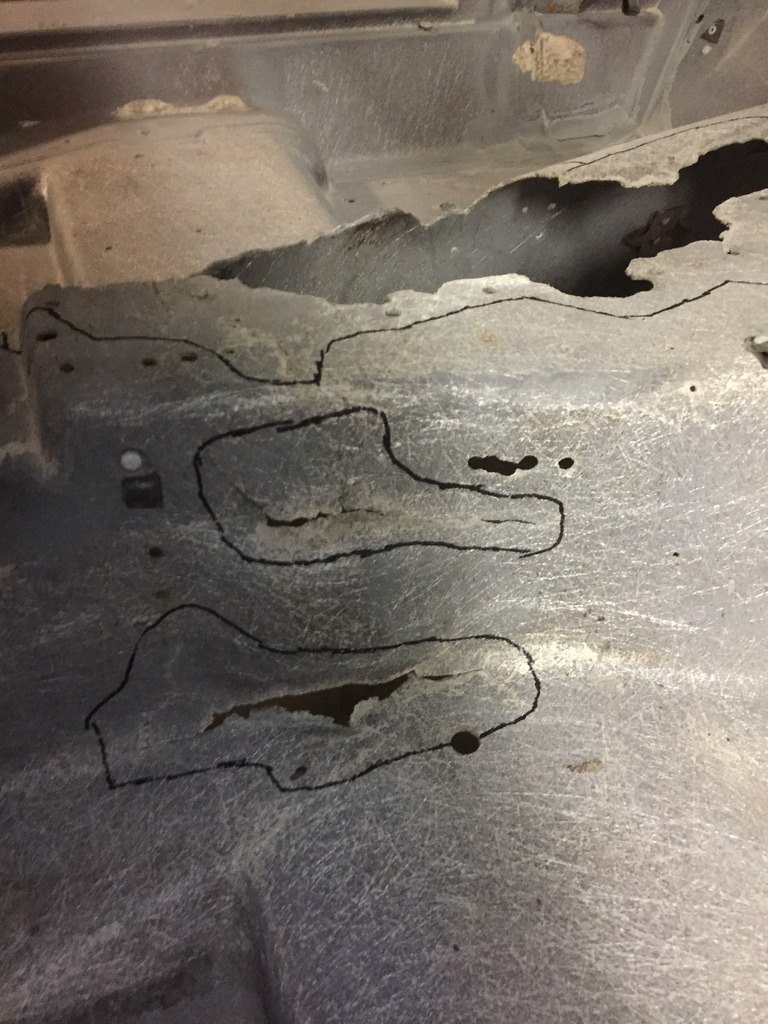
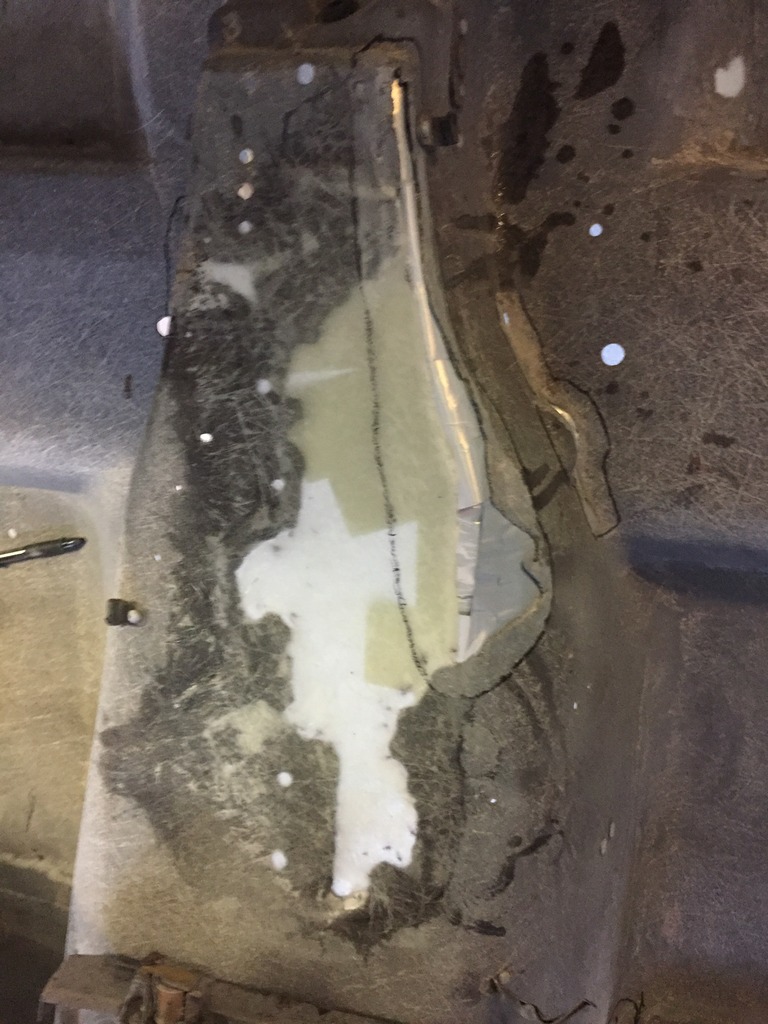
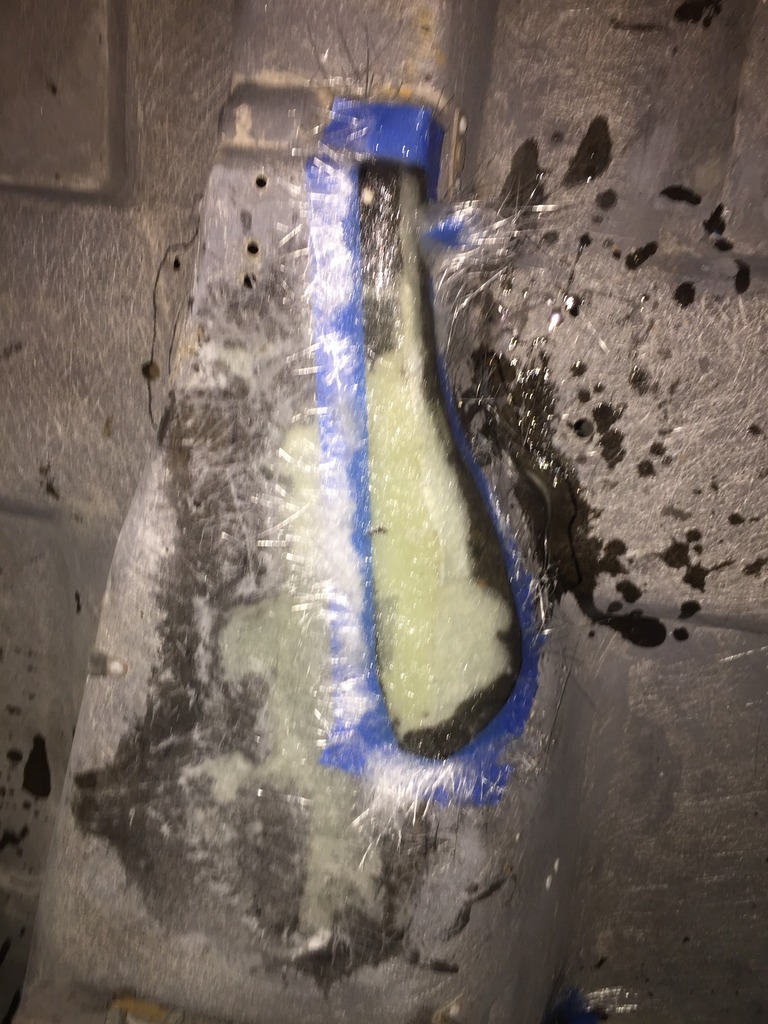
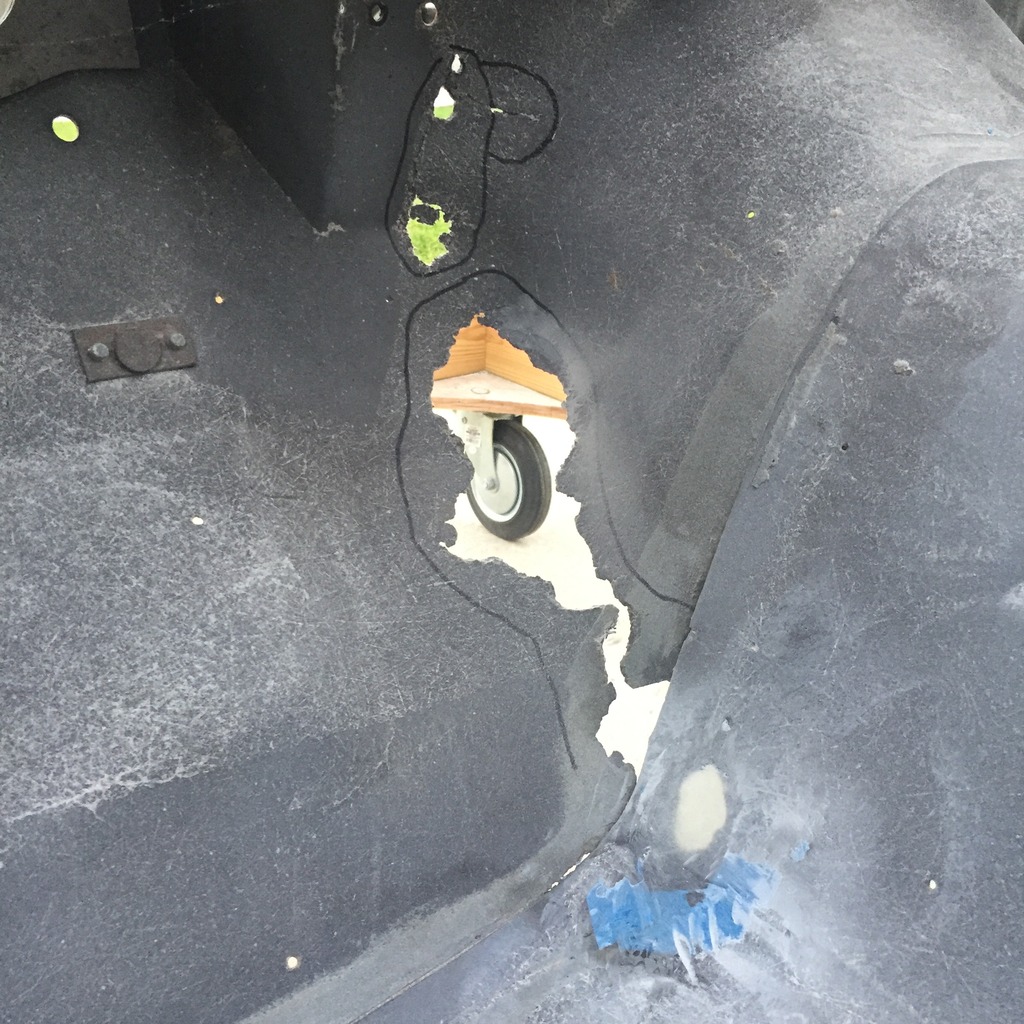
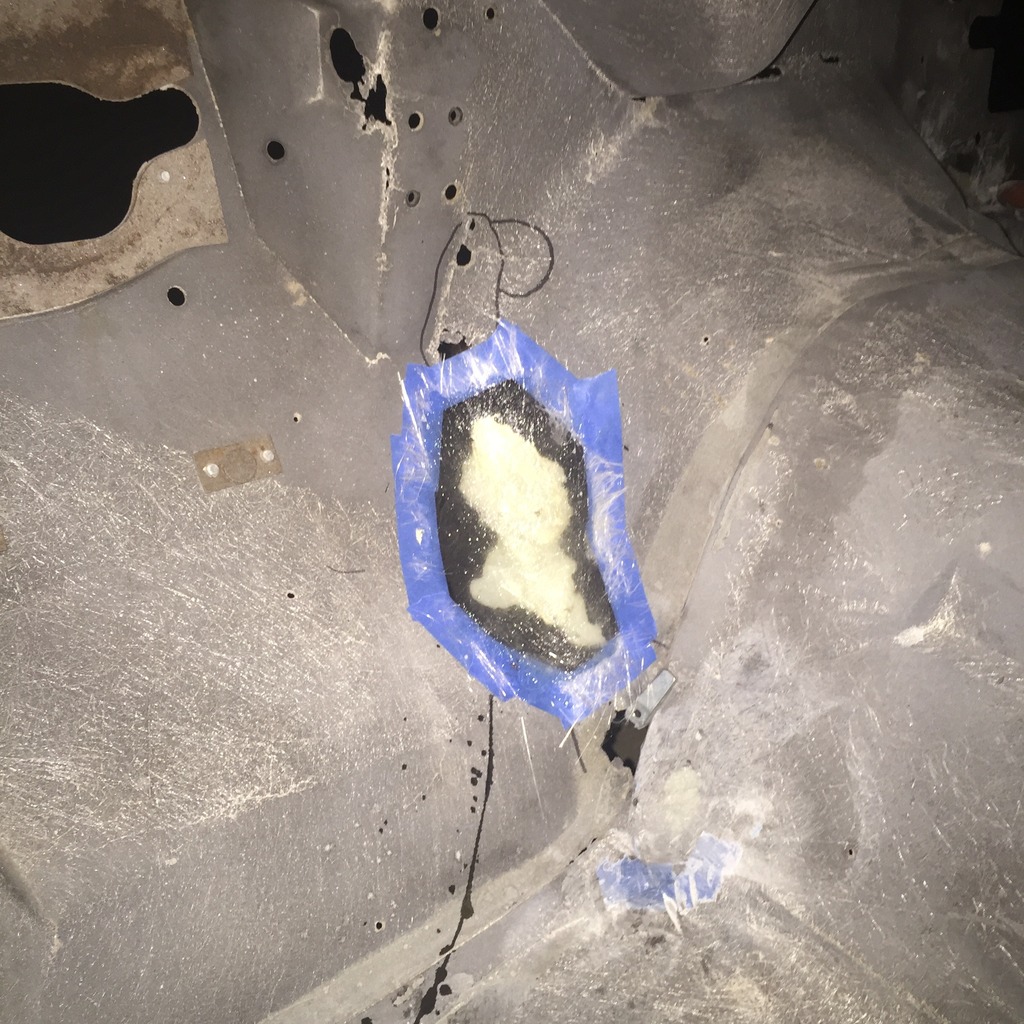
The second major repair I did was on the passenger side foot well where it meets the tunnel. I had to guess at the contour where the edge met the tunnel, but I think it turned out pretty well.
The car cover is in the background of the picture above

The car cover is in the background of the picture above


Thread Starter
Race Director
Joined: Apr 2005
Posts: 11,556
Likes: 52
From: SoCal Twin Turbo, Any Questions?
St. Jude Donor '06-'07
Repair was done in two parts first the straight part, as far as I cound estimate:

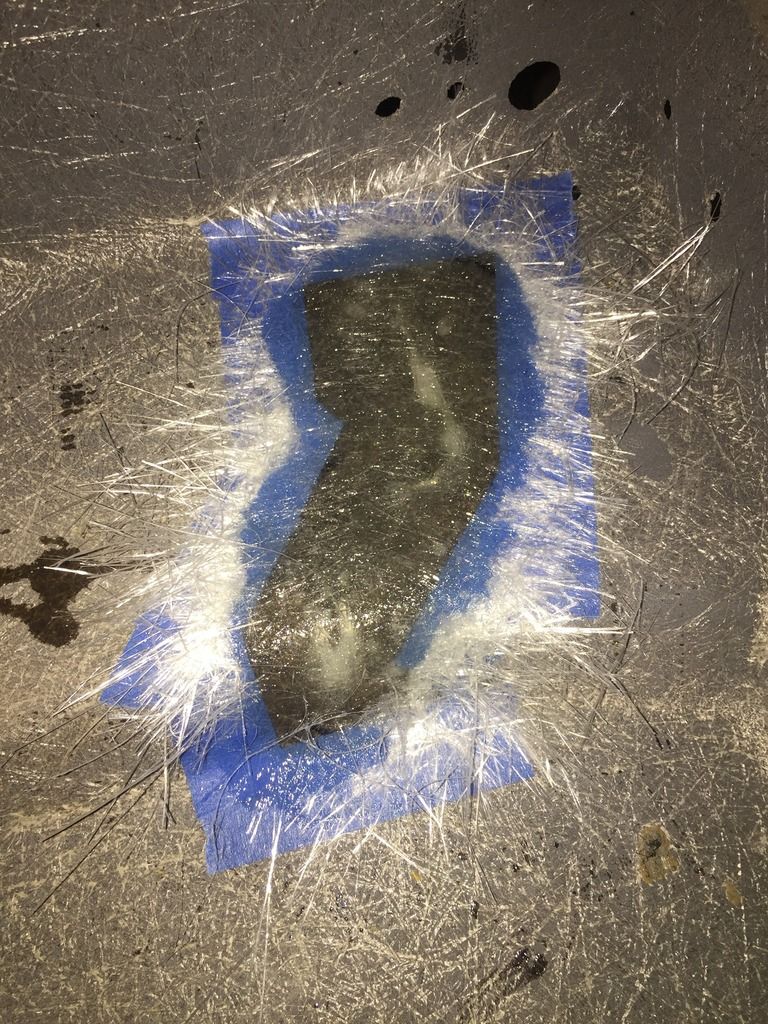
If I had it to do over, I would have done it from the inside, but I made that adjustment for the second half of the repair for the curved portion:


Still working on sanding down the repair and blending it in to the stock glass.
I have a production line set up going where I sand the freshly dried repair, and grind down the next repair section, then tape off, do the repair, and then let set for 24-48 hours, then repeat.
Safety Car
Joined: Jun 2013
Posts: 4,399
Likes: 793
Repair was done in two parts first the straight part, as far as I cound estimate:


If I had it to do over, I would have done it from the inside, but I made that adjustment for the second half of the repair for the curved portion:
Still working on sanding down the repair and blending it in to the stock glass.
I have a production line set up going where I sand the freshly dried repair, and grind down the next repair section, then tape off, do the repair, and then let set for 24-48 hours, then repeat.
RVZIO
Thread Starter
Race Director
Joined: Apr 2005
Posts: 11,556
Likes: 52
From: SoCal Twin Turbo, Any Questions?
St. Jude Donor '06-'07
Drifting


Joined: Mar 2013
Posts: 1,926
Likes: 304
From: Lansing MI
Bob, I love checking in and seeing your work progress!
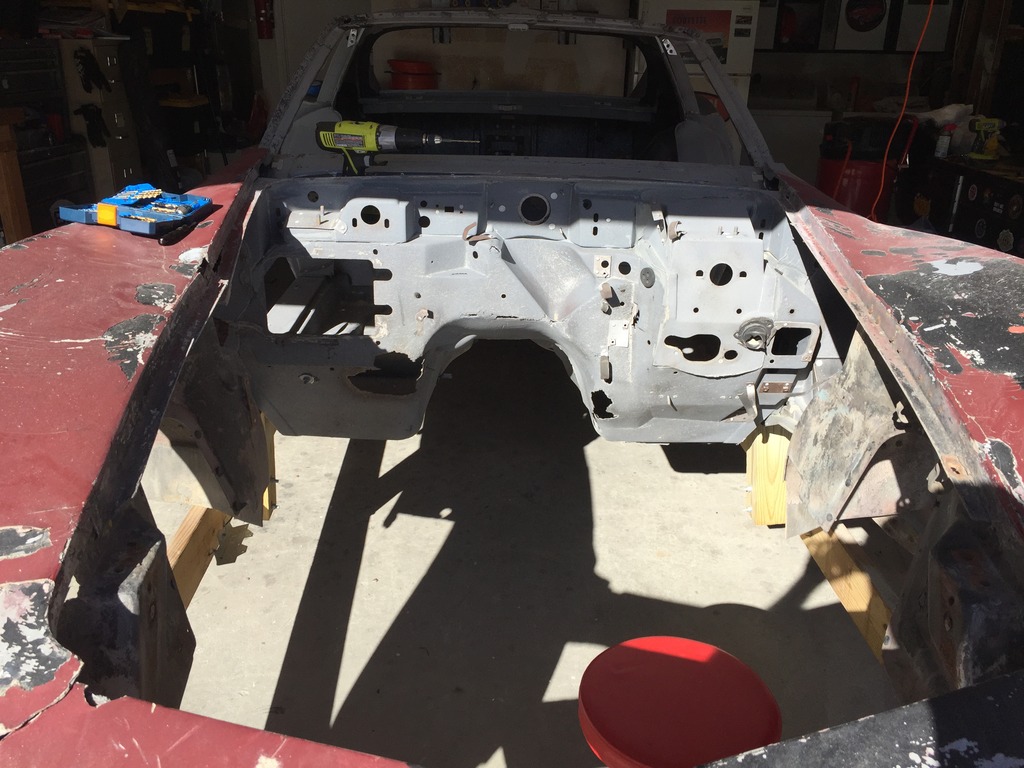
On a side note, what the heck happened to that poor Corvette? It looks like the previous owner's angry ex took a hammer to it.
On a side note, what the heck happened to that poor Corvette? It looks like the previous owner's angry ex took a hammer to it.
Last edited by chazde3; Jun 21, 2017 at 10:03 AM.
Thread Starter
Race Director
Joined: Apr 2005
Posts: 11,556
Likes: 52
From: SoCal Twin Turbo, Any Questions?
St. Jude Donor '06-'07

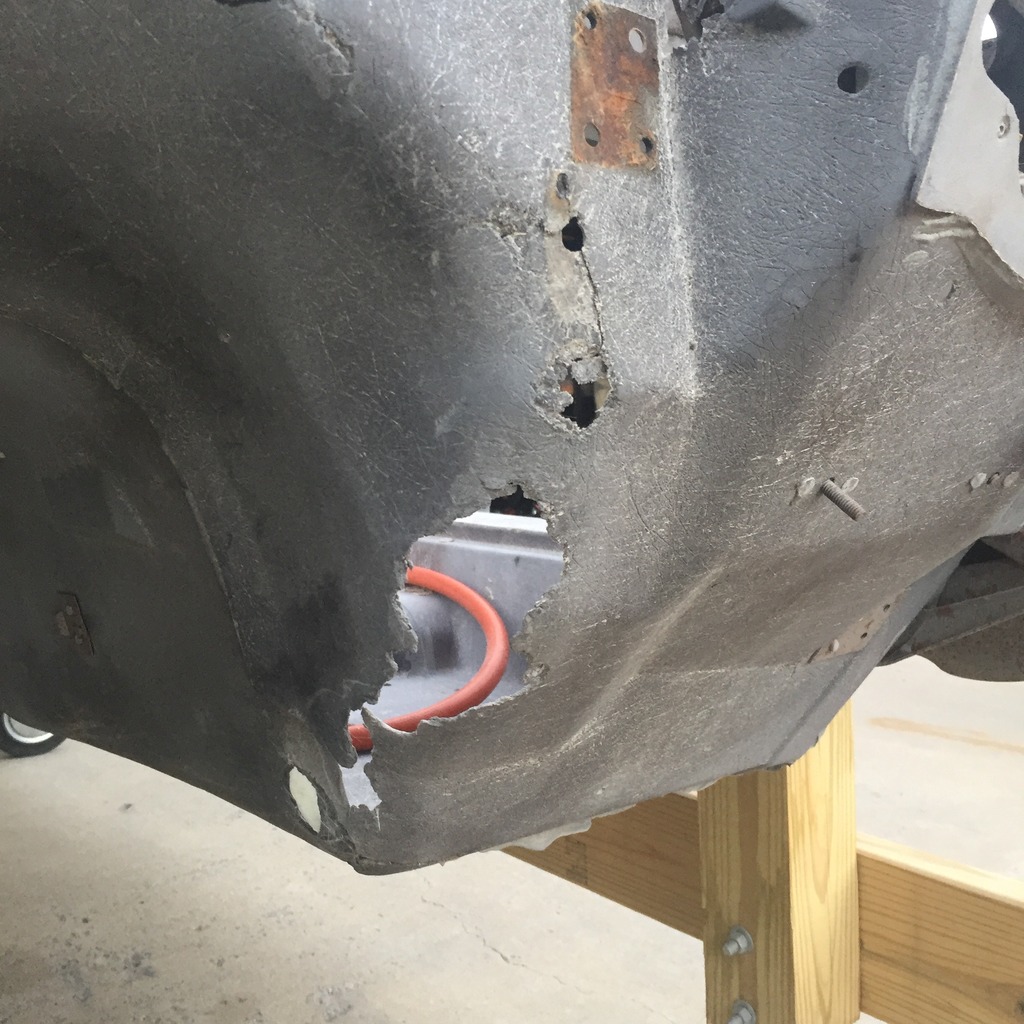
Excellent question. It was ridden hard and put away wet for many years. Definitely got hit in the front and rear passengers side. My best guess is after it was in a wreck someone else picked it up for a track car (It had big 70's style fender flares and green paint with gold flake at one point) And it looks like either a clutch gave out on it, or someone dropped a jack stand while picking the engine out because almost all around the tunnel where it meets the firewall it was broken.
At least two others have started repairs and ran out of either time, money, or patience. Fortunately we have a great community here - I have friends who lend me hand from time to time, and I found a great used parts supplier locally.
Excellent candidate for what I wanted because it was too banged up to ever be put back together "correctly." That and it was really cheap, so I guess you get what you pay for.

Thread Starter
Race Director
Joined: Apr 2005
Posts: 11,556
Likes: 52
From: SoCal Twin Turbo, Any Questions?
St. Jude Donor '06-'07
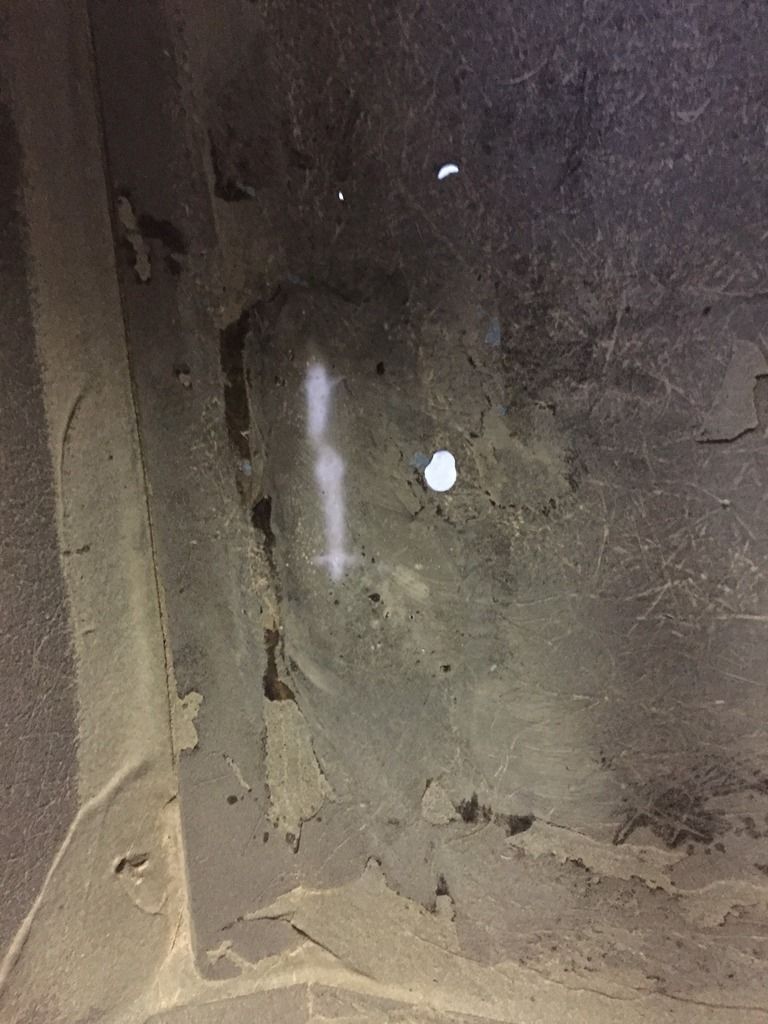
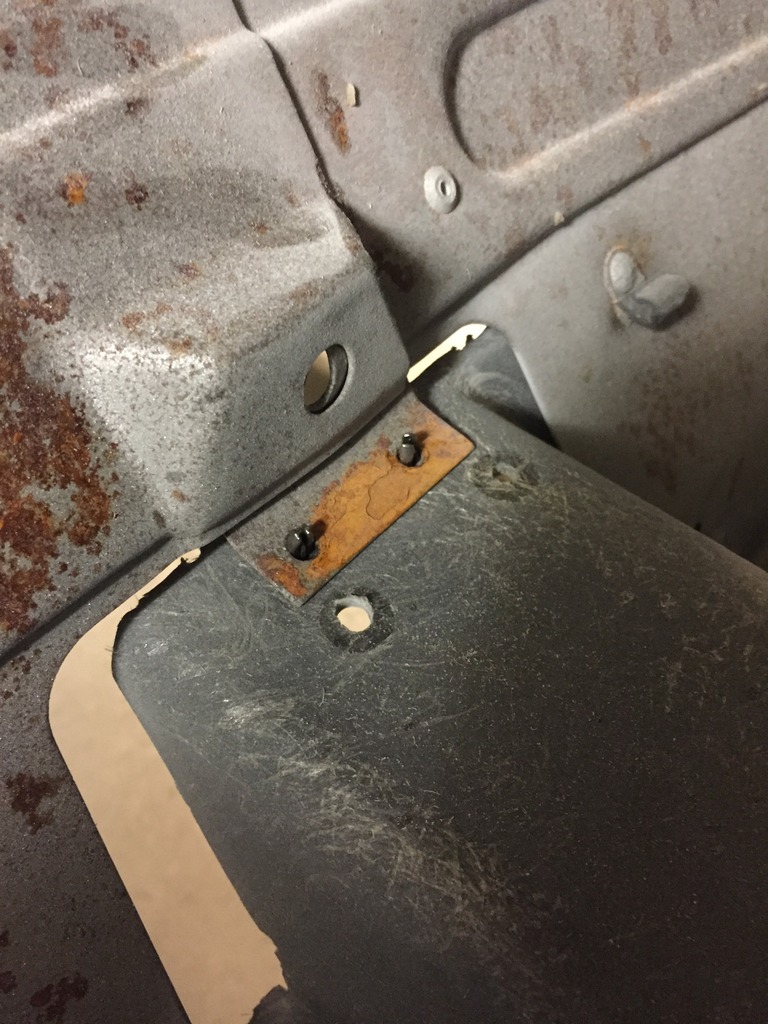
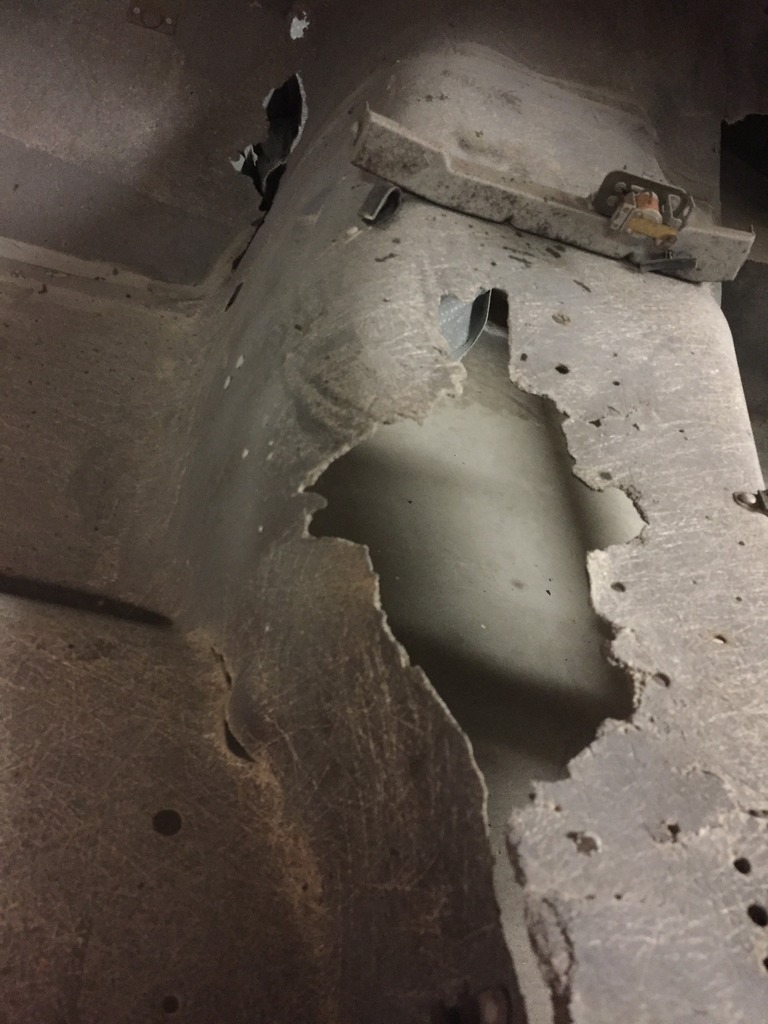
Similar repair on the drivers side.
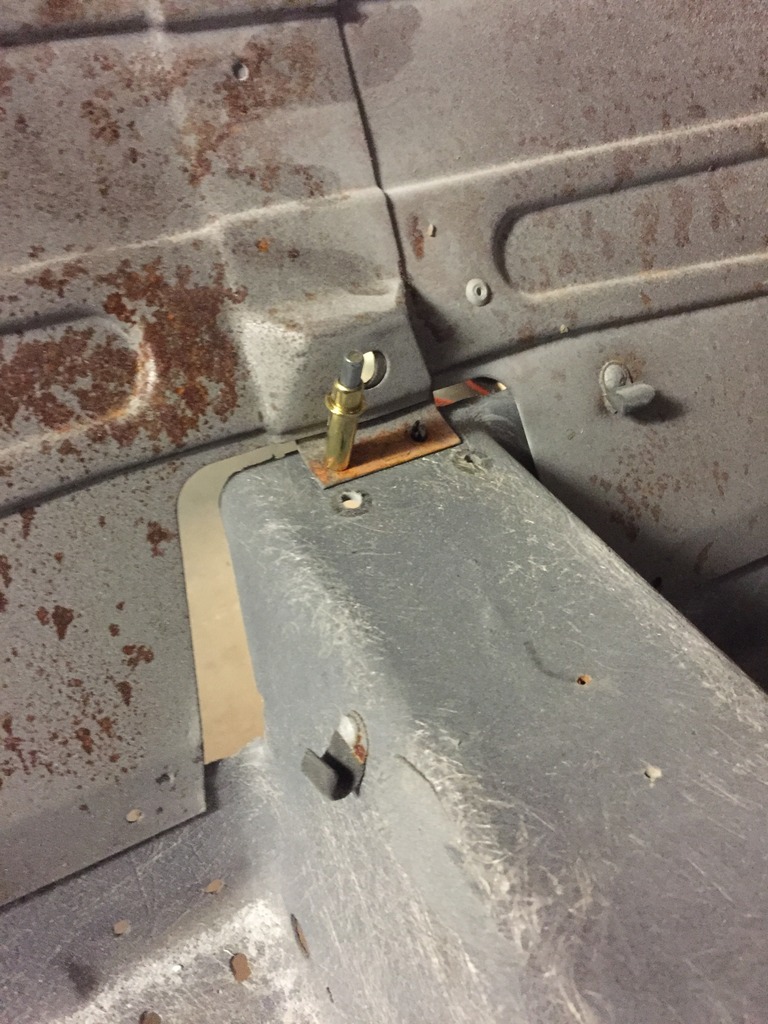
Started with a Cleco clamp to keep it aligned
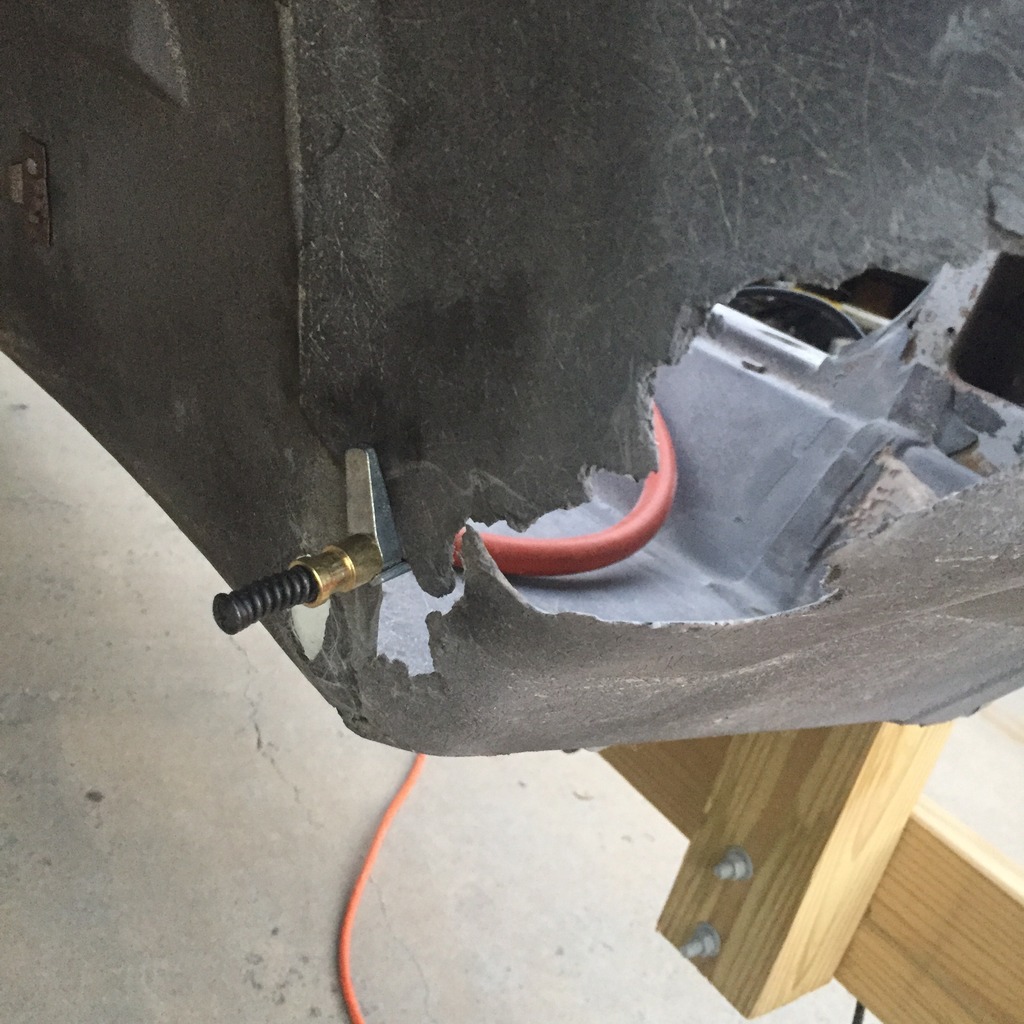
Then a Aluminum tape backing:
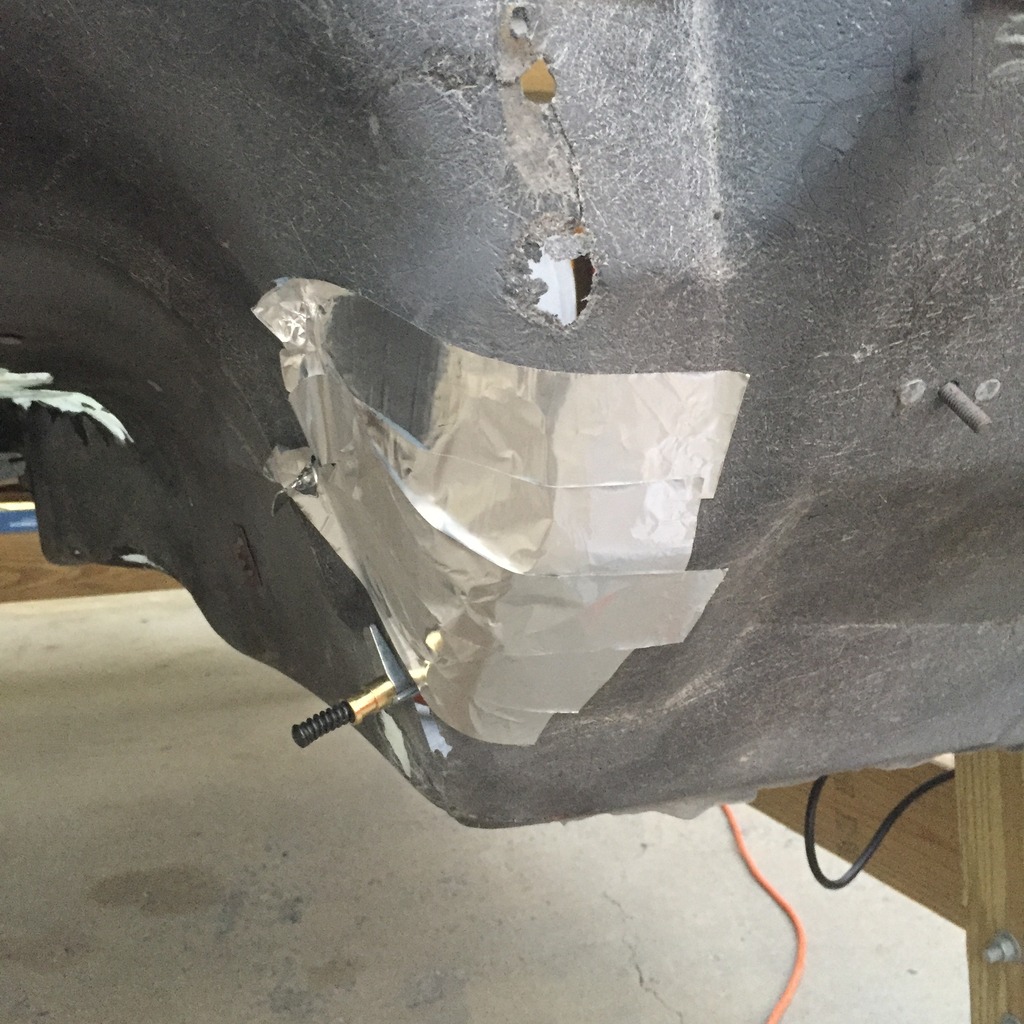
All glassed up!
Still need to finish sanding and grinding - I'm getting a bit behind, but that is ok as I ran out of resign.


Started with a Cleco clamp to keep it aligned

Then a Aluminum tape backing:

All glassed up!

Still need to finish sanding and grinding - I'm getting a bit behind, but that is ok as I ran out of resign.
Thread Starter
Race Director
Joined: Apr 2005
Posts: 11,556
Likes: 52
From: SoCal Twin Turbo, Any Questions?
St. Jude Donor '06-'07
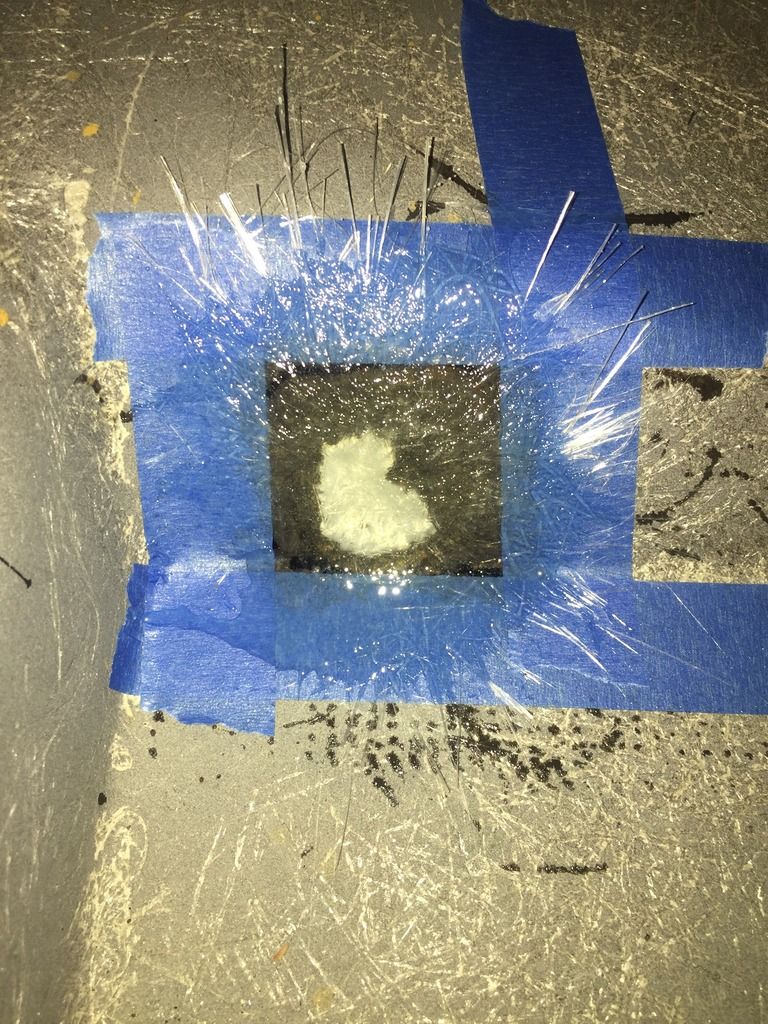
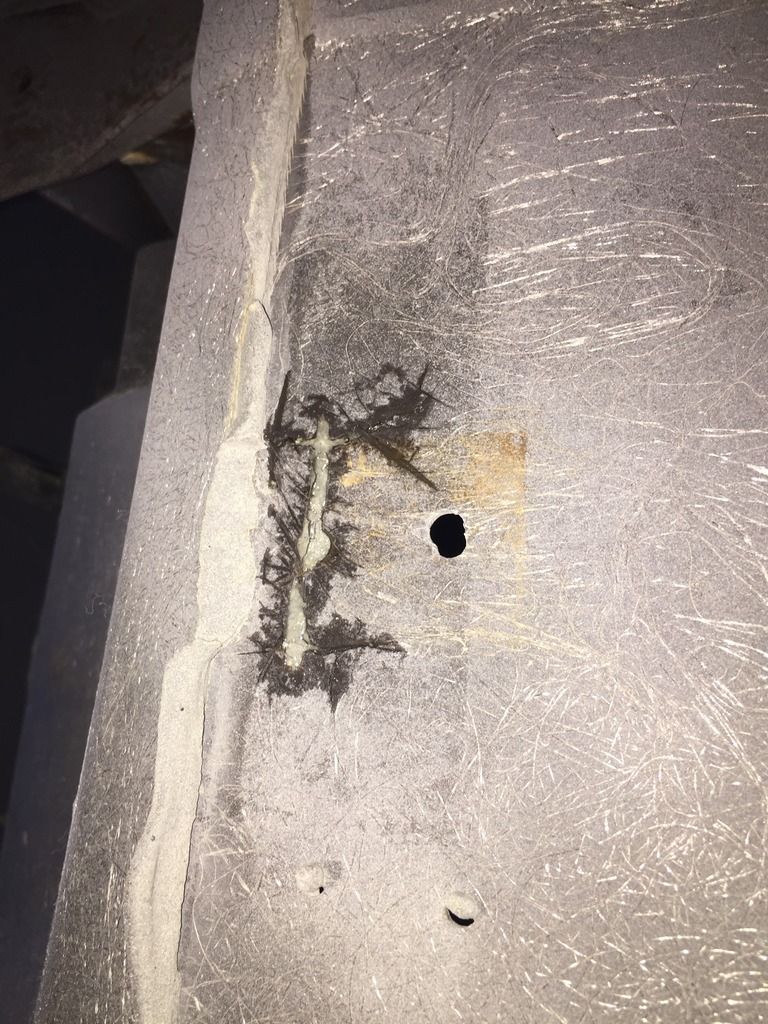
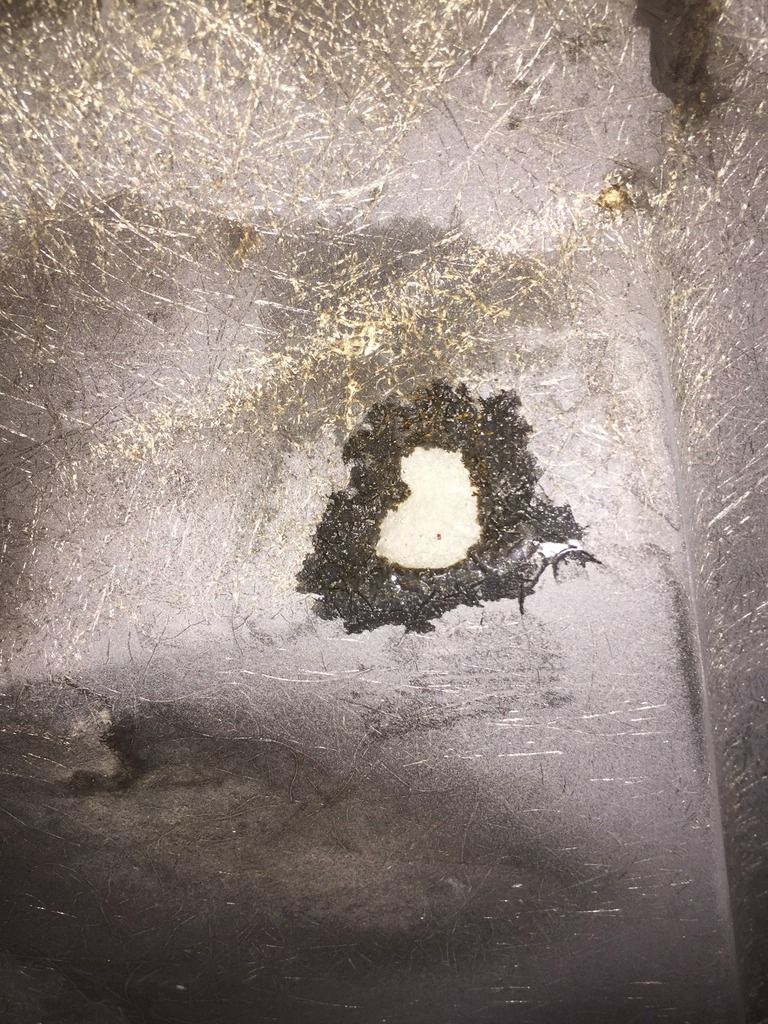
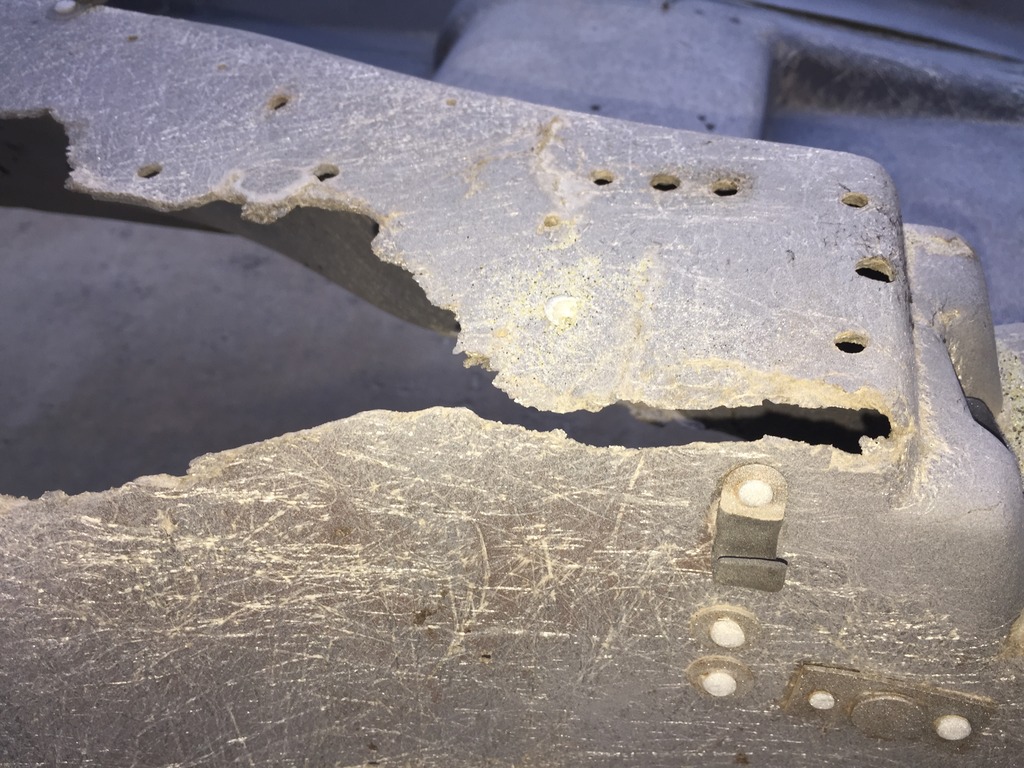
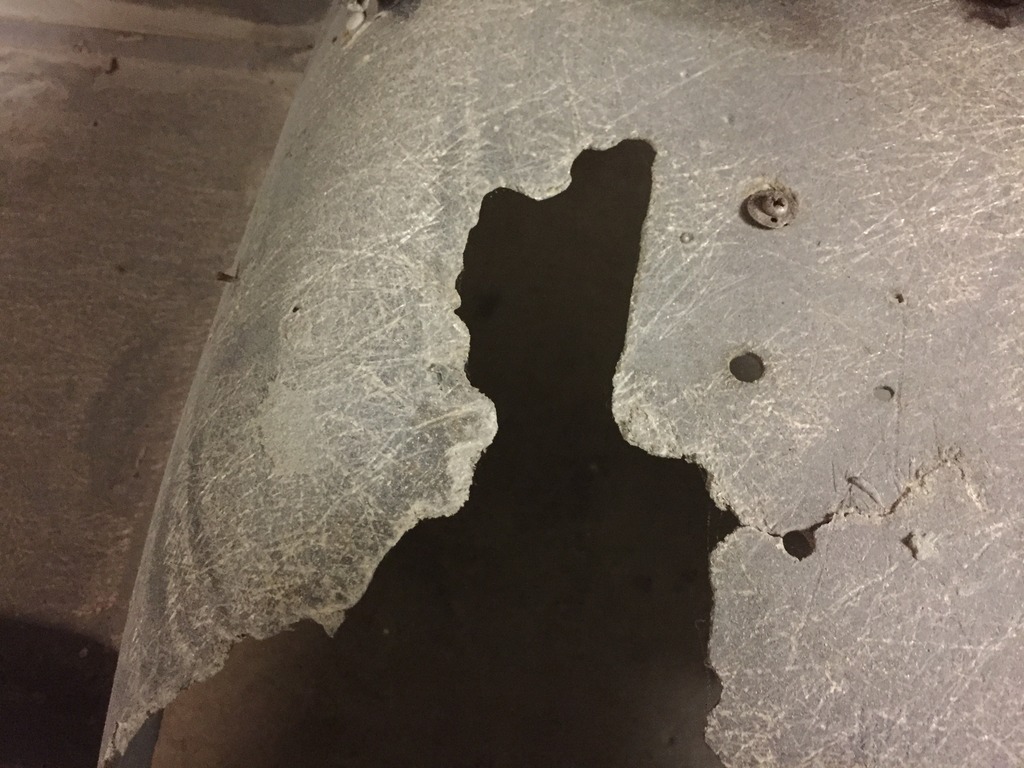
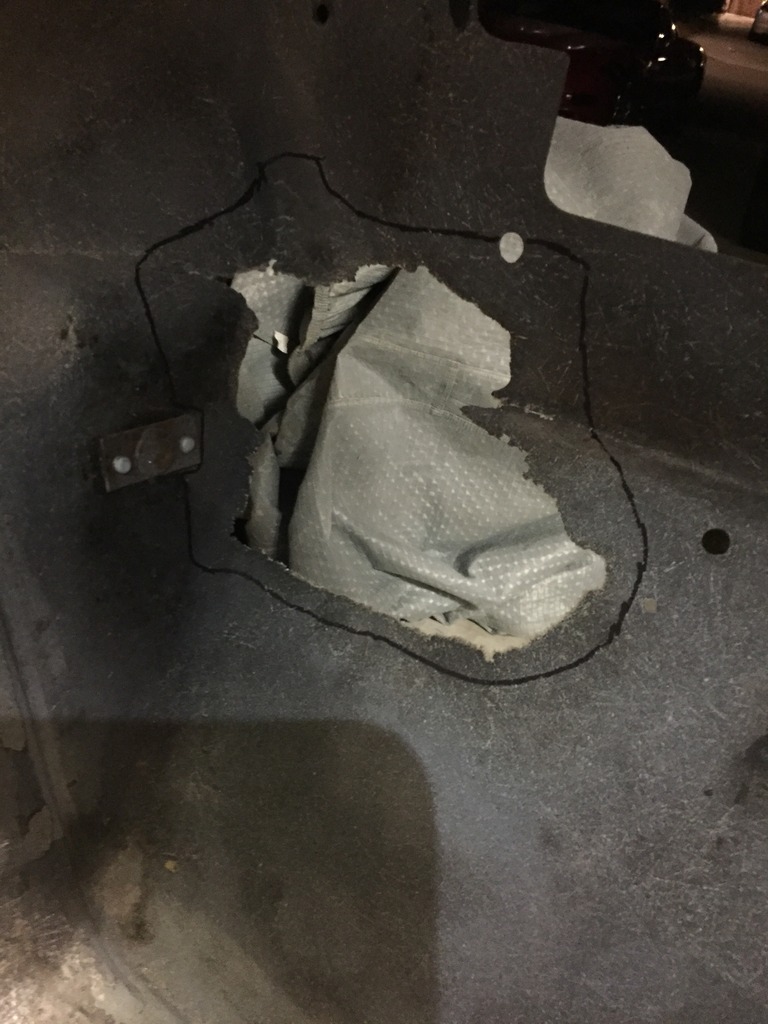
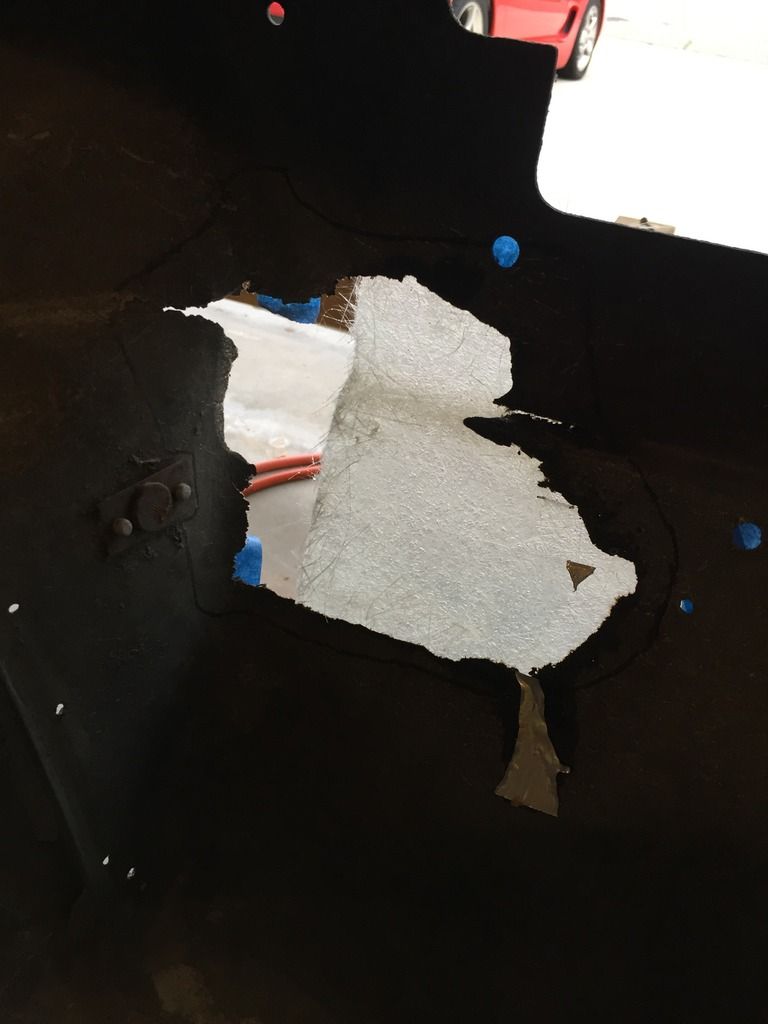
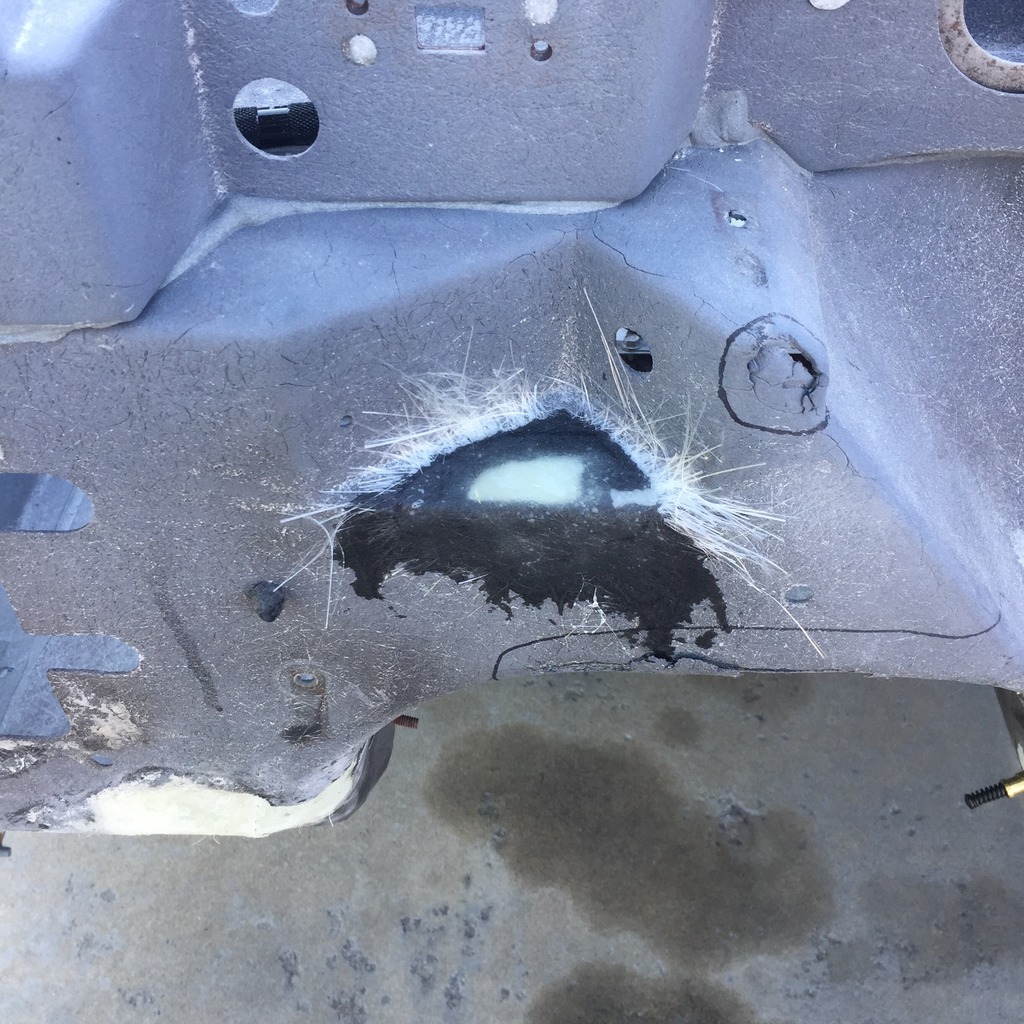
Small triangle shaped repair near the wiper motor mounting area.
I forgot to take a before picture, but here it is after the grind:
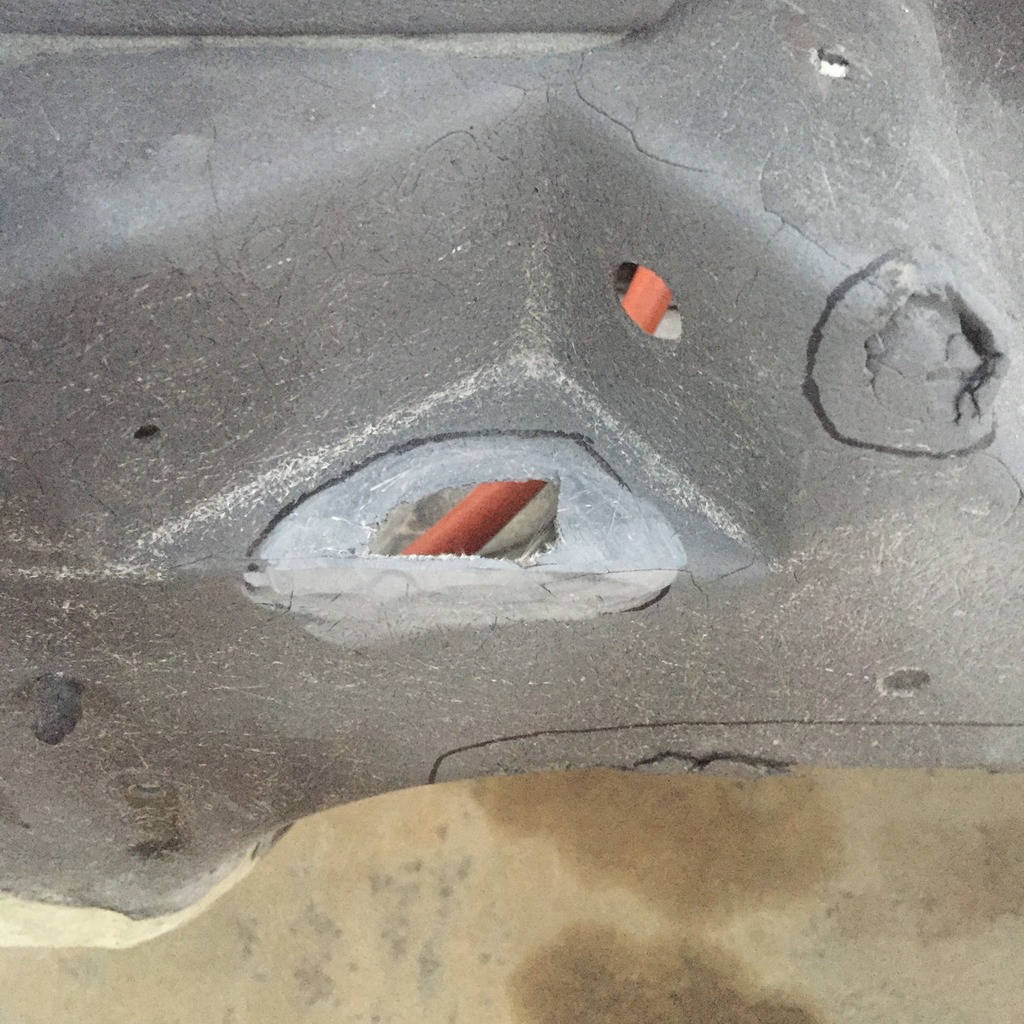
Glassed up! (I also forgot the masking tape)
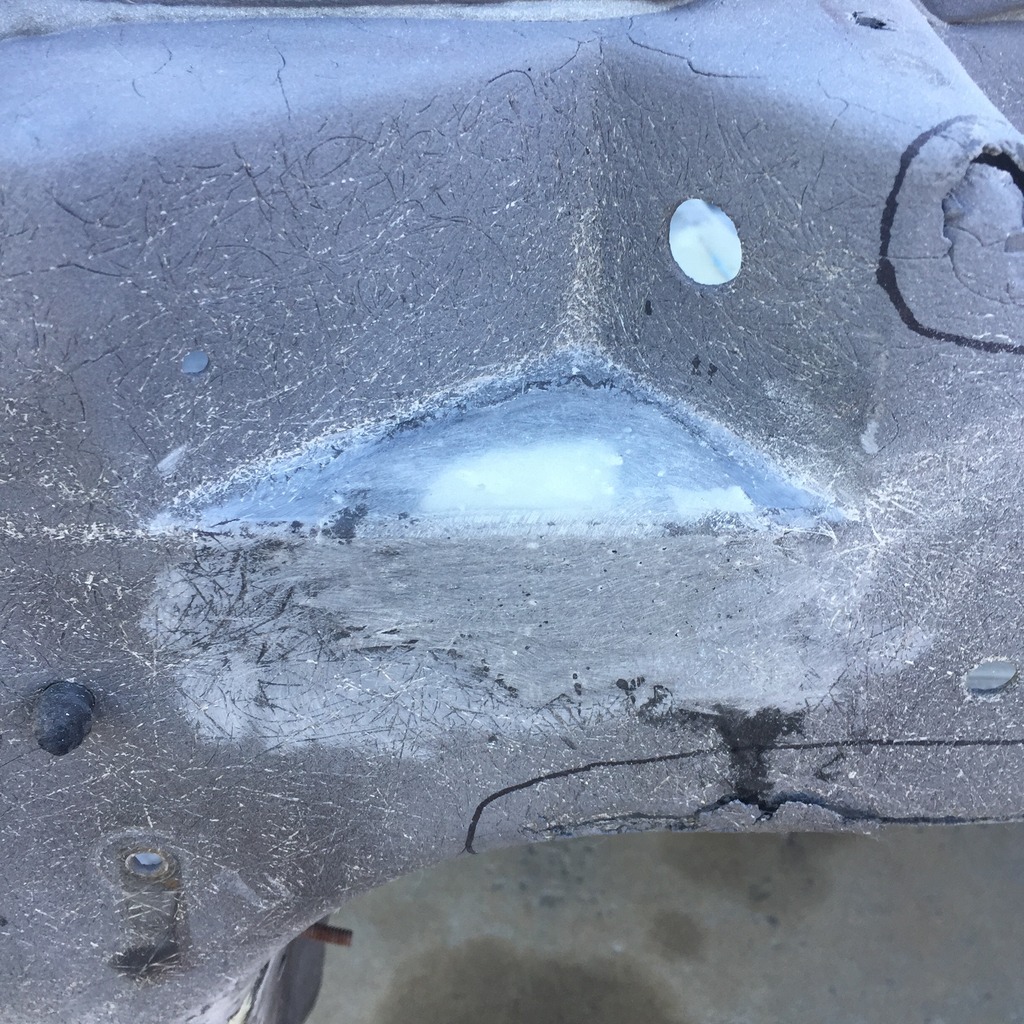
And all ground down:
I forgot to take a before picture, but here it is after the grind:

Glassed up! (I also forgot the masking tape)

And all ground down:
