When you click on links to various merchants on this site and make a purchase, this can result in this site earning a commission. Affiliate programs and affiliations include, but are not limited to, the eBay Partner Network.
So, back to closing the one millimetre gap between the fiberglass body and the passenger side bumper's corner mounting pad. I expected this to take no more than a couple of weeks -it seemed so straightforward. So I decided I'd take a picture every 15 minutes or so to document for the auto body beginner how to do this "brief" (lol!) job. I started out by figuring I'd just add a bit of fiberglass to the smallest possible area needed to take up the gap as shown by the pink arrow in this previously posted diagram:
Here's after I applied the first layer of fiberglass over the corner bumper mounting surface:
That wasn't quite enough, so I added another layer:
At this time I was trying to minimize the footprint of my repair area, not realizing it would have to be a far larger surface area I worked on than I had originally thought would do. It was at this time I had my weed induced brain fart and sanded down two of the three bumper mounting surfaces I originally had mostly sorted out.
I started this in piecemeal fashion, trying to minimize the repair size, not realizing that doing it this way instead of taking off the gel coat from a much bigger surface area would be a lot more work in the long run. So, bit by bit:
As you can see in the two photos below, I sanded away too much material and the green tape I have on the back side of the repair is showing through (black arrows).
The area shown by the black arrow in the picture above would end up being a super troublesome spot I ended up repeatedly laminating and sanding on both the inside and outside of the body. It turned out that the corner bumper bracket needed to be very close to the surface of the fiberglass at that point and the rough inner surface of the hand laid fiberglass wasn't going to do as it prevented the corner bracket from being positioned high enough to best position the bumper.
Time to put another layer of glass on the body:
(Below picture) Once again, I got a little too "in the groove" with the inline sander and die grinder(black arrows) and I again sanded away too much and went right through thus making more work for myself than was necessary . As you can see, the size of my work area is growing considerably from the few square inches I originally thought it would cover.
Here's the primary tools I've been using up until this point. A 3" angle sander and a die grinder with a couple different stones. And a lot by hand. By the time I was done aligning the passenger side bumper I was surprised to find I'd gotten a lot better at sanding and shaping than I had been and had learned a lot more through trial and error.
I learned that the more stuff you can set out and prepare before you mix up the fiberglass resin and hardener, the better it goes, and the less likely you are to run out of time before the resin starts to harden:
Before I mix up the resin and hardener, I also lay out a bunch of pieces of paper towel to wipe things off with as I'm laying up the fiberglass and immediately after I'm done - nothing worse than trying to handle things while you're going with fiberglass resin dripping off your hands and onto everything you don't want it on:
One problem I had with aligning the passenger side bumper was that the mounting bulge on the quarter panel was a little too high compared to the driver's side. To correct this I decided to add thickness to the floor of the quarter panel bulge on the exterior surface, and sand away material on the inside floor of the bulge to give me more room to position the bumper flower down on the quarter panel (see arrows):
And again its time for more lamination as the repair surface is too thin:
I also start adding mat and resin on the inside of the body modification. Somehow I only ended up with a few pictures of my work on the inner body surface despite laminating and sanding down that area several times. There was A LOT of work in this area:
The modified quarter panel bumper mounting surface is starting to take shape, particularly along the lower edge of the bulge (green arrows) which I am extending downwards from its original point. This will allow me to lower the part of the bumper that goes forward along the quarter panel to better match the driver's side:
And again, needing more thickness, I add more mat and resin:
As previously mentioned, my plan was to take pictures every 15 minutes or so to demonstrate the progression of sanding I used to get the shape I wanted:
At this point I discover a flaw in the aftermarket rear clip just above the side marker light:
Starting to get a nice shape on the quarter panel bumper mounting bulge:
Too much material on the underside so I have to thin that out:
The underside of the bulge smoothed out yet again:
While I'm adding thickness to the two bumper mounting surfaces I'm regularly checking the fit of the bumper. After some time at this I discover its easier to tape a level to the passenger side bumper instead of trying to position both the bumper and level at the same time:
Needs a bit more thickness on the quarter panel mounting surface:
I added a couple of pieces of mat here as not much more thickness was needed. To minimize the amount of sanding I had to do, after I applied the wet mat and resin I placed a sheet of wax paper over top and then pressed the whole thing flat with a short piece of 2 by 4:
Part way through messing around again with the passenger rear bumper I decided it was time to try a pair of these thin stretchy "Mechanix" gloves and they are an absolute joy to use. While shaping these bumper mounting surfaces I do a great deal of sanding with my hands and the rough grit sandpaper really chews up the fingertips and I'm always breaking nails. The gloves eliminate all that and make my hand sanding much more efficient than it was before. With the gloves they actually seem to stiffen my flimsy fingers and I can sand harder and longer and more smoothly with them on than without them. A big bonus is that when you're sanding by hand with course grit paper it builds up a lot of heat and I have to stop regularly to cool my finger tips. Again with the gloves I don't have a problem with my fingers getting too hot:
At this point in time I decide to focus on the inside of the bumper mounting surfaces. As I previously mentioned, the insides of the panels need to be smoothed and carefully shaped to give clearance for the corner bumper bracket along the line indicated by the arrows:
I'm closing in on the proper plane for the two bumper mounting surfaces at the corner of the junction of the tail light panel and quarter panel as well as the one on the quarter panel. I just need a little more thickness:
The top part of my lamination fell away here due to the angle and I ended up with a void there and would need to do it again:
So, here I'm laminating the same spot because the top of the fresh mat and resin fell away from the surface
This time I catch on and after laying up the fresh glass and resin I support the top edge with a few pieces of tape:
Now its finally time to re-drill my bumper bolt hole:
While sanding inside the repair, I find the upper lip above the corner bumper bracket has gotten too thin so I decide to add some thickness to the top side of the repair:
The surface of the inner bracket and the corner bumper mounting surface are finally in the same plane ( corrected an earlier problem where they weren't in the same plane) You can see the head of the bolt and washer are in the same plane as the fiberglass:
The bolt on the bumper bracket and the hole I drilled in the fiberglass line up pretty well:
I've had to repeatedly go back inside the gas tank area to get the inner surface of the body shaped properly to allow at least a mm or two of clearance above the corner bumper bracket. This part is tremendous fun as it mostly has to be sanded by hand. I make regular use of a thin strip of sandpaper wrapped around a washer to get the concave curves right. I use the 3" angle sander in there a couple of times but as one might expect I accidentally sand away too much on a few occasions and have to add more fresh mat and resin than would have otherwise been needed:
As I go I'm checking very regularly how things are lined up. The levels work well along the tail light panel. Of course, you need your car on a level surface to begin with if a level is going to be of any use to you. The hoist I'm working on is level and before doing bodywork on the rear I also took measurements at both ends of the rocker panels to the bed of the hoist and leveled the car which was sitting an inch higher on the right side compared to the left. I don't know what the deal is with the car not sitting level on a level surface but I'm not worrying about it at this point in time.
The driver's side is nice and level:
The passenger side is not quite there yet:
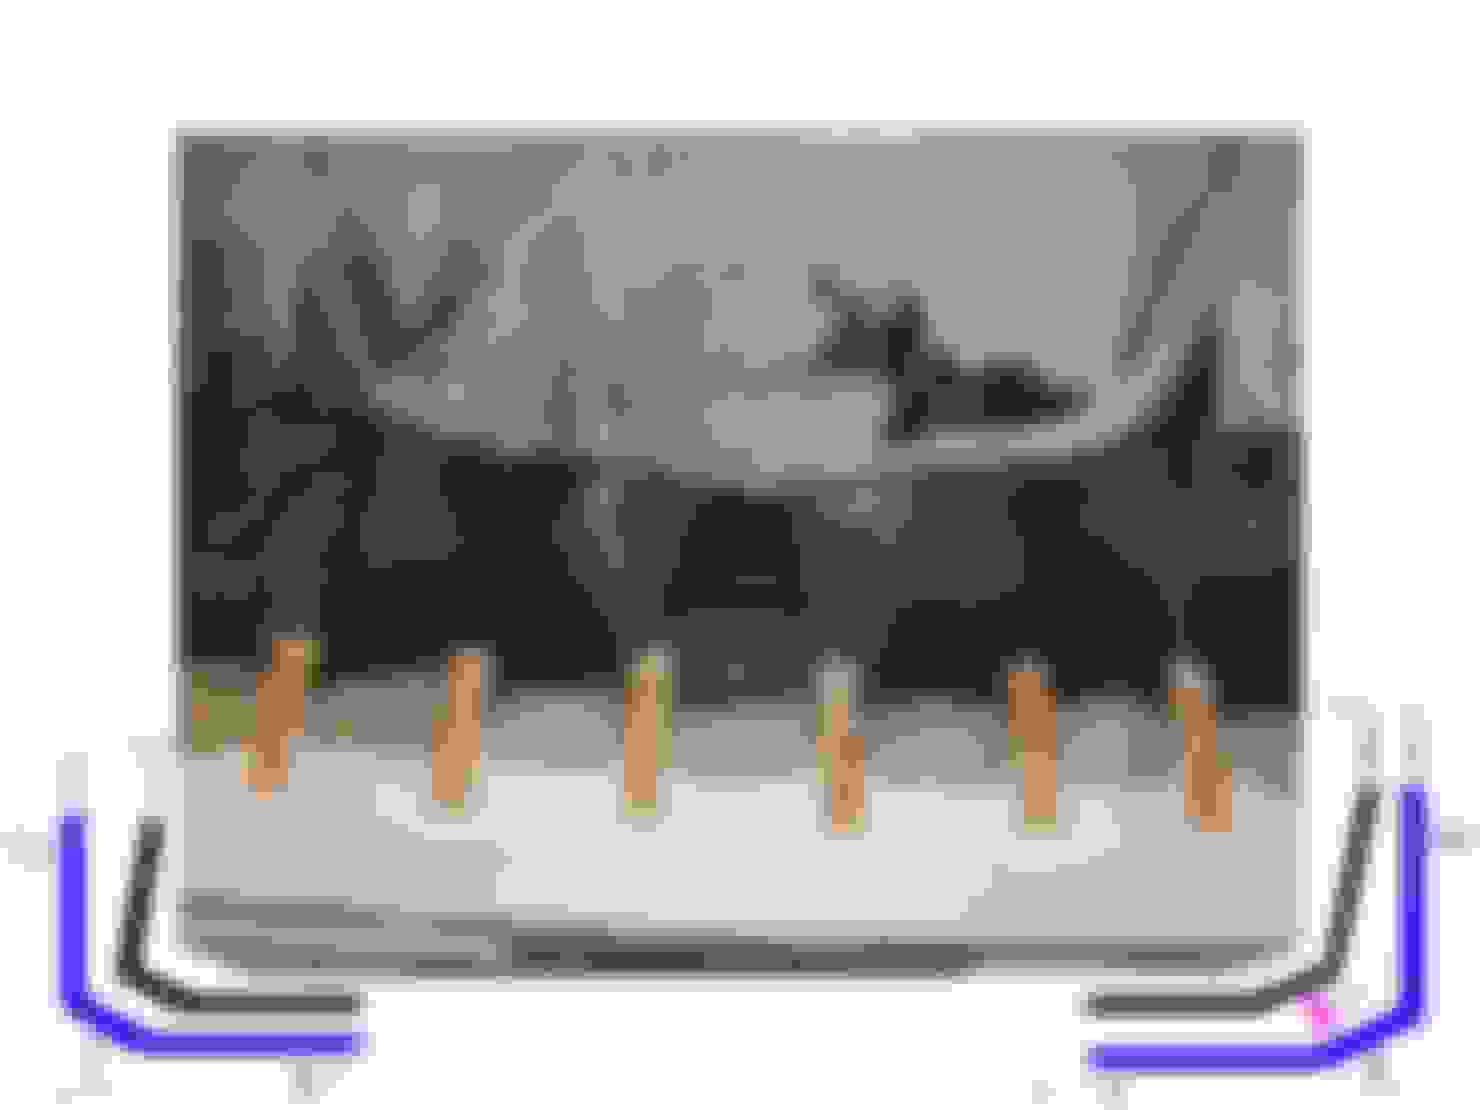
At this point the passenger bumper is level or close to level along the tail lights, but poorly positioned along the quarter panel - the orange line shows I've added more mat and resin than I needed to the floor of fiberglass bump on the quarter panel making it lower than necessary. Point (A) is the aproximate position of the top of the corner bumper mount - changing the thickness at the top and bottom of this part of the body causes the forward tip of the bumper to rotate along the blue line while point (A) remains basically stationary:
As the forward tip of the bumper along the quarter panel moves up and down, it changes the level of the rear part of the bumper along the tail lights. Its quite a juggling act to get the bumper level along the tail lights and at the right height and tilt along the quarter panel - moving one part of the bumper takes the other part out of alignment and vice versa. I estimate from Oct 2018 to Oct 2019 I spent about 400 hours trying to re-align the passenger side bumper. I'd say easily 30 to 40 hours of that was looking at the car and bumper and thinking about how I needed to change the shape of the two mounting points to get the bumper to move the directions(s) I wanted it to.
This corner bumper mounting surface is the most critical one, its position and plane relative to the car largely controls the position of the bumper and how well its going to line up.
Here I'm sanding away the mat and resin I added to the lip just under the tail lights to make room for the bumper bracket on the inside:
While I initially thought I was only going to have to add mat and resin to the 3" by 3" corner bumper mounting surface I slowly discovered my repair area was going to need to be much bigger than that to blend that area into the rest of the exhaust filler panel:
In the past when I'd laid up filler on a panel as above, I went straight to my long inline sander to level it out. That has always been pretty slow going to knock down the high spots, so I decided to try a 6" 80 grit sanding disc on the air sander first, to more quickly sand down the high spots and do the initial rough leveling of the filler. Also shown are the tiny sanding blocks I relied on for so much of the sanding on the bumper mounting surfaces and a piece of paper I used to check for a perfectly flush fit between the bumper or bumper bracket and the fiberglass mounting surface. That piece of paper would be key to telling me where to sand down the fiberglass bumper mounting surface to tilt the bumper in any particular direction. The washer with the thin strip of sandpaper wrapped around it would see extensive use on the inside of the body on the concave surfaces there.:
Using the air sander first after applying filler greatly sped up the rough leveling on flat panels and then when it was reasonably close to level I went to 36 grit on the inline sander:

 01-04-2020, 04:35 AM