When you click on links to various merchants on this site and make a purchase, this can result in this site earning a commission. Affiliate programs and affiliations include, but are not limited to, the eBay Partner Network.
Good score on the suspension stuff! Does it have stainless sleeved calipers as well?
Thanks, I was very surprised when I looked up the cost of the Vette Products kit relative to what I gave for the car...
As far as the brakes go, I do not know if they are sleeved, I don't think so. But to my surprise, none were leaking. There were signs the passenger side rear was leaking at one time as the parking brake shoes had fluid on them, but the caliper was new(ish) and was dry.
So, I have replaced the rocker channels and floor pans. Still need to do a bit more sandblasting of everything before I seam sealer and paint everything. Just got a new nose bar which I need to install, and still need to pick up a new core support, then all of the rust will be taken care of and it will be off to paint and body hopefully 1Q 2017.
So, off to paint and body turned out to be a short trip... I am painting the car myself. As of now, I have everything in primer, and am blocking everything down before shooting sealer, base and clear.
What I have a question about is door gaps. Obviously, none of these cars had great gaps from the factory, and mine were no different. I am not looking for PERFECT here, but I'd like to have at least a somewhat uniform and flat fit. So my questions are as follows:
- Can I set my door gaps on the body dolly without having them drastically change when I put the body on the frame?
- If I need to build up (add material) to the door to close a wide gap, am I better off building it on the door, or the front fender?
- What is the best product to use for building up material on the edge of the door? Fiberglass matt and resin, or something else? If it is resin, what is the best way to do it?
Also, attached are some recent pictures. You can see the door gap on the top edge of the passenger side door...
Paint and body is almost completely done. Need to shoot the 2-tone on the hood, and it will be finished. Color is Watkins Glen Gray Metallic.
Wound up picking up a Gen 4 Aluminum 5.3 out of a junkyard. Planned to drop it in as is, but pulled a head and found cylinders full of broken glass. Off to the machine shop. Wound up punching it out to 3.898" (stock LS1/LS6 bore). Already had LS6 heads on it, but milled them to 62cc, good valve job, balanced everything, and got forged Mahle pistons and Forged H-Beams. Just finished assembly.
Had LT1 T56 lying around from another project. Bought LS1 style midplate, input shaft, and bellhousing, and converted the trans over for the LS.
Purchased all of my suspension and steering bits. Got radiator, fuel system sorted. Need exhaust, cooling fans, controller (probably going Holley HP EFI), drive shaft, brake calipers, and wheels and tires before moving to interior.
Hope to finish up paint in the next month or so, then will break down paint booth and start putting the chassis together. Plan to make it a roller before dropping the motor and trans in there, then I will drop body on to make sure everything is going to fit before making trans cross member modifications.
Your 80 is a cream puff compared to what I started with. Im close to twenty deep in this big block car. Everything is new mechanical and interior. Only thing I kept was the wiring and I wish I had changed that now. Attachment 48191495
how true that statement is, I tried to save a few bucks for finish work and not change the wire harness during my resto-conversion and regret it now that I'm chasing down problems. The price of the harness seems like a bargain now that the finish work is stalled because of wiring issues..
Rebuilt rear-end with 3.73s, new posi clutches, new bearings, new cross shaft
Rebuilt trailing arms
I slip-fit the inner wheel bearings for future ease of assembly/disassembly
Put high-grade and longer wheel studs in the stub axles
Sprayed Lizard skin on bottom of body
Begun assembly on the frame/suspension
Found issue in that stock control arm bushings do not fit VB&P Fabricated control arms (I have another thread dedicated to this - I will be making my own bushings out of Delrin)
Wow, hood looks great! Your paint booth looks identical to the one I built to paint our 79 a few years ago (right down to the fluorescent lights location and blower location) - but I put the plastic on the inside. Are you blowing air in, or sucking it out?
Wow, hood looks great! Your paint booth looks identical to the one I built to paint our 79 a few years ago (right down to the fluorescent lights location and blower location) - but I put the plastic on the inside. Are you blowing air in, or sucking it out?
I was blowing air in through a filter. I had a lot of issues with dust nibs, especially in the clear coat. I will wet sand and buff the car after assembly and should be able to get through everything - I put 3 heavy coats of clear on for that reason.
The next car I paint, I will actually use plywood walls, and paint them in a gloss white paint that should be easier to clean, and also reflect more light. I figure the plywood won't flap around like the plastic did when I open the door and shake little bits of debris off to fly around the booth.
The next car I paint, I will actually use plywood walls, and paint them in a gloss white paint that should be easier to clean, and also reflect more light.
Flat white actually reflects more light than gloss white but will not clean up very well if it gets dirty. The two colours on the hood look great together.
I was blowing air in through a filter. I had a lot of issues with dust nibs, especially in the clear coat. I will wet sand and buff the car after assembly and should be able to get through everything - I put 3 heavy coats of clear on for that reason.
The next car I paint, I will actually use plywood walls, and paint them in a gloss white paint that should be easier to clean, and also reflect more light. I figure the plywood won't flap around like the plastic did when I open the door and shake little bits of debris off to fly around the booth.
How did your '79 turn out?
I had pretty much the same experience. My booth is pressurized too, using a furnace blower motor with filters on both the input and output, but with the plastic on the inside - it held together pretty good (and wood 2x4's don't clean up very easy - that was my main reason for keeping them on the outside). I definitely had the dust nib problem too, but most of them sanded/buffed out. I had a friend (retired painter) actually spray mine while I watched and learned - I hope to spray my 69 Firebird by myself soon.
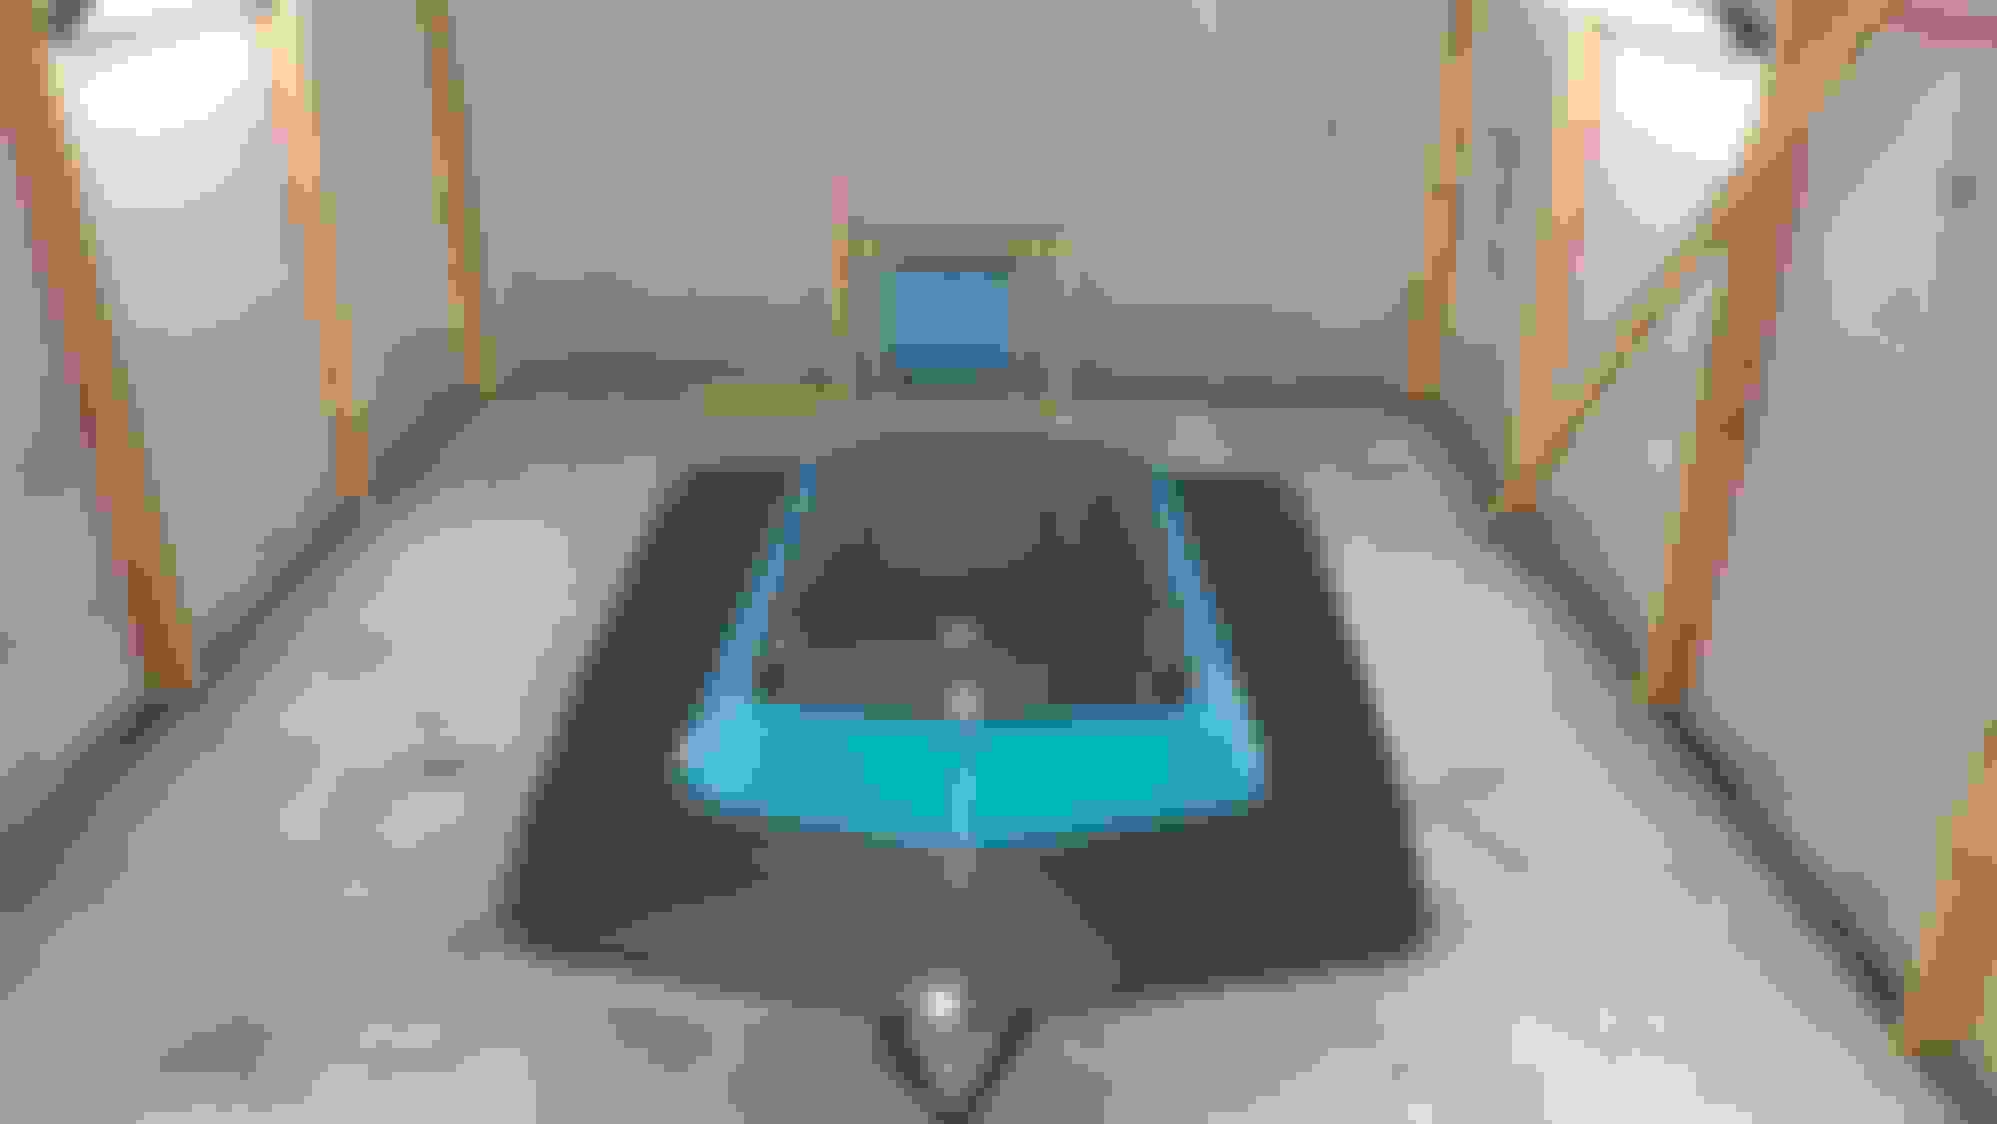
Well the fun stuff is happening now. Chassis is almost complete. I have installed all of the suspension, steering, and brakes, though I need to figure out my steering stop solution. Shimmed all of my rotors to ~0.001" or less runout. Dropped in the engine (with help), transmission, and shortened driveshaft. Tranny and rear end are full of fluid. I bought some headers that seem to fit perfectly and were a very good price. The gas tank is in with a Walbro 255 in the tank, and fuel lines ran with return style regulator. I plugged up the Holley HP EFI and test fired the engine. Has good oil pressure and sounds good, so I don't have to worry about pulling it out after the body is back on it.
Next steps are to paint the firewall black, and install heater box/blower motor before dropping body on the frame. Might start looking like something before too long...


 !
!


 work is stalled because of wiring issues..