Help with t-tops pls


Safety Car


Joined: Mar 2005
Posts: 4,255
Likes: 82
From: Brampton Ont.
Apply some penetrating oil on it over the course of a couple days to allow it to soak inside the threads that are hidden. Members have there personal preference as to which oil they use and my favourite is PB Blaster.
Once you feel it's had time to soak/penetrate into the threads, use something that will maintain a good grasp of the item you want to remove (al the while not damaging the triangle head) and apply pressure both in the off as well as on position in order to rock it back and forth. This will allow the oil to penetrate further into the threads, If you're not have the success you with, try more penetrating oil. You don't need a lot, but it does need to penetrate inside the threads.
Once you feel it's had time to soak/penetrate into the threads, use something that will maintain a good grasp of the item you want to remove (al the while not damaging the triangle head) and apply pressure both in the off as well as on position in order to rock it back and forth. This will allow the oil to penetrate further into the threads, If you're not have the success you with, try more penetrating oil. You don't need a lot, but it does need to penetrate inside the threads.
Last edited by Maymyvetteliveforevr; Aug 2, 2016 at 02:16 PM.
Racer


Joined: Aug 2013
Posts: 339
Likes: 54
From: Fayetteville NC
Get a can of PB Blaster and spray right above to allow it to get inside and wait about 15 minutes before trying to remove. I believe the triangle piece your are referring to has a nut tack welded inside and won't move unless the weld break. 
Team Owner


Joined: Sep 2006
Posts: 31,303
Likes: 4,391
From: Westminster Maryland
Hi Tb,
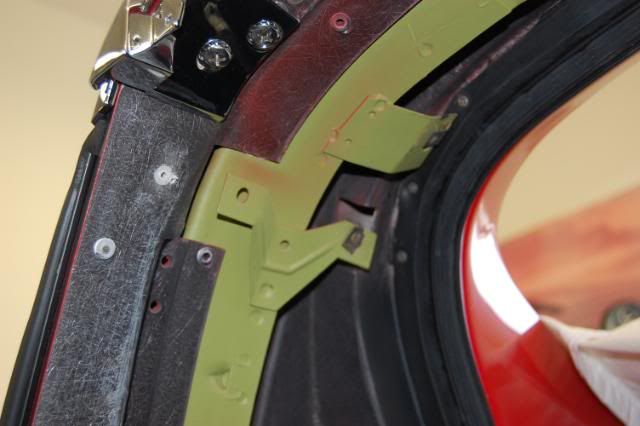
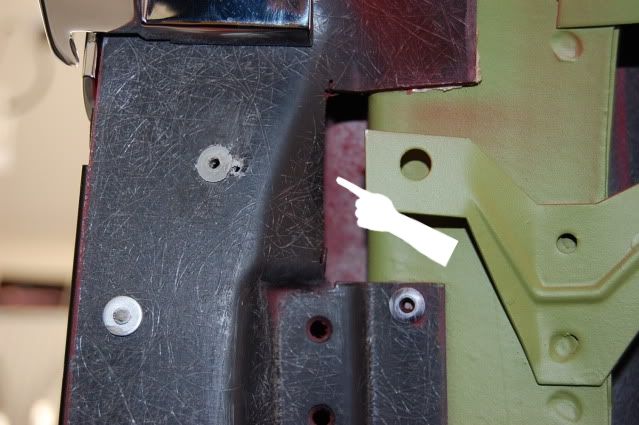
You need to be very careful breaking those 3 threaded parts loose.
They all thread into a rectangular 'nut plate' with 3 threaded holes in it.
It's held in place on the lock pillar in a 'cage'.
IF you put too much pressure on the nut plate trying to break the pin or the 2 screws loose you'll break the cage that supports the nut plate.
IF the nut plate breaks free from the cage it will drop down in the lock pillar when you remove the pin and 2 screws.
Use caution and lots of your favorite rust blaster as has been suggested.
Good Luck!
Regards,
Alan
Last edited by Alan 71; Aug 2, 2016 at 03:48 PM.
Safety Car

Joined: Feb 2012
Posts: 4,705
Likes: 983
From: Orlando FL

When removing mine, I removed the top screw, then only loosened the bottom screw, enough to slide the outer piece over a little. Then I installed a long screw into the top hole... to hold the backing plate from falling. Then I removed the bottom screw and the outer plate.
I left it there during primer and paint, then re-installed the latch in reverse order later.
You can see the screw sticking out in this picture....