When you click on links to various merchants on this site and make a purchase, this can result in this site earning a commission. Affiliate programs and affiliations include, but are not limited to, the eBay Partner Network.
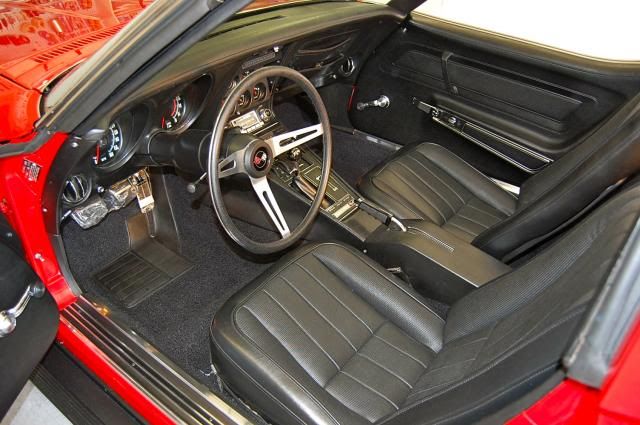
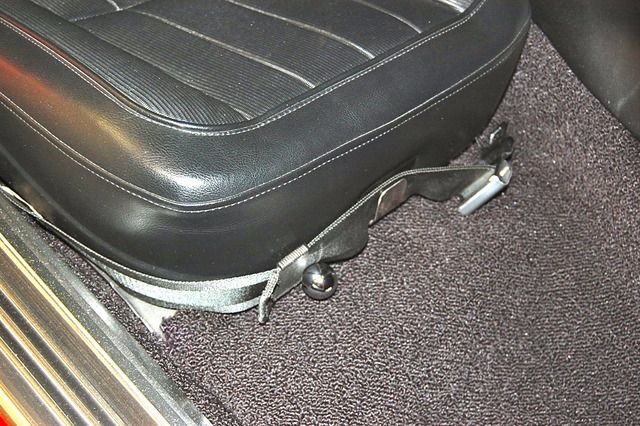
I'm putting a pair of seats together for my uncle's '70 with Al Knoch foam and covers, and I've got these creases at the front of the seat bottom. Is this normal, and if not, how can I fix this?
Hi r,
Those depressions aren't typical.
Are you reusing the original seat bolsters or have you replaced them?
I found that the bottom cover needs to be warmed with a heat gun or hair dryer and the cover pulled more tightly to the sides and then forward to remove the depressions.
IF that doesn't seem to be solving the appearance problem you can get some small pieces of seat foam from an upholstery shop and reach under the cover at those points and put the extra foam in place to plump up the cover.
A pretty easy fix.
Regards,
Alan
I'm not sure what you mean by "reusing the original seat bolsters." I'll give those suggestions a try though. I looked at the foam for the other bottom and it looks like the groove in the foam comes further forward than it needs to, so I think adding foam will be what it takes to fix it.
Hi r,
By bolster I mean the foam rubber 'form' you show in your photo.
It appears you have new foam. Generally the original has yellowed but more importantly compressed from age.
I see what you mean by the extent go the groove but I still think at least part of what you're seeing is caused by the cover not being pulled tightly enough.
To my eye the cover in your photo does have a generally 'loose' look about it.
It took me me several tries and quite a bit of pulling and tugging to get the covers as tight as I felt they should be.
Regards,
Alan
Notice how much further down the sides and the front of the bolster this seam is on my sear bottom than your seat bottom.
It does look like you have the covers too loose. One trick is to let the cover sit out in the sun for a while, which softens it. Then do pull it tight on all sides of the seat bottom.
Hi r,
By bolster I mean the foam rubber 'form' you show in your photo.
It appears you have new foam. Generally the original has yellowed but more importantly compressed from age.
I see what you mean by the extent go the groove but I still think at least part of what you're seeing is caused by the cover not being pulled tightly enough.
To my eye the cover in your photo does have a generally 'loose' look about it.
It took me me several tries and quite a bit of pulling and tugging to get the covers as tight as I felt they should be.
Regards,
Alan
Notice how much further down the sides and the front of the bolster this seam is on my sear bottom than your seat bottom.
Ok I see what you're saying. I assumed the seam was supposed to be right on the edge of the foam instead of down the sides. I'll try again and see what I can do.
Originally Posted by 69monzacpe
It does look like you have the covers too loose. One trick is to let the cover sit out in the sun for a while, which softens it. Then do pull it tight on all sides of the seat bottom.
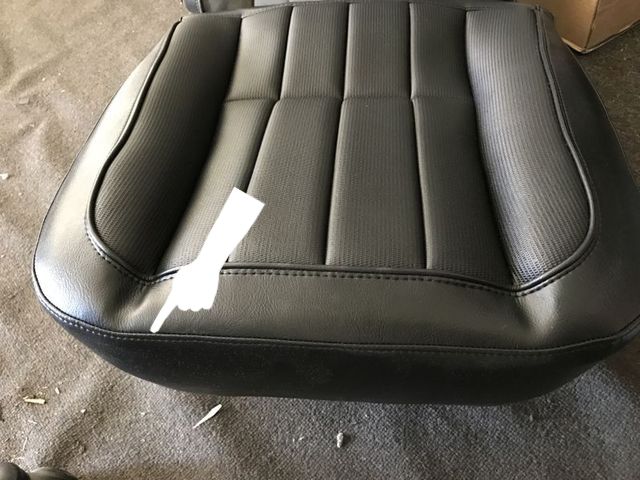
Here's mine:
I wanted to put it out in the sun before doing it but I've got the seats at work and if I put that stuff outside here, it'll disappear. I'll try using the heat gun and if that doesn't work, I'll have to wait until I can take the stuff home.
Once you get the covers tight, use a hair dryer to gently heat up the vinyl. I wouldn't recommend the heat gun because it works too fast.Then maybe work it a little with your hands, but don't get carried away. And make sure the the foam underneath is good, and does not have any ISSUES> The shape of the foam will be what you will have after the vinyl is on and tight. If the foam has some compression from age, get a cheapo clothing steamer and steam the foam before you put it together. There's a career in this if you get good at it!Good luck
Hi r,
Those depressions aren't typical.
Are you reusing the original seat bolsters or have you replaced them?
I found that the bottom cover needs to be warmed with a heat gun or hair dryer and the cover pulled more tightly to the sides and then forward to remove the depressions.
IF that doesn't seem to be solving the appearance problem you can get some small pieces of seat foam from an upholstery shop and reach under the cover at those points and put the extra foam in place to plump up the cover.
A pretty easy fix.
Regards,
Alan
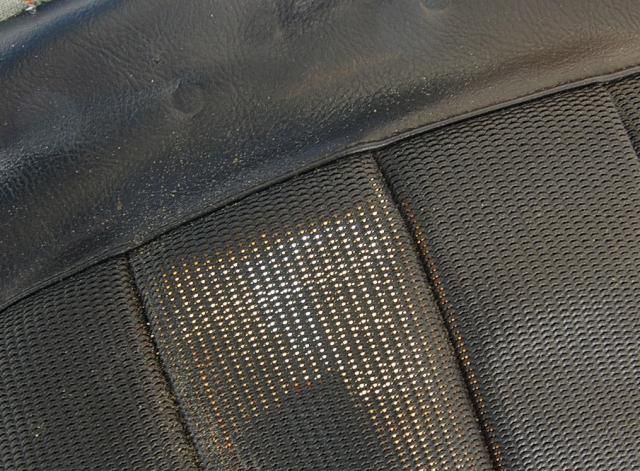
These are Al Knock covers.
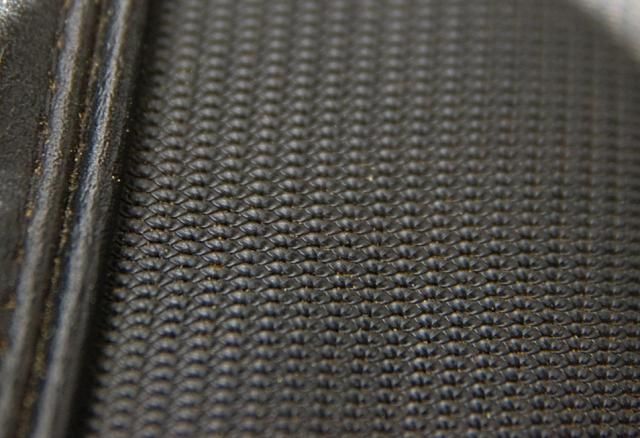
Hi Alan. Can you compare the repro comfort weave to the original pattern. Also how many points were deducted for the repro seats, assuming you had them during judging.
Hi da,
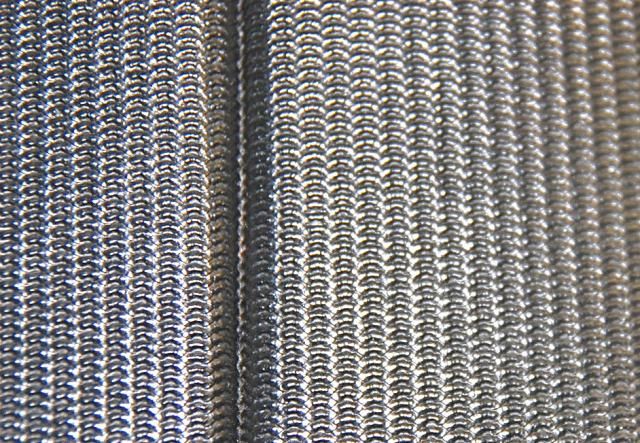
It's quite easy to tell the difference between the original comfort weave material and the reproduction material.
Upon close inspection the 'perforations' in the original material can be seen. They're noticeably missing in the reproduction material.
In Flight Judging there are 20 points available for originality and 15 for condition.
In the CCDIF matrix (20% each category) I'd say the material loses some of the Configuration points. So that would be 4 points if that's all there was to the 'configuration' of the covers….but there's more, such as the pattern of the seats and the stitching. So I'd probably take 2 points total for originality (1 each for the material used not being typical of production on each seat).
What do you think?
Regards,
Alan
Original Comfortweave:
AK Comfortweave:
The perforations…. light coming through the holes:
Real comfort weave material is available by the yard. You would have to have an upholsterer cut out the fake comfort weave and sew in the real stuff. I don't know why the upholstery manufacturers don't use the real material, it is available. The sent me a sample, but I can't remember the name of the company who makes it.
When I change the color of my interior, I will spend the extra dough and have the real Comfort weave sewn in. It really makes a difference on a hot day.
Back in the day I worked at my cousins upholstery shop (2 doors away). Any time her dad did a car seat he always used sheets of cotton padding as a filler. When I asked why, he said that there will always be voids and irregularities in custom seat covers or pre-made ones. Some times he lifted up the cover or use a long rod to poke cotton filler in the right place. He also use a heat gun to get a perfect fit.
I had most custom fit bicycle seat in the neighbor. lol
I brought the seat home today and put some cotton padding in those grooves, and then heated the cover up with the heat gun and tried to pull it tighter. I guess it looks marginally better but I don't see how I can pull that thing much tighter than it is.
Edit:
After doing a whole bunch of massaging, I'm finally starting to get somewhere
did they change the foam for later years?
This is for my 73 from Corvette America, the foam doesn't seem to have the same indentations, covers were a tight fit
As I said earlier , Al Knoch products made recently are usually defective in some way . I don't know what their problem is but I used to use a lot of Al Knoch products and they were good quality but not the case anymore. Alan's seats look good and were probably bought many years ago when quality was still important but your seat covers look typical of what you can expect today from Al Knoch. I recently tried another one of his convertible tops at the recommendation of one of the vendors thinking that maybe things got better but the stitching and fit was so bad that I ripped it back off, threw it away and bought a Robbin's top which is absolutely perfect in every way. I get lots of compliments on the Robbin's top at car cruises and people want to know what the brand is and if I installed it . I wouldn't take an Al Knoch product if someone gave it too me let alone buy one. I like doing the job once not twice !
I have a friend who used to have an upholstery shop. He said Al is getting old and less involved in the business.
I have a friend that owns an upholstery shop and hand makes all of his own convertible tops for high end street rods and he told me that if someone brings in an Al Knoch top he will not install it . He said the same thing ," Al Knoch used to make good products ".
Hi RD,
I just received the "comfortweave' material sample from SMS Fabrics.
I'll take a close-up picture of it so it can be compared to the original and AK material.
It's $150 a yard (54" wide)… so I'm thinking it would take 1-1/2 yards?
Regards,
Alan

 09-19-2016, 01:00 PM