


PSlow's '72 Restomod Project
Thread Starter
Burning Brakes

Joined: Sep 2017
Posts: 1,219
Likes: 365
From: Tolland CT
Hey Gang. Still here but not much to report. Too cold for my hands to be useful (it was STILL snowing here today!!!) so I haven't done much.
I did manage to meet up with a forum member who was kind enough to lend me his lifting harness so I can separate the body from the frame and also gave me a couple of interior door panels which are in rough shape but since I was planning on trying my hand at refinishing them anyway, it works out just fine.
It is FINALLY supposed to warm up a bit this coming Fri-Sat so I am hopefully going to finish building my engine and then start on constructing the frame for my outside spray booth/shelter.
Thread Starter
Burning Brakes
Joined: Sep 2017
Posts: 1,219
Likes: 365
From: Tolland CT
Warmer temps means my hands will actually work for a bit and it got to a nice 64 degrees yesterday so I was able to do a bit in the garage.
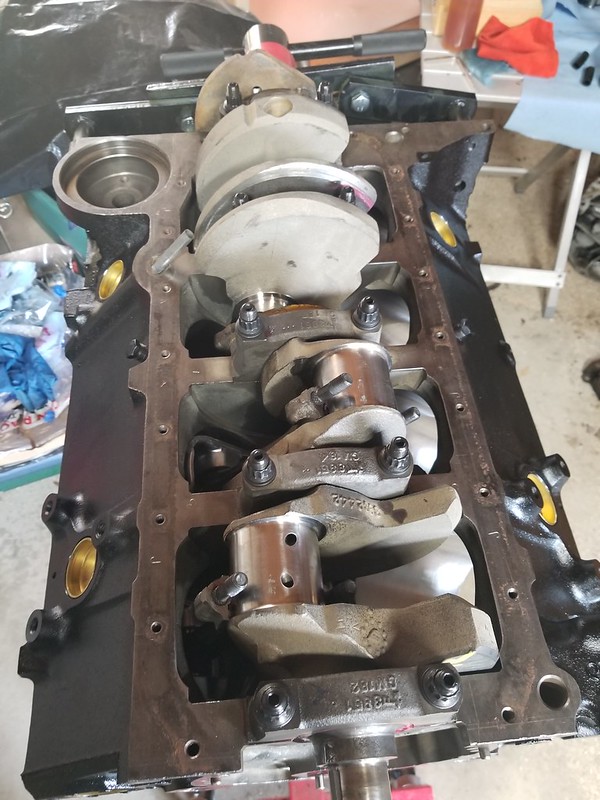
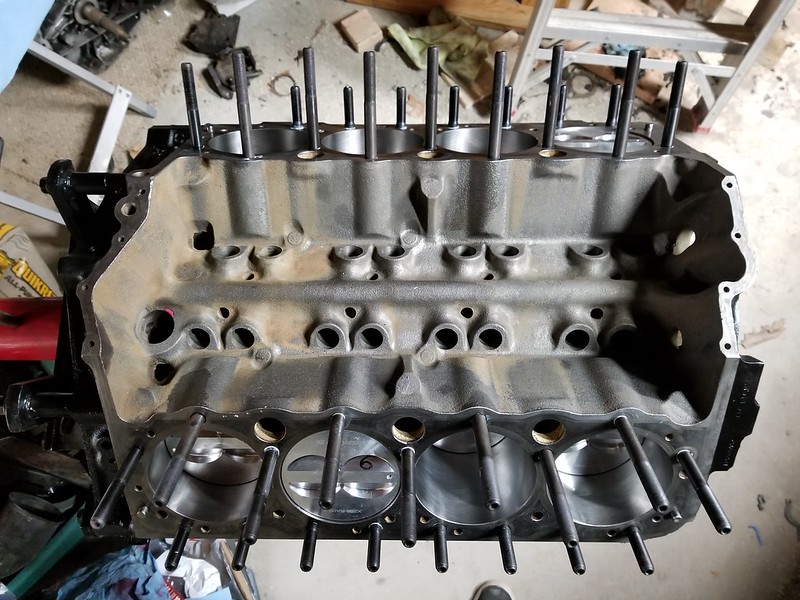
When I left off I had a block with the crank in place...
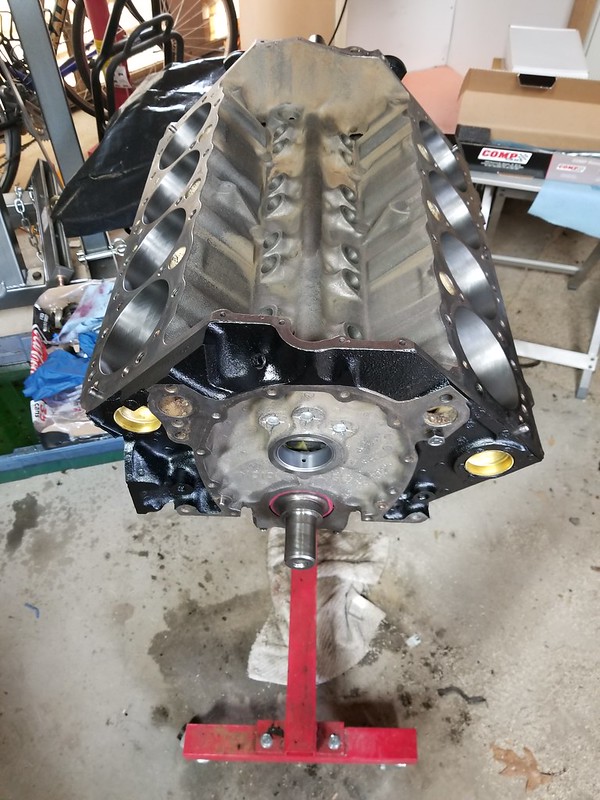
I had previously installed the piston rings so it was ready to have the pistons installed. Starting with the #1 piston I installed some rubber hose over the two connecting rod bolts so that they do not contact the crankshaft journal during installation.

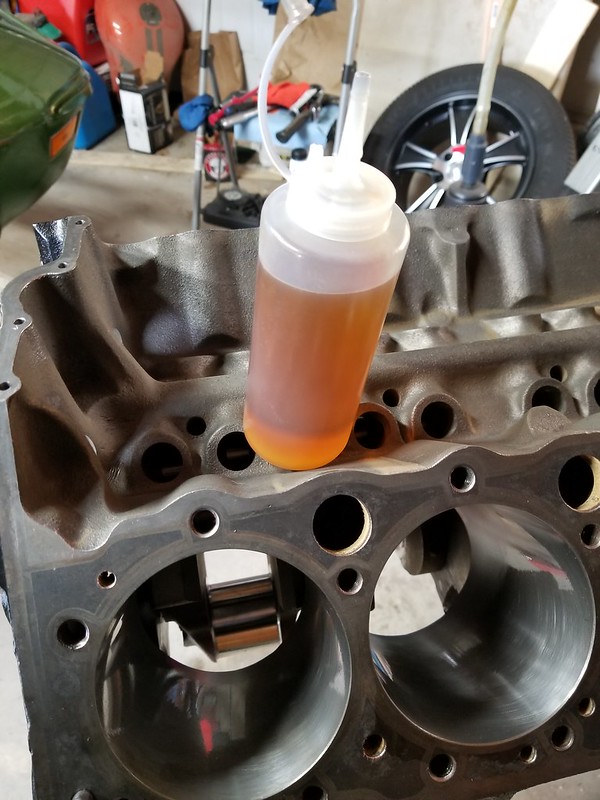
I lubricated the cylinder bores and the piston rings and skirts with engine oil. A squeeze bottle makes this really easy and relatively mess free.
A piston ring compressor is used to install the pistons. This is a pretty simple but effective device. The piston is inserted into the bore and then the compressor is used to collapse the piston rings. After that the wooden or rubber butt of a hammer is used to gently tap the piston into the bore.
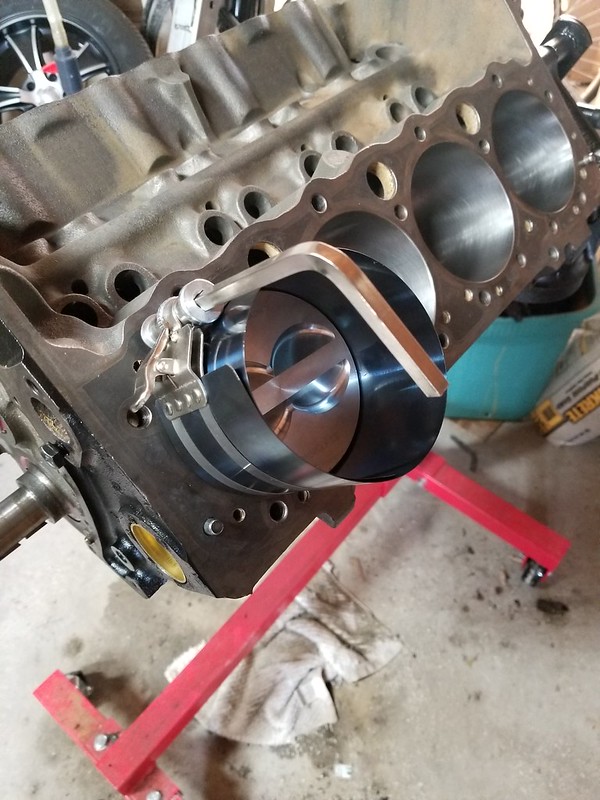
One piston is inserted into the bore while carefully making sure that the connecting rod bolts are clear of the crankshaft. Gently tapping the piston down until the rod bearing makes contact with the crankshaft journal.
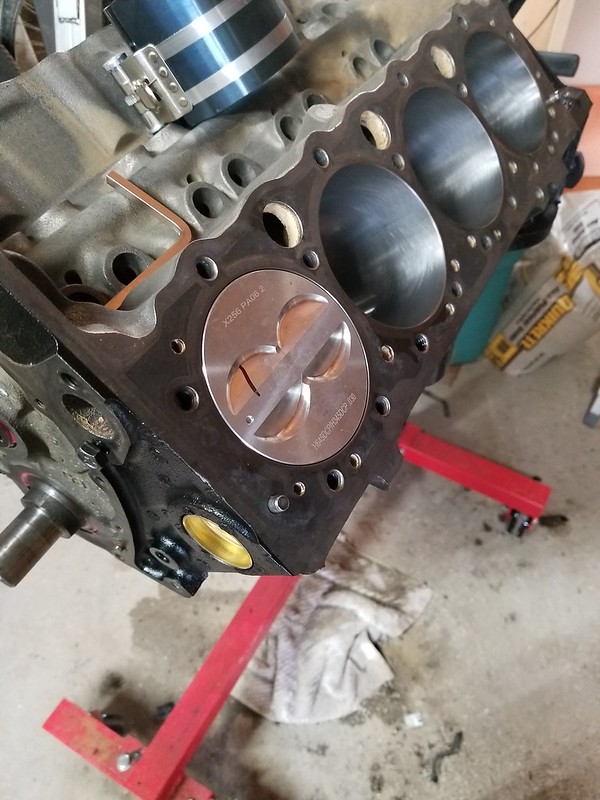
Rinse and repeat for the rest of the pistons.
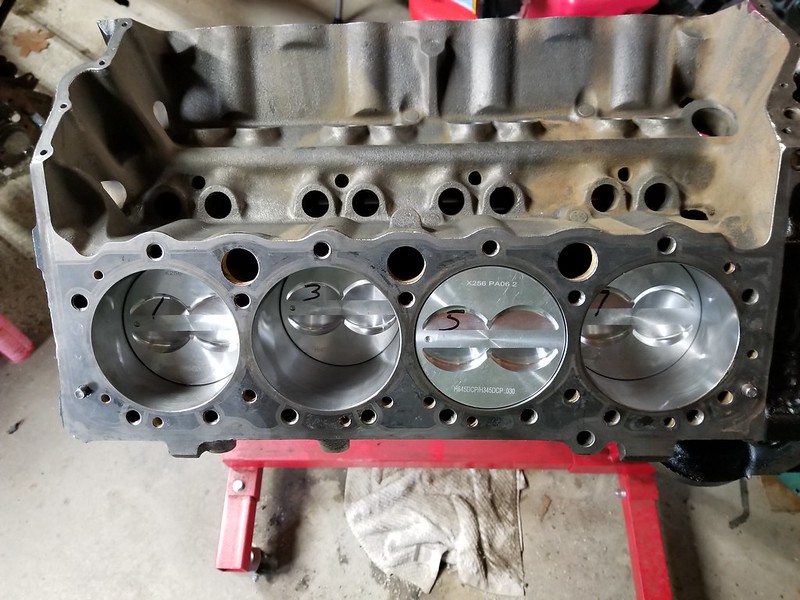
One side done and ready to have bearing clearances checked.
More tomorrow...
When I left off I had a block with the crank in place...
I had previously installed the piston rings so it was ready to have the pistons installed. Starting with the #1 piston I installed some rubber hose over the two connecting rod bolts so that they do not contact the crankshaft journal during installation.
I lubricated the cylinder bores and the piston rings and skirts with engine oil. A squeeze bottle makes this really easy and relatively mess free.
A piston ring compressor is used to install the pistons. This is a pretty simple but effective device. The piston is inserted into the bore and then the compressor is used to collapse the piston rings. After that the wooden or rubber butt of a hammer is used to gently tap the piston into the bore.
One piston is inserted into the bore while carefully making sure that the connecting rod bolts are clear of the crankshaft. Gently tapping the piston down until the rod bearing makes contact with the crankshaft journal.
Rinse and repeat for the rest of the pistons.
One side done and ready to have bearing clearances checked.
More tomorrow...
Corvette Stories
The Best of Corvette for Corvette Enthusiasts

5 Best & 5 Worst Corvette Daily Drivers
Joe Kucinski
The Headlights of Every Corvette Generation Explained
Joe Kucinski
5 Best & 5 Most Overrated Corvette Track Packages of All Time!
Joe Kucinski
Every 2027 Corvette Engine Explained
Joe Kucinski
Designer Imagines A Corvette That Looks More Like a Corvette Than the Corvette
Verdad Gallardo
10 Ugly Corvettes That We Still Kinda Love
Joe Kucinski
Top 10 Most Expensive Corvettes Ever Sold on Bring A Trailer
Brett Foote
10 Things Every Corvette Owner Needs (2026 Edition)
Michael S. Palmer
8 Most "Only Corvette Owners Understand" Quirks and Problems
Pouria Savadkouei
Thread Starter
Burning Brakes
Joined: Sep 2017
Posts: 1,219
Likes: 365
From: Tolland CT
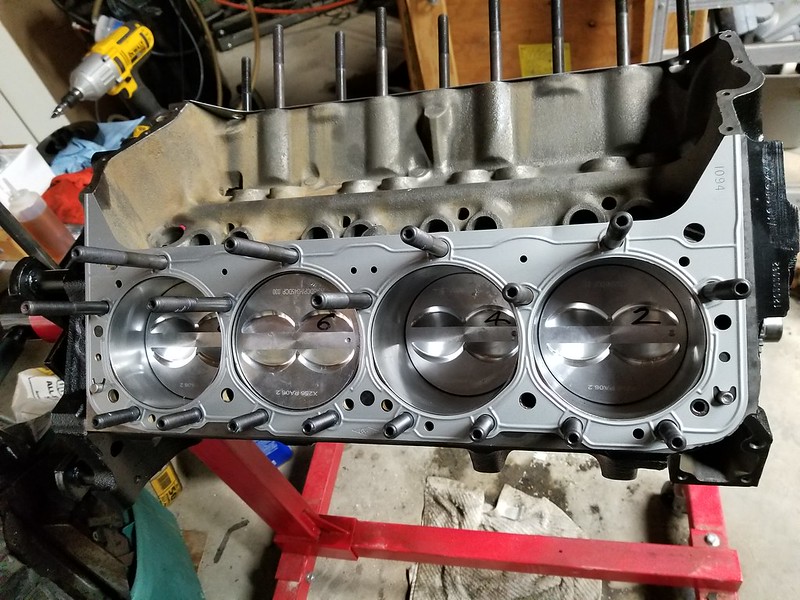
Not a lot to look at but I did get more plastigage and managed to finish installing the remaining pistons and connecting rods. Everything fell right where it was supposed to in terms of tolerances: between .002 and .0025 for the rod bearings. At least it is starting to look like something:

I also installed the camshaft, a nice retro-roller unit from Comp Cams. No actual install pics as I needed both hands but here she is in place with the timing gear starting to go on.
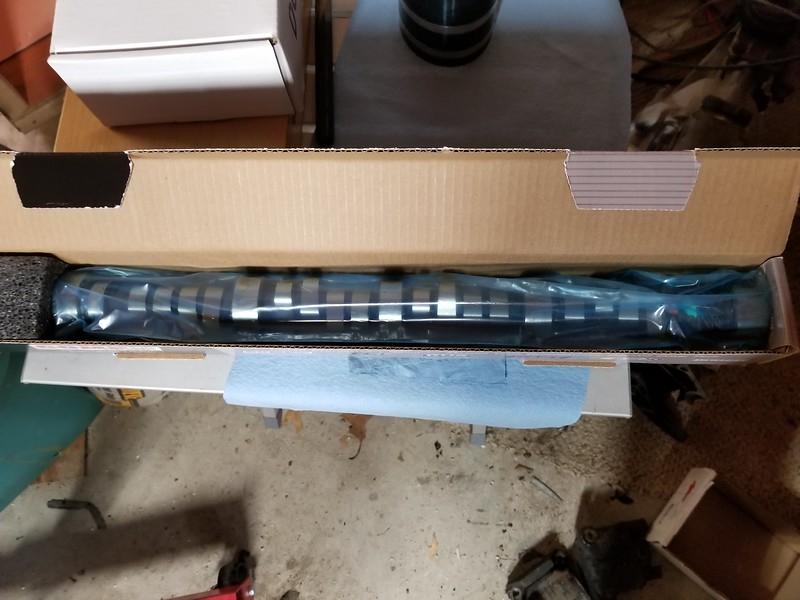
That was all that I could do on Tuesday as my hands hurt too badly to continue.
Today I spent about 30 minutes looking for my damn tool to spin the crank but came up dry so ordered another one from Amazon. While waiting I decided to begin cleaning up the oil pan. When last I touched it I had sand blasted and then powder coated it which gives a great outward appearance however I needed to be sure that all of the blast media was out.
The solution to this problem comes in the form of a really ugly third bathroom that you are going to replace the tub in anyway so it serves as a great spot for some parts cleaning. Dishwashing detergent, some brushes, and a soapy rag do wonders.
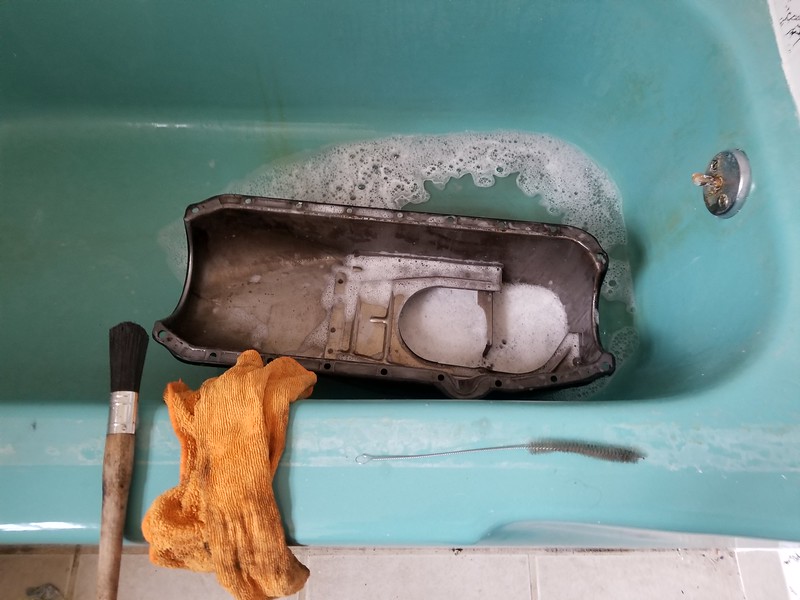
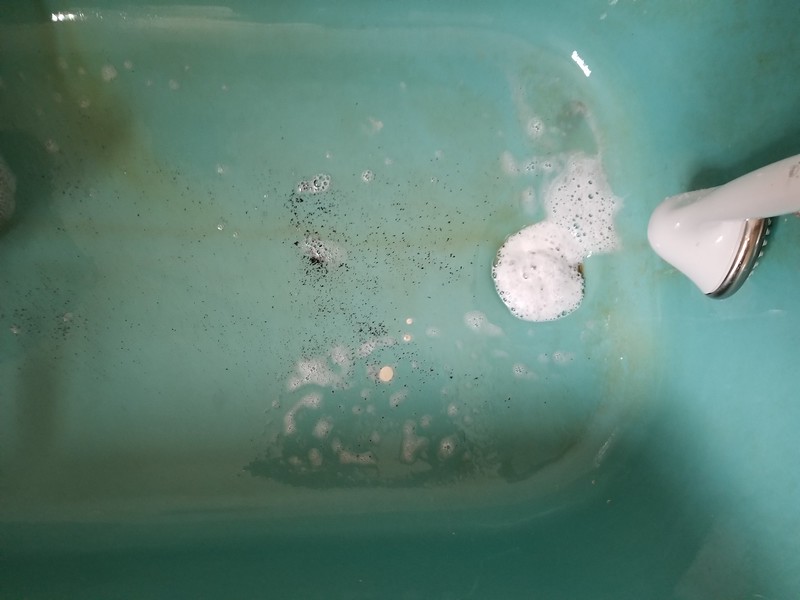
I made sure to get the brushes through every tiny crack that I could and then followed up with the rag on all the surfaces and undersides. Keep in mind that I did blow this off after I blasted it however this goes to show that there is no replacement for cleanliness when engine building. This is all of the left-over aluminum oxide blast media that I washed out of the pan. We definitely do not want this running around through my newly rebuilt engine!
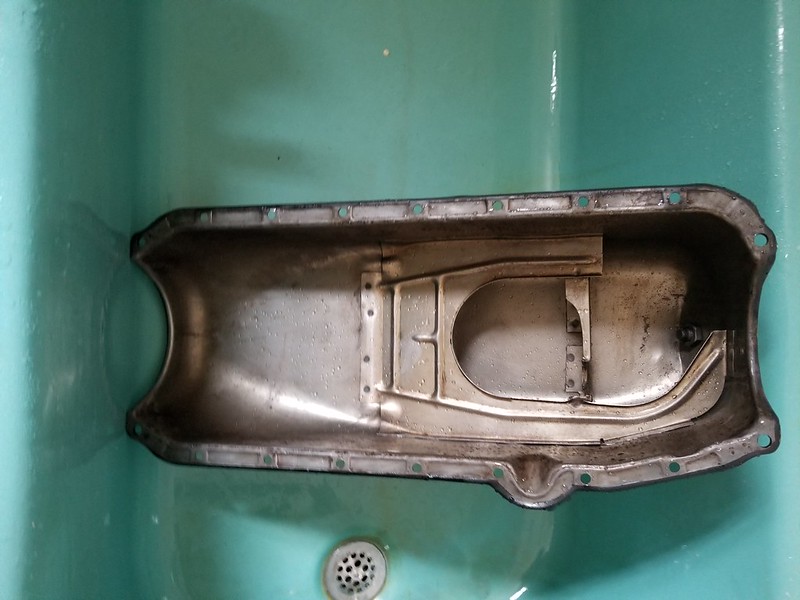
All cleaned up. I will blow it off with compressed air and then let it dry for 24 hours while I wait for my tool from Amazon.
I also installed the camshaft, a nice retro-roller unit from Comp Cams. No actual install pics as I needed both hands but here she is in place with the timing gear starting to go on.
That was all that I could do on Tuesday as my hands hurt too badly to continue.
Today I spent about 30 minutes looking for my damn tool to spin the crank but came up dry so ordered another one from Amazon. While waiting I decided to begin cleaning up the oil pan. When last I touched it I had sand blasted and then powder coated it which gives a great outward appearance however I needed to be sure that all of the blast media was out.
The solution to this problem comes in the form of a really ugly third bathroom that you are going to replace the tub in anyway so it serves as a great spot for some parts cleaning. Dishwashing detergent, some brushes, and a soapy rag do wonders.
I made sure to get the brushes through every tiny crack that I could and then followed up with the rag on all the surfaces and undersides. Keep in mind that I did blow this off after I blasted it however this goes to show that there is no replacement for cleanliness when engine building. This is all of the left-over aluminum oxide blast media that I washed out of the pan. We definitely do not want this running around through my newly rebuilt engine!
All cleaned up. I will blow it off with compressed air and then let it dry for 24 hours while I wait for my tool from Amazon.
Race Director


Joined: Mar 2016
Posts: 14,444
Likes: 8,241
From: Napa Valley California
That turquoise bath tub is a classic. It could be restored back to it's original luster and improve or at least maintain the value of your home. I'm sure the local Historical Society would agree. LOL
2026 Loser of the Year


Joined: Sep 2013
Posts: 36,615
Likes: 7,064
From: New Or-leens Loo-z-anna
While you are at it.....you may as well lay that oil pan upside down on your wife's kitchen counter top to check it for flatness LOL!
I hand to massage every bolt hole since the pan bolts had previously been well-overtightened causing some high and low spots where the gasket seats.
I hand to massage every bolt hole since the pan bolts had previously been well-overtightened causing some high and low spots where the gasket seats.
Thread Starter
Burning Brakes
Joined: Sep 2017
Posts: 1,219
Likes: 365
From: Tolland CT
While you are at it.....you may as well lay that oil pan upside down on your wife's kitchen counter top to check it for flatness LOL!
I hand to massage every bolt hole since the pan bolts had previously been well-overtightened causing some high and low spots where the gasket seats.
I hand to massage every bolt hole since the pan bolts had previously been well-overtightened causing some high and low spots where the gasket seats.


Thread Starter
Burning Brakes
Joined: Sep 2017
Posts: 1,219
Likes: 365
From: Tolland CT
Yesterday was a good day...well it started off that way anyway.
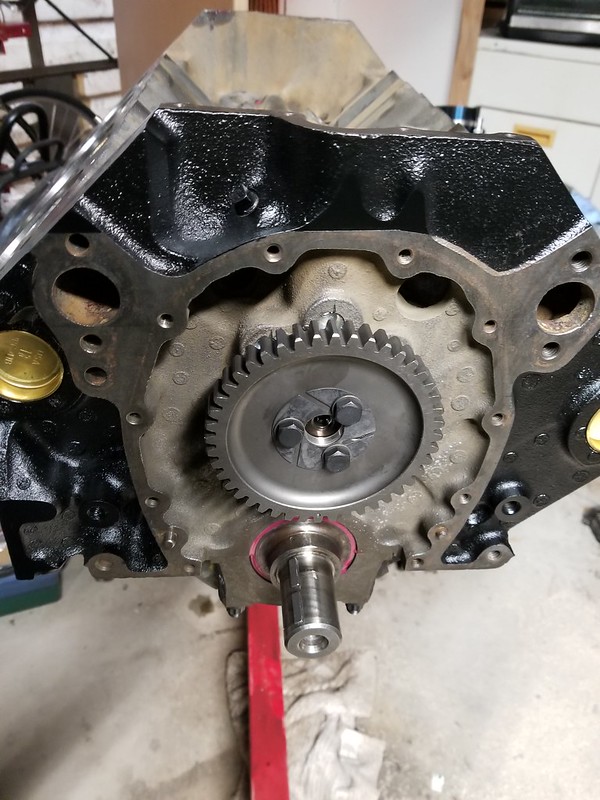
I got out to the garage early and started right in on the engine. First thing was to get the gear drive timing set in place. Note the dots on the cam and crank gear face each other which indicates that the cam and crank are timed properly. If this were a racing engine (or one where I really wanted serious performance) I would degree in the camshaft but frankly for a cruiser the default timing will be sufficient.
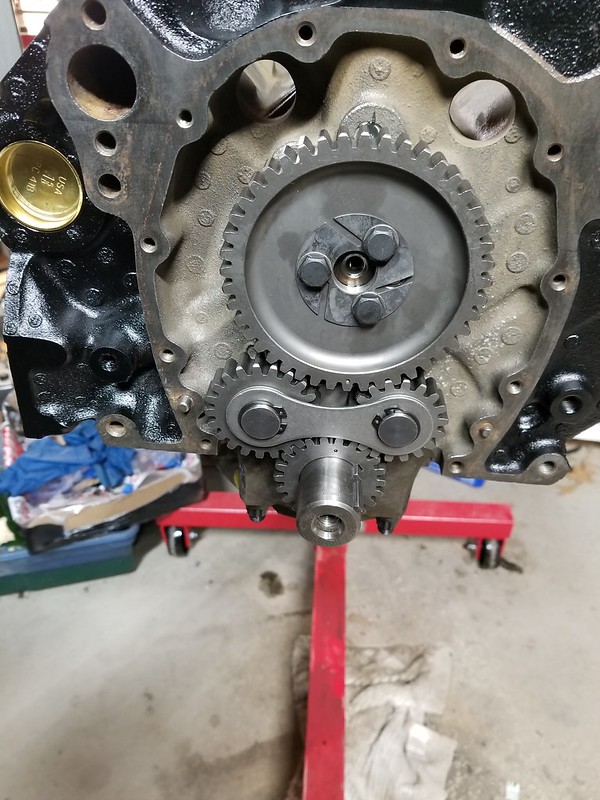
Once the gears were in place it made it easy to torque the camshaft bolts to spec (20 ft-lbs.). This particular set has a lock ring where the tabs are supposed to be bent up and over the bolts to prevent them from coming loose but if yours does not have this, be sure to use a threadlocker on these bolts. I then spun the crankshaft in a complete rotation to make sure that everything was moving as expected...green light!
After that it was time to install the cylinder head stud kit. The factory uses bolts here but many believe that studs are stronger and yield more accurate torque readings. On SBC these bolts go directly into the water jacket and so need to be installed using pipe sealant on the threads.
Using Fel-Pro 1094 head gaskets here which are simply a steel shim style and much thinner than the OEM gaskets. This will help to bump up the compression a bit and get a little extra oomph out of the mill.
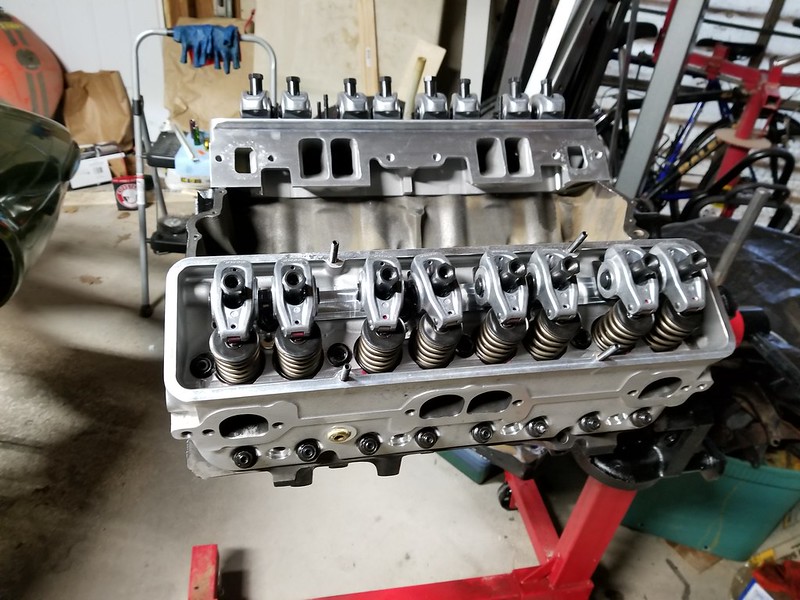
Finally a very gratifying moment was to set the cylinder heads in place. I had previously rebuilt this set of Profiler 2.05 heads so I knew that they were ready to be installed. After nearly dropping one due to my hands I recruited the help of one of my sons and a short while later they were on the engine.
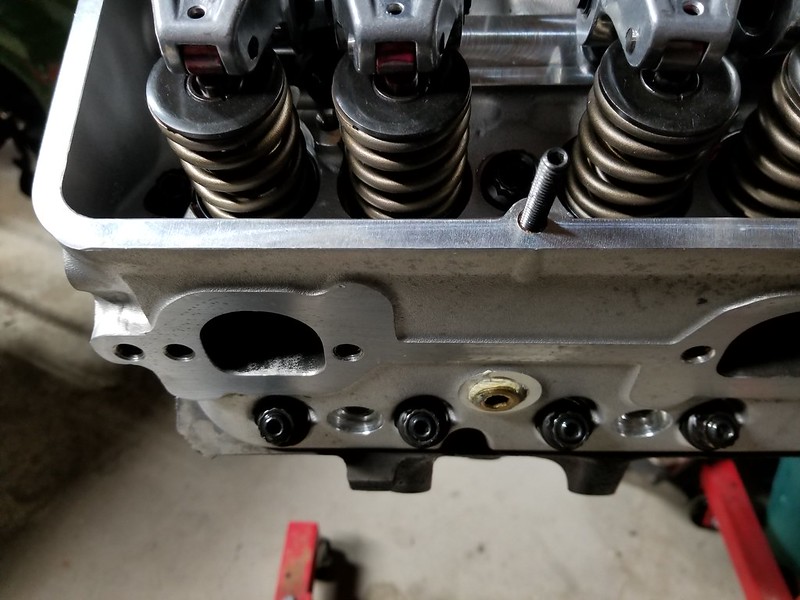
This is where my day went south. The first thing I ran into was that an ancient Craftsman allen socket broke off in one of the studs. You can see it here on the lower cylinder head stud, third one in from the left. No biggie, I can get that out later.
Issue #2 came in the form of the washer which goes beneath the cylinder head nuts was too big to fit in between the larger than stock springs on the center stud. Ok, no biggie. I held the washer with some vice grips and used my bench grinder to make two flat spots so that it fit in place.
My hands shake pretty badly when they get fatigued but I was determined to push on which caused issue number 3: the center inner stud started to cross thread. *sighs* Back the stud out and clean it up with a 7/16"-20 die. I ran a tap through the nut for good measure and then re-installed them. So far, so good.
The pi�ce de r�sistance came when I was torqueing the first cylinder head in place. 65 ft-lbs. doesn't sound like much until you have mangled wrists which is apparently more than I can bear. While installing the very last freaking nut I heard a nice crack from my left wrist and got some nice, sharp pain. Oh yay...I made an appointment with my orthopedic surgeon to close out my day. The pain is pretty bad at this point so we will see what is up.
For those who may not know, cylinder head bolts need to be torqued in a specific sequence.

It is important to note that you should install it in stages and also check the setting multiple times. I first torque each bolt to 40 ft-lbs. and then repeat at that setting. From there I move up to the final 65 ft-lbs. and check it three times. You would be surprised at how much aluminum cylinder heads can move; I was still getting studs that were loose on my 2nd time. The 3rd time is just a final check and everything is set to spec.
Here is how she sits. At least it is finally starting to look like an engine. Note that the camshaft gear retaining plate has been bent over the bolt heads as I mentioned earlier...
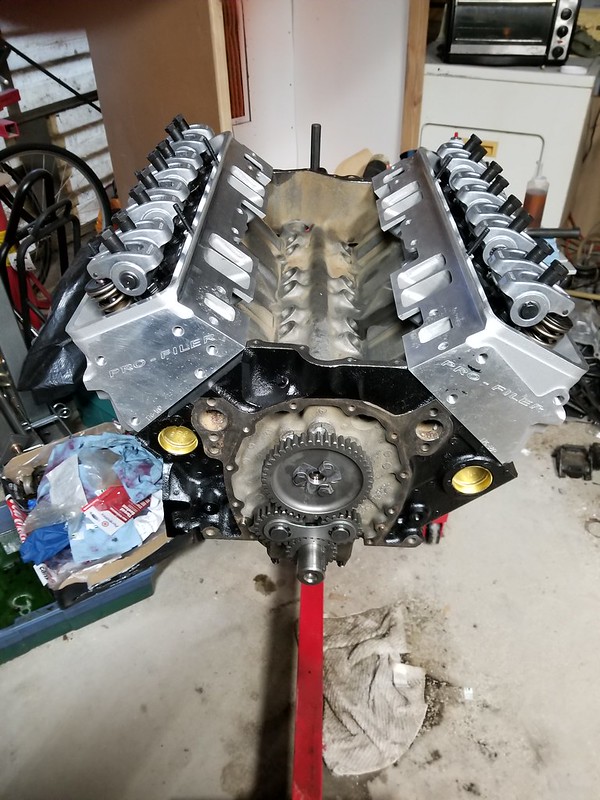
In my opinion, using studs for the cylinder heads are beneficial to the longevity of the engine but they also just look darn cool, don't you agree?
I got out to the garage early and started right in on the engine. First thing was to get the gear drive timing set in place. Note the dots on the cam and crank gear face each other which indicates that the cam and crank are timed properly. If this were a racing engine (or one where I really wanted serious performance) I would degree in the camshaft but frankly for a cruiser the default timing will be sufficient.
Once the gears were in place it made it easy to torque the camshaft bolts to spec (20 ft-lbs.). This particular set has a lock ring where the tabs are supposed to be bent up and over the bolts to prevent them from coming loose but if yours does not have this, be sure to use a threadlocker on these bolts. I then spun the crankshaft in a complete rotation to make sure that everything was moving as expected...green light!
After that it was time to install the cylinder head stud kit. The factory uses bolts here but many believe that studs are stronger and yield more accurate torque readings. On SBC these bolts go directly into the water jacket and so need to be installed using pipe sealant on the threads.
Using Fel-Pro 1094 head gaskets here which are simply a steel shim style and much thinner than the OEM gaskets. This will help to bump up the compression a bit and get a little extra oomph out of the mill.
Finally a very gratifying moment was to set the cylinder heads in place. I had previously rebuilt this set of Profiler 2.05 heads so I knew that they were ready to be installed. After nearly dropping one due to my hands I recruited the help of one of my sons and a short while later they were on the engine.
This is where my day went south. The first thing I ran into was that an ancient Craftsman allen socket broke off in one of the studs. You can see it here on the lower cylinder head stud, third one in from the left. No biggie, I can get that out later.
Issue #2 came in the form of the washer which goes beneath the cylinder head nuts was too big to fit in between the larger than stock springs on the center stud. Ok, no biggie. I held the washer with some vice grips and used my bench grinder to make two flat spots so that it fit in place.
My hands shake pretty badly when they get fatigued but I was determined to push on which caused issue number 3: the center inner stud started to cross thread. *sighs* Back the stud out and clean it up with a 7/16"-20 die. I ran a tap through the nut for good measure and then re-installed them. So far, so good.
The pi�ce de r�sistance came when I was torqueing the first cylinder head in place. 65 ft-lbs. doesn't sound like much until you have mangled wrists which is apparently more than I can bear. While installing the very last freaking nut I heard a nice crack from my left wrist and got some nice, sharp pain. Oh yay...I made an appointment with my orthopedic surgeon to close out my day. The pain is pretty bad at this point so we will see what is up.
For those who may not know, cylinder head bolts need to be torqued in a specific sequence.
It is important to note that you should install it in stages and also check the setting multiple times. I first torque each bolt to 40 ft-lbs. and then repeat at that setting. From there I move up to the final 65 ft-lbs. and check it three times. You would be surprised at how much aluminum cylinder heads can move; I was still getting studs that were loose on my 2nd time. The 3rd time is just a final check and everything is set to spec.
Here is how she sits. At least it is finally starting to look like an engine. Note that the camshaft gear retaining plate has been bent over the bolt heads as I mentioned earlier...
In my opinion, using studs for the cylinder heads are beneficial to the longevity of the engine but they also just look darn cool, don't you agree?
Last edited by PainfullySlow; Apr 20, 2018 at 06:40 AM.

2026 Loser of the Year
Joined: Sep 2013
Posts: 36,615
Likes: 7,064
From: New Or-leens Loo-z-anna

