When you click on links to various merchants on this site and make a purchase, this can result in this site earning a commission. Affiliate programs and affiliations include, but are not limited to, the eBay Partner Network.
This is my favorite thread on here. I look forward to seeing what you're up to and all of the pics! You do great work and I've learned a lot. Appreciate the updates!
Both of you are an inspiration to those who have been struck with health type road blocks. You both and others find a way to go around the blocked road and get back on it and continue. Me, at 71 just hope I can stay on the right side of the grass if you know what I mean.
Carry on!
RVZIO
Thanks but you are doing a fine job yourself. I am about to turn 69 and its a race to see who finishes first, me or the undertaker.......lol
I think Mike will agree we are all in the same club.
Busy day today with a lot of non-C3 stuff but I did still manage to get a bit done.
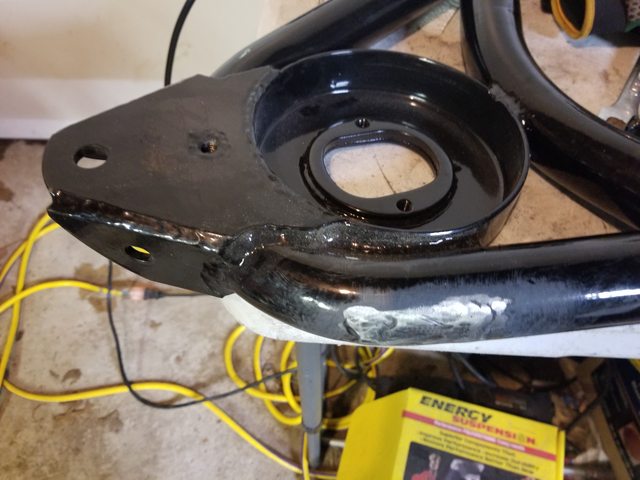
I picked up where I left off the day before with working on refinishing the trailing arms and turning them from a rusty mess into what I hope is a decent looking and performing piece.
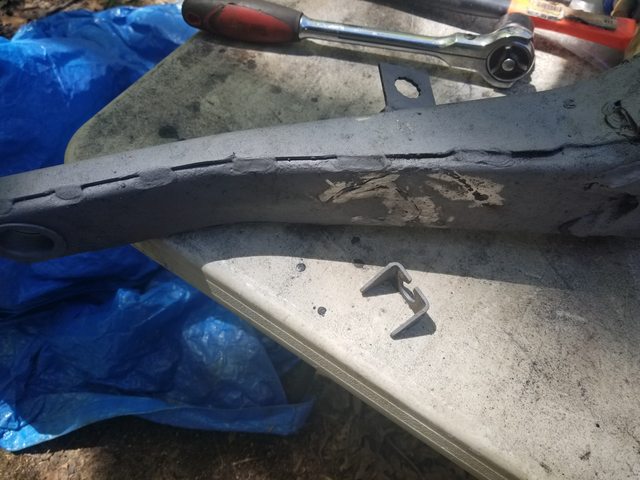
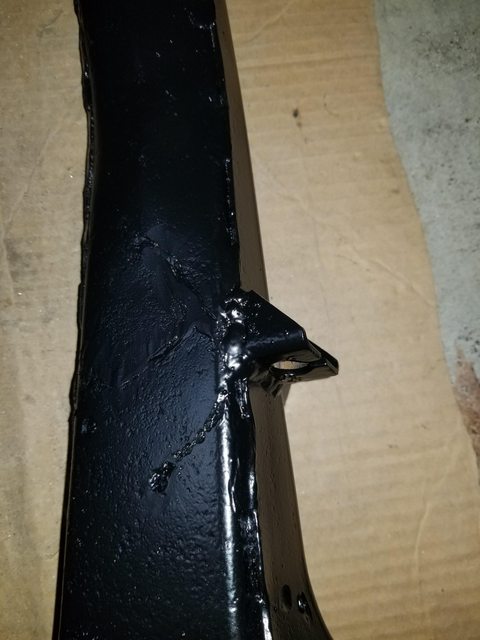
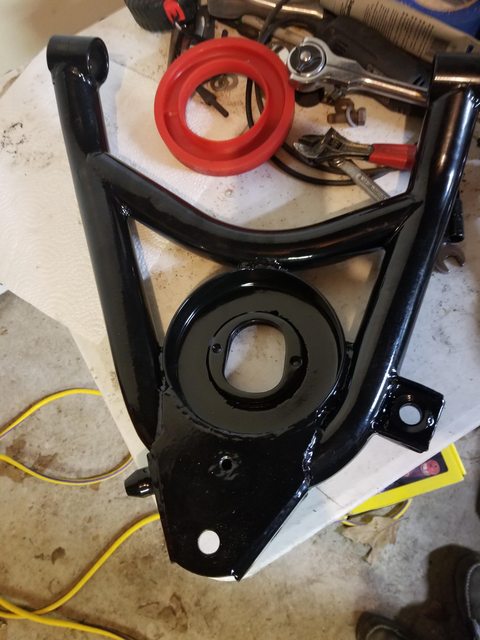
I began with descaling the parts and then quite a bit of time in my blast cabinet to get them to bare metal. Once that was done I figured that I may as well relocate the parking brake cable bracket just in case I decide to go with wider tires in the future.
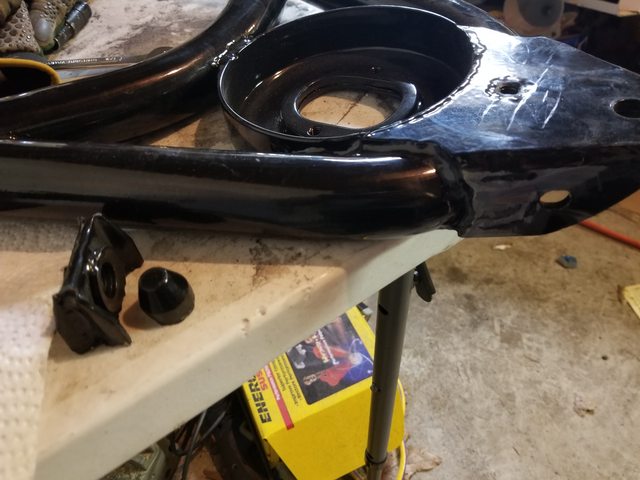
I used a dremel with a thin cutoff wheel to remove the piece...
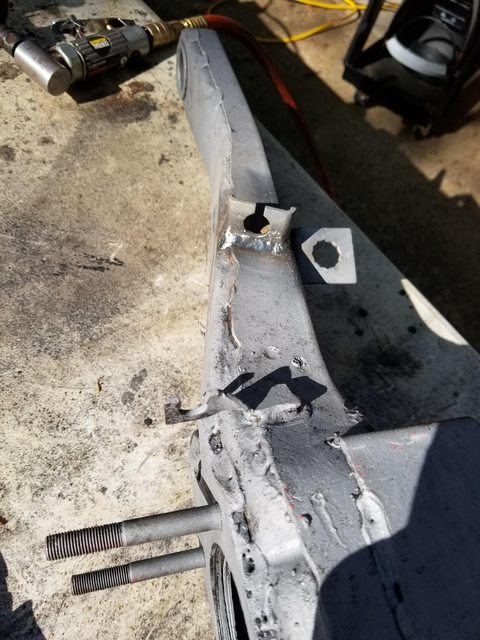
and then welded it on the top of the trailing arm with my Mig 135.
and the other side done as well
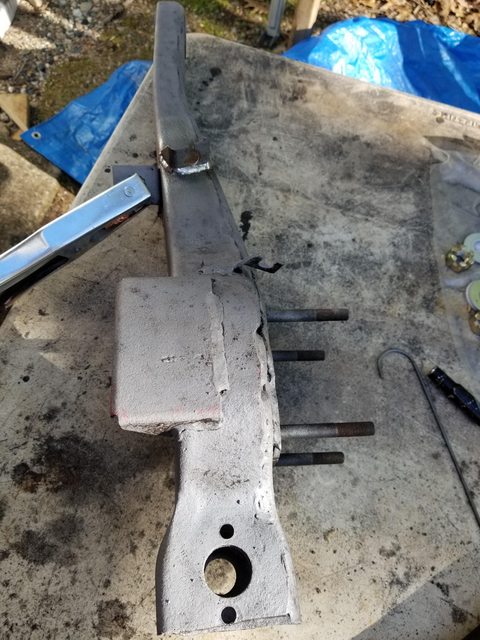
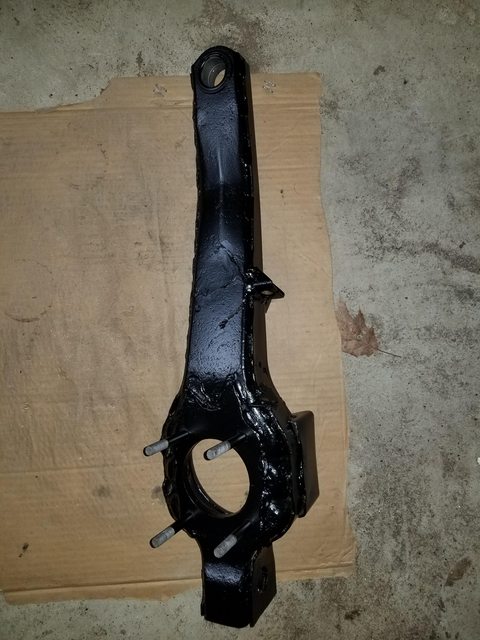
Once the welding was done I used my angle grinder to remove as much of the old bracket mounting welds from the side of the arm and then coated the entire arm with AfterBlast for a rust-free phosphate coating. Finally after that it was off to powder coat. Certainly not as pretty as new but strong, functional, and durable.
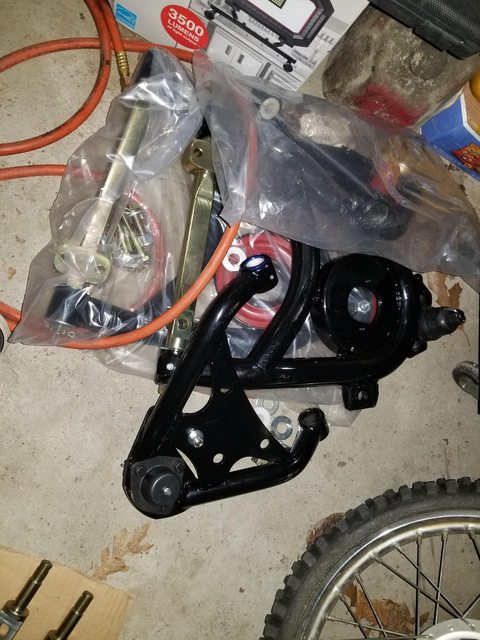
Also, it was a bit more of late Christmas here as many parts continued to arrive. Most importantly the tubular control arms that I was anxiously waiting on arrived. I have to say that I was actually pretty impressed with the quality. These things are BEEFY. As these are from a passenger car I knew that there was work to be done on them to make them right so I immediately set in on them. For details of how/why/what these are, check out the tubular control arm thread here: https://www.corvetteforum.com/forums...ar-a-arms.html
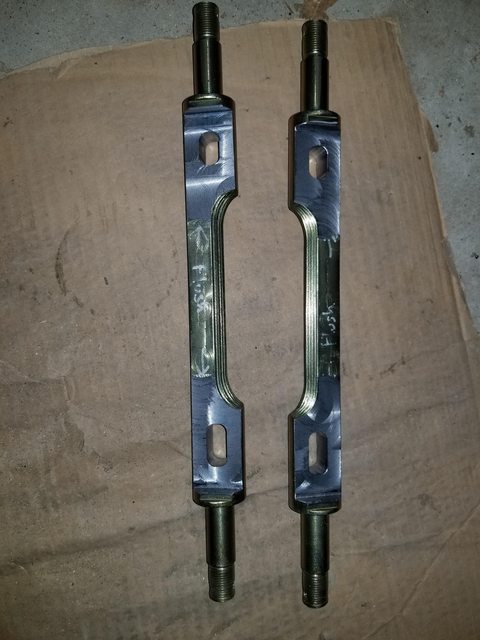
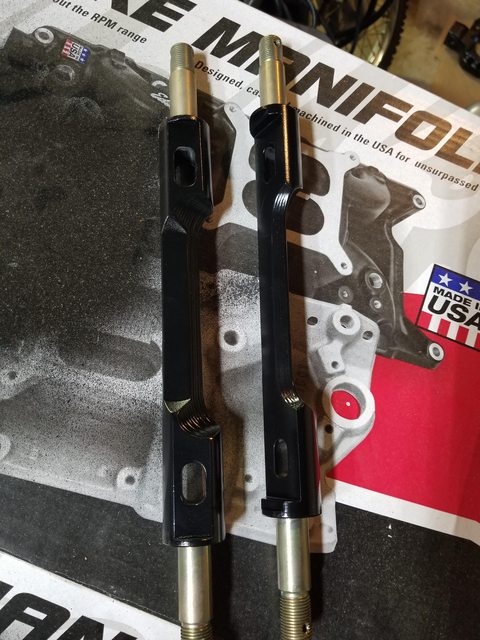
I knew that the cross shafts for the upper control arms would need to be modified so I started by removing them and then got them down to a local machinist that I know. Cheaply done and a blazing fast turnaround (I dropped them off at 2pm and picked them up at 7pm the same day).
and here are the cross shafts with the machine work already done. Tomorrow these will get powder coated and reassembled then I will start on the lowers which need to have the sway bar brackets and the steering stop moved.
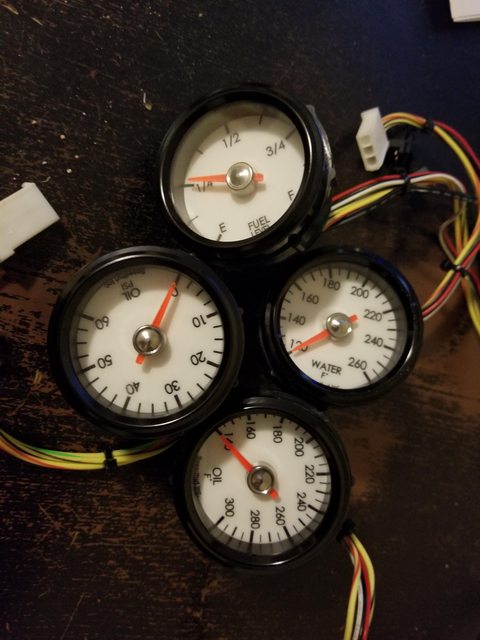
Anyway, more cool stuff that showed up today: I really like the look of white gauges and wanted a more modern (and accurate) set however quality gauges are REALLY expensive...thankfully I lucked out and found a gently used set of Speed Hut gauges (which I love) for $60! Water temp, fuel level, oil pressure, and oil temp. I will not be installing a clock so all that remains is to order up a volt meter new from the vendor and I should have a complete set of speed hut gauges for <$200! Pretty psyched about this!
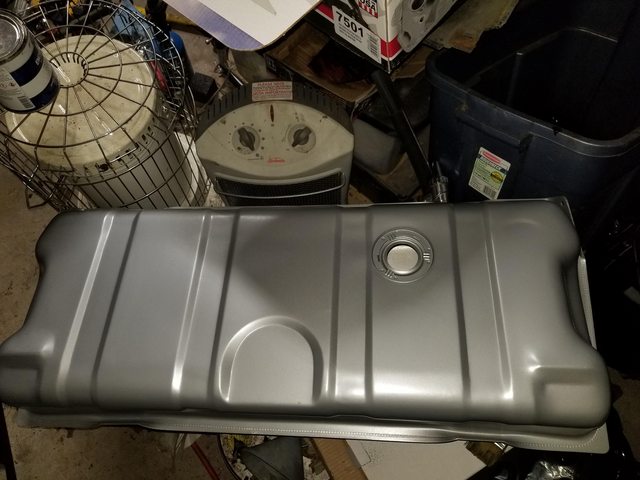
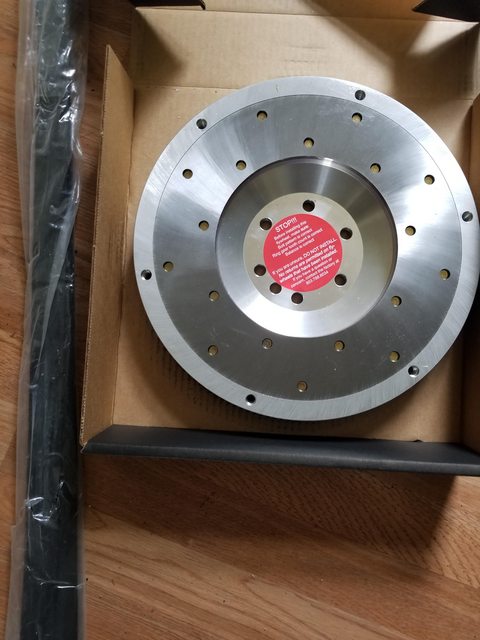
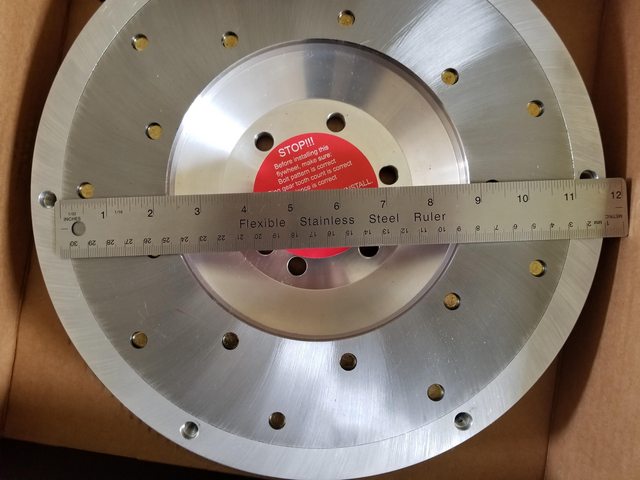
Also arriving was a new gas tank (the original is still whole but rusty. Better safe than sorry) and a billet aluminum lightweight flywheel. The tank is well made and already coated nicely but the flywheel is a RAM 18lb model designed specifically to mate up a Gen1 SBC with a T56 trans, and it is a thing of beauty. The machine work quality on this piece is outstanding!
Well, off to try to give my aching hands a rest. Knowing that it is supposed to rain tomorrow I tried to get as much done as I could today and I am already paying for it. Hopefully I will be able to continue some work tomorrow.
Well, you got a lot of nice parts in and I love when people turn around work fast. It's like they are as excited as you to get the parts back. I kinda remember back at the start of my 69 build that I spent a lot of time cleaning up the gas tank. Many chimed in about getting a new one. Good move with that also. Now go rest the hands and maybe tomorrow will be better.
Well, not much I could do today. I got about an hour in the shop before my wrists gave me a giant NOPE so I had to quit for the day.
I managed to get the steering stop and sway bar mounts removed from the lower control arms and cleaned up those areas. Also I was able to powder coat the upper control arm cross shafts but that was about it. Hopefully better tomorrow.
Hey Michael.
Quick question about the 18lb flywheel that matches the CF clutch and a 1st Gen SBC with a T56.......
You are using the hydraulic throw-out setup like the LS1 version and not the LT1 version....correct?
Is the clutch and flywheel a 11 inch combo? I saw other threads where they used a 10 1/2 inch set up.
Where did you get the RAM flywheel...and cost if you don't mind?
Thanks pal....
I cannot seem to find specs on the flywheel itself anywhere however the friction area is definitely 11" diameter. It is also a 153 tooth ring gear.
The clutch is correct for the application that the transmission came out of so a 95 F body which is a 10.5" clutch. I would think by the size of the friction area that you could absolutely fit it with an 11" clutch (since the 10.5 is really 10.4) and make it work. To be absolutely certain I would give the folks at RAM a call though.
For the throwout, I am using the factory design off of the 95 F body as well, which is a standard throwout bearing and a hydraulic slave cylinder with a clutch fork. I ordered a Wagner slave and I am using a hydraulic clutch master off of a C10 truck (also Wagner), there are lots of posts about that here on the forums but I can dig up a reference or part number if you need one =).
Last edited by PainfullySlow; 05-14-2019 at 10:56 AM.
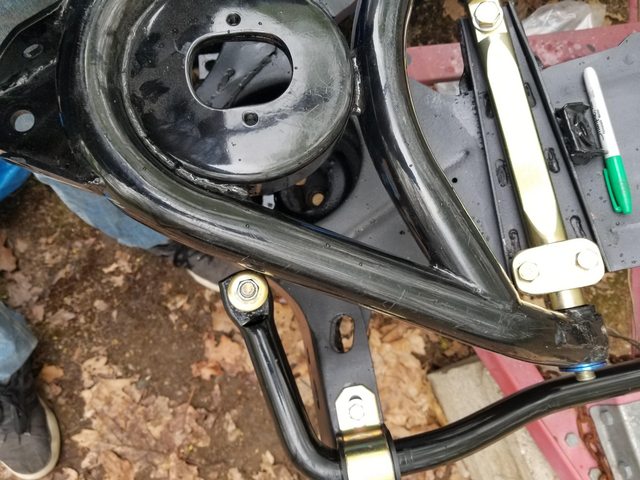
Gotta love New England weather. 30 degrees under average for the last week. It was 34 degrees overnight and warmed up to a balmy 44 during the day...and it has been raining for days. I did manage to find a little dry time between storms to get out and test fit the lower control arm project. I wanted to ensure that I was welding the sway bar tab back in absolutely the right spot so this was the most sure method that I could think of.
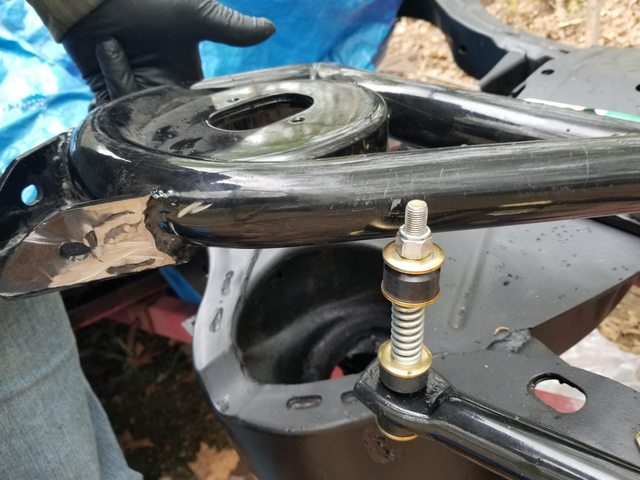
To so start I installed the sway bar link into the bar and tightened it enough so that it was rigid and then installed the lower control arm into place. It worked perfectly and gave me an exact idea of where I needed the tab to be welded.
Then it was a simple matter of fixing the tab in place so that it could be welded. I triple checked the location as I was borrowing an adage from the wood working community: measure thrice, weld once.
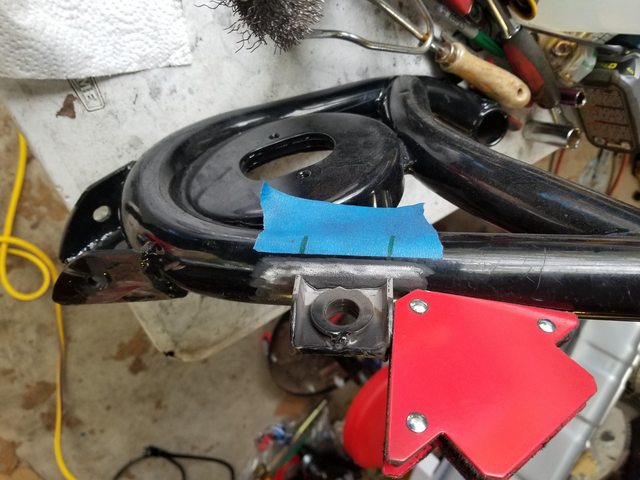
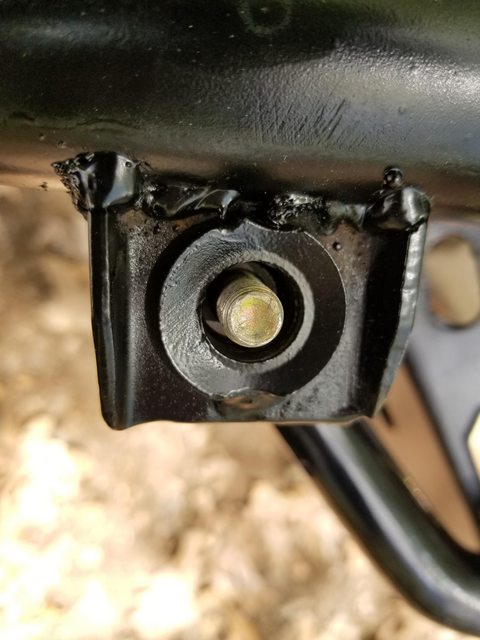
The weld looks terrible because I ran out of shielding gas mid-stream but it is very strong. Since I do not want this popping off while driving I did a very scientific test: I smacked the tab with a 5lb sledge. It passed :-p
I also welded the steering bump stop back in on the correct side. Note that it had to be placed up on the tube rather than on the flat spot that it came off of. This is based off of measurements taken from the original control arms. Since the shapes are different there is no easy way to do this so I used the center of the ball joint hole as a constant since I know that it has to be the same between both arms.
So, I have to go get more shielding gas today and then I will clean up the weld on this tab and start on the other side and then it is off to powder coating, reassembly, and installation!
Last edited by PainfullySlow; 05-14-2019 at 10:58 AM.
I cannot seem to find specs on the flywheel itself anywhere however the friction area is definitely 11" diameter. It is also a 153 tooth ring gear.
The clutch is correct for the application that the transmission came out of so a 95 F body which is a 10.5" clutch. I would think by the size of the friction area that you could absolutely fit it with an 11" clutch (since the 10.5 is really 10.4) and make it work. To be absolutely certain I would give the folks at RAM a call though.
For the throwout, I am using the factory design off of the 95 F body as well, which is a standard throwout bearing and a hydraulic slave cylinder with a clutch fork. I ordered a Wagner slave and I am using a hydraulic clutch master off of a C10 truck (also Wagner), there are lots of posts about that here on the forums but I can dig up a reference or part number if you need one =).
Thanks Mike.
So the clutch throwout setup is the LT1 version from the F body cars. It uses a clutch fork and external slave to push the throwout bearing into the clutch.
I am modifying mine to use the internal throw out bearing that mounts to the front of the trans. That requires changing the input shaft to the longer LS1 shaft, different bellhousing to make up the difference in shaft length and running the hydraulic lines out of housing - one to MC and one to bleed with. Different clutch and flywheel also.
BTW.... IIRC...the LT1 T56 uses a different flywheel and clutch to work with the clutch fork setup. Double check that.
I will be using a Quicktime scattershield RM-6023 https://www.holley.com/products/driv.../parts/RM-6023
I picked up one from a stalled project for $500 on ebay.
LS1Tech has great info on the plus and minuses of both the LT1 and LS1 versions of the T56.
Looked up your flywheel you bought....very cool. They modified the old version steel units to make up for the thickness of the flywheel.
Good luck pal......told my wife the inspiration coming out of your threads.....she likes hearing that.....tired of project cars in the yard....
Last edited by bmans vette; 05-14-2019 at 04:21 PM.
Thanks Mike.
So the clutch throwout setup is the LT1 version from the F body cars. It uses a clutch fork and external slave to push the throwout bearing into the clutch.
I am modifying mine to use the internal throw out bearing that mounts to the front of the trans. That requires changing the input shaft to the longer LS1 shaft, different bellhousing to make up the difference in shaft length and running the hydraulic lines out of housing - one to MC and one to bleed with. Different clutch and flywheel also.
BTW.... IIRC...the LT1 T56 uses a different flywheel and clutch to work with the clutch fork setup. Double check that.
I will be using a Quicktime scattershield RM-6023 https://www.holley.com/products/driv.../parts/RM-6023
I picked up one from a stalled project for $500 on ebay.
LS1Tech has great info on the plus and minuses of both the LT1 and LS1 versions of the T56.
Looked up your flywheel you bought....very cool. They modified the old version steel units to make up for the thickness of the flywheel.
Good luck pal......told my wife the inspiration coming out of your threads.....she likes hearing that.....tired of project cars in the yard....
Thanks for all the detail! I specifically chose to go with the full F body setup (LT1) for simplicity as I did not want to get involved with changing the bell housing and input shaft as I already have both. This flywheel will supposedly work with it, at least according to the folks at Ram. In theory, I should have everything that I need to get it installed at this point which I hope will be soon. I should be able to make a partial rolling chassis soon in which to put my engine and transmission. I am anxious to fire it up to make sure that I built it properly :-p
Back in the garage I managed to assemble the upper control arms with the modified cross shaft and also made the necessary modifications to the second lower control arm; moving the steering stop and sway bar mount). Finally I was able to strip the paint off of the first lower and then get it powder coated. Sadly I can only fit one of them in my oven at a time so the second one will have to wait til tomorrow.
Man, you are a machine.
Not to go off subject but saw your comment about oven size.
Ever consider constructing a larger unit by cannibalizing a couple of wall ovens and making an insulated box to enclose them?
When I started getting the powder coating stuff together I searched and found a few guys who did that.
Nothing huge like frame size but definitely big enough to all the other parts off our cars that would be great coated.......trailing arms, crossmember supports, wheels, bumpers, etc.
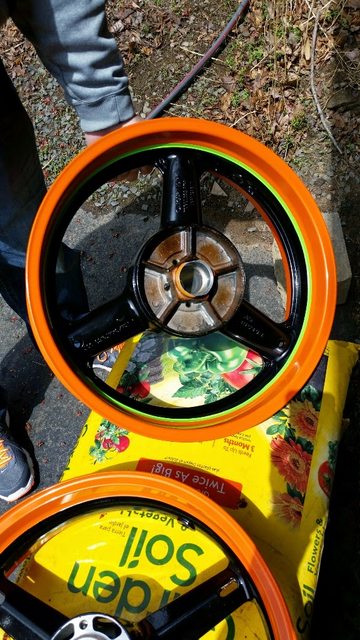
I have a set of the turbine wheels that I got from my friend David Howard. He had another set that he had sent out for coating using the black between the chrome "spokes".....looks awesome. Definitely will do that same thing.
The "bigger oven" is on my "to do" list. Right next to your spray booth.
Thanks guy for the continued pics, details and inspiration.
My Dart SHP block and forged 421 crank arrived this week.....yeehaw!
Last edited by bmans vette; 05-15-2019 at 12:23 AM.
Man, you are a machine.
Not to go off subject but saw your comment about oven size.
Ever consider constructing a larger unit by cannibalizing a couple of wall ovens and making an insulated box to enclose them?
When I started getting the powder coating stuff together I searched and found a few guys who did that.
Nothing huge like frame size but definitely big enough to all the other parts off our cars that would be great coated.......trailing arms, crossmember supports, wheels, bumpers, etc.
I have a set of the turbine wheels that I got from my friend David Howard. He had another set that he had sent out for coating using the black between the chrome "spokes".....looks awesome. Definitely will do that same thing.
The "bigger oven" is on my "to do" list. Right next to your spray booth.
Thanks guy for the continued pics, details and inspiration.
My Dart SHP block and forged 421 crank arrived this week.....yeehaw!
Heya! Thanks for the compliments but if I am a machine I am a very broken one. Keep in mind that I literally have nothing else going on. How much could you accomplish if you had 20 hours a day to devote to working on your c3?
Anyway yes, I have thought many times about building a larger oven for coating..about the size of a refrigerator I would think. Big enough to do a motorcycle frame but incidentally, I can do up to 18" rims in my current oven which is probably why I haven't upgraded yet as I have done quite a few sets of motorcycle wheels.
Anyway, even though we had the best weather today I was not able to get out to the garage. My wrists needed a rest so I am afraid I will try to get back to it tomorrow.
Size of a refrigerator?......that's a great idea.
Cannibalize one of those old ones without the fancy stuff in it.
Use the shell and insulation.
Get rid of all the plastic or anything else that will melt.
Put oven heating elements in bottom, top and sides/or back
Line inside with cannibalized metal from ovens that were used.
Maybe use one of the or both of the oven front doors with glass to monitor progress.
Reuse metal wire shelves.
Small circulating fan to eliminate hot spots.
Vent out the top to outside air.
Wire it up with existing thermostat and probe.
Mount external circuit breaker and whip to go to existing 220v wall plug.
Lots of room for modification but very little cost if you have 2 old stoves and a junk refrigerator.
Hmmmmmmmmm.......
There are many threads around about people who have done similar but to me, it is way too much effort. I would rather build one from scratch which isn't super difficult. Most of the expense of building an oven is in the heating elements, fans, and PID controller. You would need those either way. Some metal studs, rockwool insulation, and galvanized sheet metal and you have the basis for an oven. Figure somewhere between $1k-$1.5k to complete one. It just hasn't been a priority.
Originally Posted by OldCarBum
When you powder coat your wheels, does it effect the balance?
No...or I should say not if it is done properly. Powder goes on pretty evenly simply due to the nature of how the electrical charge pulls in powder. Even if you were a complete hack, powder is so light I cannot see glopping powder on in one area creating any significant amount of weight there. You would have to do something really, REALLY wrong and even then I doubt it would make any difference.
There are many threads around about people who have done similar but to me, it is way too much effort. I would rather build one from scratch which isn't super difficult. Most of the expense of building an oven is in the heating elements, fans, and PID controller. You would need those either way. Some metal studs, rockwool insulation, and galvanized sheet metal and you have the basis for an oven. Figure somewhere between $1k-$1.5k to complete one. It just hasn't been a priority.
No...or I should say not if it is done properly. Powder goes on pretty evenly simply due to the nature of how the electrical charge pulls in powder. Even if you were a complete hack, powder is so light I cannot see glopping powder on in one area creating any significant amount of weight there. You would have to do something really, REALLY wrong and even then I doubt it would make any difference.
Thanks!
Any issues mounting the tires and messing up the finish?
Thanks!
Any issues mounting the tires and messing up the finish?
As long as your coating was done properly, no. It is far more durable than paint and does not scratch as easily as anodizing. Prep and having the correct curing cycle are key to getting a uniform, durable finish.
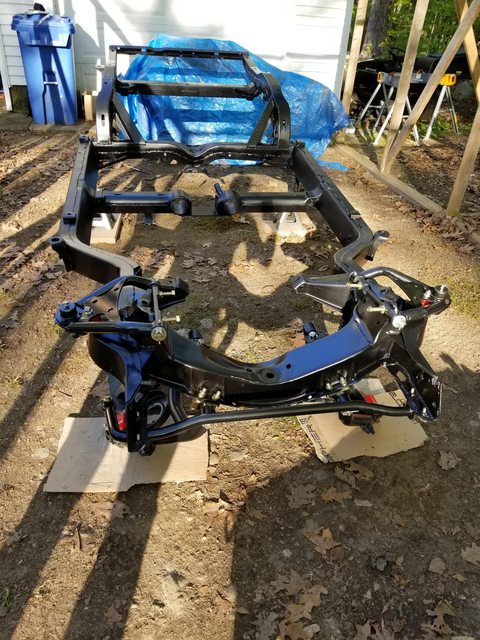
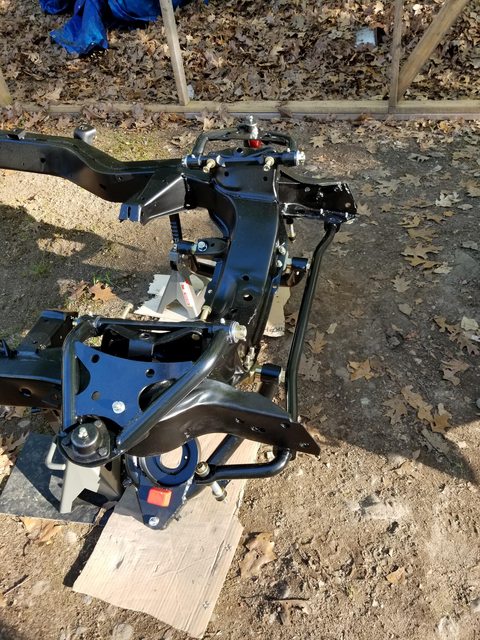
Well, yesterday I was busy. I managed to finish up the mods to all of the control arms and get them all powder coated and installed (more or less). I was very happy to see that the relocated sway bar mounts lined up perfectly.
I am waiting on a spring compressor to show up today which will hopefully allow me to button up the front suspension. I would like to have wheels on the front of this chassis by the end of day if the weather holds out. In the interim I am working on fabricating my front spreader bar...more to come on that in a bit.
A banner day here! I wanted to get a lot done today so I preemptively took some meds to combat the pain and got to work.
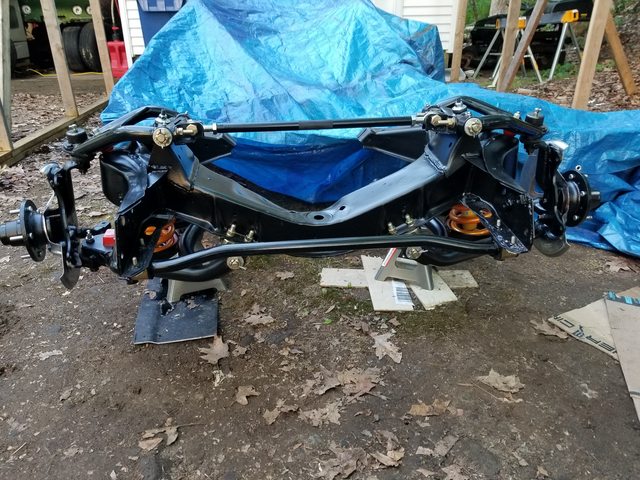
So, to keep things short, today I made my own spreader bar and brackets (thread about that is here: https://www.corvetteforum.com/forums...post1599421352) then installed it as well as the steering knuckles, hubs, Bilstein HD shocks, and springs. Basically I installed the entire front suspension today. I was hoping that I was going to be able to get the rotors, calipers, and wheels in place today but it was not to be.
Thankfully I had the help of one of my sons to do a lot of the heavy work. As pitiful as it is, I cannot muster the grip strength to lift up a steering knuckle and couldn't get anywhere near the 125 lb. ft. torque specs for the lower ball joint. Anyway, he was enjoying helping out and we got to do some step-father/son bonding which was awesome.

 05-10-2019, 10:14 PM