When you click on links to various merchants on this site and make a purchase, this can result in this site earning a commission. Affiliate programs and affiliations include, but are not limited to, the eBay Partner Network.
One year and a month.... from my first post to the first time I actually drove the 71 in traffic. I can't say the car was 100% road legal.... but it was mechanically all there. The first actual test drive revealed 2 things. 1st, the brakes started to drag the further I drove it. Upon returning, I loosened both brake lines at the master cylinder, relieved the pressure, and the brakes released. I ended up trimming the pushrod between the hydroboost and master cylinder about 3/16 of an inch and haven't had a problem since. The 2nd issue was the trans not shifting into and holding 3rd gear. I don't know how I missed it, but the vacuum hose from the modulator on the trans to the intake was missing. Installed new hose and problem solved...trans works great. Since those first couple of test drives, I have prepped and fitted the FIA headlight conversion kit. I also began fitting the L88 hood, and the door panels, which have proven to be a pain in the a**. I have no idea what decade they were purchased and they are bowed/warped so badly I can't get them to fit the door. They look new (never installed), and I really don't want to buy new panels. Hopefully I will figure it out. I also converted the amp gauge over to a voltage gauge. It has the same color and style of print and looks factory. Just personal preference. While I was converting the voltage gauge, I tried to figure out why the oil pressure gauge didn't work. Turns out the mechanism was stuck due to corrosion. I took apart the gauge, cleaned and lubricated the moving parts, put it all back together and after putting the dash back together, it works great. Oh, I almost forgot. One of the other issues I had was the temp gauge not reading correctly. I followed someone else's advice and purchased a "correct" sender for the gauge from LECTRIC LIMITED. Installed the sender along with a fan temp switch purchased on Amazon set to turn the fan on at 200* and turn off at 185* (180* thermostat). During the last drive, everything cooling system related worked perfectly. The Taurus fan wired on high only for now turned on with the gauge at about 200* and turned off with the gauge indicating about 180*. I am happy that I can walk out to the car, pump the gas once and it first at the turn of the key. After a few seconds the electric choke comes off of fast idle and the engine settles into a nice idle. I feel comfortable driving My Corvette and only expect things to get better as I continue the never ending process of "finishing" the build.
Love, love, love driving my Corvette. Even in it's rough, unfinished state, it has exceeded every thing I wanted it to be. Just like my Vmax, it puts a smile on my face every time I turn the key. Since my last post, I have had to address a few issues. The most important of those being the front shocks. When I ordered the Ridetech kit, I bought the stage 2 front and rear suspension with single adjustable shocks and front sway bar. Due to a mix up, I was sent the front shocks for a C2... which are slightly shorter and the spring is 2 inches shorter. Because of this, I could not raise the front of the car, even with the spring preload almost topped out. Talked to Ridetech and they took care of the issue, sent me a shipping label, I returned the the wrong shocks and they sent the correct shocks with the correct 10 inch springs and after installing them and setting the ride height I am happy. The ride is much better now. I finally got around to replacing the brake line that was seaping and got the brakes rebled. I have been working on tuning the carb and even though it is still bad, I have dramatically improved the gas mileage and drivability. So far, the car does what it should. I have been in traffic in 90* weather and the temp gauge never goes above 200. The Taurus fan and aluminum radiator keep the big block nice and cool. Fan comes on at 200 and shuts off at 185. While driving the temp gauge sets right on the the thermostat temp. (180). Oil pressure is stable and newly installed voltage gauge never comes off of 13.5 ish volts. The hydroboost and Borgenson steering box both work perfectly.
Next on the to-do list is converting the wiper door to electric power, getting the wipers to actually work, finish the headlight harness, and figure out why I have no dash lights (fuses are good).
I also want to say, without the wealth of info available on this forum, this project would still be in pieces in my garage. The search feature has been a huge help and I want to thank those that contribute to the data base.
Well, almost a year since my last update. I was having a great time enjoying my Corvette, right up till the transmission gave up near the end of last year. In between then and now, I have been working on a couple of projects and buying all the parts to rebuild my transmission. I was really wanting to do the TKO600 install but due to the world going a bit crazy, that project is just going to have to wait. So, what happens when you bolt a BB with over 500 hp to a transmission with unknown mileage and condition that also sat for 25 years? It wasn't pretty. I haven't seen frictions get so hot that they warp into a cone shape before... lol.
Before I was able to take the trans apart, I needed a way to attach it to my engine hoist. So, after some internet searching and some measuring, I purchased some 2 inch square tubing 1/8th inch thick and fired up the grinder, mig welder, and saws all. The fixture isn't perfect but it is functional. I have cleaned the case and now have all the needed parts to build the trans. I also am adding a couple of upgrades including a 34 element sprag and direct drum from a 4l80E, BorgWarner low roller clutch, Torington roller bearing upgrade for the rear thrust, Alto red frictions and Kolene coated steels, and a TransGo 1-2 shift kit. That should result in a pretty stout TH400 once I am done.
Just a quick update on the trans. I finished the assembly and installed the Transgo shift reprograming kit. Before I installed the trans, I replaced the positive battery cable to complete the starting/charging system upgrades. Surprisingly, there were no issues during the install except for trying to figure out how to get the trans BACK on to the trans jack. Once everything was bolted in, I moved on to the shifter. I have always liked having a solid, gated or ratchet type shifter in a performance car that had a performance automatic transmission. Most of us know, there isn't any kind of bolt in aftermarket shifter. So, after looking at what was available, I determined that my favorite, the B&M Mega shifter wasn't going to work with my plans I chose the TCI FastGate shifter. It is a simple design, feels good and allows solid single gear shifts without worrying about hitting neutral or reverse at WOT. My goal was to modify the shifter so that it bolted in using the stock mounting location/hardware, required little to no modification of the car, or parts of the car, and did not interfere with the factory AC controls. I was able to meet all those requirements with the exception of the console plate. I did end up cutting out the inner part of the stock shifter opening that supported the sliding cover that the shifter arm stuck through. I was able to leave the finished "lip" around the opening and will cover the opening with a leather boot similar to what a 4speed has. To simplify the description of what I did, I will say I had to cut away a significant amount of the shifter main frame to allow the shifter to sit down into the "well". Then I welded on mounting tabs and the cable bracket. I shortened the shifter arm and lock out "t" handle more than an inch and added a bracket to mount the factory neutral safety switch instead of using the small micro switches supplied with the shifter. If anyone has specific questions about the mods to the shifter I will be happy to answer them.
Last edited by txfatboy1; Jun 30, 2020 at 12:26 AM.
Reason: adding text and photos
Thanks. It was a lot of work but once the boot is on, I think it will look even better. I now know the transmission was slipping from the first day I started driving it.... either that or someone added a 100 hp to my engine when I wasn't looking. The shifter feels solid and transmission works great, but, I may have to go back in and change a couple of the springs to firm up the shifts a little. I chose a conservative combination and it ended up just a little too soft for my liking. Still, It's WAY better.
Hello all. Even though I frequent the forum, it has been a while (again) since my last update. I have performed a few repairs/upgrades over the past several months. I will brake these down into separate installments. First up was the finishing of the shifter boot, refreshing the shifter plate and ac controls. I also repaired the center gauge bezel and refreshed it as well....and, just to make things interesting, I finished converting the wiper door to an electric motor using info sourced that was developed by a member of this forum. I purchased a universal shifter boot on Amazon then made a simple flange to hold the boot in place. I used some flashing material from a home improvement store. It is thin and strong. After searching the web, I found several suggestions for using JB Weld to bond the repair patch to the bezel. After setting overnight, the repair was solid. The repair added NO additional width to the bezel due to the sides having a slight recess. How many would hold their bezel like this and shake the crap out of it? Pretty confident I will never have to worry about this breaking again. Freshly painted, The repair is practically invisible. I decided to change up the masking for that personal touch. The before After a little paint, polishing the lens,
A few more pics to round out the last update. Wiper door electric motor conversion in progress. The information provided was invaluable. Bracket and linkage fabricated, working on the wiring. The main wiring diagram provided was spot on. I used the exact components the author used except I had to use the opposite side headlight motor because I have the factory ac housing. All done and the wiper door works perfectly. Yes, many of us have been here.... Oh the horror.... lol Falling into the category of "since it's already out".... I redyed the center console parts. Still waiting on delivery of a few more cans to do all of the dash.
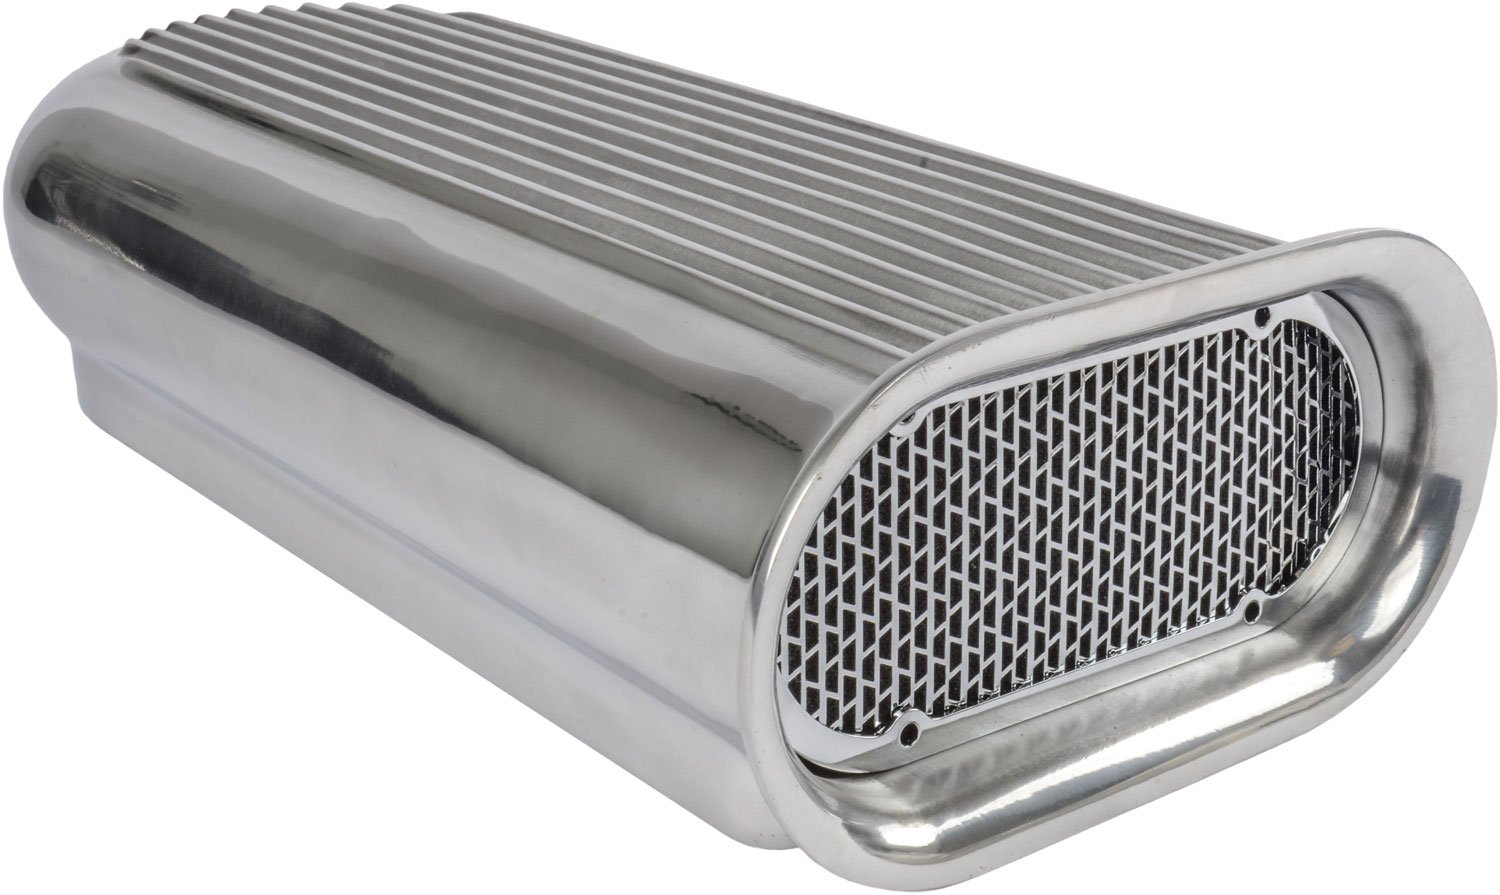
From day one, I knew I wasn't going to be in the "numbers matching, all original" group. Not that I don't appreciate that, it just wasn't possible with this car.... and not what I wanted anyway. So, after finding the right deal, I purchased a Weiand tunnel ram and 2 Holley 600cfm Vac.secondary carbs. The deal came with a gasser type scoop which honestly, I was on the fence about using, but it's starting to grow on me. I originally purchased the L88 hood knowing eventually I would be cutting a large hole in it. The intake required a lot of work to get it ready to bolt on. I gasket matched it to the Felpro large oval port gasket I used on the cylinder heads. Next, I drilled and tapped the rear coolant ports to provide a way for steam pockets to bleed off, very similar to what is done on LS engines. Finishing off with drilling and tapping the front passenger side coolant boss for heater core supply. Once all was done I cleaned it and painted with a high temp cast aluminum paint and satin clear. Roughing in the ports. Tapping the rear coolant flange for 1/4 npt 90* nipple. I insert a set screw below the nipple so I can drill a 1/16 hole. Just want there to be a path for steam pockets to escape if they form. Too big of a hole and you start to bypass the thermostat. All done and ready to bolt on.
Last edited by txfatboy1; Apr 22, 2021 at 09:52 PM.
Reason: altered text
After Getting the tunnel ram cleaned up and the old intake removed I pulled the Howards direct oiling lifters to inspect for any wear. I am pleased to say that they and the cam showed no signs of wear and looked as new as they were when I installed them. I then removed the steel Comp Cams roller tip rockers and installed a set of Scorpion aluminum 1.8 full roller rockers. I had to make one minor adjustment to the guide plates. The intake set down nice and even. Now on to the carbs. I installed metering block conversion kits to both carbs along with quick change vacuum secondary spring covers. This also allowed me to add a vacuum nipple on each cover so they can be connected together and open at the same rate. A set of Ansen USA made valve covers topped off the valve train and the fins on top match the scoop.
With the addition of the tunnel ram and 2 4bbls, I wanted to be able to monitor the air/fuel ratio real time so I can adjust/modify the carbs for best performance and fuel economy. I purchased an AEM kit. I had also purchased some SS angled O2 sensor bungs. The location was determined by the factory hole in the passenger side of the frame. I used a grinder bit and enlarged the hole into an oval shape. This allowed me to install the O2 sensor at a downward angle and stick inside the enlarged opening. I had to cut a hole in the side skirt, but they are far from perfect and had already been modified to work with the side pipes. The finished install is barley noticeable. The gauge itself will be installed where the clock is in the center console.
Sooooo, finally get everything assembled. Get the hole cut in the hood, mount the air filters and the scoop. Start it up for a couple of seconds to check for fuel leaks. Satisfied, I start it again make some minor adjustments so that it will idle and set the base timing. Start it again and let it idle and warm up to operating temp, make some minor adjustments to improve idle in gear and a final check for leaks. Time for a test drive.... that lasted all of ten minutes. Drove straight to the gas station, filled the tank, sat down, turned the key and heard a loud pop followed by a loud grinding noise. Tried turning the engine and all it did was turn until it hit the bad spot and start grinding again. It was the first time since I owned it that I had to have it towed home. Turns out the starter gear and the busing in the nose of the starter had worn over time and finally got bad enough that it broke off a couple of teeth and that was it. Thankfully, it was just over a mile from the house and it wasn't raining. Replacement flywheel and new high torque starter are installed. A couple of hours and It will be driveable again.
It�s funny that after all these years the starter gears finally went out on your first trip out of the garage.
At least you were close to home.
Well, it wasn't exactly the FIRST trip out of the garage, just the first drive with the tunnel ram. I've been driving the car for a couple of years. The starter failure was my fault for buying a cheap no-name gear reduction starter. Won't happen again.


 The shifter feels solid and transmission works great, but, I may have to go back in and change a couple of the springs to firm up the shifts a little. I chose a conservative combination and it ended up just a little too soft for my liking. Still, It's WAY better.