


Vette...meet Merlin
Melting Slicks


Joined: May 2003
Posts: 2,387
Likes: 2
From: Meriden CT
Thread Starter
Melting Slicks
Joined: Jan 2006
Posts: 3,028
Likes: 2
From: North NJ
Apparently didn't work.
I don't break promises regardless.
Thanks for adding value to the thread.

Last edited by 68 NJConv 454; Aug 28, 2007 at 10:29 AM.
Le Mans Master


Joined: Mar 2001
Posts: 6,240
Likes: 1,013
From: Watkinsville, GA and Glen Cove, NY
I wired the oil pressure switch up on the firewall near the spot the oil pressure line goes through. I put a tee in the line from the block and wired the switch from there.
Thread Starter
Melting Slicks
Joined: Jan 2006
Posts: 3,028
Likes: 2
From: North NJ
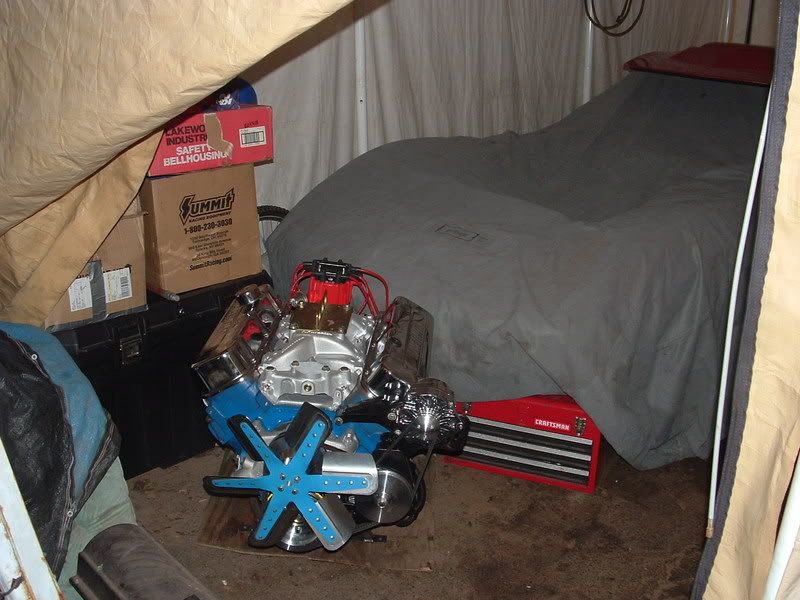
Engine is home in front of the vette.
Last night I took the accessories off so I could tape off the block and get it ready for paint. I also picked up a pair of VERY cheap alluminum valve covers. Exactly what I wanted but couldn't afford since the cheapest I've seen them is close to $300 from summit. Picked these up for a third of that. Tried to bolt them up and the bolt holes seem to be off a hair. I can bend them out a hair and it should fit fine...BUT these covers don't clear my alternator. Again I could probably do some bending/denting with a hammer but I'll leave that for the winter time.
They do look
 though.
 Paint time tonight!!!!

Gonna throw some laquer thinner and paint prep down then hit it with the POR-15 engine enamel Chevy Orange.

Thread Starter
Melting Slicks
Joined: Jan 2006
Posts: 3,028
Likes: 2
From: North NJ
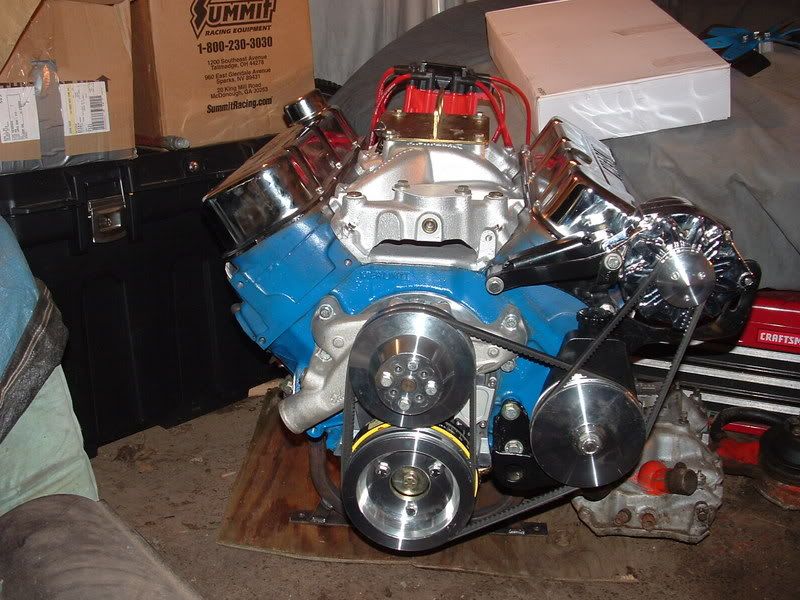
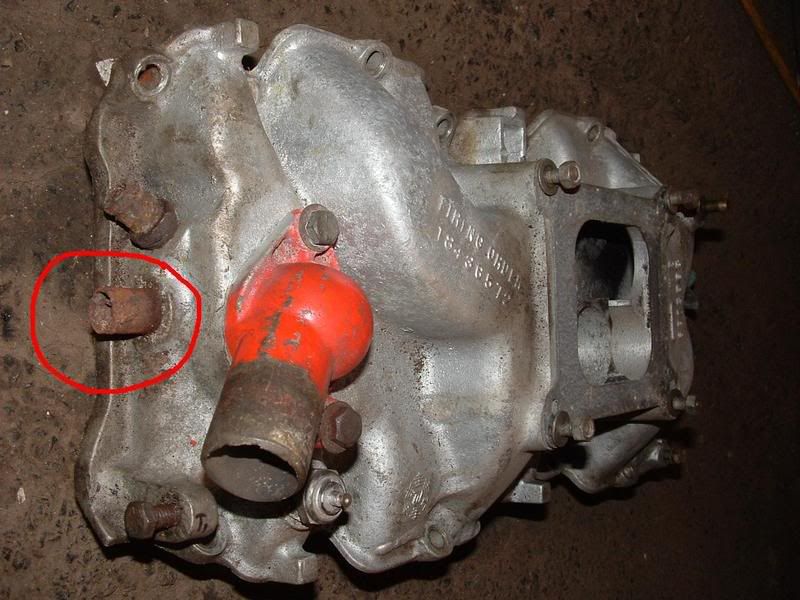
Question: Do you think it is necessary to install that 90 degree hose that runs from the top of the water pump to the intake manifold? From what I understand it helps release airbubbles in the water pump. it was there on my 454 that came with the car. The intake with the orange water neck is a vette big block intake with the fitting for the 90 degree hose circled in red.
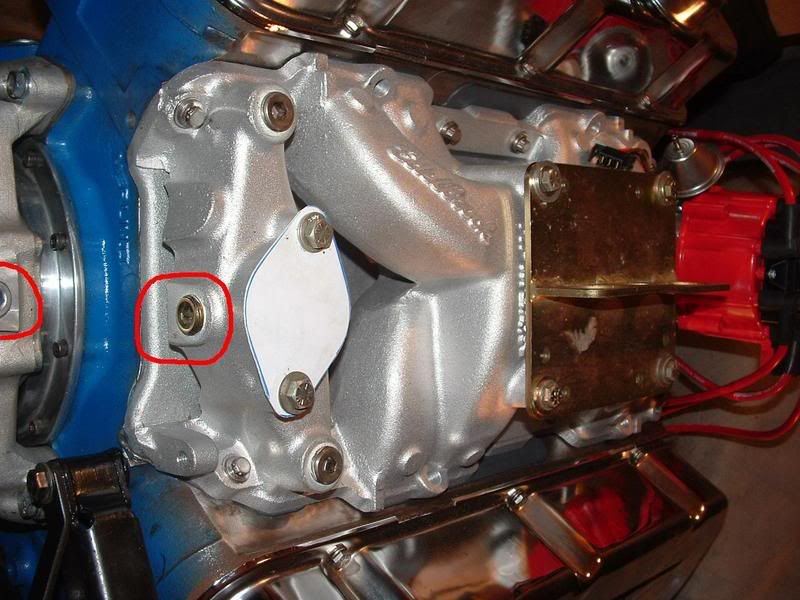
The other pic is my new RPM air gap which has the port but is plugged. The Edelbrock water pump also has the port but is plugged. I have a brand new 90 degree hose. Where can I get the nipples/fittings for those ports to use with the 90 degree hose?
Thanks
Will these work? http://store.summitracing.com/partde...5&autoview=sku
Thats a lot of $$ when all I need are 2 fittings. Not running a heater hose.
Last edited by 68 NJConv 454; Aug 29, 2007 at 05:54 PM.
Thread Starter
Melting Slicks
Joined: Jan 2006
Posts: 3,028
Likes: 2
From: North NJ
Found'em. http://store.summitracing.com/partde...0&autoview=sku
Nice stainless ones at that.
I'd rather stay away from the chrome plated steel fittings when water will be passing thru them.
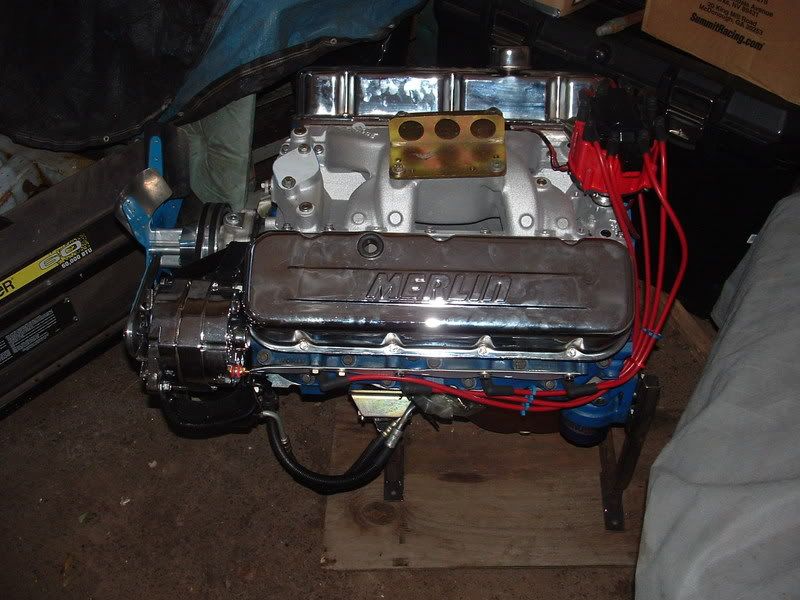
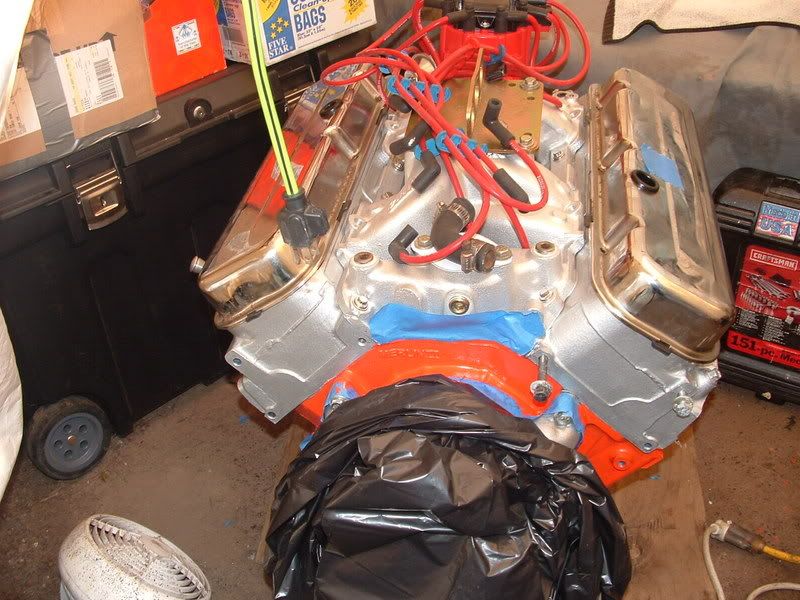
Got two coats of paint on the heads, letting them dry then might try to get a coat on the block tonight if I can keep my eyes open or I'll have to squeeze two coats in tomorrow so I can get this beast in the car over the holiday weekend.
Nice stainless ones at that.
I'd rather stay away from the chrome plated steel fittings when water will be passing thru them.
Got two coats of paint on the heads, letting them dry then might try to get a coat on the block tonight if I can keep my eyes open or I'll have to squeeze two coats in tomorrow so I can get this beast in the car over the holiday weekend.
Thread Starter
Melting Slicks
Joined: Jan 2006
Posts: 3,028
Likes: 2
From: North NJ
Running on 3 hours of sleep.
Got two coats of POR-15 Engine enamel(Aluminum color) on the heads. They look alright.
Got one coat of POR-15 Engine enamel (Chevy Orange) on the block.
Blue color still shows thru.
I'm not sure if these cans I bought at Carlisle were old or what but the paint seemed very watery and thin. Paint ran like a motha. Had to go back over the heads once the first flyby started to dry.
Anyone else use the same paint? was it thin when applied? how many coats did you have to do?
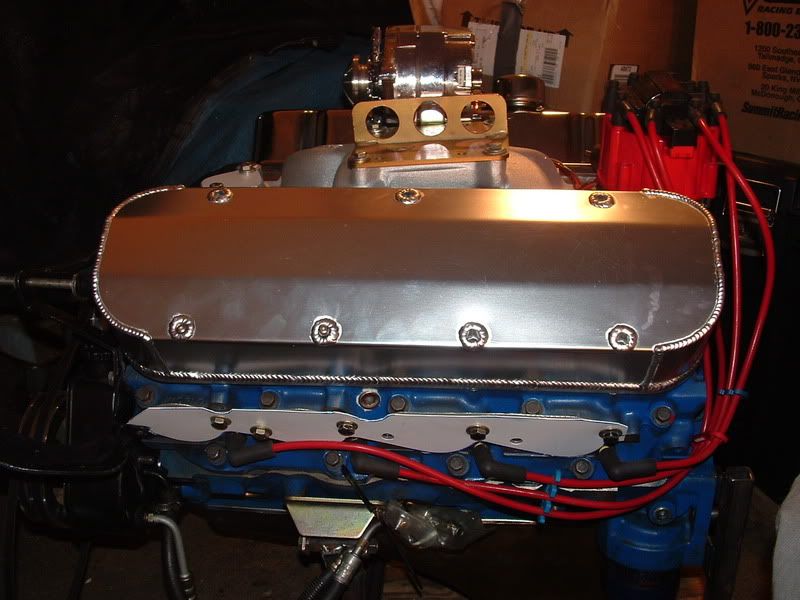
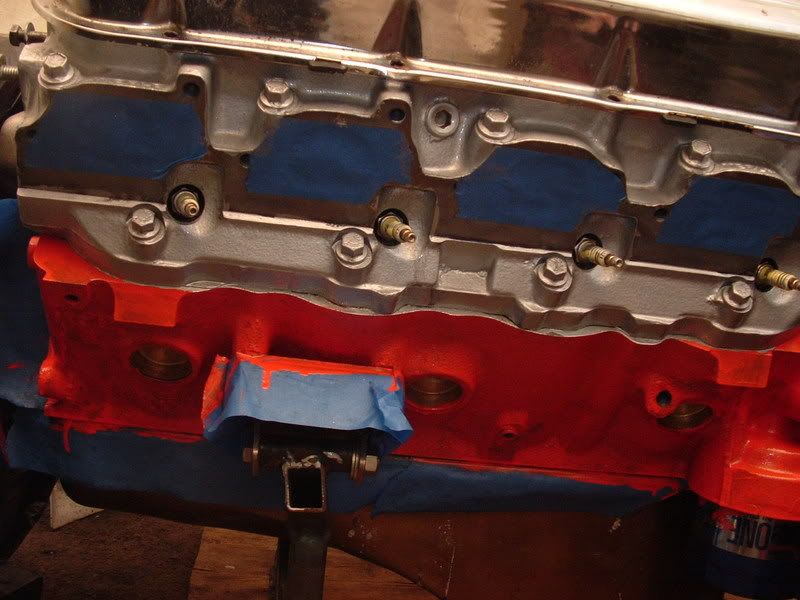
Here are some pics. Hard to see the blue in the pics b/c of the cameras flash. I promise you the orange looks dirtyish and the blue still comes through.
I used Laquer thinner and removed as much of the blue paint as I could then used metal ready, then a paint prep solution, then painted.

Got two coats of POR-15 Engine enamel(Aluminum color) on the heads. They look alright.
Got one coat of POR-15 Engine enamel (Chevy Orange) on the block.
Blue color still shows thru.
I'm not sure if these cans I bought at Carlisle were old or what but the paint seemed very watery and thin. Paint ran like a motha. Had to go back over the heads once the first flyby started to dry.
Anyone else use the same paint? was it thin when applied? how many coats did you have to do?
Here are some pics. Hard to see the blue in the pics b/c of the cameras flash. I promise you the orange looks dirtyish and the blue still comes through.
I used Laquer thinner and removed as much of the blue paint as I could then used metal ready, then a paint prep solution, then painted.
Corvette Stories
The Best of Corvette for Corvette Enthusiasts

10 Reasons the C6 Z06 is Still A Performance Benchmark After 20 Years
Joe Kucinski
How Much Horsepower Every Corvette Engine "LOST" in 1972
Joe Kucinski
Top 10 DOs and DON'Ts for Protecting Your Convertible Top!
Michael S. Palmer
Top 10 Most Explosive Corvettes Ever Made: Power-to-Weight Ratio Ranked!
Joe Kucinski
150 hp to 1,250 hp: Every Corvette Generation Compared by the Specs That Matter
Joe Kucinski
8 Coolest Corvette Pace Cars (and Replicas) of All Time
Verdad Gallardo
Top 10 Corvette Engines RANKED by Peak Torque (70+ Years of Muscle!)
Joe Kucinski
Corvette ZR1X Will Be Pacing the Indy 500, And Could Probably Race, Too!
Verdad Gallardo
Top 10 Corvettes Coming to Mecum Indy 2026!
Brett FooteRace Director


Joined: Jan 2000
Posts: 13,015
Likes: 2,260
From: Corsicana, Tx
2020 C2 of the Year - Modified Winner
2020 Corvette of the Year (performance mods)
C2 of Year Winner (performance mods) 2019
2017 C2 of Year Finalist
My experience with POR-15 is that it is a very thick paint with lots of solids in it. Goes on thick and takes forever to dry. Once it does...it's there forever though! Those splotchy spots look like oil/grease/moisture still getting to it.....it does seem to be picky about that. I used a propane torch on the whole block to cook the moisture etc off right before painting.
I used it on my 540 block when it was first built. A few years later I pulled it out to do some upgrades and when I happened to be looking at the pics I had taken just before it was installed, I was amazed to see how much it had faded. It was very light as compared to the bright orange it was when I installed it.
But it stuck very well. So now it's basically a primer coat and I just use Duplicolor or Krylon spray bombs and it looks great.
JIM
Burning Brakes

Joined: Sep 2006
Posts: 967
Likes: 0
I can't imagine the secret either. I put 18 inch with a 4 inch back space on mine. I could have also went with 3 1/2 back space because of the larger diameter. I just finished lowering the front end a little today and have not taken a photo yet. I am not a fan of tires sticking out of the body. I had 275's and went back to 235's
Could the backspacing be a secret because he is selling someone else's wheels as his own and if the backspacing is listed it will be obvious they are not his rims?
Thread Starter
Melting Slicks
Joined: Jan 2006
Posts: 3,028
Likes: 2
From: North NJ
 Not my cup of tea but all are possibilities. Now stop watching CSI. moving on.
Last edited by 68 NJConv 454; Aug 30, 2007 at 02:04 PM.
Thread Starter
Melting Slicks
Joined: Jan 2006
Posts: 3,028
Likes: 2
From: North NJ
My experience with POR-15 is that it is a very thick paint with lots of solids in it. Goes on thick and takes forever to dry. Once it does...it's there forever though! Those splotchy spots look like oil/grease/moisture still getting to it.....it does seem to be picky about that. I used a propane torch on the whole block to cook the moisture etc off right before painting.
I used it on my 540 block when it was first built. A few years later I pulled it out to do some upgrades and when I happened to be looking at the pics I had taken just before it was installed, I was amazed to see how much it had faded. It was very light as compared to the bright orange it was when I installed it.
But it stuck very well. So now it's basically a primer coat and I just use Duplicolor or Krylon spray bombs and it looks great.
JIM
I used it on my 540 block when it was first built. A few years later I pulled it out to do some upgrades and when I happened to be looking at the pics I had taken just before it was installed, I was amazed to see how much it had faded. It was very light as compared to the bright orange it was when I installed it.
But it stuck very well. So now it's basically a primer coat and I just use Duplicolor or Krylon spray bombs and it looks great.
JIM

I don't plan on beating on my car too much but I hope the paint holds up to the heat. The orange always looks great when new but sh*ty when dirty. Hopfully I'm able to keep'er pretty.
Race Director
Joined: Jan 2000
Posts: 13,015
Likes: 2,260
From: Corsicana, Tx
2020 C2 of the Year - Modified Winner
2020 Corvette of the Year (performance mods)
C2 of Year Winner (performance mods) 2019
2017 C2 of Year Finalist
ANYTHING you do to cover that ugly blue will be a huge improvement! I never figured out why they used that color unless they got a heck of a deal on it!
JIM
JIM
Thread Starter
Melting Slicks
Joined: Jan 2006
Posts: 3,028
Likes: 2
From: North NJ
Thanks guys.
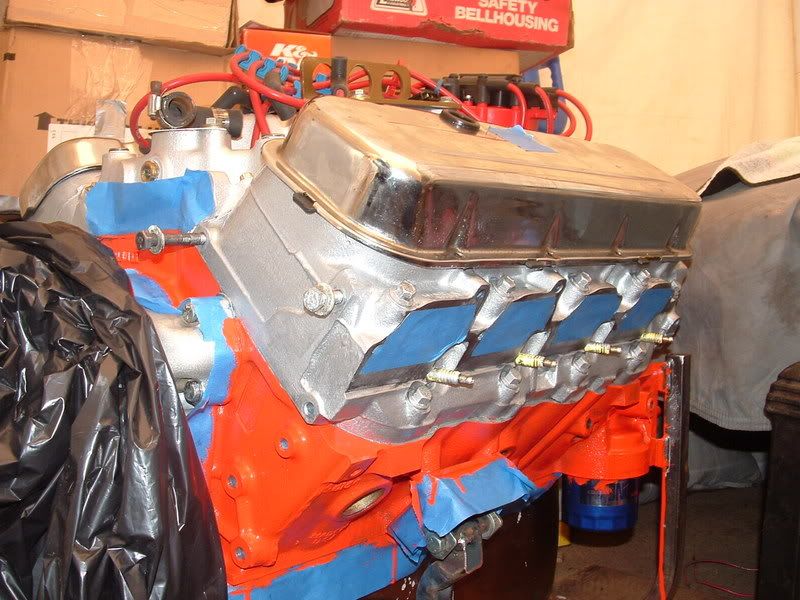
Applied the final coats last night, looks much better.
I agree Jim, no idea why the blue. Maybe cheaper b/c noone else wants to buy it.
Brown truck is scheduled to dop off some pressents today including a Power Master starter, centerforce dual friction clutch, roller pilot bearing, oil pressure cutoff switch, thermostats & neck, Ultra 40 plug wires and a few other small items. Hoping to throw the clutch, lakewood bellhousing w/ block saver shield and starter on this weekend and in she goes. Then I can nit-pick and install the small stuff.
Still have to wire the Mark VIII fan with dc controller.
My only parts left to purchase are radiator hoses, clutch boss, power steering hoses for hydro/jeep box and a power steering pump if necessary, i might try to get away with the stock pump due to budget restrictions. If it burns out it burns out and I have to upgrade anyway.
Oh and I also need spark plugs.....what plugs are you guys running with the merlin block and hooker sidepipes??? not sure if it is just with the hooker pipes but the previous owner said he had to use Accel Shorty Header plugs p/n 0275s, he mentioned the 0276s won't fit b/c they're too long. Anyone find the 0275s or can recommend other plugs that they know fit my setup?? I'm running Moroso Ultra 40 race plug wires.
Also, anyone running an HEI distributor on their big block? Engine came with an HEI but the previous owner used an MSD tach drive unit to retain his stock tach. I have converted mine to HEI but the distributor looks huge. I'm unsure if it will fit. Just curious if others were able to get them to fit in their vette. I'm not sure what type of distributor it is, it has a billet shaft and base.
Here's a tuff pic.
Race Director
Joined: Jan 2000
Posts: 13,015
Likes: 2,260
From: Corsicana, Tx
2020 C2 of the Year - Modified Winner
2020 Corvette of the Year (performance mods)
C2 of Year Winner (performance mods) 2019
2017 C2 of Year Finalist
Yep it will fit fine...tight but it works OK.
JIM
JIM
Thread Starter
Melting Slicks
Joined: Jan 2006
Posts: 3,028
Likes: 2
From: North NJ
Thanks for the encouragement and advice guys.
As of last night here's where I'm at.
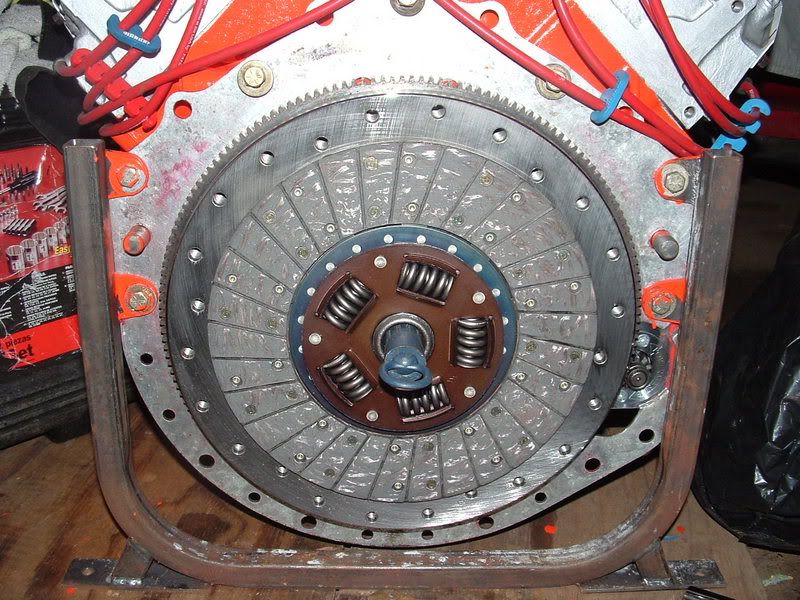
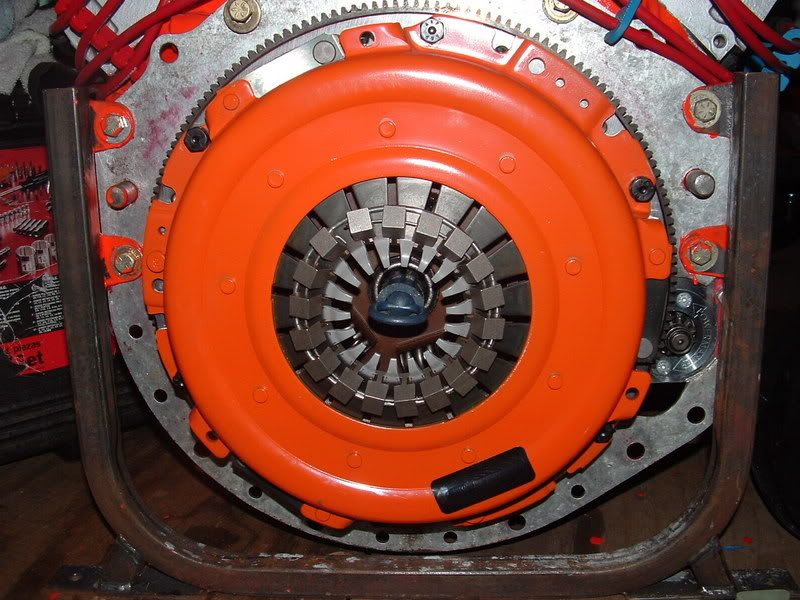
New Hays perf flywheel on, pure brass pilot bushing in, blocksaver plate on, high tq mini starter on, painting all done, centerforce dual friction 11" clutch on.
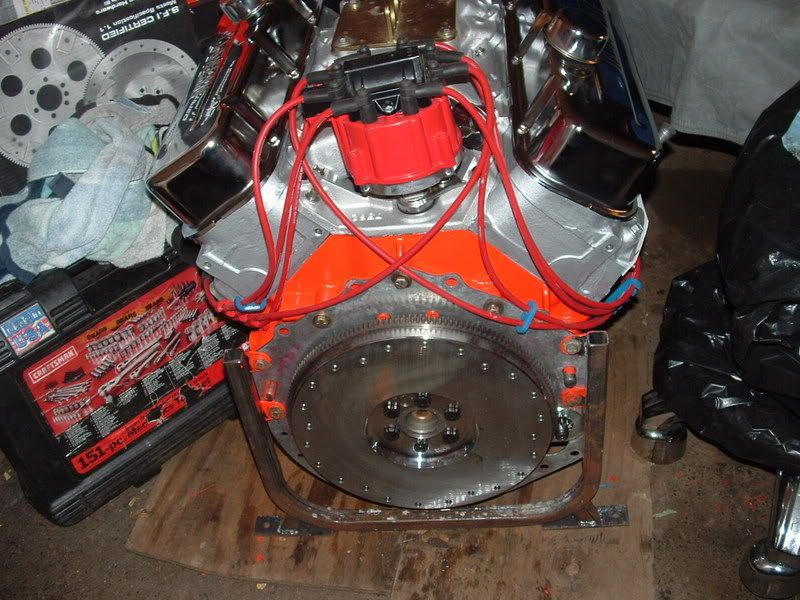
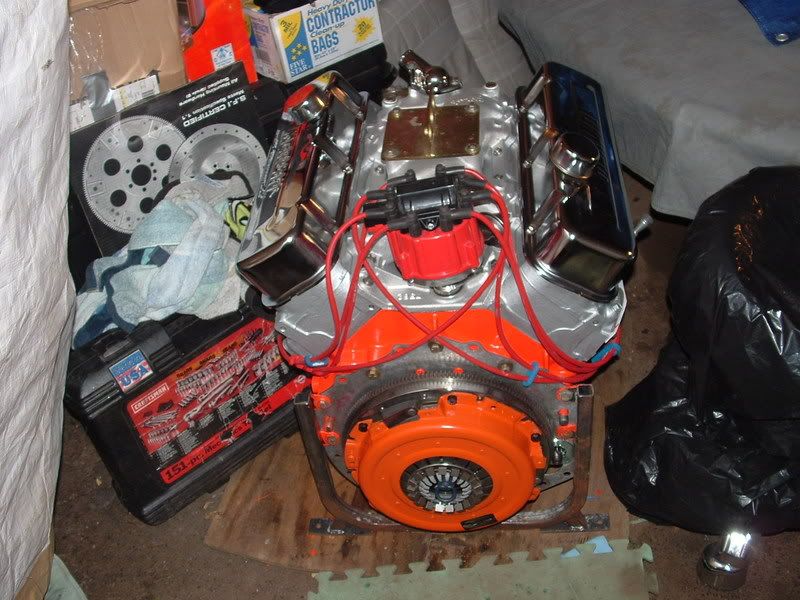
I'm digging the orange and aluminum paint.
Here's the M21 trans with hurst comp plus shifter.

As of last night here's where I'm at.
New Hays perf flywheel on, pure brass pilot bushing in, blocksaver plate on, high tq mini starter on, painting all done, centerforce dual friction 11" clutch on.
I'm digging the orange and aluminum paint.
Here's the M21 trans with hurst comp plus shifter.
