8.1 Vortec Conversion...Anybody??????

Burning Brakes

Joined: Jun 2009
Posts: 840
Likes: 4
From: Syracuse IN

When I installed one of these 8.1's in our ski boat, i use the original style exhaust manifolds, but I had to do some custom grinding on the port due to a different size than the 454. What exhaust are you planning on using? Allan

Team Owner


Joined: Oct 2004
Posts: 81,241
Likes: 3,063
From: altered state
St. Jude Donor '05
I am running the exact engine 496 HO in our Supra Ski boat. It puts the ol POS 454 to shame. yes it is a metric motor but all of the motor mounts, bell housing mounts are the same. This motor has a much better usable power than either the 454 or 502. I am glad you put in a modern engine and forget what the Vette Praisers say. you will be able to drive it and have fun, while they will be praising and wishing it would run good. Allan

Check out Pace Performance, I believe they have one thats converted to carb as a drop in unit. Count on seeing some build on these with outrageous #s soon.
Id love to have a LSx big block.

Thread Starter
Burning Brakes
Joined: Jul 2001
Posts: 1,038
Likes: 3
From: Clinton IL
THat is what I will have to do - this is a normal tall deck height - 10.4"

1st Gear

Joined: Sep 2009
Posts: 1
Likes: 0
So, I might have totally missed it, and I appologize if I did....but....What are you using for the computer? Are you using the stock computer from the truck or aftermarket?? I was given an 8.1 but no computer and a hacked up wiring harness. Just wonderin how to make the dam thing run while still getting the coils/fuel injection
Thread Starter
Burning Brakes
Joined: Jul 2001
Posts: 1,038
Likes: 3
From: Clinton IL
So, I might have totally missed it, and I appologize if I did....but....What are you using for the computer? Are you using the stock computer from the truck or aftermarket?? I was given an 8.1 but no computer and a hacked up wiring harness. Just wonderin how to make the dam thing run while still getting the coils/fuel injection
The cam and crank sensor wires are reversed from a LS - and the cam sensor is out front like an LS2. The knock sensors are low instead on in the intake. We made three simple modes (flipped the wires, lengthened the main cam sensor harness, and swapped the ends on the knock sensors)...and it was good to go. Rodney at Spare ECM (see him on Ebay) took care of providing the computer and doing the programming.
THis is the harness - and you just run the 411 computer (as your engine should be drive by wire).
http://www.painlessperformance.com/w...reet%20Machine
You can convert to drive by cable if you want by changing the throttle body (all LS throttle bodies interchange on the 8.1) and selecting the correct harness.
Thread Starter
Burning Brakes
Joined: Jul 2001
Posts: 1,038
Likes: 3
From: Clinton IL
Since the engine is now running - this weekend I decided to switch gears. Instead of putting the body back on first - I'm going to put the core support in the frame and hang the radiator and sort out the radiator hoses first. That will be better than hanging over the fenders or having to have the car up in the air on the lift all weekend.
The last two ugly spots will be getting the air intake tube to the filter to fit...and the exhaust. I expect a bit of a battle getting the headers on as they will be for a standard big block deck - so I'll be jumping on them to bend them down under the frame for sure.
Thread Starter
Burning Brakes
Joined: Jul 2001
Posts: 1,038
Likes: 3
From: Clinton IL
Long overdue update.
I have good news/bad news/good news...you know the drill.
Good news...The over the radiator cold air intake is coming out as nice as you might expect from the terrible amount of limited space. After a cool notch in the core, and some massaging of the tubes....we have a functional CIA that will feed behind the front grill.

Bad news....Got the radiator in...filled with water and test fired...turns out my ebay engine was a dud. The seller forgot to mention that it was actually a blown motor. Had a bad gasket and warped set of heads. Funny thing is, when we pulled the pan to have it shortened - there wasn't a single trace of water in the crankcase - but baby...when I got it up and going...she filled up!


So...heads off - engine checked out - picked the heads up last week. Shaved them, one new exhaust seat...and valve - and they are good to go.
Got a good look around inside. This is really an impressive piece of big block iron.
Good news - we took this opportunity to sink a HR270 Comp cam thump stick in there. That will be here next week so I can measure the pushrods...etc. Will also be running roller tip rockers to squeeze under the valve covers.
Got the Vintage A/C box in and condenser to mock up the rest and know where to plug the wire harness.
In two weeks I hope to have the exhaust and have it all up and running again.
Drive by wire throttle roughed into place.

Somebody please remind me...why do we love this hobby so?????

I have good news/bad news/good news...you know the drill.
Good news...The over the radiator cold air intake is coming out as nice as you might expect from the terrible amount of limited space. After a cool notch in the core, and some massaging of the tubes....we have a functional CIA that will feed behind the front grill.
Bad news....Got the radiator in...filled with water and test fired...turns out my ebay engine was a dud. The seller forgot to mention that it was actually a blown motor. Had a bad gasket and warped set of heads. Funny thing is, when we pulled the pan to have it shortened - there wasn't a single trace of water in the crankcase - but baby...when I got it up and going...she filled up!
So...heads off - engine checked out - picked the heads up last week. Shaved them, one new exhaust seat...and valve - and they are good to go.
Got a good look around inside. This is really an impressive piece of big block iron.
Good news - we took this opportunity to sink a HR270 Comp cam thump stick in there. That will be here next week so I can measure the pushrods...etc. Will also be running roller tip rockers to squeeze under the valve covers.
Got the Vintage A/C box in and condenser to mock up the rest and know where to plug the wire harness.
In two weeks I hope to have the exhaust and have it all up and running again.
Drive by wire throttle roughed into place.
Somebody please remind me...why do we love this hobby so?????
Corvette Stories
The Best of Corvette for Corvette Enthusiasts

How Much Horsepower Every Corvette Engine "LOST" in 1972
Joe Kucinski
Top 10 DOs and DON'Ts for Protecting Your Convertible Top!
Michael S. Palmer
Top 10 Most Explosive Corvettes Ever Made: Power-to-Weight Ratio Ranked!
Joe Kucinski
150 hp to 1,250 hp: Every Corvette Generation Compared by the Specs That Matter
Joe Kucinski
8 Coolest Corvette Pace Cars (and Replicas) of All Time
Verdad Gallardo
Top 10 Corvette Engines RANKED by Peak Torque (70+ Years of Muscle!)
Joe Kucinski
Corvette ZR1X Will Be Pacing the Indy 500, And Could Probably Race, Too!
Verdad Gallardo
Top 10 Corvettes Coming to Mecum Indy 2026!
Brett Foote
Top 10 C9 Corvette MUST-HAVES to Fix These C8 Generation Flaws!
Michael S. Palmer
Le Mans Master


Joined: Dec 2006
Posts: 5,557
Likes: 9
From: Oquirrh Mountains
St. Jude Donor '09
Long overdue update.
Bad news....Got the radiator in...filled with water and test fired...turns out my ebay engine was a dud. The seller forgot to mention that it was actually a blown motor. Had a bad gasket and warped set of heads. Funny thing is, when we pulled the pan to have it shortened - there wasn't a single trace of water in the crankcase - but baby...when I got it up and going...she filled up!
Bad news....Got the radiator in...filled with water and test fired...turns out my ebay engine was a dud. The seller forgot to mention that it was actually a blown motor. Had a bad gasket and warped set of heads. Funny thing is, when we pulled the pan to have it shortened - there wasn't a single trace of water in the crankcase - but baby...when I got it up and going...she filled up!
 Friggin people!
 I'm glad it turned out to be nothing worse than that for you.

Racer

Joined: Aug 2005
Posts: 355
Likes: 18
From: Corona Ca
Hi All,
Dunno if you have heard of these guys, but they handle a lot of 496/8.1 stuff.
http://www.raylarengine.com/index.html
Interesting project, gets the LS1 reliability with the BBC looks. Good luck on this project.
Best,
Tom
Dunno if you have heard of these guys, but they handle a lot of 496/8.1 stuff.
http://www.raylarengine.com/index.html
Interesting project, gets the LS1 reliability with the BBC looks. Good luck on this project.
Best,
Tom
Thread Starter
Burning Brakes
Joined: Jul 2001
Posts: 1,038
Likes: 3
From: Clinton IL
Progress...and goodies.

Putting the head on using the torque to yield bolts.

These are the adjustable push rods. You can't run the engine with these. They are only used to determine the measurement for the custom push rods. These are non-adjustable rockers - therefore I have to make up the adjustment in the push rod.

These are the magnum roller tips. They will give me a tad more lift, less friction...AND they will fit under the valve cover.

On the inside - I mounted the new Vintage Air Sure fit system, then sought the perfect spot to run the wire harness. This spot drops the harness right over the back of the engine, and clears the goods on the HVAC.

And...the electronics will all be safely tucked away (thanks to the 4' longer harness) in the rear storage compartment.

Spent the rest of the day running the now 2 gauge (big thick puppy) battery cables, grounds, and other time consuming stuff.
Will set the new Painless chassis wire harness in and connect it to the Watson Hot Dot - push button starter.
Waiting on -
Push rods
Headers.
Putting the head on using the torque to yield bolts.
These are the adjustable push rods. You can't run the engine with these. They are only used to determine the measurement for the custom push rods. These are non-adjustable rockers - therefore I have to make up the adjustment in the push rod.
These are the magnum roller tips. They will give me a tad more lift, less friction...AND they will fit under the valve cover.
On the inside - I mounted the new Vintage Air Sure fit system, then sought the perfect spot to run the wire harness. This spot drops the harness right over the back of the engine, and clears the goods on the HVAC.
And...the electronics will all be safely tucked away (thanks to the 4' longer harness) in the rear storage compartment.
Spent the rest of the day running the now 2 gauge (big thick puppy) battery cables, grounds, and other time consuming stuff.
Will set the new Painless chassis wire harness in and connect it to the Watson Hot Dot - push button starter.
Waiting on -
Push rods
Headers.
Thread Starter
Burning Brakes
Joined: Jul 2001
Posts: 1,038
Likes: 3
From: Clinton IL
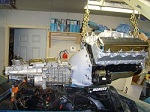
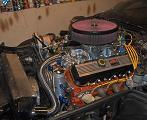
And it runs!
Still waiting on the side pipe headers...so this is all temporary and running through open manifolds.
If you scroll to the bottom of this page you can view the video.
http://mcspeed.homestead.com/Killer-II.html
Still waiting on the side pipe headers...so this is all temporary and running through open manifolds.
If you scroll to the bottom of this page you can view the video.
http://mcspeed.homestead.com/Killer-II.html


Melting Slicks

Joined: May 2007
Posts: 2,171
Likes: 1
From: Warwick RI

At least I hope that's what he meant...it would be a rude post otherwise


Pro

Joined: Jan 2002
Posts: 695
Likes: 0
From: Ashley Michigan
great build.. I was planning on doing this for the longest time but couldn't come up with the funding. And since there is little aftermarket support, decided to go with an lq4 for now. Glad to see someone give this motor a try.

Safety Car

Joined: Apr 2004
Posts: 3,818
Likes: 4
From: San Bruno ca
I just went to your website and i have to say "GREAT JOB" I was very impressed  Please let me know if you ever want to sell it
One i hope to get the chance to build a nice street vette like yours
Please let me know if you ever want to sell it One i hope to get the chance to build a nice street vette like yours
Thread Starter
Burning Brakes
Joined: Jul 2001
Posts: 1,038
Likes: 3
From: Clinton IL
And...were done!
I know...I know....just a truck motor...
http://mcspeed.homestead.com/Killer-II-page-two.html
Not bad for a cam and rocker arm swap.
I know...I know....just a truck motor...
http://mcspeed.homestead.com/Killer-II-page-two.html
Not bad for a cam and rocker arm swap.
We took the car to Mike Hornback at Straightline Performance in New Lenox, IL to dyno tune. Our original dyno pull netted poor results as our air/fuel readings were way too lean to continue. Mike hacked into the PCM and did his thing resulting in some awesome numbers.
Non-corrected for cold air temps on the Mustang Dyno, it laid down 372 rwhp and 488 rwtq. Not to shabby a VERY mild cam…and otherwise stock configuration. The throttle response is amazing and crisp. It is truly a unique assembly of parts to create a real street monster that is as gentle and easy as a four cylinder. Corrected for temperatures 359/475 – or WCF
He said his dyno runs 19% off at the crank when doing C5/C6 with manual trans. So…figure my manual is even heavier because it is full of heavy gear oil…instead of the light smooth T56, but still…that means on a 30 degree day it is making almost 600 ft lbs of torque! It comes on at 2,000 RPM and holds it until about 4,300 and then drops the HP by 5,200 – as we had expected. So…short shift…and hang on to your hat!
Non-corrected for cold air temps on the Mustang Dyno, it laid down 372 rwhp and 488 rwtq. Not to shabby a VERY mild cam…and otherwise stock configuration. The throttle response is amazing and crisp. It is truly a unique assembly of parts to create a real street monster that is as gentle and easy as a four cylinder. Corrected for temperatures 359/475 – or WCF
He said his dyno runs 19% off at the crank when doing C5/C6 with manual trans. So…figure my manual is even heavier because it is full of heavy gear oil…instead of the light smooth T56, but still…that means on a 30 degree day it is making almost 600 ft lbs of torque! It comes on at 2,000 RPM and holds it until about 4,300 and then drops the HP by 5,200 – as we had expected. So…short shift…and hang on to your hat!
Burning Brakes
Joined: Jun 2009
Posts: 840
Likes: 4
From: Syracuse IN
gerry72 Do you know anything about the 8.1 496? This engine puts every other big block from GM to shame. The marine industry has been using this as the highest output engine available since 2001. Basically 475hp at 5,300 rpm all day long. This is not even the highest output You can go higher by supercharging. The old mark v and vi are good but antique technology. I have one of these 8.1's a 425 hp version in my 20' ski boat. I pulled out the old 454 and litterally threw it away due to being such a pos. I am glad someone finally installed a 8.1 in a C3. This is not just a truck engine at all. Al