



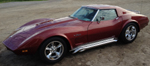


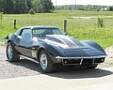







My custom 68
Thread Starter
Instructor

Joined: Feb 2006
Posts: 144
Likes: 0
 My custom 68
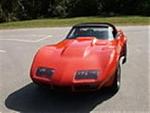
Here's a few pictures of my custom 68, everything has been modified in this car except from the buitiful original curves.
I'm gonna take some pictures of the underneath very soon, everything here is modified, chromed etc as well.
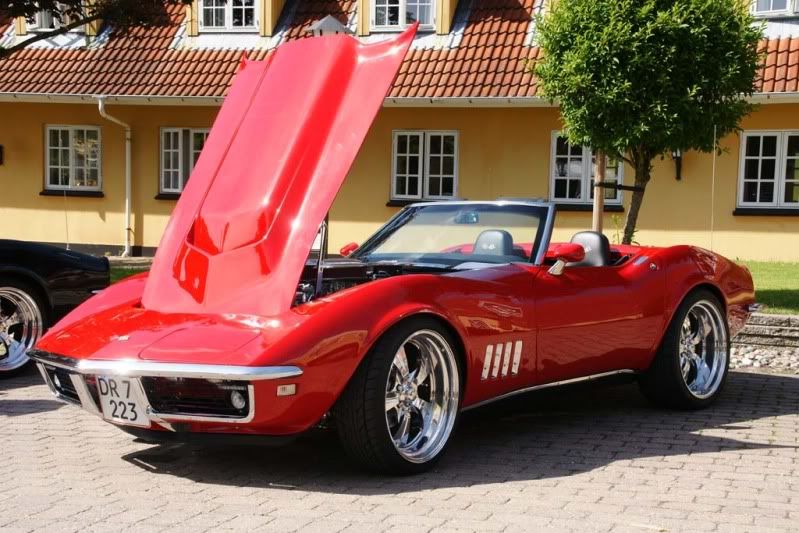
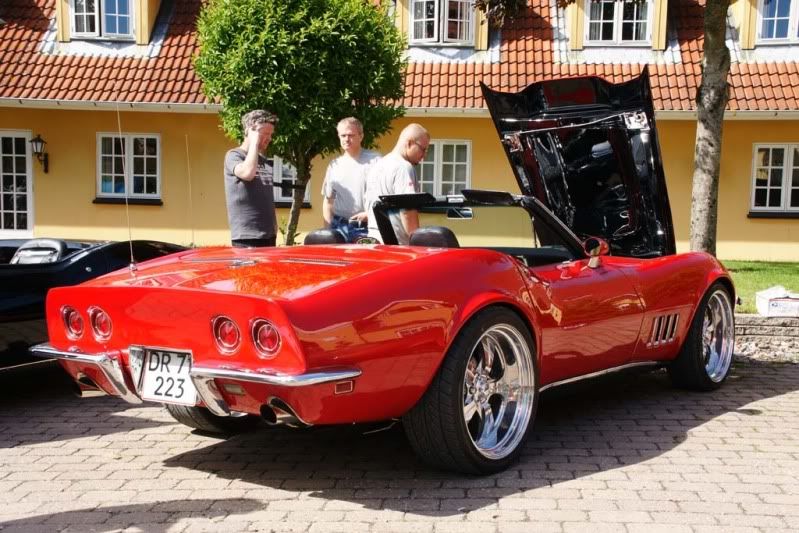


I'm gonna take some pictures of the underneath very soon, everything here is modified, chromed etc as well.
Corvette Stories
The Best of Corvette for Corvette Enthusiasts

How Much Horsepower Every Corvette Engine "LOST" in 1972
Joe Kucinski
Top 10 DOs and DON'Ts for Protecting Your Convertible Top!
Michael S. Palmer
Top 10 Most Explosive Corvettes Ever Made: Power-to-Weight Ratio Ranked!
Joe Kucinski
150 hp to 1,250 hp: Every Corvette Generation Compared by the Specs That Matter
Joe Kucinski
8 Coolest Corvette Pace Cars (and Replicas) of All Time
Verdad Gallardo
Top 10 Corvette Engines RANKED by Peak Torque (70+ Years of Muscle!)
Joe Kucinski
Corvette ZR1X Will Be Pacing the Indy 500, And Could Probably Race, Too!
Verdad Gallardo
Top 10 Corvettes Coming to Mecum Indy 2026!
Brett Foote
Top 10 C9 Corvette MUST-HAVES to Fix These C8 Generation Flaws!
Michael S. Palmer






Race Director


Joined: Jan 2007
Posts: 14,935
Likes: 3,343
From: NYC NY


 More info please for a VERY well done "custom"!


Thread Starter
Instructor
Joined: Feb 2006
Posts: 144
Likes: 0
Thank you all for the nice comments 
A complete writeup on the mods on the car would take me a very long time, the car literrally has hundreds of modifications where many are "one of a kind" items i had to make by hand.
First let me in advance apolligize for any wrong spelling, use of wrong words etc. as English is not my first language.
The car started life in March 1968 as a Fully optioned standard engine327Cui 300HP) car. it was rally red with red interior, i am the 3rd owner of the car when i bought it in England 7 years ago (i come from Denmark myself)
I bought it as a numbers matching car but soon found out that it was far from that and as such it was fine because it would only have made me feel bad when i started to modify it.
Most of the Mechanical mods has been achieved with off the shelf items, that has been Chromed or polished so theres is nothing shocking in that department neither something that has not been seen before, but i have tried out literally tons of different combinations before i arrived at what i wanted out of it.
What i think/Hope i have achieved is a Early C3 that pays respect to the buitiful curves of the original design but with alot more attention to detail and a joy to ride.
Heres a list of Mechanical mods that springs to mind:
- VBP Dual mount adjustable rear suspension with QA1 dampers
- Willwood Brakekit from Corvette engineering
- Vansteel 2" Offset trailingarms
- Sharkbite SemiCoilovers with 550lbs springs in the front
- Keisler TKO600 0.82OD 5Speed transmission
- 3.70 modified differential build by Mike Dyer (Tracdogg)
- Ford Wayne clutch 3" Halfshafts
- 408 SB with App. 400RWHP build with only the best items available.
- Retrotek Fuelinjection (looks like a Demon carb)
- Offset A-arms for better caster/camber control
- Billet Specialties 20" rims on Nitto tires 8X20 4"BS front 9½X20-5"BS rear
- 2" Turbular Front swaybar
- Steeroids Rack&Pinion steering
- VBP HD Rear Strutrod kit
- VBP Front Spreader bar
- Almost every single nut & bolt in the car has been changed to ARP polished stainless steel ones
- Chris Mcdonalds Electrical Headlight conversion
- Ididit Tilt Chrome Steering collum
Here's a small description of a few of the custom modifications that has been made, funny thing is that many of the little details that most people do not notice has been the ones that took the most time and effort to get just right.
- Hand made Polished Stainless steel gas tank with baffles and sump, it has been fabricated so that it follows and covers the frame completely
it takes up to 30 gallon.
-I fabricated a Stainless steel mount for the Electrical fuelpump and Aeromotive filters that covers the entire rear crossmember, that made me able to also cover most of the Russel fuelline.
All fittings has been made with russel or Earl Bright anodized or black ones, i did not want any other colors but Black and Chrome/SS/polished alu.
On the picture you can see the Red K&N airfilter i just bought some Cloth dye to color it black.
- 2½" Polished stanless steel Exhaust with Dynomax Flowthroug mufflers
- At first i had the LT1 hood on the car with the Vacuum Wiper system, i modified it to work with a liniar actuator, but due to the aircleaner i wanted on it i had to go for the L88 Hood and i did like the long version better than the short one so i removed all of the vacuumsystem from the car.
This presented a problem in regards to the now open area down to the wipers bay, i got one of the plastic covers you can buy but i was not pleased with the finish and decided to make one in Stainless steel that would cover the entire area along with the lip of the windshield, Lets just say i will NEVER build one of those again it took me 3 long weeks and a cracked windshield to build it frome welded together small pieces and polished up.
The rails down the inner fender lip was easy but makes a nice polished frame for the engine bay.
- The L88 Hood was bought from Ecklers and is handlaminated but had a somewhat poor fit, this was to be expected due to the differences in our old cars it was a tedious job to make a perfect fit for the hood because the rest of the car was allready painted and i used many days on polish it with (watersanding is this the correct word? i use grain3000 paper with water to remove any imperfections in the clearcoat and then polish it all up)
Thankkfully i had mounted a set of click and remove hood hinges theese hinges are a blessing if you often remove your hood because no adjustments are nessesery just click the hood on and go.
I think i had to take the hood on and off about 25times to make it fit in all lines.
The underside of the hood was where the real work was hidden, as it comes from the factory it is very rough fiber matte it took me almost a week of daily sanding to get it smooth and nice.
- The engine bay itself has been heavely modified, there is no Cables, wiring, hoses, relays etc except for the absolutely nessesery ones to operate the engine and those has also been integrated and hidden away as best as possible.
I build in a more modern heater that is hidden away under the modified Aircon box you can see on the far side of the enginebay picture, the hoses to it has been wired with Russel -AN10 fittings and is following the engine block underneath the headers so its not visible at all.
The rubberflaps that covers the upper a-arms was replaced with shields in SS i made a form out of some sheetaluminum and had the ss ones lasercut in the correct thickness that was i could bend them in hand afterwards to follow the recess and contours of the inner fender wall.
- The March Performance Bullit Serpentine kit was modified to fit into a C3 i had to mount the Powersteering pump up high or it woulda hit the frame crossmember, i decided to go with March Perf. aluminium1pc pump and alternator for the clean look, the reason for this kind of pulley setup was to make symmetry to the engine instead of the alternator hanging out to one side, same reasoning with the aircleaner type wich by the way was a real Pain in the a.. to get to fit even under the high L88 hood i had to build a complete new buttomplate for it i wanted to keep the fat aluminum border for the looks so it was no easy task.
As you can see i had to modify the distributor shield as well when i lowered the aircleaner.
Everytime i had an idea for a modification some sort of problem arised that had to be dealt with.
I opted for Ceramic coated Hooker headers due to the fact that the car is driven, chrome will turn blue and crack and SS will turn yellow-brown, the sound of the engine is awesome but on the loud side so next project is to make a double muffler incased a s a single element that can be switched by a electrical cutout.
I tried to make my hood open with a electrial actuator mainly because i wanted to remove the hoodlock system completely and just yse a couple of guides instead it turned out that the new longer hood puts to much strain on the pivot point of such a system so instead i build in a Lokar hood opening handle that operates 10x more smoothely than the original one and also i modified the brackets and hood locks so that the hood now opens and locks without anyone can hear it.
- The interior has been altered alot especially at the places that no one sees, i have build a more rigid frame for the intrumentation parts of the interior i was getting tired of the hassle to get theese parts to fit correctly every time you dismantled them, now i can pull out the interior and mount it again in 1-2 hours all wiring in the car has been build over a 18sercuit system from Painless wiring the fuse box is now placed under the right side dash for easy acess and cleaniness all wiring has been powerbraided and shrinkwrapped with only the best Phillips waterproof quick connectors that goes to every single gauge,feeler,light etc. so its a breeze to ex remove the speedo/tacho dashpad with 7screws and a quick connector.
- Instrumentation was kind of hard i wanted to show KM/h and Degree Celsious instead of MP/h and Degree F so my choices was very limited
I opted for a set of Autometer Ultralite series that had theese options
I custom made a acrylic back plate for all the small gauges to have them sit just right in the original dashpanel. the 5" Tachometer and Speedo i took the original housings and removed the front glass made a new backplate with the correctsize hole for the instrument and sanded the groove out where the old glass had been, after a shiort while the sanding cracked so instead i filled it out with fiber material and just sanded the last roughess out.
All of the gauges came with a grey anodized bezel i pryed these off (be very jentle they are pressed and folded on or you will bend the bezel)
and removed all of the grey anodizing with fine sandpaper then i polished them up to a mirror like shine.
- At the shifter console i removed the ashtray and heater operation unit
i then made a housing in SS for a widescreen GPS unit it fits nicely into the hole of the combined ashtray and heater area, then i had a new cover lazercut that fits the bezel with the GPS housing.
- The old optical cables is long gone but i reused the original placements of the information lights to put in hidden (under the original style lenses) led lights i have put in indication for turn left and right (green), Parking brake (red), normal light (green) and highbeam (blue)
Also in the shifter console i found room to put in an extractable drinkholder if you look at the picture of the interior you can barely see it on the right side of the console it works perfectly hidden away when not used and can be operated by both the driver or passenger when needed.
The seats are from a 1971 Porche 911 they are fantastic seats to sit in.
I had them covered in black with red inner trim Bisonleather.
And the corvetteflags on the headrest
The softtop is a Black Cloth and the intire top frame has been Chromed also all of the hardware under the topdecklid has been chromed.
There are many more items and fabrications to the car (basicly everything you can think off) but i am alittle tired of writing for now.
I was not sure if this would be the correct forum to post in but i will continue to post pictures and descriptions for those that want.
If anyone can be inspired by my work it would be an honor to try and help out.
A complete writeup on the mods on the car would take me a very long time, the car literrally has hundreds of modifications where many are "one of a kind" items i had to make by hand.
First let me in advance apolligize for any wrong spelling, use of wrong words etc. as English is not my first language.
The car started life in March 1968 as a Fully optioned standard engine327Cui 300HP) car. it was rally red with red interior, i am the 3rd owner of the car when i bought it in England 7 years ago (i come from Denmark myself)
I bought it as a numbers matching car but soon found out that it was far from that and as such it was fine because it would only have made me feel bad when i started to modify it.
Most of the Mechanical mods has been achieved with off the shelf items, that has been Chromed or polished so theres is nothing shocking in that department neither something that has not been seen before, but i have tried out literally tons of different combinations before i arrived at what i wanted out of it.
What i think/Hope i have achieved is a Early C3 that pays respect to the buitiful curves of the original design but with alot more attention to detail and a joy to ride.
Heres a list of Mechanical mods that springs to mind:
- VBP Dual mount adjustable rear suspension with QA1 dampers
- Willwood Brakekit from Corvette engineering
- Vansteel 2" Offset trailingarms
- Sharkbite SemiCoilovers with 550lbs springs in the front
- Keisler TKO600 0.82OD 5Speed transmission
- 3.70 modified differential build by Mike Dyer (Tracdogg)
- Ford Wayne clutch 3" Halfshafts
- 408 SB with App. 400RWHP build with only the best items available.
- Retrotek Fuelinjection (looks like a Demon carb)
- Offset A-arms for better caster/camber control
- Billet Specialties 20" rims on Nitto tires 8X20 4"BS front 9½X20-5"BS rear
- 2" Turbular Front swaybar
- Steeroids Rack&Pinion steering
- VBP HD Rear Strutrod kit
- VBP Front Spreader bar
- Almost every single nut & bolt in the car has been changed to ARP polished stainless steel ones
- Chris Mcdonalds Electrical Headlight conversion
- Ididit Tilt Chrome Steering collum
Here's a small description of a few of the custom modifications that has been made, funny thing is that many of the little details that most people do not notice has been the ones that took the most time and effort to get just right.
- Hand made Polished Stainless steel gas tank with baffles and sump, it has been fabricated so that it follows and covers the frame completely
it takes up to 30 gallon.
-I fabricated a Stainless steel mount for the Electrical fuelpump and Aeromotive filters that covers the entire rear crossmember, that made me able to also cover most of the Russel fuelline.
All fittings has been made with russel or Earl Bright anodized or black ones, i did not want any other colors but Black and Chrome/SS/polished alu.
On the picture you can see the Red K&N airfilter i just bought some Cloth dye to color it black.
- 2½" Polished stanless steel Exhaust with Dynomax Flowthroug mufflers
- At first i had the LT1 hood on the car with the Vacuum Wiper system, i modified it to work with a liniar actuator, but due to the aircleaner i wanted on it i had to go for the L88 Hood and i did like the long version better than the short one so i removed all of the vacuumsystem from the car.
This presented a problem in regards to the now open area down to the wipers bay, i got one of the plastic covers you can buy but i was not pleased with the finish and decided to make one in Stainless steel that would cover the entire area along with the lip of the windshield, Lets just say i will NEVER build one of those again it took me 3 long weeks and a cracked windshield to build it frome welded together small pieces and polished up.
The rails down the inner fender lip was easy but makes a nice polished frame for the engine bay.
- The L88 Hood was bought from Ecklers and is handlaminated but had a somewhat poor fit, this was to be expected due to the differences in our old cars it was a tedious job to make a perfect fit for the hood because the rest of the car was allready painted and i used many days on polish it with (watersanding is this the correct word? i use grain3000 paper with water to remove any imperfections in the clearcoat and then polish it all up)
Thankkfully i had mounted a set of click and remove hood hinges theese hinges are a blessing if you often remove your hood because no adjustments are nessesery just click the hood on and go.
I think i had to take the hood on and off about 25times to make it fit in all lines.
The underside of the hood was where the real work was hidden, as it comes from the factory it is very rough fiber matte it took me almost a week of daily sanding to get it smooth and nice.
- The engine bay itself has been heavely modified, there is no Cables, wiring, hoses, relays etc except for the absolutely nessesery ones to operate the engine and those has also been integrated and hidden away as best as possible.
I build in a more modern heater that is hidden away under the modified Aircon box you can see on the far side of the enginebay picture, the hoses to it has been wired with Russel -AN10 fittings and is following the engine block underneath the headers so its not visible at all.
The rubberflaps that covers the upper a-arms was replaced with shields in SS i made a form out of some sheetaluminum and had the ss ones lasercut in the correct thickness that was i could bend them in hand afterwards to follow the recess and contours of the inner fender wall.
- The March Performance Bullit Serpentine kit was modified to fit into a C3 i had to mount the Powersteering pump up high or it woulda hit the frame crossmember, i decided to go with March Perf. aluminium1pc pump and alternator for the clean look, the reason for this kind of pulley setup was to make symmetry to the engine instead of the alternator hanging out to one side, same reasoning with the aircleaner type wich by the way was a real Pain in the a.. to get to fit even under the high L88 hood i had to build a complete new buttomplate for it i wanted to keep the fat aluminum border for the looks so it was no easy task.
As you can see i had to modify the distributor shield as well when i lowered the aircleaner.
Everytime i had an idea for a modification some sort of problem arised that had to be dealt with.
I opted for Ceramic coated Hooker headers due to the fact that the car is driven, chrome will turn blue and crack and SS will turn yellow-brown, the sound of the engine is awesome but on the loud side so next project is to make a double muffler incased a s a single element that can be switched by a electrical cutout.
I tried to make my hood open with a electrial actuator mainly because i wanted to remove the hoodlock system completely and just yse a couple of guides instead it turned out that the new longer hood puts to much strain on the pivot point of such a system so instead i build in a Lokar hood opening handle that operates 10x more smoothely than the original one and also i modified the brackets and hood locks so that the hood now opens and locks without anyone can hear it.
- The interior has been altered alot especially at the places that no one sees, i have build a more rigid frame for the intrumentation parts of the interior i was getting tired of the hassle to get theese parts to fit correctly every time you dismantled them, now i can pull out the interior and mount it again in 1-2 hours all wiring in the car has been build over a 18sercuit system from Painless wiring the fuse box is now placed under the right side dash for easy acess and cleaniness all wiring has been powerbraided and shrinkwrapped with only the best Phillips waterproof quick connectors that goes to every single gauge,feeler,light etc. so its a breeze to ex remove the speedo/tacho dashpad with 7screws and a quick connector.
- Instrumentation was kind of hard i wanted to show KM/h and Degree Celsious instead of MP/h and Degree F so my choices was very limited
I opted for a set of Autometer Ultralite series that had theese options
I custom made a acrylic back plate for all the small gauges to have them sit just right in the original dashpanel. the 5" Tachometer and Speedo i took the original housings and removed the front glass made a new backplate with the correctsize hole for the instrument and sanded the groove out where the old glass had been, after a shiort while the sanding cracked so instead i filled it out with fiber material and just sanded the last roughess out.
All of the gauges came with a grey anodized bezel i pryed these off (be very jentle they are pressed and folded on or you will bend the bezel)
and removed all of the grey anodizing with fine sandpaper then i polished them up to a mirror like shine.
- At the shifter console i removed the ashtray and heater operation unit
i then made a housing in SS for a widescreen GPS unit it fits nicely into the hole of the combined ashtray and heater area, then i had a new cover lazercut that fits the bezel with the GPS housing.
- The old optical cables is long gone but i reused the original placements of the information lights to put in hidden (under the original style lenses) led lights i have put in indication for turn left and right (green), Parking brake (red), normal light (green) and highbeam (blue)
Also in the shifter console i found room to put in an extractable drinkholder if you look at the picture of the interior you can barely see it on the right side of the console it works perfectly hidden away when not used and can be operated by both the driver or passenger when needed.
The seats are from a 1971 Porche 911 they are fantastic seats to sit in.
I had them covered in black with red inner trim Bisonleather.
And the corvetteflags on the headrest
The softtop is a Black Cloth and the intire top frame has been Chromed also all of the hardware under the topdecklid has been chromed.
There are many more items and fabrications to the car (basicly everything you can think off) but i am alittle tired of writing for now.
I was not sure if this would be the correct forum to post in but i will continue to post pictures and descriptions for those that want.
If anyone can be inspired by my work it would be an honor to try and help out.
Last edited by PNK; Jul 8, 2009 at 09:14 AM.


