


Snowman's Bruiser Project Phase Five

Former Vendor
Joined: Oct 2007
Posts: 2,092
Likes: 2
From: walpole ma
Thread Starter
Le Mans Master


Joined: Dec 1999
Posts: 8,627
Likes: 1
From: Houston Texas
CI 1-2-3-4-5-6-7-8-9-10 Vet
St. Jude Donor '03-'04-'05-'06-'07-'08-'09
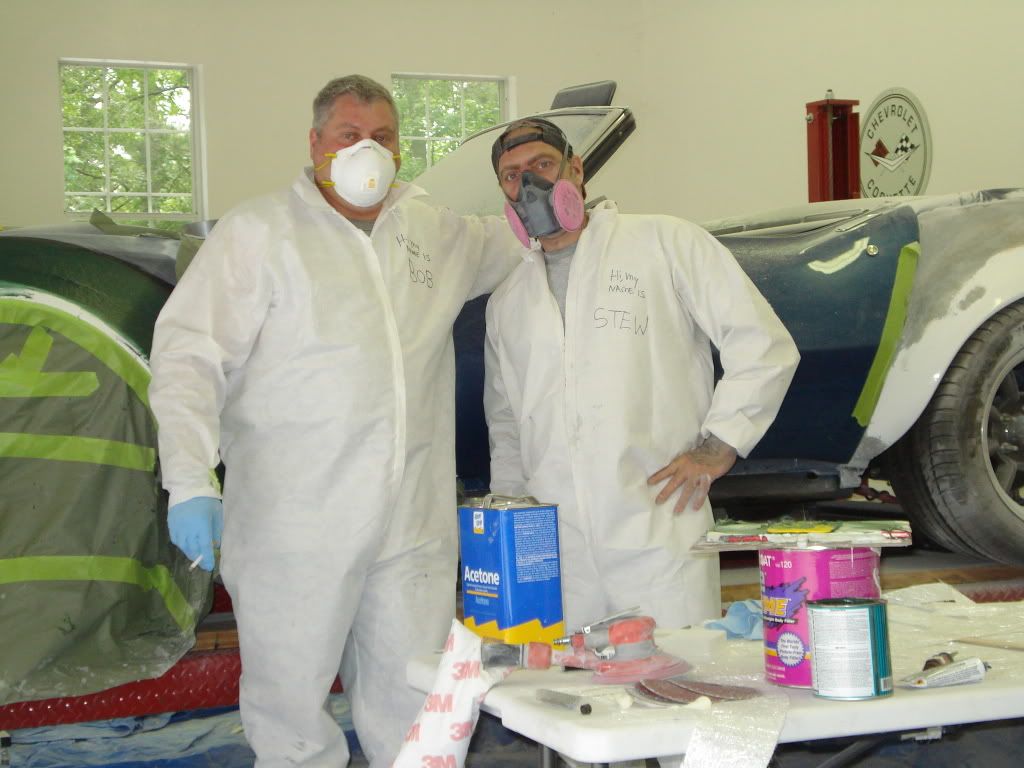
When the flares were "done", they gelcoated everything to date on the car. When they returned for the 2nd round, they did the entire car then sprayed the entire car with gel coat again, then sanded, then primer. Hours and hours and (did I say) hours of hard work. They are good, they work their adz off and they have fun at the same time. In the early going when they were sanding all the old paint off the car, dust was everywhere so they got full throwaway jumpsuits and masks, took black magic markers and printed their names on the jumpsuits every day. Stan if you have a pic to send of that, would be great.
Some flares in gelcoat pics:


They glassed in the rear lower panel so it is solid, given I went with side pipes:

Here are a couple of others closer to the second round of gelcoat...car completely stripped down and reworked.

They cut in cold air ducts to the L88 cold air plenum and fitted all that to the car. I would have pulled my hair out getting all that to work.

Our boys taking a short break back at my garage after primer was done.

A closeup of Stan the Man himself:

Oops! That was Stan's alter ego Stan with an A (Satan) I know Stan, that's SO wrong!

And Tim taking a short break:

Stan, you have to send the pic with the jumpsuits if you can. That was pricesless.
Here is a love note from Joe, one of their other customers who was having his car striped while they were in Texas with me. All in good fun. LOOK AT THE FINISH ON THAT CAR and it wasn't even done yet!! Amazing, can't wait!

Last edited by Snowman; Nov 26, 2009 at 06:19 PM.
Melting Slicks

Joined: Jan 2006
Posts: 3,028
Likes: 2
From: North NJ
Can you provide more info on this "rollbar" and what is needed for the install? Is this NHRA legal for track use? Who makes it? Cost? PM me if you don't want it public info. Thanks 
I saw your picks of bruiser at the track and I'm suprised they didn't give you a hard time running the vert with the top off in the 10's. Any track around here would kick you off if you ran under a 13.5 with a vert/softtop.
I saw your picks of bruiser at the track and I'm suprised they didn't give you a hard time running the vert with the top off in the 10's. Any track around here would kick you off if you ran under a 13.5 with a vert/softtop.
Thread Starter
Le Mans Master
Joined: Dec 1999
Posts: 8,627
Likes: 1
From: Houston Texas
CI 1-2-3-4-5-6-7-8-9-10 Vet
St. Jude Donor '03-'04-'05-'06-'07-'08-'09
Can you provide more info on this "rollbar" and what is needed for the install? Is this NHRA legal for track use? Who makes it? Cost? PM me if you don't want it public info. Thanks
I saw your picks of bruiser at the track and I'm suprised they didn't give you a hard time running the vert with the top off in the 10's. Any track around here would kick you off if you ran under a 13.5 with a vert/softtop.
I saw your picks of bruiser at the track and I'm suprised they didn't give you a hard time running the vert with the top off in the 10's. Any track around here would kick you off if you ran under a 13.5 with a vert/softtop.
The track day was a private track day. A group of us from the CF rented the track at Beech Bend in BG. While we did a cursory safety check and wore helmets, we didn't have to comply with other NHRA specs.
This setup would not pass for NHRA I'm guessing. No halo, the side bars probably too low. The setup you see was custom made for my car by a fellow here in Texas. Chrome-moly, awesome fit around the door panels, side bars even pre-loaded so they won't rattle. Everything is welded to the frame but the cage itself is bolted to the fittings welded to the frame so can be removed. After Stan and Tim do a fit check on the cage and all the brightwork, I will remove it all so it is protected and out of their way for the rest of the body work and paint. Our guy here did an excellent job, is all powdercoated. He did Jim Moore's 66 as well. Send a PM if you want his reach information. He has a 3 bay shop, works on one car at a time so you are in and out in a week or less with everything all done.
Race Director


Joined: Jan 2000
Posts: 13,018
Likes: 2,262
From: Corsicana, Tx
2020 C2 of the Year - Modified Winner
2020 Corvette of the Year (performance mods)
C2 of Year Winner (performance mods) 2019
2017 C2 of Year Finalist
Mine is basically identical to this one. In fact the guy who built it sorta worked out the *program* for these things on my car. We wanted it out of chrome moly for lightweight, soft tops to go up and down, access to rear compartments, needed to be removable, swing out sidebars that cleared the small door opening of a Vette with the top up or with a hardtop installed, etc, etc. We probably drove him nuts....but he's a true craftsman and does great work.
I've run at lots of NHRA tracks since I installed it and overall it meets the needs except that my convertible is in the 9's and over 135 mph..so that gets you into the need for full halo bar with 8 point minimum, window nets etc. But usually no big issue at the track yet.
Convertibles bring their own set of issues to NHRA rules,,,but bolting a hardtop on them magically helps a lot of that!
Vette's bring even more issues due to the size of the cabin, That whole 2" away from the helmet rule is tough as well as the angle of the sidebars. There's just so much you can do and still fit a human in there.
JIM
Last edited by 427Hotrod; Nov 28, 2009 at 05:40 PM.
Corvette Stories
The Best of Corvette for Corvette Enthusiasts

Top 10 Most Expensive Corvettes Ever Sold on Bring A Trailer
Brett Foote
10 Things Every Corvette Owner Needs (2026 Edition)
Michael S. Palmer
8 Most "Only Corvette Owners Understand" Quirks and Problems
Pouria Savadkouei
10 Reasons the C6 Z06 is Still A Performance Benchmark After 20 Years
Joe Kucinski
How Much Horsepower Every Corvette Engine "LOST" in 1972
Joe Kucinski
Top 10 DOs and DON'Ts for Protecting Your Convertible Top!
Michael S. Palmer
Top 10 Most Explosive Corvettes Ever Made: Power-to-Weight Ratio Ranked!
Joe Kucinski
150 hp to 1,250 hp: Every Corvette Generation Compared by the Specs That Matter
Joe Kucinski
8 Coolest Corvette Pace Cars (and Replicas) of All Time
Verdad Gallardo
Thread Starter
Le Mans Master
Joined: Dec 1999
Posts: 8,627
Likes: 1
From: Houston Texas
CI 1-2-3-4-5-6-7-8-9-10 Vet
St. Jude Donor '03-'04-'05-'06-'07-'08-'09


Thread Starter
Le Mans Master
Joined: Dec 1999
Posts: 8,627
Likes: 1
From: Houston Texas
CI 1-2-3-4-5-6-7-8-9-10 Vet
St. Jude Donor '03-'04-'05-'06-'07-'08-'09
I had convertible top up today, tried getting in my usual way...butt first and couldn't bend my head low enough. Have to do the head first entry method from now on!  At least I don't drive around with stuffed animals in my front seat! See you next May!
DP
At least I don't drive around with stuffed animals in my front seat! See you next May!DP
Last edited by Snowman; Nov 30, 2009 at 12:01 AM.
Melting Slicks
Joined: Jan 2006
Posts: 3,028
Likes: 2
From: North NJ
Wow lots of questions!
The track day was a private track day. A group of us from the CF rented the track at Beech Bend in BG. While we did a cursory safety check and wore helmets, we didn't have to comply with other NHRA specs.
This setup would not pass for NHRA I'm guessing. No halo, the side bars probably too low. The setup you see was custom made for my car by a fellow here in Texas. Chrome-moly, awesome fit around the door panels, side bars even pre-loaded so they won't rattle. Everything is welded to the frame but the cage itself is bolted to the fittings welded to the frame so can be removed. After Stan and Tim do a fit check on the cage and all the brightwork, I will remove it all so it is protected and out of their way for the rest of the body work and paint. Our guy here did an excellent job, is all powdercoated. He did Jim Moore's 66 as well. Send a PM if you want his reach information. He has a 3 bay shop, works on one car at a time so you are in and out in a week or less with everything all done.
Mine is basically identical to this one. In fact the guy who built it sorta worked out the *program* for these things on my car. We wanted it out of chrome moly for lightweight, soft tops to go up and down, access to rear compartments, needed to be removable, swing out sidebars that cleared the small door opening of a Vette with the top up or with a hardtop installed, etc, etc. We probably drove him nuts....but he's a true craftsman and does great work.
I've run at lots of NHRA tracks since I installed it and overall it meets the needs except that my convertible is in the 9's and over 135 mph..so that gets you into the need for full halo bar with 8 point minimum, window nets etc. But usually no big issue at the track yet.
Convertibles bring their own set of issues to NHRA rules,,,but bolting a hardtop on them magically helps a lot of that!
Vette's bring even more issues due to the size of the cabin, That whole 2" away from the helmet rule is tough as well as the angle of the sidebars. There's just so much you can do and still fit a human in there.
JIM
I've run at lots of NHRA tracks since I installed it and overall it meets the needs except that my convertible is in the 9's and over 135 mph..so that gets you into the need for full halo bar with 8 point minimum, window nets etc. But usually no big issue at the track yet.
Convertibles bring their own set of issues to NHRA rules,,,but bolting a hardtop on them magically helps a lot of that!
Vette's bring even more issues due to the size of the cabin, That whole 2" away from the helmet rule is tough as well as the angle of the sidebars. There's just so much you can do and still fit a human in there.
JIM


Burning Brakes

Joined: Mar 2004
Posts: 816
Likes: 1
From: Finland
We got the car running late the night before beginning the trek to BG for the Cruisein and spent Wednesday afternoon and evening putting the rest of the car together so we could run at the track.

We did well at the track, ran 10.946@129 as best run. Car went straight and it was obvious we had a lot of work left to do with suspension, carburetor linkage, hydraulic clutch slave, and other tricks. But Bruiser went straight and got it done.

And a bit of gratuitous celebration back at the hotel.

First run was a test run given Bruiser only had single digit miles on him. White helmet runs have me as the driver. My code name is Jack in the Box for obvious reasons. The black helmet ones (the really good ones) have Jim Moore, the Great Temptor as the driver.
This first run, we weren't completely sure it would drive straight so I took it a little easy. (that's my excuse and I'm sticking to it)
http://www.fototime.com/D8B0202F69D7AD7/convx264.mp4
Then after some adjustments (lowering tire pressures significantly being one), Jim took the wheel. We have some in car shots as well as out of car shots.
http://www.fototime.com/2EAB4B0D866ED98/convx264.mp4
http://www.fototime.com/46C80DF4CB761B4/convx264.mp4
And one run in Jim's 66 to show us how it is supposed to be done. His friend Doug in the Nova works for Holley and comes out every year to race him. Notice the playful banter before the run then it's all business.
http://www.fototime.com/679DE25440ED3A2/convx264.mp4
Came back to Texas, tranny out, clutch master and slave replaced with correct parts. Had to move the tranny back half an inch, recut and rebalanced drive shaft but now all is well down below except 3rd gear synchros got crunched in BG so eventually tranny will have to come back out and be sent back for repairs.
Phase Four: Complete the basic body work and get the entire car to primer
This will be represented by one photograph for now. The story will be told later but here is an interim step. Car completely stripped to the glass, major work done to fix front clip, rear which was drooping, the doors, full gelcoat, lots of sanding ending in primer.
Okay that is where we stand at the moment! Whew!
Doug
We did well at the track, ran 10.946@129 as best run. Car went straight and it was obvious we had a lot of work left to do with suspension, carburetor linkage, hydraulic clutch slave, and other tricks. But Bruiser went straight and got it done.
And a bit of gratuitous celebration back at the hotel.
First run was a test run given Bruiser only had single digit miles on him. White helmet runs have me as the driver. My code name is Jack in the Box for obvious reasons. The black helmet ones (the really good ones) have Jim Moore, the Great Temptor as the driver.
This first run, we weren't completely sure it would drive straight so I took it a little easy. (that's my excuse and I'm sticking to it)
http://www.fototime.com/D8B0202F69D7AD7/convx264.mp4
Then after some adjustments (lowering tire pressures significantly being one), Jim took the wheel. We have some in car shots as well as out of car shots.
http://www.fototime.com/2EAB4B0D866ED98/convx264.mp4
http://www.fototime.com/46C80DF4CB761B4/convx264.mp4
And one run in Jim's 66 to show us how it is supposed to be done. His friend Doug in the Nova works for Holley and comes out every year to race him. Notice the playful banter before the run then it's all business.
http://www.fototime.com/679DE25440ED3A2/convx264.mp4
Came back to Texas, tranny out, clutch master and slave replaced with correct parts. Had to move the tranny back half an inch, recut and rebalanced drive shaft but now all is well down below except 3rd gear synchros got crunched in BG so eventually tranny will have to come back out and be sent back for repairs.
Phase Four: Complete the basic body work and get the entire car to primer
This will be represented by one photograph for now. The story will be told later but here is an interim step. Car completely stripped to the glass, major work done to fix front clip, rear which was drooping, the doors, full gelcoat, lots of sanding ending in primer.
Okay that is where we stand at the moment! Whew!
Doug

Anyhow a dream car you have out there!!!!!!
Thread Starter
Le Mans Master
Joined: Dec 1999
Posts: 8,627
Likes: 1
From: Houston Texas
CI 1-2-3-4-5-6-7-8-9-10 Vet
St. Jude Donor '03-'04-'05-'06-'07-'08-'09
Big week for Bruiser. Mike Dyer is here since Wednesday. So far have all taillights functioning at their brightest, back up light link works. We are pressing to get as much mechanical work done on the car before Stan and Tim come on Sunday.
Starter works (had to replace my old one). Mike completely went through my tilt/tele wheel and it is sorted out now. Horn works, still missing back ordered parts from Summit to finish the job on the column but the horn works.
Then we tackled the A/C hoses which weren't routed correctly. Will need some new connectors done on a couple of lines so we are held up there at the moment. Moved fuel regulator to the firewall, move fan controller out of sight, move MSD box up higher on the fender so have really cleaned up passenger side of engine compartment. Now working to plumb the PS and PB correctly. Looking for a Pre 80 PS pump part at the moment and have 3 possible sources for that tomorrow. Reservoir was insufficiently plumbed to fit a 5/8" line to gravity feed the PS pump and it has been cavitating on slow speed turns. That should be finished tomorrow.
Had the poly bushing at the top of the front coil over stack crap out on the driver's side and the car settled on that side. Passenger side one is still there but failing. Bought a new front sway bar rebuild kit to harvest the correct thick curved washers and new cushions to redo the coilover setup tomorrow. That will be some work but will then be right.
Some other dribs and drabs to get done...getting fuel gauge to work, speedo to work, install Alpine deck.
More soon. Is like a scavenger hunt. I was all over town today in my dually picking up parts in the SNOW!!

Doug
Last edited by Snowman; Dec 5, 2009 at 02:51 AM.
Melting Slicks
Joined: Jul 2006
Posts: 2,373
Likes: 6
From: Baltimore MD
Man! nice vids,your car runs good,just think the other two cars were only a very little faster then yours,if your car gets setup a little better i think you could beat them.Anyway your car is looking awsome and runs awsome Bill
Bill
Bill

Thread Starter
Le Mans Master
Joined: Dec 1999
Posts: 8,627
Likes: 1
From: Houston Texas
CI 1-2-3-4-5-6-7-8-9-10 Vet
St. Jude Donor '03-'04-'05-'06-'07-'08-'09
Productive 4 days with Mike Dyer.
We are back to what we'll call moving forward.
In the last 4 days, Mike Dyer handled the following with a little help from me, mostly chasing parts. He really just kept pressing and did a great job.
1) Taillights work, reverse connection now works
2) Fuel gauge now functions, isn't calibrated yet. Need to get OEM style sending unit. The one I have, though new, is a piece of crap.
3) Moved the fuel regulator to the firewall, cleaned up the running of fuel lines. Will go from 90 degree to 45 degree fasteners where they mate with the Holley. Will let the fuel lines lay better under the hood.
4) Rerouted the A/C lines.
5) Completely re-plumbed the PS system and Hydraboost, fixed the PS pump, thanks Rob for your help. We did a late night transfer as Rob ate dinner with his family to get a JBwelded piece back for my PS pump. :o)
6) Rebuilt the tilt/tele wheel, replaced key cylinder, ignition switch, car cranks like a champ now
7) Moved and re-set the MSD box. We have the -20degree locked out for cranking now
8) Reinstalled the cooling fans...flipped the setup over and it really is secure now.
9) Dave removed the headliner from the hard top tonight and it looks like I have a pristine, almost-never-used 68 hardtop. Stan said it was well bought, has all hardware, headliner, good SS trim, good back window. Will begin to work on prepping hardtop for paint this week.
10) We pulled the side pipes and when measuring, found that both rocker panels will fit back on the car without requiring any cutting or dremmeling of any kind. THAT is a big beak!
11) Engine compartment is pretty well along getting cleaned up. It's dirty but a lot of pluming and wiring is nicely tucked away. More to go, rewiring up fan controllers and the like but is REALLY coming along.
12) Repaired the front shocks. I will buy softer springs for the front to bring the front down.
13) We are going to put in a thermostat for the winter season. We ran the motor for some time tonight and the water temp didn't come up for some time. What should the temp be? 160? 180? 195?
14) I am ordering new valve covers this week and will set them aside until the car is done.
15) I ordered a new 40" Craftsman rolling tool box and will keep it in the house til I clean the car garage when Bruiser goes to Larry's.
Stan came today. Tim is sick and may come later in the week. We went over the whole car tonight. I need a new front bumper...mine is bent into a V. Looking for a good quality used one that I can re-chrome. Does anyone know a good re-chroming place in Houston area? I might do another couple of pieces. We'll see.
Stan starts in the morning tomorrow and says he's not going home until the paint work is done. Mike is going home in the morning and coming back down this week to work with Stan as his #2 at least until Tim comes. Rest of the bright work will come off in the morning before Stan gets to the garage with supplies.
Daily updates now. Feel free to come by and visit if you are in Houston area!
Doug
Last edited by Snowman; Dec 12, 2009 at 06:18 AM.
Thread Starter
Le Mans Master
Joined: Dec 1999
Posts: 8,627
Likes: 1
From: Houston Texas
CI 1-2-3-4-5-6-7-8-9-10 Vet
St. Jude Donor '03-'04-'05-'06-'07-'08-'09
Okay update update!
Stan has just about finished wet standing the entire car. Just has underside of the nose to go tomorrow morning.
What do you think of my custom low-drag wheels covers? Makes it look like a toy car almost. Will paint bolts on one side and smiley faces have been suggested for the other.


Door isn't latched in this picture. When you wet the fender and sight along the edge of the car, looks like a metal car on it's way to glass smooth. Really a great job!

I was so excited yesterday to find out there was more dismantling to do! Mike Dyer and I stripped out the interior yesterday, removed seats, roll cage, carpet, pads, flow through ventilation panels (this was originally a non-air car). Still some work to do to scrape out the rest of the glue and leftover crud then interior will be pretty clean. This car was also originally an automatic car and they hacked up the transmission tunnel pretty badly when they went to 5speed. We will replace tranny tunnel and re-glass interior before we're done.


I think I've found a new calling! Since Tim wasn't here, I took on sanding the top today. Is just about done except for around window.
Who can tell me where to get new back window and new stainless steel trim for window and around the front lip of the top? My stainless and window are pretty good actually but while I am at it, I want to do it right.


Tomorrow, I'm going to skim the fiberglass on the top. I have a feeling that will be harder to do right than it looks but I'm learning and enjoying making a mess.
More pics tomorrow.
Doug
Stan has just about finished wet standing the entire car. Just has underside of the nose to go tomorrow morning.
What do you think of my custom low-drag wheels covers? Makes it look like a toy car almost. Will paint bolts on one side and smiley faces have been suggested for the other.
Door isn't latched in this picture. When you wet the fender and sight along the edge of the car, looks like a metal car on it's way to glass smooth. Really a great job!
I was so excited yesterday to find out there was more dismantling to do! Mike Dyer and I stripped out the interior yesterday, removed seats, roll cage, carpet, pads, flow through ventilation panels (this was originally a non-air car). Still some work to do to scrape out the rest of the glue and leftover crud then interior will be pretty clean. This car was also originally an automatic car and they hacked up the transmission tunnel pretty badly when they went to 5speed. We will replace tranny tunnel and re-glass interior before we're done.
I think I've found a new calling! Since Tim wasn't here, I took on sanding the top today. Is just about done except for around window.
Who can tell me where to get new back window and new stainless steel trim for window and around the front lip of the top? My stainless and window are pretty good actually but while I am at it, I want to do it right.
Tomorrow, I'm going to skim the fiberglass on the top. I have a feeling that will be harder to do right than it looks but I'm learning and enjoying making a mess.
More pics tomorrow.
Doug

Racer


Joined: Jul 2004
Posts: 414
Likes: 1
Here is a love note from Joe, one of their other customers who was having his car striped while they were in Texas with me. All in good fun. LOOK AT THE FINISH ON THAT CAR and it wasn't even done yet!! Amazing, can't wait!
[/QUOTE]
For the record... not my finger - though, that does look like me with the camera If the paint wasn't so slick, it would have never given me away!
[/QUOTE]For the record... not my finger - though, that does look like me with the camera
If the paint wasn't so slick, it would have never given me away!