


Windshield Frame Prep

Thread Starter
Instructor


Joined: Feb 2011
Posts: 234
Likes: 15
I removed the windshield mold on 1975 convertable, cleaned and primed the windshield frame. (Minor rust 3 pin size holes covered with metal epoxy frame in real nice condition). My question is the inside top of the frame, some people have stated that it should be filled with urethane. Is this a good idea or will it cause water retention?
My next question is how do you seal the seams of the top windshield molding or is it not nessary?
My next question is how do you seal the seams of the top windshield molding or is it not nessary?
Instructor
Joined: Oct 2006
Posts: 127
Likes: 0
From: Monroe Washington
I removed the windshield mold on 1975 convertable, cleaned and primed the windshield frame. (Minor rust 3 pin size holes covered with metal epoxy frame in real nice condition). My question is the inside top of the frame, some people have stated that it should be filled with urethane. Is this a good idea or will it cause water retention?
My next question is how do you seal the seams of the top windshield molding or is it not nessary?
My next question is how do you seal the seams of the top windshield molding or is it not nessary?
Check out this site from pws69 a real good read. Also check the AIM it shows where to put the sealant.
http://www.speakeasy.org/~pws/Corvette.htm
Ron
Former Vendor
Joined: Aug 2006
Posts: 76,656
Likes: 1,853
From: Jeffersonville Indiana 812-288-7103
St. Jude Donor '08-'09-'10-'11-'12-'13-'14-'15
I always use the primer on the frames before painting. I have a write up on the site about this too... http://willcoxcorvette.com/repairand...lp.php?hID=306
Hope it helps you..
Willcox
Hope it helps you..
Willcox
Team Owner


Joined: Sep 2006
Posts: 31,274
Likes: 4,366
From: Westminster Maryland
Hi Rodney,
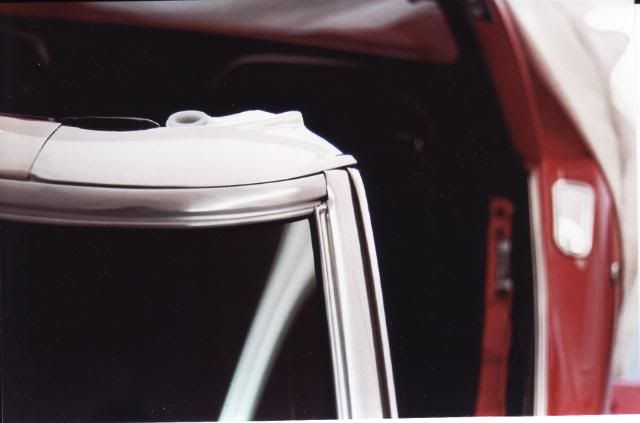
A silver color sealer was used to seal the joint between the large header trim and the long thin piece of windshield trim. It continued on into the joint between the long thin piece and the a-pillar trim.
A black sealer was used in the seam between the large header trim and the 2 cast corner pieces.
Hope this helps!
Regards,
Alan
Before sealer:
After sealer: the flash makes it look like there's a lot of sealer but there's just a tiny bit.
Drifting

Joined: May 2012
Posts: 1,353
Likes: 44
From: Calgary Alberta
This old thread is worth resurrecting because it's proving difficult to find much information.
What type of sealer is used in Alan's pictures above, between the top molding and the windshield trim? My 1970's windshield is, I believe, original (code NT - Jan. 1970 for a Jan. 1970 car), and there's a greyish sealer in that small gap which has come out in a couple of spots. I'd like to replace it.
Hopefully you see this Alan!
Last edited by Brcmpbl; Sep 10, 2016 at 09:43 PM.
Team Owner
Joined: Sep 2006
Posts: 31,274
Likes: 4,366
From: Westminster Maryland
Hi B,
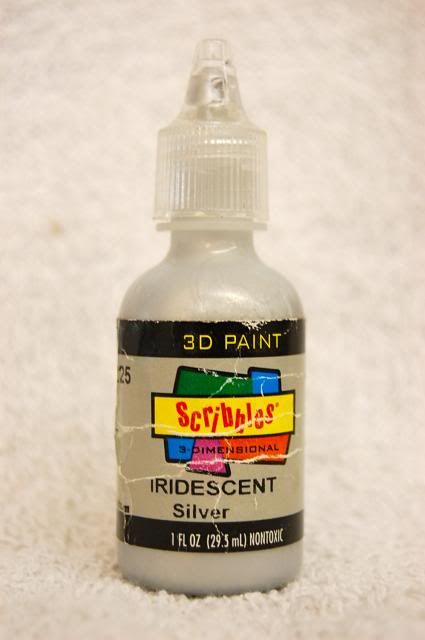
Here's an example of the sealer on an original car and a picture of what I used to achieve the result in the pictures in this thread.
Regards,
Alan
I bought the paint at my local craft store. It goes on like thick paint� you squeeze the tube� it sets up hard but flexible after a few hours. I used my finger to smooth it into the contours I wanted while it was still soft.
If you experiment with it a bit you'll find it's easy to work with.
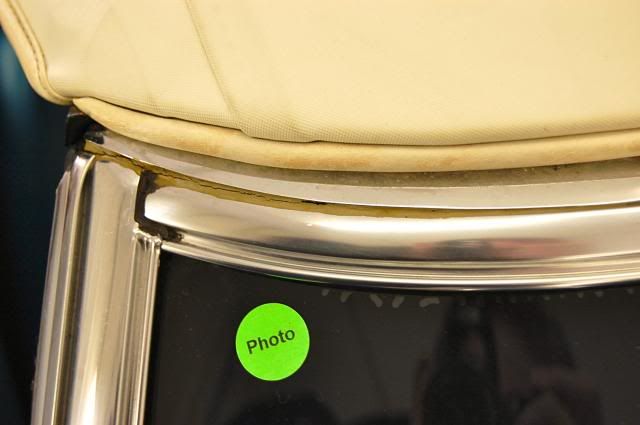
Here's the sealer on an original 69.
Here's an example of the sealer on an original car and a picture of what I used to achieve the result in the pictures in this thread.
Regards,
Alan
I bought the paint at my local craft store. It goes on like thick paint� you squeeze the tube� it sets up hard but flexible after a few hours. I used my finger to smooth it into the contours I wanted while it was still soft.
If you experiment with it a bit you'll find it's easy to work with.
Here's the sealer on an original 69.
Team Owner
Joined: Sep 2006
Posts: 31,274
Likes: 4,366
From: Westminster Maryland
Hi B,
Very nice to see that!
Certainly looks like the ss trim hasn't been off� is that true?
If you decide to replace the sealer that's on there now I'd be careful removing what's there and SAVE it in a little baggy.
Certain people are often curious just what that material is like!
I like the windshield logo very much too!!!
Regards,
Alan
Corvette Stories
The Best of Corvette for Corvette Enthusiasts

Top 10 Most Expensive Corvettes Ever Sold on Bring A Trailer
Brett Foote
10 Things Every Corvette Owner Needs (2026 Edition)
Michael S. Palmer
8 Most "Only Corvette Owners Understand" Quirks and Problems
Pouria Savadkouei
10 Reasons the C6 Z06 is Still A Performance Benchmark After 20 Years
Joe Kucinski
How Much Horsepower Every Corvette Engine "LOST" in 1972
Joe Kucinski
Top 10 DOs and DON'Ts for Protecting Your Convertible Top!
Michael S. Palmer
Top 10 Most Explosive Corvettes Ever Made: Power-to-Weight Ratio Ranked!
Joe Kucinski
150 hp to 1,250 hp: Every Corvette Generation Compared by the Specs That Matter
Joe Kucinski
8 Coolest Corvette Pace Cars (and Replicas) of All Time
Verdad GallardoDrifting
Joined: May 2012
Posts: 1,353
Likes: 44
From: Calgary Alberta
Hi Alan,
I don't believe the trim has ever been off the car. There's no gap between the trim and the windshield itself. I've never had the trim off myself, and the windshield is very likely the original one - while it is in good shape, it has a couple of windshield wiper scrapes and other imperfections that demonstrate its age - I have no intention to replace it. The car is an early January build, and the glass code is consistent with that as well. The grey sealer runs along the gap in the same way on both sides of the car.
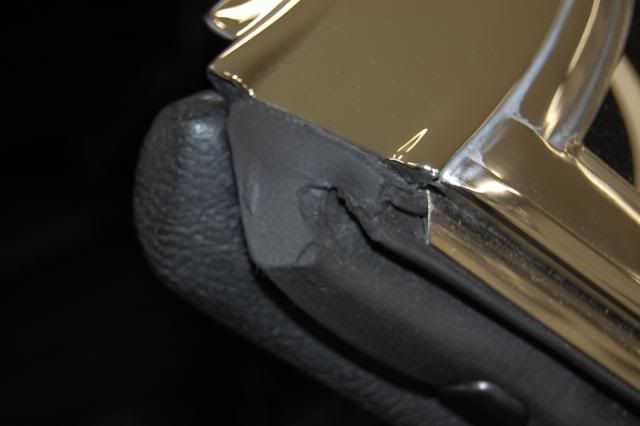
Much of the car appears to be as it was from the factory, though it was re-piainted in the proper colour in the 1990s (and not overly well), and the interior has been partially "restored" in the past (though with incorrect pile carpeting and deluxe-style wooden inserts in the door panels and shift plate - if I ever find the time, I'll go back to loop carpet and standard door panels). I've always thought it was a neat car. Here are a couple of pictures of a loose piece of the grey sealer:
Top:

Side:

I suspect I'll leave the remaining sealer alone and just fill in the spots where it has come out over time. The car never gets wet. Thanks.
I don't believe the trim has ever been off the car. There's no gap between the trim and the windshield itself. I've never had the trim off myself, and the windshield is very likely the original one - while it is in good shape, it has a couple of windshield wiper scrapes and other imperfections that demonstrate its age - I have no intention to replace it. The car is an early January build, and the glass code is consistent with that as well. The grey sealer runs along the gap in the same way on both sides of the car.
Much of the car appears to be as it was from the factory, though it was re-piainted in the proper colour in the 1990s (and not overly well), and the interior has been partially "restored" in the past (though with incorrect pile carpeting and deluxe-style wooden inserts in the door panels and shift plate - if I ever find the time, I'll go back to loop carpet and standard door panels). I've always thought it was a neat car. Here are a couple of pictures of a loose piece of the grey sealer:
Top:

Side:

I suspect I'll leave the remaining sealer alone and just fill in the spots where it has come out over time. The car never gets wet. Thanks.
Last edited by Brcmpbl; Sep 11, 2016 at 02:48 PM.