



My Personal Paint Thread

Thread Starter
Melting Slicks


Joined: Feb 2006
Posts: 3,428
Likes: 5
From: Japan

My best friend's big brother once told me "You know Dave, you're gonna wind up just like Mel someday...a middle aged hot rodder!"
He sure nailed that one...

Melting Slicks
Joined: Aug 2012
Posts: 3,487
Likes: 83
From: Titusville Florida
His name is Mark Worman...funny thing is , I grew up in Oregon just like him. There was a guy ("Mel") who lived just down the street from me in Portland, he had his and hers '68 Dodge Charger R/T's, his was about the same color green as my Vette and his wife's was white, his was a 440 4-speed and hers was a 383 automatic. If I'm ever in Springfield I'm gonna stop by his shop and tell him about that...later "Mel" traded his Charger for a black '70 Challenger R/T 440 4-speed with an alligator vinyl top. That car would be worth a zillion bucks today.
My best friend's big brother once told me "You know Dave, you're gonna wind up just like Mel someday...a middle aged hot rodder!"
He sure nailed that one...
My best friend's big brother once told me "You know Dave, you're gonna wind up just like Mel someday...a middle aged hot rodder!"
He sure nailed that one...
My first car was a 68 Charger R/T, wish I had that car back now!!!
Drifting


Joined: Aug 2003
Posts: 1,868
Likes: 13
From: Mascoutah IL
Alan, I was watching 'Graveyard Carz' last night where they were assembling a '71 'Cuda, in this utterly hospital-clean facility, repeatedly emphasizing how letter-perfect their restorations were. I mean, they were SO good, they were almost as good as YOUR car!!
All kidding aside (your car IS probably the most nicely, accurately-restored C3 I've seen on this forum though- no kidding there), it just felt a little embarrassing to be going through the trials and tribulations that I have endured with this project, expending as much or more work as those guys do but getting far lesser results because I just don't have the resources that those guys have. It's not that I don't know what perfection looks like, it's that it takes soooo much effort to get there when you don't have the right equipment or experience that it's almost impossible to really produce what you set out to produce.
Still, it will be infinitely better than what I had two years ago, and I might even be able to put it in a car show or two without having to make excuses for the paint!
All kidding aside (your car IS probably the most nicely, accurately-restored C3 I've seen on this forum though- no kidding there), it just felt a little embarrassing to be going through the trials and tribulations that I have endured with this project, expending as much or more work as those guys do but getting far lesser results because I just don't have the resources that those guys have. It's not that I don't know what perfection looks like, it's that it takes soooo much effort to get there when you don't have the right equipment or experience that it's almost impossible to really produce what you set out to produce.
Still, it will be infinitely better than what I had two years ago, and I might even be able to put it in a car show or two without having to make excuses for the paint!
Watched the same episode of GYC... What surprise me is that they are just now getting the shop crane and media blasting cabinet... Figured they would've had those machines years ago...
Keep at it and you'll be done before you know it... Bet it was nice finally starting her back up ;-)
Rogman
Thread Starter
Melting Slicks
Joined: Feb 2006
Posts: 3,428
Likes: 5
From: Japan
Car is looking great Dave!!!
Watched the same episode of GYC... What surprise me is that they are just now getting the shop crane and media blasting cabinet... Figured they would've had those machines years ago...
Keep at it and you'll be done before you know it... Bet it was nice finally starting her back up ;-)
Rogman
Watched the same episode of GYC... What surprise me is that they are just now getting the shop crane and media blasting cabinet... Figured they would've had those machines years ago...
Keep at it and you'll be done before you know it... Bet it was nice finally starting her back up ;-)
Rogman
Thread Starter
Melting Slicks
Joined: Feb 2006
Posts: 3,428
Likes: 5
From: Japan
Today's progress...
I FINALLY finished the job list that I started last Saturday, which basically consisted of putting assorted trim pieces back on after cleaning up the respective areas to which they attached. In my last post I showed the taillights installed, but when I went to hook them up I realized that the fixtures to which the lenses were attached were reversed...I took them apart and fixed that, then hooked all the wires up. Next I reinstalled the antenna. This was a little tricky because the coax cable that went to the back of the radio had been spliced at some point, not sure why, but I wound up having to re-splice it by taking and soldering two pieces of 14 ga. wire to each side of the coaxial cable, then taping the whole mess together with electrical tape. THAT took a little bit of time.
I also put my new 'Stingray' emblems on the sides...

...so now it's officially a Stingray again. Apparently that's supposed to be a pretty big deal. Next, I pulled my shiny new exhaust bezels out of my goodie box...

...and proceeded to install those. A few years ago I had a new exhaust system installed, along with a pair of new stainless tips, and the hamburger at the muffler shop only got the left side to align with its cutout this well...

...which was pretty disgusting to say the least. I cut the little tack welds that were holding it on, and repositioned it thusly-

And then screwed down the little grilles behind the rear window.

Now that everything looked semi-symmetrical, I installed the bumpers and luggage rack...

...and the back of the car is now pretty much complete. I used the leftyover rubber washers to act as cushions between the bumpers and the fiberglass when installing the bumpers, since I got new ones in the luggage rack installation kit that I bought (the little circular washers that the rack sits on were pretty badly rusted). As for the rack itself, if I'd had my druthers I'd druther not have put it back on the car, but I just got a bit lazy about plugging those holes, so I decided to leave it on. Overall I'm pretty happy with the way it all looks...
After all that, I started it back up and started troubleshootingt the lights and wipers. The vacuum signal was pretty weak at the relays (about 6-7 in. hg.) and after a little bit of head scratching I discovered that a large vacuum line was pulled loose from the bottom of the wiper relay. I reconnected it and VOILA! suddenly everything was working...sort of. Now the wiper door popped right up, but didn't want to close when I turned the wipers off. When I looked over at the little vacuum shutoff valve under the right side wiper arm, it looke like it wasn't really closing nearly as far as it should, so with the engine still running I pushed down on it with a long screwdriver and the wiper door slammed shut so hard that it nearly took all the fingers off of my right hand! Once I got my hand and the screwdriver safely extricated from under the wiper door I removed the grille, took out the offending valve, and elongated its attach holes with a rotary file enough to adjust it up onto the wiper arm a little more. Problem solved.
Lastly, I took out my front grilles, sanded all the scuzzy crust off of them, and masked one of them off to reapply the painted part...

...more on that tomorrow. Toodles!!
I also put my new 'Stingray' emblems on the sides...
...so now it's officially a Stingray again. Apparently that's supposed to be a pretty big deal. Next, I pulled my shiny new exhaust bezels out of my goodie box...
...and proceeded to install those. A few years ago I had a new exhaust system installed, along with a pair of new stainless tips, and the hamburger at the muffler shop only got the left side to align with its cutout this well...
...which was pretty disgusting to say the least. I cut the little tack welds that were holding it on, and repositioned it thusly-
And then screwed down the little grilles behind the rear window.
Now that everything looked semi-symmetrical, I installed the bumpers and luggage rack...
...and the back of the car is now pretty much complete. I used the leftyover rubber washers to act as cushions between the bumpers and the fiberglass when installing the bumpers, since I got new ones in the luggage rack installation kit that I bought (the little circular washers that the rack sits on were pretty badly rusted). As for the rack itself, if I'd had my druthers I'd druther not have put it back on the car, but I just got a bit lazy about plugging those holes, so I decided to leave it on. Overall I'm pretty happy with the way it all looks...
After all that, I started it back up and started troubleshootingt the lights and wipers. The vacuum signal was pretty weak at the relays (about 6-7 in. hg.) and after a little bit of head scratching I discovered that a large vacuum line was pulled loose from the bottom of the wiper relay. I reconnected it and VOILA! suddenly everything was working...sort of. Now the wiper door popped right up, but didn't want to close when I turned the wipers off. When I looked over at the little vacuum shutoff valve under the right side wiper arm, it looke like it wasn't really closing nearly as far as it should, so with the engine still running I pushed down on it with a long screwdriver and the wiper door slammed shut so hard that it nearly took all the fingers off of my right hand! Once I got my hand and the screwdriver safely extricated from under the wiper door I removed the grille, took out the offending valve, and elongated its attach holes with a rotary file enough to adjust it up onto the wiper arm a little more. Problem solved.
Lastly, I took out my front grilles, sanded all the scuzzy crust off of them, and masked one of them off to reapply the painted part...
...more on that tomorrow. Toodles!!

Drifting
Joined: Aug 2012
Posts: 1,650
Likes: 2
From: Tulsa Oklahoma
I FINALLY finished the job list that I started last Saturday, which basically consisted of putting assorted trim pieces back on after cleaning up the respective areas to which they attached. In my last post I showed the taillights installed, but when I went to hook them up I realized that the fixtures to which the lenses were attached were reversed...I took them apart and fixed that, then hooked all the wires up. Next I reinstalled the antenna. This was a little tricky because the coax cable that went to the back of the radio had been spliced at some point, not sure why, but I wound up having to re-splice it by taking and soldering two pieces of 14 ga. wire to each side of the coaxial cable, then taping the whole mess together with electrical tape. THAT took a little bit of time.
I also put my new 'Stingray' emblems on the sides...
...so now it's officially a Stingray again. Apparently that's supposed to be a pretty big deal. Next, I pulled my shiny new exhaust bezels out of my goodie box...
...and proceeded to install those. A few years ago I had a new exhaust system installed, along with a pair of new stainless tips, and the hamburger at the muffler shop only got the left side to align with its cutout this well...
...which was pretty disgusting to say the least. I cut the little tack welds that were holding it on, and repositioned it thusly-
And then screwed down the little grilles behind the rear window.
Now that everything looked semi-symmetrical, I installed the bumpers and luggage rack...
...and the back of the car is now pretty much complete. I used the leftyover rubber washers to act as cushions between the bumpers and the fiberglass when installing the bumpers, since I got new ones in the luggage rack installation kit that I bought (the little circular washers that the rack sits on were pretty badly rusted). As for the rack itself, if I'd had my druthers I'd druther not have put it back on the car, but I just got a bit lazy about plugging those holes, so I decided to leave it on. Overall I'm pretty happy with the way it all looks...
After all that, I started it back up and started troubleshootingt the lights and wipers. The vacuum signal was pretty weak at the relays (about 6-7 in. hg.) and after a little bit of head scratching I discovered that a large vacuum line was pulled loose from the bottom of the wiper relay. I reconnected it and VOILA! suddenly everything was working...sort of. Now the wiper door popped right up, but didn't want to close when I turned the wipers off. When I looked over at the little vacuum shutoff valve under the right side wiper arm, it looke like it wasn't really closing nearly as far as it should, so with the engine still running I pushed down on it with a long screwdriver and the wiper door slammed shut so hard that it nearly took all the fingers off of my right hand! Once I got my hand and the screwdriver safely extricated from under the wiper door I removed the grille, took out the offending valve, and elongated its attach holes with a rotary file enough to adjust it up onto the wiper arm a little more. Problem solved.
Lastly, I took out my front grilles, sanded all the scuzzy crust off of them, and masked one of them off to reapply the painted part...
...more on that tomorrow. Toodles!!
I also put my new 'Stingray' emblems on the sides...
...so now it's officially a Stingray again. Apparently that's supposed to be a pretty big deal. Next, I pulled my shiny new exhaust bezels out of my goodie box...
...and proceeded to install those. A few years ago I had a new exhaust system installed, along with a pair of new stainless tips, and the hamburger at the muffler shop only got the left side to align with its cutout this well...
...which was pretty disgusting to say the least. I cut the little tack welds that were holding it on, and repositioned it thusly-
And then screwed down the little grilles behind the rear window.
Now that everything looked semi-symmetrical, I installed the bumpers and luggage rack...
...and the back of the car is now pretty much complete. I used the leftyover rubber washers to act as cushions between the bumpers and the fiberglass when installing the bumpers, since I got new ones in the luggage rack installation kit that I bought (the little circular washers that the rack sits on were pretty badly rusted). As for the rack itself, if I'd had my druthers I'd druther not have put it back on the car, but I just got a bit lazy about plugging those holes, so I decided to leave it on. Overall I'm pretty happy with the way it all looks...
After all that, I started it back up and started troubleshootingt the lights and wipers. The vacuum signal was pretty weak at the relays (about 6-7 in. hg.) and after a little bit of head scratching I discovered that a large vacuum line was pulled loose from the bottom of the wiper relay. I reconnected it and VOILA! suddenly everything was working...sort of. Now the wiper door popped right up, but didn't want to close when I turned the wipers off. When I looked over at the little vacuum shutoff valve under the right side wiper arm, it looke like it wasn't really closing nearly as far as it should, so with the engine still running I pushed down on it with a long screwdriver and the wiper door slammed shut so hard that it nearly took all the fingers off of my right hand! Once I got my hand and the screwdriver safely extricated from under the wiper door I removed the grille, took out the offending valve, and elongated its attach holes with a rotary file enough to adjust it up onto the wiper arm a little more. Problem solved.
Lastly, I took out my front grilles, sanded all the scuzzy crust off of them, and masked one of them off to reapply the painted part...
...more on that tomorrow. Toodles!!

Safety Car

Joined: Sep 2012
Posts: 4,688
Likes: 42
From: Palm Harbor, Florida
Nice work so far. You have exact same toolbox as me I think. The one more toward front of vehicle. Had it well over 20years now, both bottom and top. Well, I think they are the same. The handles are the same. Same color too, I know they only made a few red(lol).
Drifting
Joined: Aug 2003
Posts: 1,868
Likes: 13
From: Mascoutah IL
Dave--
Outstanding work... No pictures of the finger, or did it look too bad??? All kidding aside, glad you're okay... As I was reading, I was expecting the story to go to the emergency room... Can't wait to see how the grilles turn out... When are you going to put the doors on???
Rogman
Outstanding work... No pictures of the finger, or did it look too bad??? All kidding aside, glad you're okay... As I was reading, I was expecting the story to go to the emergency room... Can't wait to see how the grilles turn out... When are you going to put the doors on???
Rogman
Corvette Stories
The Best of Corvette for Corvette Enthusiasts

Corvette & Porsche 911: How Two Icons Conquered the Last 25 Years
Joe Kucinski
2027 Chevrolet Silverado 1500 First Look: Everything You NEED to Know!
Michael S. Palmer
5 Best & 5 Worst Corvette Daily Drivers
Joe Kucinski
The Headlights of Every Corvette Generation Explained
Joe Kucinski
5 Best & 5 Most Overrated Corvette Track Packages of All Time!
Joe Kucinski
Every 2027 Corvette Engine Explained
Joe Kucinski
Designer Imagines A Corvette That Looks More Like a Corvette Than the Corvette
Verdad Gallardo
10 Ugly Corvettes That We Still Kinda Love
Joe Kucinski
Top 10 Most Expensive Corvettes Ever Sold on Bring A Trailer
Brett Foote
Thread Starter
Melting Slicks
Joined: Feb 2006
Posts: 3,428
Likes: 5
From: Japan
Doug, I bought that (Kennedy) toolbox back around 1983...it has served me pretty faithfully but I've long since outgrown it! I've been lobbying for one of those giant Costco babies for awhile now but Christmas has come and gone and still don't have it...grrr.
As for fingy, it's fine. I just underestimated the amazing power of the C3 wiper door!!
As for fingy, it's fine. I just underestimated the amazing power of the C3 wiper door!!



Safety Car
Joined: Sep 2012
Posts: 4,688
Likes: 42
From: Palm Harbor, Florida
I hear ya, I got a nice husky top box a few years ago in addition. The old red toolbox has served me well also. Some drawer liners and lube the sliders now and then it does the trick. I don't really have room for a nice big one in my garage.
Thread Starter
Melting Slicks
Joined: Feb 2006
Posts: 3,428
Likes: 5
From: Japan
On to the Front End...
This morning I continued with prepping the grilles, which took an agonizing long time. Basically the process went like this- first I scuffed up the painted parts with some sandpaper that was rough enough to remove the corrosion from the pitted areas, and at the same time i took a small half-round file and knocked down some of the casting flash. Probably a killer for NCRS points, but still makes them look a bit better IMHO. After that I wiped them down with some precleaner, then masked them like this-

This was accomplished by using 2" wide el cheapo super-sticky masking tape and a utility (Stanley-type) knife. I pressed the tape down onto the grille, then cut away the masking tape. After that I applied two good coats of Dupli-Color cast iron engine paint and pulled the mask off. In the case of the left side grille (which hadn't been in an accident and was as old as the rest of the car) a lot of the chrome was peeling away. I couldn't really do anything with the part that was on the upper surface of the chrome surround that runs along the outer edge, but I did touch up the 'lattice' part of the grille with a small brush and some silver paint. There was a small amount of black that I touched up as well, and here was the result...
(Right side)

(Left side)

Certainly not new, but much improved over what they looked like when I pulled them out of storage and perfectly acceptable to me considering replacements are $1200 the pair
After that it was just a rather tedious matter of pulling out the various brackets and trim pieces and running them across the wire wheel, painting them black, and putting them on...
(Gaping Hole)

(Bumper & Air Dam Installed)

(Overriders Installed)

(Grilles Installed...YEEAAAHHHHH!!!!!!)

So, overall I'd say it was a reasonably productive weekend, and with the exception of only one or two minor items the car is pretty much ready for the installation of carpet now. I purchased an ACC carpet set with insulation last year...any of you carpet installation experts, please jump in NOW, OK?
This was accomplished by using 2" wide el cheapo super-sticky masking tape and a utility (Stanley-type) knife. I pressed the tape down onto the grille, then cut away the masking tape. After that I applied two good coats of Dupli-Color cast iron engine paint and pulled the mask off. In the case of the left side grille (which hadn't been in an accident and was as old as the rest of the car) a lot of the chrome was peeling away. I couldn't really do anything with the part that was on the upper surface of the chrome surround that runs along the outer edge, but I did touch up the 'lattice' part of the grille with a small brush and some silver paint. There was a small amount of black that I touched up as well, and here was the result...
(Right side)
(Left side)
Certainly not new, but much improved over what they looked like when I pulled them out of storage and perfectly acceptable to me considering replacements are $1200 the pair
After that it was just a rather tedious matter of pulling out the various brackets and trim pieces and running them across the wire wheel, painting them black, and putting them on...
(Gaping Hole)
(Bumper & Air Dam Installed)
(Overriders Installed)
(Grilles Installed...YEEAAAHHHHH!!!!!!)
So, overall I'd say it was a reasonably productive weekend, and with the exception of only one or two minor items the car is pretty much ready for the installation of carpet now. I purchased an ACC carpet set with insulation last year...any of you carpet installation experts, please jump in NOW, OK?
Last edited by birdsmith; Feb 10, 2013 at 10:27 PM.


Instructor


Joined: May 2004
Posts: 111
Likes: 0
From: Centreville MD
I've been playing voyeur throughout your thread, beautiful job, by the way! I thought I might have one small piece of advice about the carpet. It's WAY easier to install it if it's warm. You're in a warm-weather climate, so you don't have the same concerns as we do back east this time of year. But still, laying it in the sun for 30-45 mins will loosen it up nicely. I installed carpet in my brother's '71 LeMans in upstate NY in the dead of winter in an un-heated garage...not my idea of fun. Disclaimer - I'm not a professional installer, but I did install carpeting for about three years way back when... Congrats on a job extremely well done!
Thread Starter
Melting Slicks
Joined: Feb 2006
Posts: 3,428
Likes: 5
From: Japan
I've been playing voyeur throughout your thread, beautiful job, by the way! I thought I might have one small piece of advice about the carpet. It's WAY easier to install it if it's warm. You're in a warm-weather climate, so you don't have the same concerns as we do back east this time of year. But still, laying it in the sun for 30-45 mins will loosen it up nicely. I installed carpet in my brother's '71 LeMans in upstate NY in the dead of winter in an un-heated garage...not my idea of fun. Disclaimer - I'm not a professional installer, but I did install carpeting for about three years way back when... Congrats on a job extremely o done!
Thread Starter
Melting Slicks
Joined: Feb 2006
Posts: 3,428
Likes: 5
From: Japan
The Inside Part
Got up Saturday ready to tear into the carpet...while I was still in the shower wifey came banging on the door complaining that the car had a flat. I've plugged a million tires in my day so I figured no big deal...go outside, fired up the compressor, and pulled the jack out to go look at the tire. Started putting air in it and the air was rushing out of a 1" long slit in the sidewall. Looked over at the F150, same deal. Some scummy little s@#t went down our street slashing tires Friday night...put the donut on the commuter car so wifey could get to the gym on time, put the spare on the truck, talked to the neighbor (who knew a guy at his work who could hot-patch the truck tire) and FINALLY got to work on the Vette about three hours later than I had planned. I DID manage to get the compartment doors redone Saturday-when I took them apart the cheesy particle board-stuff that they're made of was coming apart in places-

...So I filled up the delaminations with Elmer's wood glue and clamped them in a vise for awhile,

Which worked like the proverbial champ. I also stripped and repainted the little escutcheon plate thingies that go around the latch buttons...

Then put the whole thing back together...

NEXT: Carpeting the inside
...So I filled up the delaminations with Elmer's wood glue and clamped them in a vise for awhile,
Which worked like the proverbial champ. I also stripped and repainted the little escutcheon plate thingies that go around the latch buttons...
Then put the whole thing back together...
NEXT: Carpeting the inside
Thread Starter
Melting Slicks
Joined: Feb 2006
Posts: 3,428
Likes: 5
From: Japan
(Cont'd. ...)
Once I was done with the compartment door assy. I got started on the interior. The carpet set basically consists of six pieces- one each for the rear fenders, aft stowage compartment, rear bulkhead, and one each for the driver's and passenger compartment. The set I bought was made by ACC, and as far as I can tell it's decent quality, but it's a LOT of work to install. Each piece comes way bigger than necessary, and there are no holes anywhere, so you have to figure out how to locate each one and cut them accordingly without screwing up- the old carpenter's cliche "measure twice/ cut once" definitely applies here. The sequence goes- fenders, stowage compartment, driver/ passenger floors/ then finally the rear bulkhead and compartment door assembly.
I started yesterday by fitting the right rear fender piece. I laid the old piece over it to try and get a rough hole location, then cut the periphery down until I had a good fit. I stuck it down with some Duro spray adhesive, then installed the shoulder harness reel and the chunk of foam rubber...


I repeated the procedure for the left side, then fitted the floor section...

...this piece was tricky because the "dome light" frame had to be screwed into two holes in the rear of the compartment and locating those with a scribe was a BI%*H to say the least. I'm a bit on the fat side and I don't fit back there real well, but I did manage to get it done. One problem I did run into was that the little rubber plugs that help hold the carpet onto the rear of the compartment were so old and dried out that it wasn't possible to get them plugged back in, so until I can get some new ones the carpet is gonna have to sit there on its own. It's stuck in there pretty well on its own so I'm not too worried about that.
Next, I moved on to the passenger compartment, which began like this-

as you can see this piece is WAAYYYY huge, so I dragged it back out and tried to fit it into the [very shabby] old piece as best as possible, then cut it down to within about an inch of the original. After that, I started fitting the console and parking brake cover around it, and just went around a little at a time cutting material away until it seemed to fit correctly...

Once it was trimmed properly, I installed the sill plate and kick panel and located the seat and seatbelt holes with a little razor knife. I used the same knife for a lot of the trimming as well- it was one of those ones where you can break off little segments of the blade when it wears out and it really seems to work better than anything else I tried. Lastly, I trimmed the rear bulkhead piece and dropped the compartment door assembly into place, but those will have to come back out while I fit the driver's side.
 .
.
Really, in terms of pure difficulty, this is one scary job, because if you screw anything up you've basically destroyed a very expensive piece of carpet. This really adds to the time required to do the job properly because if you go too fast you'll cut too much material away. That combined with some insolent little no-life punk slicing my tires conspired to prevent me from finishing the job this weekend, but it should be done in a few days...
I started yesterday by fitting the right rear fender piece. I laid the old piece over it to try and get a rough hole location, then cut the periphery down until I had a good fit. I stuck it down with some Duro spray adhesive, then installed the shoulder harness reel and the chunk of foam rubber...
I repeated the procedure for the left side, then fitted the floor section...
...this piece was tricky because the "dome light" frame had to be screwed into two holes in the rear of the compartment and locating those with a scribe was a BI%*H to say the least. I'm a bit on the fat side and I don't fit back there real well, but I did manage to get it done. One problem I did run into was that the little rubber plugs that help hold the carpet onto the rear of the compartment were so old and dried out that it wasn't possible to get them plugged back in, so until I can get some new ones the carpet is gonna have to sit there on its own. It's stuck in there pretty well on its own so I'm not too worried about that.
Next, I moved on to the passenger compartment, which began like this-
as you can see this piece is WAAYYYY huge, so I dragged it back out and tried to fit it into the [very shabby] old piece as best as possible, then cut it down to within about an inch of the original. After that, I started fitting the console and parking brake cover around it, and just went around a little at a time cutting material away until it seemed to fit correctly...
Once it was trimmed properly, I installed the sill plate and kick panel and located the seat and seatbelt holes with a little razor knife. I used the same knife for a lot of the trimming as well- it was one of those ones where you can break off little segments of the blade when it wears out and it really seems to work better than anything else I tried. Lastly, I trimmed the rear bulkhead piece and dropped the compartment door assembly into place, but those will have to come back out while I fit the driver's side.
.Really, in terms of pure difficulty, this is one scary job, because if you screw anything up you've basically destroyed a very expensive piece of carpet. This really adds to the time required to do the job properly because if you go too fast you'll cut too much material away. That combined with some insolent little no-life punk slicing my tires conspired to prevent me from finishing the job this weekend, but it should be done in a few days...
Last edited by birdsmith; Feb 18, 2013 at 10:46 PM.
Thread Starter
Melting Slicks
Joined: Feb 2006
Posts: 3,428
Likes: 5
From: Japan
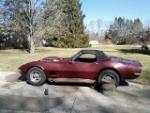
As for driving, all that's left after the carpet is build up and install the doors, put the spare tire carrier back in, and bleed the brakes with my shiny new Motive power bleeder.
California Stingrays is doing a cruise up to San Luis Obispo in May which sounds like fun...
Drifting
Joined: Mar 2009
Posts: 1,461
Likes: 362
From: Monson MA
Well Done
birdsmith, I have to say what a great job you have done with this thread and your car. I have read this from the beginning and follow it with every added post. I am in the process of a frame off with my 68 and it's been a long road finding the time and money to continue. I stay pretty pumped and you sharing every step and seeing the progress just helps keep the vision and excitement flowing.
A big thank you and you have done a fantastic job.
Peter
A big thank you and you have done a fantastic job.
Peter