


My Personal Paint Thread

Thread Starter
Melting Slicks


Joined: Feb 2006
Posts: 3,428
Likes: 5
From: Japan
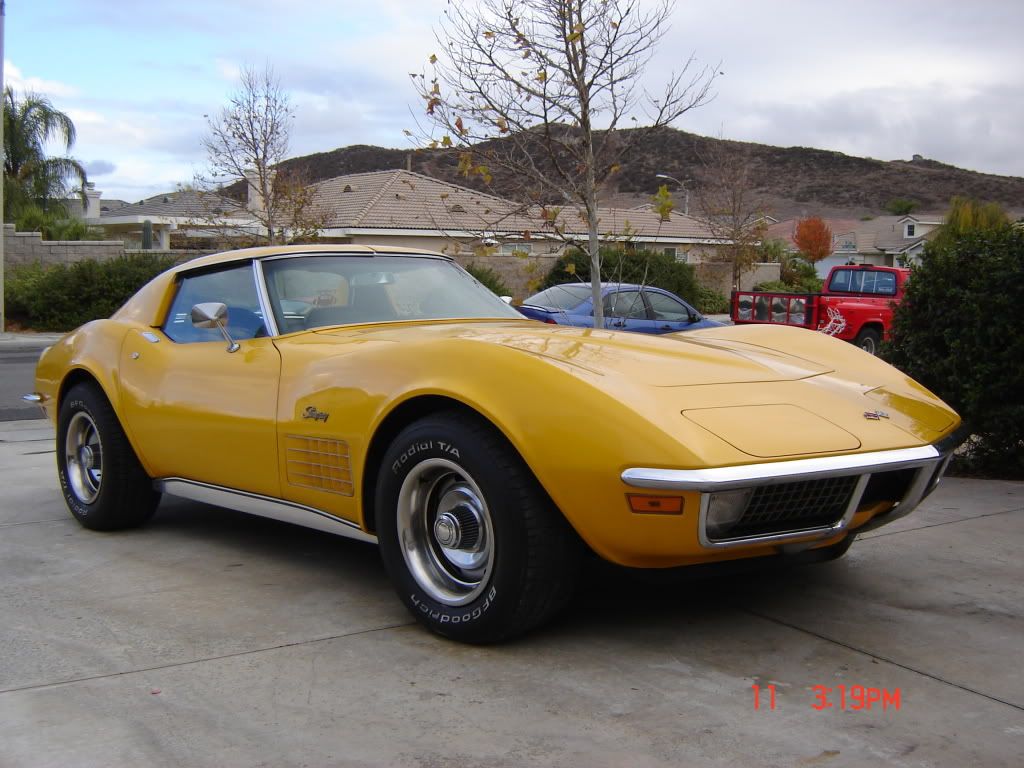
Howdy all...those of you who have frequented this forum for awhile are by now familiar with me, but nobody's really seen my car because I pretty much hate screwing around with things like photobucket. Today after months of ruminating I finally decided to bite the proverbial bullet and start prepping my faithful ol' 1970 C3 for a long-overdue repaint. When I bought the car in 1997 from a little ol' lady it was Ontario Orange or a close facsimile thereof, and while it did catch my attention sitting in its owner's driveway with a "For Sale" sign in the window it wasn't exactly the color that I would have preferred.Therefore, after owning it for about three years and getting the major mechanical issues straightened out, I scuffed it down real good and squirted about six coats of yellow lacquer onto it. The previous orange color was a base/clear job whose clearcoat had begun to burn off by then so I figured it was due, and while the end result wasn't exactly show quality it was a huge improvement over what I had...it was a neat-looking color and it was shiny. Not long after that my job took me overseas for a couple years and the Vette wound up parked outside due to no garage space, which didn't do the fragile and brittle lacquer paint any favors, so while the car still photographed well and was a decent-looking 10-footer it had a number of nagging problems that needed to be corrected. Since lacquer is now all but illegal in the great state of California the only real option at this point is a complete repaint, and this time I really want to take my time and do the job right. Since it is a complete, numbers-matching car (with the exception of the 4-speed that I swapped in four years ago) I have decided that the only really correct way to go is back to the original color which was Donnybrooke Green. I normally work 10-hour days at my job but today I decided to come home after just eight hours. Having an extra two hours of energy left, I decided to strip the right-side roof panel...
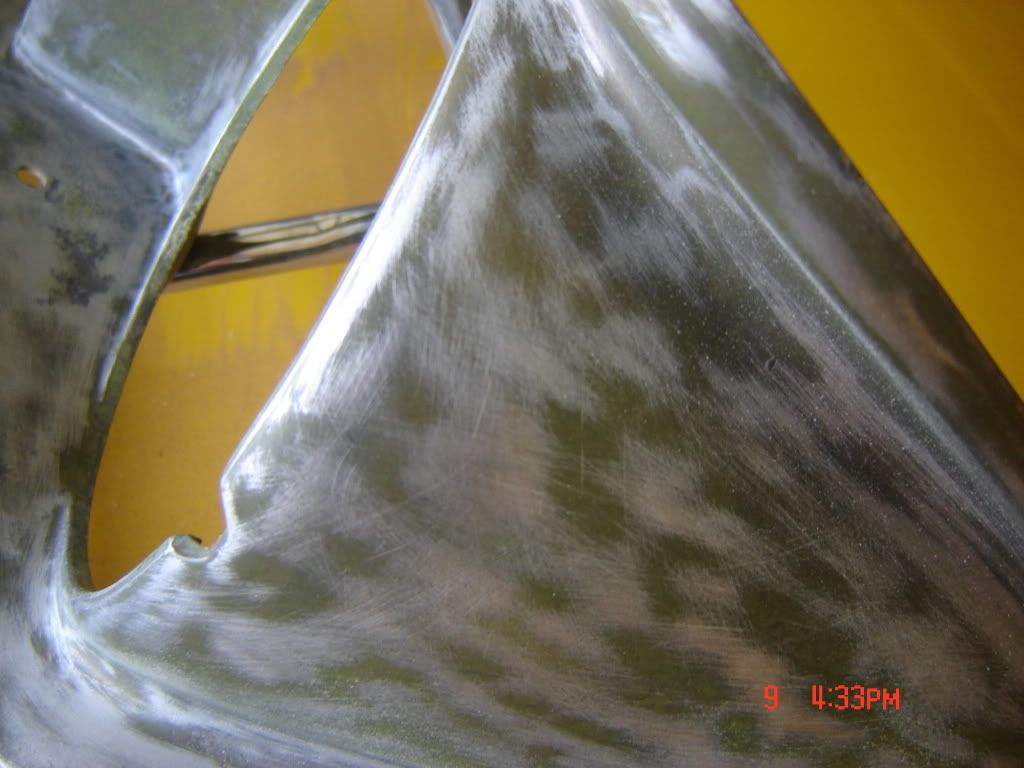
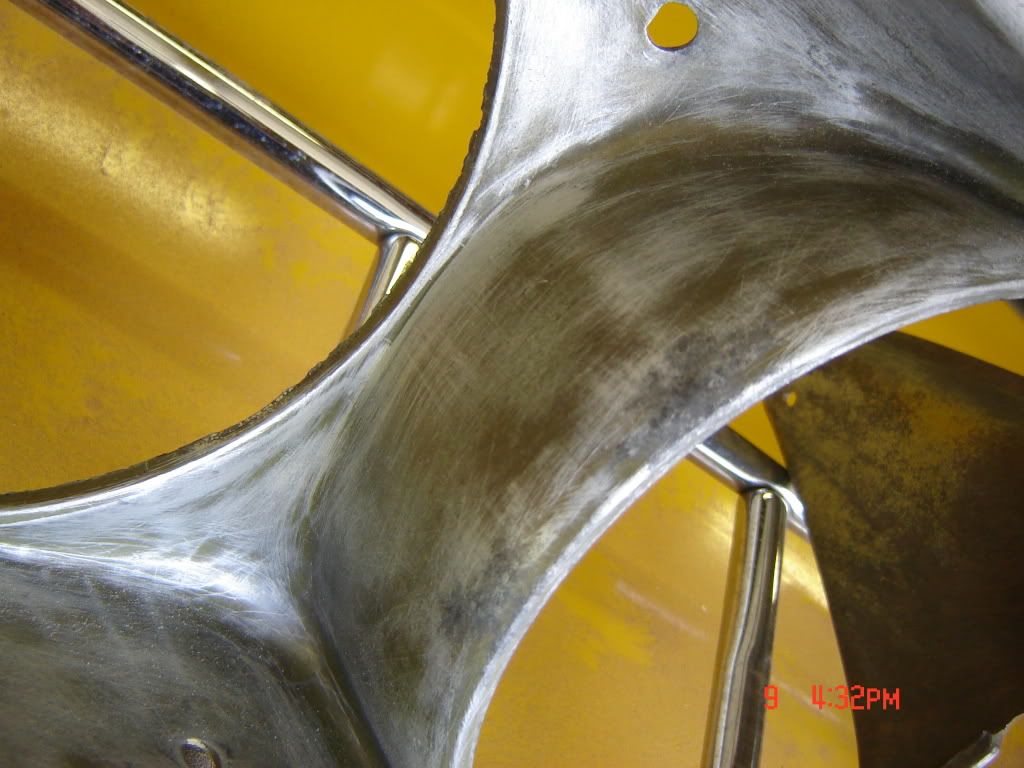
Having read numerous posts in the past about scraping old paint off with razor blades, I decided to test that theory with a finely-sharpened putty knife. Now please, before all you razor blade advocates come out of the woodwork and scold me for not using the approved razor blades, understand that as an aircraft metal mechanic with 36 years' experience (I'm 53) I have honed my putty knife-sharpening skills to a literal razor's edge...suffice to say that after about an hour of diligently scraping away I had removed about a square foot of the top layer of paint. This clearly wasn't going quickly enough, so I loaded up my Milwaukee orbital disc sander with 100 grit and got to it. After about an hour I had gone through the topcoat, through the primer, the previous orange, through what appeared like another layer of red oxide primer, then a layer of silver(?) and finally one more layer of grey primer before I arrived at the glass underneath it all. I never did notice any Donnybrooke Green, so I'm now guessing that at least the right side roof panel was not native to this car...
Now, while I have painted a few cars in my by-now rather lengthy life, they have all been with either lacquer or the old DuPont Centari enamel which is no longer available either, using cheapo Harbor freight guns, etc.- your typical driveway jobs. Just last year I did do a respray of my son's Nissan 240SX in our garage, and while the end result WAS a vast improvement over the existing paint job there were a number of problems associated with the cheap equipment I was using and my very limited knowledge of modern base/clear paint systems. Making those sorts of mistakes on my cherished C3 would not be at all acceptable, so I have humbly come before the body and paint experts here on this forum in the hope of:
(1) Getting as many pointers as possible about safely removing ALL the previous layers of paint from the entire car without detroying or damaging anything, at minimum expense.
(2) Getting some useful advice on the best paint gun/guns that I can get my hands on for the most economical price. Understand I'm on a budget- I'm ALWAYS on a budget, and with a kid leaving for college in the fall that won't soon change
(3) Having obtained the requisite proper equipment, getting advice on the correct materials and every possible detail about their proper use, i.e., types and amounts of reducers to use, gun/line pressures, etc., etc.
(4) Obtainig ANY other useful advice that would help me in this process.
Please understand that the last thing I would like to see is for this thread to descend into an endless pi$$ing contest over who-knows- more-than-who, and also please understand that I am committed to doing this thing myself so if you're gonna come on here to try and discourage me from doing it or going any further because I made some mistake, don't bother. I am old and creaky but these kinds of projects are what keeps me alive, so I will value all the useful advice that any of you may provide. Attached are (2) before and (1) after pic of my stripped RH roof panel... I will try and keep posting pictures as the whole job progresses, mistakes included, so that hopefully anybody else willing to try it will learn...here goes!

Burning Brakes


Joined: Oct 2010
Posts: 1,160
Likes: 23
From: Prescott AZ
Hi Birdsmith,
I'm like you in the fact that I use to do a lot of painting years ago. Mostly centari and emaron. I've only played with the color coat clear coat a couple of times. I will be getting ready to paint my 70 vette in the next year and would also like to hear from the experts. Good luck with your project and keep us posted on how it goes/ turns out.
Rob
Team Owner


Joined: Sep 2006
Posts: 31,270
Likes: 4,362
From: Westminster Maryland
Hi bsmth,
Here are my thoughts on painting!
I did everything on my restoration except powder coating the frame, chrome plating, and PAINT.
Even though I was planning on acrylic lacquer, (the easiest paint EVER to spray), based on how many times I had to do many, many things OVER several times to make them the way I wanted, I feared I'd be painting for the rest of my life before I got it almost perfect.
So I brought the painter the body on a dolly and under his guidance prepped the car for paint. He sprayed all the primer, sealer, and paint and it was right the first time.
How picky will you be?
Regards,
Alan

Melting Slicks


Joined: Mar 2008
Posts: 2,989
Likes: 198
From: Meriden CT
Base coat / clear coat is easy, you can do it. Look at the "restification" section on chevelles.com
Once it's stripped you're going to use a sealer, then do any filler work, then primer/surfacer, once that's blocked sealer and BC/CC.
You'll probably want to wet sand, buff & polish too after the clear coat.
There are some good HVLP guns for under $100, but I can't remember the brand. Mine's a DeVilbiss, and was quite a bit more $.
Stck with one manufacturer for the paint, I've used R-M and PPG, but I liked the R-M better. Your supplier can guide you in what you need.

Drifting

Joined: Feb 2008
Posts: 1,560
Likes: 4
From: Arlington texas
I'm working on my body also as we speak. I hear all the people with the razor blades but that's way too tedious for me. I used a stripper that did a fair job for most of my paint and now am putting my air compressor to work with sanding whats left. It is coming off fairly easily. If I hadn't removed so much with the stripper then I would be soda blasting it just to get it done. It's too late for me to justify buying the soda blaster now.
I've tried asking in the paint section down below but never got much response from them. I'll be keeping an eye on this thread. I need to buy some guns also and have been wondering which one to get that is good but won't break the bank.
I have been quite impressed with how well the fiberglass has held up all these years. I figured I'd find stress cracks or something when the paint came off but so far nothing at all.
Partially for the budget but mainly for the pride, I am trying not to farm anything out on this car. Hopefully when it's done I can say I did it, if I don't die first!
Le Mans Master


Joined: Apr 2005
Posts: 6,355
Likes: 425
From: Seattle Area WA
For a solid color and the fact that you have used Centari I would not be afraid to shoot PPG Concept single stage, it is much easier to touch up and it has great depth too. You might want to give DUB a shout in the paint forum, he is doing a Donnybrooke green car right now. I used BC/CC on my son's '76 that you can look at in my album under my profile. Very easy to use, lots of depth and with 3 coats of clear there is plenty to sand out the bugs and dust and be slick as snot.
Last edited by Scott Marzahl; May 10, 2011 at 11:52 PM.
Drifting
Joined: Feb 2008
Posts: 1,560
Likes: 4
From: Arlington texas
I'm replacing my hood so will be spending some time practicing on it.
Corvette Stories
The Best of Corvette for Corvette Enthusiasts

Top 10 Most Expensive Corvettes Ever Sold on Bring A Trailer
Brett Foote
10 Things Every Corvette Owner Needs (2026 Edition)
Michael S. Palmer
8 Most "Only Corvette Owners Understand" Quirks and Problems
Pouria Savadkouei
10 Reasons the C6 Z06 is Still A Performance Benchmark After 20 Years
Joe Kucinski
How Much Horsepower Every Corvette Engine "LOST" in 1972
Joe Kucinski
Top 10 DOs and DON'Ts for Protecting Your Convertible Top!
Michael S. Palmer
Top 10 Most Explosive Corvettes Ever Made: Power-to-Weight Ratio Ranked!
Joe Kucinski
150 hp to 1,250 hp: Every Corvette Generation Compared by the Specs That Matter
Joe Kucinski
8 Coolest Corvette Pace Cars (and Replicas) of All Time
Verdad GallardoRacer

Joined: Apr 2009
Posts: 331
Likes: 44
From: Cincinnati Ohio
Your yellow paint job looks great! After seeing what you have already done along with stripping and painting 2 Camaro's, and 2 C3 Corvettes (73 and a 76) along with several other vehicles in a two car garage, I can attest you can do it. I stripped all 4 using chemical strippers "Captain Lee's" with good results and no problems after several years. Depending on the number of previous coats of paint, it may take 3-5 gallons of stripper. (1 car had 13 coats of paint on it!) Key is getting it clean after stripping and don't let it sit on the fiberglass for a long time. Wash with soap and water, acetone and dewaxer.
I used PPG system paints because I have two sources close to me. DP Epoxy Primers as sealer, K36 sanding primer, and either Concept DCC single stage or DBU Base Coat followed by Clear Coat DC4000. You may have to use a specific color primer for some base coats.( IE: Millennium Yellow needs white primer.) I have used Concept as a single stage and also as a base coat followed with clear.
I added an old furnace fan with a filter in the attic of the garage to provide a down draft and had the garage door closed all but about 12". Works like a downdraft booth. I use an old gallon thinner can to hold it open. When I did the Camaro's I used a conventional DeVilbiss JG gun, when I did the Corvette's I upgraded to a DeVilbiss JGA HVLP gun ~$200. But you will need different tips for the various stages of paint. 1.2 or 1.3 mm, 1.5 mm and 1.7 mm for primers.
I loved Lacquer as it was forgiving and fast. The BCCC paints are expensive and require a lot of different thinners and catalysts depending on temperature etc. You can expect to spend ~ $1500 + just for paint depending on colors. Red is expensive. No doubt the BCCC are more durable than lacquer. The current lacquer paints are not like the old versions. I think it has to do with removal of lead. If you put clear over Concept it has an exceptional depth of gloss.
As mentioned by Scott, you can fix runs and bugs etc in clear coat with a good block sanding with up to 2000 grit followed by 3 stage buffing. I think the next one I paint I will find a spray booth to rent or I would vote for Alan's solution of prepping it and taking it to someone with a paint booth to do the final painting. The garage approach works, but a booth is really nice.
Go for it!
Unk
Thread Starter
Melting Slicks
Joined: Feb 2006
Posts: 3,428
Likes: 5
From: Japan
Wow..thanks everybody for all the interest. Alan, I've seen a lot of your posts, they're always very polite and well thought out and I know you do mean well but this thing is as much of a crusade with me as anything else, so unfortunately I'm committed to doing it myself...it's things like this that keep me alive and breathing. To all the others that provided insight so far I really do appreciate the info as every bit will help in the end. I put off getting started with this for a long time, but the way that I always wind up finishing projects like this is by getting started- I figured if I just stepped out in the garage and stripped a roof panel there would be no turning back! I do have access to a gigantic media blasting facility where I work along with some very cooperative and interested painters so I will take the wiper door, side vents, and top grilles to them for stripping. I may resort to chemical stripper for intricate areas like the hood flange and door jambs but at this point I think that the orbital sander is gonna be the way to go for most of the rest of the car. I'm also thinking of getting rid of the luggage rack just to clean up the rear deck some. There is a spot on the top right rear fender crease that looks blistered as well where something caused the glass to lift slightly- I'll post a pic of that soon so maybe one of you can advise me best on how to permanently make it go away.
Here in the Temecula valley there is really only one well-equipped paint store still around, I purchased the paint for my son's car from them last year and the owner is quite helpful. I'll see what he recommends as far as paint and bounce it off of you guys.
The next job will be the other roof panel I think and probably the hood...BTW it has some measly-looking blistering where apparently AC oil sprayed underneath it; I could also use some tips on how to fix that since I just slathered some bondo on it before the yellow repaint and the blisters magically reappeared after just a few weeks- I'll see if I can't get a decent-looking pic of that to post as well.
Again thank you all for taking the time to reply- there are a lot of great people here and this forum has saved my vette's butt a few times already!
Drifting
Joined: Jun 2007
Posts: 1,404
Likes: 1
From: Ansonia/NYC CT
I have a question for the pain gods here. I razor bladed all the paint off of my hood (figured I'd start there), and it peeled off easy when the paint was warm, kinda like latex. BUT. There is a brick red layer of primer on there that WON'T razor blade. If I sand, is there anything I should know about? Like, hey, don't sand all the way onto the fiber glass, are there any resins or coatings that could cause said glass to start fraying, etc?
And last, what's a good brand of primer? My car is gonna be ALL primer this year, saddly. Next year, though, it's bring sexy back.
And last, what's a good brand of primer? My car is gonna be ALL primer this year, saddly. Next year, though, it's bring sexy back.
Thread Starter
Melting Slicks
Joined: Feb 2006
Posts: 3,428
Likes: 5
From: Japan
Kevin, I went through that same layer when I sanded the one roof panel but in my case it appeared under the orange layer that was under the yellow topcoat. My car wasn't originally orange so this was part of an earlier respray it would seem...I kept going beyond the red primer and found what appeared to be silver underneath that so I'm guessing that my right-side roof panel came from a car that was originally silver...still working OT this week so I likely won't have the time or energy to strip the left side panel until maybe Sunday.
Thread Starter
Melting Slicks
Joined: Feb 2006
Posts: 3,428
Likes: 5
From: Japan
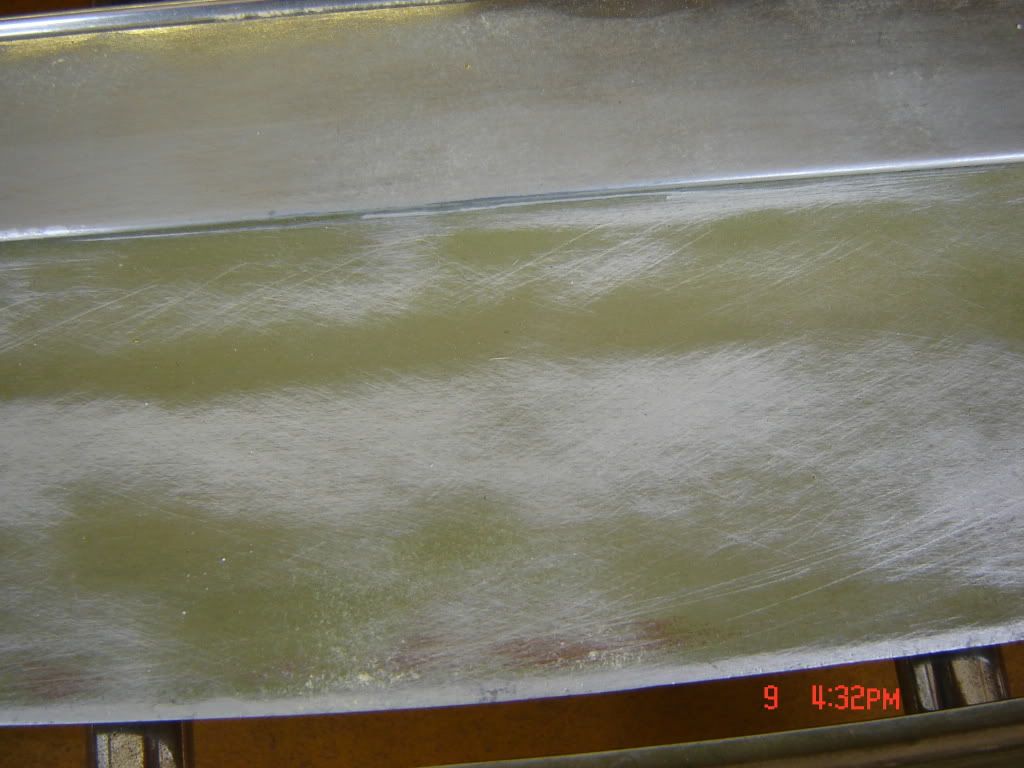
FINALLY, I'm back at the vette after a very hectic last month or so. Our one and only son just graduated from High School last week with full-ride ROTC scholarship in hand; he'll be off to TCU in the fall. About a week ago I had some secret friends from a secret place media blast all the metal parts (Wiper door, wiper grille, rear grilles, headlight surrounds, and side grilles) at a VERY attractive price (FREE!). I did make some interesting discoveries- it looks for all the world that a PO at some point took all these parts completely down to metal because there are sanding scratches on the wiper door, headlight frames, and side grilles, but at least they are now completely bare and undamaged so that's one less thing to worry about. I've cleared out a space in an outdoor shed so I'll start removing, wrapping, cataloguing, and storing all the loose parts soon, and then I'll finish disassembling the car so I can finish stripping it. I'm kinda fat right now so hopefully this will help me burn off a few excess lbs. by the end of summer!! You can see by the pics the sanding scratches...somebody really put some elbow grease into these things way back when...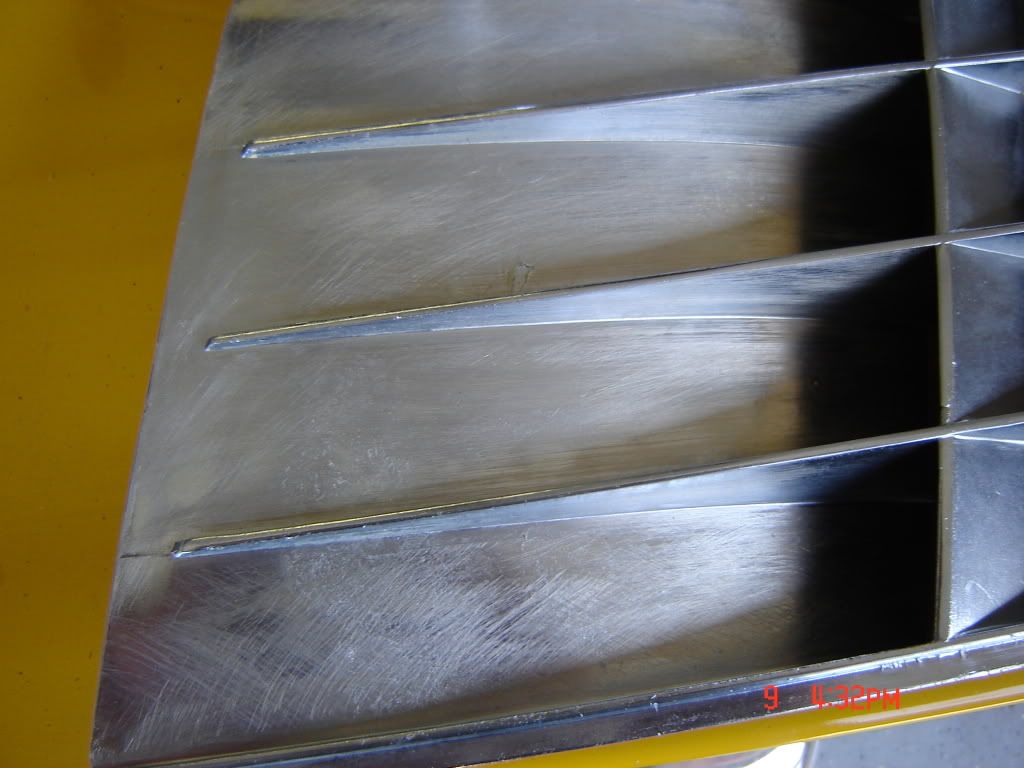

Last edited by birdsmith; Jun 9, 2011 at 09:14 PM.
Drifting
Joined: Aug 2009
Posts: 1,635
Likes: 8
From: Enid Oklahoma
You already have a head start. You have used paint guns and know the "feel" it takes to avoid runs. Now I suggest really reading the sheets on the characteristics of each paint with each manufacturer. You will find thier recommended overlap as well as recommended flash times between coats. I shoot about a 10 inch wide pattern at about 10-12 inches. And you probably already know the inportance of keeping the gun perpendicular to the surface. Since you will shoot a clear you really need a good base. With a single stage, you can get rid of a lot of flaws when you cut and buff, but once the clear is on, it is there forever, so a clean room is imperative. I use both HVLP and conventional guns. I lean toward the hvlp because I don't have a ventilation system and the hvlp does not leave as much in the air. Clear is just like paint, you need to match the activator to the temp so it cures at the proper rate or you will either be waiting forever for it to flash or find yourself in a panic mixing and refilling for the next coat. It is bette to have to wait then to have to hurry. With the green base, make sure to shoot maybe a dark gray primer, it will ease the first shot coverage. I like PPG paints, I love the last wetcoat, it goes on and flows awesome. The hardest thing for me after is when it is time to cut and buff, but when that shine comes back better than before it is well worth it! There will be a lot of other great comments, good luck gettin back at it, and pat that kid on the back for his ROTC!!!!!!Hooorah!
Last edited by 81pilot; Jun 9, 2011 at 10:20 PM.
Thread Starter
Melting Slicks
Joined: Feb 2006
Posts: 3,428
Likes: 5
From: Japan
Thanks for the info...before I get into choosing exactly what kind of paint I'll be using I'm gonna try and really make a big dent in getting the body stripped, which will be a huge lot of work. When I can see light at the end of THAT tunnel I'll go visit our local paint store and make a decision as to exactly what kind of paint system I'll be using, then I'll start bugging you guys about the best kinds of paint guns, primers, sealers, etc.- thanks again for any and all info you guys can provide- the more the better. I'll be posting on this thread a lot more often from now on so it won't be getting buried quite as badly either. I'll be off to Texas for a week herding junior off to college orientation but should have lots of time after that to really get grinding on this thing...

Instructor
Joined: Sep 2008
Posts: 222
Likes: 0
From: penngrove ca
Whatever you do don't go to maaco. I took my 76 to the local maaco (cost $4000) to paint; when I took it back to fix the poor paint they left the car outside in rain, broke the power steering cylinder plus a bunch of other stuff and not fixing the paint. I ended up going to court for damages.
I took an auto paint class at the local JC when it was time to paint my sons Mustang. The class is nice because you can get allot of practice. the class was 1 afternoon a week and 6 full days on Saturday over the semester. Well worth the time & $ invested.
I took an auto paint class at the local JC when it was time to paint my sons Mustang. The class is nice because you can get allot of practice. the class was 1 afternoon a week and 6 full days on Saturday over the semester. Well worth the time & $ invested.
Thread Starter
Melting Slicks
Joined: Feb 2006
Posts: 3,428
Likes: 5
From: Japan
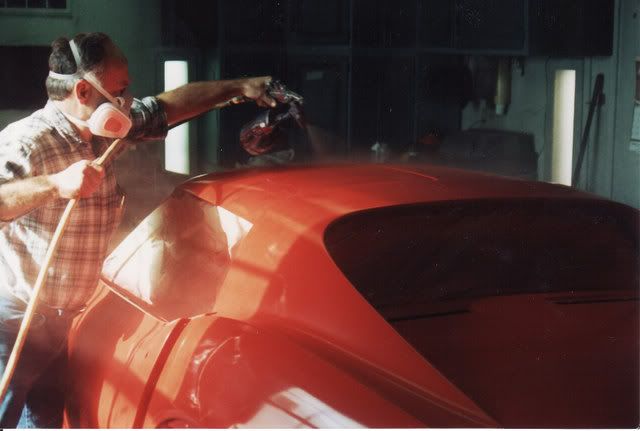
The biggest issue I'm dealing with isn't exactly how to paint; I've painted several cars with reasonable success over the years including the two cars shown in the garage but the biggest issue nowadays (esp. In CA) is our tree-hugging socialist greenie government and the effect they have on what kinds of paints I can use. The paint companies have done a magnificent job at trying to stay ahead of the EPA over the years but if you're a home hobbyist painter who isn't constantly keeping abreast of the latest technology things are changing so fast that you have to re-learn the paint game every time you paint another car. All my previous paint jobs (with the exception of my son's Nissan last year) were either lacquer or enamel-VERY easy even with crappy equipment, but obviously now I'm gonna have to go out and spring for a couple of decent-quality guns. Hopefully your experience after the paint class is a good one and post up the results so we can all pick it apart!

Melting Slicks
Joined: Aug 2008
Posts: 2,200
Likes: 3
From: Lehigh county Pennsylvania
Performing a color change is a daunting task for the DIYer. You have past experience as guidance so it's not like you're a total newbie. From a quick skim of your past posts, I take it that you are determined to remove all the old paint not just smooth what you've got and repaint.
Personally, I have had good results using chemical strippers. If you choose the sharpened blade route, that's OK too. Here is a primer (pun intended) on how painting was done at the St. Louis factory:
"...Repaired areas were disc sanded and sprayed with a red oxide primer. Then the body was sprayed with a gray primer and baked for 45 minutes in a drying oven. The primer was disc sanded, this time with wet sanding, using the oxide layer as a 'stop sign.' When the wet sanding was completed and all imperfections had been repaired a second coat of gray primer was applied and this sealer-primer was again baked on. A final wet sanding with fine paper produced a smooth body surface...(then) the Corvette was finished with 2 color coats."
My suggestion is don't scrape, peel or sand any farther than the baked on primer. (Stripper will normally not remove it.) It is a good barrier between the fibreglas/gelcoat and your new undercoats. There is no good reason to go any farther.
Thinking ahead to any spray equipment has everything to do with the capacity of your compressor. Obviously an HVLP gravity gun is preferred over the old-school, siphon-feed cream of the crop, Binks #7. But even some of the HVLP's require more air volume than your typical portable garage compressor can supply. You don't need a slew of single purpose guns for a once-in-a-blue-moon paint job. What you used last time should suffice as your primer gun. For a topcoat gun, I'm partial to the Sharpe Titanium 1 line. And it's all metal; no plastic...except the paint cup.
You should also look into how you're going to protect yourself from the toxic isocyanate fumes
Looks like the thigh got in the wet paint???
Last edited by 69 Chevy; Jun 11, 2011 at 11:49 AM.
Thread Starter
Melting Slicks
Joined: Feb 2006
Posts: 3,428
Likes: 5
From: Japan
Thanks 69Chevy...very good info there. I have a couple cartridge-type respirators that may not be the super air-purifying type but should forestall COPD for a few weeks anyway. You may have noticed in my first post that I had sanded thru the aforementioned red oxide primer coat on the one roof panel that I had experimentally stripped. We didn't notice any of this primer when stripping any of the metal parts but as shown there were significant sanding scratches in them so it would appear that during an earlier repaint that somebody stripped all the original Donnybrooke Green off the car. Originally I was wondering if the roof panel that I stripped was from another car since I didn't find any green in there, but obviously I'll learn more as I get further into the job. At this point I am leaning toward using some kind of chemical stripper on the door jambs and some of the other tight spots, and per the advice you produced I think from now on I'll be a little more careful not to blow through that red primer as I continue sanding...