


My Personal Paint Thread

Thread Starter
Melting Slicks


Joined: Feb 2006
Posts: 3,428
Likes: 5
From: Japan
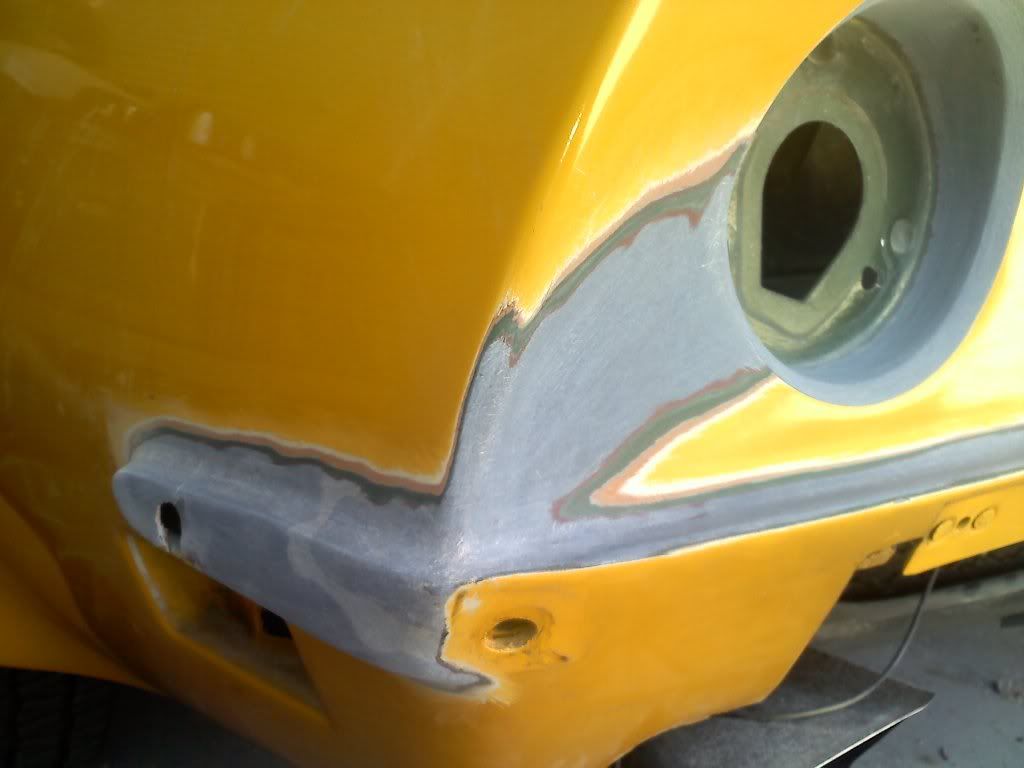
Got to spend the last couple days in the garage sanding. Began by hand-sanding the taillight pockets and the 'ribs' that go under the rear bumpers- I went through all six previous layers of paint right down to the bare glass, and noticed a layer of red primer at the bottom of it all which is obviously the factory primer/sealer. Can anybody out there recommend a replacement primer/sealer that will be compatible with modern non-solvent based basecoat/clearcoat paint? Also, is it safe to leave the car in the garage out of direct sunlight without any paint on it for extended periods? Mostly I just wanted to get used to working in my 100-degree garage...sweated my a$$ off!! There's gonna be an awful lot of labor involved in this thing so I thought I'd do some of the difficult stuff first. Obviously some of this is going to be just too much effort for hand sanding so I'm gonna have to go the stripper route at some point, I'm thinking in particular the door jambs and the vent openings on the rear deck, so stripper recommendations would be nice as well. Also, some repair work is gonna be in order for the bumper bolt holes at the rear corners, so any suggestions there will be welcome.
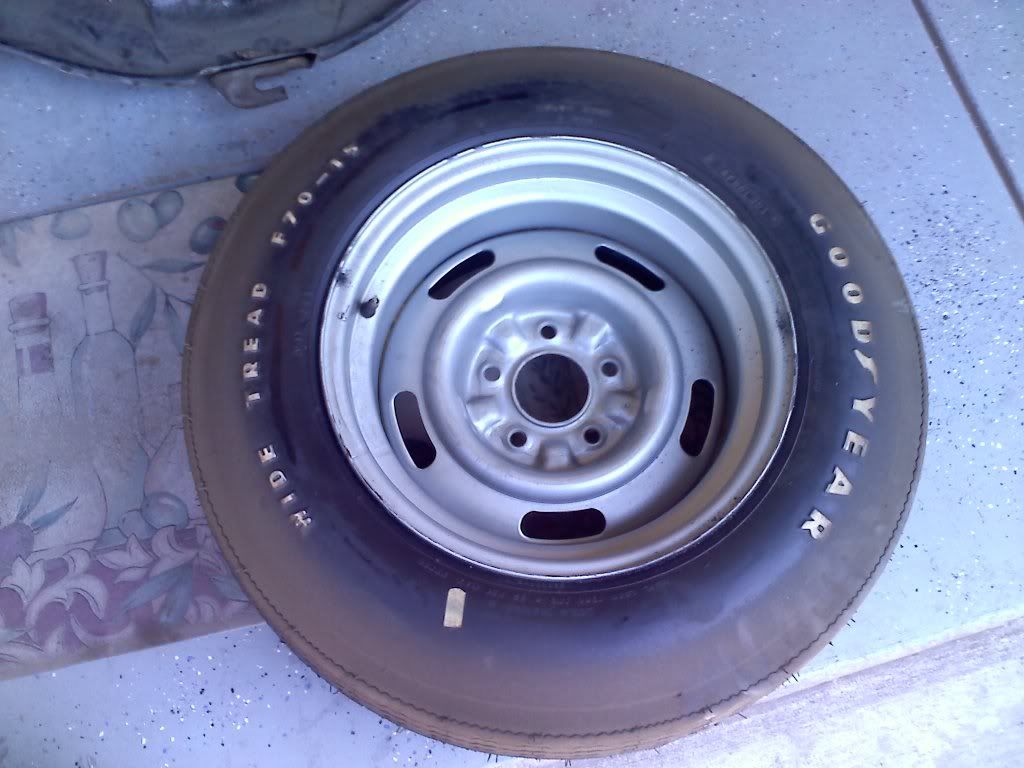
In addition I decided to pull the tank out and replace the rubber gas lines since they're certainly (over)due, so I removed the spare tire carrier and pulled out my pristine 41 year-old unused Goodyear spare for y'all to drool over. And for all you NCRS types, the answer is NO!! so don't even think about asking! I'm removing the gas tank so I can do a little cleaning in there AND I'd like to retrieve the tank sticker, so if any of you tank-sticker-removal-and-preservation types could chime in it would be much appreciated as well.
OK, so that's all I need right now guys...feel free to pile on!!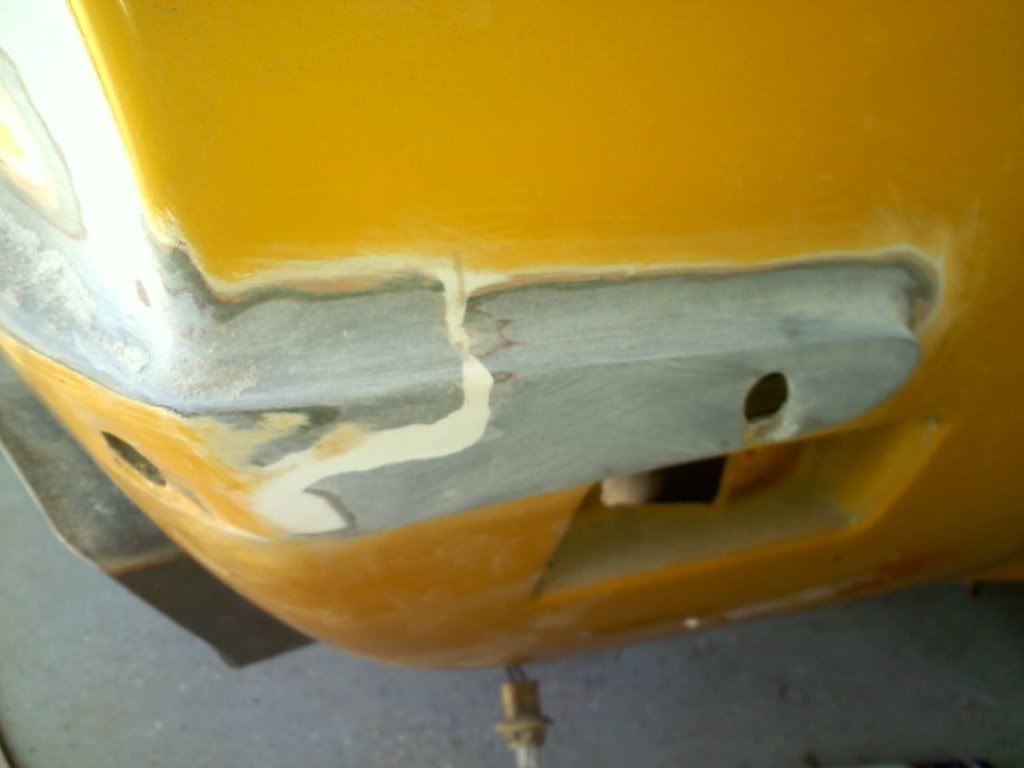

Melting Slicks
Joined: Aug 2008
Posts: 2,200
Likes: 3
From: Lehigh county Pennsylvania
Lots of good info by forum member Lars here:
http://web.archive.org/web/200310111...=111&TopicID=3
POR 15 POR-STRIP is a fiberglas friendly stripper.
http://web.archive.org/web/200310111...=111&TopicID=3
POR 15 POR-STRIP is a fiberglas friendly stripper.
Thread Starter
Melting Slicks
Joined: Feb 2006
Posts: 3,428
Likes: 5
From: Japan
69Chevy, thanks for that link- lotsa useful stuff there. As it sits right now I'm gonna drop the gas tank in the next couple days and maybe this weekend I'll attack the rear clip with the sander and try to get that stripped. Once that's done I'll have to find some sealer to cover all that bare glass. One thing I have discovered so far is that the OE red oxide primer is very thin and once I've sanded through the original green there is very little of the primer underneath it, so in spite of others' admonitions to the contrary I'm just gonna sand down to the glass and the reseal it with some suitable material. I'm visualizing many sweaty days in my immediate future...
Thread Starter
Melting Slicks
Joined: Feb 2006
Posts: 3,428
Likes: 5
From: Japan
Don't even know if this is gonna work...for some reason I'm having a horrible time posting images from Photobucket; the image won't paste into the field of text after I've copied it from Photobucket so I manually typed in the image title.
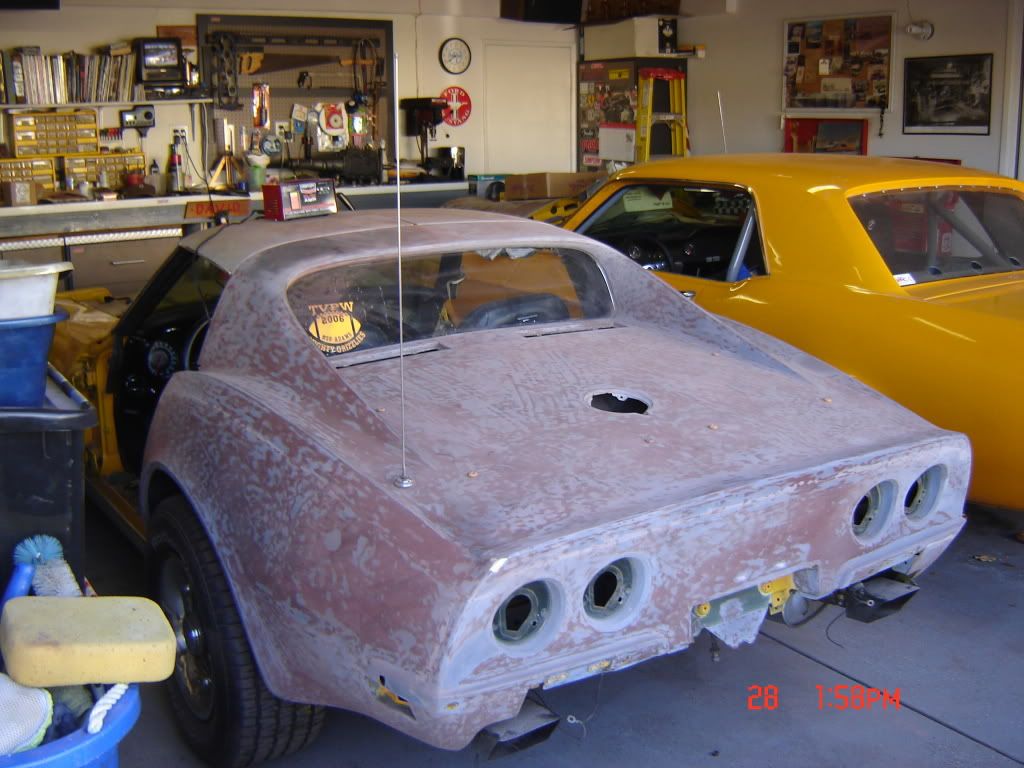
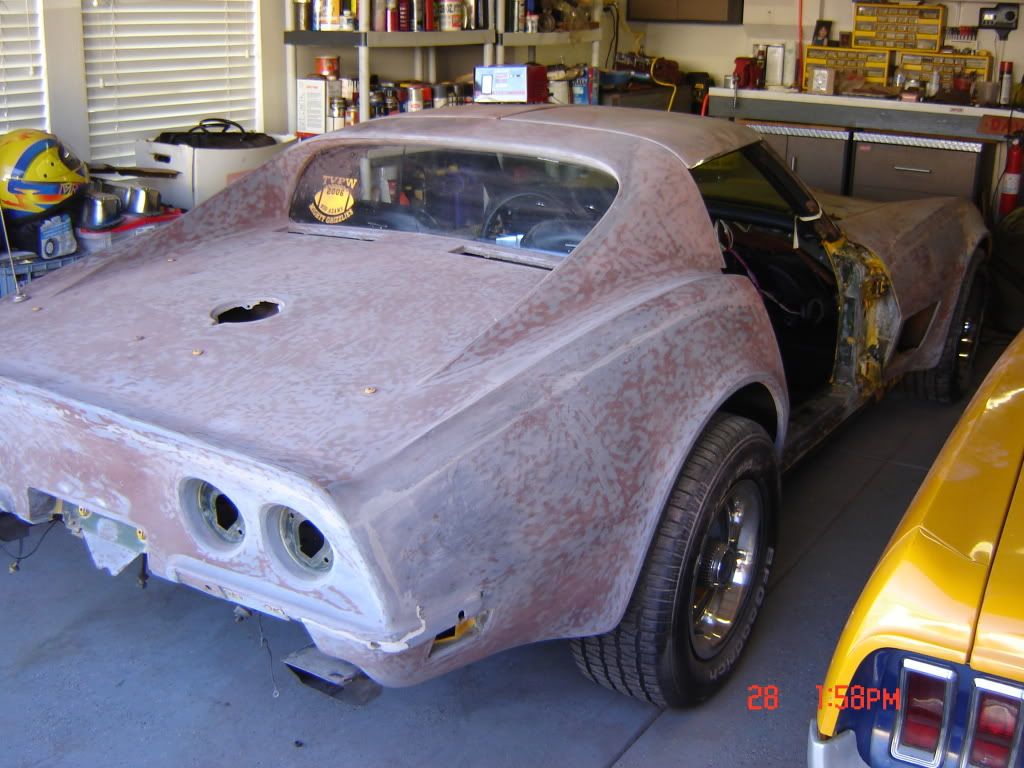
At any rate, this is the progress so far, 9 months after beginning. The entire back half of the car has been stripped and sanded to a 120 finish, and this has been achieved by a combination of all the approved methods (and probably some not-approved ones as well!) including shaving the paint off with a sharpened putty knife, applying "fiberglass stripper" which is about as effective as pouring Coca-Cola on the car IMO, and lastly (and mostly) manually gruelingly grinding away for endless tiring hours with 60 grit sandpaper through the thick coat of red primer that was hiding under the last two paint jobs, through the incredibly tough factory metallic green topcoat, and down into the red factory primer/sealer until I just begin to scratch the surface of the glass underneath. So far the rear clip is done, the back part of the right side door jamb, the outer door panels, and most of the right front fender. There are Corvette parts laying everywhere, and if I'm persistent I'm hoping to have all of this sanding nightmare complete by May which will have been one year from the time I started. There is some minor damage (some very small nicks and gouges from the scraping process) that will have to be dealt with and a few small craks that will have to be glassed up, then I will fifnish sand the entire car to probably a 320 finish before applying sealer, sanding that, then priming/blocking/basecoat/clearcoat I happen to have a neighbor who's gotten into the car-flipping business and he's been a lot of help with sharpening my paint-spraying skills, so I'm not really all that intimidated by the idea of shooting a decent-looking base/clear finish. Just this endless sanding and sanding and sanding and sanding...uuuggghhhh.
I do have a couple of questions for anybody out there who might be interested-what is the safest way to get those thin stainless trim pieces off of the T-Top edges? The one on the right side is sprung out and I need to fix that, and I just want to paint the car properly so they've gotta come off...
Also, if any of you guys are into cheerleading and don't want to see this thing abort into the "Failed Restorations" thread I could use some encouragement...bye now...back to the rack-er...garage

Last edited by birdsmith; Jan 28, 2012 at 05:17 PM.
Pro


Joined: Sep 2011
Posts: 613
Likes: 11
From: EVANSVILLE Wisconsin
Birdsmith, you have incredible determination there, what a daunting task! I'm in the middle of a frame off on my '80 and need to decide soon what to do about paint and stripping the car. Someone earlier in this thread mentioned soda blasting, is there any drawback to this process that would make hand sanding worth it, other than not being able to say that I did it myself? I simply don't want to spend the next 6-8 months sanding, and if soda blasting is safe and effective my guess is that it'd be done in a day.
Congrats on a great project and PRESS ON, we're watching!!!!
Congrats on a great project and PRESS ON, we're watching!!!!
Team Owner


Joined: Sep 2006
Posts: 31,271
Likes: 4,362
From: Westminster Maryland
Hi bird,
PROGRESS!!!!
You said you need encouragement.... when you're doing it yourself EVERYTHING takes time, and FAR more time than you ever imagined!
I can't tell you how many times I came upstairs from my garage and my wife would say, "any progress today?", and I'd have to say "no!". YOU have progress!!!
The roof panel trim... the side piece and small connector piece are mounted with screws and a pop rivet under the weatherstrip retainer. The front piece is 'crimped' in place. Easy to pry off, but hard to get back on without scarring the new paint.
Regards,
Alan
Thread Starter
Melting Slicks
Joined: Feb 2006
Posts: 3,428
Likes: 5
From: Japan
gbarmore, to use a somewhet hackneyed phrase, if I knew then what I had known now I would likely have gone the soda blasting route myself. I haven't even called any local shops to see what it costs but I'm sure it isn't cheap, but at this point I've probably got $150 just in stripper and sandpaper...I would definitely recommend looking into it. There is certainly no way a professional shop could make money doing this the way I'm going about it, but as some of you have already found out I tend to be a little hardheaded! Alan, I was wondering if maybe adding 1 ply of fiberglass to the bottom of the roof panel wouldn't give that trim piece a little more material to 'bite' onto...does that sound like something that would work? Also, I had begun to disassemble the headlights and kind of stalled at getting the right side door off of the car- can someone out there explain to me just how to do that (I know- I should buy an AIM but have been too cheap to spring for one so far). I probably won't get any time to spend on the car today (Honey-do's) but there it is and I do thank all of you who were kind enough to look in for the encouragement!!
Corvette Stories
The Best of Corvette for Corvette Enthusiasts

Top 10 Most Expensive Corvettes Ever Sold on Bring A Trailer
Brett Foote
10 Things Every Corvette Owner Needs (2026 Edition)
Michael S. Palmer
8 Most "Only Corvette Owners Understand" Quirks and Problems
Pouria Savadkouei
10 Reasons the C6 Z06 is Still A Performance Benchmark After 20 Years
Joe Kucinski
How Much Horsepower Every Corvette Engine "LOST" in 1972
Joe Kucinski
Top 10 DOs and DON'Ts for Protecting Your Convertible Top!
Michael S. Palmer
Top 10 Most Explosive Corvettes Ever Made: Power-to-Weight Ratio Ranked!
Joe Kucinski
150 hp to 1,250 hp: Every Corvette Generation Compared by the Specs That Matter
Joe Kucinski
8 Coolest Corvette Pace Cars (and Replicas) of All Time
Verdad Gallardo
Thread Starter
Melting Slicks
Joined: Feb 2006
Posts: 3,428
Likes: 5
From: Japan
Before I go back out to the Torture Chamber (also known as "Dave's Garage"!!) I thought I'd drop a couple shots of the latest progress. I finally finished removing ALL of the parts that have to come off; headligt doors (PITA!), front grilles, rocker trim, etc. 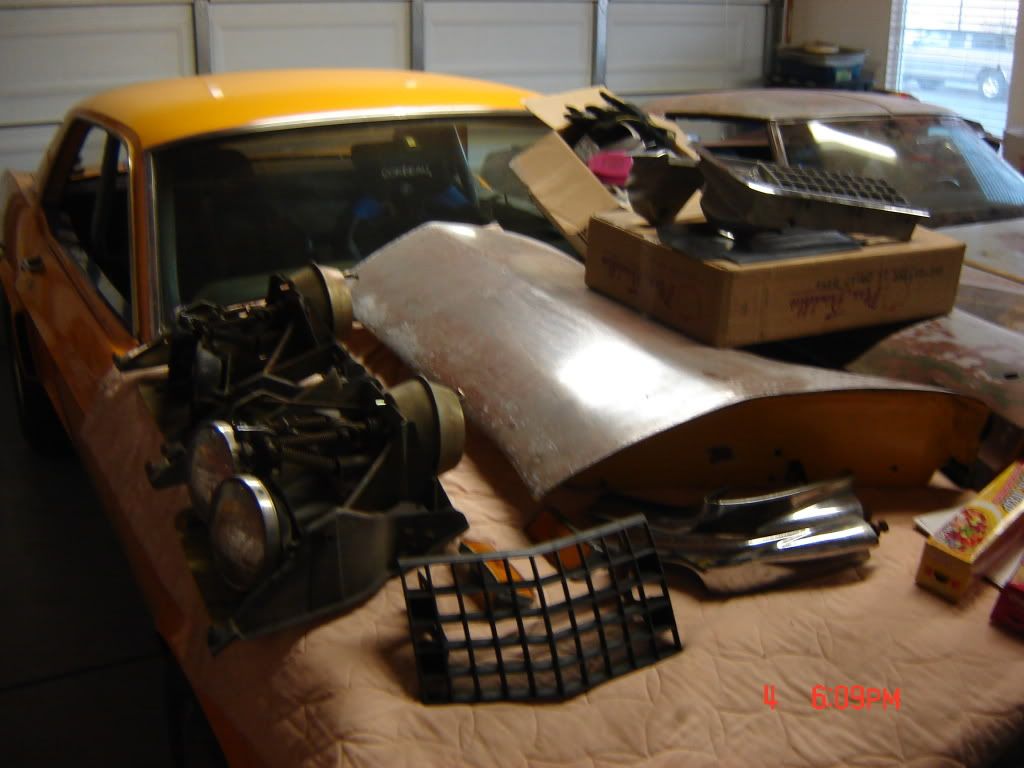
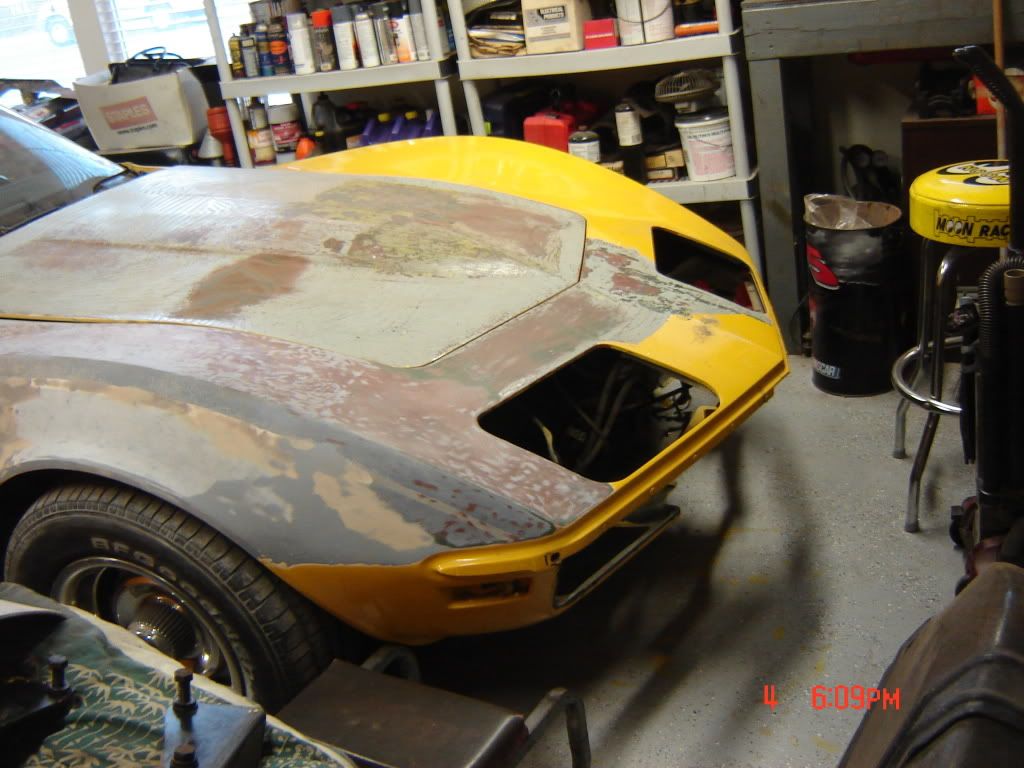
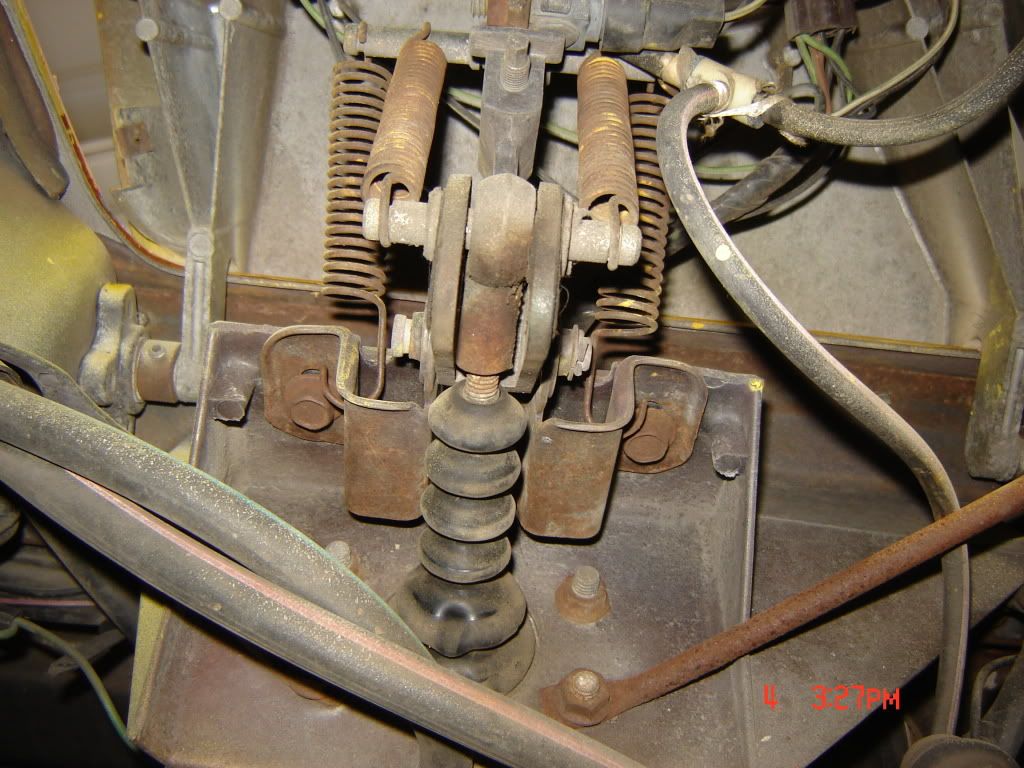 As is evident in these pics my beloved Mustang Trans-Am clone has been relegated to the role of storage unit, but judging by some of the views I've heard expressed on these pages the best possible use for a Mustang is for storing Corvette parts! I also took some pics of the underside of a headlight door so I'd have something to refer to after they're all taken apart. Rather than getting that stuff blasted I think I'm gonna drop the steel parts into a tub of muriatic acid to clean them up then just paint all the hardware with a suitable (read:close) shade of Rustoleum. Comments/criticism would be greatly appreciated here.
I'm going to spend the rest of the day emptying out the Torture Chamber and making it a little more user-friendly, getting rid of stuff I don't use, etc, and maybe putting up some shelves so after that I can get around the corner and get the rest of the front end stripped. Cheers to all and thanks for your support!
As is evident in these pics my beloved Mustang Trans-Am clone has been relegated to the role of storage unit, but judging by some of the views I've heard expressed on these pages the best possible use for a Mustang is for storing Corvette parts! I also took some pics of the underside of a headlight door so I'd have something to refer to after they're all taken apart. Rather than getting that stuff blasted I think I'm gonna drop the steel parts into a tub of muriatic acid to clean them up then just paint all the hardware with a suitable (read:close) shade of Rustoleum. Comments/criticism would be greatly appreciated here.I'm going to spend the rest of the day emptying out the Torture Chamber and making it a little more user-friendly, getting rid of stuff I don't use, etc, and maybe putting up some shelves so after that I can get around the corner and get the rest of the front end stripped. Cheers to all and thanks for your support!
Last edited by birdsmith; Feb 12, 2012 at 01:41 PM. Reason: pictures didn't post!!!
Racer

Joined: Nov 2011
Posts: 261
Likes: 1
From: Montgomery TX
Ive done a lot of painting in my garage, in the driveway and backyard over the years. Having to deal with an old lacquer paint is a pain. he only way to do it right it to totally strip it like you are doing. E careful not to break through the gel coat when you get down to the glass. If you raise the fibers you just bought yourself a lot of extra prep work. You could take it down to the primer then do any repair/ filler work then spay with a good primer filler and block the whole car. The key is doing the body and prep work correctly otherwise all the bad spots will shopw through the nice new shiny paint.
odays Urethane paints are relatively easy to use with a little practice the proper reducers and careful mixing. If you are going with a solid (non metalic) color I would recomend a single stage urethane. This is the least cost option since you only need to buy a gal. of paint with the activator/reducer. E is no needfr a clearcoat with a solid color paint. Two good coats will still allow for some color sanding and polishing.
If you are using a metalic or pearl color then a two stage system is needed. But you will be buying twice as much paint and reducer.
Metalics are tricky to spray if you are inexperienced. Variations in Gun technique, position, air pressure, etc can really mess up a metallic finish.
I have used el-cheapo Harbor Freight Guns for multiple paint jobs with great success. And if I drop one and mess it up I can trash it and go buy another for $39. Try that with a $300 Pro gun. If you use a HVLP gravity feed gun you must have a big 220V compressor with at least 60 gal tank and 8cfm. If you try to use an HVLP with a small compressor the pressure will drop off and your spray pattern will change and you will make a nice orange peel or you have to wait for it to catch up which is not an option with the urethane paints. If you have a smaller compressor then use a std siphon gun but plan on lots of overspray and using about 20% more paint. A cheap siphon gun made for automotive painting does a decent job using single stage paints. I never had good luck using one with clearcoat though.
No matter what you paint with you must use a good paint respirator made for organic vapors. They sell disposible ones for about $30 or replacable cartridge masks for $45 and up. Either way, it's a small price to pay unless you want to be half brain dead and fed with a spoon but have a nice car.
The are you paint in must be Clean Clean Clean Clean. Dust is your worst enemy when painting and compressed air does tend to kick it up. I line my three car garage with builders plastic sheet, blow down the floor with compressed air then wash the floor. I lay plastic on the floor and pull the car in . Some guys wet the floor but I'm in Texas and the humidity is high enough so I don;t wan to add any more moisture (another enemy). Pick the right reducer based on the ambient temperature when you will be painting. Mix the paint exactly per the manufacturers recomended ratio, typically 4:1 paint to activator/Reducer, THIS is critical, too little or too much activator will really mess up the finish ( I know from my mistakes).
If apinting in a garage you need to have some airflow to pull the fumes and overspray out. Open a window(s) in the back of the garage prop a cheap funace filter in the window opening. put a box fan on the floor and pull the garage door down on top of it. Spray starting upwind so the over spray is not being pulled into fresh paint. DONT let anyone watch.
You also need very good lighting so you can see reflection of bright light off the surface of the paint. This allows you to see how the coverage is and lets you see any runs before you make them worse.
Practice on an old door or hood or a garbage can before spraying the car to get the feel for the gun, how fast to move, etc.
Do some reading on gun adjustment and spraying technique before you attempt to paint so you at least know the basics or youll just get very frustrated and waste a lot of paint.
Sorry for the long rant but I just helped someone through this after they became very frustrated on thier own.
Thread Starter
Melting Slicks
Joined: Feb 2006
Posts: 3,428
Likes: 5
From: Japan
Texasbaehr, it sounds like you know what you?re talking about, thank you for the pointers. I have developed a sanding technique whereby I pretty much stop right when I start to break through the base primer so I think I'll be ok when it comes to surface damage. I plan on using a DeVilbiss Finish Line' gun for base/clear and one of my old Harbor Freight guns for primer, and as I mentioned initially I will be spraying the car in its original color which was Donnybrooke Green. I am aware of some of the issues with getting uniform color when shooting base/clear metallics...fortunately the guy who moved in next door to me a couple years ago also paints in his garage so I've been getting a little practice there too. I was actually a little intimidated by the prospect of shooting this car but now not so much; I'm actually looking forward to it...thanks again for the info and please feel free to contribute, I do appreciate it!
Racer
Joined: Nov 2011
Posts: 261
Likes: 1
From: Montgomery TX
looks like you're on the right track. good luck. You will enjoy the satisfaction of doing this yourself even if it's not perfect.
I'm in the process of prepping to paint my 81. Luckily it has a decent two stage coat on it now and the paints in good shape. Other than rebuilding some previous bad fiberglass repairs, I'm just wetsanding to flatten it then I'll shoot epoxy primer filler sealer, block it and then singlestage black urethane.
I'm in the process of prepping to paint my 81. Luckily it has a decent two stage coat on it now and the paints in good shape. Other than rebuilding some previous bad fiberglass repairs, I'm just wetsanding to flatten it then I'll shoot epoxy primer filler sealer, block it and then singlestage black urethane.
Thread Starter
Melting Slicks
Joined: Feb 2006
Posts: 3,428
Likes: 5
From: Japan
Yeah...the bodywork isn't such an issue but whenever that accident happened part of the repair was a new right front grille, which doesn't really match the left front which is now shedding little chrome flakes. You wouldn't happen to know anybody that has a bargain-basement left front '70 grille, wouldja? The ones in the catalogs are kinda pricey nowadays...
Burning Brakes


Joined: Apr 2007
Posts: 1,039
Likes: 62
From: Kona Hawaii
Great thread! This is valuable info for the scared to take it on crowd like myself.Hope to retire next year and painting my vette is on the retirement project list.Your project is a great motivator for sure.Looking forward to seeing your progress and don't get discouraged,if so walk away take a break and get a fresh start.I completed an auto to manual trans swap with many trying moments,got it done and now enjoying the ride 10x more.When your cruisin in that shiny new vette all the pitfalls will be forgotten! Go git'er done.....Aloha's
Drifting

Joined: Aug 2003
Posts: 1,868
Likes: 13
From: Mascoutah IL
Yeah...the bodywork isn't such an issue but whenever that accident happened part of the repair was a new right front grille, which doesn't really match the left front which is now shedding little chrome flakes. You wouldn't happen to know anybody that has a bargain-basement left front '70 grille, wouldja? The ones in the catalogs are kinda pricey nowadays...
Rogman
Thread Starter
Melting Slicks
Joined: Feb 2006
Posts: 3,428
Likes: 5
From: Japan
Great thread! This is valuable info for the scared to take it on crowd like myself.Hope to retire next year and painting my vette is on the retirement project list.Your project is a great motivator for sure.Looking forward to seeing your progress and don't get discouraged,if so walk away take a break and get a fresh start.I completed an auto to manual trans swap with many trying moments,got it done and now enjoying the ride 10x more.When your cruisin in that shiny new vette all the pitfalls will be forgotten! Go git'er done.....Aloha's
Thread Starter
Melting Slicks
Joined: Feb 2006
Posts: 3,428
Likes: 5
From: Japan
Unfortunately, no!!! Sorry... I have to figure out a way to restore all 3 of mine up front as well... If I get it figured out, I'll let you know... Several months away from worrying about that yet... Thanks again for the HiLoks... Used all 30 collars!!! Those things are great...
Rogman
Rogman
Drifting
Joined: Aug 2003
Posts: 1,868
Likes: 13
From: Mascoutah IL
ALL 30??!!?! Whatever for?? Seriously Rog I can't wait to check in tomorrow...My lunch is from 10:30-11:00...could you possibly set up live streaming video for the big event?? About those grilles, I'm gonna have to figure out a way to blast the old finish off without destroying the shiny parts myself. I know chrome shops are becoming an endangered species, esp. here in the people's republic of Cali, but I'll have to figure out some way to get that little mess fixed. As for the RF fender, there's a little bondo in there but it was really pretty smooth before so I may just put a thin skin over the top of it and call it good...but first all that !!@?!*%! old paint's gotta come off!!
#4 mounts = 8
Seat Belt Brackets/Re-enforcements = 14
Battery hold down = 3
Seat Brackets = 4
So, sorry, used 29 and checked, yepper, have 1 left in the bag... Used mainly the 4s and 5s for length... These things are the bomb!!!
Rogman
Thread Starter
Melting Slicks
Joined: Feb 2006
Posts: 3,428
Likes: 5
From: Japan
My crew is coming over tomorrow at 1230, and then I promised them lunch after the body drop, so guessing my update will be aorund 1400-1430 tomorrow... I used the HiLoks on almost every piece on the under carriage... Let's see if I can count them up:
#4 mounts = 8
Seat Belt Brackets/Re-enforcements = 14
Battery hold down = 3
Seat Brackets = 4
So, sorry, used 29 and checked, yepper, have 1 left in the bag... Used mainly the 4s and 5s for length... These things are the bomb!!!
Rogman
#4 mounts = 8
Seat Belt Brackets/Re-enforcements = 14
Battery hold down = 3
Seat Brackets = 4
So, sorry, used 29 and checked, yepper, have 1 left in the bag... Used mainly the 4s and 5s for length... These things are the bomb!!!
Rogman