


Wiper control panel
Thread Starter
Instructor


Joined: Nov 2006
Posts: 130
Likes: 1
From: Wylie TX
I may have a big problem and I am just now finding it out. I have been sorting out some mechanical issues on my "project 69". Recently, I have be chasing a few electrical gremlins.
I removed the wiper control panel (above the gauge cluster) some time ago to solve a wiper issue. I seem to remember that the lower two screws were not really holding anything, just kind of "there". Now that I am getting back to put it together, it seems like where the upper screws mount, those tabs are "gone". Not sure if I broke them or if my friend did so by accident (he was a big help, so I have not wanted to ask).
The AIM has zero detail about how this panel attaches (at lest the 69 AIM). I have looked at couple of vendors to see if the tabs are on the two dash panels (Speedo bezel and passenger pocket) or the top pad, or all three. I cannot see enough detail to understand how this panel bolts up.
Does anyone have a couple of pictures handy, or know of a good reference I can try. I have a couple of other books to look through, but I have not found anything yet.
Sure hope I do not have to replace all of that, as I was only planning on a Dye job!
Any help would be appreciated.
Update: I took a couple of picutres this morning, but they did not come out very well. The best one is here:
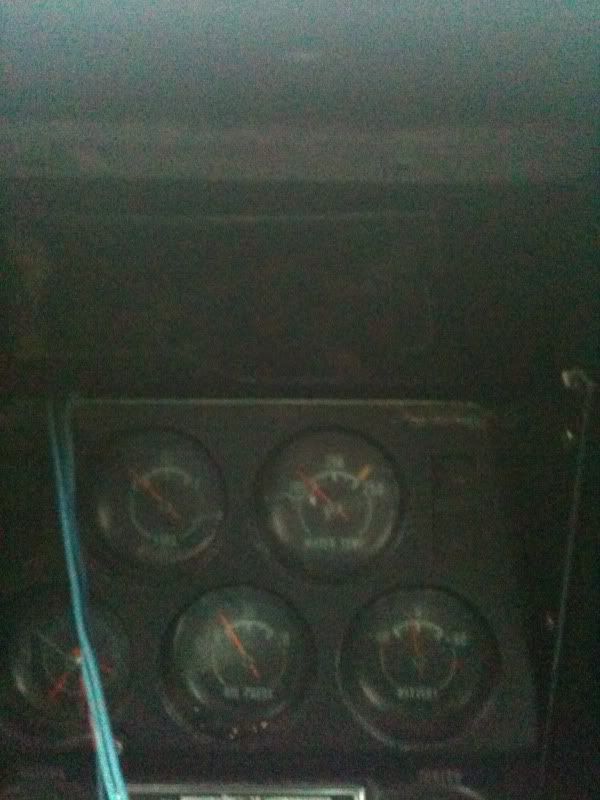
As you can see, in the upper right hand corner, there is nothing for the screw to "go in to". I did notice that the air plenum looks to be broken. I found a piece of metal and the missing part of the of the plastic plenum is attached. That does have a screw hole. So, I still cannot tell exactly whjere the screw tabs are. Looks like the lower two are on the plenum, but I have no idea about the upper ones. Will try to get a better picture friday.
I removed the wiper control panel (above the gauge cluster) some time ago to solve a wiper issue. I seem to remember that the lower two screws were not really holding anything, just kind of "there". Now that I am getting back to put it together, it seems like where the upper screws mount, those tabs are "gone". Not sure if I broke them or if my friend did so by accident (he was a big help, so I have not wanted to ask).
The AIM has zero detail about how this panel attaches (at lest the 69 AIM). I have looked at couple of vendors to see if the tabs are on the two dash panels (Speedo bezel and passenger pocket) or the top pad, or all three. I cannot see enough detail to understand how this panel bolts up.
Does anyone have a couple of pictures handy, or know of a good reference I can try. I have a couple of other books to look through, but I have not found anything yet.
Sure hope I do not have to replace all of that, as I was only planning on a Dye job!
Any help would be appreciated.
Update: I took a couple of picutres this morning, but they did not come out very well. The best one is here:
As you can see, in the upper right hand corner, there is nothing for the screw to "go in to". I did notice that the air plenum looks to be broken. I found a piece of metal and the missing part of the of the plastic plenum is attached. That does have a screw hole. So, I still cannot tell exactly whjere the screw tabs are. Looks like the lower two are on the plenum, but I have no idea about the upper ones. Will try to get a better picture friday.
Last edited by richardttu; Jan 26, 2012 at 10:05 AM. Reason: Update: picture added
Burning Brakes


Joined: Oct 2003
Posts: 836
Likes: 26
From: Harrisburg Pa
go to my photobucket as I have some pics there that may help you.
Tom;
http://s583.photobucket.com/albums/ss275/tombush/
Tom;
http://s583.photobucket.com/albums/ss275/tombush/
Team Owner


Joined: Sep 2006
Posts: 31,335
Likes: 4,449
From: Westminster Maryland
Hi r,
From your picture I can see the top 1/3rd of your gauge bezel is missing. It's been broken off.
The part that's mssing is in the shape of an upside down U. It has the 3 tabs the switch plate screws mount to.
Regards,
Alan
It's shown in the interior area of the AIM.
Instrument Cluster, UPC12, Sheet B2, Item 1.
Last edited by Alan 71; Jan 26, 2012 at 10:32 AM.
Thread Starter
Instructor
Joined: Nov 2006
Posts: 130
Likes: 1
From: Wylie TX
Thanks Tom. Picture 1 does show one of the tabs in the upper right corner that are missing from mine. Is that on the dash pad, or is there some metal bracing that I am missing? It does not seem to show anything about the 2 lower screw connections.
Thread Starter
Instructor
Joined: Nov 2006
Posts: 130
Likes: 1
From: Wylie TX
Alan, as always, you are correct. I was looking at UPC 1, Sheet E2. It does look like the the top two "tabs" on the that bezel are indeed missing. Looking at a picture form a vendors website, it is clear that all of the tabs connect to that bezel. Not the best news, but it is much better than replacing the two dash panels, in terms of cost anyway.
Thanks very much for you help...
Thanks very much for you help...
Thread Starter
Instructor
Joined: Nov 2006
Posts: 130
Likes: 1
From: Wylie TX
Alan, it turns out we have only partially solved it. There are 5 screw holes in the wiper pane. There is one going up into the dash metal frame straight up. That one is still there on my car. There are two in the top of the gauge bezel (per your earlier post). The picture of the new bezel shows only two.
So, that leaves the two screws lower down on the wiper panel (part 6 of which there are 4 on the Aim). Do these tie into the side panels? I have not found a better picture, so any other advice would help.
So, that leaves the two screws lower down on the wiper panel (part 6 of which there are 4 on the Aim). Do these tie into the side panels? I have not found a better picture, so any other advice would help.
Team Owner
Joined: Sep 2006
Posts: 31,335
Likes: 4,449
From: Westminster Maryland
Hi r,
I'm basing this on a 71 but I believe a 69 is the same.
There are only 3 screws that fasten the wiper switch bezel to the gauge bezel.
Then there are 4 screws that fasten the bezel to the right and left lower dash pads (2 each side).
Then finally 2 nuts for the studs at the bottom of the gauge bezel that go into the shifter console.
Were some additional holes drilled in your wiper switch bezel to compensate for the missing part of the gauge bezel? From your description that's what it sounds like.
The kit of fasteners that's sold is 7 screws and 2 nuts (3+4+2), so coincides with what I believe the screw count is.
Regards,
Alan
The original holes in the wiper switch bezel are nicely countersunk.. are all yours?
Just thought....Is yours an a/c car? Does an a/c bezel take more screws?
Last edited by Alan 71; Jan 27, 2012 at 02:45 PM.
Thread Starter
Instructor
Joined: Nov 2006
Posts: 130
Likes: 1
From: Wylie TX
You may be on to something Alan. It does have air conditioning. I just got home from work and brought the panel inside to get a good picture.

You can see 5 screw holes. One in the top (goes into the dash). 2 above the air con vents, which look like they go into the gauge bezel (I have ordered a new one) and 2 screws in the bottom, for a total of 5. They look to be factory as they are nicely recessed.
Digging around, I found what looked like the broken end of the air conditioning "plenum" that goes behind the vents and feeds air. it has a small strip of metal that seems to be attached to it with some kind of glue. That may be the part I need. I have to find a picture somewhere first.
Thanks for all your help so far.
Corvette Stories
The Best of Corvette for Corvette Enthusiasts

5 Best & 5 Worst Corvette Daily Drivers
Joe Kucinski
The Headlights of Every Corvette Generation Explained
Joe Kucinski
5 Best & 5 Most Overrated Corvette Track Packages of All Time!
Joe Kucinski
Every 2027 Corvette Engine Explained
Joe Kucinski
Designer Imagines A Corvette That Looks More Like a Corvette Than the Corvette
Verdad Gallardo
10 Ugly Corvettes That We Still Kinda Love
Joe Kucinski
Top 10 Most Expensive Corvettes Ever Sold on Bring A Trailer
Brett Foote
10 Things Every Corvette Owner Needs (2026 Edition)
Michael S. Palmer
8 Most "Only Corvette Owners Understand" Quirks and Problems
Pouria SavadkoueiTeam Owner
Joined: Sep 2006
Posts: 31,335
Likes: 4,449
From: Westminster Maryland
Hi R,
YES!
Now I'm looking at the a/c pages in the AIM.
I see the 5 screws with the lower 2 fastening to the "outlet assembly center duct"!!!
You will still need a gauge bezel that has the top part intact. Otherwise the only thing holding the wiper-switch/a/c outlet in place will be those 2screws to the outlet assembly. I believe that IF that outlet assembly isn't grounded, the wiper switch won't work, because it needs to be grounded.
Regards,
Alan
Team Owner


Joined: Jul 1999
Posts: 65,492
Likes: 230
From: Orange Park Florida
Hi R,
YES!
Now I'm looking at the a/c pages in the AIM.
I see the 5 screws with the lower 2 fastening to the "outlet assembly center duct"!!!
You will still need a gauge bezel that has the top part intact. Otherwise the only thing holding the wiper-switch/a/c outlet in place will be those 2screws to the outlet assembly. I believe that IF that outlet assembly isn't grounded, the wiper switch won't work, because it needs to be grounded.
Regards,
Alan
YES!
Now I'm looking at the a/c pages in the AIM.
I see the 5 screws with the lower 2 fastening to the "outlet assembly center duct"!!!
You will still need a gauge bezel that has the top part intact. Otherwise the only thing holding the wiper-switch/a/c outlet in place will be those 2screws to the outlet assembly. I believe that IF that outlet assembly isn't grounded, the wiper switch won't work, because it needs to be grounded.
Regards,
Alan

Thread Starter
Instructor
Joined: Nov 2006
Posts: 130
Likes: 1
From: Wylie TX
Yeah, I found a picutue of the duct last night. That is going to be a pain, and likely expensive to replace. Thanks everyone. Dembo, that picture was perfect.
One more thing to add to the "to do" list and budget.
One more thing to add to the "to do" list and budget.
Team Owner
Joined: Sep 2006
Posts: 31,335
Likes: 4,449
From: Westminster Maryland
Hi,
For ONCE the AIM drawing looks like the real car as shown in dembo's picture.
Now dembo,
No holes in the side of your dash panel???? New panel, new skin, or no screws from the gauge bezel????
Just curious!
Regards,
Alan
For ONCE the AIM drawing looks like the real car as shown in dembo's picture.
Now dembo,
No holes in the side of your dash panel???? New panel, new skin, or no screws from the gauge bezel????
Just curious!
Regards,
Alan
Burning Brakes
Joined: May 2007
Posts: 1,022
Likes: 33
From: Lokeren, Belgium
Hi Alan,
New pads, i postphoned to pre-drill those holes until the rh panel was in as well to try and avoid the droopy top left instrument cluster corner. Drilling when it was in allowed me to push the cluster up a bit.
Nick
Ps I sincerely appreciate your compliment in the sill topic
New pads, i postphoned to pre-drill those holes until the rh panel was in as well to try and avoid the droopy top left instrument cluster corner. Drilling when it was in allowed me to push the cluster up a bit.
Nick
Ps I sincerely appreciate your compliment in the sill topic