


Front end too high

Thread Starter
Cruising

Joined: May 2011
Posts: 12
Likes: 0
Well I just finished rebuilding the diff and entire rear suspension. Looks great and runs great as well. Only 1 problem the front end is too nigh with the passenger side front at 29 7/8. And driver side front at 29 1/8. Rear is at 27 both sides and looks right. Question how do I lower the front? Shocke were new when I bought the car and always looked high.
Any suggestion would be appreciated. Oh and it is a 1980 vette
Any suggestion would be appreciated. Oh and it is a 1980 vette
Le Mans Master


Joined: Apr 2007
Posts: 7,353
Likes: 72
From: Graceland in a Not Correctly Restored Stingray
First, make sure the car is fully settled on the suspension and that both front springs are properly seated.
Second, the most accurate way of measuring ride height (per suspension geometry) is by the Z and D dimensions, as they are virtually unaffected by non-OE tire sizes.

Third, if after making absolutely certain that everything is right your ride height(s) still prove too high, then it's time to worry about shortening the front coils. FWIW, the default performance Z and D heights are more than an inch lower.
Second, the most accurate way of measuring ride height (per suspension geometry) is by the Z and D dimensions, as they are virtually unaffected by non-OE tire sizes.
Third, if after making absolutely certain that everything is right your ride height(s) still prove too high, then it's time to worry about shortening the front coils. FWIW, the default performance Z and D heights are more than an inch lower.
Le Mans Master
Joined: Apr 2007
Posts: 7,353
Likes: 72
From: Graceland in a Not Correctly Restored Stingray
Front Z is the difference between the height of the CL of the front lower control arm pivot bolt from level ground as compared to that of the bottom most surface of the spindle (at the lower ball joint nut), as shown in the illustration at the upper left. In your case, the production Z spec should be 2.85" +0.25", or between 2.60" and 3.10", measured at curb weight. Do check both sides of the car.
If you can't get the body sitting right without resulting in caddywompus Z and D, you could have body mount issues, if not something worse.
If you can't get the body sitting right without resulting in caddywompus Z and D, you could have body mount issues, if not something worse.
Le Mans Master
Joined: Apr 2007
Posts: 7,353
Likes: 72
From: Graceland in a Not Correctly Restored Stingray
Most common way of lowering the front ride height is by cutting off a bit of coil from the bottom, and make certain the spring reseats properly in the top pocket. I prefer using a carbide hacksaw myself, and have found it unnecessary to re-close the end. It will take less than you think to affect a noticeable change, so better to take small bites and do a couple of extra mock ups (settling things every time) than to ruin a spring. If your ball joints are still good, you can buy replacement boots should you destroy them taking things apart. Oh, and carefully use a proper spring compressor, as there's a lot of energy stored up just waiting to sock it to you.
If that apparent 3/4" fenderwell height difference up front is also reflected in assymetric Z heights, there's a chance one of the springs has taken a different set, and in that case I'd replace them both rather than cutting just one to level things out, as you don't want to run the risk of creating significantly different spring rates from one side to the other. Should the springs have relatively equal free lengths when out, could still be a spring problem, but it's more likely pointing to something else.
Oh, well. I tried to help...
Last edited by TheSkunkWorks; Dec 3, 2012 at 07:07 PM.
Burning Brakes

Joined: Feb 2011
Posts: 849
Likes: 0
From: Woodland California
Corvette Stories
The Best of Corvette for Corvette Enthusiasts

Top 10 Most Expensive Corvettes Ever Sold on Bring A Trailer
Brett Foote
10 Things Every Corvette Owner Needs (2026 Edition)
Michael S. Palmer
8 Most "Only Corvette Owners Understand" Quirks and Problems
Pouria Savadkouei
10 Reasons the C6 Z06 is Still A Performance Benchmark After 20 Years
Joe Kucinski
How Much Horsepower Every Corvette Engine "LOST" in 1972
Joe Kucinski
Top 10 DOs and DON'Ts for Protecting Your Convertible Top!
Michael S. Palmer
Top 10 Most Explosive Corvettes Ever Made: Power-to-Weight Ratio Ranked!
Joe Kucinski
150 hp to 1,250 hp: Every Corvette Generation Compared by the Specs That Matter
Joe Kucinski
8 Coolest Corvette Pace Cars (and Replicas) of All Time
Verdad Gallardo
Melting Slicks


Joined: Aug 2001
Posts: 3,050
Likes: 124
From: Wichita KS
...
If that apparent 3/4" fenderwell height difference up front is also reflected in assymetric Z heights, there's a chance one of the springs has taken a different set, and in that case I'd replace them both rather than cutting just one to level things out, as you don't want to run the risk of creating significantly different spring rates from one side to the other. Should the springs have relatively equal free lengths when out, could still be a spring problem, but it's more likely pointing to something else.
If that apparent 3/4" fenderwell height difference up front is also reflected in assymetric Z heights, there's a chance one of the springs has taken a different set, and in that case I'd replace them both rather than cutting just one to level things out, as you don't want to run the risk of creating significantly different spring rates from one side to the other. Should the springs have relatively equal free lengths when out, could still be a spring problem, but it's more likely pointing to something else.
Question 2: Did you make sure you installed the springs with the bottom side (notch) DOWN? If one spring is upside down this could cause the car to sit unevenly.
Last edited by mapman; Mar 30, 2012 at 02:10 AM. Reason: Q1:should have been "reinstalled the springs" NOT "shocks"

Le Mans Master
Joined: May 2008
Posts: 9,063
Likes: 2,736
2022 C3 of the Year Finalist - Modified
Front coil springs - I have new Moog 5758 coils. I hear different things said here. Is there a top or bottom to these shocks, I don't see it. In other words, can they be put upside down. If so, what side goes up.
Second, I understand you have to seat the coil in the correct circle at the top, the spring tends to want to get hung up off center. THe spring must sit in the circle designed for it.
Third, On the lower control arm there is a definite notch with a drain hole. I don't see a similar notch at that top. At least not as obvious. Assuming there is a notch at the top, which one is more importatnt to get right, top or bottom. Because with these coils you can't have it in both, it would be one or the other.
What is correct?
Le Mans Master


Joined: Oct 2007
Posts: 7,453
Likes: 976
From: RI, Now Franklin/Nashville TN
Reading this thread made me think back about 5-6 years when I replaced my F-41/gymkhana front springs with 550 springs 1 inch shorter than stock. I didn't recall a top or bottom to the replacement springs so I just took a look at the OEM springs that I still have and there is no difference in the coil ends on the stock spring and there is no notch on either end of the spring to indicate a top or bottom to the spring. Another words, I don't believe that you can put the spring in backwards unless on an aftermarket spring there are differences between ends.
Just replaced the rear coils on my 2001 pontiac grand prix with rear struts and there is definitely a correct way to orient the spring on the strut. 2008 Chrysler 300 rear coil spring/shock and there is no difference in how the coil spring goes in on that car as well.
Lastly, the 78-82 C3's are notorious for having a stock rear end sag look. My 78 always sagged in the rear (appearance) until I corrected the stance with the aforementioned 1 inch shorter 550 front springs with 255/45 17 ZR front tires (1 inch shorter than the rear 255/50/17's), the VBP 360 mono spring in 1986, a few years ago Bilstein Sport shocks in the rear. Here's how it looks today:
[IMG]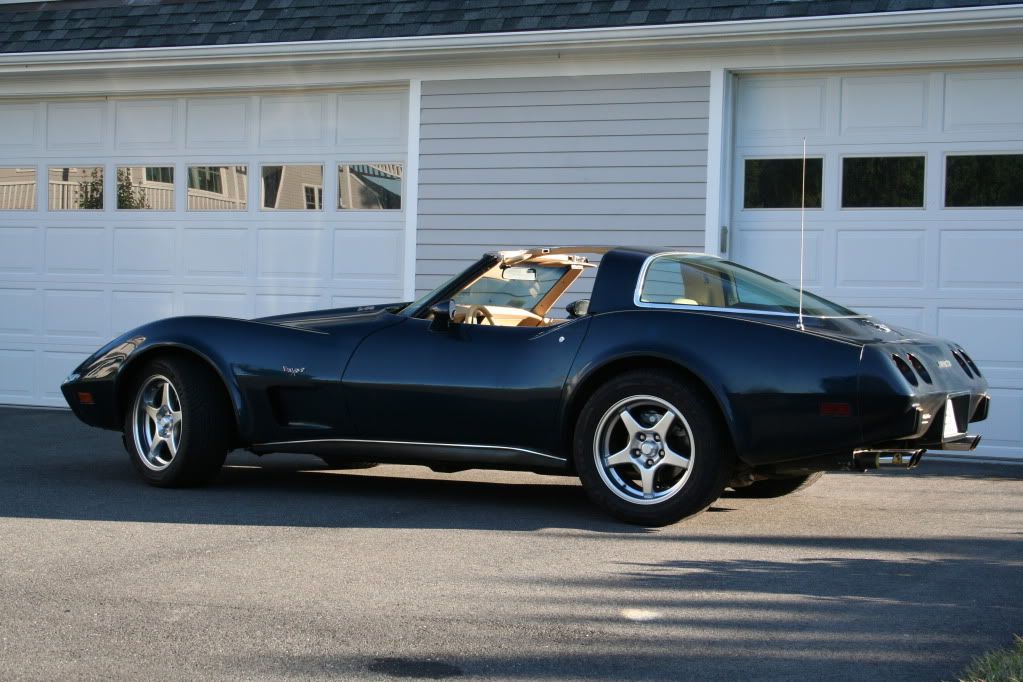 [/IMG]
My friends 79 L-82 4 speed bought new in 1979 sagged from day one in the rear.
Just replaced the rear coils on my 2001 pontiac grand prix with rear struts and there is definitely a correct way to orient the spring on the strut. 2008 Chrysler 300 rear coil spring/shock and there is no difference in how the coil spring goes in on that car as well.
Lastly, the 78-82 C3's are notorious for having a stock rear end sag look. My 78 always sagged in the rear (appearance) until I corrected the stance with the aforementioned 1 inch shorter 550 front springs with 255/45 17 ZR front tires (1 inch shorter than the rear 255/50/17's), the VBP 360 mono spring in 1986, a few years ago Bilstein Sport shocks in the rear. Here's how it looks today:
[IMG]
[/IMG]My friends 79 L-82 4 speed bought new in 1979 sagged from day one in the rear.
Team Owner


Joined: Sep 2006
Posts: 31,274
Likes: 4,366
From: Westminster Maryland
Hi iwm,
I believe that earlier in the seventies the original springs did have a top and bottom. The first couple of coils at the top were noticeably closer together than the rest of the coils. I'm not sure about the later springs, or aftermarket springs.
I believe normally the spring is installed in the bottom a-arm so the cut end of the spring can be seen through the drain hole.
Regards,
Alan
Last edited by Alan 71; Dec 2, 2012 at 01:05 PM.

Le Mans Master
Joined: Jan 2000
Posts: 8,918
Likes: 27
From: New Hill NC
On most stock non performance springs there is a top and bottom, but that is determined by coil spacing and spring rates. With many aftermarket springs the coil spacings and rates are the same, so it makes no difference. If a spring is made correctly there is no need to worry about the top end if you set the bottom in the socket correctly. The coils are cut off in the same position so they fit both ways.
Le Mans Master
Joined: May 2008
Posts: 9,063
Likes: 2,736
2022 C3 of the Year Finalist - Modified
I just bought Moog 5758. There is not up or down, top or bottom. They coil spacing is the same on either end, BUT ends of the coil are NOT lined up. The coil indentation is much deeper in the lower control arm that in the tower so it seems to me that it would much more important to locate the end of the coil in the lower control arm.
Another issue I would like to raise is the idea of cutting the coils. The last coil wind in these Moog coils is pulled up into the coil, if you know what I mean. ANother way to describe this is that if you sit this coil on the ground, it will stand straight up. Eaton Spring discusses this on their website. If you were to cut this coil, it would no longer stand straight up. The only point I am making is that the coil as bought essentially has a flat bottom and top (almost). Not sure if any of this means anything, but making a point.
As for now, these forums do nothing buy confuse the issue. SOme same the coil end must be in the tower notch, others same the lower control arm notch, some say the coil ends are cut in same point, mine are not. Ultimately, not sure if any of it matters.
I go with basic logic. I am putting the bottom end of the coil into the deeper recess in the lower control arm, leaving some of the drain hole open, and wherever it falls at the top is beyond my control. See what happens in a year or so when it gets put on the ground.
Le Mans Master
Joined: May 2008
Posts: 9,063
Likes: 2,736
2022 C3 of the Year Finalist - Modified
Hi iwm,
I believe that earlier in the seventies the original springs did have a top and bottom. The first couple of coils at the top were noticeably closer together than the rest of the coils. I'm not sure about the later springs, or aftermarket springs.
I believe normally the spring is installed in the bottom a-arm so the cut end of the spring can be seen through the drain hole.
Regards,
Alan
I believe that earlier in the seventies the original springs did have a top and bottom. The first couple of coils at the top were noticeably closer together than the rest of the coils. I'm not sure about the later springs, or aftermarket springs.
I believe normally the spring is installed in the bottom a-arm so the cut end of the spring can be seen through the drain hole.
Regards,
Alan
Le Mans Master
Joined: Jan 2000
Posts: 8,918
Likes: 27
From: New Hill NC

Burning Brakes
Joined: Feb 2011
Posts: 849
Likes: 0
From: Woodland California
It took me two tries to get it right

This is a picture with it in right.
Same springs and everything.
[IMG]

Ralph
Last edited by Ralphbf; Dec 4, 2012 at 02:35 AM.
Le Mans Master
Joined: May 2008
Posts: 9,063
Likes: 2,736
2022 C3 of the Year Finalist - Modified
When you say out of place, you have to mean that the upper coil was not sitting into the circular recess, i.e. it was off center and hung up. As opposed to just not rotated into a position that the end of the coil was near the sight hole.
Burning Brakes
Joined: Feb 2011
Posts: 849
Likes: 0
From: Woodland California
There is almost a nothingness that the top of the coil sets in.
I've replaced coils before and this was harder than I ever imagined it would be.
Just be aware, there is a specific place the top of coil must set.
Ralph
I've replaced coils before and this was harder than I ever imagined it would be.
Just be aware, there is a specific place the top of coil must set.
Ralph
Burning Brakes
Joined: Feb 2006
Posts: 1,223
Likes: 4
From: Regina Saskatchewan
I've just replaced my stock coils with 5758's. The top and bottom pocket have a notch and the 5758s are not clocked the same as OEM. I was planning on taking 1/2 a coil out of mine anyway so it worked out well. 1/2 a coil on one coil and 1/2 a coil PLUS about 2" on the other.
This made them exactly clocked like the OEM springs and they both fell right into their respective notches. After a 100 miles its dropped the front fender 1.5 inches.
This made them exactly clocked like the OEM springs and they both fell right into their respective notches. After a 100 miles its dropped the front fender 1.5 inches.
Last edited by couperdecar; Jan 2, 2013 at 06:43 AM.