


Basic Tach Face Replacement?

Thread Starter
Intermediate

Joined: Dec 2012
Posts: 42
Likes: 4
I have a 70 Vette that I want to simply replace the Mechanical Tach Face. Everything I've read talks about pulling the Tach out, which appears overkill . . . to me. Isn't it simply removing the driver side dash panel; exposing the Tach lens; removing the Lens; and then removing the Tach needle and then two screws to remove and replace the face; and then replace the needle? Any help, criticism, etc. is appreciated before I dig in. https://www.corvetteforum.com/forums...es/cheers2.gif
Team Owner


Joined: Sep 2006
Posts: 31,273
Likes: 4,366
From: Westminster Maryland
Hi Bel,
There's not really a way to remove the dash pad and leave the gauges in place… the gauges come out with the pad and must be released from the back side of the pad to even gain access to the lens.
Regards,
Alan
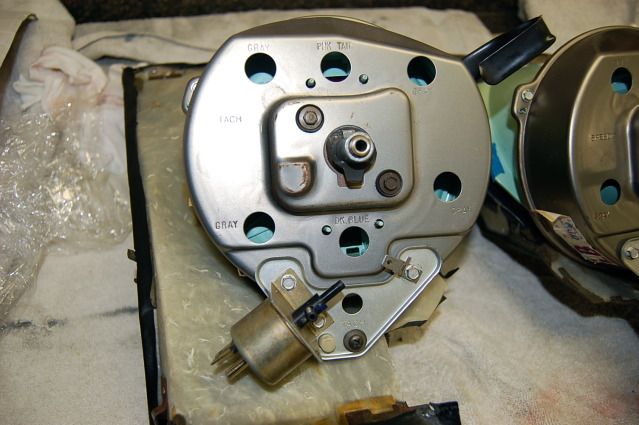
In this picture you can see one of the small hex headed screws on the speedometer that holds it in place. There are 3 of these on the tachometer housing that must be removed to release the gauge from the dash pad in order to have access to the lens.

Last edited by Alan 71; Apr 2, 2014 at 07:47 AM.
Former Vendor
Joined: Aug 2006
Posts: 76,656
Likes: 1,853
From: Jeffersonville Indiana 812-288-7103
St. Jude Donor '08-'09-'10-'11-'12-'13-'14-'15
Like the two post above stated, the driver side pad must be removed, then the "Can" removed from the dash.
Once you gain access to the face and needle it is pretty simple. You turn the needle counter clock wise while pulling upward and it will come off. To put the needle back on you start with it at 100 mph and gently push inward while you turn it back to zero. (friction fit) It may take you a couple of times to get it right.. and pay attention to exactly where the needle is at before you remove it so you can put it back in the same place.
If you need help pulling the left pad go read this.
Corvette Left Hand Dash Pad Removal Made Easy 1968-1977
Willcox
Pro


Joined: Jan 2010
Posts: 518
Likes: 12
From: Panhandle
Bel,
It's gonna be a big job. The process is simple, but access is the killer.
I just did it!
Suggest you review willcox's thread! Most helpful.
http://willcoxcorvette.com/instructi...77_secured.pdf
Once accessible, you will be removing three screws to pull the TAC out. Don't forget about #3 screw. It's hidden pretty well. They are 1/4 inch and nut driver works great.
The picture is of a TAC for 75 on... However, the three screws were the same for my 74 and should be for your TAC as well.
Pull back the TAC. Take to your clean work area.
Then you will pull off the needle gently. Next, The two screws on the face. USE the largest blade that fits the entire screw head securely with no play. If you use a baby screw driver, may not get enough bite and distort the head.
Other things:
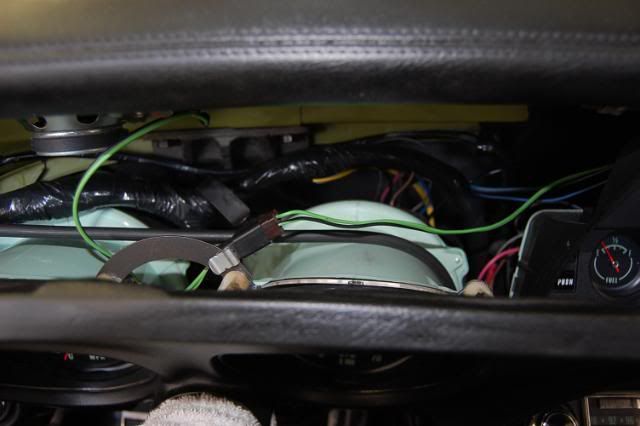
Before you try to pull the dash out, Make sure the two cables (speedo and TAC) are disconnected or you will break the blue plastic shrouds! Some people disconnect the cables in the engine area and trans and push them into the dash area. Done it both ways! Same same.
Light switch is tough, mark the two vacuum lines so you get them in the right order. Don't forget them on the reinstall. Light switch wires are never long enough!
Before you start pulling things apart, take a few pics if possible or make a few routing notes.
Before you secure the dash, check the bulbs make sure they all work.
Most of all take your time. When you get frustrated. Stop and come back to it.
Hope this helps....keep asking questions.
It's gonna be a big job. The process is simple, but access is the killer.
I just did it!
Suggest you review willcox's thread! Most helpful.
http://willcoxcorvette.com/instructi...77_secured.pdf
Once accessible, you will be removing three screws to pull the TAC out. Don't forget about #3 screw. It's hidden pretty well. They are 1/4 inch and nut driver works great.
The picture is of a TAC for 75 on... However, the three screws were the same for my 74 and should be for your TAC as well.
Pull back the TAC. Take to your clean work area.
Then you will pull off the needle gently. Next, The two screws on the face. USE the largest blade that fits the entire screw head securely with no play. If you use a baby screw driver, may not get enough bite and distort the head.
Other things:
Before you try to pull the dash out, Make sure the two cables (speedo and TAC) are disconnected or you will break the blue plastic shrouds! Some people disconnect the cables in the engine area and trans and push them into the dash area. Done it both ways! Same same.
Light switch is tough, mark the two vacuum lines so you get them in the right order. Don't forget them on the reinstall. Light switch wires are never long enough!
Before you start pulling things apart, take a few pics if possible or make a few routing notes.
Before you secure the dash, check the bulbs make sure they all work.
Most of all take your time. When you get frustrated. Stop and come back to it.
Hope this helps....keep asking questions.
Last edited by TeaEye; Dec 26, 2017 at 04:50 PM.
Thread Starter
Intermediate
Joined: Dec 2012
Posts: 42
Likes: 4
Thank you all. This was certainly an eye opener from what I envisioned. The information offered makes the job pretty clear. I've read a lot of articles not near as clear, and the virtual reality walk through you all have offered should certainly "minimize" any frustration on my part.
P.S. If I plan on replacing the top dash pad, I guess this would be a good time as well, or doesn't it matter if I do this later?
Again, very much appreciated to all. Bel
P.S. If I plan on replacing the top dash pad, I guess this would be a good time as well, or doesn't it matter if I do this later?
Again, very much appreciated to all. Bel
Team Owner
Joined: Sep 2006
Posts: 31,273
Likes: 4,366
From: Westminster Maryland
Hi Bel,
Now would be the time to replace the upper pad.
It too is not a trouble free job because the pad needs to be 'humped' slightly in it's middle to get it to slip into position. Try to do it on a warm day when the pad has been sitting in the sun for a while.
Also, the detail and fit of the new pads isn't always as good as the originals.
Regards,
Alan
Thread Starter
Intermediate
Joined: Dec 2012
Posts: 42
Likes: 4
Thanks Alan. Access to Corvette Forum and you guys have answered in much greater detail more to my questions than I've been able to sift through the Internet and most parts catalogues over many months of searching. I'm retiring next Spring and have this 1970 Vette hungry for attention, both fix and play. I'll be working on the Dash this Spring, and then enjoy her over the summer. You guys are the best. Much appreciated. Bel
Corvette Stories
The Best of Corvette for Corvette Enthusiasts

Top 10 Most Expensive Corvettes Ever Sold on Bring A Trailer
Brett Foote
10 Things Every Corvette Owner Needs (2026 Edition)
Michael S. Palmer
8 Most "Only Corvette Owners Understand" Quirks and Problems
Pouria Savadkouei
10 Reasons the C6 Z06 is Still A Performance Benchmark After 20 Years
Joe Kucinski
How Much Horsepower Every Corvette Engine "LOST" in 1972
Joe Kucinski
Top 10 DOs and DON'Ts for Protecting Your Convertible Top!
Michael S. Palmer
Top 10 Most Explosive Corvettes Ever Made: Power-to-Weight Ratio Ranked!
Joe Kucinski
150 hp to 1,250 hp: Every Corvette Generation Compared by the Specs That Matter
Joe Kucinski