




Excessive Pushrod Wear!?

Drifting


Joined: Jul 2013
Posts: 1,299
Likes: 93
From: Tri-Cities TN

Although you may pick up a few thousands of lift you're side loading the valve stem. Will you see any hp or sacrifice durability??? Probably not! This doesn't have to be dead on but you want your sweep to cross the centerline of the valve stem. Close is good enough in most street engines.
If the pattern is no wider then .060" you will not side load the valve. If you go wider pattern but put it in the center you will wear the guides out. My teacher was the guy that made roller rockers for Harvey Crane, who was his teacher.
Close enough for street engines, no sir. Street engines this is most critical as they see more time on the engines than other engines. A drag engine with 400 passes will see about 125 miles. A board member may see 1500 to 3000 miles a year. The rocker and valve sees more cycles in a street car than in any HP application just about.
Drifting
Joined: Jul 2013
Posts: 1,299
Likes: 93
From: Tri-Cities TN
Thats not true. The sweep of a rocker tip is a function of vlv lift and the rocker ratio. In extreme cases lash caps are used to increase the vlv tip area for this.
And Smokey Y. (may he rest in peace) said the critical point for geometry is never let the contact point get closer than 0.20" to the edge. That is the important critiria.
And that Circle Article used Smokey for its VTG reference. And i have his Power Secrets right next to me to prove what i say. Reading that CT art says the roller moves in the exh direction - not centered on the exh side. Did u even read your own reference article??? Heres a quote: The critical element is not the positioning of the sweep path on the valve tip; it is the geometric angles of the rocker pivots to the valve stem.
Of course, we don't want to see the roller rocker contact point move any closer than 0.020 inch to the edge of the valve stem, as Smokey has stated, but being off-centered has little negative effect on components such as valve guides and valvetrain harmonics and no effect on performance.
The more i read your posts the more it reads like you are running your mouth hoping no-one will look it over and challenge u.
BTW do own a corvette???
And Smokey Y. (may he rest in peace) said the critical point for geometry is never let the contact point get closer than 0.20" to the edge. That is the important critiria.
And that Circle Article used Smokey for its VTG reference. And i have his Power Secrets right next to me to prove what i say. Reading that CT art says the roller moves in the exh direction - not centered on the exh side. Did u even read your own reference article??? Heres a quote: The critical element is not the positioning of the sweep path on the valve tip; it is the geometric angles of the rocker pivots to the valve stem.
Of course, we don't want to see the roller rocker contact point move any closer than 0.020 inch to the edge of the valve stem, as Smokey has stated, but being off-centered has little negative effect on components such as valve guides and valvetrain harmonics and no effect on performance.
The more i read your posts the more it reads like you are running your mouth hoping no-one will look it over and challenge u.
BTW do own a corvette???
The center of a 11/32 stem valve would be .170". Perfect geometry does not care about lift, I assure you we just had a pump gas 532CID leave here with .760" lift and its pattern was .060". We had pump gas 509 leave here with .670" and it had .060". From .170-.060" is .110". This is the clearance you have to work with. No closer than .020" to the tip. Factoring the .020" you now have an area .090" wide that you want to put a pattern of .060". In engine building that is half mile wide.
If you choose to not read my post then welcome to America. Your fellow forum members that have read, listened, are not tearing down their engines. Whether they have bought product or not from me, we still give tech support.
Do I own a corvette, I don't see what this matters but no I don't. I do own the equipment to properly do check this stuff.
Last edited by StraubTech; Jun 12, 2014 at 03:36 PM.

Thread Starter
Racer

Joined: May 2013
Posts: 421
Likes: 6
From: Chicago IL
I just checked roller placement last night, but wanted to talk to Scott before I do this and order the pushrods. This photo is with the 7.900 length and just roller starting point - I did not crank the engine over to go all the way through the motion. I bought two of the super thin springs so that the rods wont collapse the hydraulic lifters and have them on cylinder 1 exh/int. I might change them out for every cylinder and test just for kicks.


Drifting
Joined: Jul 2013
Posts: 1,299
Likes: 93
From: Tri-Cities TN
It's understandable as I am a nobody to most. My company has not been in business for 60 years grinding cams. I have been fortunate enough to have grown up in this industry since '88. I have worked for some very smart people over the years. The knowledge I have gain I share on the net to help, whether you bought parts from us or not, I care enough about my industry I don't want to see enthusiast have issues.
Corvette Stories
The Best of Corvette for Corvette Enthusiasts

Top 10 Most Explosive Corvettes Ever Made: Power-to-Weight Ratio Ranked!
Joe Kucinski
150 hp to 1,250 hp: Every Corvette Generation Compared by the Specs That Matter
Joe Kucinski
8 Coolest Corvette Pace Cars (and Replicas) of All Time
Verdad Gallardo
Top 10 Corvette Engines RANKED by Peak Torque (70+ Years of Muscle!)
Joe Kucinski
Corvette ZR1X Will Be Pacing the Indy 500, And Could Probably Race, Too!
Verdad Gallardo
Top 10 Corvettes Coming to Mecum Indy 2026!
Brett Foote
Top 10 C9 Corvette MUST-HAVES to Fix These C8 Generation Flaws!
Michael S. Palmer
10 Revolutionary 'Corvette Firsts' Most People Don't Know
Joe Kucinski
5 Reasons to Upgrade to an LS6-Powered Corvette; 5 Reasons to Stay LT2
Michael S. Palmer
Safety Car


Joined: Aug 2000
Posts: 3,711
Likes: 43
From: San Antonio TX
Chris,
I'll be the first to admit I do have knowledge voids and I am grateful for your posts since they all have information helping me to fill those voids or to purge bad tribal knowledge. I know it can be unrewarding giving away valuable subject matter expert opinion and getting pushback, but some of us are genuinely happy to have you on the board.
I'll be the first to admit I do have knowledge voids and I am grateful for your posts since they all have information helping me to fill those voids or to purge bad tribal knowledge. I know it can be unrewarding giving away valuable subject matter expert opinion and getting pushback, but some of us are genuinely happy to have you on the board.
Drifting
Joined: Jul 2013
Posts: 1,299
Likes: 93
From: Tri-Cities TN
Chris,
I'll be the first to admit I do have knowledge voids and I am grateful for your posts since they all have information helping me to fill those voids or to purge bad tribal knowledge. I know it can be unrewarding giving away valuable subject matter expert opinion and getting pushback, but some of us are genuinely happy to have you on the board.
I'll be the first to admit I do have knowledge voids and I am grateful for your posts since they all have information helping me to fill those voids or to purge bad tribal knowledge. I know it can be unrewarding giving away valuable subject matter expert opinion and getting pushback, but some of us are genuinely happy to have you on the board.
I think Justin got a good education this morning. The way Scott does it using the polylock as your measuring tool is simple, neat, and spot on.
And thank you Gerry!!!
Thread Starter
Racer
Joined: May 2013
Posts: 421
Likes: 6
From: Chicago IL
Ok, so here it is - the best way (now in my humble opinion  ) to measure your pushrod size. Please note, this was all thanks to Chris and Scott at Straub Technologies. We are very fortunate to have their support on this forum as well as others - thanks guys!
STEP 1 - Find out your cam's gross valve lift. In my case, the XE262 lift is .462 on intake (.469 on exhaust, but intake should suffice). Take that number and divide it by 2. This will give you your lift number at half the movement. Now take that number and divide it by .041 if you have 3/8 studs or .050 if you have 7/16 studs. This will give you the amount of distance to travel on the threads. In my case with 3/8 studs, this gives me 5.63. Remember that number.
STEP 2 - Take your rocker and make a mark from the center of the roller folcrum to the center of the rocker tip like the image below. This will give you the geometry line to follow that will show your rocker being perpendicular with the valve at lift.

STEP 3 - Take your rocker and set it on the stud without the pushrod. Thread your polylock on just a few threads and hold the rocker up so that the roller is touching the valve tip.

STEP 3 Continued...While holding the rocker up, look at the line on the side and turn the poly lock so the line is parallel with the retainer cap. *Note - the roller tip will most likely be far over to the exhaust side of the valve tip - this is ok and will change anyway when the valve is pressed down.

STEP 4 - Remember that number we figured out earlier? That is how many turns you will need to turn the poly lock until you reach half lift. Marketing the poly lock, turn it the number of turns you calculated. *Note - if you have an adjustable pushrod, go ahead and drop it in now before you tighten down on the poly lock.

STEP 5 - Once you have the poly lock down the correct number of turns, twist your adjustable pushrod until you are at 0 lash. This will be the correct pushrod length at the correct geometry for your set up.

*NOTE - For hydraulic lifters, you will need to add .050 to your final number. In my case, I added .050 and that brings me to 7.900! Bingo!

Chris and Scott, if I forgot anything or misrepresented anything, please let me know.
) to measure your pushrod size. Please note, this was all thanks to Chris and Scott at Straub Technologies. We are very fortunate to have their support on this forum as well as others - thanks guys! STEP 1 - Find out your cam's gross valve lift. In my case, the XE262 lift is .462 on intake (.469 on exhaust, but intake should suffice). Take that number and divide it by 2. This will give you your lift number at half the movement. Now take that number and divide it by .041 if you have 3/8 studs or .050 if you have 7/16 studs. This will give you the amount of distance to travel on the threads. In my case with 3/8 studs, this gives me 5.63. Remember that number.
STEP 2 - Take your rocker and make a mark from the center of the roller folcrum to the center of the rocker tip like the image below. This will give you the geometry line to follow that will show your rocker being perpendicular with the valve at lift.

STEP 3 - Take your rocker and set it on the stud without the pushrod. Thread your polylock on just a few threads and hold the rocker up so that the roller is touching the valve tip.

STEP 3 Continued...While holding the rocker up, look at the line on the side and turn the poly lock so the line is parallel with the retainer cap. *Note - the roller tip will most likely be far over to the exhaust side of the valve tip - this is ok and will change anyway when the valve is pressed down.

STEP 4 - Remember that number we figured out earlier? That is how many turns you will need to turn the poly lock until you reach half lift. Marketing the poly lock, turn it the number of turns you calculated. *Note - if you have an adjustable pushrod, go ahead and drop it in now before you tighten down on the poly lock.

STEP 5 - Once you have the poly lock down the correct number of turns, twist your adjustable pushrod until you are at 0 lash. This will be the correct pushrod length at the correct geometry for your set up.

*NOTE - For hydraulic lifters, you will need to add .050 to your final number. In my case, I added .050 and that brings me to 7.900! Bingo!

Chris and Scott, if I forgot anything or misrepresented anything, please let me know.
Last edited by Jartanyon; Jun 13, 2014 at 11:58 AM.
Le Mans Master

Joined: Oct 2002
Posts: 7,098
Likes: 378
From: Las Vegas - Just stop perpetuating myths please.
As i said before that adj p-rod is the most difficult tool i have ever used. The rocker arm tester would be done in a tiny fraction of the time to measure as provided here.
Any how where does any printed information on VTG does it say to off center the contact patch? "justified on the exh side"??? Not the Chevy Power Manual, not Crane Cams tech tips, not D. Vizards "how to" books, not in Smokeys Pwr Secrets. Some how all of those missed such an "important" detail. Not hardly. More likely some one that wants to hide something will make that concept sound as complicated and esoteric as possible to only hide the fact they have a lessor solution. I read posts all the time of setting lifter pre-load that are extremely difficult only because the individual doesnt really know what to look for.
Yea, so if setting the contact patch off center - justified on the exh side - is soo important show us one reference that says so - not some expert acquaintance. Just one printed reference to this.
cardo0
BTW u never explained why Smokey or your Circle Track article said center contact patch was ok. Both state the optimum geometry occurs at a certain amount vlv lift. Not contact patch location.
Any how where does any printed information on VTG does it say to off center the contact patch? "justified on the exh side"??? Not the Chevy Power Manual, not Crane Cams tech tips, not D. Vizards "how to" books, not in Smokeys Pwr Secrets. Some how all of those missed such an "important" detail. Not hardly. More likely some one that wants to hide something will make that concept sound as complicated and esoteric as possible to only hide the fact they have a lessor solution. I read posts all the time of setting lifter pre-load that are extremely difficult only because the individual doesnt really know what to look for.
Yea, so if setting the contact patch off center - justified on the exh side - is soo important show us one reference that says so - not some expert acquaintance. Just one printed reference to this.
cardo0
BTW u never explained why Smokey or your Circle Track article said center contact patch was ok. Both state the optimum geometry occurs at a certain amount vlv lift. Not contact patch location.
Last edited by cardo0; Jun 13, 2014 at 02:05 PM. Reason: spelling

Le Mans Master


Joined: Apr 2011
Posts: 6,284
Likes: 1,171
From: Hermosa
How much difference is that from the length you had?
Pretty cool procedure. Sounds like it would save a lot of time.
Did you run it through to see where the wear patch is now?
I ended up with rods a lot shorter than stock for my aluminum heads shaved .030 and roller lifters.
Pretty cool procedure. Sounds like it would save a lot of time.
Did you run it through to see where the wear patch is now?
I ended up with rods a lot shorter than stock for my aluminum heads shaved .030 and roller lifters.


Thread Starter
Racer
Joined: May 2013
Posts: 421
Likes: 6
From: Chicago IL
How much difference is that from the length you had?
Pretty cool procedure. Sounds like it would save a lot of time.
Did you run it through to see where the wear patch is now?
I ended up with rods a lot shorter than stock for my aluminum heads shaved .030 and roller lifters.
Pretty cool procedure. Sounds like it would save a lot of time.
Did you run it through to see where the wear patch is now?
I ended up with rods a lot shorter than stock for my aluminum heads shaved .030 and roller lifters.


Thread Starter
Racer
Joined: May 2013
Posts: 421
Likes: 6
From: Chicago IL
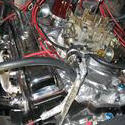
The new pushrods came yesterday (http://www.summitracing.com/parts/sum-1457900) and they are WAY nicer than the first set! Got them installed with the Comp full roller rockers and they all seem to fit really well. There are two pushrods - one on each side - that are very close to touching the heads at the top of the slot so I will have to keep an eye on that. Set the lash with the car running by slowly backing off until the rocker clattered and then slightly tighten until it stopped and added a half turn from there.
These oil much better than the last set. I originally thought it was a lifter issue, but after seeing how much these rockers were drenched in oil, I think it was the rods and rockers.
Now I have to get my timing figured out and get the power out of the build that I should be seeing. Either my distributer is off a tooth or so (most likely) or the balancer has slipped. At 16 degrees initial, the car doesn't run as well as it should and vacuum is at like 11/12. If I continue to 20 degrees, it starts to smooth out and run great and vacuum hits around 15. Something doesn't seem right.
These oil much better than the last set. I originally thought it was a lifter issue, but after seeing how much these rockers were drenched in oil, I think it was the rods and rockers.
Now I have to get my timing figured out and get the power out of the build that I should be seeing. Either my distributer is off a tooth or so (most likely) or the balancer has slipped. At 16 degrees initial, the car doesn't run as well as it should and vacuum is at like 11/12. If I continue to 20 degrees, it starts to smooth out and run great and vacuum hits around 15. Something doesn't seem right.
Last edited by Jartanyon; Jun 18, 2014 at 09:51 AM.