When you click on links to various merchants on this site and make a purchase, this can result in this site earning a commission. Affiliate programs and affiliations include, but are not limited to, the eBay Partner Network.
To diagnose the vacuum, I bought a MightyVac and applied it to each of the actuators, verifying they would hold a vacuum. I found my actuator in the rear (the defrost / floor controller between the box and the firewall) was spent. Replaced. Also verified the dial controller in the console was working properly using a vacuum gauge. Then verified all actuators would properly open and close the doors, looking for door mechanical issues you imply you may have. I had none. Good luck. Frustrating parts situation.
Has anyone tried using a non-AC heater core with an AC heater box and a non-AC box/cover in the engine bay?
No I have not, but I have a question(s).
I have to ask, did you have the heater core tested at a radiator shop to see if it can be fixed ?
Secondly, if the original core is "shot" and the new core is off slightly could your local radiator shop, (using the original as an example) do a little magic and make the new one fit correctly ?
Not impossible I don't think.
If it helps your not the first one to have run into similar issues, I may be next as I'm completely rebuilding my 70' Coupe w A/C.
Best of Luck, it'll all work itself out.
Last edited by caskiguy; 08-06-2017 at 09:21 AM.
Reason: misspelling
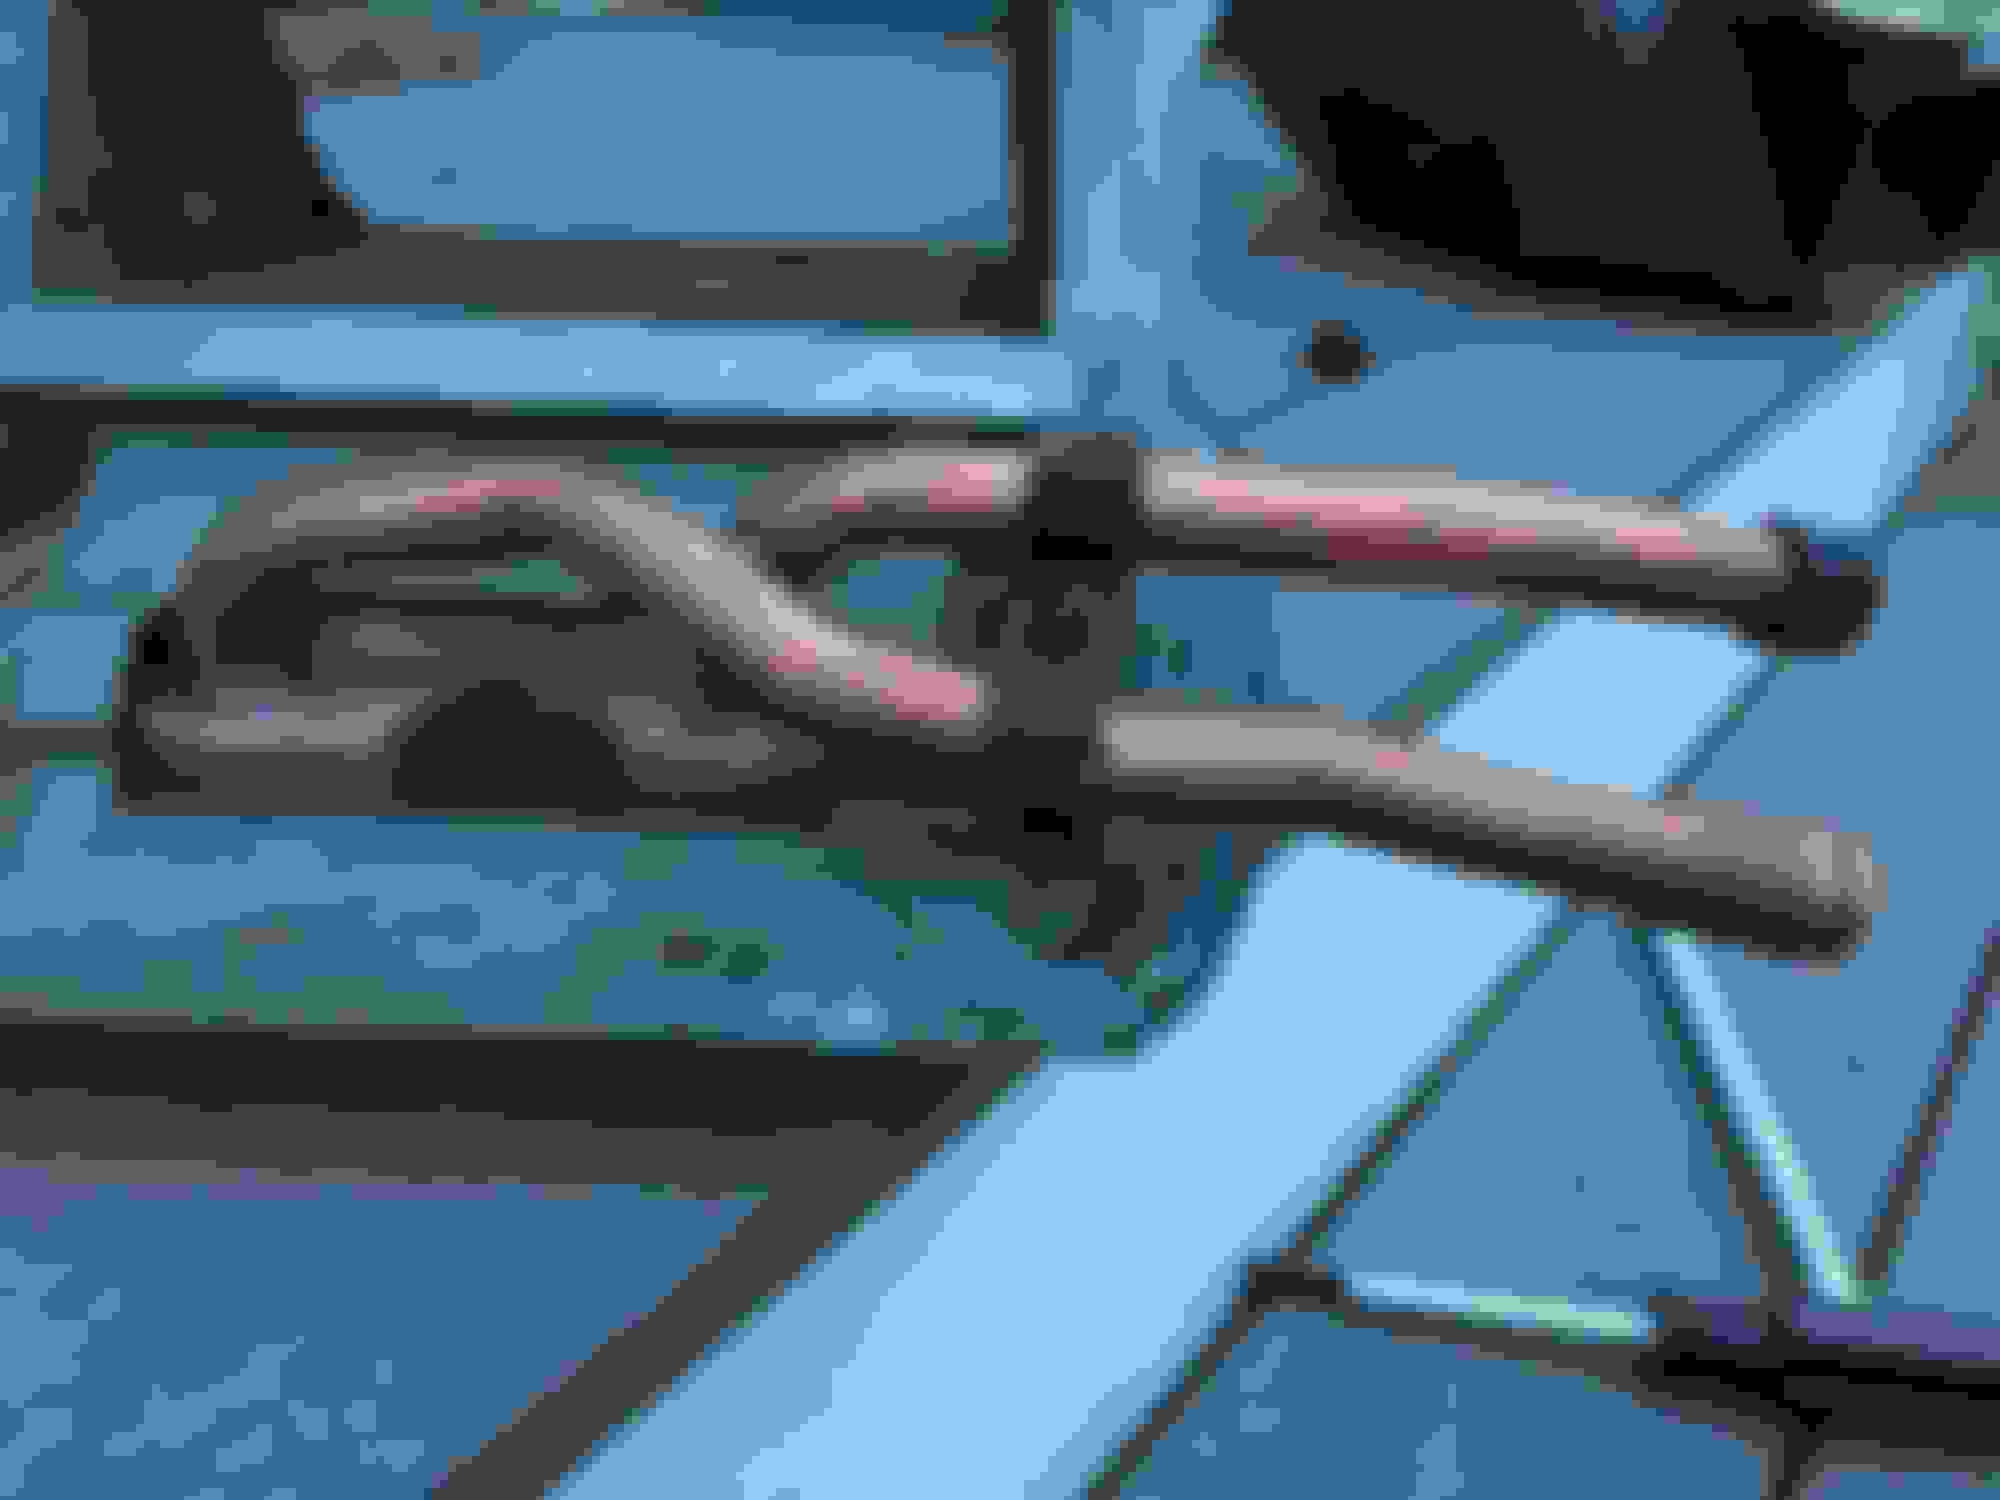
So, it seems like the fourth time was the charm... kinda. The most recent core came from Keen Parts. It fit just as well as my first one from Paragon, which is to say that the main part of the core fits into the heater box, but the pipes are too close together to sit in the cradle. I went out and bought a couple springs to bend each pipe without linking them. As you can see in the before and after pics below, the bending worked well. However, I broke the solder that connect the two pipes.
How important is that solder? Do I need to repair it before I continue with the install?
Since its such a joy to install the core, I would solder the two pipes back together, then take it to your radiator shop and have them test the core just in case a swedge joint was stressed and developed a fracture. Best to check it now then to see that bright green fluid drip on your carpet again. I plan to go with a new vintage ac system when I redo my non operating ac. Complete system is about $1,400.00
I bought mine in Partsgeek, the aluminum one, and I have to say that it was very similar to the OEM, just some small deviation on one of the tubes which made it run closer to the body, but was good enough.
Heat core has been pressure tested and resoldered, so I'm working on the install today. The seal kit from Doc has decent instructions. Thought I'd post a few pics while the weatherstrip adhesive dries.
I'm not sure if I installed the first two foam pieces around the tubes in the right direction. There was a seam that I wasn't thrilled with, so I put some adhesive in there.
I spent most of the day working on the heater box and the hoses. After getting the box in real nice, I realized I didn't bend one of the pipes on the core enough because the 1" thick foam piece that installs around the pipes to block off the core from the bottom of the car didn't fit right. That was frustrating, but I pulled the box, bent the pipes again, and used the very scientific pressure testing method of covering one pipe with my thumb while blowing into the other side before reinstalling the box.
Later on I realized that I forgot to reattach the vacuum lines going to and from the regulator on the back of the box. Luckily they weren't working anyway so I didn't get too upset. I just hope they don't interfere with me trying to get the regulator working that controls the diverter for the defogger.
Fan works and a ton of heat is flowing. That heater box gets really, really hot! Although I don't have the factory vacuum controlled shut off valve in the engine bay, I do have a manual valve hooked up by the engine that will do just fine for my three-season toy.
All thats left left is to stop the small leak on the back end of my shut off valve and reattach the heating ducts with parts from the new seal kit. Then she's back on the road
Ductwork is now complete. I knew I would need to use the foil tape to connect the defogger duct. However, I decided to bring out my inner Bubba to combine foil tape with foam board from a craft store to seal up the hole where the AC duct connects with the heater box in an attempt to seal up some leaks.
Air flow is better than before, but it�s nothing to write home about. I�m sure it�s because the defogger diverter flap is stuck in the middle, sending air to the feet and windshield. Then there�s the fact that I forgot to install the new foam seal that goes to the duct on the left side of the heater box. I might just leave that one be as the fit was kind of tight to begin with.
Very nice job.
It's a real bitch the orig. parts are mostly long gone.
To boot I have a 1968 which adds to the mix.
There is a thread somewhere here, I contributed to a while back.
It addresses our dissatisfaction with the lack of quality control/fit of after market parts.
Sadly, the vendors have to bend over backwards to compensate for poor manufacturing. Unless they make it in house, then they are all buying from the same manufactures off shore.
Depending on how the workers day went depends on the reliability of the part.
I for one will never buy a new wiper switch again, I'd wait like I did and find a functional take off.
I rebuilt my AC evaporator case using Doc's seal kit.
Again great fit, modified 1 gasket but it worked.
Job was a bitch on BB car.
Marshal
I�ll work on the evaporator case in the spring or during the winter. If anyone has a tutorial or some photos explaining where all the screws are on the case, I�d appreciate it. My GM Assembly Manual only shows the non-ac setup. All other AC components have been removed by a prior owner, so I may remove the case entirely and go with an aftermarket non-ac conversion cover.
The biggest pain pain in the a$$ about the heater core was fastening the clamps that hold the hoses to the pipes. There was almost no room at all to get tools in there. I had to use my fingertips to turn the screwdriver and then grab on to the handle with a pair of pliers to tighten it the rest of the way. My back still aches from the awkward angle.

 07-27-2017, 09:12 AM


 I might just leave that one be as the fit was kind of tight to begin with.