When you click on links to various merchants on this site and make a purchase, this can result in this site earning a commission. Affiliate programs and affiliations include, but are not limited to, the eBay Partner Network.
Thanks Calwldlife. I'm thinking something similar, maybe in addition to the bad PCV pulling oil in with carb vacuum. It's definitely age-related because the car passed smog when it was last driven in 2004 and must have been in a reasonable state of tune at the time. Then after sitting for 17 years this s what we have!
I will be sure to check flatness of the heads and manifold before I reassemble.
Originally Posted by calwldlife
Looks like intake mani was not sealed.
Oil was sucked into the head runners.
Lucky the water seals stayed.
Either mani warped, wasn't tight, lost sealing, or heads were milled at a bad angle.
I guess I'm pretty happy with these results. This is with a cold engine. I can check again later when I have it running. I'll definitely go with REELAV8TR's suggestion of running sea foam to continue cleaning the inside.
The pushrods all passed inspection just fine. All the ends were bright and polished with no cracking or galling. The amount of crud inside and out it just amazing. I have them soaking again until tomorrow to make sure I got it all. I forgot to roll test them and will do that tomorrow. The rockers all look good too. They look practically new under all that sludge!
Originally Posted by ebbnflow
before reusing pushrods, clean them inside-out and then inspect all ball-ends closely for any cracks, microfractures etc.
Also, roll em on a pane of glass to check if bent. Ball-end must be shiny with no blemish; anything else is garbage.
* inspect all rockers in both their pivot cup And pushrod cup for cracks, microfractures etc; replace any non conforming.
go back & duplicate tests & record; but this time, follow-up with ~ 1/2 ounce of ATF or motor oil in each cylinder (try to squirt it at top edge of piston) & test again & record. Looking for any difference(s) between dry & wet. The addition of oil helps leaky rings seal but has no effect on valve seal. Helps rule in or out rings. Are you listening for air hiss within intake tract, exhaust tract & crankcase?
With the lifter valley wide open like it is, I can easily hear that the leak is through the rings into the crank case.
I should have listened back at the mufflers. I might repeat and check that just to see, but I think the result is good enough to proceed forward with reassembly. I'd hate to pour even more oil into the cylinders and foul the cat more.
Originally Posted by ebbnflow
go back & duplicate tests & record; but this time, follow-up with ~ 1/2 ounce of ATF or motor oil in each cylinder (try to squirt it at top edge of piston) & test again & record. Looking for any difference(s) between dry & wet. The addition of oil helps leaky rings seal but has no effect on valve seal. Helps rule in or out rings. Are you listening for air hiss within intake tract, exhaust tract & crankcase?
With the lifter valley wide open like it is, I can easily hear that the leak is through the rings into the crank case.
I should have listened back at the mufflers. I might repeat and check that just to see, but I think the result is good enough to proceed forward with reassembly. I'd hate to pour even more oil into the cylinders and foul the cat more.
I agree if your goal remains the same, to get the original engine running well enough to pass smog and get your registration current. All your out at this point is labor and some consumables.
Those results are better than I thought they would be. You're only using 25 psi for the test? Could be why it shows pretty decent. I would go at least 50. 100 is better yet. But you established that the leakage is from the rings it sounds like.
little bit of internal cleaning and you might make it even better.
You got a baseline. Next time, if you do it again, use same test pressure.
I have found that a compression test will show the difference before and after seafoam plenty good as well.
The instructions for the leak tester say to open the regulator until the gauge on the right is in the "set" point to calibrate, and then connect it to the cylinder being tested. I think if I crank up the pressure then the result will be different. I was running about 60 psi of line pressure from the compressor.
Originally Posted by REELAV8R
Those results are better than I thought they would be. You're only using 25 psi for the test? Could be why it shows pretty decent. I would go at least 50. 100 is better yet. But you established that the leakage is from the rings it sounds like.
little bit of internal cleaning and you might make it even better.
You got a baseline. Next time, if you do it again, use same test pressure.
I have found that a compression test will show the difference before and after seafoam plenty good as well.
I used the leak tester to hold the valves in place while I removed the springs. I made a very simple spring compressor tool in 5 minutes. It worked great. The keepers fought me a little because of the amount of sludge. I need to soak the springs, retainers and keepers so I can have clean parts to put back. This means I can only do two cylinders at a time.
I work on companion cylinders, such as 1/6, which are both at TDC at the same time. So, when I get the spring off I can remove the air pressure and let the valves drop. They can't go anywhere because the pistons are at TDC. But I can't continue to the next cylinders until I put them back together. Also, if you do this, do something do keep the crank from turning when you pressurize the cylinder.
With pressure applied I checked the exhaust and intake for any leakage. There was none. The valves fit the guides silky smooth and I can turn the valves and feel that the face and seat are smooth as well.
The original valve stem seals were super crusty and fell apart and there were no umbrella seals present.
Old OE square o-rings are typically hard, broken and MIA. The general did Not install additional rubber umbrella or other seals. That (heavy) tin cup just below retainer is the OE umbrella/ shield/deflector and it works in conjunction with (otherwise ineffective) square o-rings. Yours also has its OE (heavy) Exhaust valve rotators laying just atop Exhaust umbrellas. Your motor will appreciate rubber umbrellas. The final generation-iteration of sbc ... L30 & L31 Vortecs ... have real (& Much-improved) valve stem seals atop guides and have No rotators, No tin cups, and No flat coil damper springs..
Thanks. Great info! I was noticing how heavy the parts were too, and I don't really see how that square seal does much being in between the retainer and valve stem. When I first got my Z06 with the LS6 I changed the valve springs from the stock yellow springs to blue. The yellow springs were known for breaking and the car had broken one which was the reason it was sold. Of course the dealership that repaired it only changed the one spring.
Anyway, the LS engines are sure a pleasure to work on, but I'm enjoying the nostalgia of this old SBC!
I am leaning toward the newer generation Vortec engines as a base to build on so I can enjoy the benefits you listed, roller lifters and other updates.
Originally Posted by ebbnflow
Old OE square o-rings are typically hard, broken and MIA. The general did Not install additional rubber umbrella or other seals. That (heavy) tin cup just below retainer is the OE umbrella/ shield/deflector and it works in conjunction with (otherwise ineffective) square o-rings. Yours also has its OE (heavy) Exhaust valve rotators laying just atop Exhaust umbrellas. Your motor will appreciate rubber umbrellas. The final generation-iteration of sbc ... L30 & L31 Vortecs ... have real (& Much-improved) valve stem seals atop guides and have No rotators, No tin cups, and No flat coil damper springs..
L30 (5.0L) & L31 (5.7L) iron-head Vortec motors are a great platform for a build! Although their spring is conventional and straight with No damper, L30 & L31 can certainly be retrofitted with (Much-improved) beehive like OE LS have. And, just like most earlier (flat tappet) sbc motors, L30 & L31 springs' seat pressure average 80 lbs; even though they have somewhat heavier roller lifters it's still ~ 80 lbs on seat. OE roller lifters have no "links" like retrofit roller lifters do; thereby OE roller lifters are considerably lighter than linked retrofit roller lifters.
I initially thought that the heat crossover and EGR ports are separate, but now I see that the EGR gets its exhaust source from the crossover. I need to have a functional EGR to pass the smog check so I cannot block the crossover. Bummer, it needs to go back together the same way it came apart.
I would still think there is an advantage to leaving the EFE flapper open in the exhaust, so at least the exhaust isn't forced through the intake when the engine is cold.
Try blocking driver side w/ plate/gasket & then stuffing the x-over beneath plenum with "dollar store" stainless steel pot scrubbers; that way, there will be heat for EGR at passenger side, but little to none coursing beneath plenum. Aluminum foil/plates won't (T-shirt) survive long
It's a great idea, but I can't risk sending debris downstream and wrecking the cat. To pass smog, this car needs to have its original square flat cat. It's expensive to replace.
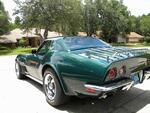
I knew I would face these challenges when I bought the '76 so there are going to be plenty of these compromises along the way.
No worries, I'm still having fun! It will be great to get this on the road, soon I hope!
Originally Posted by ebbnflow
Try blocking driver side w/ plate/gasket & then stuffing the x-over beneath plenum with "dollar store" stainless steel pot scrubbers; that way, there will be heat for EGR at passenger side, but little to none coursing beneath plenum. Aluminum foil/plates won't (T-shirt) survive long
Here in Virginia we still have inspections to keep the car licensed as a "driver". On our C4 I replaced the factory catalytic converter with a higher flowing unit from Summit decades ago. It still passes inspection with a higher flowing cat, it just cleaner than before. I also put a Cat back Chambered pipe system and the Corvette gained almost 14 hp from the swap. Won't California let you use a upgraded aftermarket catalytic on your 1976 Corvette? The early flat catalytic's are full of the pellets are they not? Maybe you can replace them and renew the catalytic converter for a few more years. I remember when the 1976 Corvette came out and the foul smelling exhaust the cars of that era made.
On a Trip I left my Car for a few weeks. When I got back it would start and idle only. When you tried to rev it up it would "choke". I determined it was the catalytic converter being plugged so I drove it over to a shop at ~10-15 mph and had them remove the converter from the car. They gave it to me and I took a long flat bladed screwdriver and broke the ceramic element and shook out all the parts. Then the guy put it back on my car and I drove 400 miles home that afternoon. My mileage went up a little without the functional converter in place.
Once you get your Corvette back together I would doubt the engine will ever see sludge like that again! I had not seen anything that bad in a LONG time. Pennsylvania Crude oil is high in Sulfur which helps sludge build up so I have avoided it forever.
Be very careful with the carbon inside your engine block, if it breaks loose it can wreak havoc on the engine if it gets into the lubrication system. I would be sure to blow out every passage way where oil passes and maybe run a wire brush through them to ensure they won't slow the oil down. I would also flow some solvent through the push-rods as they can hold a lot of crap inside them. I use a small parts washer with heated solvent as it cleans it right away.
I use 100 psi to leak down test. The higher the psi the better the rings will seal......the pressure gets behind the ring and pushes it against the bore. It is also super easy at 100psi to read percentage of leakdown on the second gauge.
I have always used 100 p.s.i. as that is the way I was taught to do it. It is easier and more accurate.
We had to do it annually on my Cessna for the maintenance records so we could determine when I needed to rebuild the engine. I have never seen it done using 25 p.s.i. before.
I suspect when the crud is out from in the rings the Leak Down test results should go up as well.
That harbor freight leakdown tester is kind of a POS in it's current form. You only need one gauge to do the test. If you give it 100 psi and the gauge drops to 80 psi. Do math and you get 20% leakage. 50 psi and it drops to 40 psi, math again and you still get 20% leakage.
In any case use a consistent method so you can get consistent and comparable results.