







Another Interior Refresh - Pics

Thread Starter
Melting Slicks


Joined: Feb 2005
Posts: 2,057
Likes: 5
From: Bay Shore, NY
 Another Interior Refresh - Pics
I took some pix of the carpet install on my 85's interior a few weeks ago and thought I'd share. I completed it in time for a show my Corvette club was sponsoring and actually took home a second place trophy.
Its funny, when I look back at what the interior used to look like, I wonder how I lived with it that way for so long. I went "new" with the weatherstripping on the doors, windshield and rear window (still need to do the halo), the visors, the carpet and rounded it out with new mats. I had found used door panels and seats from a low mileage C4 in the same color saving me a lot of money and at the same time, the patina of those "original" parts sits well with the rest of the car. The remaining interior parts were either cleaned or re-dyed to the original color so everything matches and looks consistent. I just need a shifter **** to complete it and i'm thinking of wrapping some of the plastic trim in carbon fiber or something else to help it stand out.
I owe a lot to the members of this forum and reading about their experiences and using their tips to get the job done. Thanks fellas!
Here are some of the pics:
With the side panels off, the console skeleton is visible. It was in good shape with no broken tabs, etc. The floor was clean as well.
[IMG]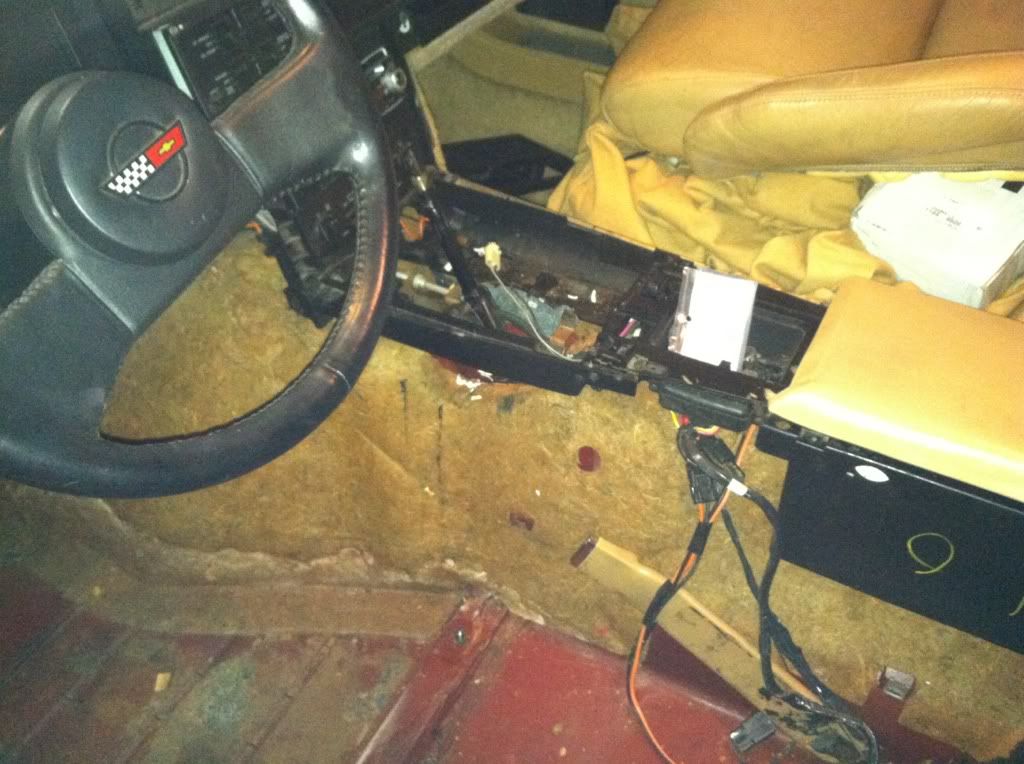 [/IMG]
Console side piece removed, cleaned of glue (Goo Gone works great btw) and ready for dying:
[IMG]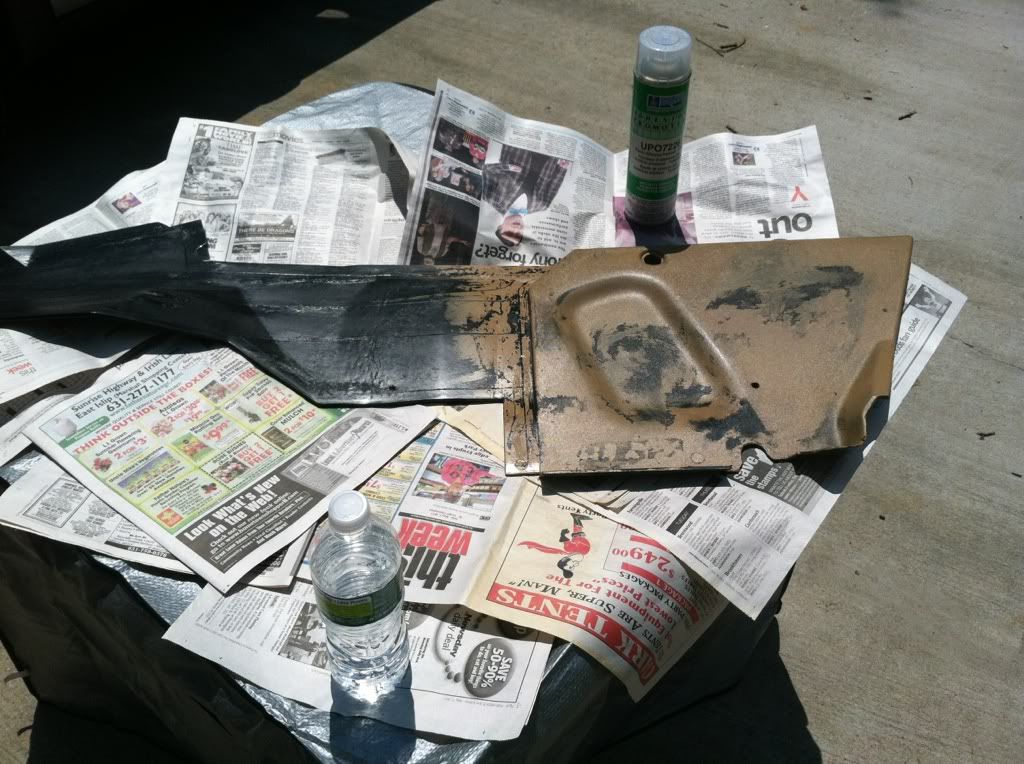 [/IMG]
Seat belt receiver getting a refresh:
[IMG]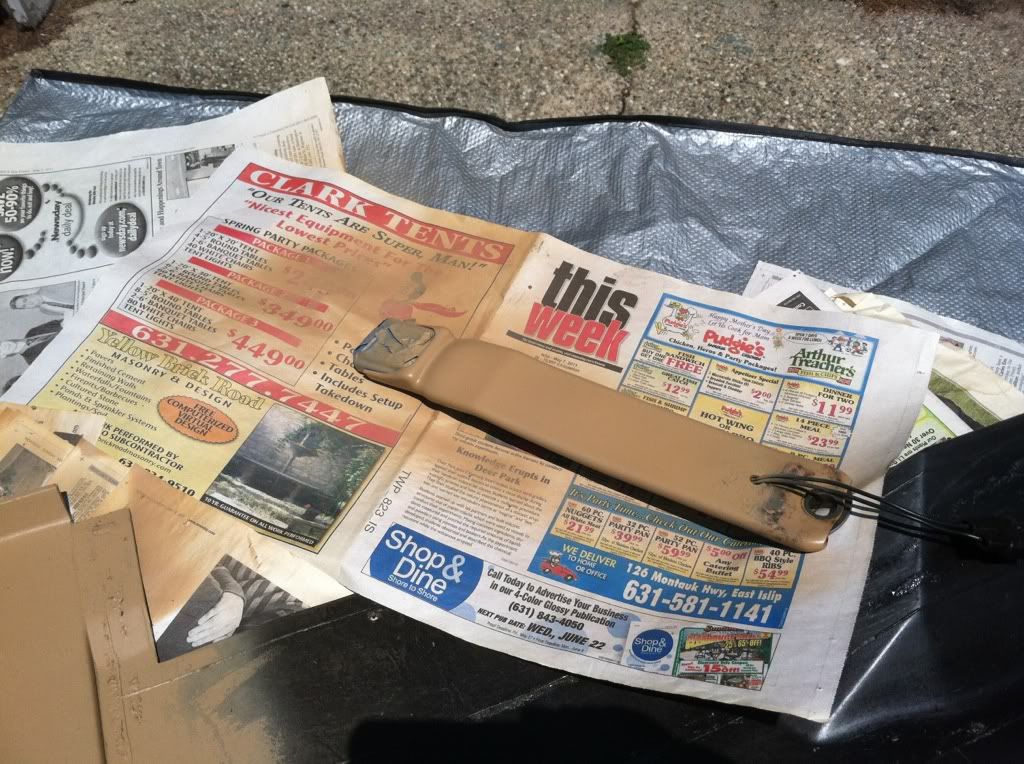 [/IMG]
Re-dyed console side:
[IMG]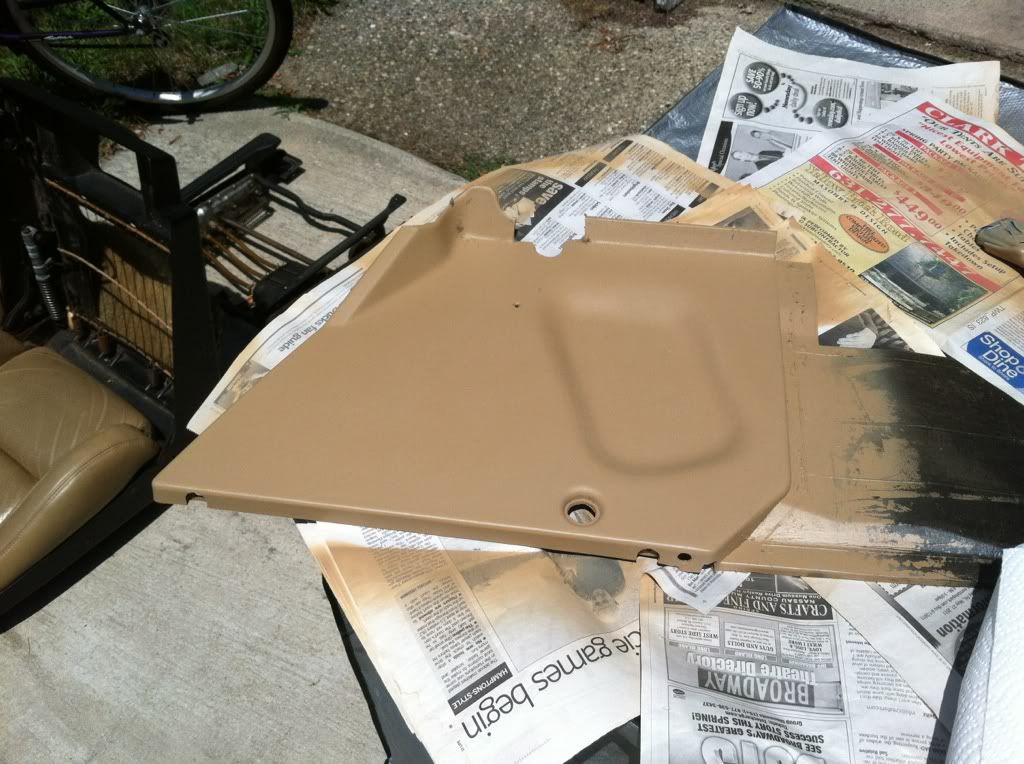 [/IMG]
I purchased the poly backed carpets and installed Dynamat on the floor boards. It makes a difference, the road noise is minimal now. The foam on the center console was in amazing shape so I left it alone, I just trimmed around it for the Dynamat install:
[IMG]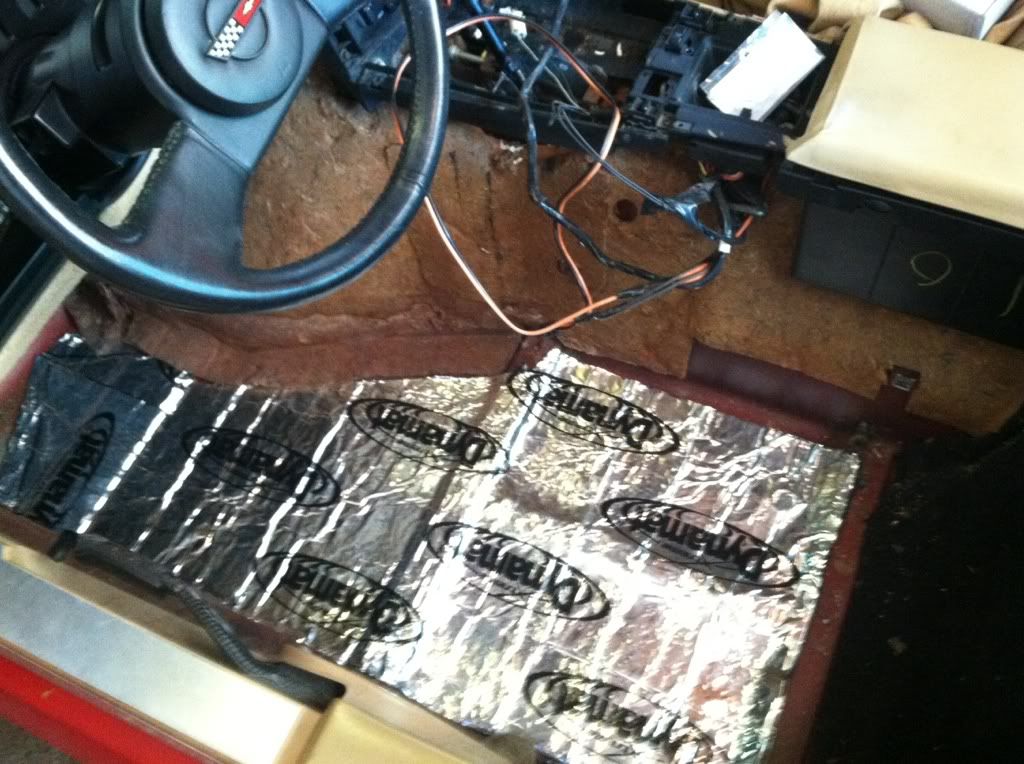 [/IMG]
Test fitting the carpet:
[IMG]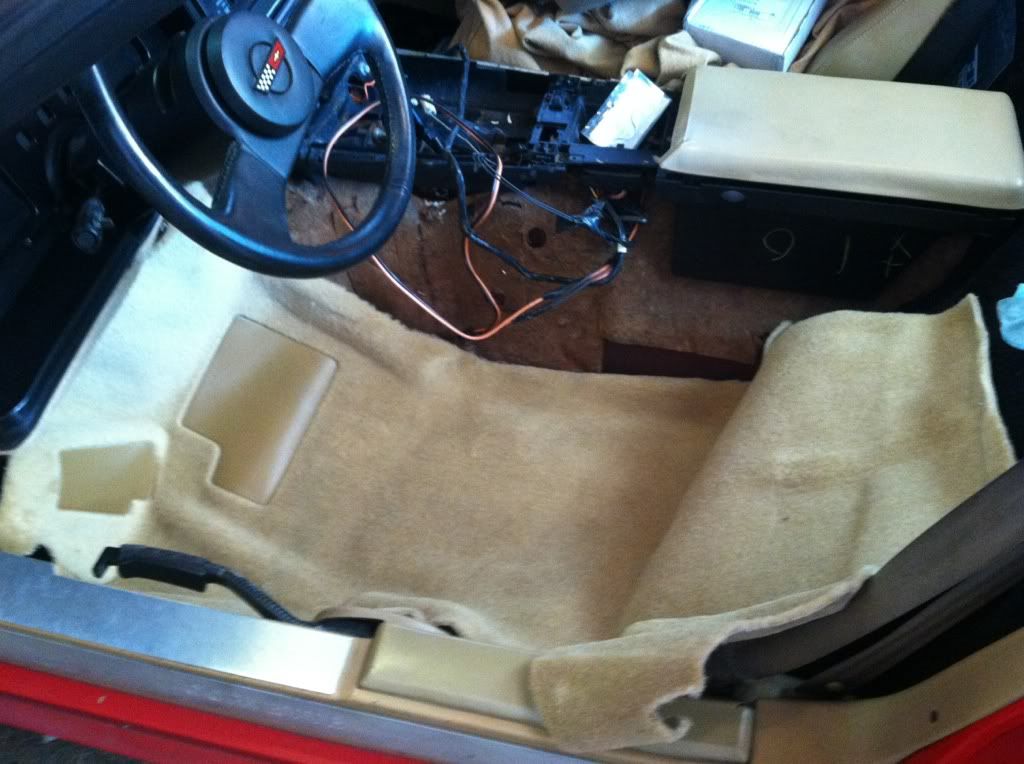 [/IMG]
Driver's side carpet installed over the Dynamat, an almost perfect fit, just a little trimming was required up by the gas pedal:
[IMG]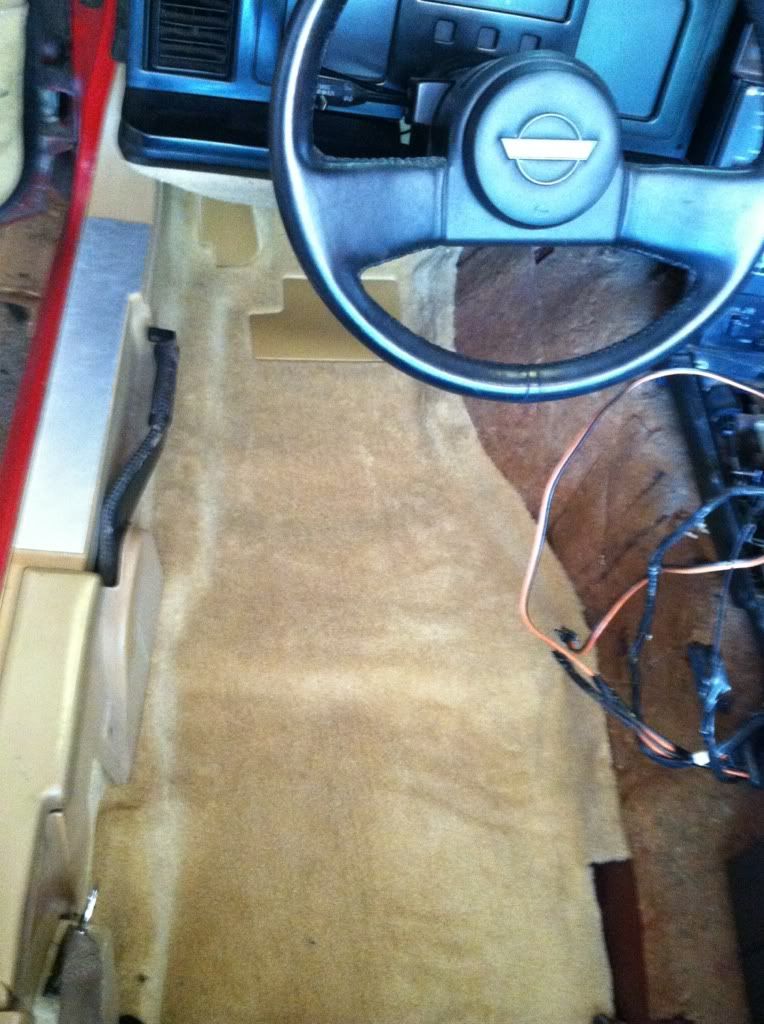 [/IMG]
Side panel installed without carpet. I used the yellow trim adhesive after reading some of the posts of prior installs and it worked great:
[IMG]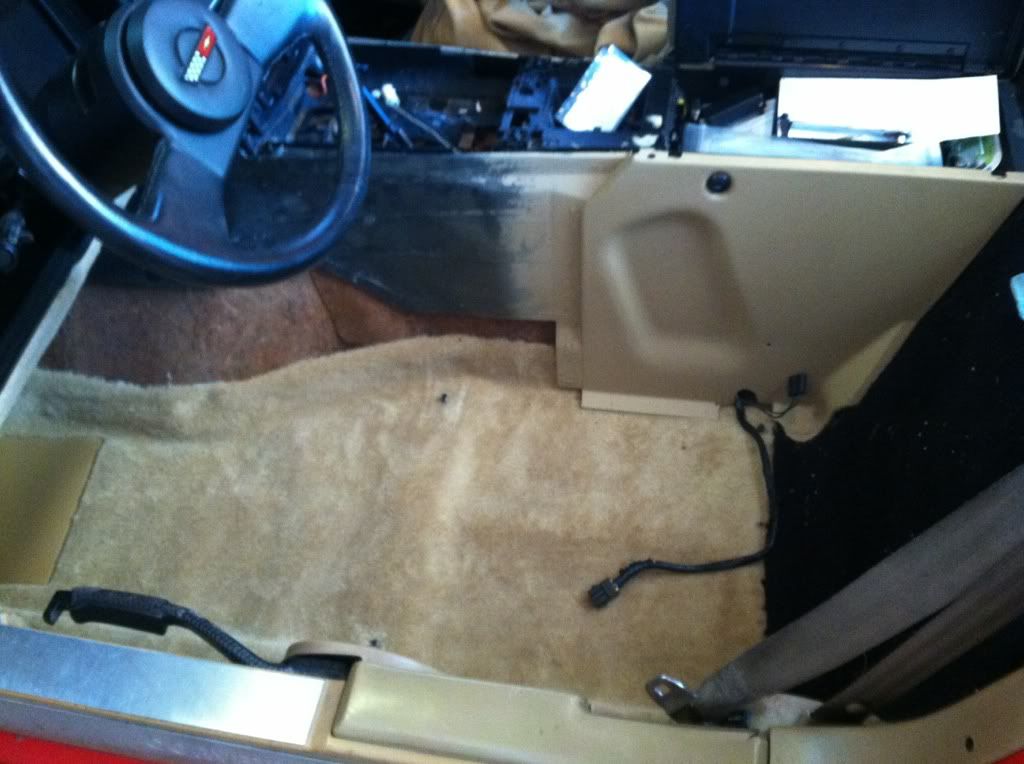 [/IMG]
Passenger side seat belt receiver and side panel refresh:
[IMG]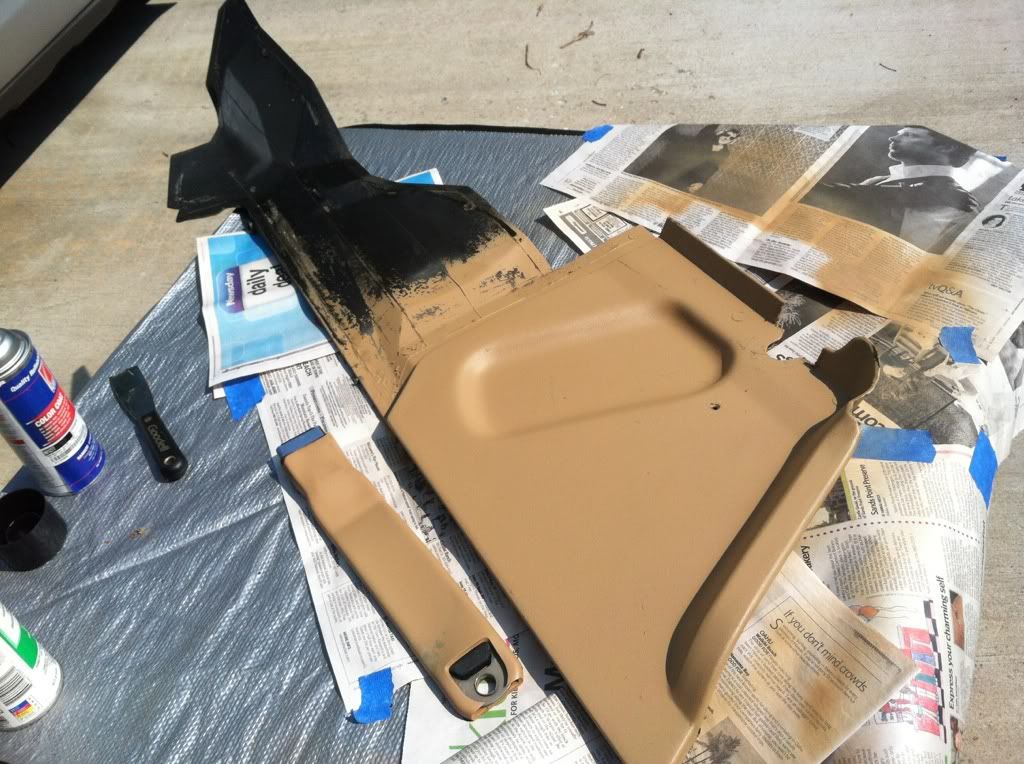 [/IMG]
I used Dynamat on the passenger side floor board as well, but didn't take any pics, I was on a roll and didn't stop. The passenger side required additional trim in the footwell once the side panel carpet was installed. All in all, I only needed to trim about an inch. I am very impressed with the carpets Willcox supplied.
Here is the completed interior, minus the new mats:
[IMG]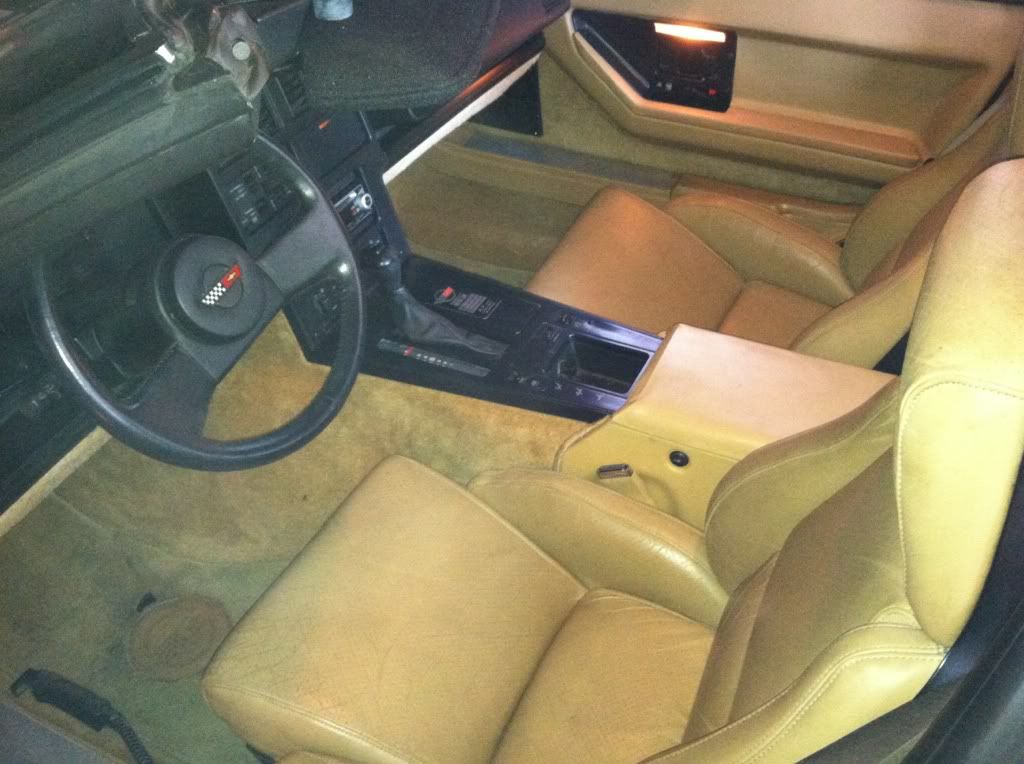 [/IMG]
Driver's side with new mats (made from the same company that made the carpets);
[IMG]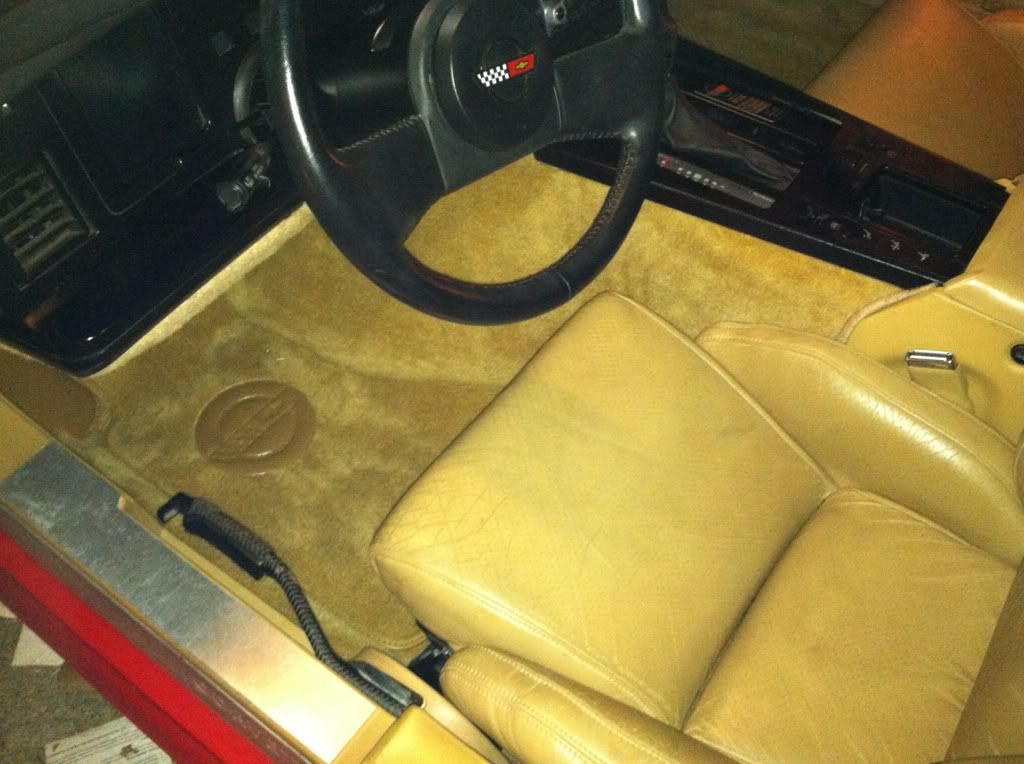 [/IMG]
Passenger side:
[IMG]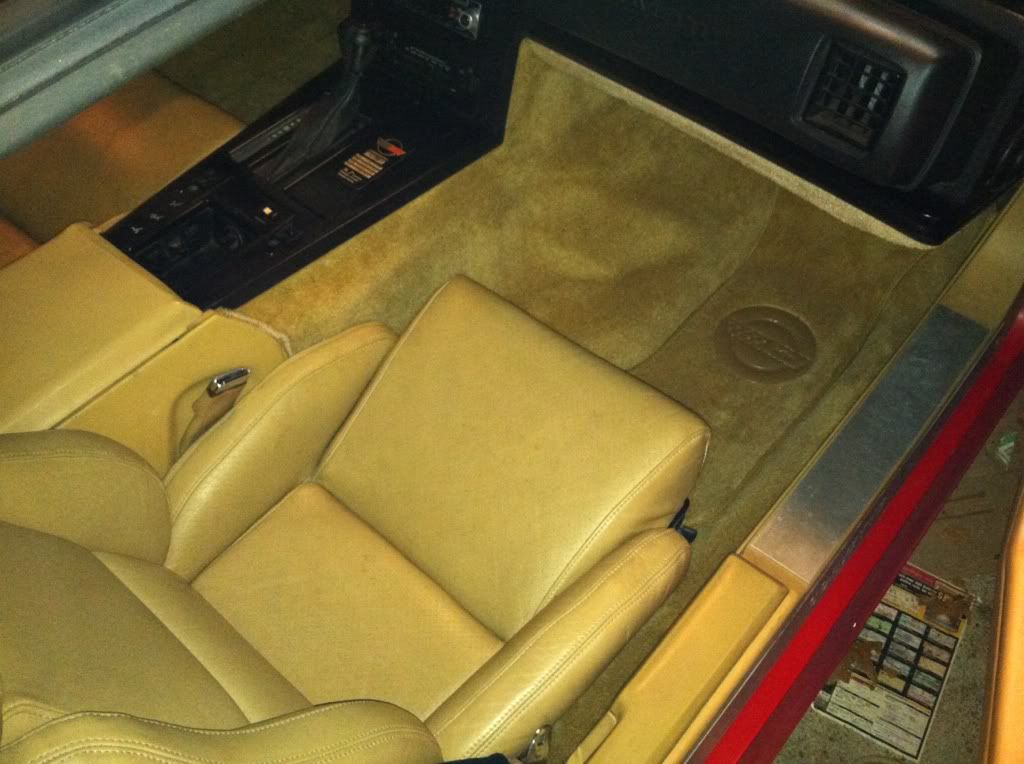 [/IMG]
Now, anyone have any suggestions on how to clean the seat belt fabric?
Its funny, when I look back at what the interior used to look like, I wonder how I lived with it that way for so long. I went "new" with the weatherstripping on the doors, windshield and rear window (still need to do the halo), the visors, the carpet and rounded it out with new mats. I had found used door panels and seats from a low mileage C4 in the same color saving me a lot of money and at the same time, the patina of those "original" parts sits well with the rest of the car. The remaining interior parts were either cleaned or re-dyed to the original color so everything matches and looks consistent. I just need a shifter **** to complete it and i'm thinking of wrapping some of the plastic trim in carbon fiber or something else to help it stand out.
I owe a lot to the members of this forum and reading about their experiences and using their tips to get the job done. Thanks fellas!
Here are some of the pics:
With the side panels off, the console skeleton is visible. It was in good shape with no broken tabs, etc. The floor was clean as well.
[IMG]
[/IMG]Console side piece removed, cleaned of glue (Goo Gone works great btw) and ready for dying:
[IMG]
[/IMG]Seat belt receiver getting a refresh:
[IMG]
[/IMG]Re-dyed console side:
[IMG]
[/IMG]I purchased the poly backed carpets and installed Dynamat on the floor boards. It makes a difference, the road noise is minimal now. The foam on the center console was in amazing shape so I left it alone, I just trimmed around it for the Dynamat install:
[IMG]
[/IMG]Test fitting the carpet:
[IMG]
[/IMG]Driver's side carpet installed over the Dynamat, an almost perfect fit, just a little trimming was required up by the gas pedal:
[IMG]
[/IMG]Side panel installed without carpet. I used the yellow trim adhesive after reading some of the posts of prior installs and it worked great:
[IMG]
[/IMG]Passenger side seat belt receiver and side panel refresh:
[IMG]
[/IMG]I used Dynamat on the passenger side floor board as well, but didn't take any pics, I was on a roll and didn't stop. The passenger side required additional trim in the footwell once the side panel carpet was installed. All in all, I only needed to trim about an inch. I am very impressed with the carpets Willcox supplied.
Here is the completed interior, minus the new mats:
[IMG]
[/IMG]Driver's side with new mats (made from the same company that made the carpets);
[IMG]
[/IMG]Passenger side:
[IMG]
[/IMG]Now, anyone have any suggestions on how to clean the seat belt fabric?
Last edited by ejscarfo; Jul 31, 2012 at 10:56 PM. Reason: added more pix

Team Owner

Joined: Aug 2005
Posts: 34,988
Likes: 515
From: Riverside County Southern California
Co-winner 2020 C4 of the Year - Modified
2018 Corvette of Year Finalist
2017 C4 of Year
2016 C7 of Year Finalist
St. Jude Donor '09 thru '20
Looks good. Use simple green to clean the seat belt.
Thread Starter
Melting Slicks
Joined: Feb 2005
Posts: 2,057
Likes: 5
From: Bay Shore, NY
Corvette Stories
The Best of Corvette for Corvette Enthusiasts

5 Best & 5 Worst Corvette Daily Drivers
Joe Kucinski
The Headlights of Every Corvette Generation Explained
Joe Kucinski
5 Best & 5 Most Overrated Corvette Track Packages of All Time!
Joe Kucinski
Every 2027 Corvette Engine Explained
Joe Kucinski
Designer Imagines A Corvette That Looks More Like a Corvette Than the Corvette
Verdad Gallardo
10 Ugly Corvettes That We Still Kinda Love
Joe Kucinski
Top 10 Most Expensive Corvettes Ever Sold on Bring A Trailer
Brett Foote
10 Things Every Corvette Owner Needs (2026 Edition)
Michael S. Palmer
8 Most "Only Corvette Owners Understand" Quirks and Problems
Pouria Savadkouei
Advanced

Joined: Jul 2012
Posts: 60
Likes: 0
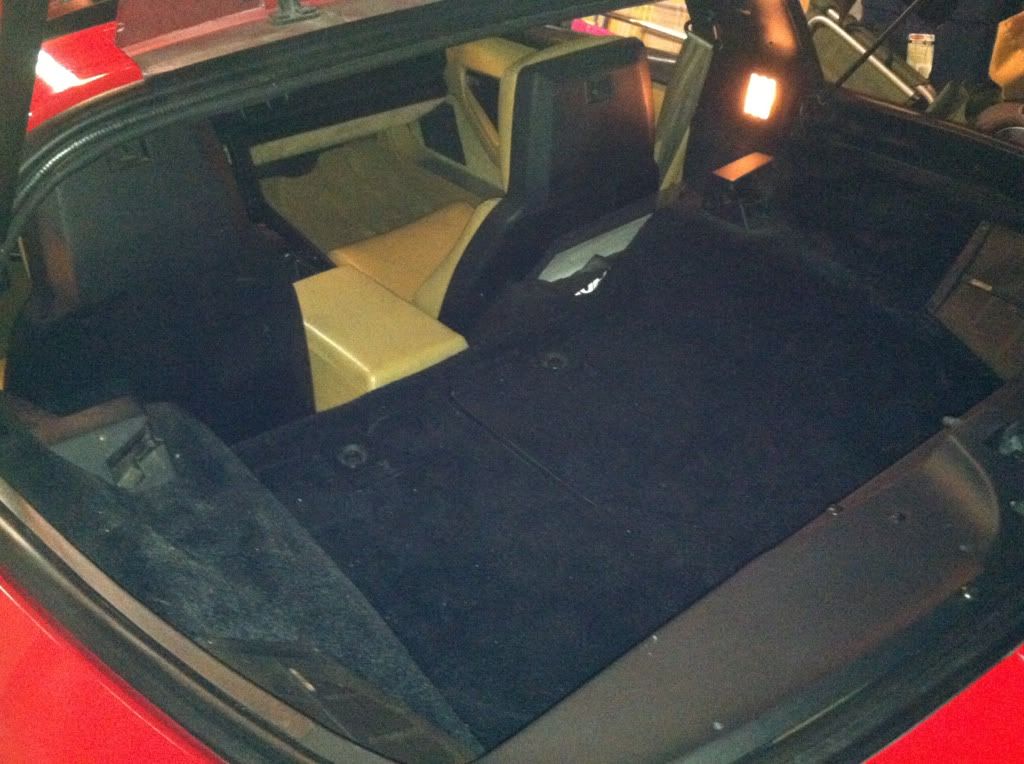
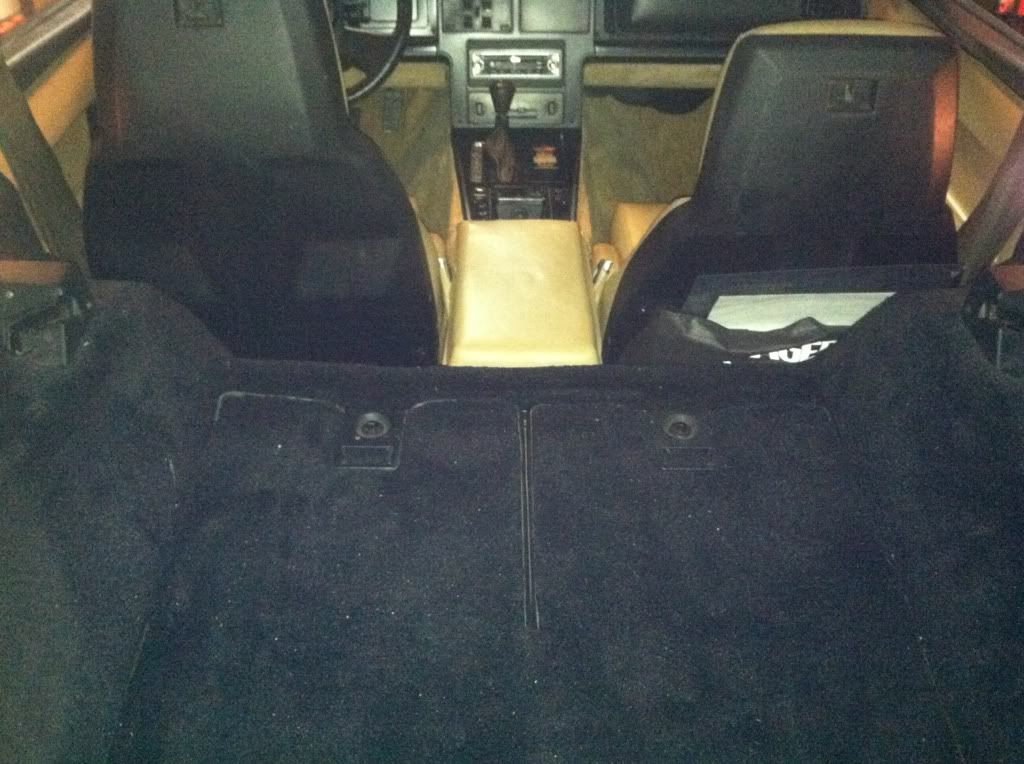
Gotcha. My rear carpet is very beat up and needs to be redone badly, but my interior is bronze. The original carpet has been faded by sun so much that if I get a brand-new bronze rear carpet, it will be a totally different color than the rest of the carpets! Redoing all the carpet (not to mention the rest of the interior in a perfect world) is not exactly necessary or in my budget, so black is a good idea. Do you have any pictures of how your black rear carpet looks compared to the rest of the car and saddle?

Thread Starter
Melting Slicks
Joined: Feb 2005
Posts: 2,057
Likes: 5
From: Bay Shore, NY
Gotcha. My rear carpet is very beat up and needs to be redone badly, but my interior is bronze. The original carpet has been faded by sun so much that if I get a brand-new bronze rear carpet, it will be a totally different color than the rest of the carpets! Redoing all the carpet (not to mention the rest of the interior in a perfect world) is not exactly necessary or in my budget, so black is a good idea. Do you have any pictures of how your black rear carpet looks compared to the rest of the car and saddle?
Being bronze is so dark to begin with, what if you just dyed the carpets? I had used a spray dye from Corvette America (you can actually see the can in one of the pix) to refresh my carpets before I replaced them and it worked well, just wouldn't cover the coffee stains on the passenger side panel from the PO because saddle is a light color, but the color was a match and the fibers didn't get too stiff. I kept it that way for a year before I decided if I wanted to actually show the car, it needed new carpets.
A few people here have also used RIT fabric dye. If your carpets are just faded and not torn up, it would be an inexpensive solution for you.
Last edited by ejscarfo; Jul 31, 2012 at 01:50 PM.


Thread Starter
Melting Slicks
Joined: Feb 2005
Posts: 2,057
Likes: 5
From: Bay Shore, NY
I used Corvette America's interior spray dye. I also used an adhesion promoter on the side panels before I dyed them. The color match is spot on and I know its durable as I dyed the glovebox cover 5 years ago and it still looks like new.
Advanced
Joined: Jul 2012
Posts: 60
Likes: 0
A few people here have also used RIT fabric dye. If your carpets are just faded and not torn up, it would be an inexpensive solution for you.[/QUOTE]
Unfortunately, they're pretty well torn up.
The sun has not only faded my '85's carpet, it has actually shrunk the carpet in the hatch so it no longer reaches its intended spot. This has made it very hard to affix the shrunken carpet. I tried a couple adhesives (even double sided carpet tape), but to no avail. I think I could
1) put a black rear hatch carpet to do a budget fix (because a bronze wouldn't at all match the faded bronze carpets in the rest of the car) or
2) just bite the bullet and do bronze carpets in the whole car.
Unless someone has another idea for how to reattach the shrunken rear carpet?
Unfortunately, they're pretty well torn up.
The sun has not only faded my '85's carpet, it has actually shrunk the carpet in the hatch so it no longer reaches its intended spot. This has made it very hard to affix the shrunken carpet. I tried a couple adhesives (even double sided carpet tape), but to no avail. I think I could
1) put a black rear hatch carpet to do a budget fix (because a bronze wouldn't at all match the faded bronze carpets in the rest of the car) or
2) just bite the bullet and do bronze carpets in the whole car.
Unless someone has another idea for how to reattach the shrunken rear carpet?
Thread Starter
Melting Slicks
Joined: Feb 2005
Posts: 2,057
Likes: 5
From: Bay Shore, NY
Are the front carpets decent? Could you dye those and just replace the rear? I used the poly backed carpets to save some money. Maybe that would work for you too. I think Willcox still has the discount for Forum members. Might want to check that out.

Advanced
Joined: Jul 2012
Posts: 60
Likes: 0
I will, thanks! And congrats on your new interior.
Thread Starter
Melting Slicks
Joined: Feb 2005
Posts: 2,057
Likes: 5
From: Bay Shore, NY
I got mine from Willcox. They have discounts for Forum members and their service was excellent.
Thread Starter
Melting Slicks
Joined: Feb 2005
Posts: 2,057
Likes: 5
From: Bay Shore, NY
Gotcha. My rear carpet is very beat up and needs to be redone badly, but my interior is bronze. The original carpet has been faded by sun so much that if I get a brand-new bronze rear carpet, it will be a totally different color than the rest of the carpets! Redoing all the carpet (not to mention the rest of the interior in a perfect world) is not exactly necessary or in my budget, so black is a good idea. Do you have any pictures of how your black rear carpet looks compared to the rest of the car and saddle?
[IMG]
 [/IMG]
[IMG]
 [/IMG]