When you click on links to various merchants on this site and make a purchase, this can result in this site earning a commission. Affiliate programs and affiliations include, but are not limited to, the eBay Partner Network.
Interesting. My car does not overheat, but it takes a long time for great to come out of the vents. I wonder if the heater core and hoses are clogged in a similar fashion as yours.
I flushed the core when I did a full flush (knock sensors pulled) in the fall and it went from just warm to hot coming out of the vents so yes. I would pull the surge tank and directly flush the core, both directions…. It could also be your blend doors etc but try that. I obviously didn’t get everything out of the surge tank, not even close (but I also didn’t expect a bunch of junk in it).
Oh and seeing those hoses in the fall was another motivating factor of what I am doing.
More progress. Should fire it this evening sans water pump to make sure I didn’t royally screw something up.
Plugs and wires were not a terrible job with everything torn apart (no ps pulley, no water pump etc….). Strangely enough I had the most frustration with removing the cylinder one plug boot and reinstalling the clip under the AC compressor. Other than that nothing terrible (cylinder 8 was not hard with the right tools and no I didn’t have to lay across the engine). I removed the ASR from its bracket on the driver side and I’m sure removing one or more of the spark plug brackets on the driver side would have made it a bit easier.
Getting at plug 8…was not difficult with my breaker bar (for space reasons). This was not the most difficult plug/boot for me.
To get the space I needed for removing each plug I used a combo of the plug socket, breaker bar, ratchet and a 3/4 socket that fit the end of the plug socket. I also had a plug socket without the rubber inside for reinstall. This made it so I didn’t have to contort to try and remove the socket after tightening.
#8… not bad color(IMO?), they all looked almost identical.
This is what the gap was checking with a cheap tool…out of spec
Had a “helper”. Note I removed the ASR from its bracket and was able to do everything from the top.
This clip frustrated me. It goes on under the AC compressor and I dropped it at least four times. The angle of the wires through the bracket, how tight it is and how hard it is to see what you are doing is really annoying
Redone seals
I flushed again… I had an old plastic school folder from my son and wedged it in there as a green shower deflector. Worked great, wish I had taken the time to do that in the past.
I directly flushed the heater core through the outlet with a clear hose that fit inside (third time flushing it since I started this project) and this came out of it and the inlet hose (which is getting replaced).
Note on the intake below being so dirty and the wire having exposed strands.
When I bought the car, first thing I did when I got it home was to pull the engine covers to clean. Underneath I found the areas around the injectors packed with seeds. A mouse/mice had been in there using that area as a storage bin some time in the past. I vacuumed it out and used air to clean it at the time. Fast toward to now and I found that damaged wire sheath (and a couple of injector wires similarly) but the strands were not damaged. I cleaned with alcohol and then used some star brite liquid electrical tape to reseal/protect them. I am not positive that is mouse related or age but regardless I addressed it.
Petris opti with vacuum retrofit
Mo opti
Opti installed. I had an old label maker and put it to work on the plug wires.
Eww…. And notice that black wire coming from the harness.
Why is a glass bead in there!?!?!?
Intake removed, valley
Already sprayed with brake cleaner getting ready to scrub.
Cleaning up…
Intake…
Liquid electrical tape seemed like the most reasonable fix.
A little bit of squeeze out. Would like to see that all the way across but it is to the edge so hopefully fine… but hey if it does leak I am really good at doing jobs twice! I had a good 1/4 bead so I expected more.
Looks ok there, it’s just that curve in the prior photo that I wanted to see more protrusion
Went a bit heavier in the rear and towards the outside edge.
Petris vent harness routing. I may zip tie the harness away from the valve cover. The only way to do this appears to be to remove the bracket from the intake/back side of the alternator and ac compressor. I had already done this to remove the intake. Don’t mix up the bolts (one is different).
Great job! Love the detail n your pics. This is probably a “next year” project for me… my coolant flushed pretty easily and car heats and cools fine. Maybe mine was maintained to a degree? Keep this story goin I want to see how it ends.
Great job! Love the detail n your pics. This is probably a “next year” project for me… my coolant flushed pretty easily and car heats and cools fine. Maybe mine was maintained to a degree? Keep this story goin I want to see how it ends.
Hey no problem, a lot of this stuff is routine and has been covered numerous times over the years but I figured I’d find some interesting things (at least interesting to me) and could maybe help others “see” how some of this stuff goes…definitely no expert.
Doing this much at once “while you’re in there” definitely makes it take a lot longer than it has to. But I’m also paying down maintenance debt that hopefully once I’m at the top of I’m only fixing/doing one thing at a time (and not 50).
My cooling system was particularly bad, same with my opti…it was obviously not maintained well (minus oil changes). I am feeling pretty good about where I’m getting it to. As long as you flush the coolant every now and then it will be fine.
btw, I JUST STARTED IT!!! I was super nervous, which is odd for me…but I also usually take the approach of doing one thing at a time not touching multiple systems at once like I have done here. Just hoping nothing starts leaking after I button it up…still nervous about that even though I was careful (even redid the water pump shaft seal).
Hooked up all the sensors and the old broken CTS temporarily…and no SES light and definitely seems a little smoother!
Next up is WP weep hole mod, install, hoses, put the belt and pulleys back on, finally fill and bleed the system!!! Then it’s back on the road!
Nice work (and great photos)! As difficult as it is to reach some of those areas to replace parts, it is tougher to get a phone in there and get a good photo to include the area of interest.
Here is what I did to start the engine, broken connector but still working cts…maybe I’ll keep it in the parts bin for stuff like this…
I used red scotch brite pads on most mating surfaces. I had flushed directly into the block here so needed to knock the flash rust back off.
Used bench grinder to knock down the barbs. Chucked it in the drill so I could spin it easily/quickly.
Installed and epoxied in place, it was a tight fit so doubt necessary but just in case! Dremel’d off two barbs per a prior forum member’s suggestion.
Vacuum hose I had laying around, cut to length once installed. I routed it behind the passenger side plug wires at the opti.
I smeared a very thin layer of rtv on the block side of the WP gaskets to stick them to the block to make install easier, maybe a little help with sealing. Also I’ve “read” that it can make cleanup easier “next time” by not having the paper stuck directly to the block.
WP installed, you can see the petris vent harness there. It will have split loom (supplied) added to it before continuing (directions say it makes it easier to get to that bolt to remove it). Also found an old radiator rubber inlet/outlet cap set and blocked off the throttle body inlet/outlet. I am going to pull the passenger outside WP bolt and try to blow air into the hole. There was no sealant on the outside bolts and from pics and everything I can tell those outside bolts don’t go into the water jacket….but just to be 1000% sure, for posterity and to prevent someone from hydro locking their bolts, I will test.
Did you clean the intake ports in the heads? If so, how? They look very clean.
No, I only sucked out any debris that fell in there when removing the intake. I used a cheap plug in dust buster with a clear hose and rag jammed in it to suck up any debris I couldn’t wipe out in the ports/valley. Apparently that is what decently running 47k mile lt1 intake ports look like? I didn’t even think to touch them as there was no real buildup. Ports 5678 seemed to be the dirtier than 1234.
Since these engines are port injection instead of direct (like newer cars) the fuel naturally keeps the intake ports and valves clean.
Yes, I did notice 6 and 8 were a bit oil coated. That's what prompted my question when I compared to the driver's side bank.
As long as the valves are clear, all is good.
Yes, I did notice 6 and 8 were a bit oil coated. That's what prompted my question when I compared to the driver's side bank.
As long as the valves are clear, all is good.
yeah both sides were equally dirty (57,68). The dirtiest seemed to be 5 and 6. Since it was even/mirror image on both sides, the spark plugs all looked fairly equal, I figure it has to do with the air flow through the intake (maybe in combo with the PCV system) and nothing to worry. Yes the valves looked “ok”.
some more updates.. I have coolant in it but didn’t get a chance to start it tonight. I’m cleaning out the overflow tank a bit more, need to pick up a little more coolant and then should be all set!
Btw I saw a tip somewhere about using silicone spray to make getting hoses on much easier and boy did that make attaching those effortless. I also wiped some on the inside of the rubber intake tube and that slid on very easily.
It also helped with the surge tank grommet.. first attempt at install and it popped through and disappeared below the washer fluid reservoir. I couldn’t see it. I poked around and finally got it with a grabber tool. Put a little silicone on it and no issue the second time:
I think final vent harness routing
Routing with split loom…I didn’t feel right not having it secured so added zip ties…added one more after this
Billety goodness…
Installing…
Installed!
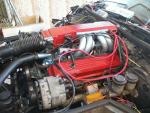
Pretty much done. You can see where I chose to put the vent tube on the intake. Note I converted to the later hoses and bypassed the throttle body, cleaned it up a little.
Bled the system , put leg heat full on and it wouldn’t get hot enough to kick the fans on…I think that is a good sign! Finally shut the heat off and went through a couple full fan cycles. No problems and no leaks whatsoever so far.
Even though I didn’t notice anything really “off” with idle before, it definitely seems to idle smoother and quieter (pulleys and belt probably didn’t hurt either). Put some miles on it and another thing I noticed was on decel. The rifle “pops” out of the exhaust seem to be reduced and the normal pops seem to be limited to right after getting off throttle then switches to burbles all the way through coast. Unless this is all in my head (absolutely could be and I haven’t driven it enough either to confirm this) it probably means less unburnt fuel is making its way into the exhaust during coasting. Which points to better ignition(?) or maybe new intake gaskets helped or ?
Anyway I was pleasantly surprised that I noticed anything different at all.
As for temps it seemed to sit while moving at about 190 with oil temps around 212…. This is a little change for me as I put a stock 180 thermostat in instead of the 160 that I didn’t realize was even in it. I also have a suspicion the prior CTS was reading high…
J55s show up Friday but I think I will take a brake.
One last thing for now I forgot, probably common knowledge but I did confirm the outer most bolts (short) of the water pump do not go into the water jacket using shop air. This means only the long ones should get rtv.
Designer Imagines A Corvette That Looks More Like a Corvette Than the Corvette
Slideshow: A Jaguar designer's personal project imagines what a modern front-engined Corvette might look like if Chevrolet revisited the golden age of the Stingray.