


DIY LED lights

Thread Starter
Le Mans Master


Joined: Aug 2009
Posts: 5,197
Likes: 190
From: ALL governments are legalized mobsters, so doesn't matter where I live :(
Hello everyone,
There were a couple of threads that CF members started on how to add LED lights to the front corner/bumper lights on the C5. As far as I can remember no one completed the task. One member however did mount the flat style LEDs on the outside...not exactly the best option. So over the summer I got my hands on some clear corner lights and had some LED's from another project so I thought I'd give it a go.
Those of you who are into sport bikes will know that one of the popular mods is to add angel eyes/halo eyes, and LED's to the front head lights. This is done by baking the lights in the oven...scarry proposition for sure, but it's done all the time, and is the only true proper way to install the LEDs. I've seen advise in the past by others to drill holes in the corners and try and slip in the LED's...let me tell all of you this will not work and if you try you will only damage the lights. I will show you how I did mine in the pics below...I did however miss on set of pics on where to drill the corner of the lights to thread the wires through.
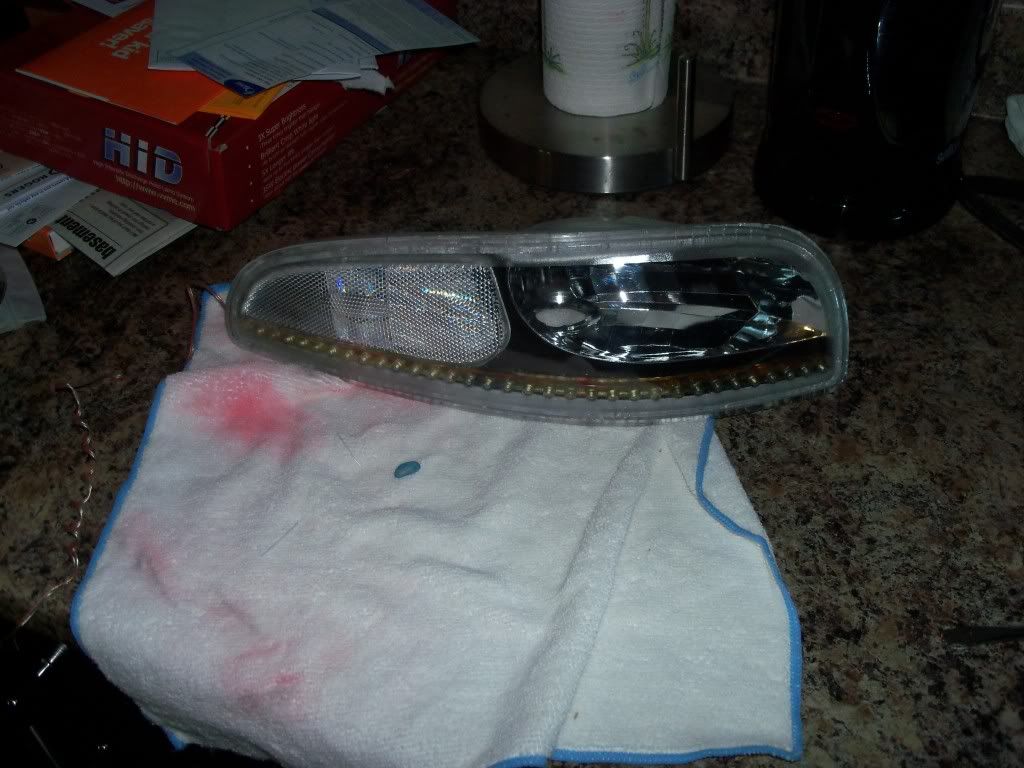
New corner lights and LED strip I used.
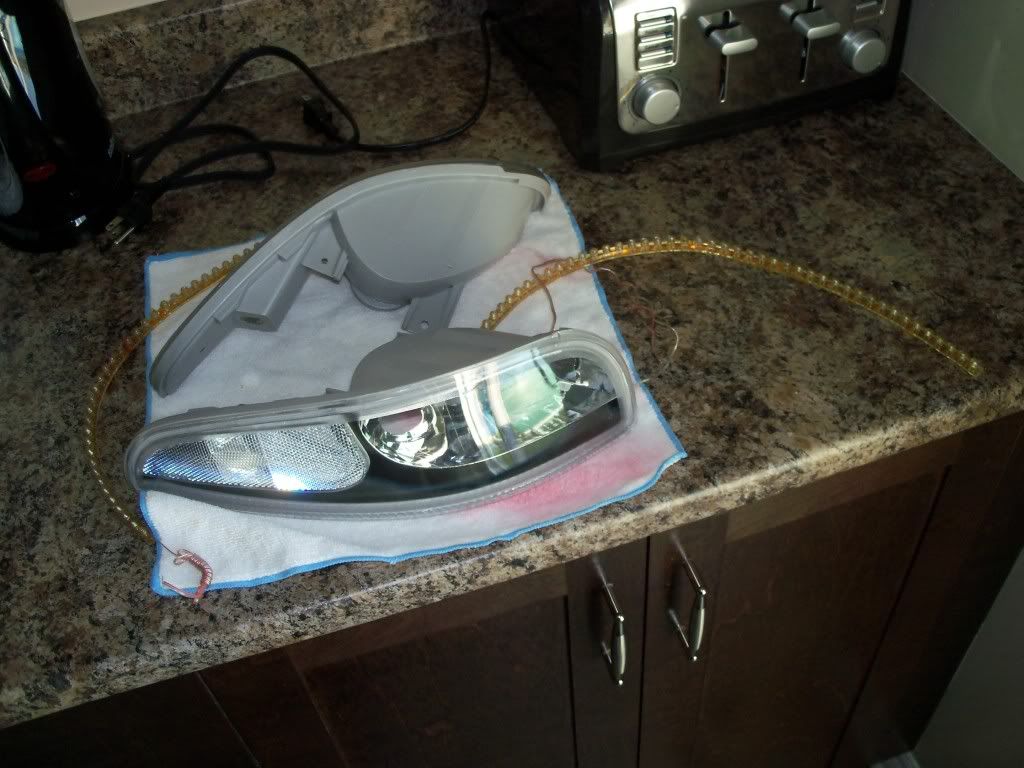
As for baking, not all lights are created equal. The lights I used are from Depot. The glue is not at all like the factory lights and I was worried that this would pose a problem. The only problem I had was determing how long to leave the lights in the oven. After talking to some friends who have done it on their motorcycle lights I had a better idea on what to do. I pre heated the oven to 210F and left the lights in their for about 15 minutes. The glue was still strong, so back they went for another 3 minutes...nope, still longer, I left them in for another 5, and now they started becoming easier to take apart, but still had to use some force. Overall I would recommend leaving them in for 20min, check them, and longer if needed. You shouldn't have to use that much force to get the lense off. If you hear cracking, put them back in the oven.
Because of the style of LED I used I had to trim some of the material at the corners of the lights. (right side trimmed compared to left)
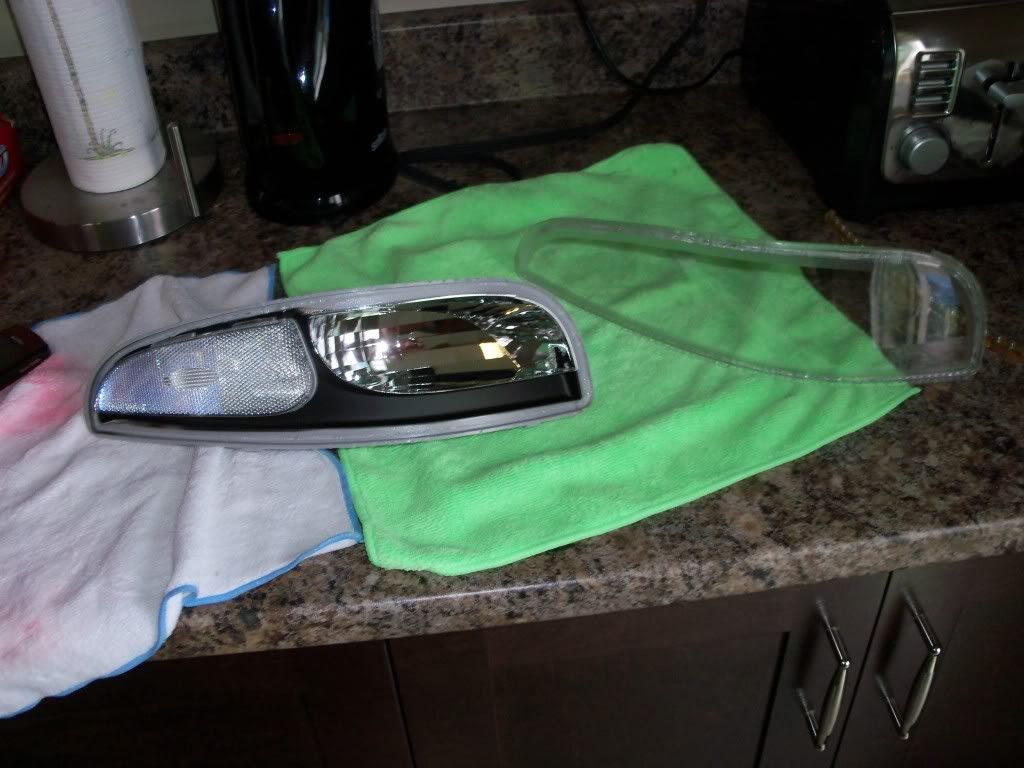
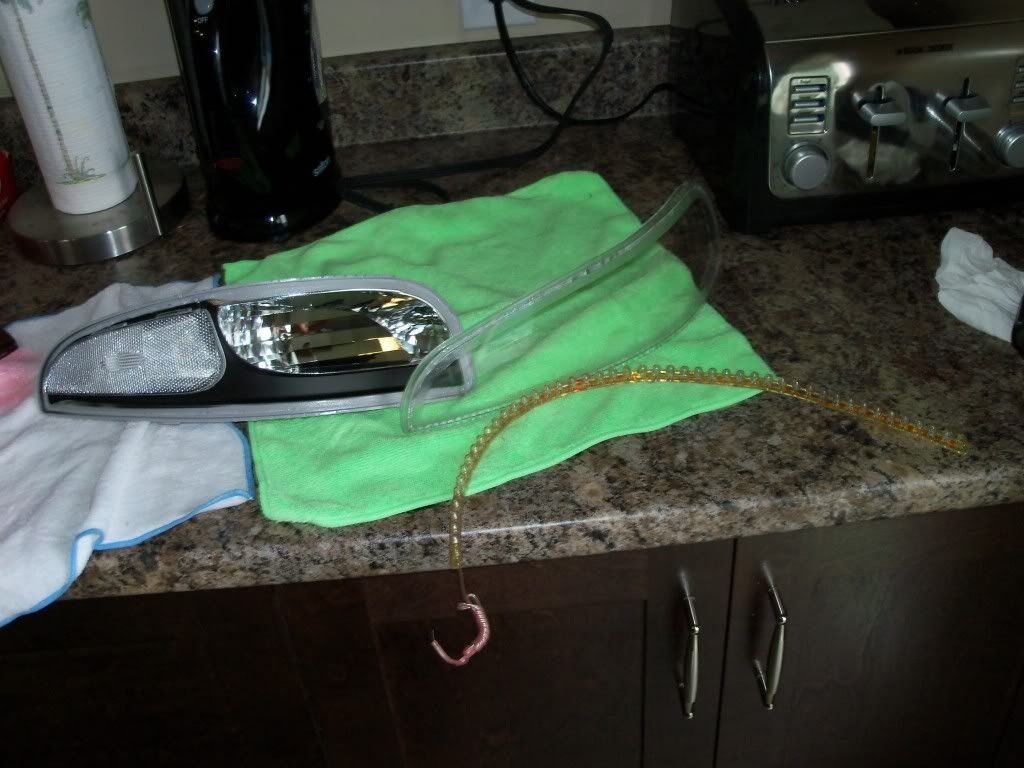
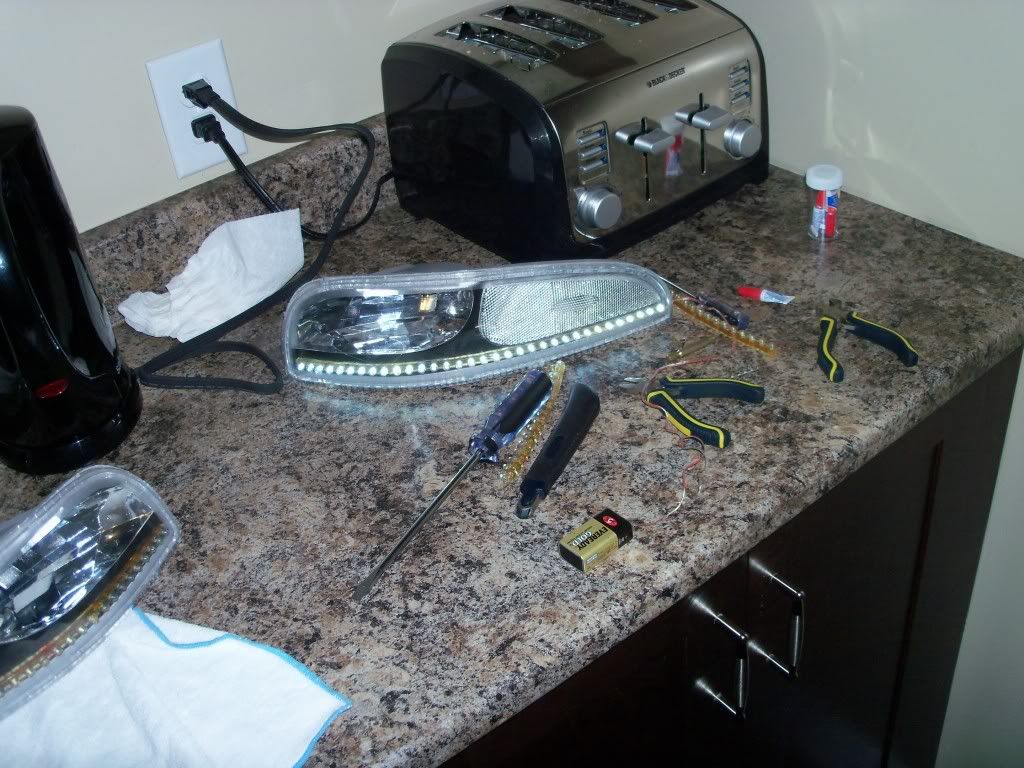
Getting the LEDs to stay in place was a bit of a chore. There is a seam in the lights that this type of LED fit in just right. I used clear silicone and a little crazy glue to help hold the LED's in place. I had to also physically hold the lights until the adhesive began to dry. Then I used the clear silicone to put the lens back on the housing. As I said earlier the only pic missing is drilling a small hole just big enough to pass the wires through at the corner of the lights.
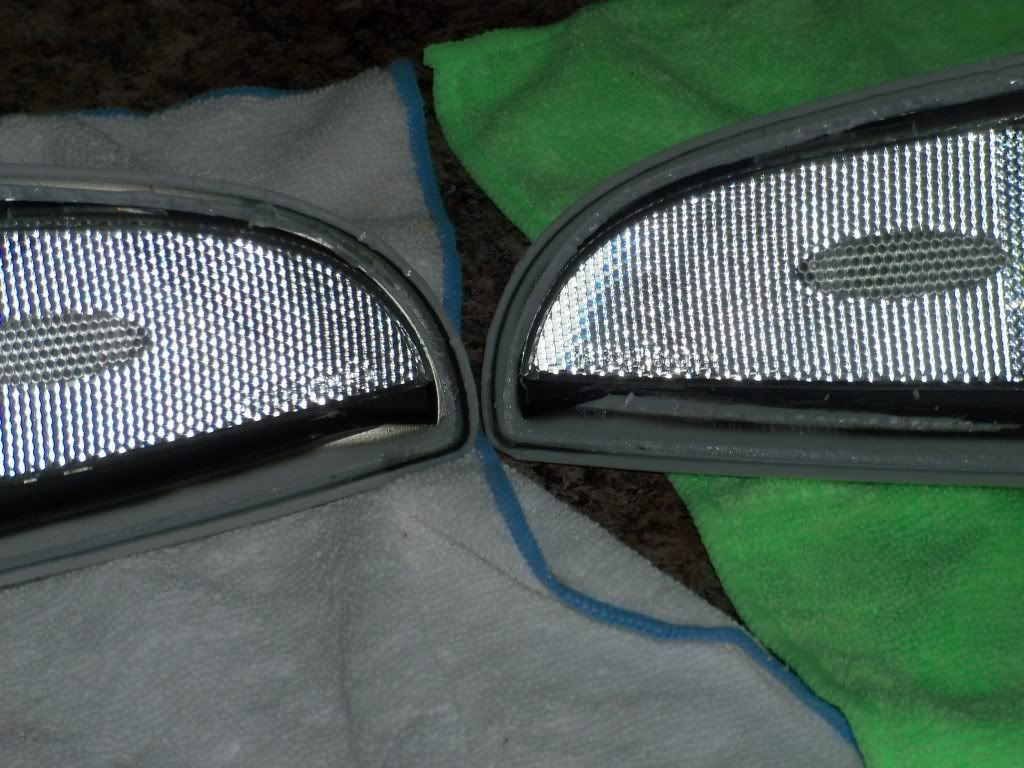
This is how they look completed.
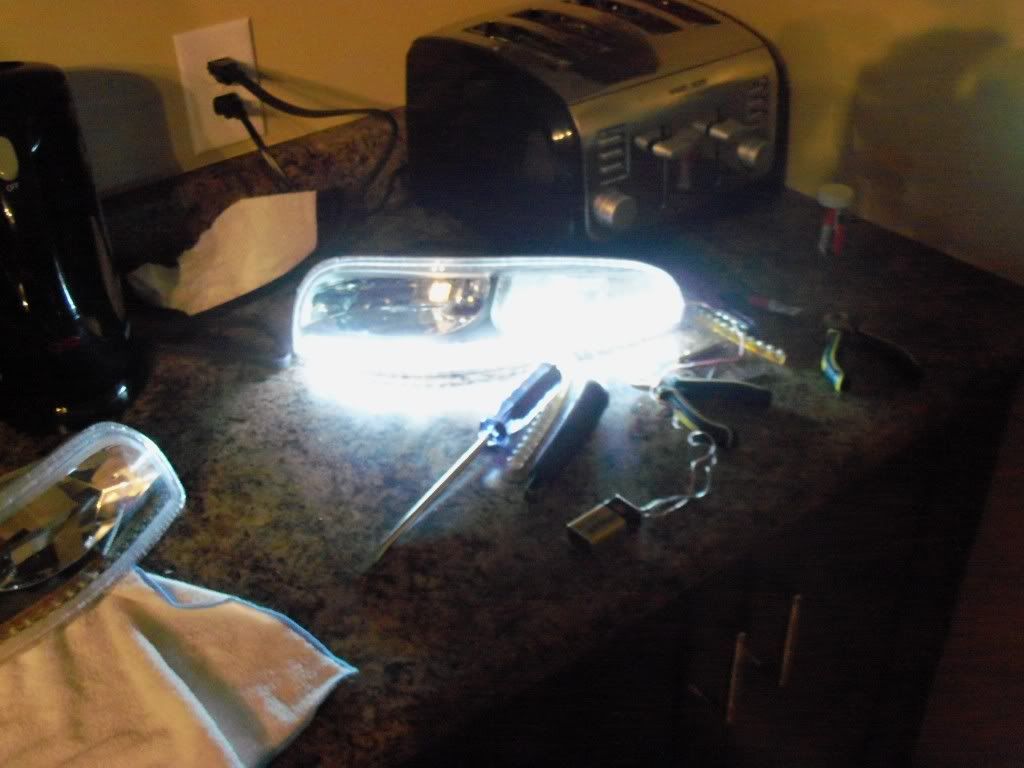
This is how the LED's look powered by a 9volt battery and no flash on the camera
With the no flash and lights off.
Now keep in mind I like doing DIY projects. Those of you thinking about attempting this may just want to get a set from JW that are already pre made and have the wiring harness already attached. JW's are a plug and play system. I will have to splice into my wires to hook mine up. I did save some money, but it wasn't about the money so keep that in mind if your going to attempt it yourself.
Cheers.
There were a couple of threads that CF members started on how to add LED lights to the front corner/bumper lights on the C5. As far as I can remember no one completed the task. One member however did mount the flat style LEDs on the outside...not exactly the best option. So over the summer I got my hands on some clear corner lights and had some LED's from another project so I thought I'd give it a go.
Those of you who are into sport bikes will know that one of the popular mods is to add angel eyes/halo eyes, and LED's to the front head lights. This is done by baking the lights in the oven...scarry proposition for sure, but it's done all the time, and is the only true proper way to install the LEDs. I've seen advise in the past by others to drill holes in the corners and try and slip in the LED's...let me tell all of you this will not work and if you try you will only damage the lights. I will show you how I did mine in the pics below...I did however miss on set of pics on where to drill the corner of the lights to thread the wires through.
New corner lights and LED strip I used.
As for baking, not all lights are created equal. The lights I used are from Depot. The glue is not at all like the factory lights and I was worried that this would pose a problem. The only problem I had was determing how long to leave the lights in the oven. After talking to some friends who have done it on their motorcycle lights I had a better idea on what to do. I pre heated the oven to 210F and left the lights in their for about 15 minutes. The glue was still strong, so back they went for another 3 minutes...nope, still longer, I left them in for another 5, and now they started becoming easier to take apart, but still had to use some force. Overall I would recommend leaving them in for 20min, check them, and longer if needed. You shouldn't have to use that much force to get the lense off. If you hear cracking, put them back in the oven.
Because of the style of LED I used I had to trim some of the material at the corners of the lights. (right side trimmed compared to left)
Getting the LEDs to stay in place was a bit of a chore. There is a seam in the lights that this type of LED fit in just right. I used clear silicone and a little crazy glue to help hold the LED's in place. I had to also physically hold the lights until the adhesive began to dry. Then I used the clear silicone to put the lens back on the housing. As I said earlier the only pic missing is drilling a small hole just big enough to pass the wires through at the corner of the lights.
This is how they look completed.
This is how the LED's look powered by a 9volt battery and no flash on the camera
With the no flash and lights off.
Now keep in mind I like doing DIY projects. Those of you thinking about attempting this may just want to get a set from JW that are already pre made and have the wiring harness already attached. JW's are a plug and play system. I will have to splice into my wires to hook mine up. I did save some money, but it wasn't about the money so keep that in mind if your going to attempt it yourself.
Cheers.
Race Director


Joined: Jul 2008
Posts: 17,770
Likes: 3,699
From: The Sunshine State
2022 C5 of the Year Finalist - Modified
2021 C5 of the Year Finalist - Modified
C7 of the Year - Modified Finalist 2021
Finalist 2020 C7 of the Year -- Modified
2020 C5 of the Year Finalist - Modified
C5 of Year Finalist (appearance mods) 2019
2018 C5 of Year Finalist
Very nice! BTW-where did you get those clear corner lenses? Me likey! 

Banned Scam/Spammer
Joined: Feb 2007
Posts: 50,093
Likes: 267
From: Oklahoma City
St. Jude Donor '09-'10-'11-'12-'13-'14-'15-'16-'17,'19,'22
Cool. I've never heard of anyone taking those apart successfully. We cut slits and seal the leds in.
If anyone needs the strips we sell them without the mod!
If anyone needs the strips we sell them without the mod!
Le Mans Master

Joined: May 2006
Posts: 5,987
Likes: 18
From: DuBois PA
St. Jude Donor '11-'12-'13-'14-'15
 I've tried on the factory ones to no avail... They laughed at the heat!
Good job!!!!!!!!
I have the exact same light assemblies but from JW, get some installed pics and we can compare!
Last edited by tstar; Sep 28, 2010 at 02:14 PM.
Thread Starter
Le Mans Master
Joined: Aug 2009
Posts: 5,197
Likes: 190
From: ALL governments are legalized mobsters, so doesn't matter where I live :(
I got mine on ebay before I found out that JW was selling them. They sat in my garage for a year before I decided to do this.
Using aftermarket lights was a concern, and I won't lie I cringed everytime I pried on the seam and head a "crack." They could have easily broke because the glue isn't the same as what's used on OEM lights.
I thought about cutting slits but I just didn't want to take a chance with this type of LED...maybe the flat style but these just seemed to big.
I thought about cutting slits but I just didn't want to take a chance with this type of LED...maybe the flat style but these just seemed to big.
Corvette Stories
The Best of Corvette for Corvette Enthusiasts

Every 2027 Corvette Engine Explained
Joe Kucinski
Designer Imagines A Corvette That Looks More Like a Corvette Than the Corvette
Verdad Gallardo
10 Ugly Corvettes That We Still Kinda Love
Joe Kucinski
Top 10 Most Expensive Corvettes Ever Sold on Bring A Trailer
Brett Foote
10 Things Every Corvette Owner Needs (2026 Edition)
Michael S. Palmer
8 Most "Only Corvette Owners Understand" Quirks and Problems
Pouria Savadkouei
10 Reasons the C6 Z06 is Still A Performance Benchmark After 20 Years
Joe Kucinski
How Much Horsepower Every Corvette Engine "LOST" in 1972
Joe Kucinski
Top 10 DOs and DON'Ts for Protecting Your Convertible Top!
Michael S. Palmer
Thread Starter
Le Mans Master
Joined: Aug 2009
Posts: 5,197
Likes: 190
From: ALL governments are legalized mobsters, so doesn't matter where I live :(

Thread Starter
Le Mans Master
Joined: Aug 2009
Posts: 5,197
Likes: 190
From: ALL governments are legalized mobsters, so doesn't matter where I live :(
Le Mans Master
Joined: May 2006
Posts: 5,987
Likes: 18
From: DuBois PA
St. Jude Donor '11-'12-'13-'14-'15
http://www.youtube.com/watch?v=HMZ9pRzEtvo
Tim


Banned Scam/Spammer
Joined: Feb 2007
Posts: 50,093
Likes: 267
From: Oklahoma City
St. Jude Donor '09-'10-'11-'12-'13-'14-'15-'16-'17,'19,'22
19 inch is what you want for this mod
Pro

Joined: Oct 2004
Posts: 667
Likes: 10
From: New York
Le Mans Master
Joined: May 2006
Posts: 5,987
Likes: 18
From: DuBois PA
St. Jude Donor '11-'12-'13-'14-'15
Day;

Night;

Boy, those were taken awhile ago! My car's changed alot since those were taken...
Tim

