
Hood pad insulator, P/N 10285631


 08-27-2011, 09:01 PM
#22
Team Owner


Member Since: May 2001
Location: Virginia
Posts: 24,998
Received 1,227 Likes
on
874 Posts
St. Jude Donor '11

Looks like you got some good answers to your question. The liner is very delicate so I can see why shipping costs would be high.
Just out of interest, is your insulator damaged? If not and it's just looking tired, it's possible to bring it back to life with a spray can of paint.
Heres a How To I did some time ago just in case its of any use:
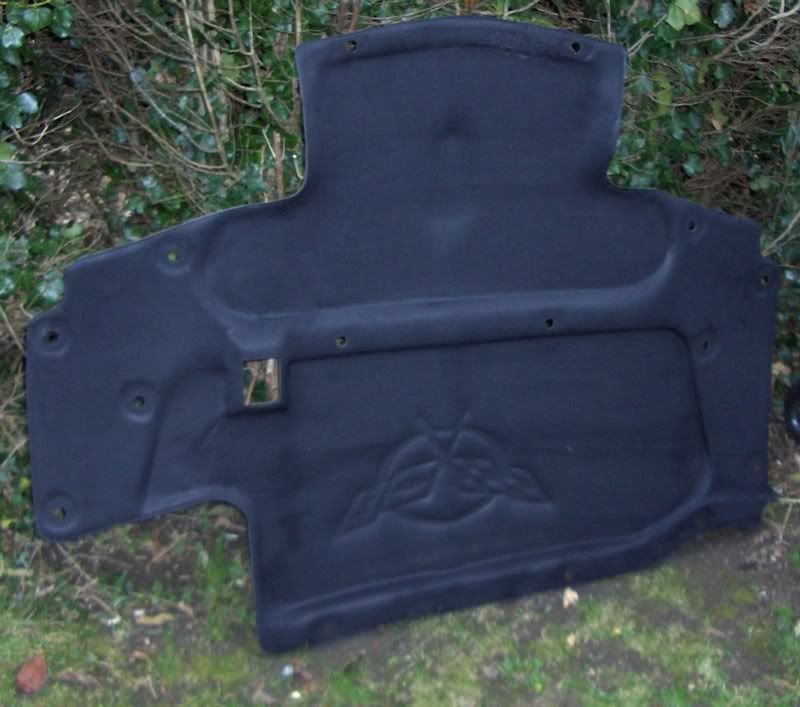
Refurbishing a Corvette C5 Hood Liner
The liner is made of a very delicate material so be careful in how you handle it once it�s removed. The surface is a fabric type finish and hard brushing will cause it to become rough and fibrous. It will also crack easily if you let it flex so if you take it outside beware of strong wind.
As you take the final fasteners out, support the liner so you don�t crack the liner around the eyelets.
The actual work takes only minutes. The drying time is the only slow process.
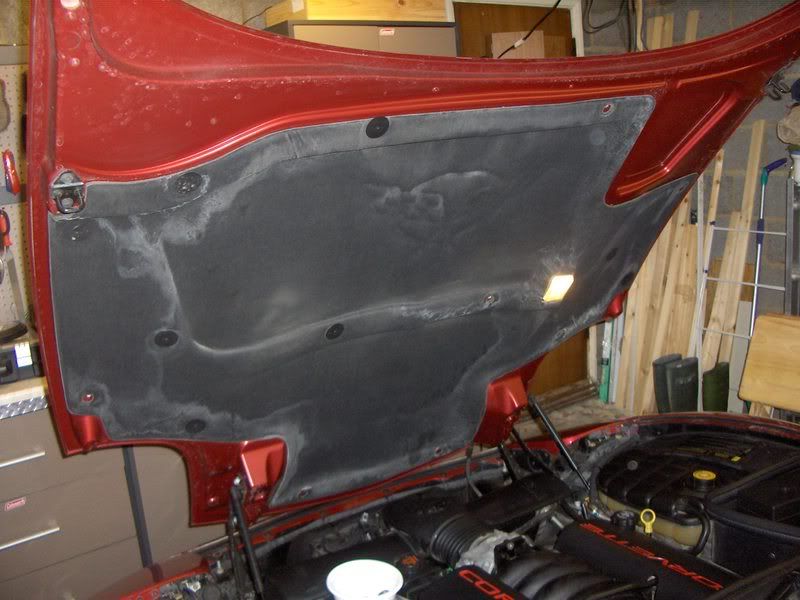
As you can see, the liner will have attracted quite a bit of dirt and grime.
OK here we go.
Lift the hood.
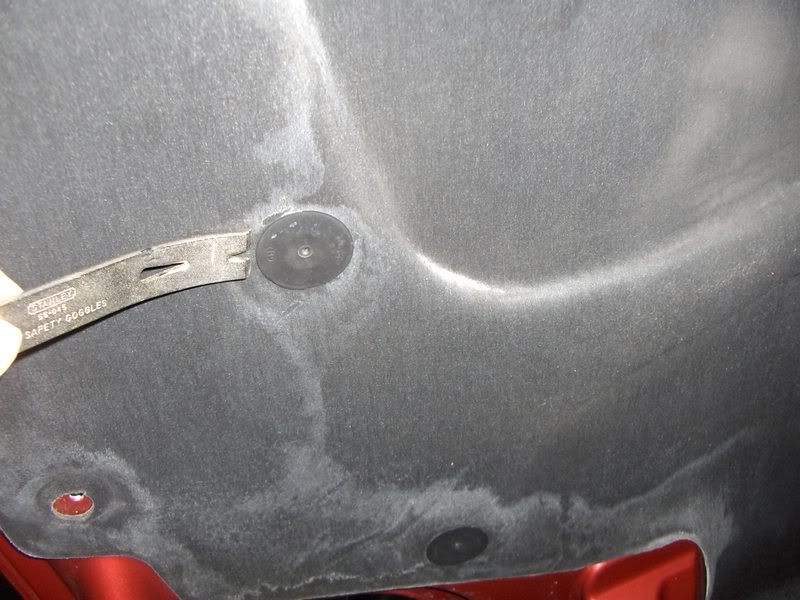
Remove the fasteners gently, top, then bottom and middle ones last. This will support the liner better as you take them out. Us a tool with a forked end. I�ve heard of a barbeque fork being used. I used a nail puller work in behind the fastener.
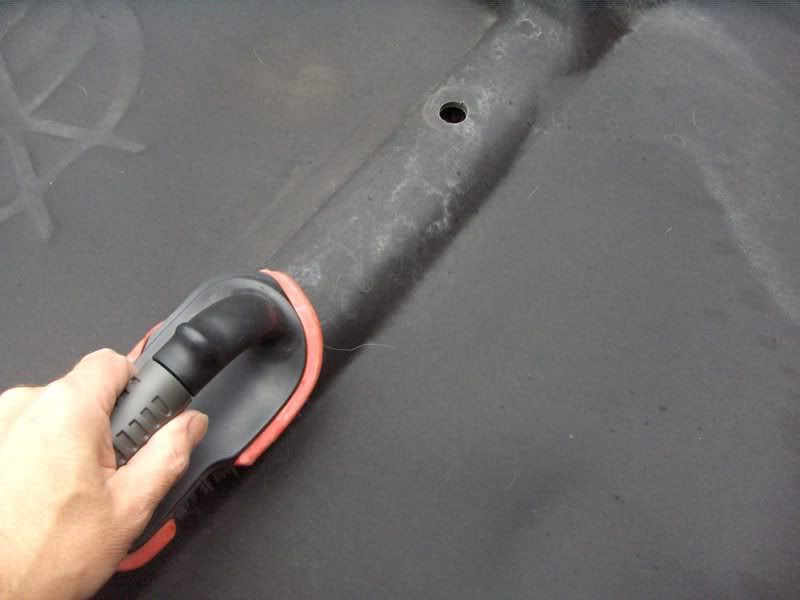
Take the liner outside and brush the surface gently with a soft brush to remove any dirt. Take care not to damage the surface of the liner.
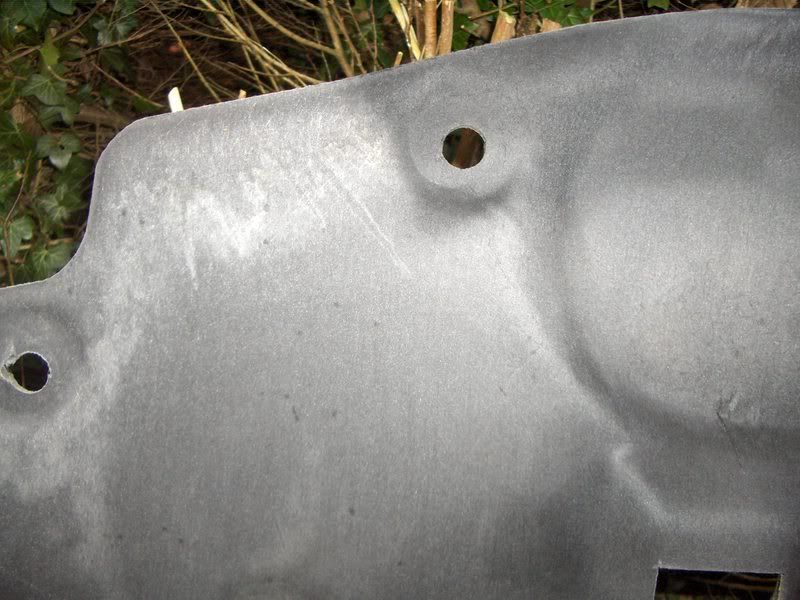
Spray the liner with black paint. The difference between the old and the new surface is immediately apparent.
Use as many coats as you see fit. The liner is porous so it will take at least 3 coats to get good coverage. Leave it for 30 mins between coats to allow the paint to dry.
If you plan to paint the Corvette emblem, you may wish to apply extra paint around the embossed area on the liner. This will stop the liner absorbing the coloured paint.
Once the paint is dry (and you may wish to leave it overnight), you can either paint the emblem or apply a decal. I chose the decal which I picked up from RPI Designs (a Forum Vendor). Alternatively if you prefer, you can refit the liner and apply the decal when it�s back in place.
Refit the liner in the hood fitting the middle fasteners first to hold it in place, then refit the remaining fasteners. A gentle push fit is all it takes to reinsert the fastener.
The finished Hood Liner

Just out of interest, is your insulator damaged? If not and it's just looking tired, it's possible to bring it back to life with a spray can of paint.
Heres a How To I did some time ago just in case its of any use:
Refurbishing a Corvette C5 Hood Liner
The liner is made of a very delicate material so be careful in how you handle it once it�s removed. The surface is a fabric type finish and hard brushing will cause it to become rough and fibrous. It will also crack easily if you let it flex so if you take it outside beware of strong wind.
As you take the final fasteners out, support the liner so you don�t crack the liner around the eyelets.
The actual work takes only minutes. The drying time is the only slow process.
As you can see, the liner will have attracted quite a bit of dirt and grime.
OK here we go.
Lift the hood.
Remove the fasteners gently, top, then bottom and middle ones last. This will support the liner better as you take them out. Us a tool with a forked end. I�ve heard of a barbeque fork being used. I used a nail puller work in behind the fastener.
Take the liner outside and brush the surface gently with a soft brush to remove any dirt. Take care not to damage the surface of the liner.
Spray the liner with black paint. The difference between the old and the new surface is immediately apparent.
Use as many coats as you see fit. The liner is porous so it will take at least 3 coats to get good coverage. Leave it for 30 mins between coats to allow the paint to dry.
If you plan to paint the Corvette emblem, you may wish to apply extra paint around the embossed area on the liner. This will stop the liner absorbing the coloured paint.
Once the paint is dry (and you may wish to leave it overnight), you can either paint the emblem or apply a decal. I chose the decal which I picked up from RPI Designs (a Forum Vendor). Alternatively if you prefer, you can refit the liner and apply the decal when it�s back in place.
Refit the liner in the hood fitting the middle fasteners first to hold it in place, then refit the remaining fasteners. A gentle push fit is all it takes to reinsert the fastener.
The finished Hood Liner
 08-29-2011, 07:00 PM
#23


I was looking for one also and had the same problem. I picked one up from GMPARTSHOUSE one of the vendors at Carlisle ( I paid 102 plus tax for a total of about 108). Only problem was box was about 5' long by 4' wide. Was not sure what to do as I didn't think this would fit in the back of my Z06. Luckily they also had new clips to use (Used 15 clip cost about $21). As I'm carying this hugh box over my head back to my car everyone was looking. I kept sayin it was to keep the rain from the hurrican off of me. I decided to just remove the old one and replaced it right there on the fun field. Took about 10 minutes total. You might want to give them a call not sure how much shipping would be or how much of a discount I got but in the end I was very happy that they had them. I would recomend if your purchasing a new one to also buy the clips as they look and fit better than the old ones.
08-29-2011, 10:00 PM
#24
Drifting

Thread Starter

I was looking for one also and had the same problem. I picked one up from GMPARTSHOUSE one of the vendors at Carlisle ( I paid 102 plus tax for a total of about 108). Only problem was box was about 5' long by 4' wide. Was not sure what to do as I didn't think this would fit in the back of my Z06. Luckily they also had new clips to use (Used 15 clip cost about $21). As I'm carying this hugh box over my head back to my car everyone was looking. I kept sayin it was to keep the rain from the hurrican off of me. I decided to just remove the old one and replaced it right there on the fun field. Took about 10 minutes total. You might want to give them a call not sure how much shipping would be or how much of a discount I got but in the end I was very happy that they had them. I would recomend if your purchasing a new one to also buy the clips as they look and fit better than the old ones.

 09-03-2011, 04:03 PM
#27
Drifting
Thread Starter
Picked one up today at a local dealer. Thanks to a friend (Thanks Jim!!)
I got a great price, $94.13 out the door!!
Thanks guys for all the replys! I appreciate all the help you can find on this forum. It is just a wealth of helpful information!
I got a great price, $94.13 out the door!!
Thanks guys for all the replys! I appreciate all the help you can find on this forum. It is just a wealth of helpful information!
09-03-2011, 05:59 PM
#28
Instructor


I'm getting ready to do this next week and had a thought.
Rather than spraying 3 plus coats of black paint from a can what about using a paint roller, and a brush where needed to get unto the uneven areas?
Seems like you could get a better, faster, and more uniform coat of paint using a roller and the brush where needed. It may just take a little longer to dry.
Comments Please?
09-03-2011, 06:06 PM
#29
Race Director

Member Since: Jul 2007
Location: Reno is so close to Hell you can see Sparks , State Of Confusion
Posts: 18,681
Likes: 0
Received 38 Likes
on
23 Posts
St. Jude Donor '12-'13-'14
I'm getting ready to do this next week and had a thought.
Rather than spraying 3 plus coats of black paint from a can what about using a paint roller, and a brush where needed to get unto the uneven areas?
Seems like you could get a better, faster, and more uniform coat of paint using a roller and the brush where needed. It may just take a little longer to dry.
Comments Please?
Rather than spraying 3 plus coats of black paint from a can what about using a paint roller, and a brush where needed to get unto the uneven areas?
Seems like you could get a better, faster, and more uniform coat of paint using a roller and the brush where needed. It may just take a little longer to dry.
Comments Please?
Mr.Bill
 02-21-2012, 02:24 PM
#31
Race Director


 02-21-2012, 08:12 PM
#33
Melting Slicks

 01-18-2014, 12:24 PM
#36
Burning Brakes

Has anyone purchased a hood pad insulator recently? Some of the quotes I'm getting,include ridiculous shipping charges. If you've heard of a good price, with shipping, please let me know! Also, I'm looking for
a used one, undamaged. If you've replaced your hood with a custom version, and no longer need the stock hood pad, let me know what you've got!
a used one, undamaged. If you've replaced your hood with a custom version, and no longer need the stock hood pad, let me know what you've got!