When you click on links to various merchants on this site and make a purchase, this can result in this site earning a commission. Affiliate programs and affiliations include, but are not limited to, the eBay Partner Network.
I just got the code on my 01 at 38,000 miles.
I immediately came here and read up after seeing the P1416
So I did the shot of carb cleaner/ WD40 from AFTER the first check valve. I shot a good 5 second burst and then a compressed air push. I then let that sit for 1/2 hour. I also shot some into #1.
Then after 1/2 hour I did the same with the w/d 40 and let that sit for an hour.
Cleared codes, and now going on 3 weeks code free. I don't know how long it will last, but for now I'm happy...
I got a p0492 code on Friday coming home from work. Car is a 2004 coupe with 24,000 miles. Understanding the cleaning is temporary at best seeing the rubber disc, I tried it anyway since I already everything needed to do it.
When I was done I noticed a very high pitched whine coming from the engine bay for only about a minute. I started the car about 4 times over the course of the day and it does it every time. I'm guessing this is related to the A.I.R. system since I recall reading that the pump runs for about a minute at each startup. No CE light at this point, but what should I make of the whining noise? Sign that the check valve is indeed bad or something else? I don't recall anyone else commenting on having this in the previous postings.
Funny thing is I used to randomly hear this noise on occasion, like once every few weeks/months. Never could figure out what it was and car ran fine. Now I think it is clear this is related. Thoughts on why the noise is present and how to fix? I'll probably just plan on replacing both check valves at some point.
My 04 threw the p0492 code and I replace the check valve behind the intake. I don't have the whining noise you referred to. I suppose it could be your air pump but I would think you'd get additional codes with that.
So after further review (in other words, more searches), sounds as if the whining is normal operation for the air pump. Hopefully that is still true, but then I'm perplexed why in 3-1/2 years of ownership, I hadn't noticed it this consistently before.
For those contemplating replacing the bank 2 air check valve that is behind the intake manifold. DON'T.
I have an 03 C5. I am comfortable with wrenching in most circumstances especially when I have detailed instructions and/or diagrams. Thanks to this forum, I had both for this job.
Removing the manifold was no big deal. I went real slow and took pictures every time I removed something, so it was about 90 minutes of effort.
The bank 2 air valve is under the cowl and is still barely visible with the manifold out. The fuel injection wiring harness for bank one is in front of it and has very little slack to move it out of the way.
As others have stated, the valve was frozen and would not turn. The bracket that holds the air tube is mounted to the block with a 13mm bolt and is impossible to get to because of the valve and the aforementioned FI wiring bundle. For those that said they heated the valve to loosen it, how did you prevent from burning the wiring harness and all the other wires and trim in this area? I chose not to try that. For those that said they used a dremel tool to cut through the valve nut, how did you keep the shavings from falling into the now open intake ports? I chose not the do that either.
I soaked the valve and the bracket with PB blaster. My intent was to get the valve to loosen so I could turn it with the little space I had to work with or get the bracket to come loose from the bolt. I encouraged the bracket by grabbing it with pliers and after a few twists and back and forth it slipped off. With that I removed the entire air valve system from the block on both sides. I intend on finding someone that can remove the check for these codes out of the computer. I live in an area with no emissions inspection.
My recommendation: Try the various cleaning methods first. I did and it didn't work. Once I had the valve off, I blew into the valve and it is hard stuck closed. I tried to get it to work by spaying PB into it and hitting it with compressed air and I got some air to go through it but no where near the volume of a new valve. I think the cleaning/spraying is a temporary fix at best especially with those with a lot of miles/years. Those with less miles/years or those that are driven occasionally (mine is almost a DD) the valve may be just sticky because of the oily/carbon residue and block heat so the clean/spray method may work well.
Second recommendation: Abandon the firewall bank 2 valve and re-route it. I'm dubious on this one as the valve is in that position with that length of tubing/hose for a reason. But those that have tried it indicate it works. The few dollars and hour of time to at least try is worth it, IMHO.
Third recommendation: Tune the error codes out of the system. Some have stated that the vehicle will still pass emission inspections. I think this is correct as this air check valve business is a cold-start function so a standard emissions check on a warm engine may pass. That is pure conjecture on my part.
My forth recommendation: If you must have a fully operational AIR system for whatever reason, pay someone else to do it. Why ruin a perfectly good day off by dealing with this headache when you could leave it at a shop for a day, pay $300, and enjoy driving. I wish I had taken that route.
Funny you should bring this thread back up. My '04 just throw the code again last Thursday, just a tad over a year from my last code...not bad for using the carb cleaner fix. Hopefully it goes another year and if not I'll move on to plan 'B'.
Here are some more pics to add on to Bills info..... mike v
Quick note: I used all the above cleaning ideas, but also disconnected the passenger side also. I used brake cleaner and sprayed from both sides, let it sit awhile then the air,, then The W-D40 and put it all back. NO more codes. gotta love the forum folks here............................
Last edited by mike venth; 05-30-2017 at 06:01 PM.
You honestly think I cut it off while it was still bolted to the block?
Dude, there is zero room to do anything back there. I pulled the hardpipe assembly loose and had it in a vise.
This. I pulled the hard line completely out of the car and used heat to get the valve off. While the cleaning/compressed air/WD thing works for some folks it didn't last long for me.
ok folks. After removing the intake manifold and the entire air check valve assembly I have this small blue plastic gasket that appeared in my loose parts. Any idea where it came from? In addition I broke to of those squeeze type hose clamps. No parts store has that so is it worthwhile to go to the dealer for them or just replace with the standard type is screw clamp?
Small blue gasket. Where did it come from? Should I replace this squeeze type clamp for the standard screw type?
have the P0410, strange question, many screen shots show a air check valve in the outlet line, mine does not have this (98) or its not by the pump like the pictures. I have also read it should take some pressure to stop the air flow with your thumb.. Im on the fence on this, its putting out some good air but its not like its HARD to stop the air, its also not just simple pressure of thumb it takes a tiny bit, going to assume that is correct. Im so sick of the check engine light. So has somebody taken the air check valve out, or should it have one for sure?
Ok,,,,,I'm going to help put this check valve cleaning procedure in high gear and try to make it so anyone can under stand how to do it and where all the parts are:
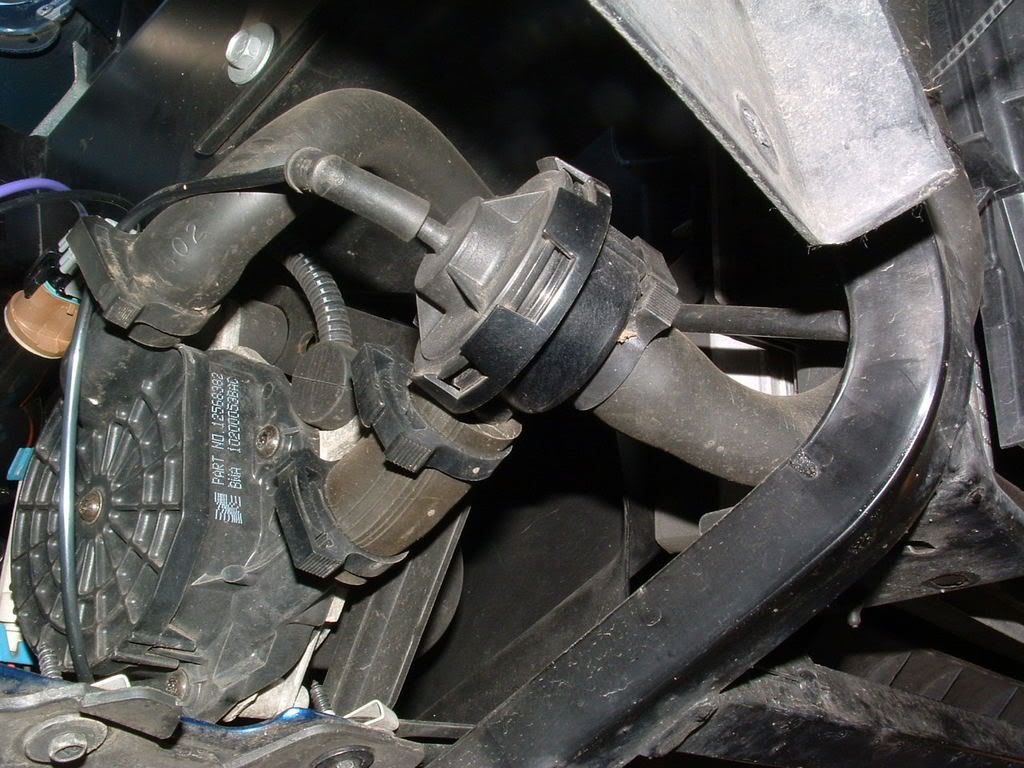
The AIR Pump is an electric motor driven pump and is below the drivers side headlight:
The output pipe off the pump is vacuum controlled:
Here is the suction side of the pump. It get clean air from the air box:
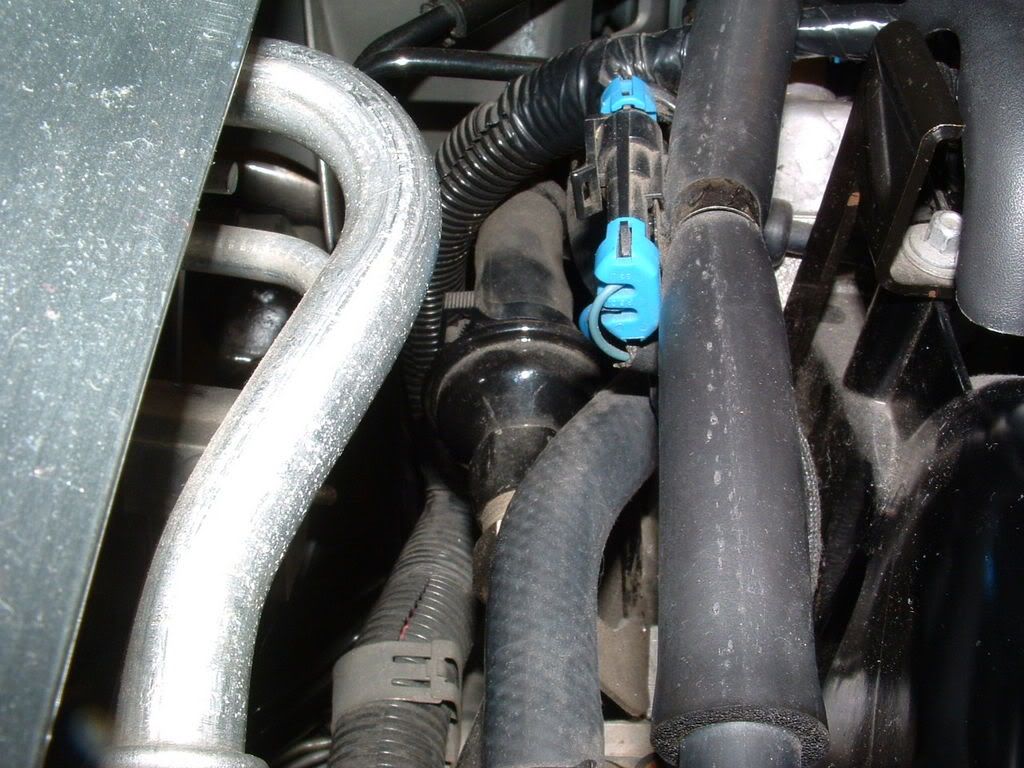
The output tube runs along the drivers side fender well. It has a connector in the center of the pipe that will allow you to disconnect the pump from the rest of the system:
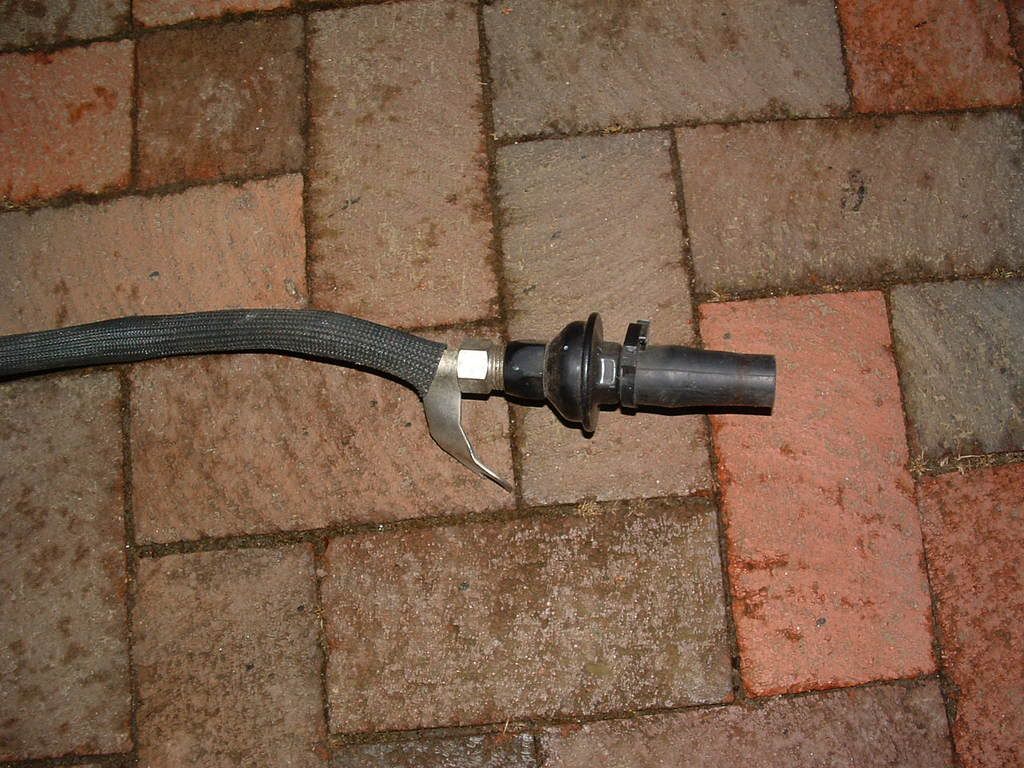
Here is the rubber hose disconnected:
You can disconnect the hose here and conduct the cleaning from this location. Spray some carburetor cleaner in the rubber hose going to the "REAR" (the one pointing UP in the picture above). This will allow cleaner to reach BOTH check valves. Once you give the hose a GOOD shot of carb cleaner, use compressed air to force it through the system.
Once you have forced the cleaner thru, give the hose a good shot of WD-40 and force that through. The CHECK VALVES have a spring loaded disk that seats on a plastic seat. If it gets exhaust reside on the seat, moisture from the cold air will cause the seat to stick shut.
Cleaning it with carb cleaner and WD-40 should allow it to free up.
IF for some reason that the seat is stuck shut bad enough, you may need to remove the hose from the AIR side of the check valve and force chemicals in that individual valve.
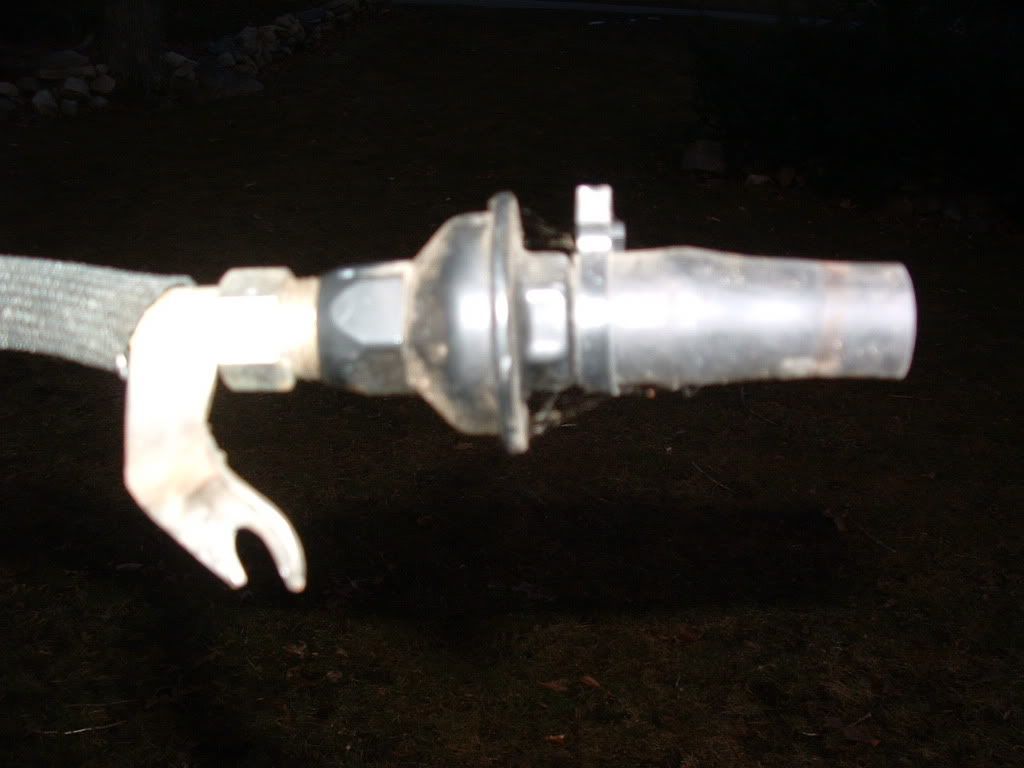
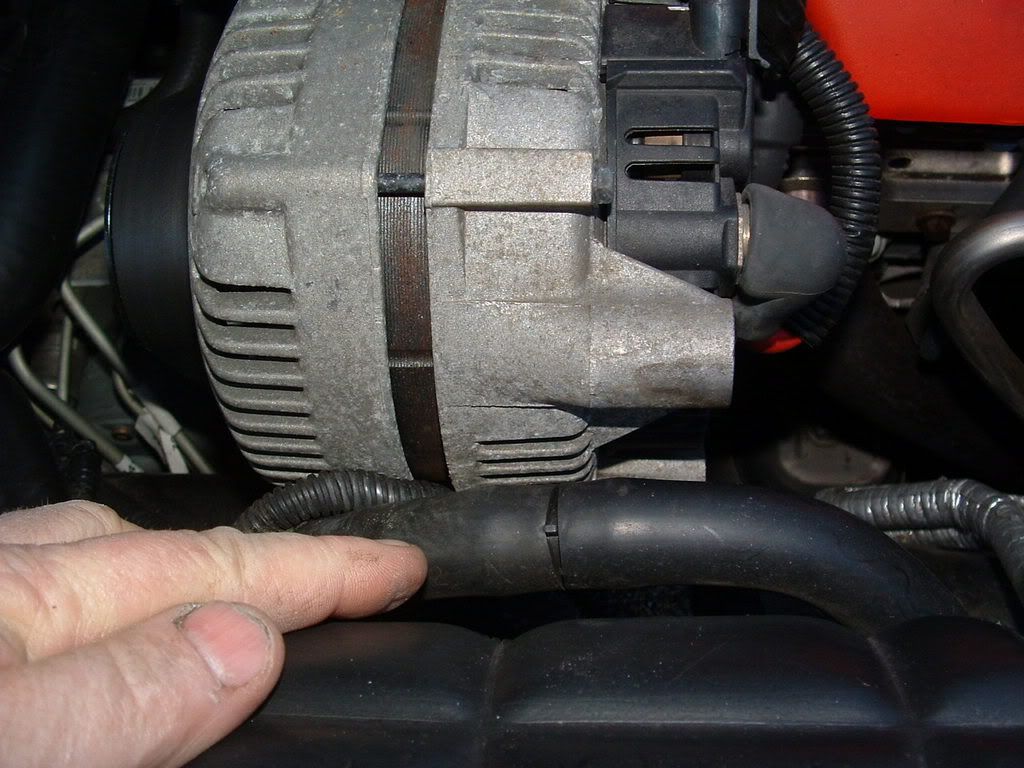
There are TWO check valves. One for the drivers side which is easily serviced and right out in the open:
The one for the passengers side is behind the engine!!!! Yep,,it's a royal BITCH to get to. It is possible to get a wrench back there and loosen the retaining bolt BUT,,, like I said,,,you will NOT enjoy the experience. I took some pictures of the passengers side valve at Bowling Green in the museum on the C5 chassis mock-up. You will NOT be able to see this on your car!
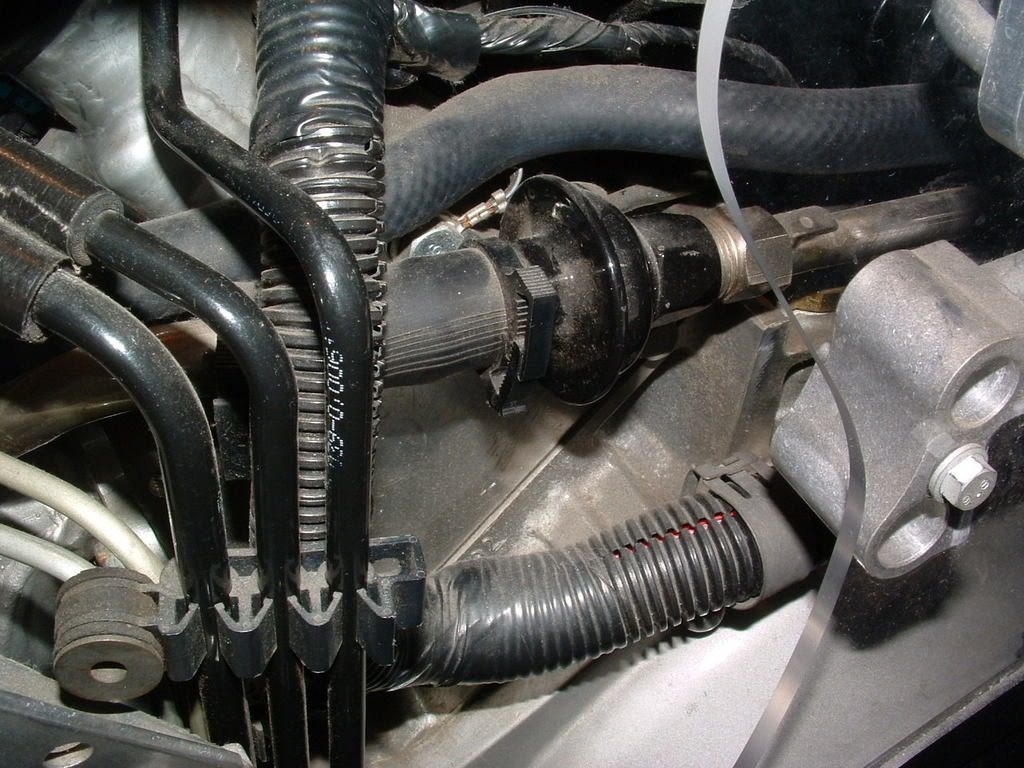
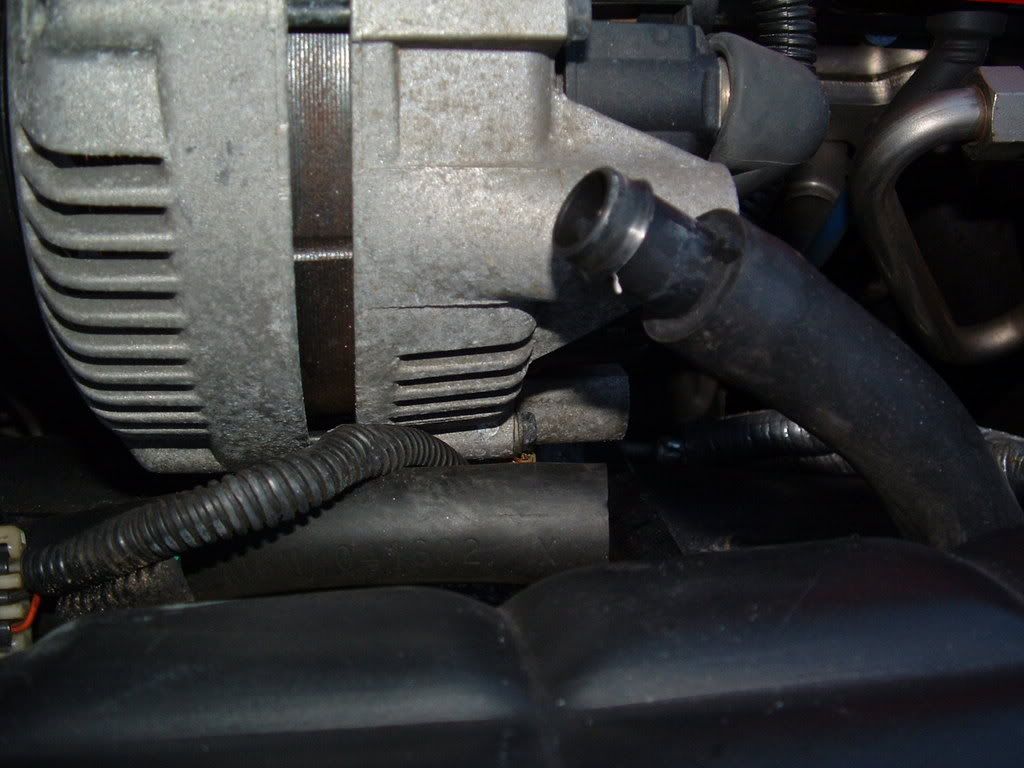
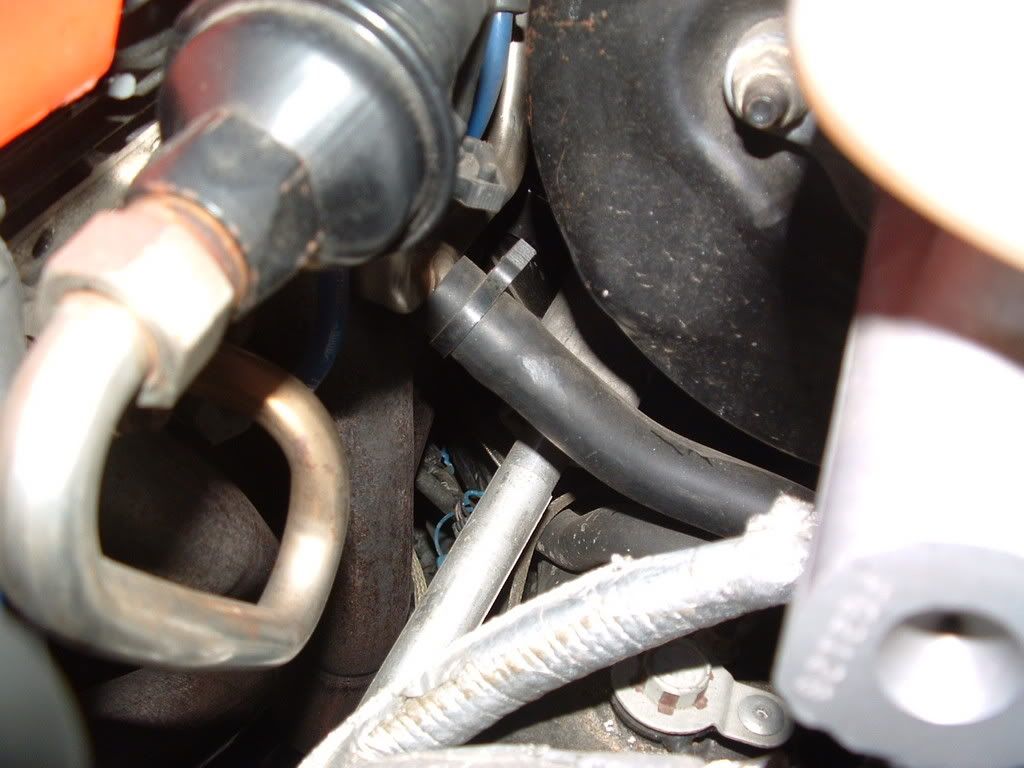
If you need to clean the passengers side valve, you can disconnect the pump air supply hose and the air supply hose from the Y connection at the rear of the engine. The next pics will show you where the Y connection is:
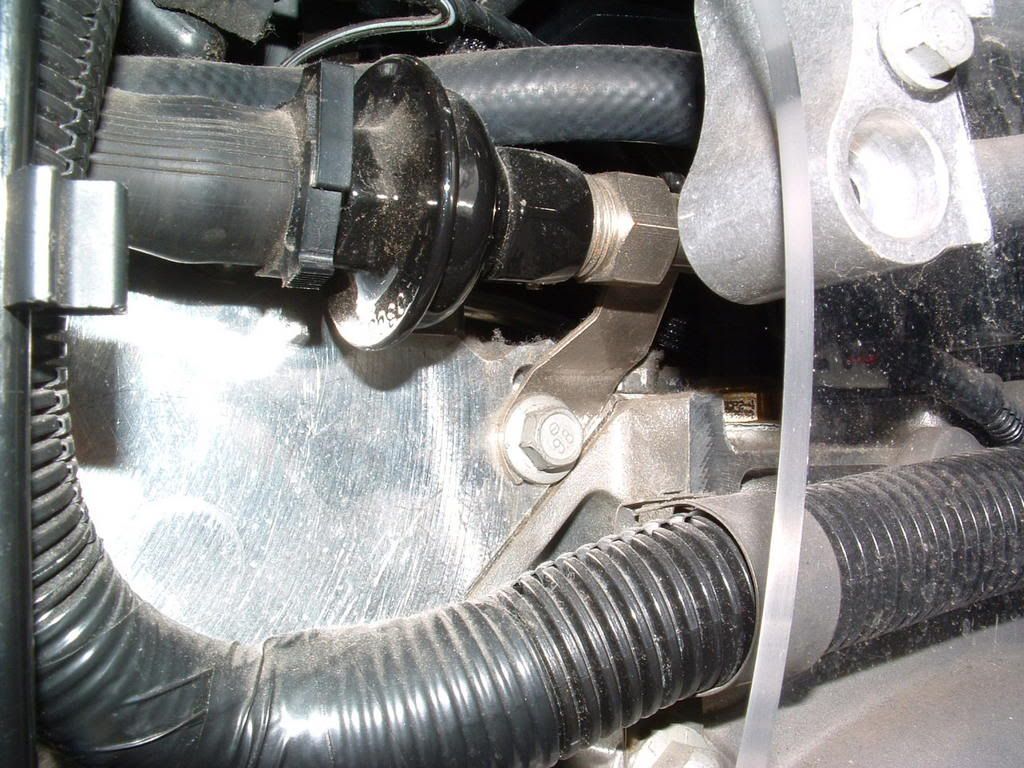
Here is where the AIR supply hose attach�s to the Y connection:
Look to the left of the power brake booster:
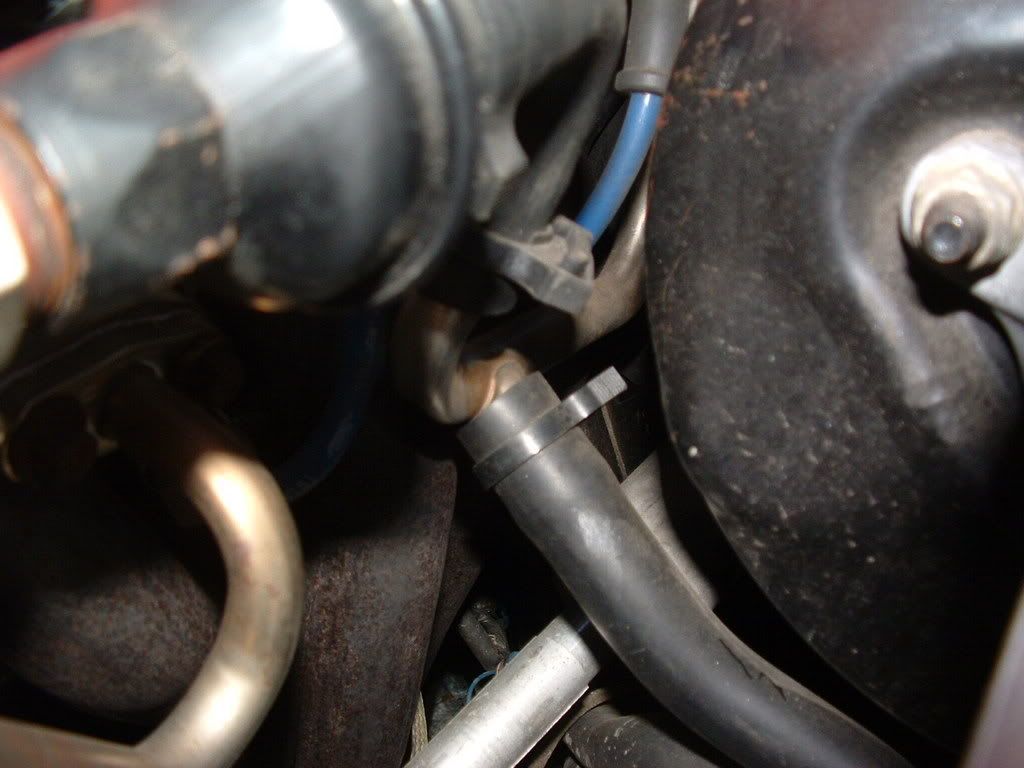
Here is the passenger side check valve, SS pipe and rubber hose fitting:
Hope this helps!
BC
What compressed air do you use for this procedure?
Canned compressed air or compressed air from a garage?
Ok- after spraying (i used) break cleaner, leave the lines open. Let them dry for awhile. Break cleaned dries pretty fast, and leaves no residue. Maybe get some canned air, used on computers to dust them off. Might work. Next put in the WD-40. Again let it dry and add some air... Not sure how far you have removed the lines, so you may need to repeat the process several times. When I did mine I had taken the tubes off the heads and kept spraying back and forth from both ends. I think I used up both cans (break cleaner &
WD-40)until I saw clean fluid coming out. Mabie over kill, but being a B***h to get to them, wasn't taking any chances on getting them not clean and re-doing it again in a few weeks. Hope it works out for you.
mike v
When mine threw a code for the passenger side valve years ago, I pushed few shots of PB Blaster through the hose in the direction of the check valve in the back of the engine. I figured PB Blaster would be better at breaking up gunk than WD40. The PB Blaster cleared it right up, and I think it's been at LEAST 5 years, now.
A few weeks ago I removed the intake manifold to change the oil pressure sensor. While back there, I removed the check valve to replace it, just to be safe. Turns out the auto parts store had given me the wrong model valve, and no one else in my area had one, so I examined mine closely.
I compared the valve's operation to the driver's side check valve which I had previously replaced, by blowing with my mouth through both of them in both directions and I couldn't tell the difference. A few tiny pieces of carbon came out, but that was it. Apparently, the PB Blaster really had done the trick, so I just put it back in. I did contemplate switching them, since the drver's side valve was newer, but I seriously couldn't see a difference between the newer driver's side valve and the one that was 16 years old. In fact, I put the 16 year old valve back where it was behind the engine.
Last edited by MrLeadFoot; 11-09-2017 at 08:27 PM.


 03-26-2016, 11:41 AM


 Yep,,it's a royal BITCH to get to. It is possible to get a wrench back there and loosen the retaining bolt BUT,,, like I said,,,you will NOT enjoy the experience. I took some pictures of the passengers side valve at Bowling Green in the museum on the C5 chassis mock-up. You will NOT be able to see this on your car!