


18 minute hazard switch replacement
Thread Starter
Pro


Joined: Nov 2010
Posts: 514
Likes: 21
Hey guys, thought this might help some people.
I had to replace my hazard safety switch in my C5 Z06, since I had no brake lights. I've read a few write ups and they all say it takes over an hour to do. I did it in 18 minutes. After doing it myself I'm absolutely shocked at the amount of time it takes people to do this and I think my way is a lot easier. With the method below, the center console bezel does not need to be removed, and the head unit doesn't need to come out either.
The steps with no video or pictures are easy and I felt they did not require visual instruction. If you feel otherwise let me know and I'll get it done.
Step 1: Pop off your trunk release switch on the left side of the steering wheel with a flat head, and your air temperature sensor cover on the right side, next to your ignition, with a flat head as well. This exposes two torx screws. Undo those screws and set them aside.
Step 2: Underneath the knee bolster there are two more torx screws of the same size. Undo those and set them aside.
Step 3: Gently pull on the bottom of the knee bolster until it pops. You need to be firm, but don't man-handle it. Be careful because there is a wire that is attached to the temperature sensor that's attached to this as well.
Step 4: I was able to gently wiggle the bolster out out without having to remove the center console bezel, and without breaking anything. I gently pried up on the bezel around the ignition and it slid right out. Once you've done this, disconnect the air temperature sensor cable, from the sensor itself.
Step 5: Pop off the hazard button. I just used my car keys to do this. I stuck them in between the button and the bezel, turned them a bit, pulled back, and it popped right off.
Step 5.5: A few people have replied to let me know that they had issues getting the hazard switch to unclip. Mine was a crappy OEM one and it just pushed right out. The general consensus to get it out is to take a small to medium sized screwdriver and give a good knock on the handle to pop it out. Alternatively if it's thin enough, you wiggle it in and use that to depress the clips. This should only add another minute or two to the total time, if any at all. (Big thanks to those who updated me with this extra step they had to take, so I can pass it on to you guys!)
Step 6:
Step 7: Shouldn't really need to be stated, but hook up the new switch and verify that you have turn signals, hazards, brake lights and tail lights before you put everything back together.
Step 8:
Step 9: Use a pair of long and skinny needle nose pliers to pull the switch forward. Looking at the face of the switch once it's in, there is an empty triangle that you can use to grab on to with the pliers. Once you've secured it in it's place, you can push the button back on.
Step 10: Reattach temperature sensor to the cables you unplugged from it, and slip the knee bolster back into place the same way you took it out, by pulling back a bit on the ignition bezel.
Step 11: Put the torx screws back in, reattach the temperature sensor cover, and plug the trunk release back in and you're good to go!
Total time took 18 minutes, not including the water and cigarette break.
Last edited by dizzysn; Jul 27, 2014 at 11:25 PM.
Racer

Joined: Jul 2008
Posts: 295
Likes: 32
From: Woodbridge Virginia
Just finished doing my replacement the other way. saw this after I was done. Wanted to fix the dim HVAC issue so I would have gone the way I went anyway but your trick looks promising if I ever have to do it again.

Le Mans Master

Joined: Mar 2011
Posts: 6,835
Likes: 302
From: Columbia SC
I too have had some intermitent turn signal function but it happens when the car is cold and hot. I have my console apart for fixing the HVAC unit so I think I will replace the hazard switch and see if that helps. Glad I saw your post while everything is apart.
Race Director


Joined: Apr 2007
Posts: 11,152
Likes: 890
From: South Western Ontario
So, how'd you get the tabs holding the switch in place to release?
It seems really odd you're showing a video if it just falling into the dash when you give it a little push considering there are tabs on the top and bottom that clip the switch body into the air vent.
It seems really odd you're showing a video if it just falling into the dash when you give it a little push considering there are tabs on the top and bottom that clip the switch body into the air vent.
Thread Starter
Pro
Joined: Nov 2010
Posts: 514
Likes: 21

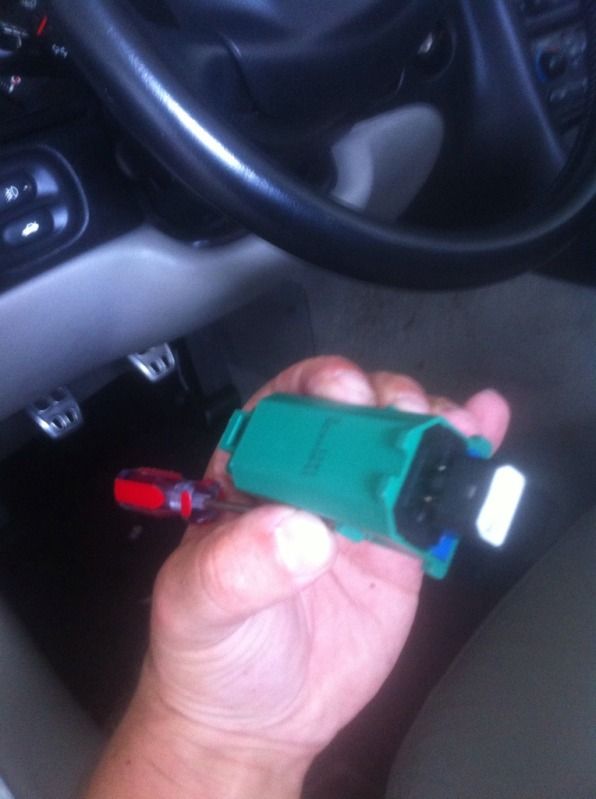
This is the that came out in the video:
As you can see there are no tabs. I was going to replace it anyway, because the few times I had to use the hazard switch, when I pushed the button a lot of times it would fall back into the dash.
I also realize now that I didn't address that in the video. I did the instructions based on the crappy one that was in there, and not the OEM unit. However like I said, there's enough room to get your hands in there and depress both tabs down to get it out.
Last edited by dizzysn; Aug 10, 2012 at 03:33 PM.
Corvette Stories
The Best of Corvette for Corvette Enthusiasts

Every 2027 Corvette Engine Explained
Joe Kucinski
Designer Imagines A Corvette That Looks More Like a Corvette Than the Corvette
Verdad Gallardo
10 Ugly Corvettes That We Still Kinda Love
Joe Kucinski
Top 10 Most Expensive Corvettes Ever Sold on Bring A Trailer
Brett Foote
10 Things Every Corvette Owner Needs (2026 Edition)
Michael S. Palmer
8 Most "Only Corvette Owners Understand" Quirks and Problems
Pouria Savadkouei
10 Reasons the C6 Z06 is Still A Performance Benchmark After 20 Years
Joe Kucinski
How Much Horsepower Every Corvette Engine "LOST" in 1972
Joe Kucinski
Top 10 DOs and DON'Ts for Protecting Your Convertible Top!
Michael S. PalmerTeam Owner


Joined: Dec 1999
Posts: 174,312
Likes: 1,217
From: Here
Pilot of Beer Force 1
Tampa Regional Coordinator
CI 4-5-6-7-8 Veteran
Organizer St. Jude Fundraiser
I believe in the Beer Fairy


Instructor
Joined: Aug 2012
Posts: 214
Likes: 10
From: Pinckney MI
Hope that helps someone. I was struggling to get the old switch loose for a bit, and trying to push up on the little green tab with a screw driver with the limited access wasn't cutting it for me!
Sure am looking forward to reliable turn signals!


Thread Starter
Pro
Joined: Nov 2010
Posts: 514
Likes: 21
Just did this fix, and I was able to wedge a small flathead screwdriver between the black plastic mount and the lower tab, causing the tab to depress. After that, a couple good whacks on the switch from the front of the dash knocked it loose.
Hope that helps someone. I was struggling to get the old switch loose for a bit, and trying to push up on the little green tab with a screw driver with the limited access wasn't cutting it for me!
Sure am looking forward to reliable turn signals!
Hope that helps someone. I was struggling to get the old switch loose for a bit, and trying to push up on the little green tab with a screw driver with the limited access wasn't cutting it for me!
Sure am looking forward to reliable turn signals!

Instructor
Joined: Aug 2012
Posts: 214
Likes: 10
From: Pinckney MI
Yep, I was able to get at it through the knee bolster. Not sure on time. Less than an hour. But, this was my fist time tearing into my new to me Vette, and I was taking it slow and steady. The hardest part was getting the damn tabs to depress so the old switch would come out. The little screwdriver trick worked like a champ though.
Thanks for the heads up on the knee bolster. If I had to take the whole center console out, the faulty hazard switch would have been in there another month or two until I got around to adding the iPhone controller mod...
Thanks for the heads up on the knee bolster. If I had to take the whole center console out, the faulty hazard switch would have been in there another month or two until I got around to adding the iPhone controller mod...
Thread Starter
Pro
Joined: Nov 2010
Posts: 514
Likes: 21
Yep, I was able to get at it through the knee bolster. Not sure on time. Less than an hour. But, this was my fist time tearing into my new to me Vette, and I was taking it slow and steady. The hardest part was getting the damn tabs to depress so the old switch would come out. The little screwdriver trick worked like a champ though.
Thanks for the heads up on the knee bolster. If I had to take the whole center console out, the faulty hazard switch would have been in there another month or two until I got around to adding the iPhone controller mod...
Thanks for the heads up on the knee bolster. If I had to take the whole center console out, the faulty hazard switch would have been in there another month or two until I got around to adding the iPhone controller mod...


Team Owner
Joined: Dec 1999
Posts: 174,312
Likes: 1,217
From: Here
Pilot of Beer Force 1
Tampa Regional Coordinator
CI 4-5-6-7-8 Veteran
Organizer St. Jude Fundraiser
I believe in the Beer Fairy
well I still haven't removed the old switch but since I was fkng with it the thing seems to be working fine now so fk it


Race Director
Joined: Apr 2010
Posts: 16,253
Likes: 1,658
From: Arizona
Nice!! When I replaced mine, I took apart the whole center console, radio, A//C unit etc and that alone took about 18 minutes.....Reseating the Hazard Relay Switch took another hour!!! This looks to be much easier. Thanks for sharing
Pro
Joined: Jul 2012
Posts: 533
Likes: 6
From: Indian Trail NC
Did it your way, was a breeze, only hard part is getting the old switch out, wedged a small screw driver in the top, used my thumb to push the bottom and pushed on the front with another screw driver, finally released it took a little patience and time, overall about 30 min
Thread Starter
Pro
Joined: Nov 2010
Posts: 514
Likes: 21
Did it your way, was a breeze, only hard part is getting the old switch out, wedged a small screw driver in the top, used my thumb to push the bottom and pushed on the front with another screw driver, finally released it took a little patience and time, overall about 30 min
Le Mans Master

Joined: Aug 2003
Posts: 5,477
Likes: 63
From: = From Toronto = 9/11/01 FDNY 343 Never Forget
CI 6-7-8-9-10 Veteran
St. Jude Donor '08-'09-'10-'11-'13-'14
 I just did. Having issues with no brake lights and the dashlights turning on when applying the brake pedal with the ignition off.
 Thinking it might be this switch.