C5 C6 Corvette: How to Relocate Coil Packs
Clean up your 'Vette's engine bay by relocating the coil packs into the fender ducts. It's a custom installation that's not too difficult.
This article applies to the C5 and C6 Corvette (1997-2013).
Most underhood modifications are made with the intention of producing more horsepower, but this is not one of them. Relocating the coil packs won't get you any more horses, but it will make the engine bay a prettier place. There are kits available from Katech which, while good, don't move them out of the engine bay. This guide outlines the steps to relocating the coil packs completely outside of the engine bay and into the fender ducts.

Materials Needed
- Wire harness extensions
- Custom spark plug wires
- 1/4" x 6" pipe
- Four (4) 7mm x 50mm bolts
- Eight (8) flat washers
- Four (4) lock washers
- Needle nose pliers (optional)
Step 1 – Remove fuel rail covers and battery
Pull off the plastic covers on the engine to expose the coil packs and fuel rails. Remove the connection from the negative battery terminal first, then the positive. The battery should be held in place by a retainer. Unbolt the plastic retainer and pull the battery out of the engine bay. Set it aside.
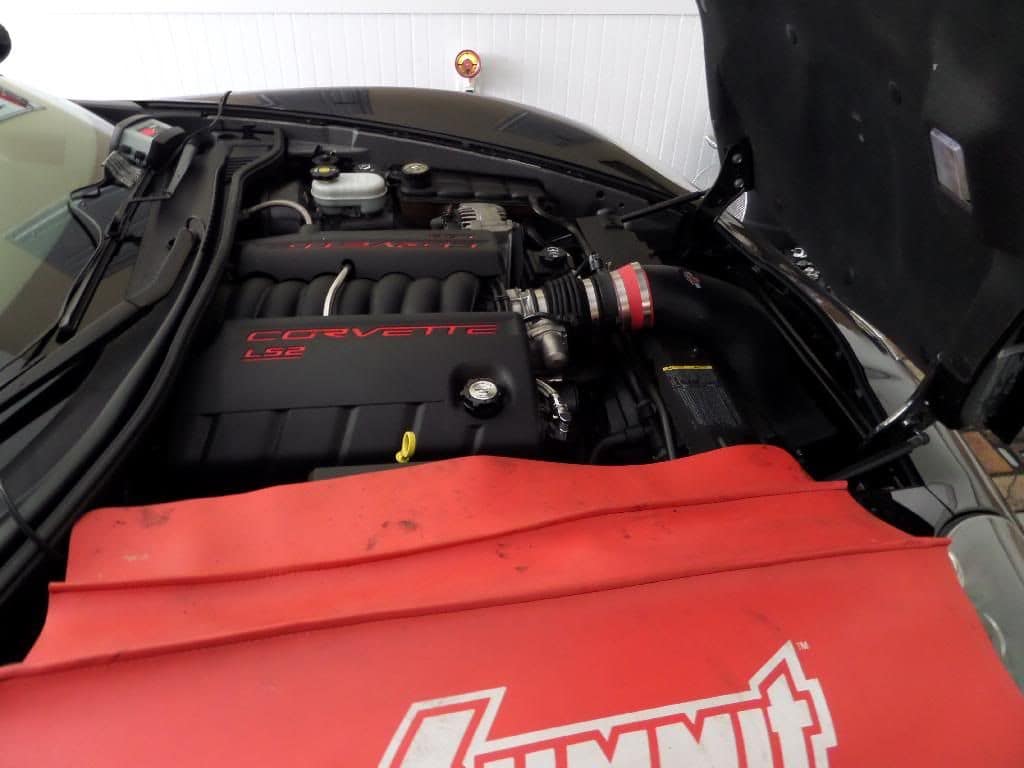
Figure 1. Remove fuel rail covers. 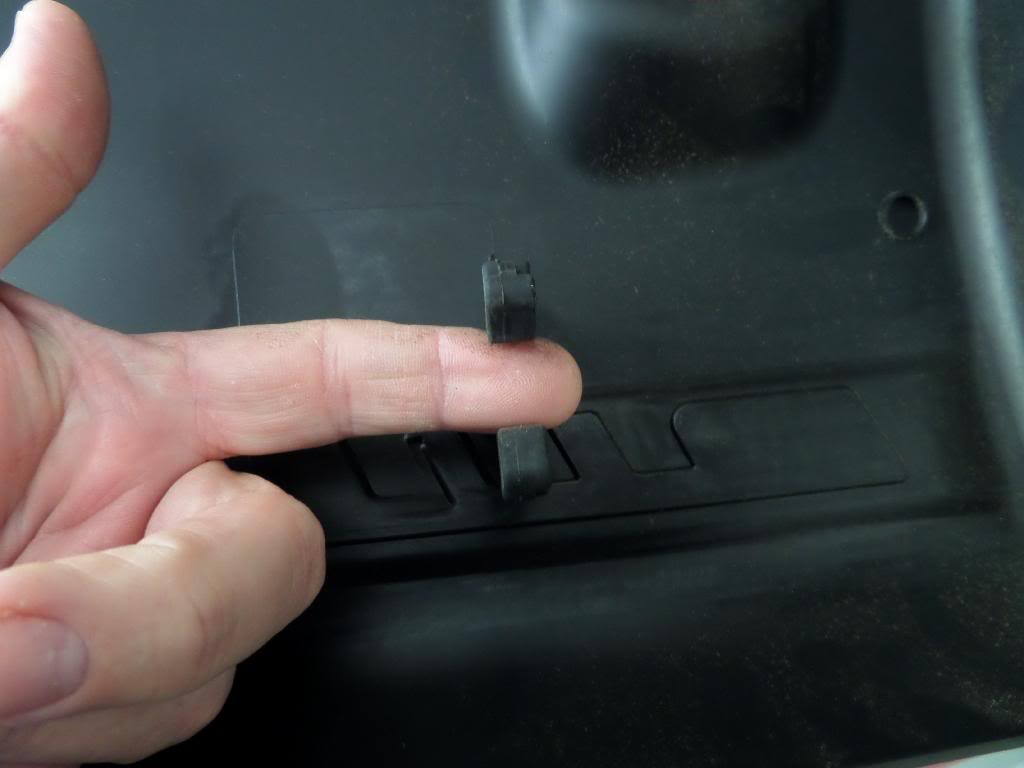
Figure 2. Rubber clips securing fuel rail covers. 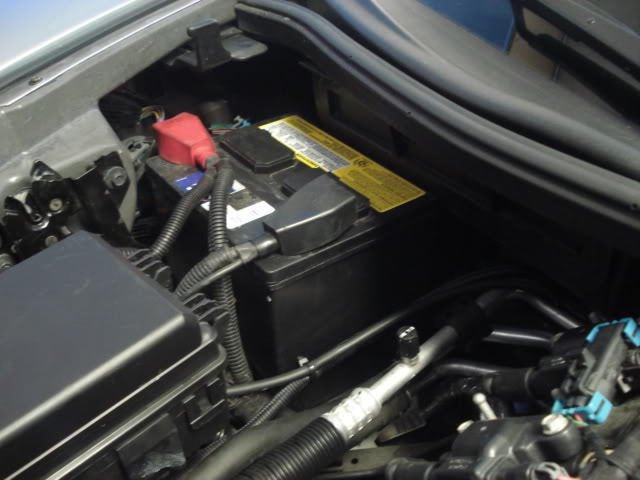
Figure 3. Remove battery.
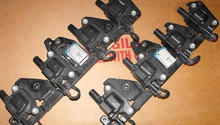
Step 2 – Remove coil packs
Unclip the white wiring harness from the coil packs. There should be two: one for each engine bank. Next, remove the spark plug wires from the coil packs and the spark plugs. These can be pulled off by hand, but don't be afraid to use needle nose pliers to remove them if needed. Dispose of them (or resell) afterward.
Finally, remove the five bolts securing the coil pack bracket to the valve cover. Remove the coil packs.
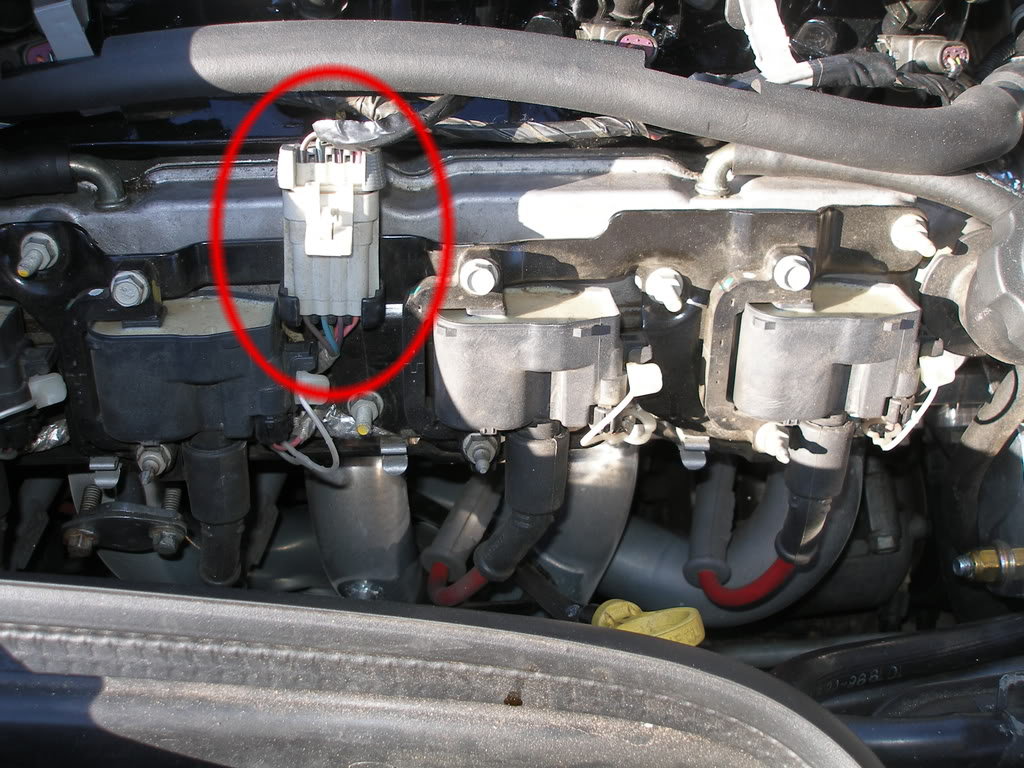
Figure 4. Unclip coil pack harness. 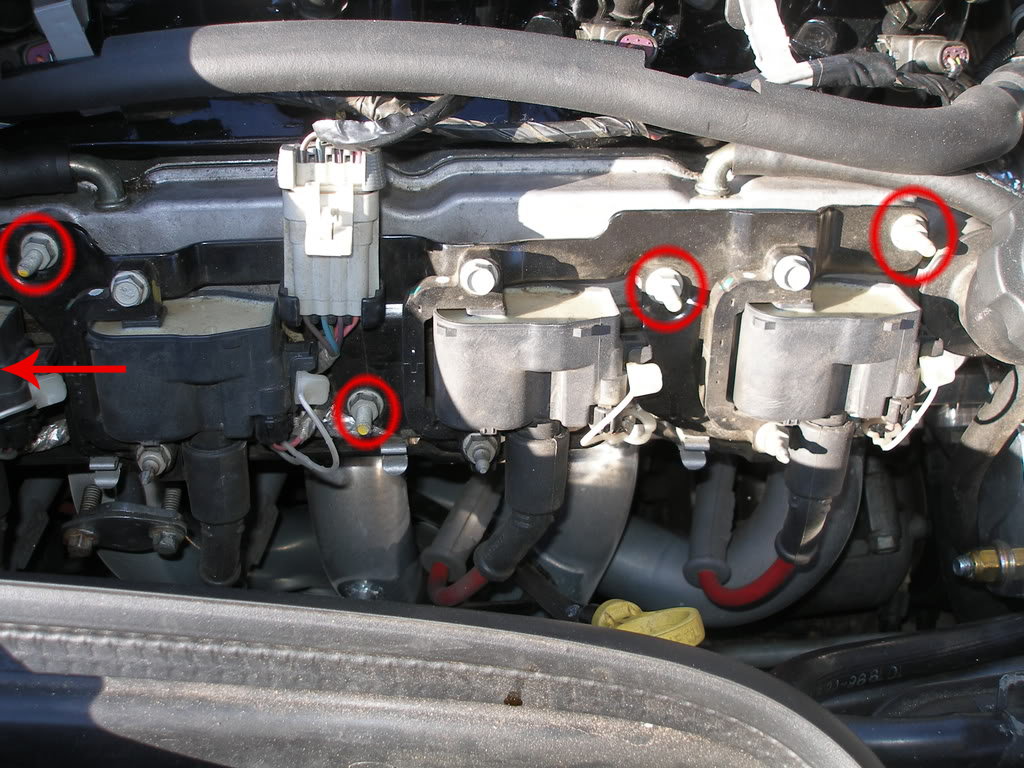
Figure 5. Remove coil pack bracket. 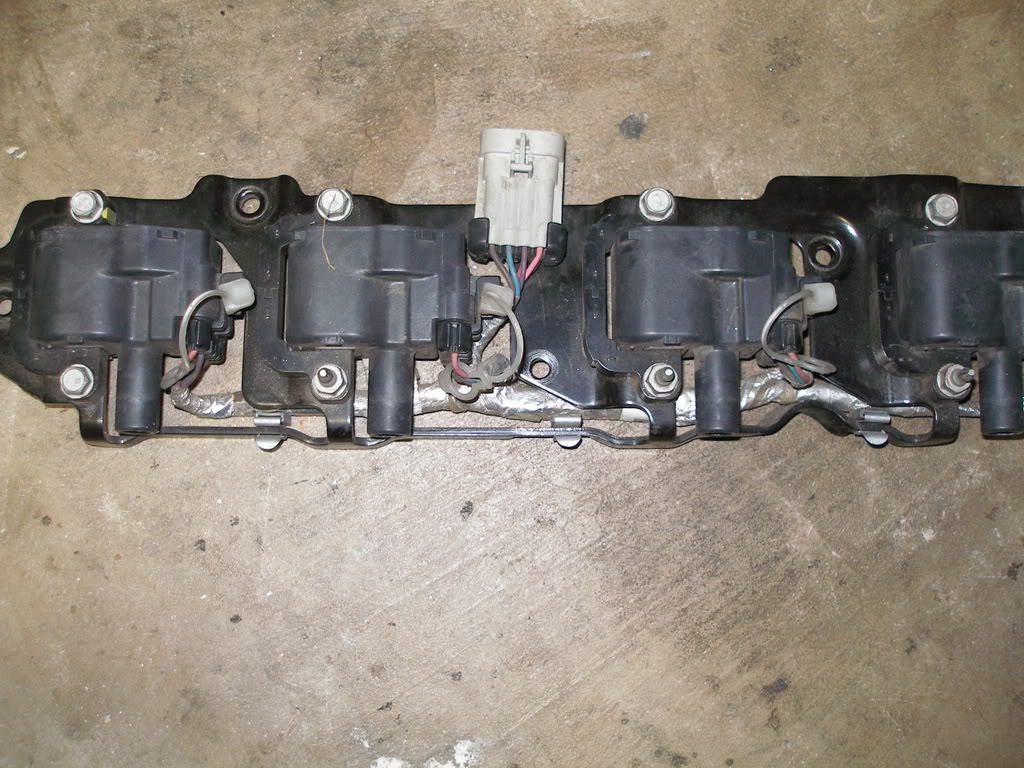
Figure 6. Removed coil pack.
Step 3 – Separate coil pack wires from fuel injector wires
The white coil pack connector wiring is wrapped up in tape. Remove the tape using small scissors or a razor. The wiring connected to the connector and the wiring connected to the injectors should be completely separate when finished. Wrap the injector wires in electrical tape to keep things organized.

Figure 7. Separate wiring harness from injector wiring. 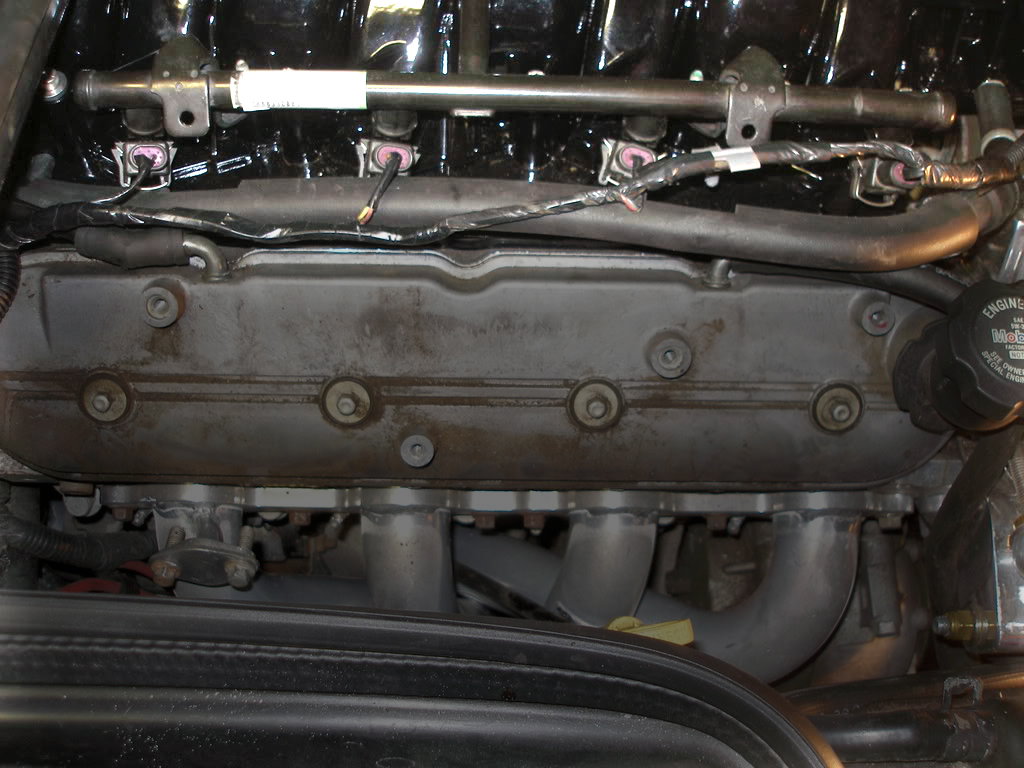
Figure 8. Re-wrap injector wires with electrical tape.
Step 4 – Remove fenders
The fenders are fastened by several bolts and clips located in the wheel well. Start at the front of the car and remove the bolts in the wheel liner securing it to the fender. Unbolt the rear fender filler panel and the bolt that attaches the fender to the wheel jamb. For more detail on this step, check out the fender removal DIY linked below.
(Related Thread: How to Remove Front Fender - CorvetteForum.com)

Figure 9. Driver's side fender removed. 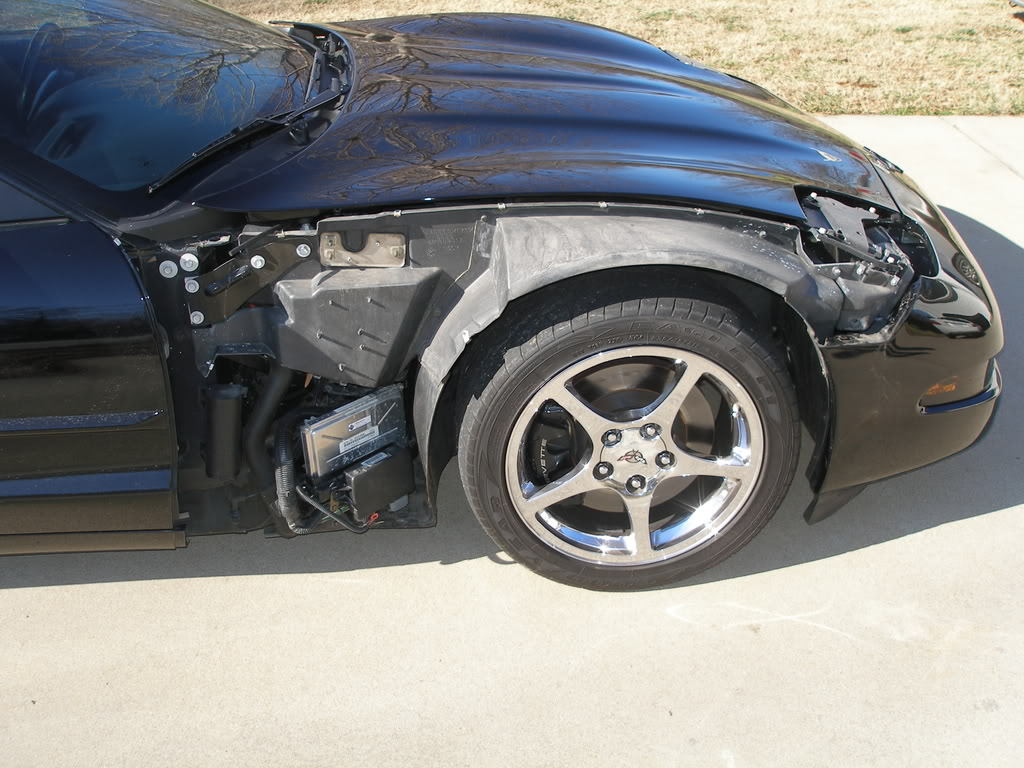
Figure 10. Passenger side fender removed.
Step 5 – Mount coil pack bracket
Mount the coil pack in the fender well. Mock up where the coil pack should go and mark the locations where it'll be fastened to the fenders. Drill holes for the bolts with a 1/4" bit. Now, cut a length of pipe to fit the distance between the bracket mounting hole and the bracket. Install the bolts through these pipes with a washer. Repeat as needed for the driver's side.
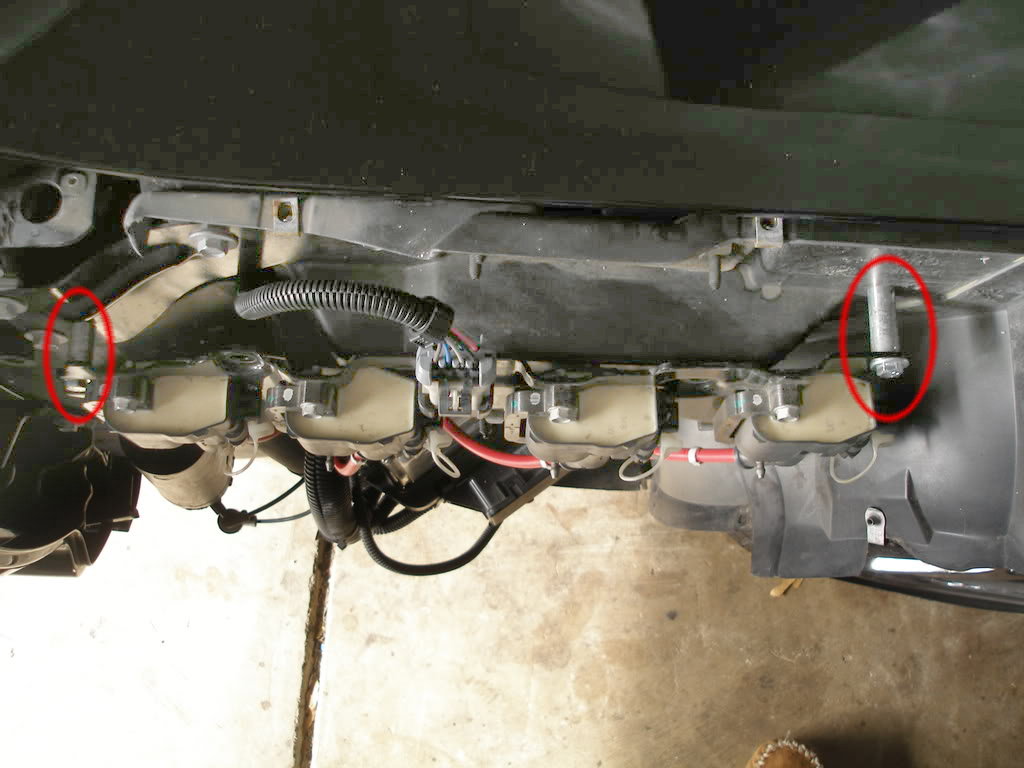
Figure 11. Driver's side installed with stand-offs. 
Figure 12. Passenger side relocated.
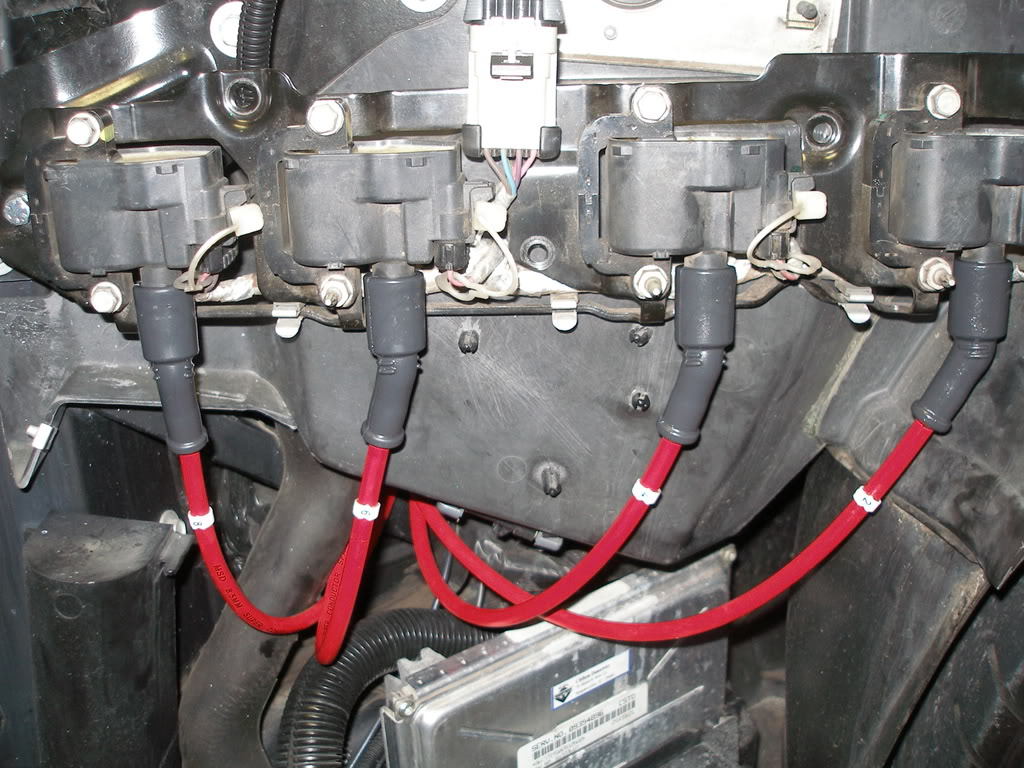
Step 6 – Connect coil plug wires
The pack should come with two pairs of wires. One pair will be shorter than the other. Plug a short wire into the #8 spark plug and wire it to the coil pack mounted on the passenger side. Mark this plug wire as #8 using the labeling clips in the package. Do the same for plugs #6, #4, and #2. Do the same on the other side. If there are no clips, mark the number on a piece of masking tape wrapped around the wire. Don't forget to use dialectric grease on the spark plug wire boots.
Then, connect the coil pack extension wires to the coil pack wiring harness. Route the extension to the coil back bracket and plug it in.
Step 7 – Start her up
Re-install the battery and start the engine. If everything is running well, re-install the fenders and enjoy the clean look of the engine bay.
Related Discussions
- How To Relocate Coil Packs - CorvetteForum.com
- Corvette Front Fender Removal - CorvetteForum.com
- Custom Coil Relocation - CorvetteForum.com