C6 C7 Corvette: How to Bleed Brake System/Replace Brake Fluid
Flushing the brakes on the Corvette is an important maintenance item. Learn how to bleed the system and replace brake fluid here.
This article applies to the C6 and C7 Corvette (2005-current).
Keeping good, clean brake fluid in your braking system can greatly improve your braking performance. While those of you who only drive on the street may not notice a big difference, this can be the difference between making that turn and wrecking your car on the track. Bleeding your brakes is important to do after any brake work is done, especially if it involves removing a brake line. You also need to change your brake fluid every so often as bleeding it only replaces a portion of the old fluid. How often is dependent on your driving style, but it should be done anywhere between every 6 months to 2 years. This article will show you how to both bleed the brakes and change the fluid.

Materials Needed
- 10mm wrench
- Power bleeder (if you are working by yourself)
- Clear silicon tubing to fit over bleeder valve
- Shop rags
- Drain containers
- Jack
- Jack stand
- Tire iron
Step 1 – Bleed fluid
Warning
During this process you need to be very careful of the following:
- Never let the brake fluid reservoir run out of fluid; this can cause severe damage to the master cylinder.
- If you are using an assistant to press the brake pedal, never let the pedal go all the way to the floor. This can also cause damage to the master cylinder.
- If any brake fluid spills, you need to clean it up immediately. Brake fluid is highly corrosive and can damage paint, electrical connections, etc.
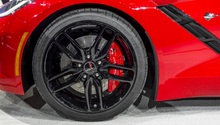
When bleeding the brakes, you need to work in this order: Right-rear, left-front, left-rear, right-front.
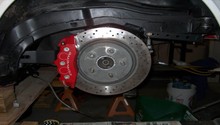
- Using the your tire iron, loosen the lug nuts on the wheel.
- Raise the car using your jack and position your jack stand underneath.
- Remove the wheel and lower the car onto the jack stand.
- Clean any dirt from around the brake fluid reservoir cover and then remove it.
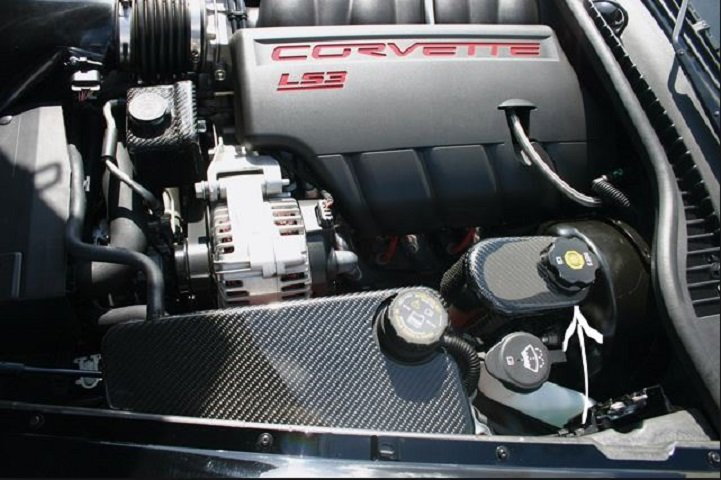
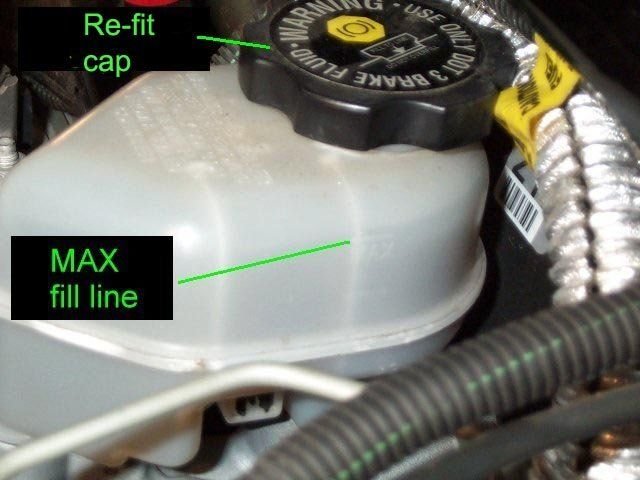
Figure 1. Brake fluid reservoir location. - Using a turkey baster or something similar, remove all of the old brake fluid from the reservoir and replace with new fluid. Only use fluid specified by your owner's manual (it should be DOT 3).
- If you are working by yourself, you will need a power bleeder to apply pressure to the braking system. Refer to the instructions that came with your power bleeder on how to do this. If you have an assistant, have them pump the brake pedal 3-5 times until it's firm and then hold the brake pedal 1/2-3/4 of the way depressed.
- Locate the bleeder valve on the caliper. If you have the stock calipers, the bleeder valve will be on the backside; however, some of the higher trim packages will also have a bleeder valve on the outside. If your car has two, you'll need to bleed from the inner valve and then the outer valve.
- Attach your silicon tubing to the bleeder valve; it should slide on and feel snug. If it isn't snug, you'll need to go to a tubing with a smaller inner diameter.
- Run the silicon tubing into your drain pan; if it isn't clear, you'll need to pour some new fluid into the drain pan to see any air bubbles.
- Using your 10mm wrench, slowly open the valve until fluid starts to flow. You need to drain until the fluid starts to come out clear and there are no air bubbles.
- If the fluid starts to slow but is still not clear or bubble-free, you'll need to close the bleeder valve, top off the reservoir, and repeat the process.
- Once the fluid coming out is the new fluid and has no bubbles, close the bleeder valve by tightening it and move to the next wheel.

(Related Article: How to Jack Up Your Vette - CorvetteForum.com)
Step 2 – Flush the brake fluid
Unfortunately, it's relatively impossible to get all the old fluid out as the ABS system will retain some. However, you can get enough where what's leftover won't make too much of a difference.
You will need to work on two wheels at a time in these sets:
- Right-rear and left-front
- Left-rear and right-front
- Remove the two wheels you are currently working on, following the steps in Step 1 above.
- Clean the reservoir cap and remove the old brake fluid from the reservoir.
- Refill the reservoir with new brake fluid.
- Attach the silicon tube to each bleeder valve and route into the drain pan.
- Starting with the bleeder valve at the back of the car, open it until fluid starts to flow and then open the one in the front as well.
- Let it gravity bleed until the fluid begins to come out clear. Make sure to keep an eye on the fluid level in the reservoir.
- Once the fluid is coming out clear, you can close the bleeder valves and repeat the process on the other set of wheels.

Step 3 – Finishing up
Once you have bled the brakes or you have changed the fluid, you'll need to test them. Before taking it for a drive, make sure the fluid in the reservoir is at the fill line. If it's overfilled, you'll need to take some out, and if it's underfilled, you'll need to add some. Then, test the brakes by pumping the brake pedal a few times. It should feel firmer than before; if it doesn't, or if it feels spongy, you'll need to repeat the bleeding process.
Related Discussions
- Bleeding Process - CorvetteForum.com
- Bleeding Your Brakes - CorvetteForum.com