Corvette: How to Mini-Tub Your C6
If you want wider rear tires without creating a fender flare, your work is cut out for you. Don't despair, read this article and learn how to do a mini-tub the professional way.
This article applies to the C6 Corvette (2005-2013).
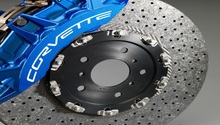
Owning a high-performance sports car like a Corvette is a never-ending project for many enthusiasts of the brand. Mini-tubbing the Corvette is not an easy undertaking. It takes a lot of skill and mechanical know-how and a serious gut-check if you think you can finish what you start. However, the end result is a 'Vette that retains those same, classic, aerodynamic lines, but somehow, mighty Goliath-like fat rear wheels got installed. The look is like no other, and you'll be hard pressed to stop staring and just get in and ride. If you are ready to tackle this difficult project, read on to learn how to do it right and relish in your victory.

Materials Needed
- Dremel with diamond tip cutting blade and extension
- Various grit sandpaper
- Industrial strength glue such as Duramix
- Masking tape
- Marker
- Fabricated tub (if purchased from an aftermarket shop)
These instructions assume that an aftermarket tubbing kit will be purchased to complete the job. This project can be completed without the kit at a much greater level of difficulty.
Step 1 – Lift the Corvette up on jack stands
Make sure that the car is really stable and there is plenty of clearance to remove the wheels and get to the shocks.

(Related Article: How to Jack up Your Vette - CorvetteForum.com)
Step 2 – Protect the interior and exterior
Removing the seats is an option, albeit a painful extra step. If you choose not to remove them, make sure to used lots of heavy-grade plastic tarp and cover everything. You are about to make a lot of fiberglass dust. Protect the outside of the car as well; you don't want to scratch the paint and damage your baby.

Step 3 – Trim the inner fenders
Remove the rear wheels so that you can gain access to the inner fender, shocks and control arm. You will need to pull the inner fender and do a little cutting here to be able to support the wider wheels. An optional step here is to swap out shocks and brackets to get more clearance when the suspension is not under load (up on jacks). If you choose not to do this, just remember to not spin the wheels when they are up on jack stands. The rear edge of the wheels may rub against the control arm. Depending on the wheels you choose, the inside inner fenders may need to be trimmed.
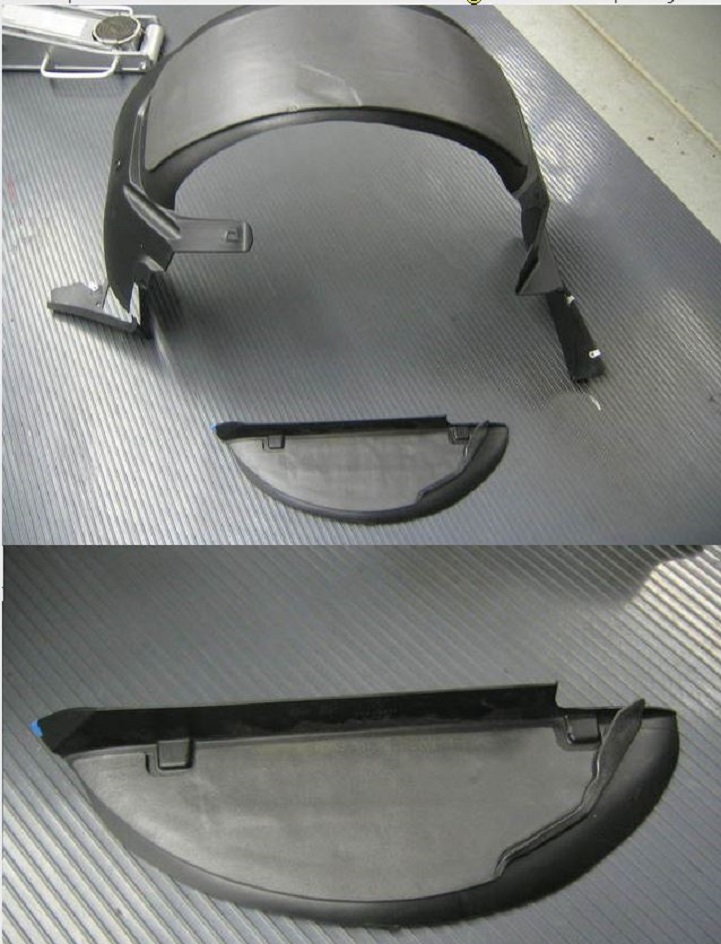
Step 4 – Cut out the tubs
A Dremel tool with a diamond cutting wheel is excellent for this job. An extension wand will make it a little easier, too. Cut out the existing tub, making sure that your aftermarket prefabricated replacement tub will fit in your opening. You will be bonding the prefab replacement tub to this hole and need to make it as flush as possible in order to look like it came that way from the factory.
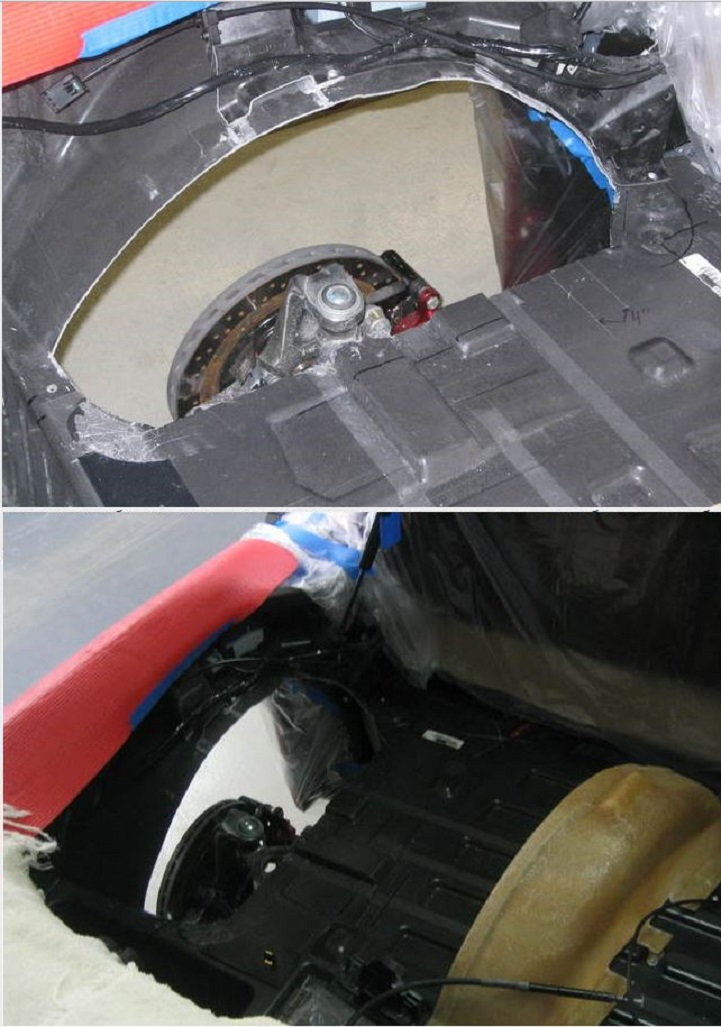
Step 5 – Install the new tubs
Use Duramix or other bonding agent (3M makes a good product) to install the new tubs in place of the old ones. Sand the edges of the openings that you just cut with 60 grit sandpaper to help make the bond adhere. Follow the directions on the bonding agent. If you have to build up any holes or cavities, use several layers and let it set a little before adding another. After it has cured, sand smooth.
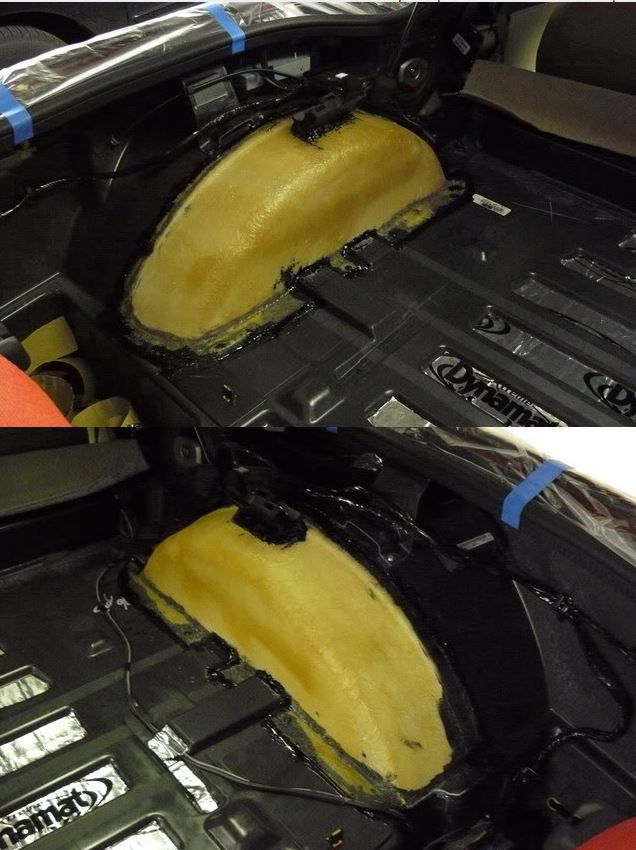
Step 6 – Refinish the interior
Use some strong adhesive or truck bed coating and apply a protective heat shield padding, and then carpet over top, for a really professional-looking job. This part is optional, of course. You can simply replace what you had in there before, but the existing carpeting will need to be re-cut to fit properly around the new tubs.

Step 7 – Install your new wide tires
Put the new rear tires on the car. Double check the clearance while they are on the jack stands. There very well could be some rubbing. Check again after dropping the car to make sure that you have good clearance from the tire and wheel and the control arm.

Related Discussions
- Mini Tub Project and Winter Mods - CorvetteForum.com
- Fiberglass Bonding Agent - CorvetteForum.com