Corvette: How to Replace Stock Shifter
Replacing the stock shifter can definitely improve your 'Vette's shifting. Learn how to change it out here.
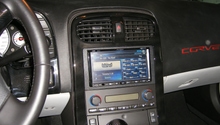
This article applies to the C5, C6 and C7 Corvette (1997-current).
Stock shifters on Corvettes are pretty good; there's no question about it. It has a fairly short throw and is comfortable to grip. But most stock shifters don't have strong positive centering mechanisms, and replacing a stock shifter with an upgraded model can shorten its throw. Upgrading your shifter can also minimize, if not outright eliminate, your chance of accidentally going from first to second gear, and most upgraded shifters are intuitive. Replacing your shifter is an affordable way to customize your car. Learn how with this step-by-step guide.

Materials Needed
- New shifter
- Flathead screwdriver
- Needle-nose pliers
- Vise-grips (optional)
- Spray lube (optional)
- Liquid wrench (optional)
- 10mm socket wrench
- Torx screwdriver
- Razor blade
- Silicone RTV
- Postcard
- Soft mallet
- 3/8" socket wrench
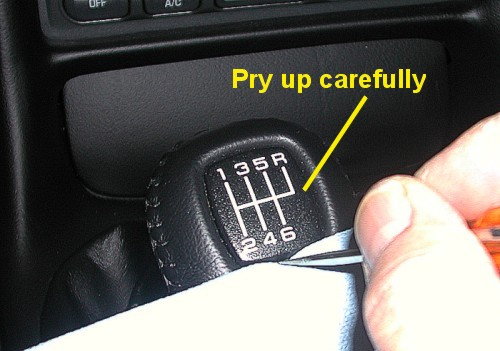
Step 1 – Remove shift knob
Use a flathead screwdriver to pry up the plastic shift pattern on the tip of the shift knob. Use the screwdriver and needle-nose pliers or vise-grips to remove the aluminum pressure pin. Hold the pin in place with the vise-grips or needle-nose pliers, and then position the screwdriver under the tab and pull up. Once you remove the pin, unscrew the shift knob and put it aside. If the pin won't move no matter how hard you pry it up, loosen it using spray lube or a liquid wrench.
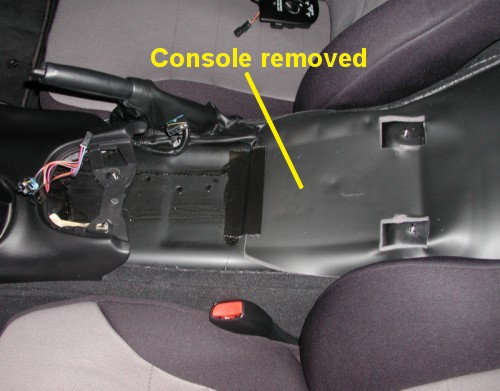
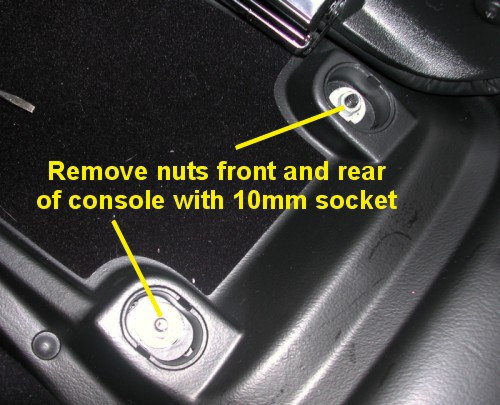
Step 2 – Remove the center console
Lift the center storage bin. You will see two plastic tabs at the rear of the bin. You should be able to lift these tabs up using your fingers. Once you do, you will see two 10mm nuts. Remove these nuts with a 10mm socket wrench.
Step 3 – Expose the shifter and shifter boot
Gently pry up the traction control button trim panel. Disconnect the traction control harness. Depending on the model of your Corvette, you also may need to disconnect the variable suspension selector harness. Disconnect the accessory plug wiring harness and use your socket wrench to remove the pair of 10mm nuts. Use your flathead screwdriver to pry up the interior temperature sensor trim plate, which is to the left of the ignition, and then remove the T15 torx screw. Lift up the ashtray cover and remove the ashtray and pair of T15 torx screws.
If you have a convertible, you also need to remove the waterfall. To do this, unscrew the three T15 torx screws. There is one on top and one on each side of the base of the waterfall. Lift the waterfall up and then set it aside. Slide the center storage bin toward the rear of your car, pop off the center console time plate, and then disconnect and set aside the cigarette lighter harness. At this point, you will see your shifter and shifter boot.
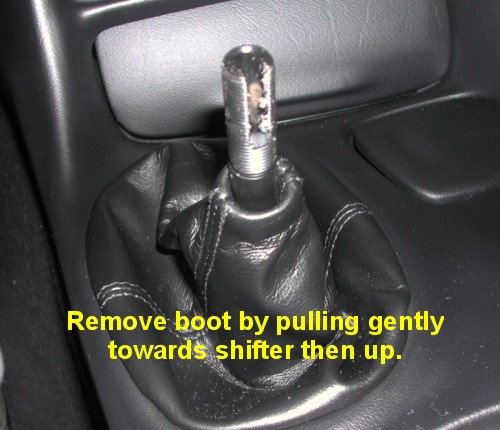
Step 4 – Lift the boot off
Use your socket wrench to remove the four 10mm bolts on the rubber shift boot, and lift the boot off.
Step 5 – Remove the shifter
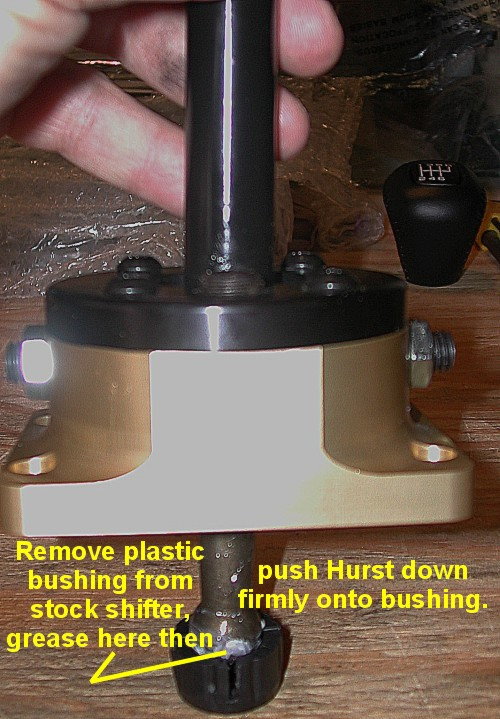
Use the socket wrench to remove the four 10mm bolts at the base of the shifter. Locate and remove the black, plastic insulator at the bottom end of your stock shifter. You'll re-install this when you put in your new shifter. Use 3/8" socket wrench to remove four additional bolts. Grip stock shifter and pull up. Once you remove it, you may need to use a razor blade to remove any old gasket material from the linkage-mounting base. Don't scrape too hard, as you can scratch and damage the base.

Figure 5. Remove 4 10mm bolts at the base of the shifter. 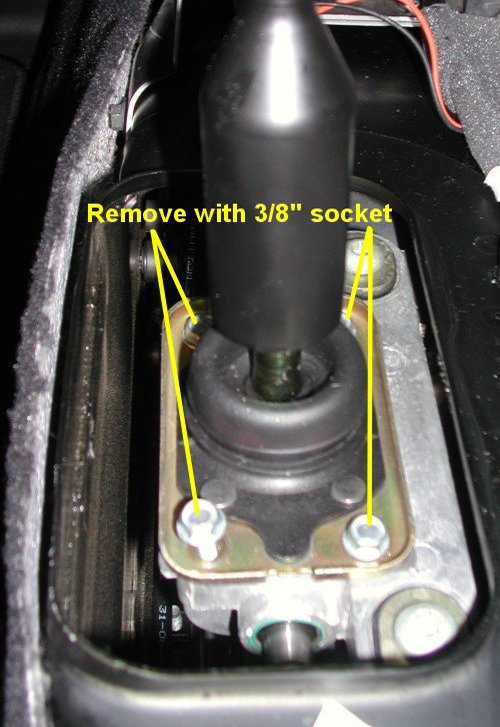
Figure 6. Use 3/8" socket wrench to remove four additional bolts.
Step 6 – Prepare to install the new shifter
Apply a bead of silicone RTV to the base of your new shifter. This will help your shifter slide and fit into place.
Step 7 – Install the new shifter
Install and tighten the four bolts that should come with your shifter. If not, the old bolts will fit. After you hand-tighten each bolt, use a torque screwdriver to tighten to 20-25 foot pounds. Tighten in a cross pattern.
Step 8 – Adjust shift stops
Put shifter into first gear and adjust the front stop. There should be just enough room to slip a postcard between the stop and the shift stalk. Repeat this step for the third gear. Put shifter into second gear and adjust the rear stop. There should be just enough room to slip a postcard between the stop and shift stalk. Repeat this step for the fourth gear. Shift your new shifter several times in each gear to make sure you've set your adjusting screws correctly.
Step 9 – Re-install stock shift boot and replace center console
Put the stock shift boot back in place, and tighten the four 10mm bolts. Put the console trim panel and center console back in place, and reconnect the traction control harness and accessory plug wiring harness. If applicable for your car, reconnect the variable suspension selector harness at this time as well. Tighten all bolts and screws.

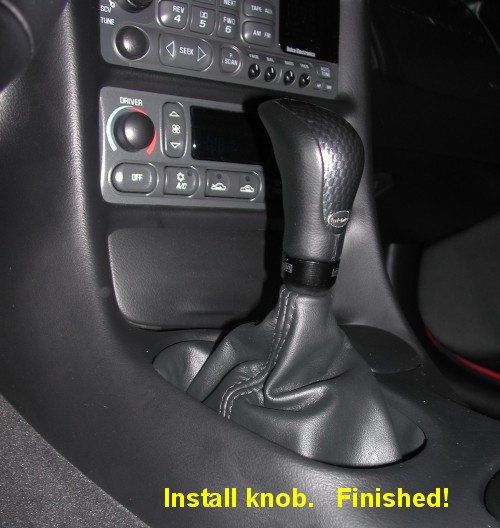
Step 10 – Re-install stock shift knob (optional) and replace pressure pin
Screw on the factory shift knob onto your upgraded shifter (if you're re-using the knob), and then replace the pressure pin. Drive in the pressure pin with a soft mallet. Once you've done this, you're ready to take your car for a test drive and make sure that your shifter works.
Related Discussions, Site and Videos
- How to Install a Short Shifter/Replace a Stock Shifter - CorvetteForum.com
- Want to Replace Stock Shifter Knob - CorvetteForum.com
- C5 Corvette Shifter Removal and Console Removal - YouTube.com
- C6 Corvette Shifter Removal and Console Removal - YouTube.com
- 1997-2004 C5 Corvette Shifter Installation - CorvetteMagazine.com