


Small repair big challenge
Thread Starter
Racer


Joined: Apr 2004
Posts: 370
Likes: 0
New England Events Coordinator
Just tried to repair the drivers side door ajar switch, while unscrewing the switch the threaded mounting piece inside the body dropped. Any thoughts on how to retrieve it, there is only a 7/8in hole inside the hatch opening, I tried a magnet, but I don't think the unit is metal. Does anyone sell a repo, and lastly if I have a unit to re-install any tricks on how to maneuver the unit without dropping it in the body cavity? 
Instructor


Joined: Aug 2008
Posts: 107
Likes: 38
From: Raleigh North Carolina
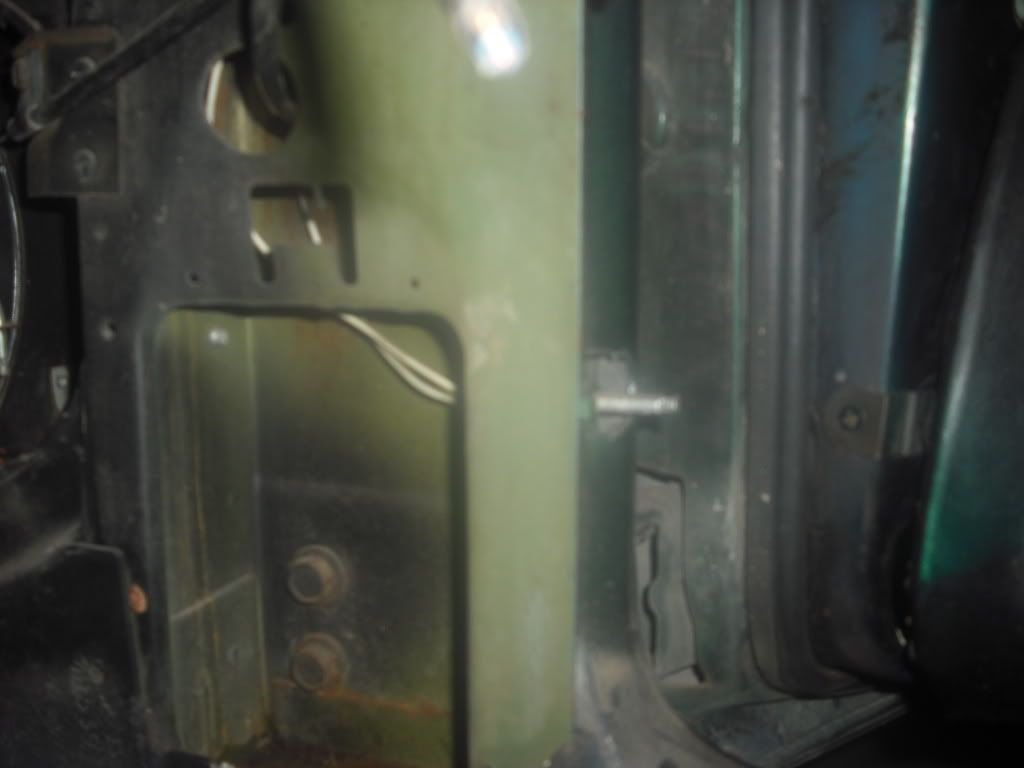
Here is the passenger side of my '70. I'm in the middle off a body of restoration and I gutted the interior awhile back so I'm not sure how much you'll have to remove to get to this cavity but it can be done.

Le Mans Master


Joined: Nov 2004
Posts: 7,850
Likes: 142
From: Tampa, Fl.
Just tried to repair the drivers side door ajar switch, while unscrewing the switch the threaded mounting piece inside the body dropped. Any thoughts on how to retrieve it, there is only a 7/8in hole inside the hatch opening, I tried a magnet, but I don't think the unit is metal. Does anyone sell a repo, and lastly if I have a unit to re-install any tricks on how to maneuver the unit without dropping it in the body cavity?
Thread Starter
Racer
Joined: Apr 2004
Posts: 370
Likes: 0
New England Events Coordinator
Hi Chuckie, I did remove the inspection cover and in this pocket area reveals a small round opening about 7/8 in round into the body cavity where the wires enter to the switch/mounting unit. I removed the switch and realized the rivets were no longer holding the threaded unit to the body and it dropped. I was hoping I could buy the threaded piece and at least have a try at sliding it into the cavity and re-rivet. but no where can I find a replacement.
Burning Brakes


Joined: Jan 2009
Posts: 766
Likes: 97
From: Lake Norman, NC
I just encountered the same problem, just 2 weeks before national judging. After getting over the panic, I set to work and found a creative way to repair.
As stated in a previous post, I removed the rear wheel and the access panel in the wheel well. I removed the wires from the switch and pulled them out through the second hole in the body (at access opening). I took a bezel nut (the large dia, thin nut that holds your radio stems into the guage cluster) and reworked the threads with a 3/8" X 24 tap. I then took a 4" long, 3/8" X 24 bolt and after wiping grease on the threads, I inserted it in through the hole in the door jamb. Before pushing the bolt in through the hole, I ran a second nut all the way up the threads for later use. I pushed the bolt through the second hole and after carefully applying JB Weld to the outer face of the bezel nut, I started the bezel nut onto the end of the grease-covered bolt. I pulled the bolt back out, causing the JB Weld to contact the back side of the fiberglass jamb, where the threaded mounting bracket had been. I ran the jam nut down to the now tape-covered jam (tape was applied to protect the painted jamb surface). This, of course, clamped the bezel nut in place while the epoxy set up. During the cure time, I occasionally turned the greased bolt to ensure that the bolt didnt end up glued to the bezel nut.
Make sense so far?
After I was certain that the epoxy had fully cured, I removed the bolt and saw that the bezel nut was securely (abeit differently than originally designed) to the back side of the door jamb. From the outside, the threads in the bezel nut look just like the bracket that had once been there. I re-assembled the wiring to the switch and with blue loctite, re-threaded the switch into adjustment. All worked perfectly and the fix was done.
Whew!! Another catastrophe averted. Got it all done and the fix left no scars. Judging went well. The switch looks exact and works perfectly!
BTW, I decided to use a bezel nut because it has more surface area for JB Weld application.
Hope this helps!!!
Last edited by redrdstr72; Aug 17, 2011 at 08:02 AM.
Corvette Stories
The Best of Corvette for Corvette Enthusiasts

Top 10 Most Expensive Corvettes Ever Sold on Bring A Trailer
Brett Foote
10 Things Every Corvette Owner Needs (2026 Edition)
Michael S. Palmer
8 Most "Only Corvette Owners Understand" Quirks and Problems
Pouria Savadkouei
10 Reasons the C6 Z06 is Still A Performance Benchmark After 20 Years
Joe Kucinski
How Much Horsepower Every Corvette Engine "LOST" in 1972
Joe Kucinski
Top 10 DOs and DON'Ts for Protecting Your Convertible Top!
Michael S. Palmer
Top 10 Most Explosive Corvettes Ever Made: Power-to-Weight Ratio Ranked!
Joe Kucinski
150 hp to 1,250 hp: Every Corvette Generation Compared by the Specs That Matter
Joe Kucinski
8 Coolest Corvette Pace Cars (and Replicas) of All Time
Verdad Gallardo
Thread Starter
Racer
Joined: Apr 2004
Posts: 370
Likes: 0
New England Events Coordinator
Yeah, Bluethundr, I was thinking that my brother in law (welder skills), can weld a correct size nut to a plate. Then with a guide wire thru the plate (to keep it from dropping inside) passed from the inside the inspection area out thru the fiberglass body opening. Tie a lg knot at the back end pull, this will pull the plate up against the inside of the body, pop rivet done. Sounds good, now I have to get working.


Thread Starter
Racer
Joined: Apr 2004
Posts: 370
Likes: 0
New England Events Coordinator
Great pic HW, I purchased a 24 inch pick up tool hoping to fish down the channel, after looking at your pic I realize that I need to fish outside to the right of the channel. Not sure I can get there from the top, the vert has access to the channel at the top though.
Thread Starter
Racer
Joined: Apr 2004
Posts: 370
Likes: 0
New England Events Coordinator
Just thinking about why this happened, I have a rubber bumper on the door that may be over sized. Every time the door closes it has been pushing the unit right off the rivets. Ugh!
Thread Starter
Racer
Joined: Apr 2004
Posts: 370
Likes: 0
New England Events Coordinator
Well being a determined bugger, I was floundering in my work shop and came up with a solution. A bracket used to hang lighting was a perfect fit for the switch (see pic), then I fabricated it (see pic two), then I installed it (see pic three). Installation with a long stiff wire through the access panel with a knot at the end to allow tension to pull the plate against the inside of the body, popped a few rivets and presto. Two working "door adjar" switches.


Racer

Joined: Oct 2016
Posts: 336
Likes: 69
From: Staten Island New York
Last edited by MISTERZ06; May 1, 2017 at 09:53 PM. Reason: GRAMMAR
