


1973 Corvette Convertible Resto
Thread Starter
Drifting


Joined: Aug 2003
Posts: 1,868
Likes: 13
From: Mascoutah IL
Seeing as I am now in the "put back together mode" figured I would start a resto thread and combine my previous threads and finish out under this title...
About me: Air Force Officer stationed at Nellis AFB, NV... Been in the AF for 26+ years... Have a 3-car garage (thank goodness) as the Vette is taking up all three stalls...
Car: 1973 Convertible, 86K original miles, original motor, TH400, PS and AC... Bought site unseen from a dealer in NC and had shipped to me (very scary)... Needed power steering rebuild and pinion seal, so what the heck, might as well pull the body (probably not the first knucklehead to do this and certainly won't be the last)!!
Started on this during the last week of July 2011, so a little more than 8 weeks in... Here are a few previous threads:
#4 mounts okay or replace
Took motor to the machine shop today
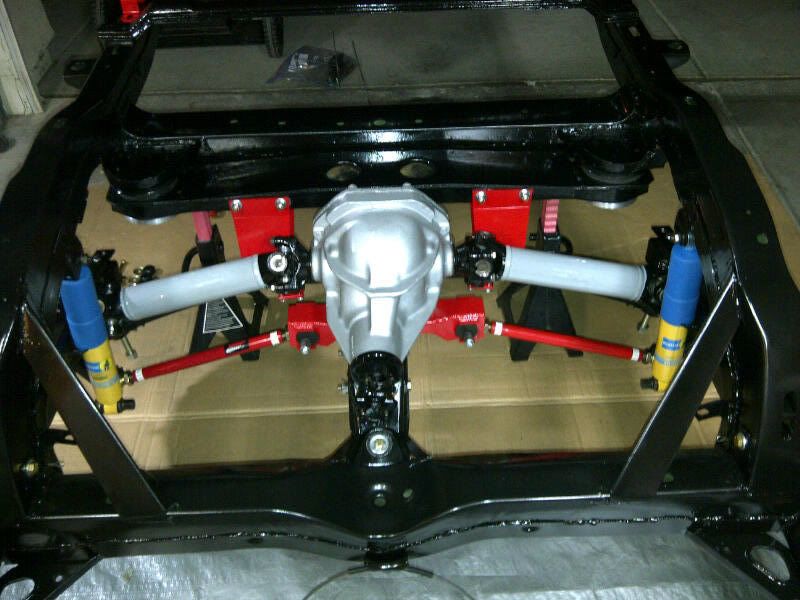
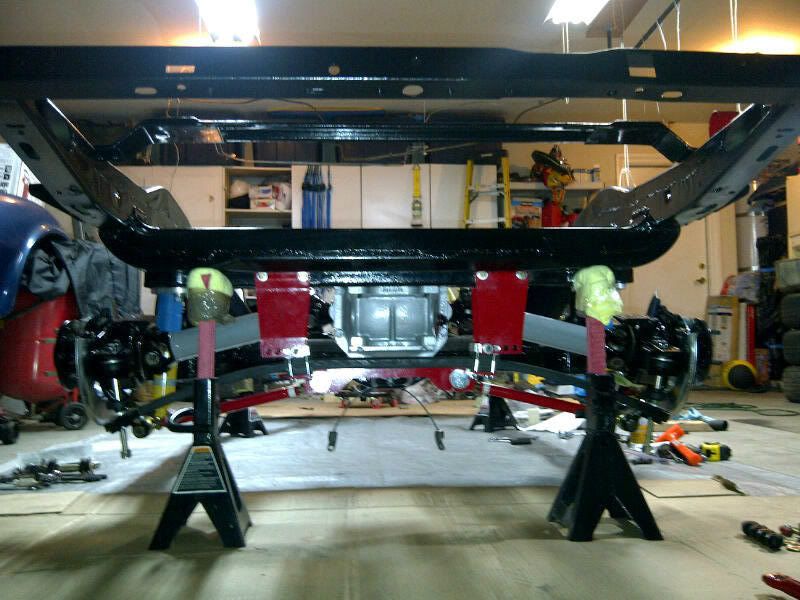
Painted the frame last weekend and placed on jack stands last night... Have worked this morning to start putting the front suspension back together... Glad to be able to open that garage door again...
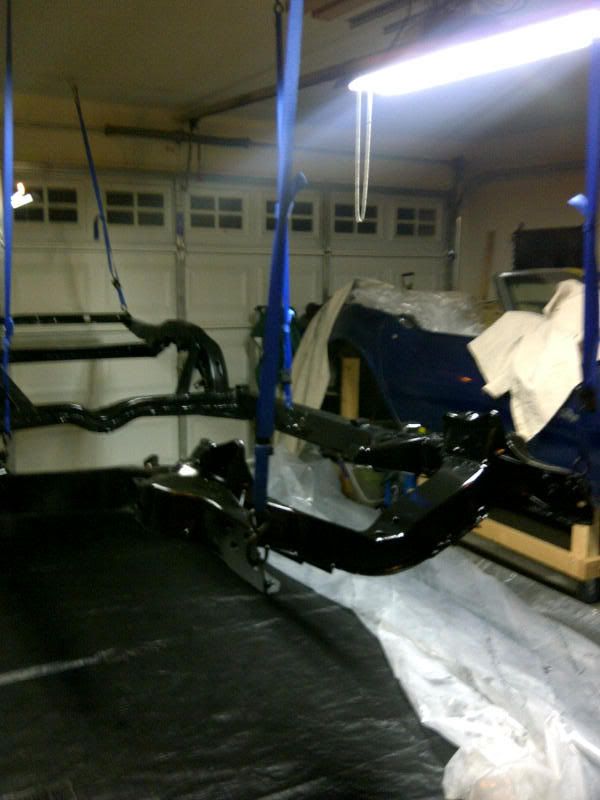
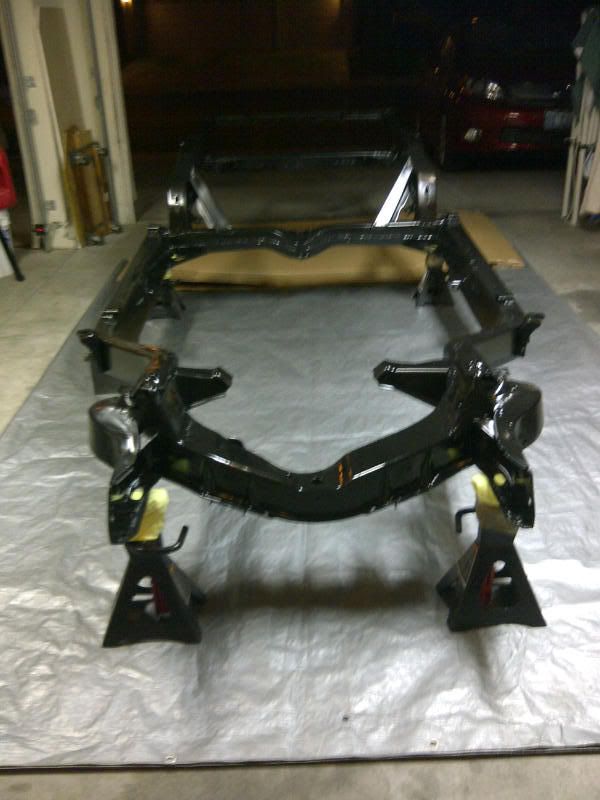
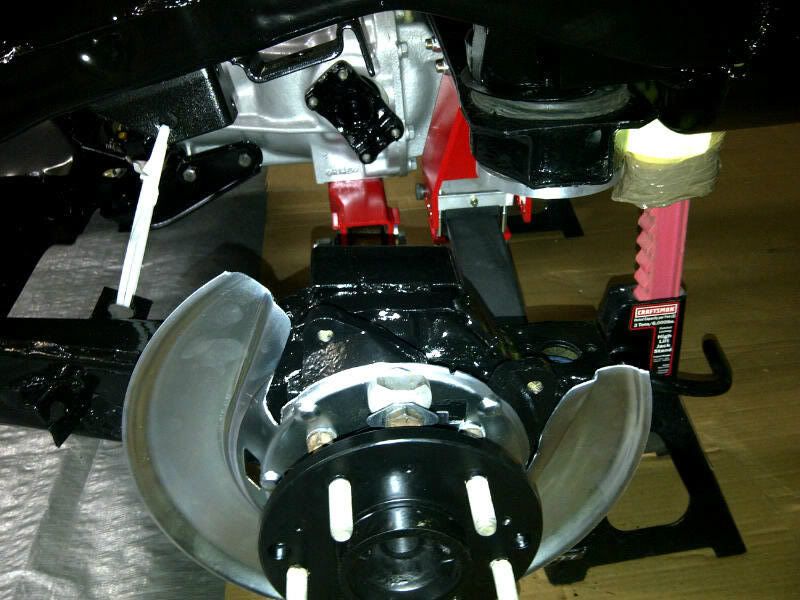
Here's the front suspension:
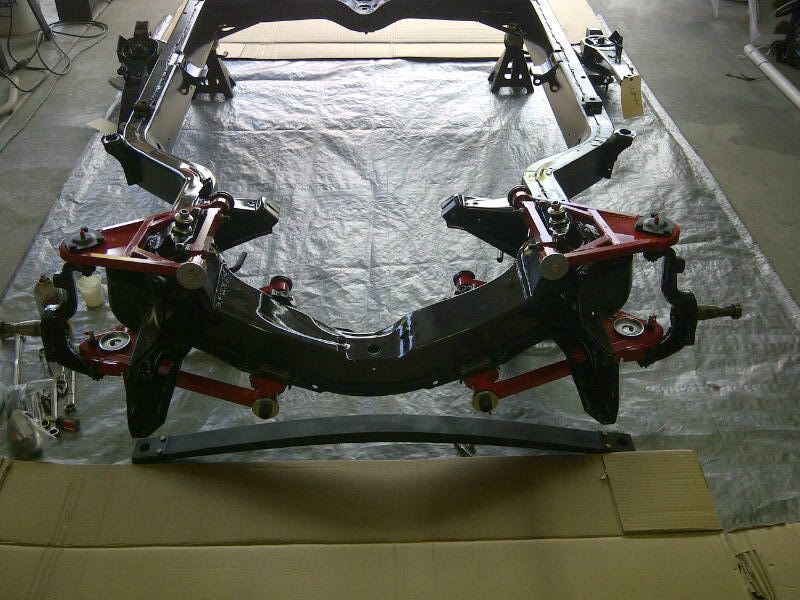
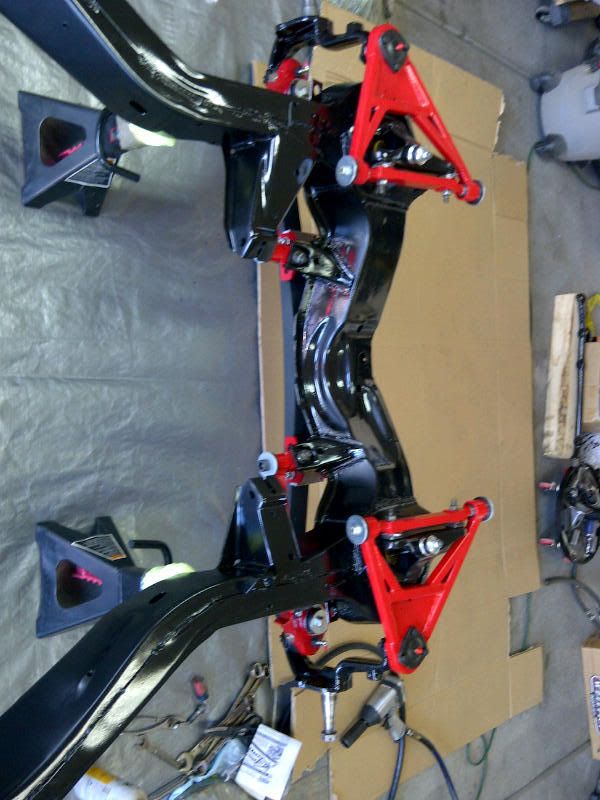
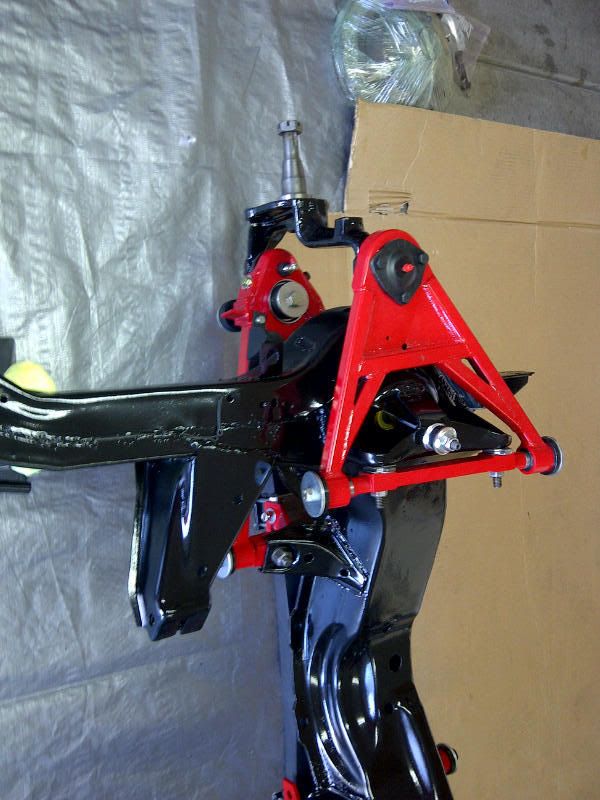
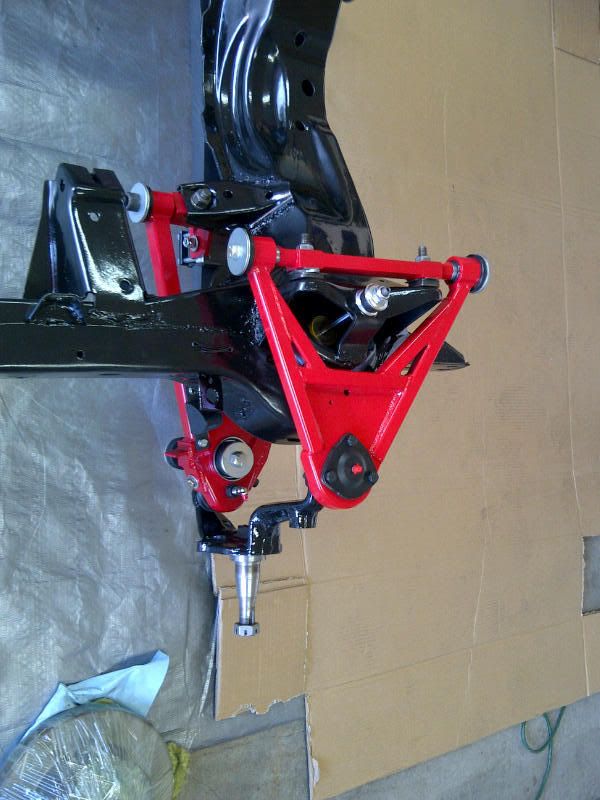
The front mono spring is resting against the frame... Is this normal or did I put the joker on wrong?? Looks like it will move away once there is some weight on the frame, but that's probably still a couple fo weeks away... Any issues with this resting on the frame for a few weeks??
Off to go install differential, trailing arms and rear suspension...
Still contemplating whether to rebuild steering box and use the original steering setup... Have all the rebuild parts from VB&P other than rebuilding the steering box and rag joint... Have looked at either steeriods or the flaming river r/p kit... Opinions?? Know how you guys like to spend our money
Should get the motor and transmissions back from the rebuild shops in a week or two... Nothing crazy on either, just good solid rebuilds on both... Will post pictures once I get these two back...
Rogman
About me: Air Force Officer
stationed at Nellis AFB, NV... Been in the AF for 26+ years... Have a 3-car garage (thank goodness) as the Vette is taking up all three stalls...Car: 1973 Convertible, 86K original miles, original motor, TH400, PS and AC... Bought site unseen from a dealer in NC and had shipped to me (very scary)... Needed power steering rebuild and pinion seal, so what the heck, might as well pull the body (probably not the first knucklehead to do this and certainly won't be the last)!!
Started on this during the last week of July 2011, so a little more than 8 weeks in... Here are a few previous threads:
#4 mounts okay or replace
Took motor to the machine shop today
Painted the frame last weekend and placed on jack stands last night... Have worked this morning to start putting the front suspension back together... Glad to be able to open that garage door again...
Here's the front suspension:
The front mono spring is resting against the frame... Is this normal or did I put the joker on wrong?? Looks like it will move away once there is some weight on the frame, but that's probably still a couple fo weeks away... Any issues with this resting on the frame for a few weeks??
Off to go install differential, trailing arms and rear suspension...
Still contemplating whether to rebuild steering box and use the original steering setup... Have all the rebuild parts from VB&P other than rebuilding the steering box and rag joint... Have looked at either steeriods or the flaming river r/p kit... Opinions?? Know how you guys like to spend our money
Should get the motor and transmissions back from the rebuild shops in a week or two... Nothing crazy on either, just good solid rebuilds on both... Will post pictures once I get these two back...
Rogman
Thread Starter
Drifting
Joined: Aug 2003
Posts: 1,868
Likes: 13
From: Mascoutah IL
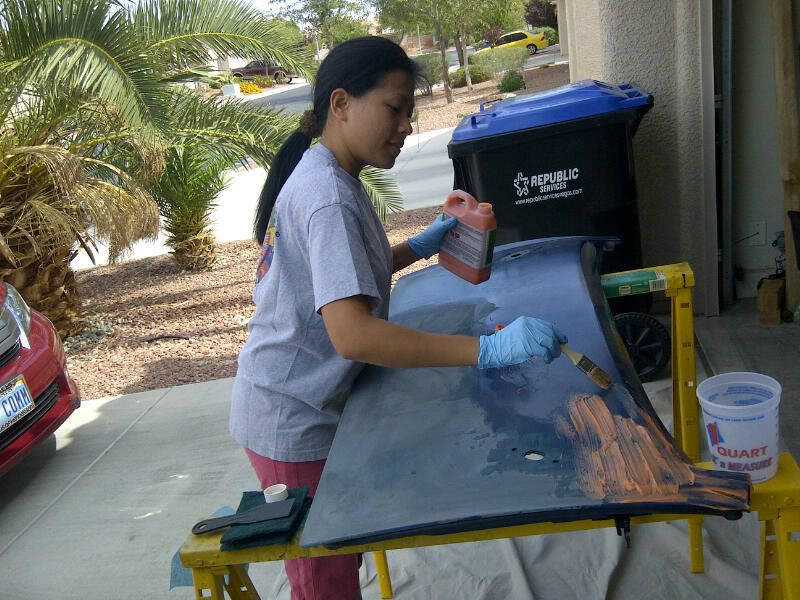
She is very understanding... She actually has been helping with cleaning a lot of the small parts... She is going to try her hand today at stripping paint (gonna let her do the convertible hatch today)...
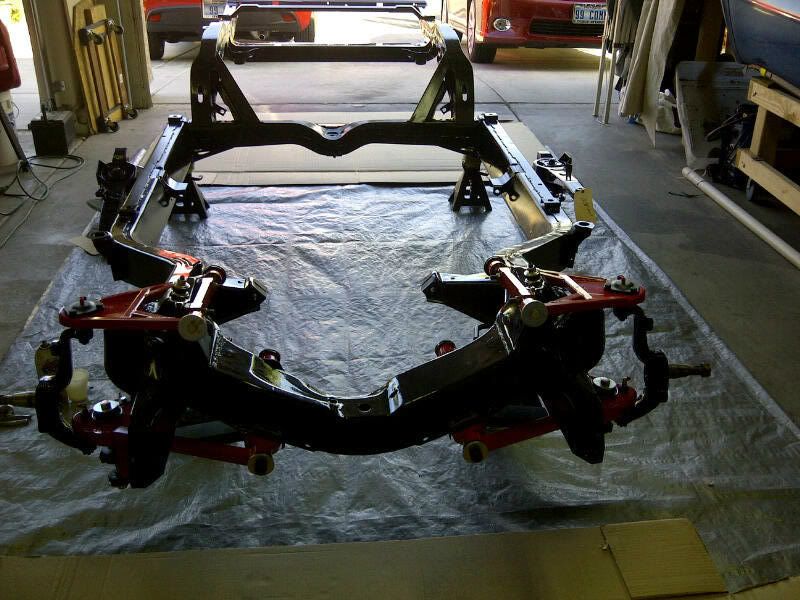
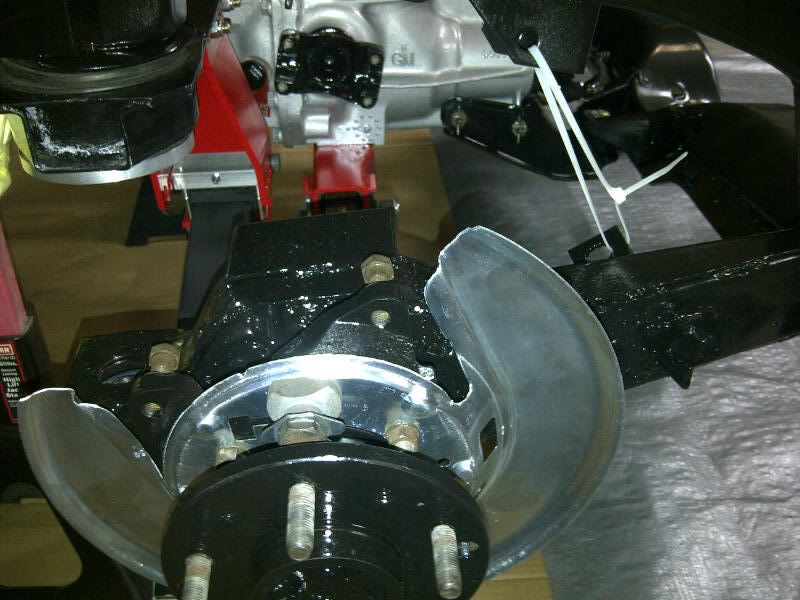
Here's a few more pictures from the rear suspension...

Rogman
Here's a few more pictures from the rear suspension...
Rogman
Thread Starter
Drifting
Joined: Aug 2003
Posts: 1,868
Likes: 13
From: Mascoutah IL
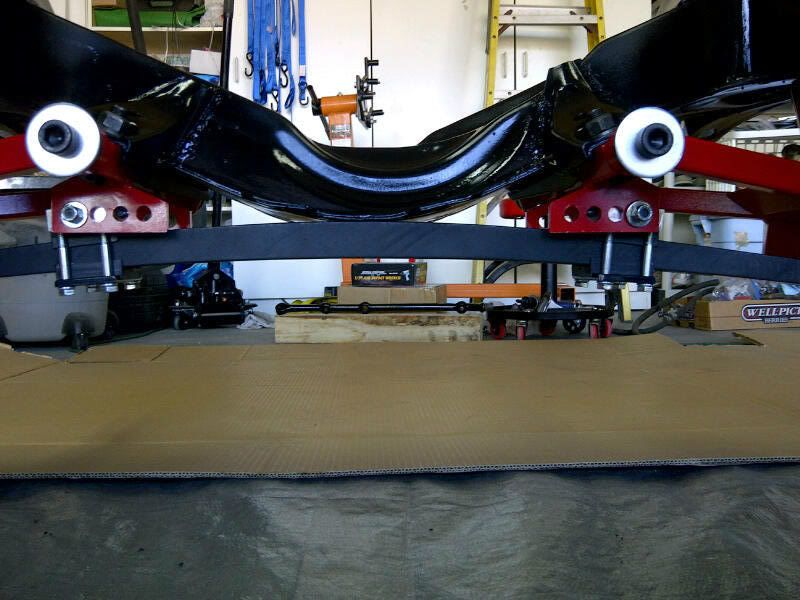
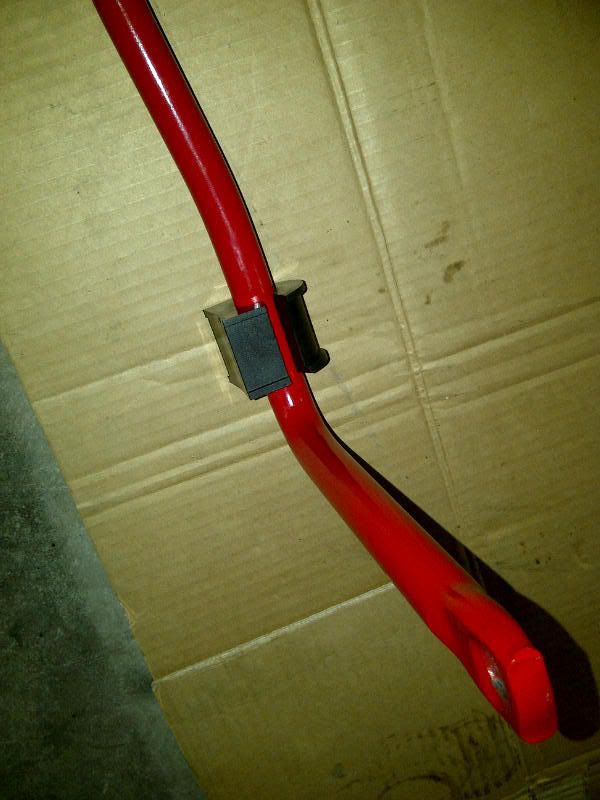
Please take a look at the gap on the rear cross member bushing... Have this gap on both sides... Is this gap supposed to be there?? The studs are torqued to 100 ft lbs of torque... Just want to ensure this is the way it is supposed to be before I go any further...
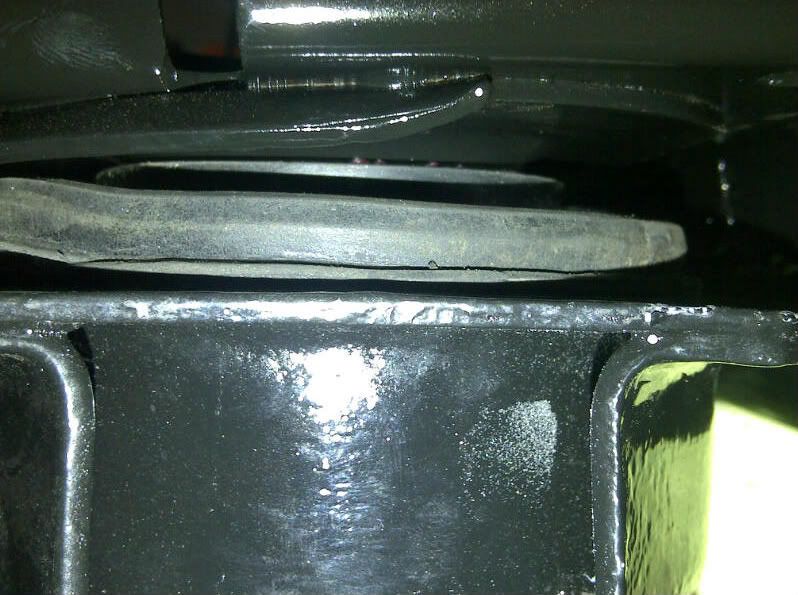
Thanks much
Rogman
Thanks much
Rogman
Drifting


Joined: Jan 2006
Posts: 1,832
Likes: 38
From: Cedar,BC
 I just rolled my 73 basketcase that has been waiting around for a few years into the shop.Frame was blasted and painted,suspension and SBC rebuilt,then set aside as I moved to the coast and built a new shop while collecting more bits and pieces.Guess I'll have to start my own thread too...
Corvette Stories
The Best of Corvette for Corvette Enthusiasts

10 Reasons the C6 Z06 is Still A Performance Benchmark After 20 Years
Joe Kucinski
How Much Horsepower Every Corvette Engine "LOST" in 1972
Joe Kucinski
Top 10 DOs and DON'Ts for Protecting Your Convertible Top!
Michael S. Palmer
Top 10 Most Explosive Corvettes Ever Made: Power-to-Weight Ratio Ranked!
Joe Kucinski
150 hp to 1,250 hp: Every Corvette Generation Compared by the Specs That Matter
Joe Kucinski
8 Coolest Corvette Pace Cars (and Replicas) of All Time
Verdad Gallardo
Top 10 Corvette Engines RANKED by Peak Torque (70+ Years of Muscle!)
Joe Kucinski
Corvette ZR1X Will Be Pacing the Indy 500, And Could Probably Race, Too!
Verdad Gallardo
Top 10 Corvettes Coming to Mecum Indy 2026!
Brett Foote
Thread Starter
Drifting
Joined: Aug 2003
Posts: 1,868
Likes: 13
From: Mascoutah IL
Thread Starter
Drifting
Joined: Aug 2003
Posts: 1,868
Likes: 13
From: Mascoutah IL
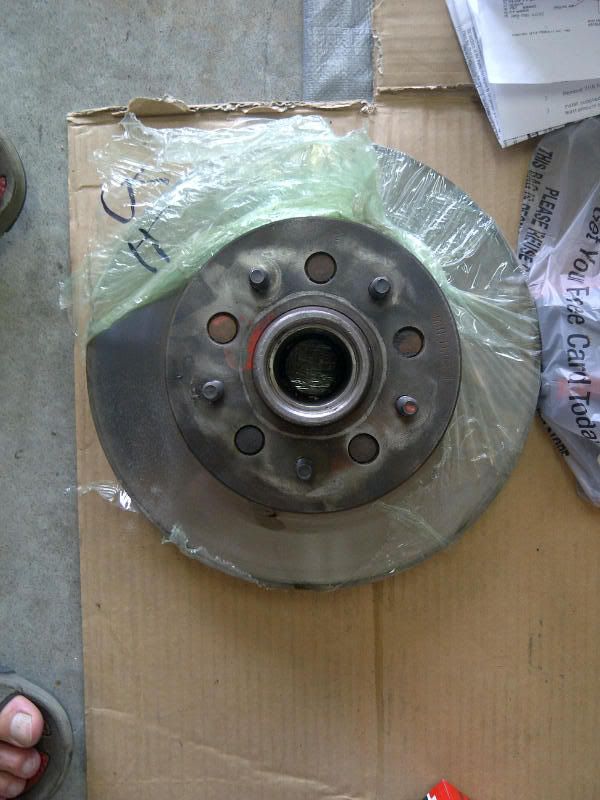
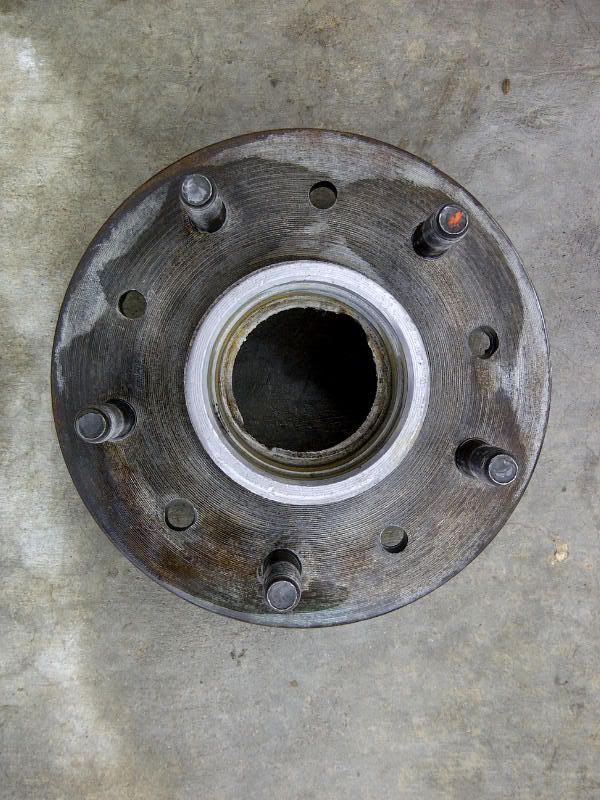
As I worked on drilling out the rivets on the front rotors:
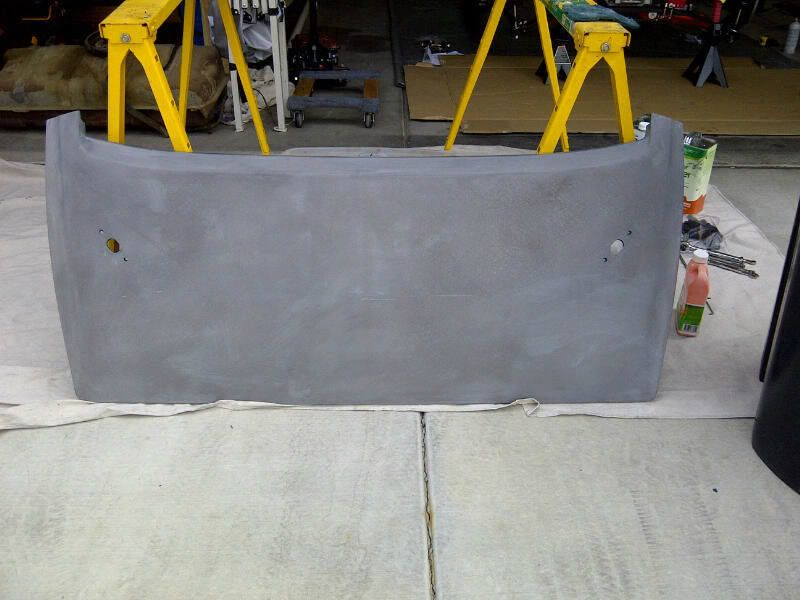
My wife (yes the understanding wife) stripped the paint off the vert hatch... She did a very good job  :
:
Plan is to get a couple of coats of paint on the front bearing assembly carriers so I can put the new bearings in and mount tomorrow night... Have to go drill the rivets out of the left front after I get caught up on the football games and NASCAR race... Will try to install rear half shafts and rear sway bar later tonight as well (if I have the energy)...
No comments on stock steering, steeroids or flaming river rack-n-pinion??
Rogman
My wife (yes the understanding wife
) stripped the paint off the vert hatch... She did a very good job :Plan is to get a couple of coats of paint on the front bearing assembly carriers so I can put the new bearings in and mount tomorrow night... Have to go drill the rivets out of the left front after I get caught up on the football games and NASCAR race
... Will try to install rear half shafts and rear sway bar later tonight as well (if I have the energy)...No comments on stock steering, steeroids or flaming river rack-n-pinion??
Rogman
Last edited by rogman16; Oct 3, 2011 at 12:44 AM. Reason: Changed Picture Orientation
Thread Starter
Drifting
Joined: Aug 2003
Posts: 1,868
Likes: 13
From: Mascoutah IL
Got the half shafts on, rear shocks and was going for the tri-fecta with the rear sway bar, but looks like I got the wrong bushings for the rear sway bar... Will have to call VB&P tomorrow (dreading this)...
Rogman
Rogman
Thread Starter
Drifting
Joined: Aug 2003
Posts: 1,868
Likes: 13
From: Mascoutah IL
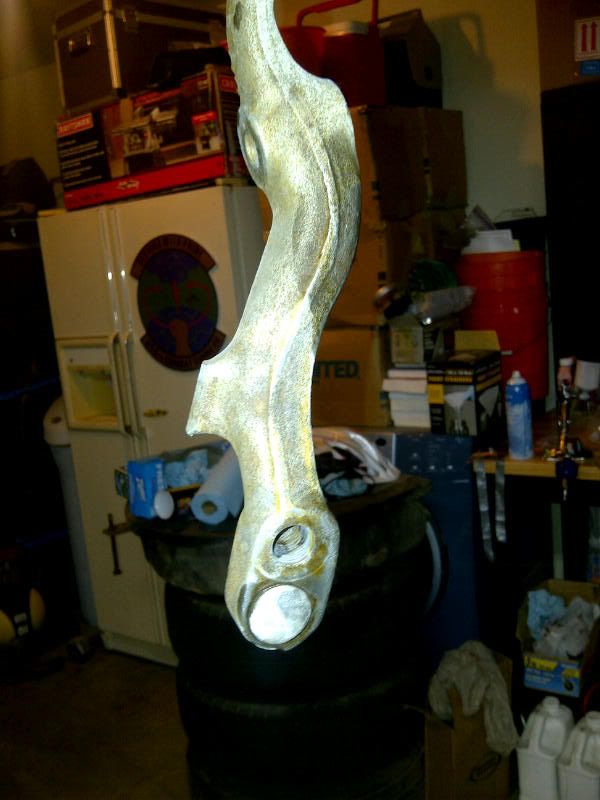
Haven't got too much accomplished over the past couple of days... Got some more parts painted, and found out it looks like I'll be picking the engine and tranny up from their respective shops at the end of the week... I've seen a couple of pictures of the stock steering systems with the double holes in the arm that attaches to the spindle assembly... My left arm has an aluminum rivet in the outer hole... Did it come this way from the factory?? It helps me keep right from left sorted out, just wonder if Bubba put it in there or they came that way from the factory...
Second questions is on an exhaust system... I really like the MagnaFlow 16841... Problem is, it is for a 73 big block... I can get McJack's headers with 2.5" exits, but what else could bite me on this?? I can't imagine more than a 6" difference in where this system would hook up to a small versus big block... Any differences in the tranny cross member or rear exit area?? Thanks much, Rogman
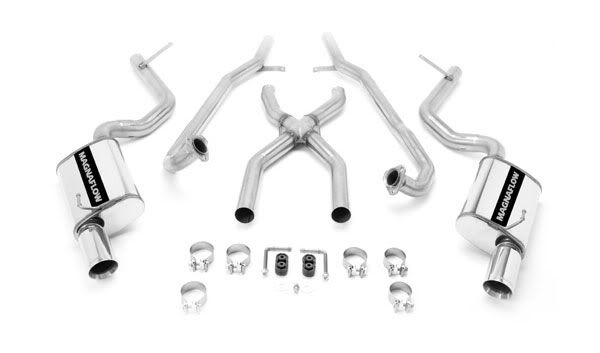
Second questions is on an exhaust system... I really like the MagnaFlow 16841... Problem is, it is for a 73 big block... I can get McJack's headers with 2.5" exits, but what else could bite me on this?? I can't imagine more than a 6" difference in where this system would hook up to a small versus big block... Any differences in the tranny cross member or rear exit area?? Thanks much, Rogman
Drifting
Joined: Jul 2002
Posts: 1,944
Likes: 20
From: The only Corvettes in Highett Victoria
Rogman,
I'd recommend a Borgeson steering box, www.borgeson.com, and you won't look back. Apart from looking like it was fitted at the factory, it will take a lot less time to fit than a R&P, and will retain the factory steering lock, unlike the R&P, and will have little or no bumpsteer, unlike the R&P.
It will also cost about half the price and in the opinion of many Corvette owners, is a stronger and far better system. If your car is not a factory power steer car, you will need a new pump, also available from Borgeson, and two new hoses. If it has a pump, all you need is a new Borgeson (two) hose kit.
One more thing, I noticed that you have left the parking brake brackets on the trailing arms. While you have the body off and can easily get to the TA retaining bolts, now is a good time to consider moving the brackets to the top of the TA. If you ever decide to fit wider wheels with a bigger than factory backspacing, you will be glad you did.
You can probably cut them off and re-weld them with the TAs in the car and all you'll need to do is touch up a little paint. Think about it.
I like what you're doing, keep the photos coming.
Regards from Down Under.
aussiejohn


Thread Starter
Drifting
Joined: Aug 2003
Posts: 1,868
Likes: 13
From: Mascoutah IL
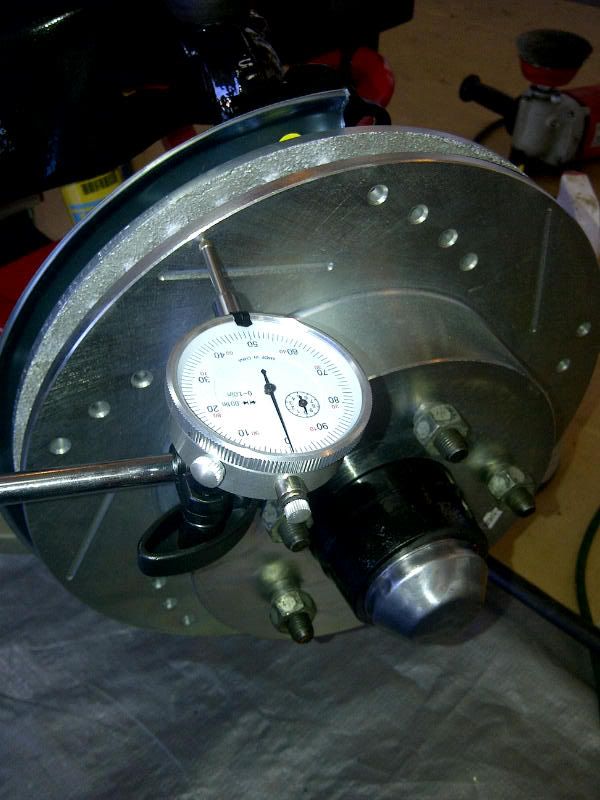
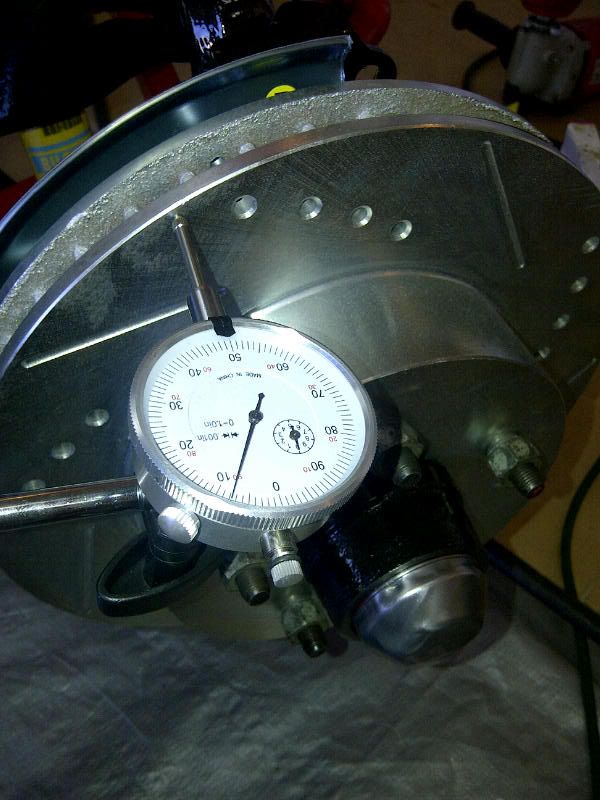
Trying to get my rotor run out within specs... Setup the dial, carefully rotated the rotor, captured the read-outs and repeated by rotating the rotor clockwise on the other four possible positions to see if any were better than others...
All were within either .007 or .008... So going with the .007 setup, know I will need a brass shim on the low side... What size should I start with??? More importantly, where is the best place to get the shims???
Any help would be greatly appreciated...
Thanks
Rogman
All were within either .007 or .008... So going with the .007 setup, know I will need a brass shim on the low side... What size should I start with??? More importantly, where is the best place to get the shims???
Any help would be greatly appreciated...
Thanks
Rogman
Burning Brakes


Joined: Jul 2009
Posts: 912
Likes: 47
From: Kansas City MO
[QUOTE=rogman16;1578877415]My left arm has an aluminum rivet in the outer hole... Did it come this way from the factory?? It helps me keep right from left sorted out, just wonder if Bubba put it in there or they came that way from the factory...
Guys, correct me if i'm wrong, but I believe the aluminum rivet plugs the hole that would have been used for non-power steering vettes? The inner (open) hole is for power steering, outer = non-power steering...
Guys, correct me if i'm wrong, but I believe the aluminum rivet plugs the hole that would have been used for non-power steering vettes? The inner (open) hole is for power steering, outer = non-power steering...
TheCorvetteBen

Joined: Feb 2007
Posts: 4,987
Likes: 144
From: Van Alstyne, TX
[QUOTE=spdrcr29;1578917249]
That is correct. It all depended on if your car had power steering or not
My left arm has an aluminum rivet in the outer hole... Did it come this way from the factory?? It helps me keep right from left sorted out, just wonder if Bubba put it in there or they came that way from the factory...
Guys, correct me if i'm wrong, but I believe the aluminum rivet plugs the hole that would have been used for non-power steering vettes? The inner (open) hole is for power steering, outer = non-power steering...
Guys, correct me if i'm wrong, but I believe the aluminum rivet plugs the hole that would have been used for non-power steering vettes? The inner (open) hole is for power steering, outer = non-power steering...
That is correct. It all depended on if your car had power steering or not
Thread Starter
Drifting
Joined: Aug 2003
Posts: 1,868
Likes: 13
From: Mascoutah IL
Got a lot accomplished over the weekend... After seeing Stinger using aluminum cans for shims to get the runout, I was able to finish 3 of 4 today (all within .002, which I was very happy with)... The front left is giving me fits, so I just took a break and will go after it tomorrow... Got the parking brakes installed, boy, I wouldn't want to make a living put these buggers on...
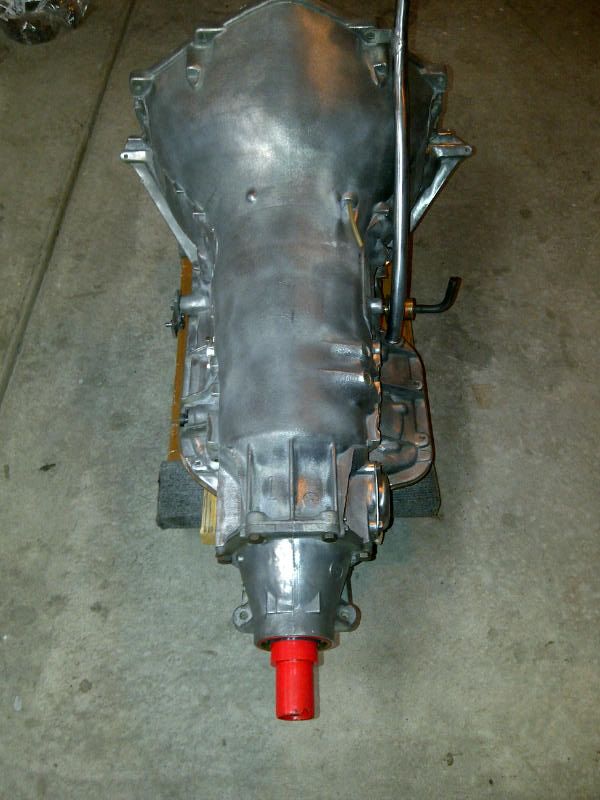
Picked up the motor and transmission from their respective shops... Transmission was a straight rebuild with a "mild" shift kit... Stock converter was redone and checked out okay...
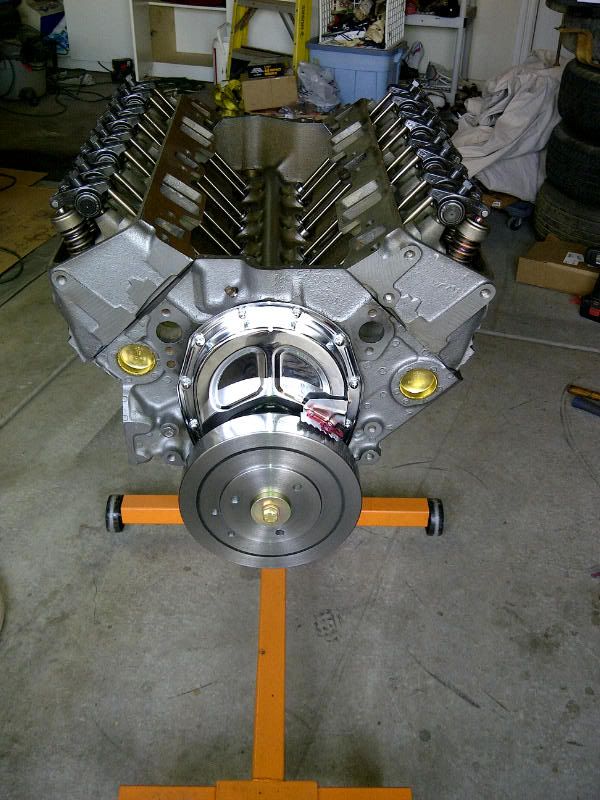
Engine--crank just needed a good polishing... Piston bore was close to being within tolerances, but the machine shop recommended .030 over... Mild cam, double roller timing chain, McJack's Headers, 2.5" Allen's exhaust, GM Perfomance aluminum intake, Summit HEI Distributer w/mech tach, Comp Cams Ultra Pro Magnum� Roller Rocker Arms... Original heads re-worked and new valve springs installed... Waiting on engine paint to be delivered... As soon as I get the paint on it, will mount the engine and transmission back in the frame...
Slowly but surely, seemingly making some progress...
Rogman
Picked up the motor and transmission from their respective shops... Transmission was a straight rebuild with a "mild" shift kit... Stock converter was redone and checked out okay...
Engine--crank just needed a good polishing... Piston bore was close to being within tolerances, but the machine shop recommended .030 over... Mild cam, double roller timing chain, McJack's Headers, 2.5" Allen's exhaust, GM Perfomance aluminum intake, Summit HEI Distributer w/mech tach, Comp Cams Ultra Pro Magnum� Roller Rocker Arms... Original heads re-worked and new valve springs installed... Waiting on engine paint to be delivered... As soon as I get the paint on it, will mount the engine and transmission back in the frame...
Slowly but surely, seemingly making some progress...
Rogman