


1973 Corvette Convertible Resto
Thread Starter
Drifting


Joined: Aug 2003
Posts: 1,868
Likes: 13
From: Mascoutah IL
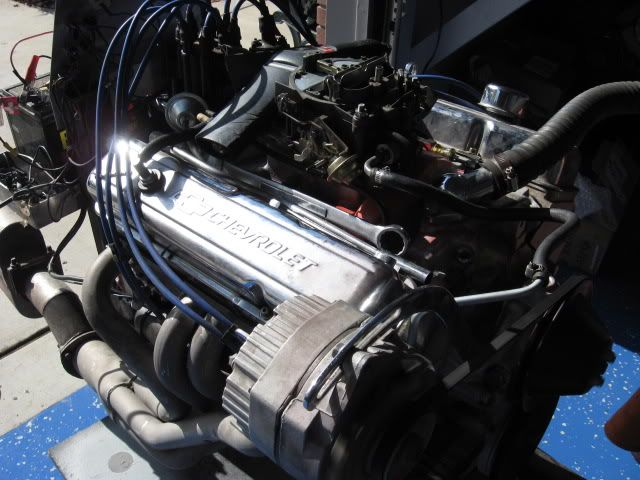
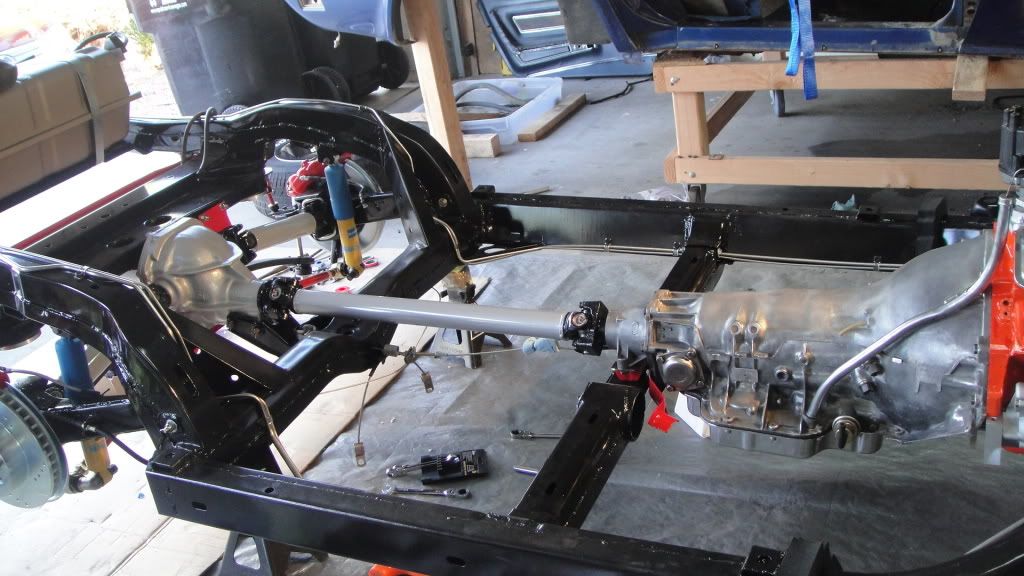
Okay, a little progress update... Actually have the wheels/tires on the frame and it is "starting" to look like this could be a car again  !! Got a few more pieces added to the engine and think I may lower it in the frame today and hook-up the transmission and cross member... Once my new fuel/brake lines get in... I'll just lower the cross member to install...
About to install the intake, water pump and valve covers to the engine... What (if any) adhesives should I apply to those gaskets before install??? The guy at NAPA recommended Super Black RTV for the water pump and valve covers... For the intake, he recommended to leave the sides "dry" and put the RTV on the four corners AND USE the end rubber gaskets... Know most folks on this forum just use straight RTV on the ends, but thought I would ask before I go out there and install...
Thoughts??? Thanks much...
!! Got a few more pieces added to the engine and think I may lower it in the frame today and hook-up the transmission and cross member... Once my new fuel/brake lines get in... I'll just lower the cross member to install...About to install the intake, water pump and valve covers to the engine... What (if any) adhesives should I apply to those gaskets before install??? The guy at NAPA recommended Super Black RTV for the water pump and valve covers... For the intake, he recommended to leave the sides "dry" and put the RTV on the four corners AND USE the end rubber gaskets... Know most folks on this forum just use straight RTV on the ends, but thought I would ask before I go out there and install...
Thoughts??? Thanks much...
Thread Starter
Drifting
Joined: Aug 2003
Posts: 1,868
Likes: 13
From: Mascoutah IL
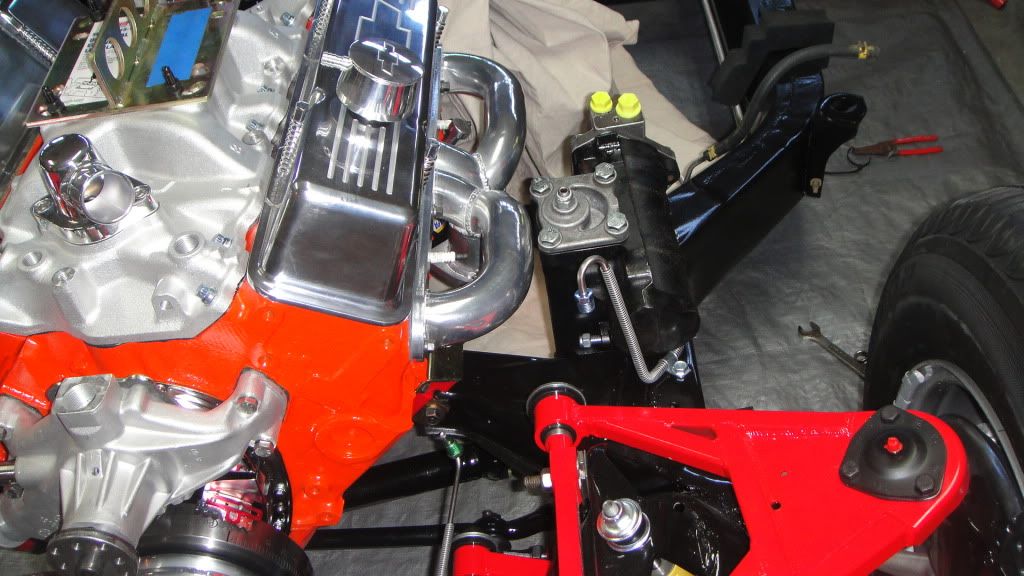
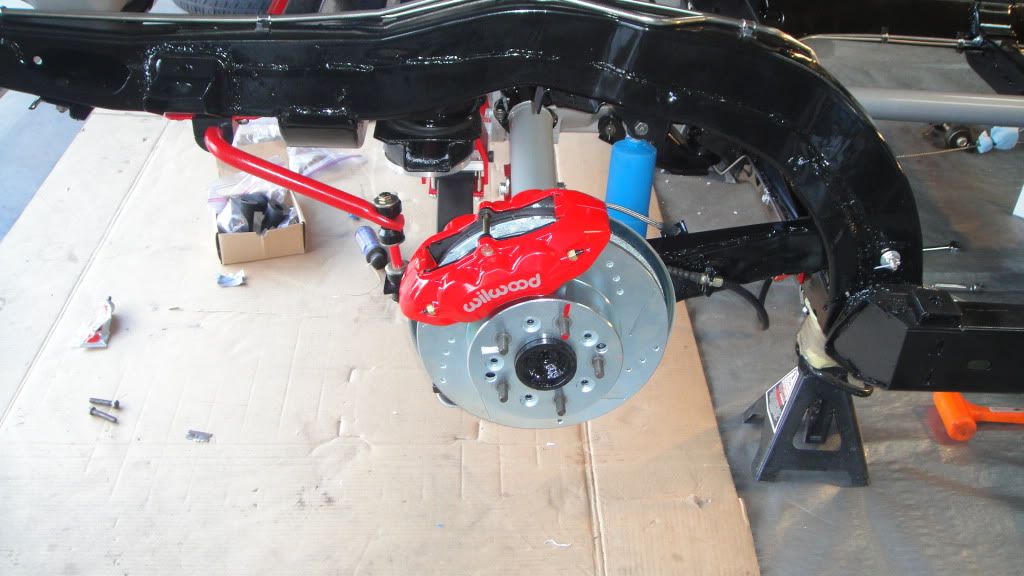
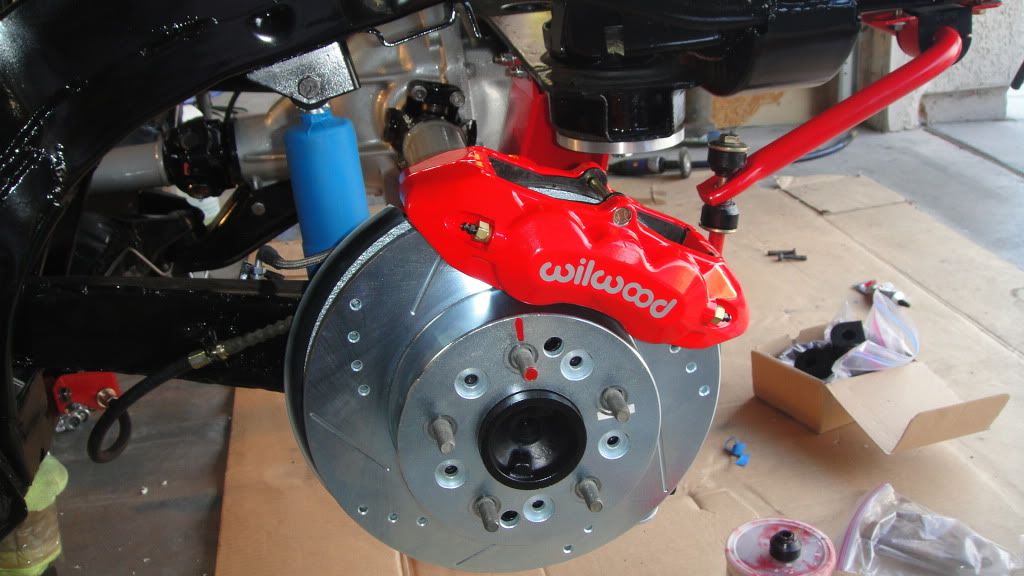
Thanks Sun... Was able to get the engine and transmission put in the frame today... Took a little while to get the second motor mount lined up, but wasn't too much of an issue... Check out the perfect alignment (NOT) on those front wheels ...
Go TDY tomorrow to Mississippi for a week, so won't get anything accomplished next week... Other than maybe getting a few things ordered and shipped to the house... The UPS and FEDEX drivers must wonder if I'm running a business out of my house with all the packages I receive...
Rogman
...Go TDY tomorrow to Mississippi for a week, so won't get anything accomplished next week... Other than maybe getting a few things ordered and shipped to the house... The UPS and FEDEX drivers must wonder if I'm running a business out of my house with all the packages I receive...
Rogman
Drifting


Joined: Jan 2006
Posts: 1,832
Likes: 38
From: Cedar,BC

I wouldn't take your parts guy's advice unless you want to chase down the inevitable oil leaks...
water pump-light skim of black RTV
valve covers-contact cement the gaskets to the covers,dry on the heads
intake-set those end gaskets on fire or throw them as far away as you can-skim of RTV around the water passages and a good bead on the ends will do the trick

Melting Slicks

Joined: Jun 2006
Posts: 2,071
Likes: 147
From: S Nevada
LOL. Yeah, the ups driver has been busy here too. Just got the new 3:55 gear set on Fri. I need to order the rest of the parts to do the rear end rebuild, but acted fast on the R&P, it was priced right at overstockdiffs.com All my parts are back from powdercoat, and I installed the A arms today. I'm using the VBP grand touring package. Noticed you upgraded. Should be sweet. I used VBP stuff on my 92, made it a real corner carver.
Thread Starter
Drifting
Joined: Aug 2003
Posts: 1,868
Likes: 13
From: Mascoutah IL
Thanks guys...
TFI, that's what I did on the intake... Never got to the waterpump or valve covers... The valve covers are on there dry on both sides... Will get back after it when I get back from MS...
Rogman
TFI, that's what I did on the intake... Never got to the waterpump or valve covers... The valve covers are on there dry on both sides... Will get back after it when I get back from MS...
Rogman
Pro


Joined: May 2011
Posts: 572
Likes: 1
From: Cooksville Maryland
DC Area Events Coordinator
UPS and FexEx delivered here the same day when the wife was home. I said "Fred, what are you doing working on a Saturday?". She was amazed that I knew them by first name, and when they said "Rick, it's my job." it blew her away that they knew ME by first name! I told her that they were coming over for Thanksgiving! 
Thread Starter
Drifting
Joined: Aug 2003
Posts: 1,868
Likes: 13
From: Mascoutah IL
Finally back at it after a couple of weeks away from home on Air Force TDYs...
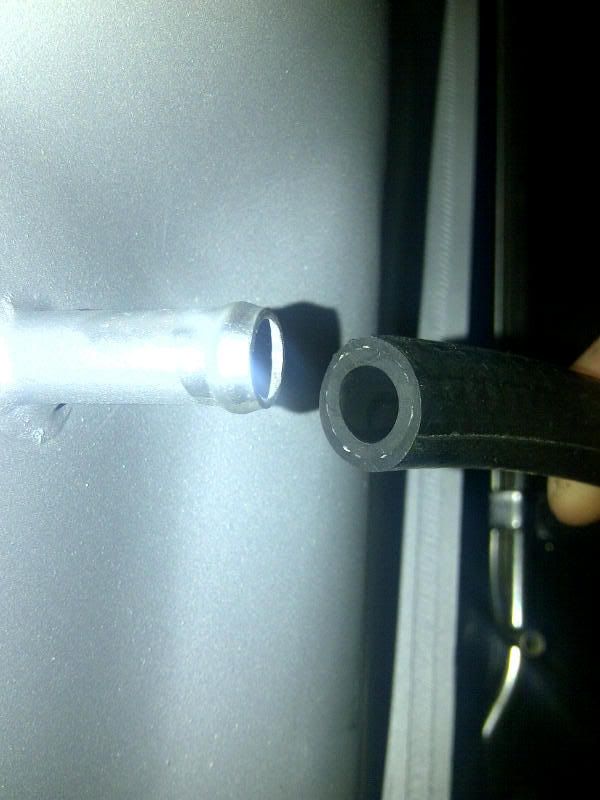
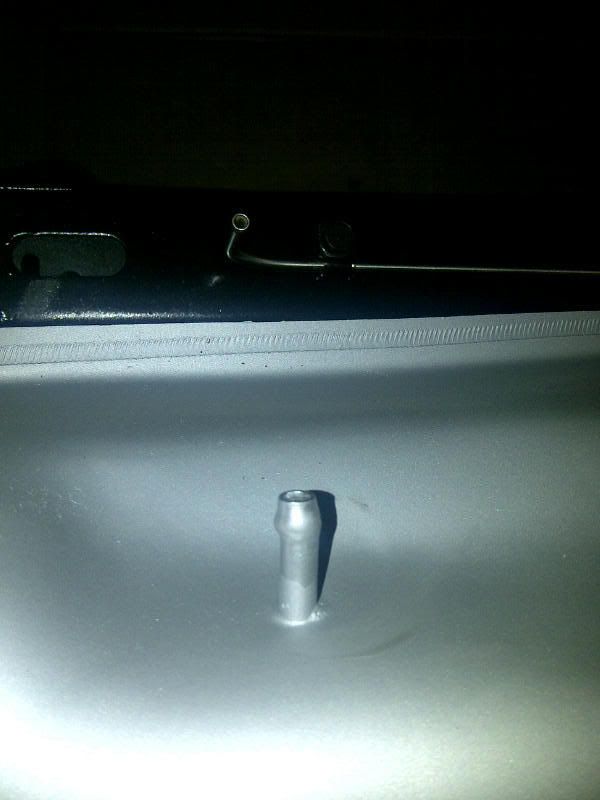
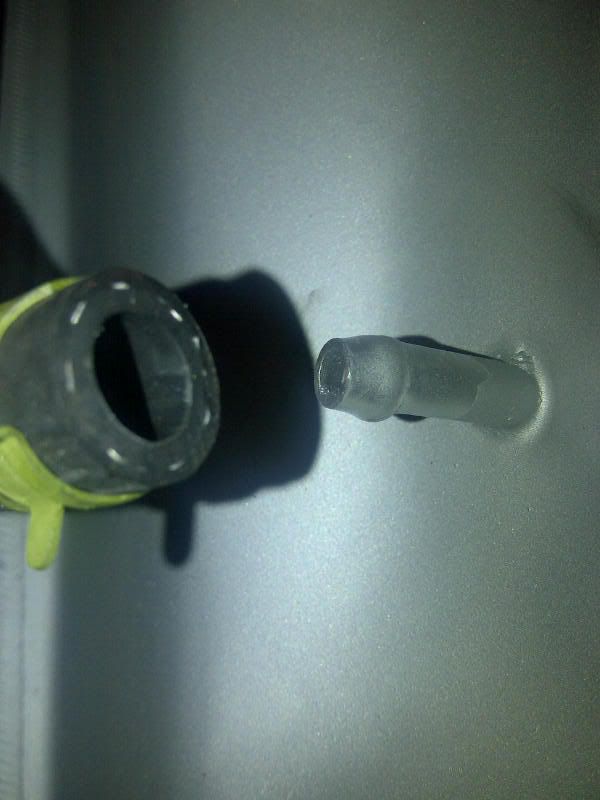
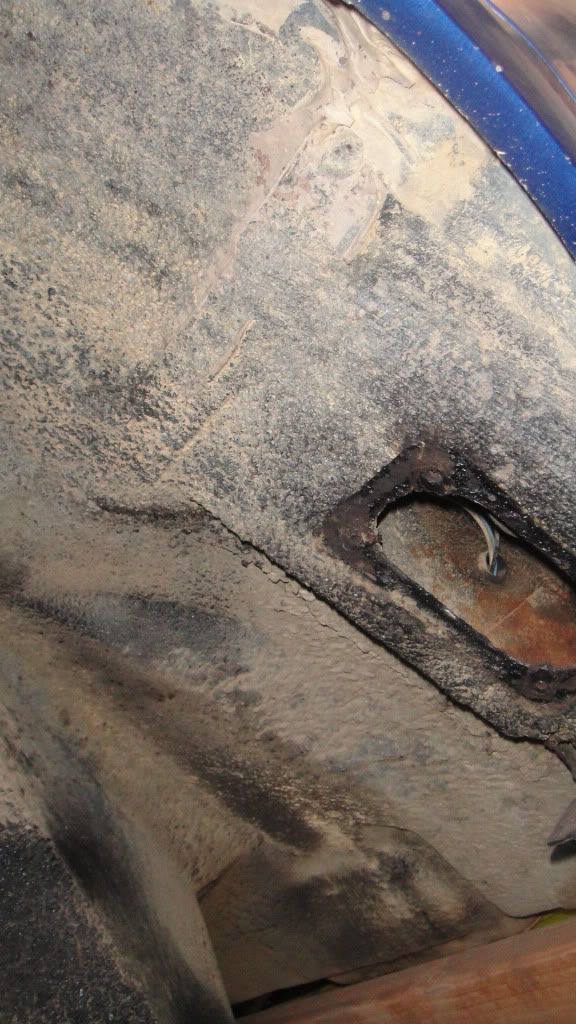
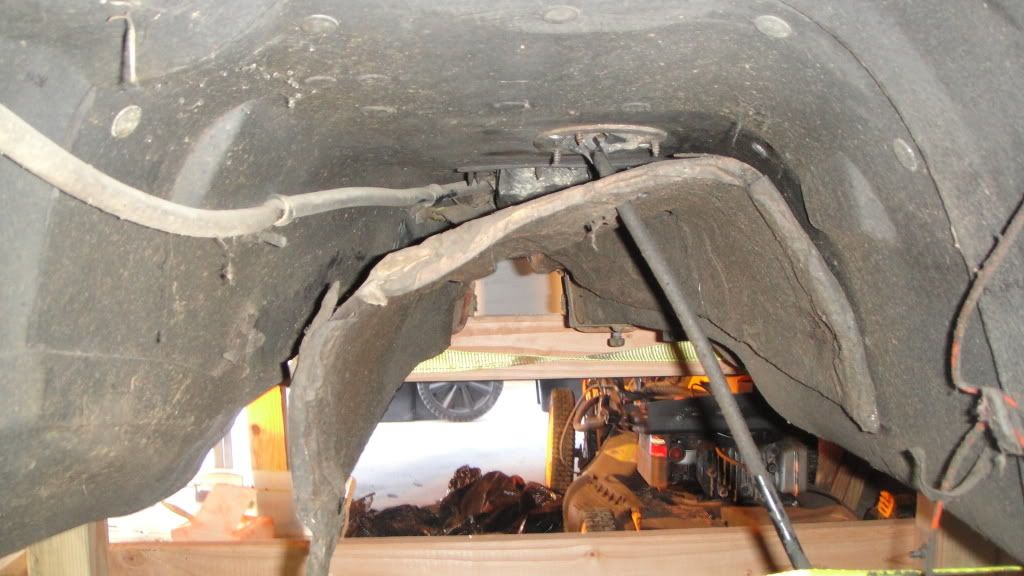
Purchased a new gas tank GM33D because original tank had been repaired in a couple of spots with some kind of epoxy... First new tank came in damaged from shipping and just now got around to installing the sender, hoses and anti-squeak pads on the second tank... Well, looks like the bubba that welded this replacement tank got the large and small vent nipples welded on the wrong side... My original tank had the large vent nipple (think 3/8") on the driver side and the small (1/4") on the passenger side... Please look at these pictures:

Passenger side:
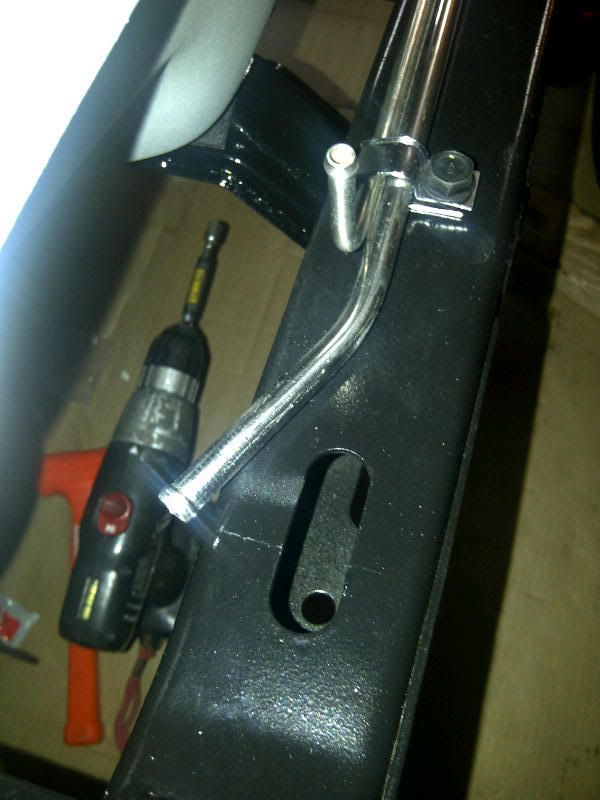
Driver Side:
Options--
1) Dealer is skeptical that this tank has been welded wrong, but is "willing" to ship it back and refund. He is out of tanks so I'll have to go to another vendor probably meaning a 200% price increase due to the original purchase was one ebay and a great deal, "or so i thought"...
2) Keep tank installed and put brass reducers on each side... Can't see this area once car is back together, but I will know this has been bubba'd...
I'm actually leaning toward the reducers so I don't have to deal with sending the tank back and waiting on a new tank to get hear...
What are your thoughts??
Thanks
Rogman
Purchased a new gas tank GM33D because original tank had been repaired in a couple of spots with some kind of epoxy... First new tank came in damaged from shipping and just now got around to installing the sender, hoses and anti-squeak pads on the second tank... Well, looks like the bubba that welded this replacement tank got the large and small vent nipples welded on the wrong side... My original tank had the large vent nipple (think 3/8") on the driver side and the small (1/4") on the passenger side... Please look at these pictures:
Passenger side:
Driver Side:
Options--
1) Dealer is skeptical that this tank has been welded wrong, but is "willing" to ship it back and refund. He is out of tanks so I'll have to go to another vendor probably meaning a 200% price increase due to the original purchase was one ebay and a great deal, "or so i thought"...
2) Keep tank installed and put brass reducers on each side... Can't see this area once car is back together, but I will know this has been bubba'd...
I'm actually leaning toward the reducers so I don't have to deal with sending the tank back and waiting on a new tank to get hear...
What are your thoughts??
Thanks
Rogman
Corvette Stories
The Best of Corvette for Corvette Enthusiasts

Top 10 Most Expensive Corvettes Ever Sold on Bring A Trailer
Brett Foote
10 Things Every Corvette Owner Needs (2026 Edition)
Michael S. Palmer
8 Most "Only Corvette Owners Understand" Quirks and Problems
Pouria Savadkouei
10 Reasons the C6 Z06 is Still A Performance Benchmark After 20 Years
Joe Kucinski
How Much Horsepower Every Corvette Engine "LOST" in 1972
Joe Kucinski
Top 10 DOs and DON'Ts for Protecting Your Convertible Top!
Michael S. Palmer
Top 10 Most Explosive Corvettes Ever Made: Power-to-Weight Ratio Ranked!
Joe Kucinski
150 hp to 1,250 hp: Every Corvette Generation Compared by the Specs That Matter
Joe Kucinski
8 Coolest Corvette Pace Cars (and Replicas) of All Time
Verdad Gallardo
Thread Starter
Drifting
Joined: Aug 2003
Posts: 1,868
Likes: 13
From: Mascoutah IL
Got an email from Lars that my quadrajet and distributor were complete and in the mail... Pretty stoked to get these parts back next week... My stuff had seen better days and very glad I had the "master" re-tool these for me...
Lars: "The carb did not run well initially - it simply would not run rich enough at idle and in the transition range: No matter what I did, the mixture remained in the 20:1 range, which is obviously not acceptable. Looking at the carb on the run engine, I suddenly realized that the air bleeds were missing out of the carb's venturi area - somebody had actually knocked the bleeds out of the casting. After locating a good donor carb with correct OEM bleeds for a '73 Vette (not easy to find) and installing these in your carb, the mixtures ended up dead-on spec (see attached photos of your carb on the run engine with rpm and Air/Fuel data). I then ran it through all modes of operation from cold-start, hot re-start, idle, and no-load cruise. I also tested for secondary operations and WOT transition. Idle is glass smooth, off-idle response is crisp, and mixtures are right where they should be. I ran the distributor extensively on my SUN machine, and it curved out very well see attached curve chart. The original curve was extremely short - only 12 degrees long, which means you would have had to run 24 degrees of initial timing to get the total up to 36. To get you a 20-degree centrifugal curve, I simply removed your advance stop bushing, so don't be alarmed if you see that it's missing - your distributor can't use it. The curve is now very nice for a performance application. I think you'll have some fun with it."
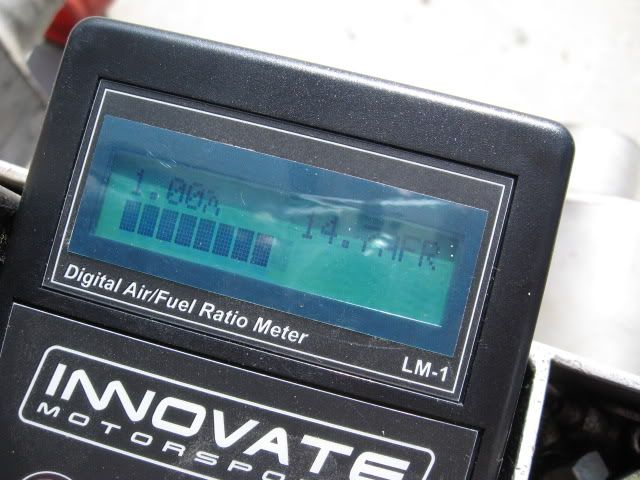

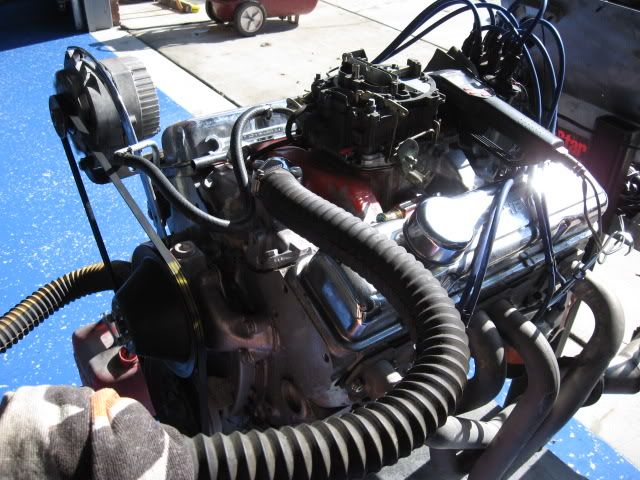
Glad I did not just buy a rebuild kit and put together myself... Here's a recap of the "extra" work Lars had to do on the carb: stripped jet and seat threads, missing air bleeds, bent secondary linkage...
Can't wait to start the new engine and hear a smooth idle...
Rogman
Lars: "The carb did not run well initially - it simply would not run rich enough at idle and in the transition range: No matter what I did, the mixture remained in the 20:1 range, which is obviously not acceptable. Looking at the carb on the run engine, I suddenly realized that the air bleeds were missing out of the carb's venturi area - somebody had actually knocked the bleeds out of the casting. After locating a good donor carb with correct OEM bleeds for a '73 Vette (not easy to find) and installing these in your carb, the mixtures ended up dead-on spec (see attached photos of your carb on the run engine with rpm and Air/Fuel data). I then ran it through all modes of operation from cold-start, hot re-start, idle, and no-load cruise. I also tested for secondary operations and WOT transition. Idle is glass smooth, off-idle response is crisp, and mixtures are right where they should be. I ran the distributor extensively on my SUN machine, and it curved out very well see attached curve chart. The original curve was extremely short - only 12 degrees long, which means you would have had to run 24 degrees of initial timing to get the total up to 36. To get you a 20-degree centrifugal curve, I simply removed your advance stop bushing, so don't be alarmed if you see that it's missing - your distributor can't use it. The curve is now very nice for a performance application. I think you'll have some fun with it."
Glad I did not just buy a rebuild kit and put together myself... Here's a recap of the "extra" work Lars had to do on the carb: stripped jet and seat threads, missing air bleeds, bent secondary linkage...
Can't wait to start the new engine and hear a smooth idle...
Rogman
Thread Starter
Drifting
Joined: Aug 2003
Posts: 1,868
Likes: 13
From: Mascoutah IL
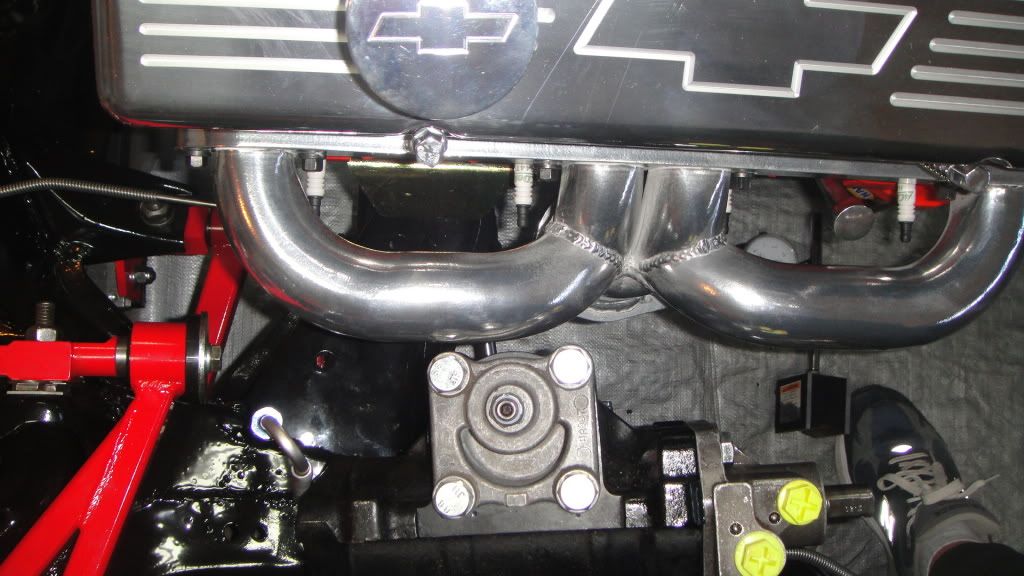
Did a test fit yesterday on the Borg steering box... Was a little worried when folks had to either dimple headers or grind the steering box to make this fit... Looks like mine fits without modification... It's a close fit, but doesn't look as close as it does in the photos... Pulled it back off and put a couple coats of POR on it... Will install later today after paint is good and dry...

Thread Starter
Drifting
Joined: Aug 2003
Posts: 1,868
Likes: 13
From: Mascoutah IL
Well, my mom will be here until Saturday, but after that, I should be able to "concentrate" on the vette 100%... A couple of trips with the Air Force and two weekends of visitors and I've lost a month, OUCH!!! I have gotten a few things done...
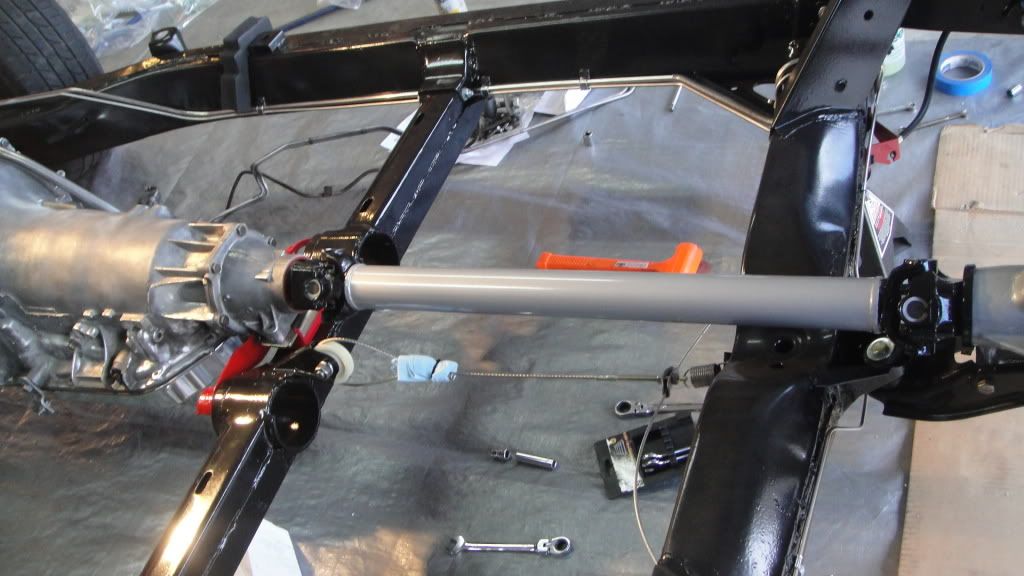
Got the rear calipers and driveshaft installed...
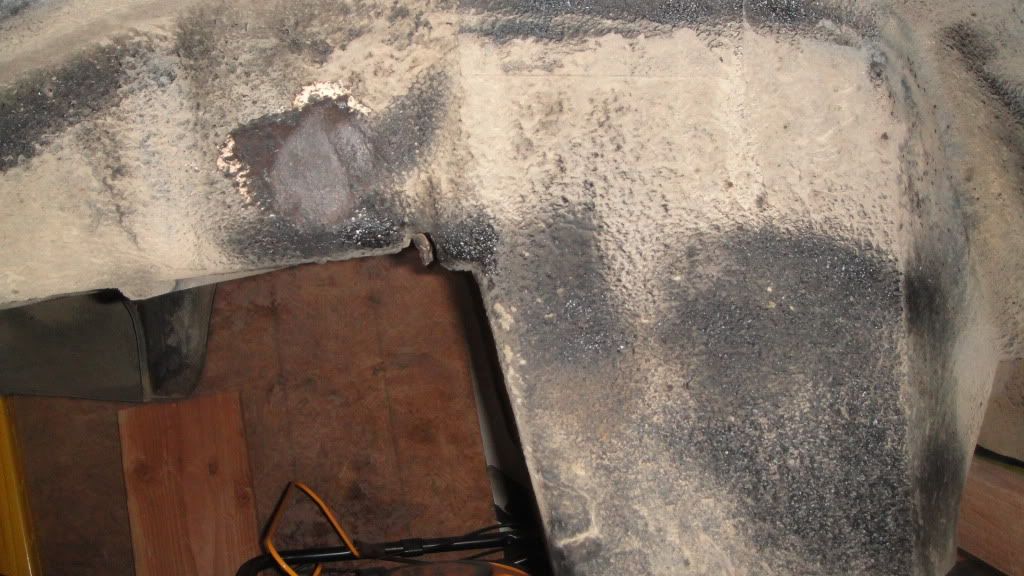
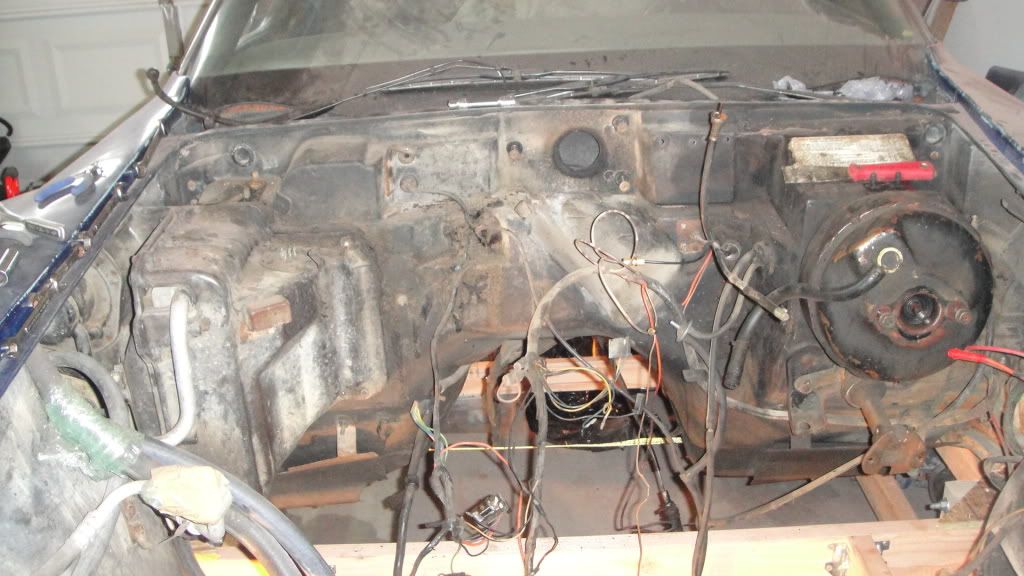
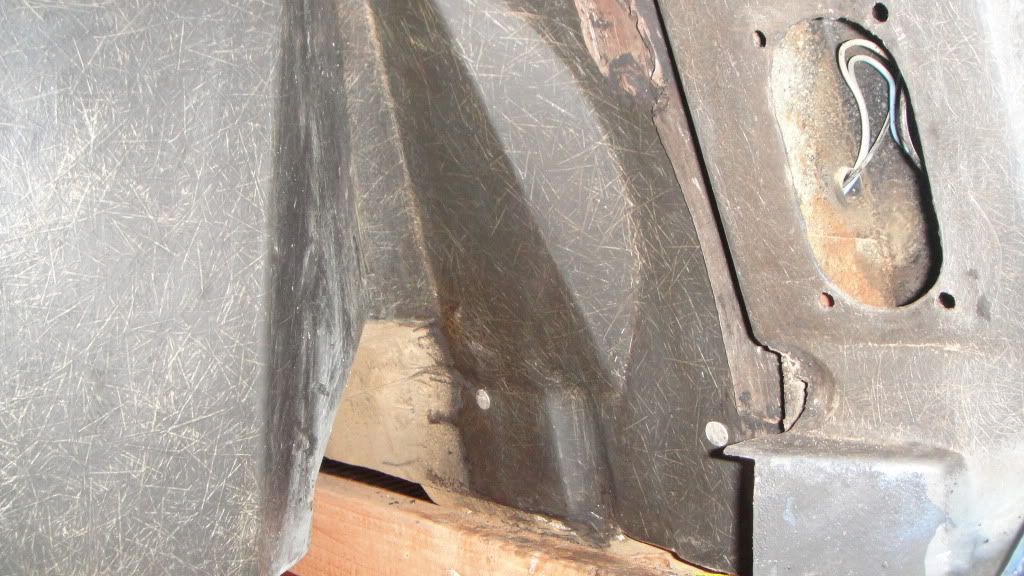
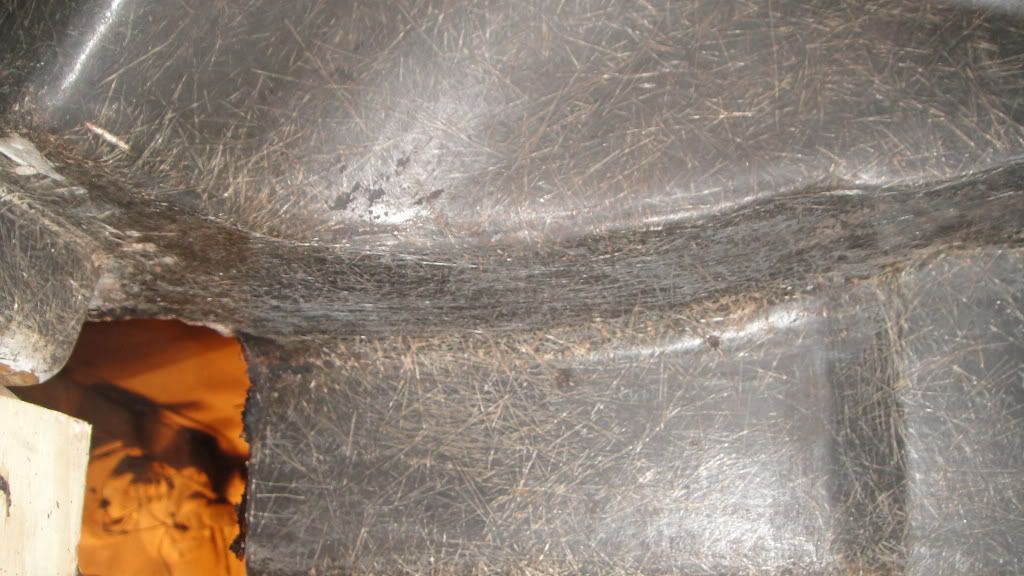
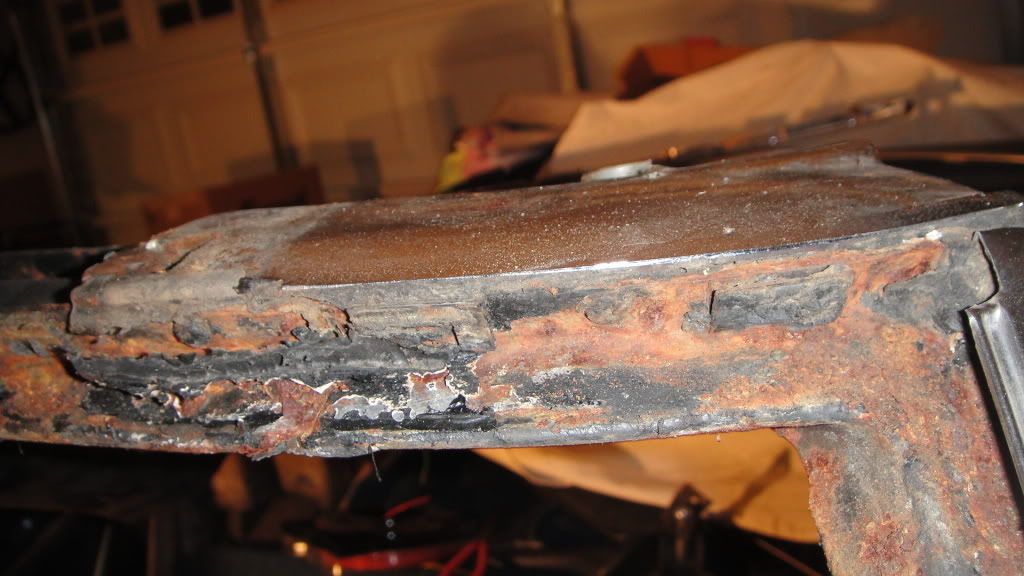
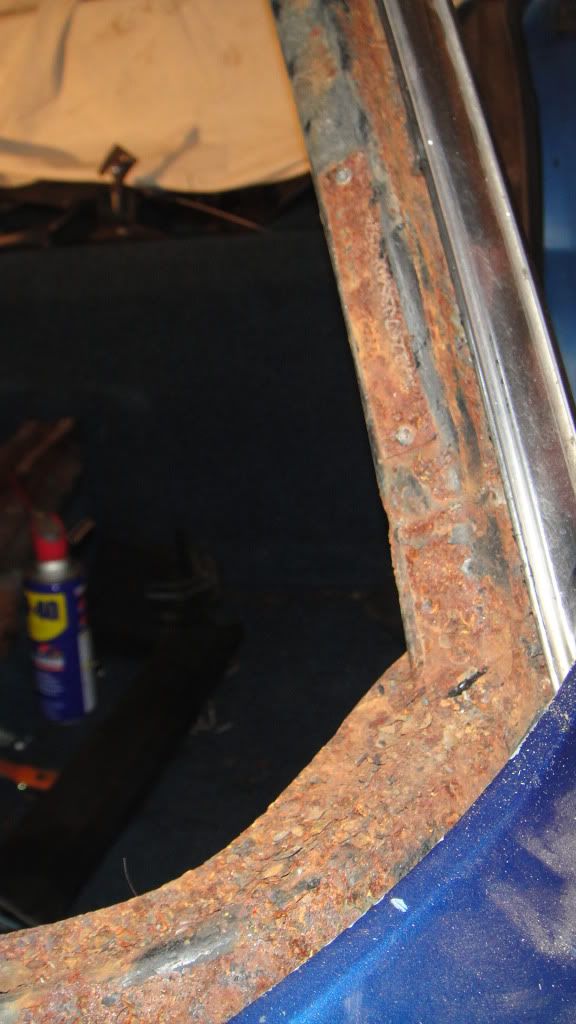
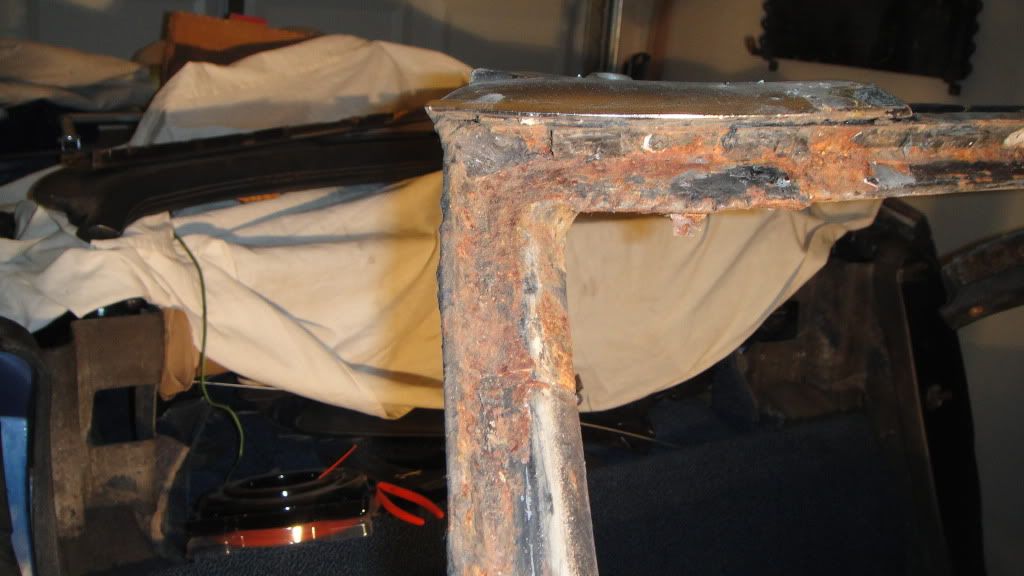
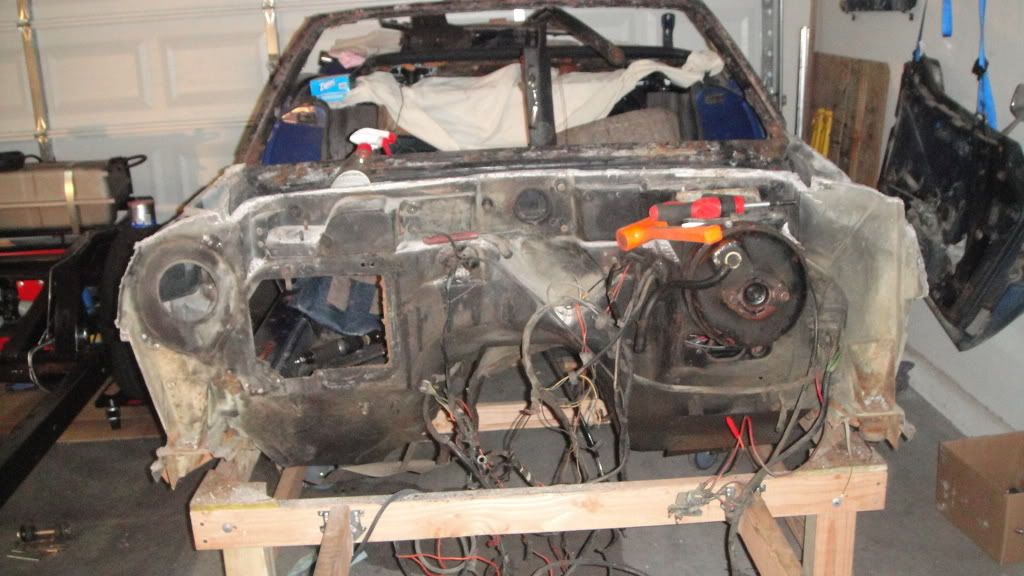
Pulled the windshield to see what I had underneath... Have tons of surface rust, but have not found any holes rusted through the frame... Will try to sand blast this weekend to see what is left...

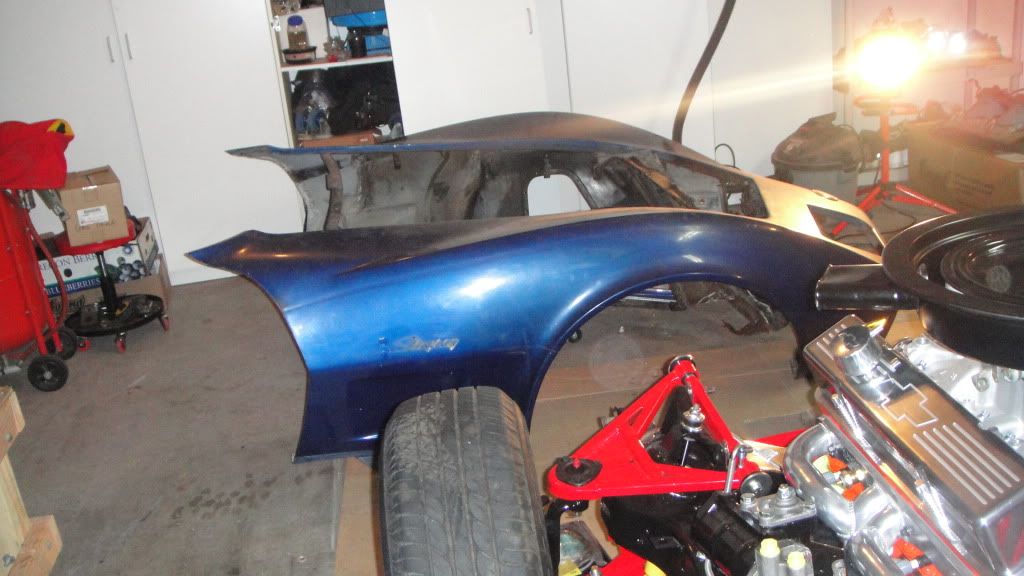
So to ensure there are no underlying issues, pulled the front clip... This was a LOT harder than I thought it would be... That fiberglass will certainly have to be "stretched" to fit over the firewall and not mess up the fresh bonding epoxy...
Plan this weekend is to pull the firewall, sand blast the windshield frame and last remaining parts that need cleaning and POR'd... Hope to have all these parts blasted and painted by the time Thanksgiving weekend is done...
Got the rear calipers and driveshaft installed...
Pulled the windshield to see what I had underneath... Have tons of surface rust, but have not found any holes rusted through the frame... Will try to sand blast this weekend to see what is left...
So to ensure there are no underlying issues, pulled the front clip... This was a LOT harder than I thought it would be... That fiberglass will certainly have to be "stretched" to fit over the firewall and not mess up the fresh bonding epoxy...
Plan this weekend is to pull the firewall, sand blast the windshield frame and last remaining parts that need cleaning and POR'd... Hope to have all these parts blasted and painted by the time Thanksgiving weekend is done...
Pro


Joined: Sep 2011
Posts: 613
Likes: 11
From: EVANSVILLE Wisconsin
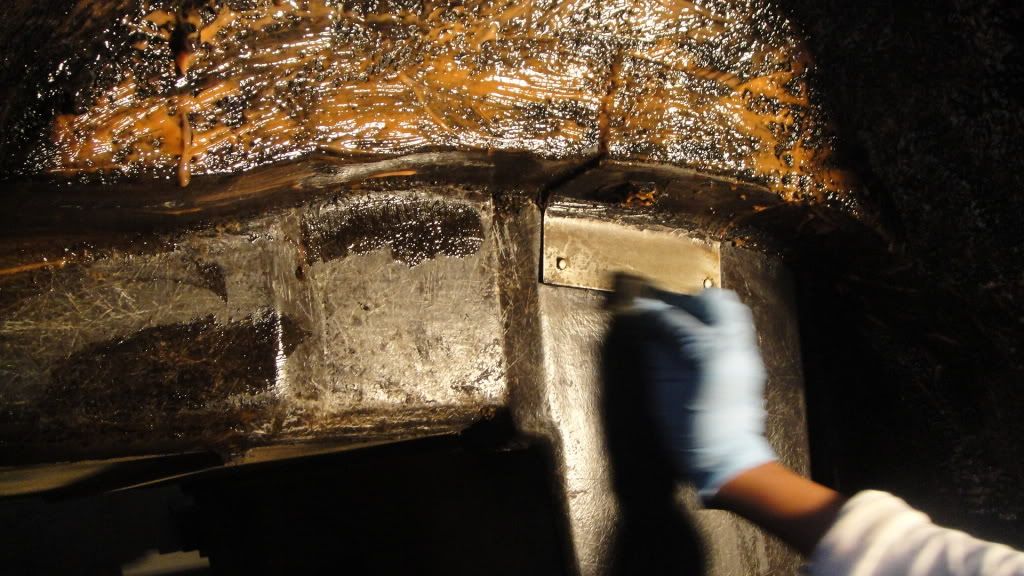
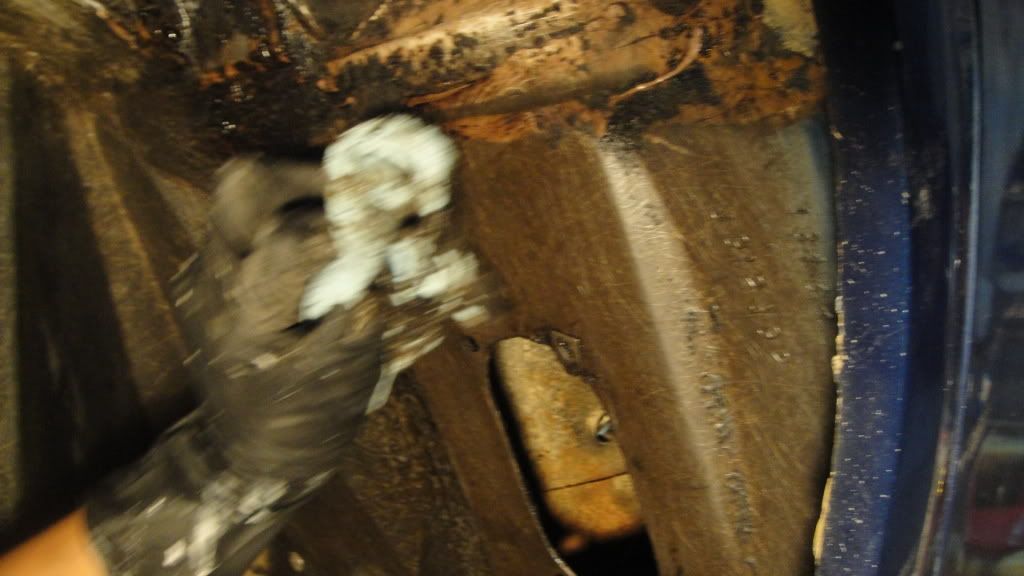
[QUOTE=rogman16;1579147030]Still a lot of work to do, but the wife is helping as well...
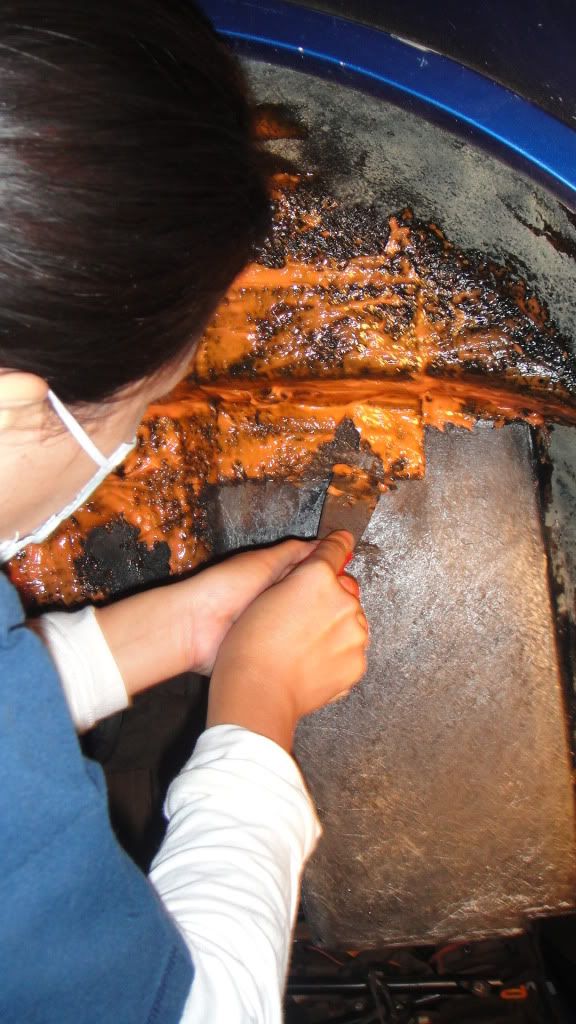
So what is your wife using to strip all that undercoating off the fiberglass? That is exactly what I'm looking to do but really don't know what to use and your results were fantastic! What are you planning to put back on these areas once it's all cleaned up? Looking great!!!
So what is your wife using to strip all that undercoating off the fiberglass? That is exactly what I'm looking to do but really don't know what to use and your results were fantastic! What are you planning to put back on these areas once it's all cleaned up? Looking great!!!
Race Director

Joined: Sep 2004
Posts: 11,874
Likes: 263
From: Arlington Va Current ride 04 vert, previous vettes: 69 vert, 77 resto mod
your project looks great....for your gas tank issue, since there has never been gas in the tank you could cut the flared nipple off and slip a brass flarred fitting of the right size with a compression fitting for the size of the tubing coming out of the tank. compression fittings are substantial and could hardly be considered "bubba'd"
Thread Starter
Drifting
Joined: Aug 2003
Posts: 1,868
Likes: 13
From: Mascoutah IL
[QUOTE=gbarmore;1579239764]
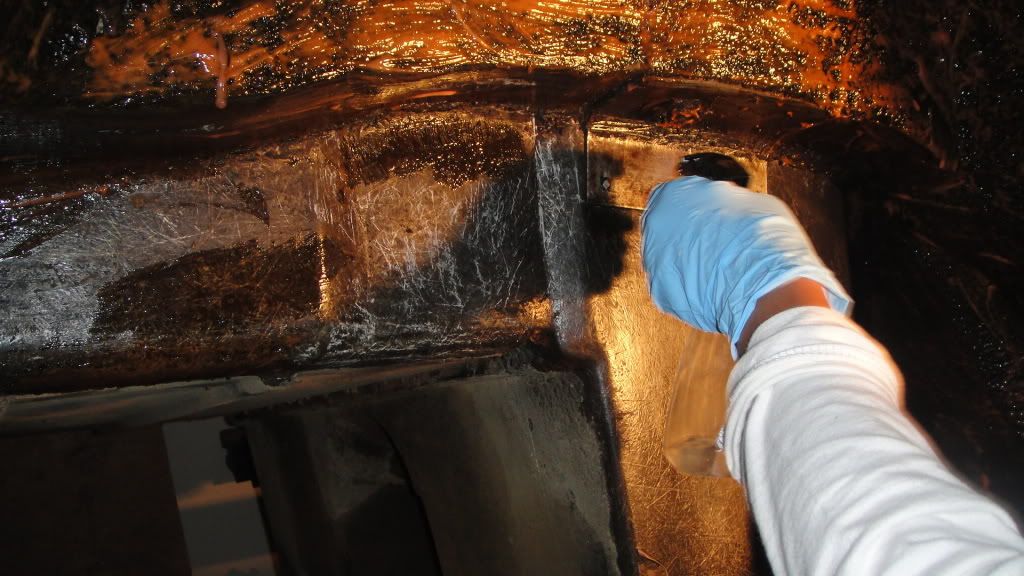
We have been using Citristrip... Thats' the first step followed by laquer thinner in a spray bottle with a green scotch brite pad... She is doing a much better job than I ever could and has tons more patience...
The current plan is to put two coats of each Lizard Skin product on the bottom and interior of the car... Just do a search on "Lizard Skin" and you'll see some very nice applications folks on the forum have accomplished...
For underneath, I also plan "seal" the lizard skin with a spray "truck bed liner type" coating tinted to Torch Red to provide a nice contrast to the black frame... Exterior paint will also be Torch Red, just not with the bed liner texture (hopefully)...
Rogman
Still a lot of work to do, but the wife is helping as well...
So what is your wife using to strip all that undercoating off the fiberglass? That is exactly what I'm looking to do but really don't know what to use and your results were fantastic! What are you planning to put back on these areas once it's all cleaned up? Looking great!!!
So what is your wife using to strip all that undercoating off the fiberglass? That is exactly what I'm looking to do but really don't know what to use and your results were fantastic! What are you planning to put back on these areas once it's all cleaned up? Looking great!!!
The current plan is to put two coats of each Lizard Skin product on the bottom and interior of the car... Just do a search on "Lizard Skin" and you'll see some very nice applications folks on the forum have accomplished...
For underneath, I also plan "seal" the lizard skin with a spray "truck bed liner type" coating tinted to Torch Red to provide a nice contrast to the black frame... Exterior paint will also be Torch Red, just not with the bed liner texture (hopefully)...
Rogman
Thread Starter
Drifting
Joined: Aug 2003
Posts: 1,868
Likes: 13
From: Mascoutah IL
your project looks great....for your gas tank issue, since there has never been gas in the tank you could cut the flared nipple off and slip a brass flarred fitting of the right size with a compression fitting for the size of the tubing coming out of the tank. compression fittings are substantial and could hardly be considered "bubba'd"
Rogman
Thread Starter
Drifting
Joined: Aug 2003
Posts: 1,868
Likes: 13
From: Mascoutah IL
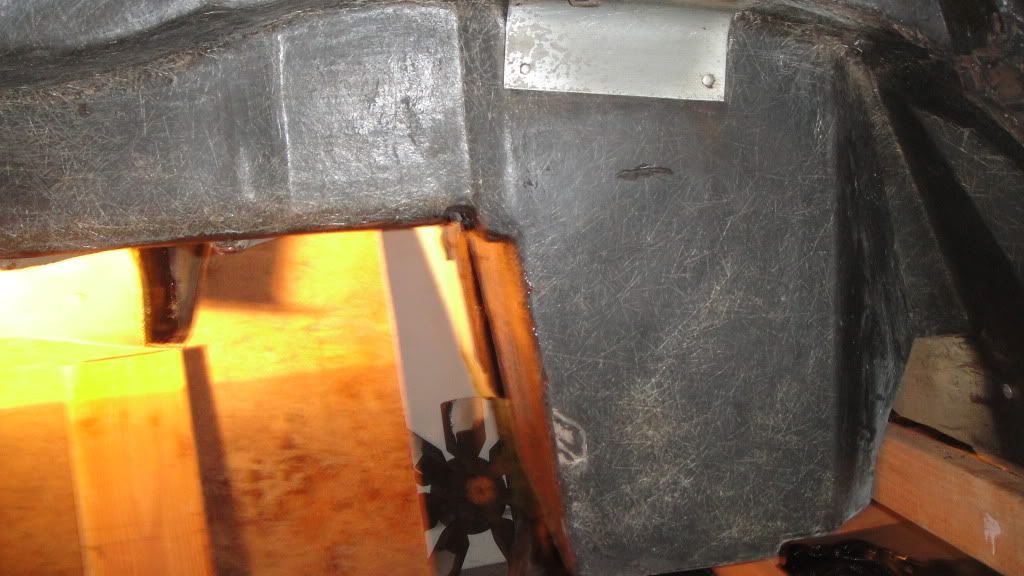
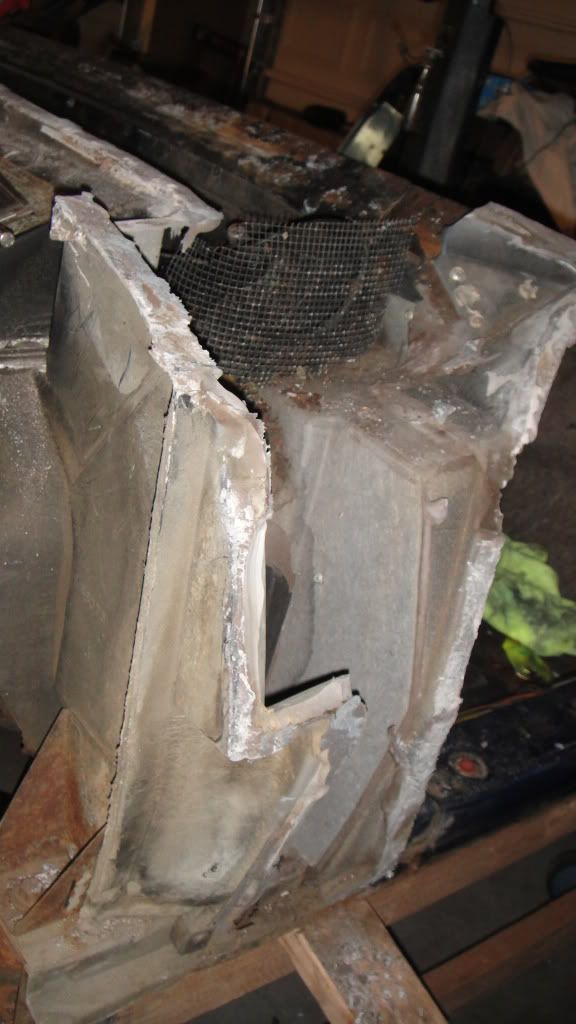
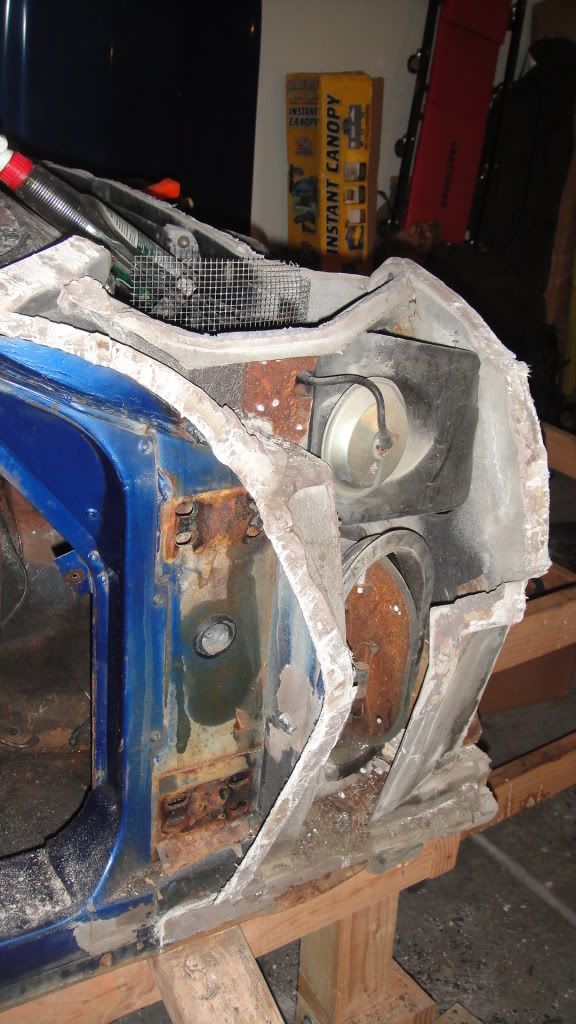
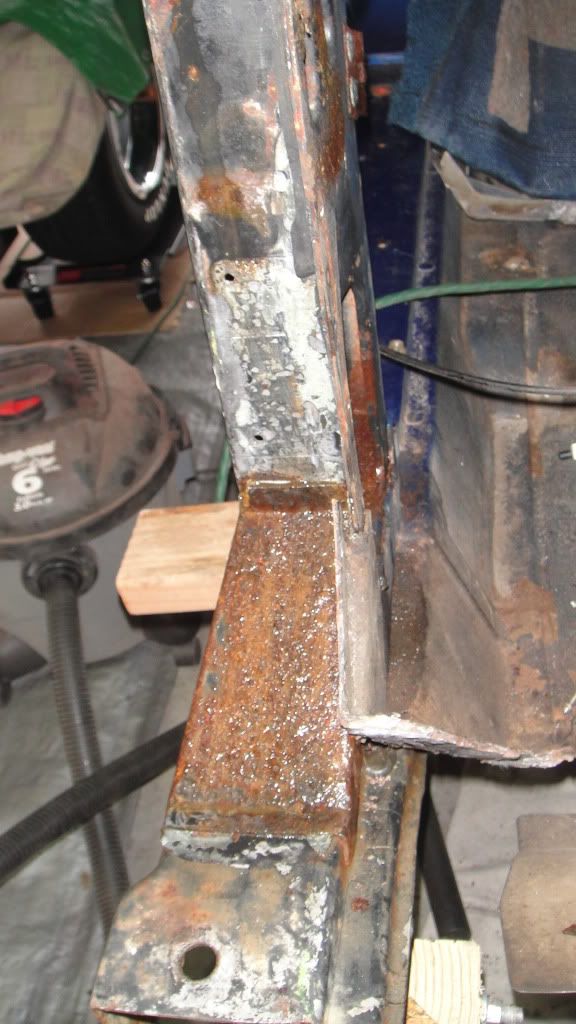
What a PITA!! After a day and a half of monkeying around and taking my time separating the two, finally got the firewall off... Here are a few "pre" pictures before I sand blast...
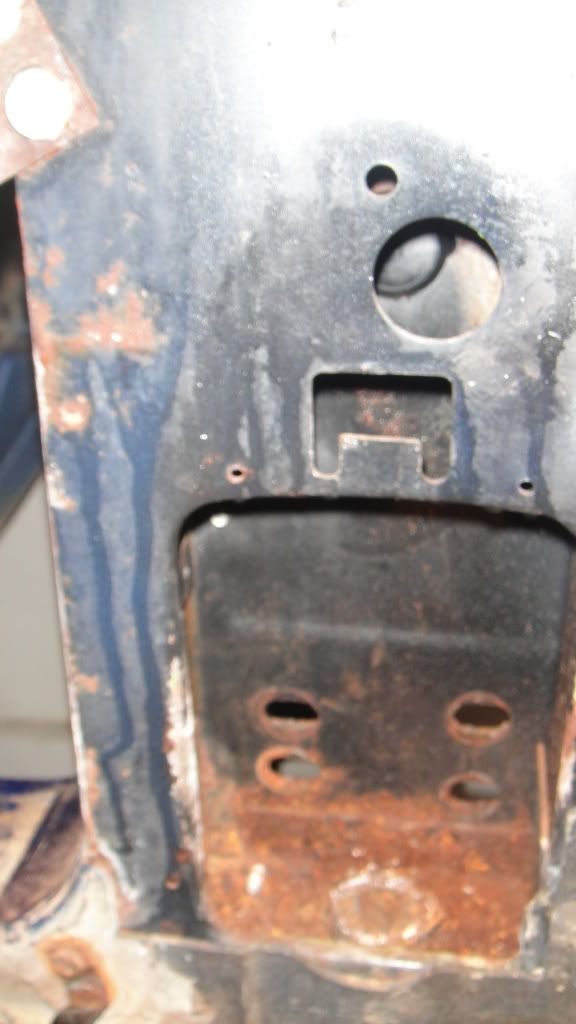
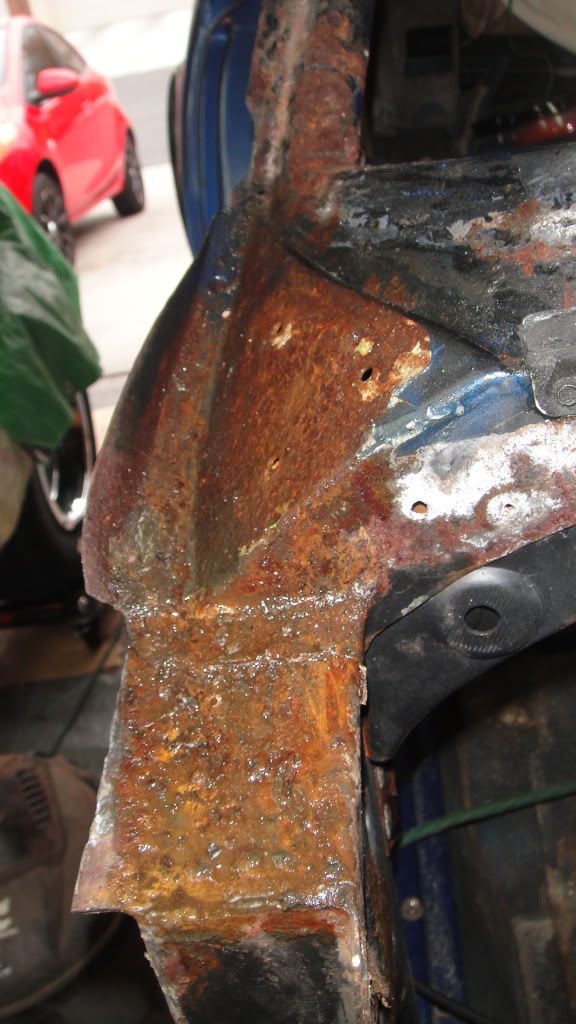

I'll post progress pics as I get a chance in between blasting...
Rogman
I'll post progress pics as I get a chance in between blasting...
Rogman