


1973 Corvette Convertible Resto
Thread Starter
Drifting


Joined: Aug 2003
Posts: 1,868
Likes: 13
From: Mascoutah IL
Finally got around to getting most of the stuff out of the interior which I should've done months ago, but oh well...
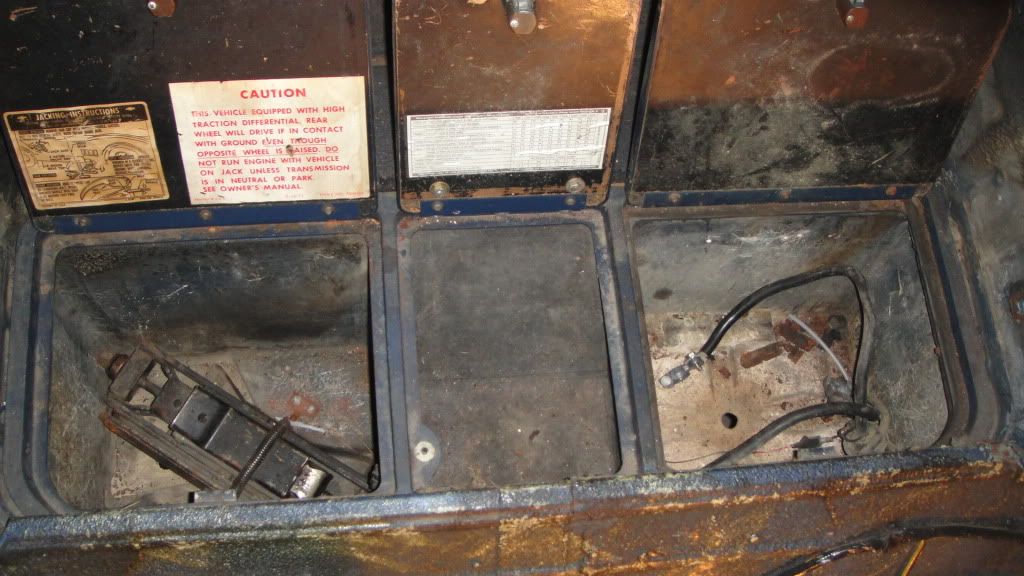
Guess Bubba didn't like the seat belt buzzer!!!
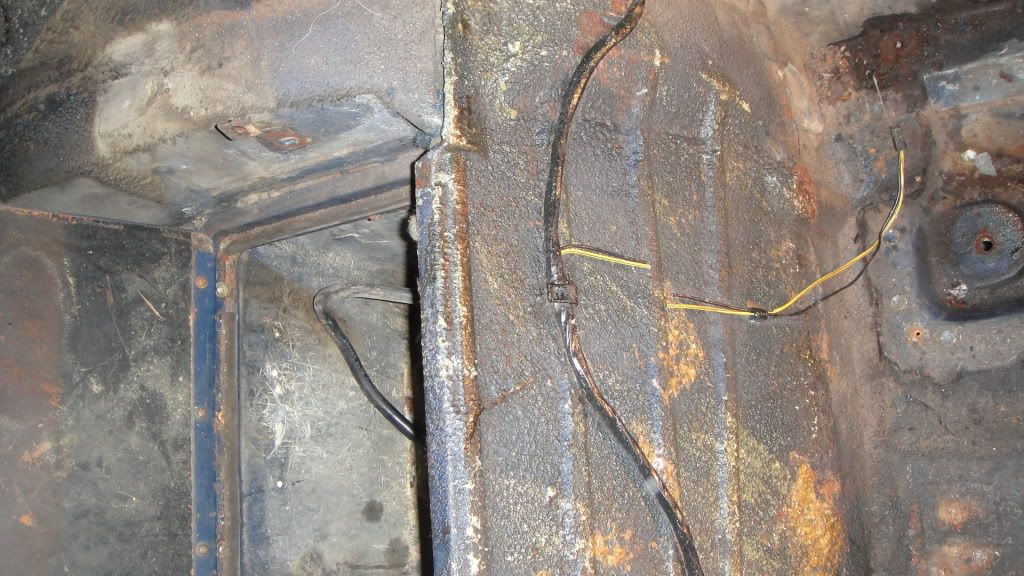
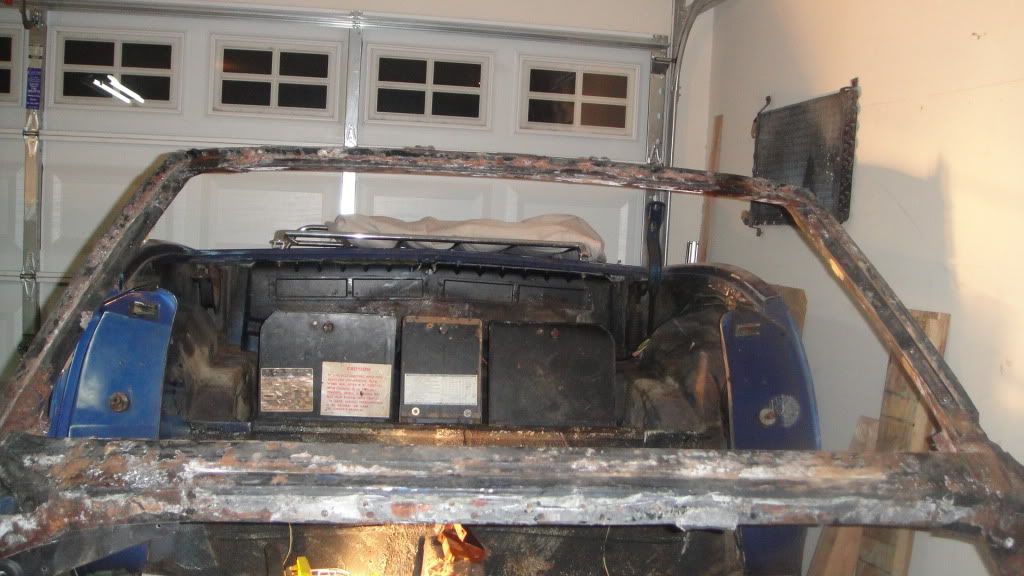
These little fittings are driving me crazy... Not digging these one time use type of fittings... I tried forever to carefully find the way these detach, to no avail... A quick search here on the forum showed these are a one time use and no easy way to disconnect to allow re-use...

Might actually get to some blasting tomorrow...
Rogman
Guess Bubba didn't like the seat belt buzzer!!!
These little fittings are driving me crazy... Not digging these one time use type of fittings... I tried forever to carefully find the way these detach, to no avail... A quick search here on the forum showed these are a one time use and no easy way to disconnect to allow re-use...
Might actually get to some blasting tomorrow...
Rogman
Thread Starter
Drifting
Joined: Aug 2003
Posts: 1,868
Likes: 13
From: Mascoutah IL
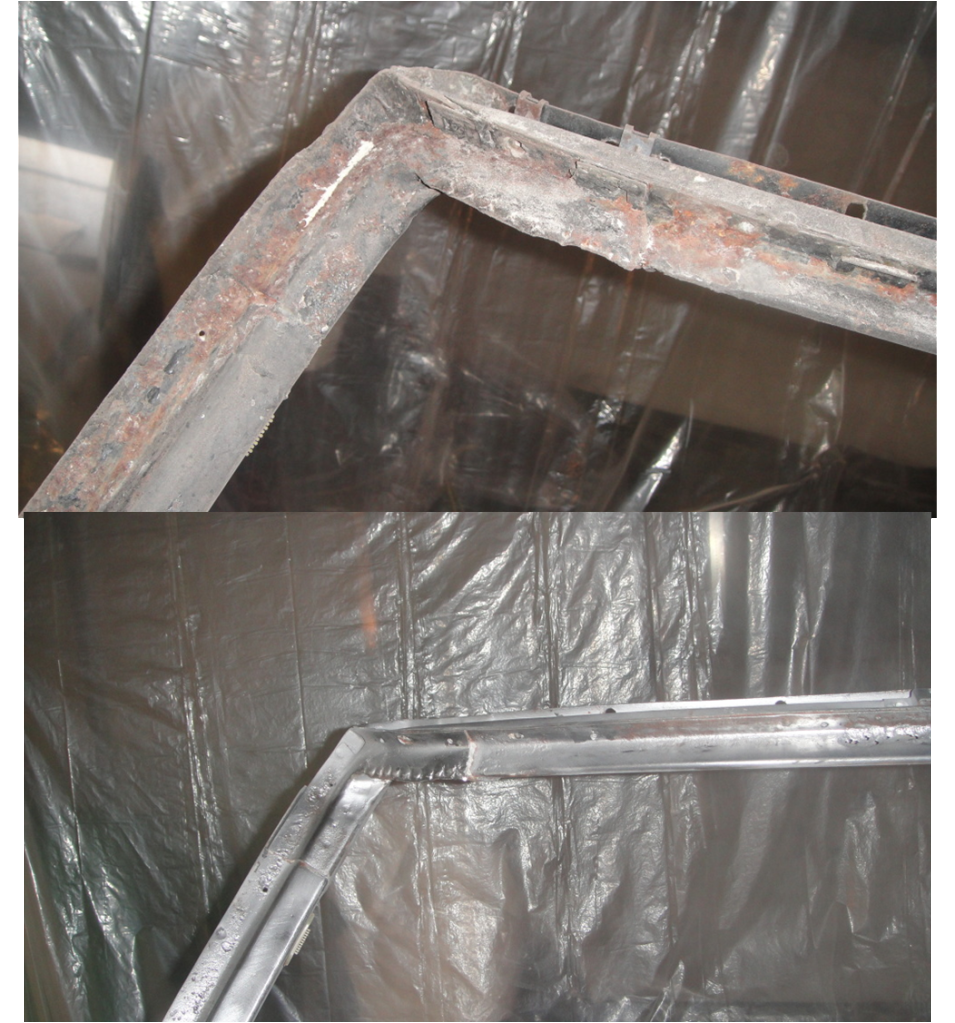
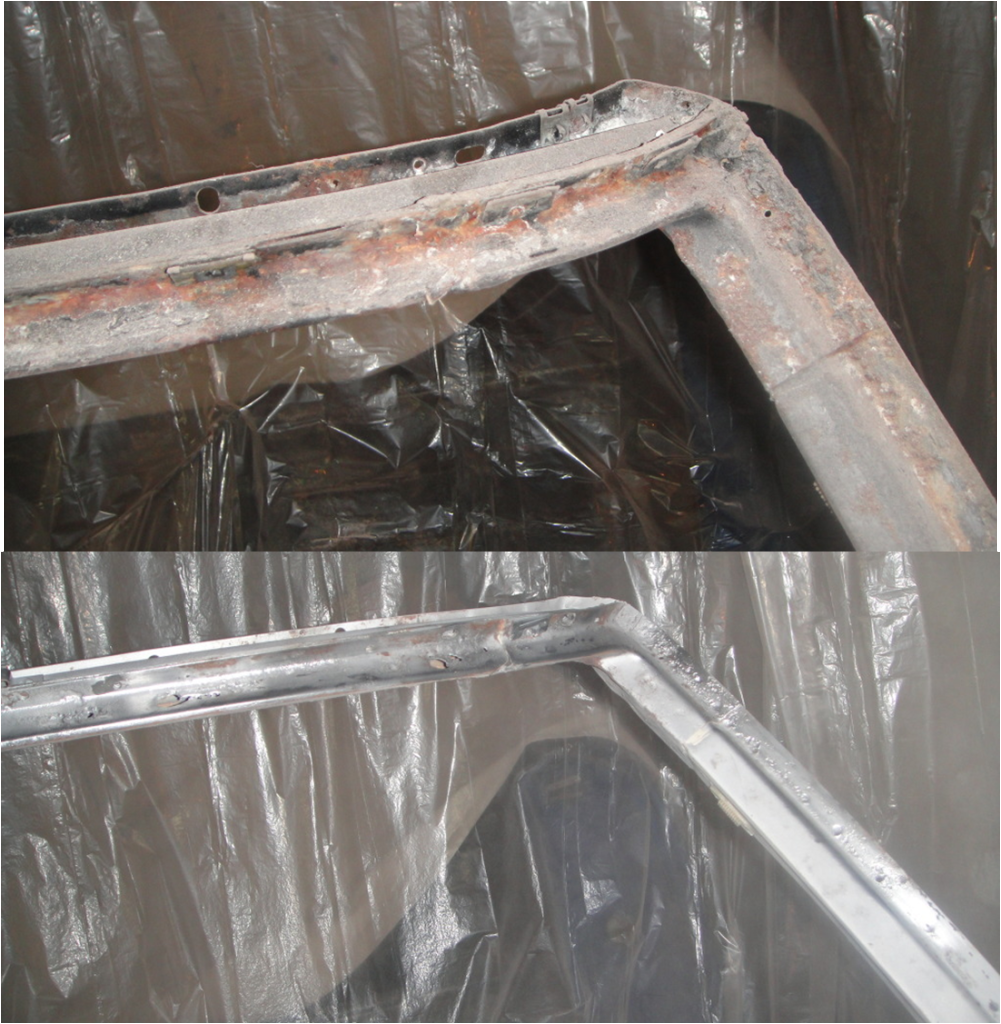
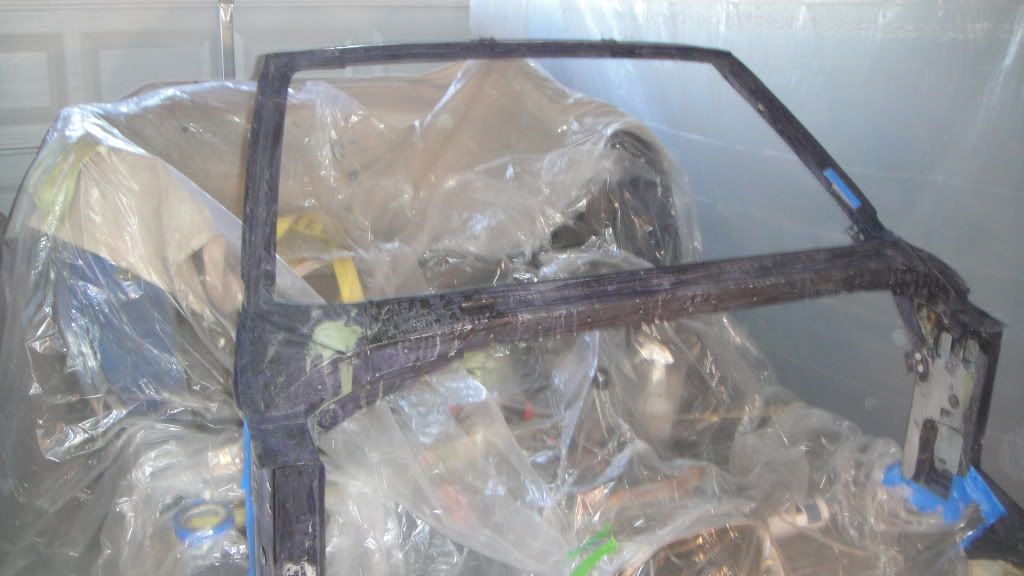
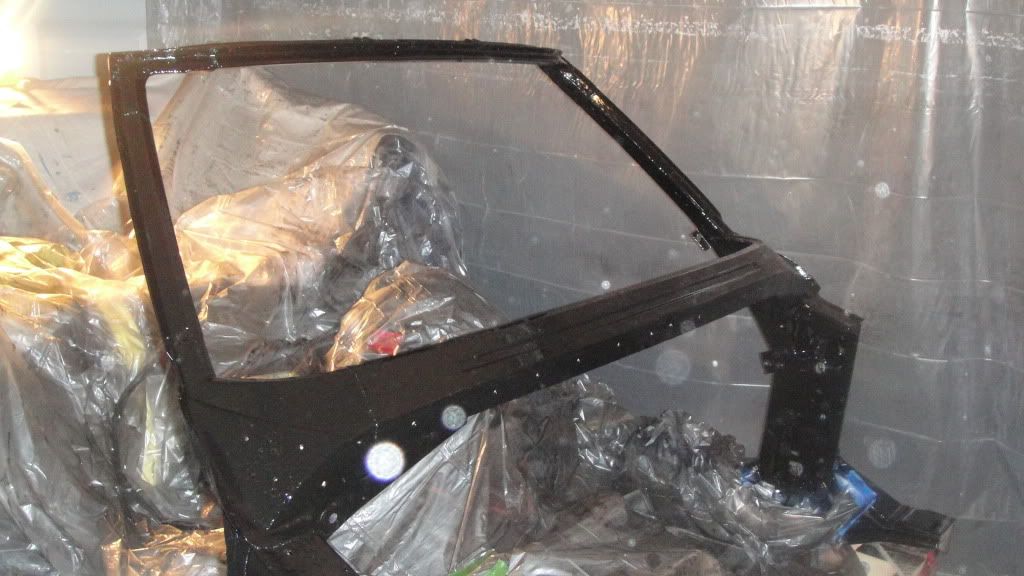
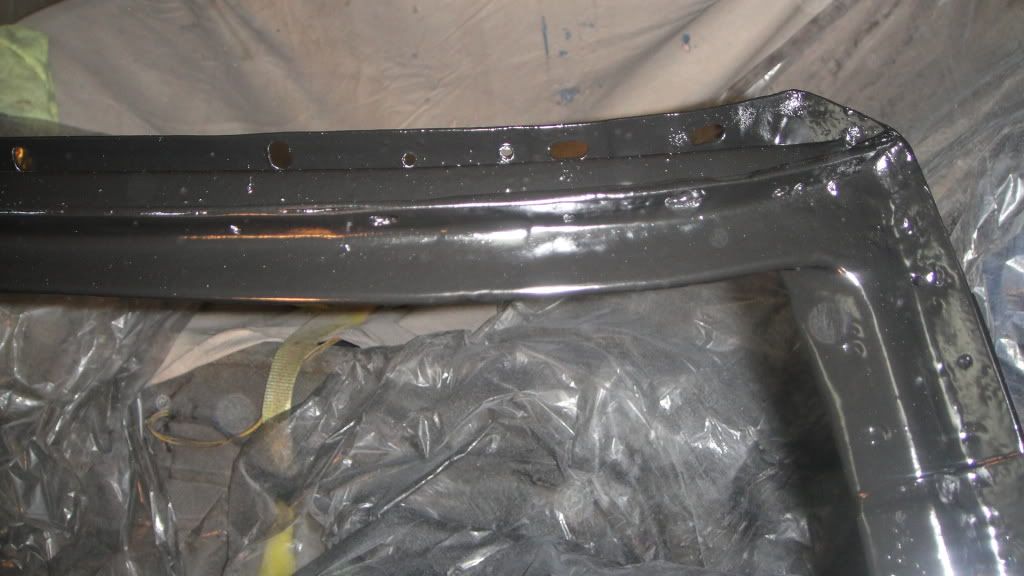
Have a few more days to refine and finish the frame, but here's a few pictures from about 15 minutes of sand blasting tonight... Sorry, meant to take the before and after pictures from the same angles, but I failed miserably...
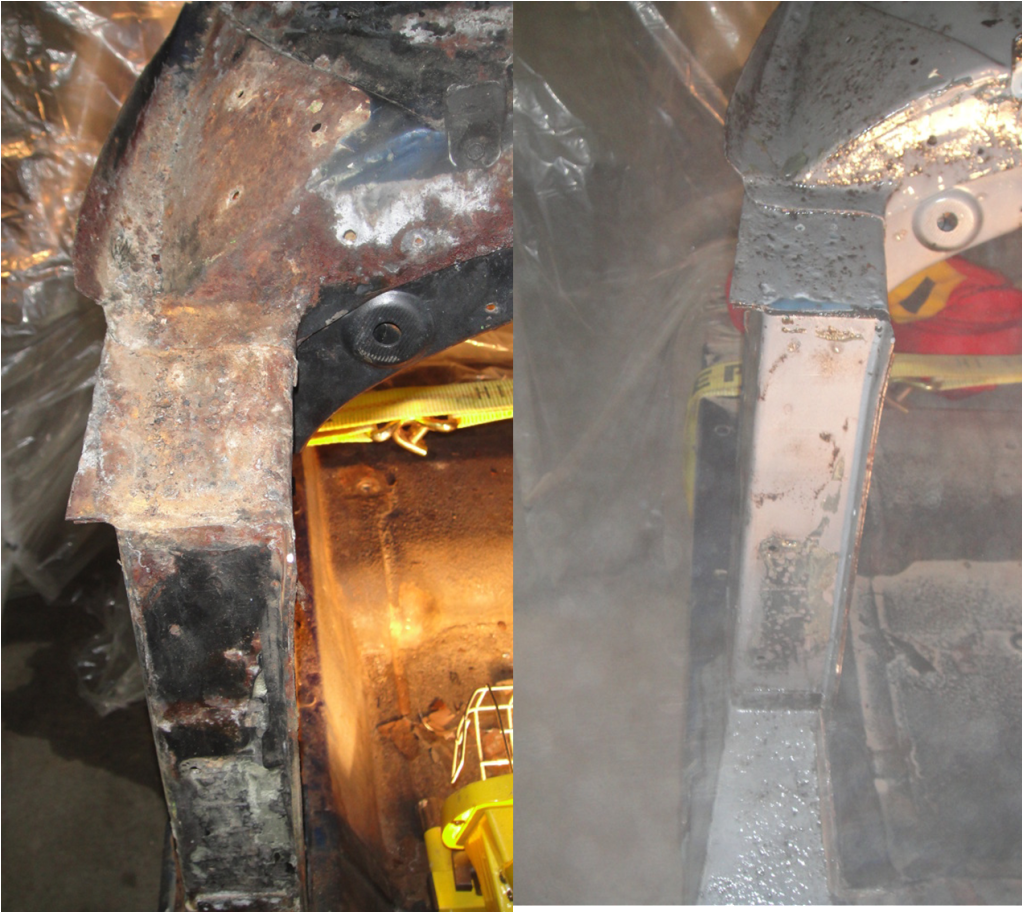
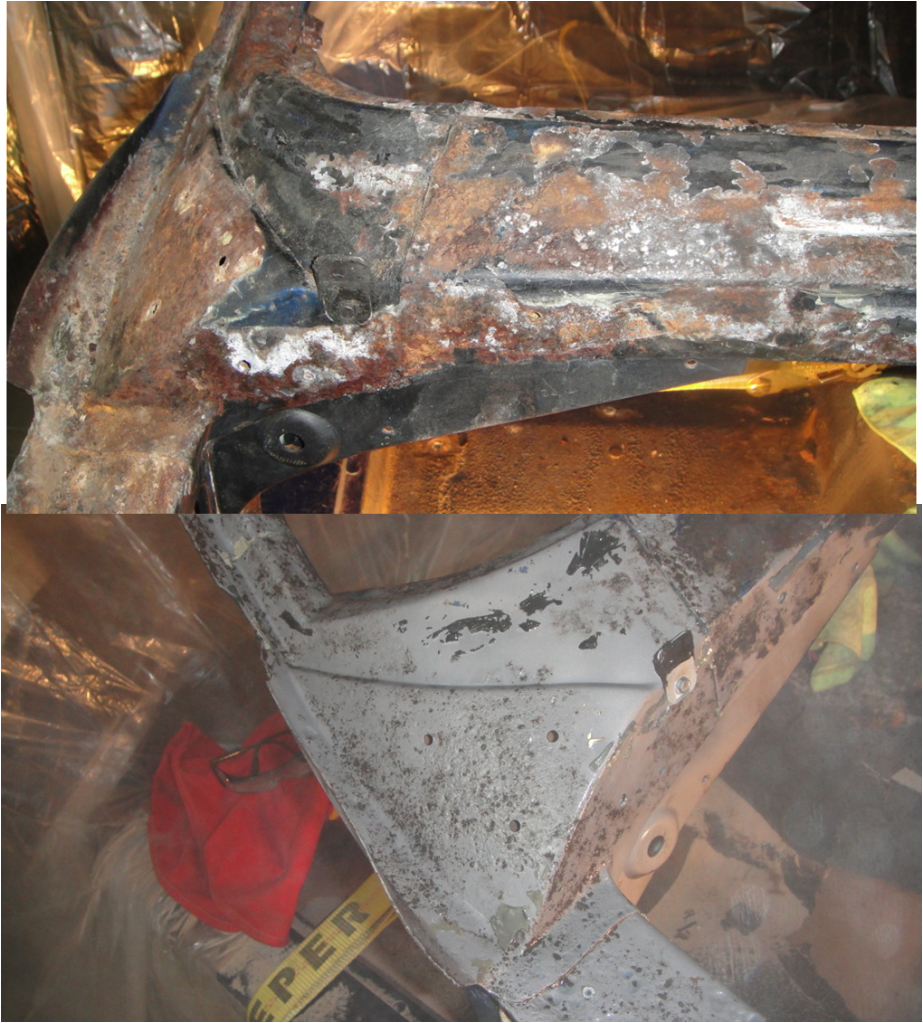
Quite a bit of pitting, and this side was the worst of the two... Plan is to finish sand blasting, wire brush clean and a couple of coats of POR 15... Any need to "fill" the pitting that will be underneath the firewall??? With no holes all the way through the metal, I am not planning on welding in any new metal...
Advice??
Thanks much
Rogman
Melting Slicks


Joined: Jun 2006
Posts: 2,071
Likes: 147
From: S Nevada
I would try and measure the depth of the worse pitting. If it was less than 20% the thickness of the metal, I'd just coat it with the por u are using and not think twice about it. If the pitting were to be substantially, deeper than I would look into a repair. Your dial indicator may be of some use as a depth gauge.
Thread Starter
Drifting
Joined: Aug 2003
Posts: 1,868
Likes: 13
From: Mascoutah IL
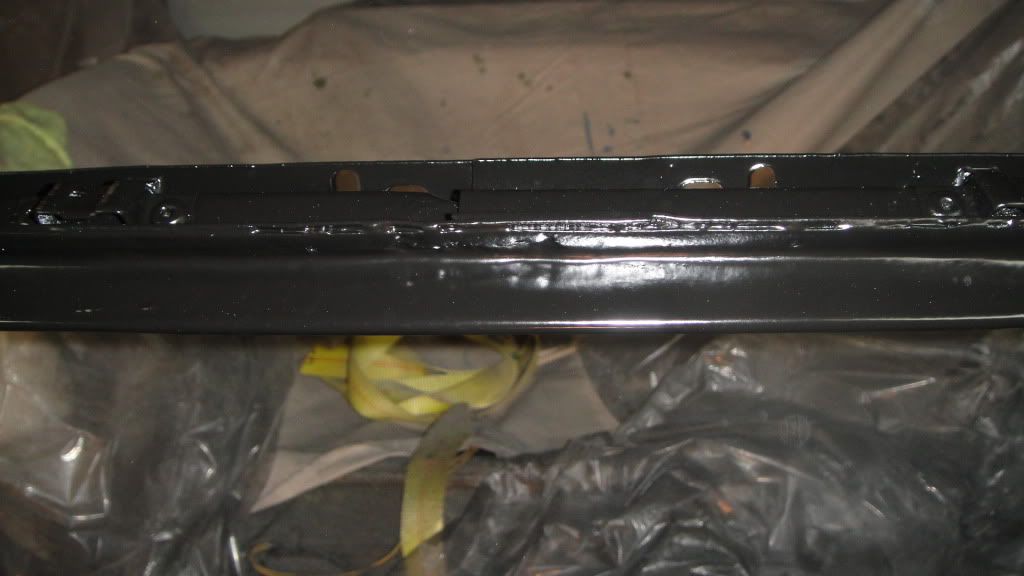
In the middle of sand blasting and thought I would give the compressor a little break and post some pictures...
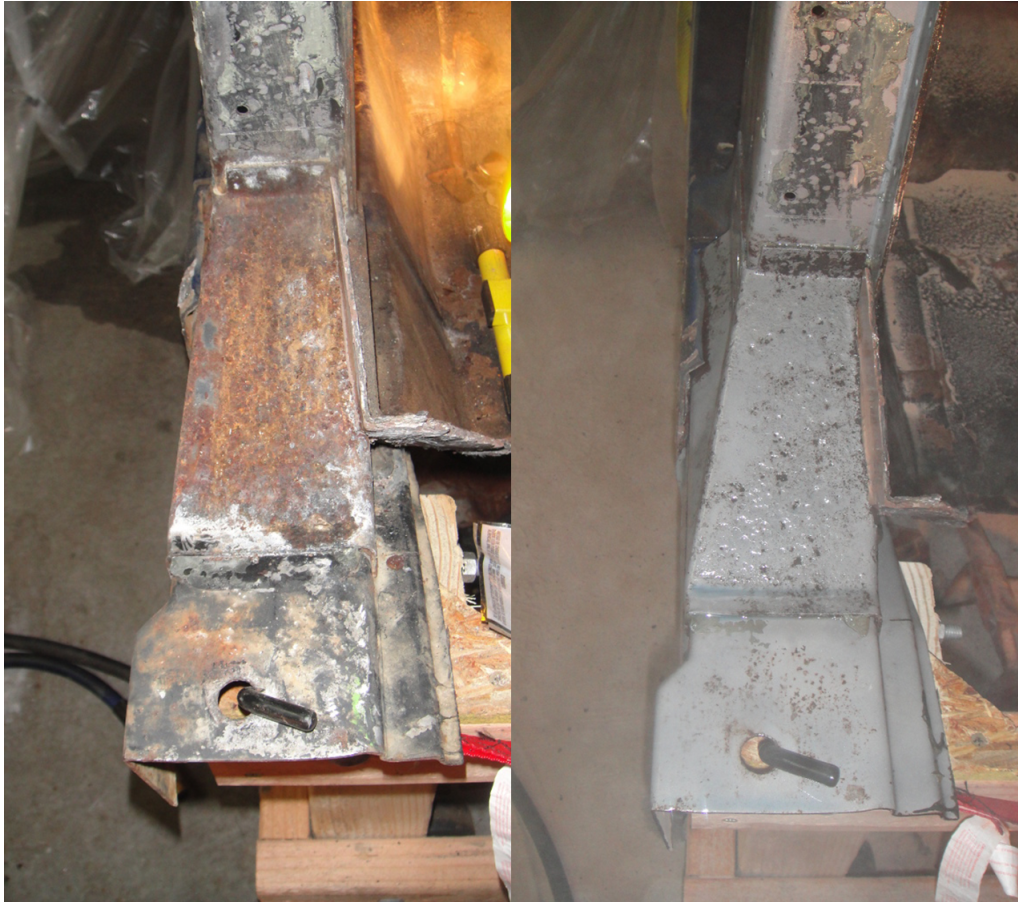
Found a few spots where I have to weld in a little new metal... Won't be able to do that until Home Depot opens tomorrow so I can get some sheet metal... What gauge sheet metal do I need???
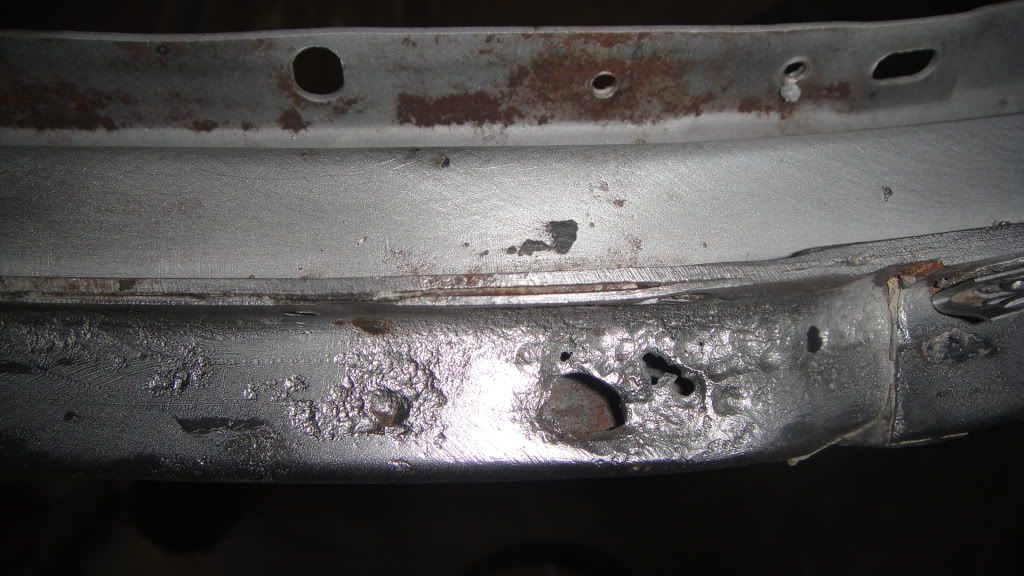

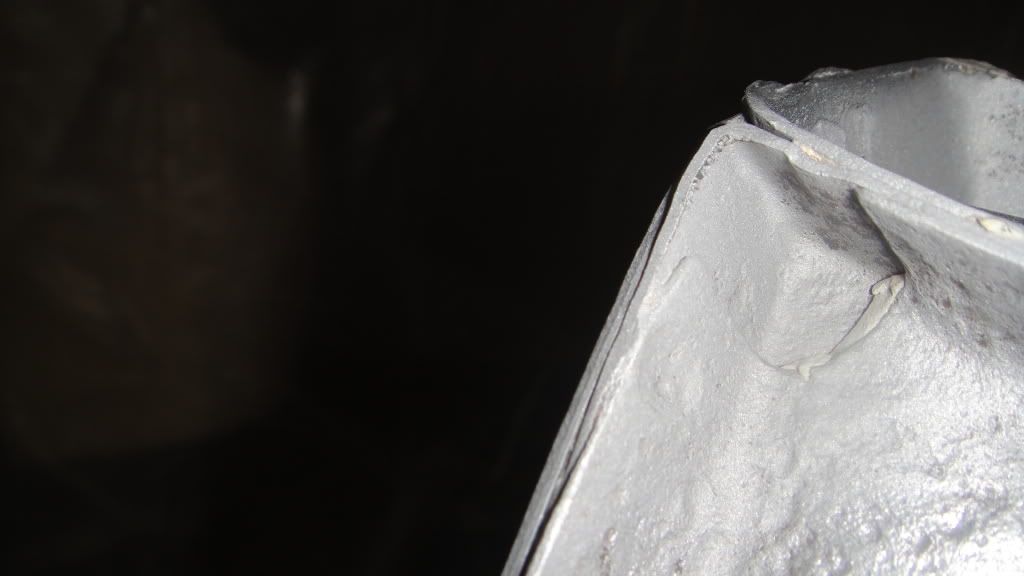
Someone put some joint compound in the rust holes... The joint compound looks and feels (white and solid) very similar to the compound that joined the front clip to the firewall... Here's a corner joint that I cleaned out, but you can see a little of the compound still in there...
What is the best compound to use to re-fill these joints?? Should I weld these joints?? I am going to order the Fusor 127EZ for the firewall/clip, can I use this in the joints???
Well, need to go load the sand blaster with a bag of sand... Really hate the scooping of sand for 10 minutes... Will continue to blast and wire brush for a few more hours...
Thanks much for looking...
Rogman
Found a few spots where I have to weld in a little new metal... Won't be able to do that until Home Depot opens tomorrow so I can get some sheet metal... What gauge sheet metal do I need???
Someone put some joint compound in the rust holes... The joint compound looks and feels (white and solid) very similar to the compound that joined the front clip to the firewall... Here's a corner joint that I cleaned out, but you can see a little of the compound still in there...
What is the best compound to use to re-fill these joints?? Should I weld these joints?? I am going to order the Fusor 127EZ for the firewall/clip, can I use this in the joints???
Well, need to go load the sand blaster with a bag of sand... Really hate the scooping of sand for 10 minutes... Will continue to blast and wire brush for a few more hours...
Thanks much for looking...
Rogman
Thread Starter
Drifting
Joined: Aug 2003
Posts: 1,868
Likes: 13
From: Mascoutah IL
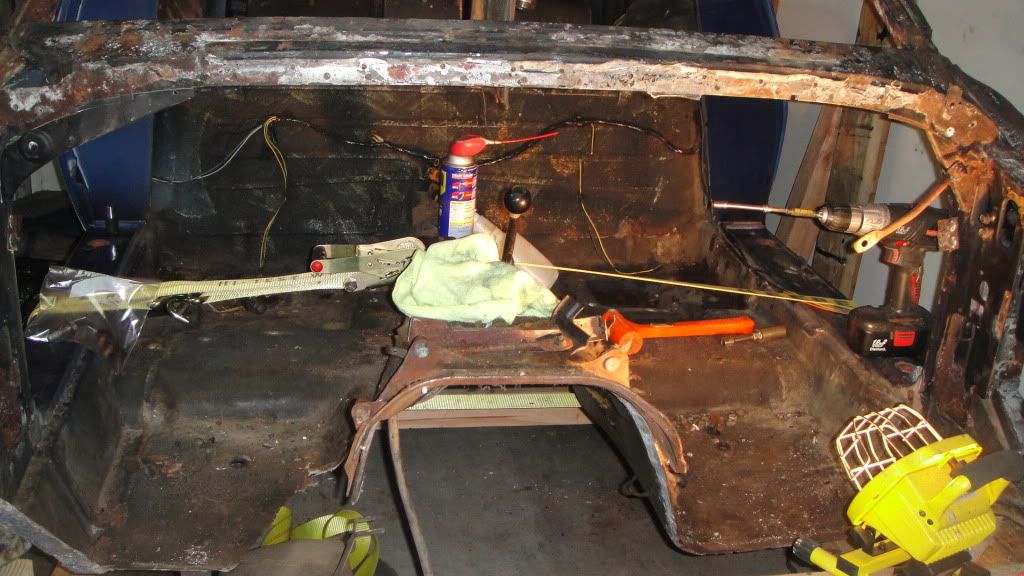
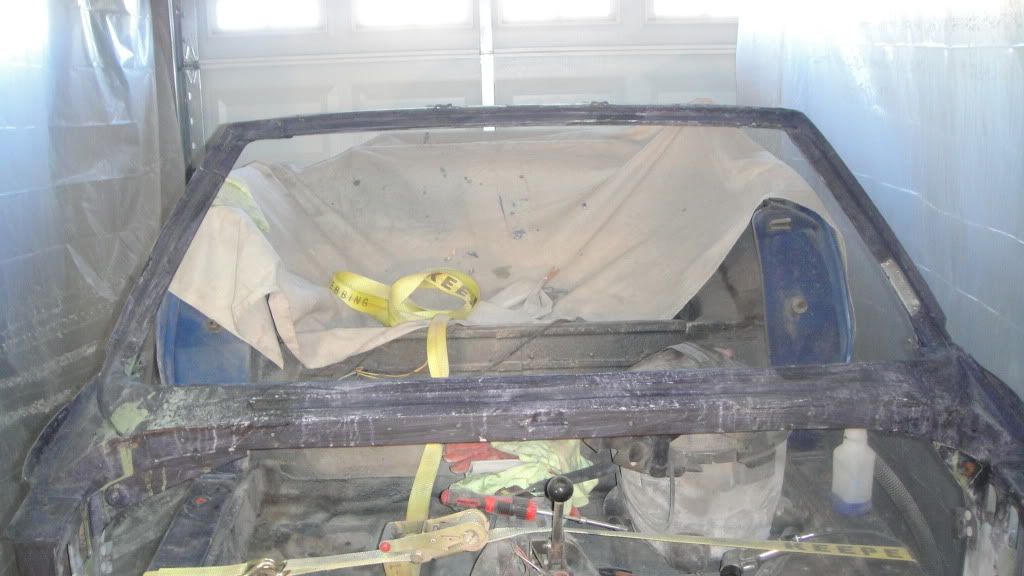
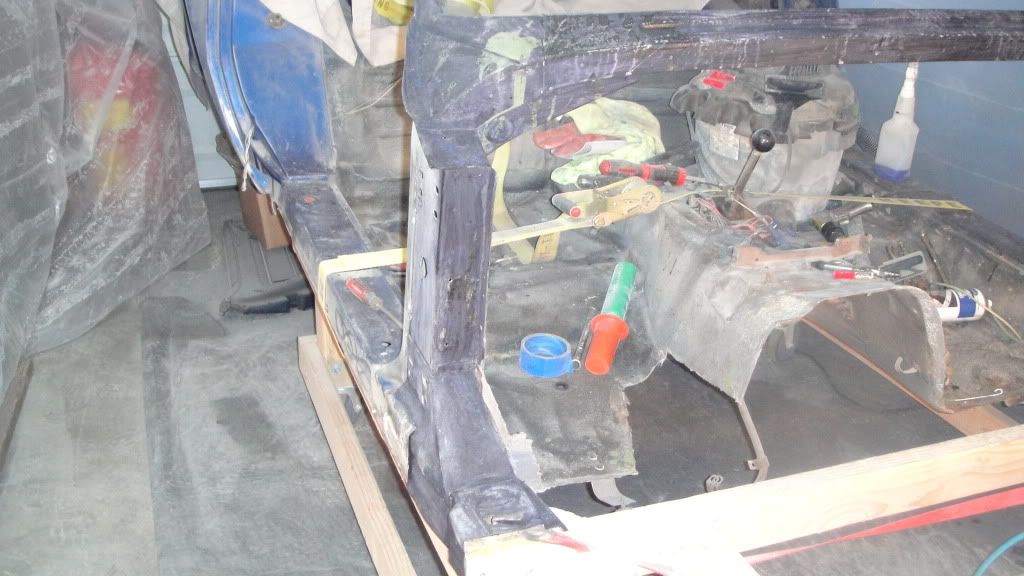
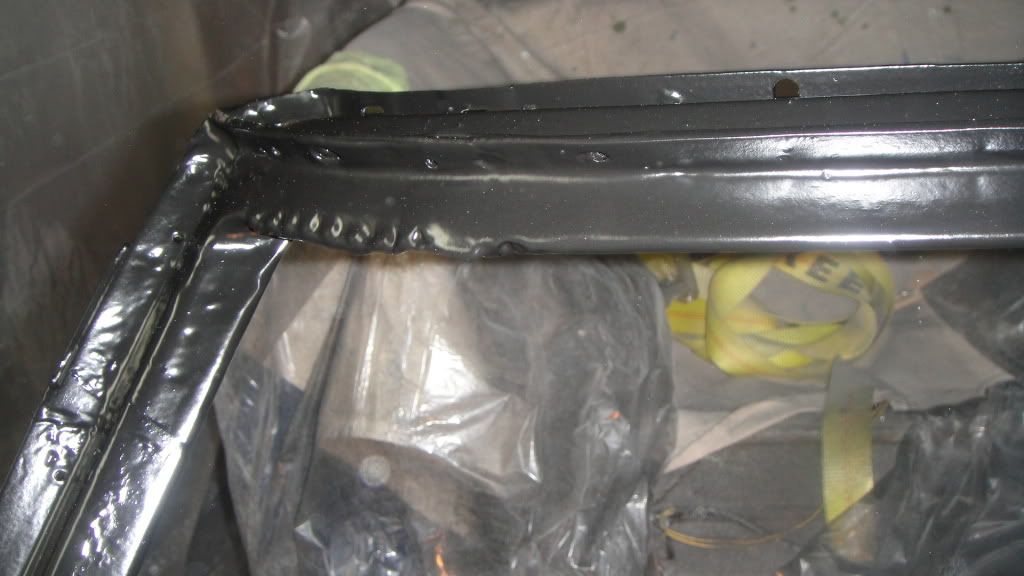
Started cleaning up and doing fiberglass repairs on the firewall as the adhesive should be here this week... Completed patching the windshield frame rust... Think I'm going to pick up some filler to smooth out the surfaces prior to re-installing the firewall... Did not get as much completed this weekend as hoped, but....
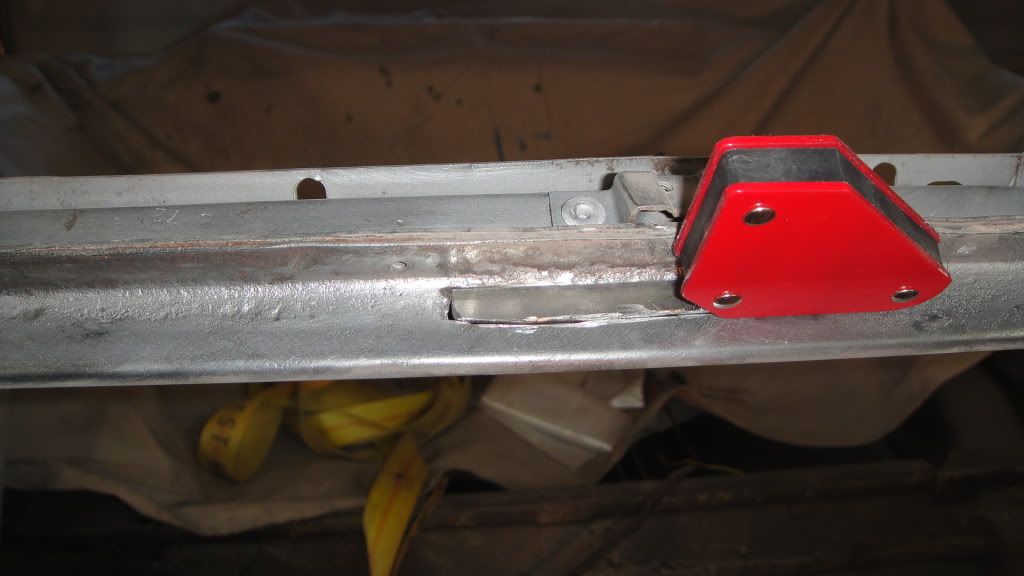
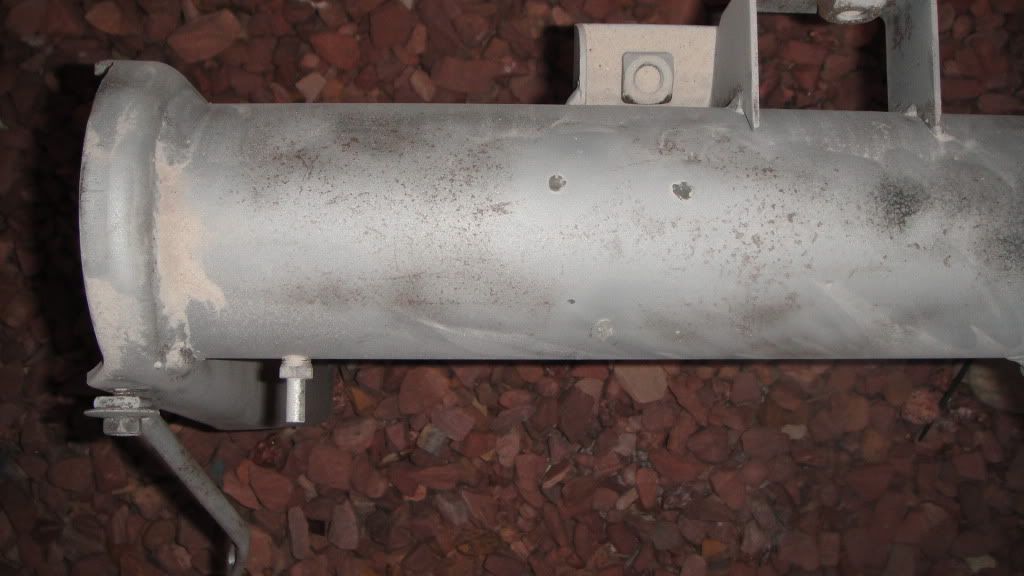
Also, need a little guidance... Should I just POR right over these 3 patched holes (rubber inserted in the holes)... Or should I weld these shut??? They currently do not leak...
Sorry I didn't get more pictures posted, I was concentrating on welding and fiberglassing... Forgot to take breaks and snap photos... Will do better next time, promise...
Thanks much...
Rogman

Racer


Joined: Jul 2005
Posts: 379
Likes: 54
When you've been on the road for a few miles, you'll probably find that the aftermarket rear sway bar was not designed for a C3 rear. Look at the angle the link goes through at the bar. It's just some supplier trying to make money sellingwith inappropriate parts.
Look for the thicker GM rear sway bar and links.
Look for the thicker GM rear sway bar and links.
Thread Starter
Drifting
Joined: Aug 2003
Posts: 1,868
Likes: 13
From: Mascoutah IL
When you've been on the road for a few miles, you'll probably find that the aftermarket rear sway bar was not designed for a C3 rear. Look at the angle the link goes through at the bar. It's just some supplier trying to make money sellingwith inappropriate parts.
Look for the thicker GM rear sway bar and links.
Look for the thicker GM rear sway bar and links.
Rogman
Corvette Stories
The Best of Corvette for Corvette Enthusiasts

Top 10 Most Expensive Corvettes Ever Sold on Bring A Trailer
Brett Foote
10 Things Every Corvette Owner Needs (2026 Edition)
Michael S. Palmer
8 Most "Only Corvette Owners Understand" Quirks and Problems
Pouria Savadkouei
10 Reasons the C6 Z06 is Still A Performance Benchmark After 20 Years
Joe Kucinski
How Much Horsepower Every Corvette Engine "LOST" in 1972
Joe Kucinski
Top 10 DOs and DON'Ts for Protecting Your Convertible Top!
Michael S. Palmer
Top 10 Most Explosive Corvettes Ever Made: Power-to-Weight Ratio Ranked!
Joe Kucinski
150 hp to 1,250 hp: Every Corvette Generation Compared by the Specs That Matter
Joe Kucinski
8 Coolest Corvette Pace Cars (and Replicas) of All Time
Verdad Gallardo
Thread Starter
Drifting
Joined: Aug 2003
Posts: 1,868
Likes: 13
From: Mascoutah IL
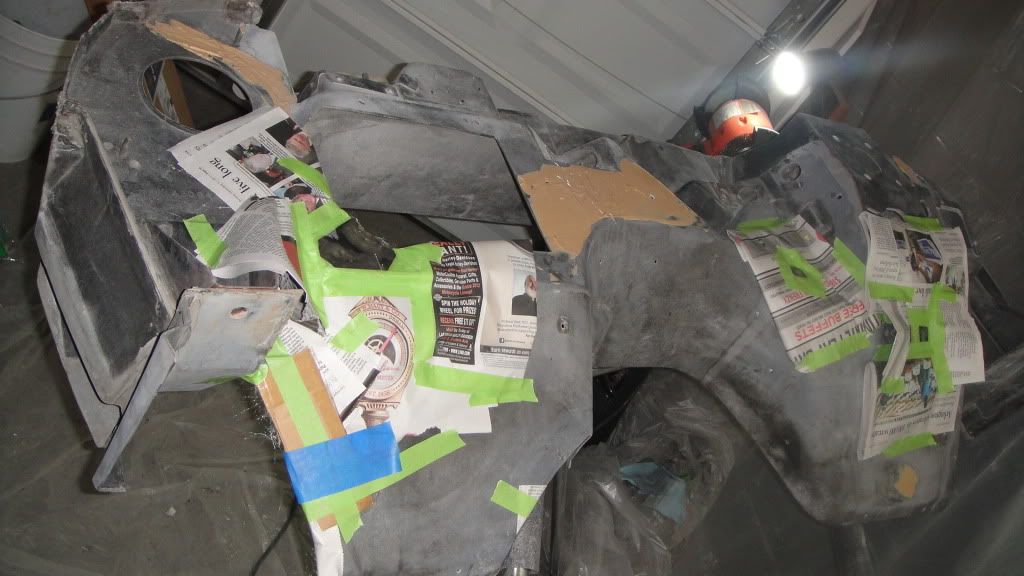
Getting closer to getting firewall back on... Got the rust encapsulator on the windshield frame and let dry for two days...

Cleaned up well and taped/covered everything I didn't want POR on...
Sprayed 2 pretty wet coats, waited 3 hours, then repeated...
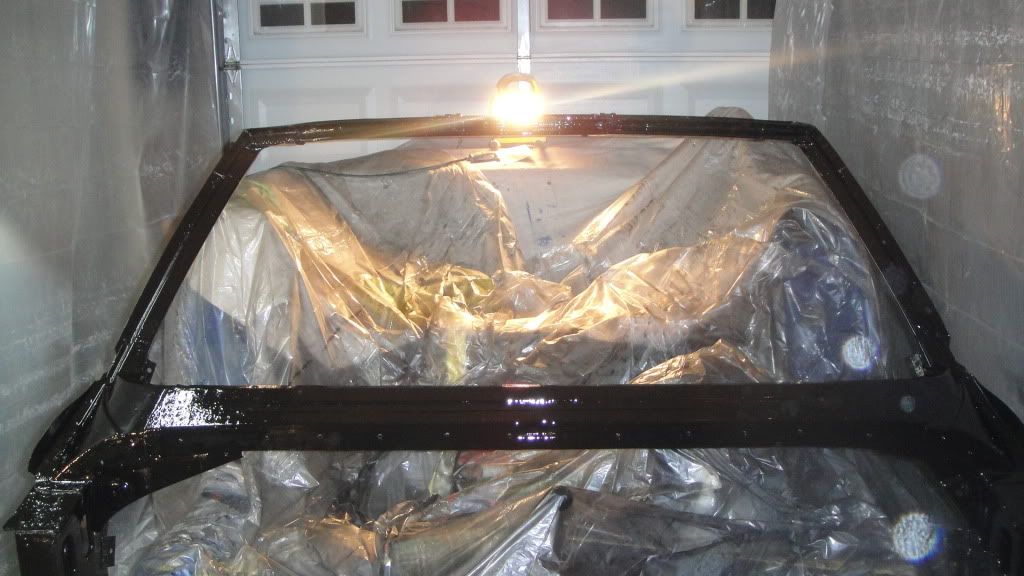
Will let dry overnight... A light coat of dyna-delite to smooth up a few imperfections, couple of coats of primer, then eastwood's 2K black top coat to finish this part off...
In between some of the above steps, need to lay a few more layers of glass to finish repairs on the fire wall...
Thanks for looking...
Rogman
Cleaned up well and taped/covered everything I didn't want POR on...
Sprayed 2 pretty wet coats, waited 3 hours, then repeated...
Will let dry overnight... A light coat of dyna-delite to smooth up a few imperfections, couple of coats of primer, then eastwood's 2K black top coat to finish this part off...
In between some of the above steps, need to lay a few more layers of glass to finish repairs on the fire wall...
Thanks for looking...
Rogman
Team Owner


Joined: Jan 2006
Posts: 37,637
Likes: 3,118
From: Crossville TN
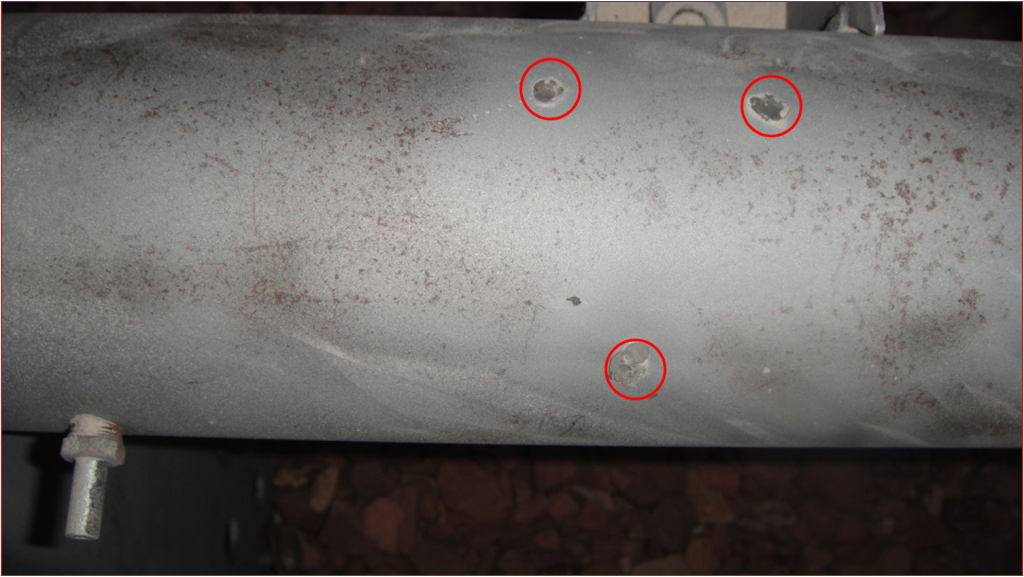
I think you should weld any holes/deep pits on that front tube assembly....which doubles as your vacuum reservoir. Leaving patched areas that could evenutually open up and cause loss of operating vacuum (and poor engine operation) is probably not the best alternative. Weld them up and grind smooth...no more problem.
Instructor

Joined: Apr 2006
Posts: 219
Likes: 0
From: Boiling Springs SC
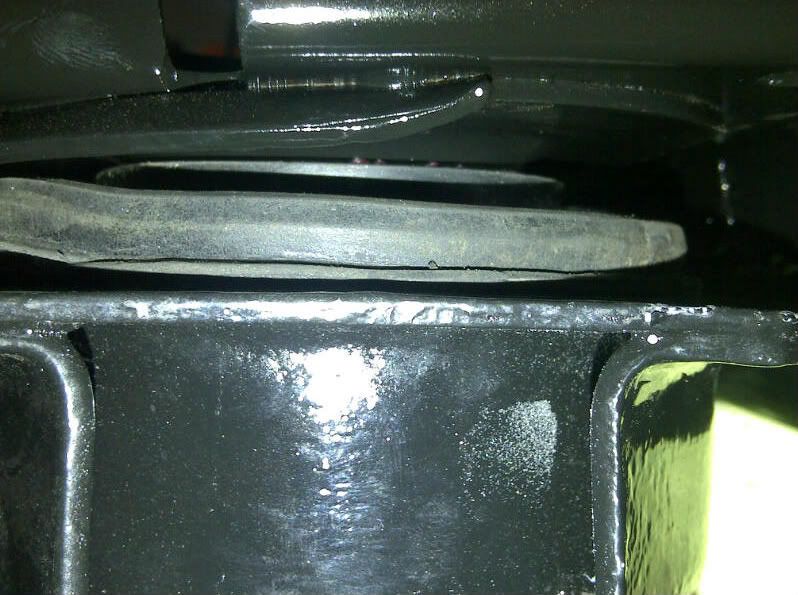
Please take a look at the gap on the rear cross member bushing... Have this gap on both sides... Is this gap supposed to be there?? The studs are torqued to 100 ft lbs of torque... Just want to ensure this is the way it is supposed to be before I go any further...
Thanks much
Rogman
Thanks much
Rogman
Thread Starter
Drifting
Joined: Aug 2003
Posts: 1,868
Likes: 13
From: Mascoutah IL
I noticed in a later post, that you have also installed the plates over the mounts. I found that by installing them and torquing them to spec it helped to further seat the main bushings. So my recommendation would be to recheck the torque on the bushings after you drop the body. PS: nice work and a great reference and confirmation on the same things I'm running into on my 73 rebuild.
Rogman
Thread Starter
Drifting
Joined: Aug 2003
Posts: 1,868
Likes: 13
From: Mascoutah IL
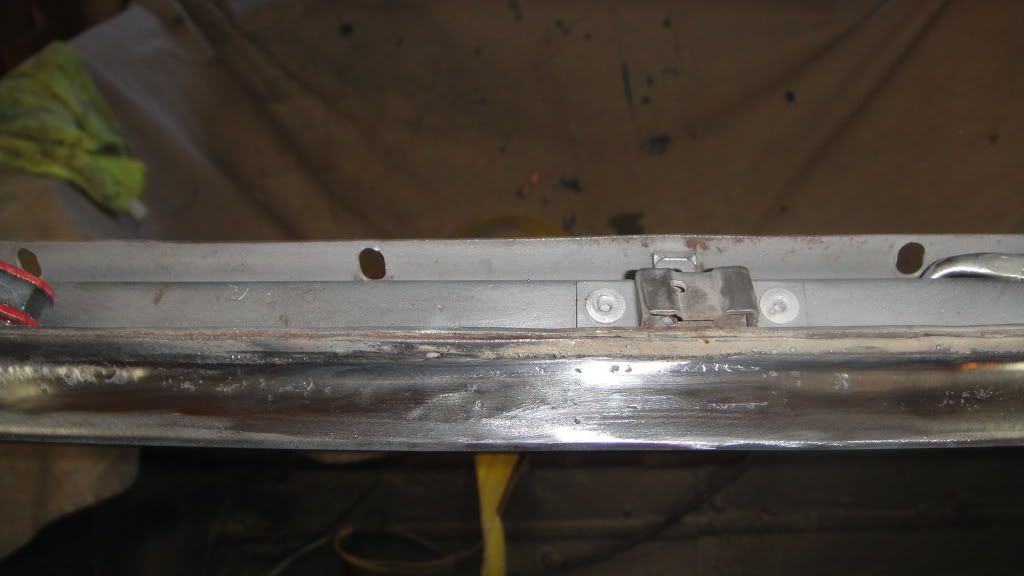
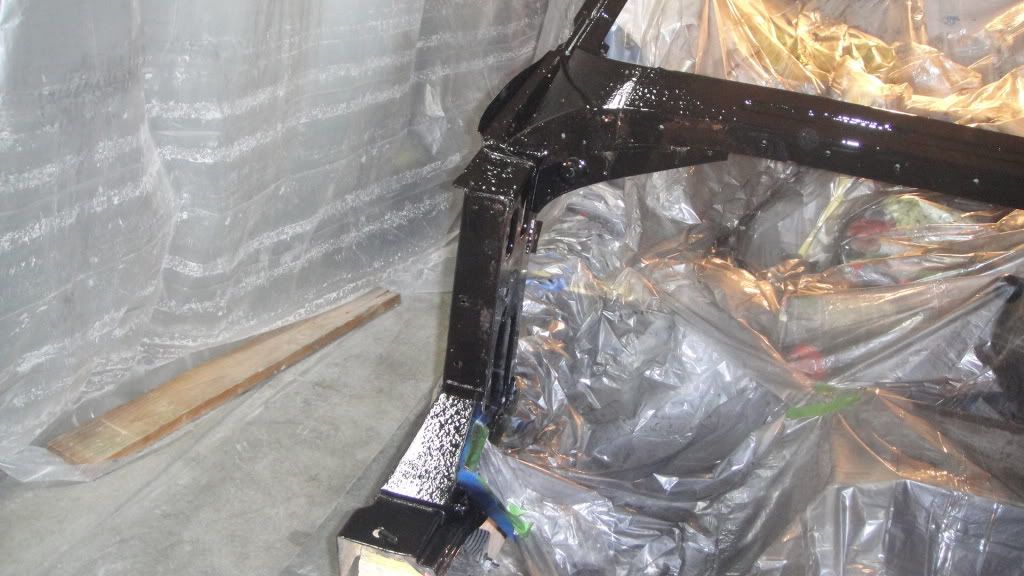
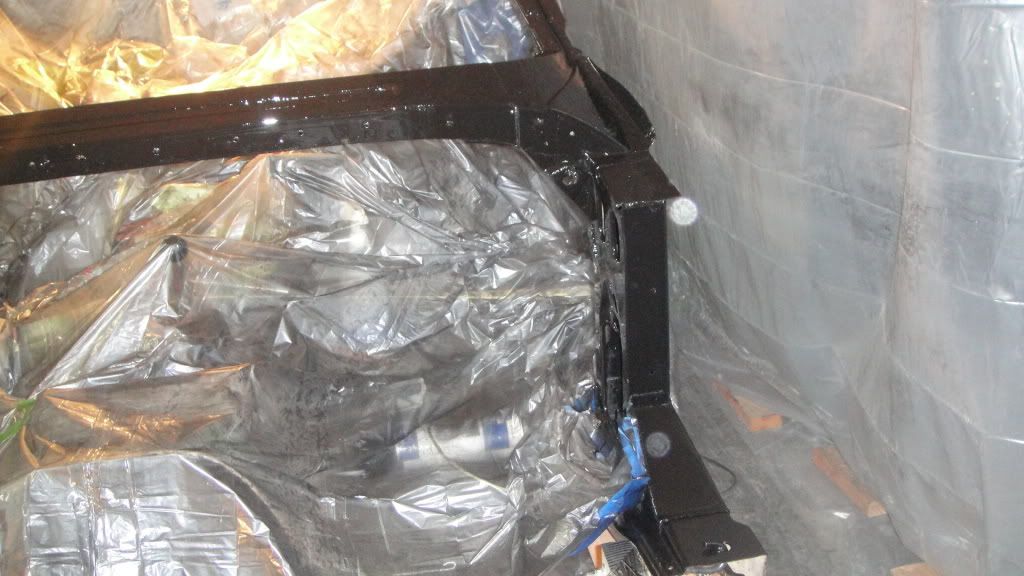
After 2 coats of POR 15, put two coats of POR 15 Self Etch primer and then two coats of Eastwood Semi Gloss 2K Engine Bay paint... Finishing cleaning up the firewall and have a little fiberglass work to touch up... May get to secure the firewall back to the birdcage tomorrow, but realistically, it will be next weekend... Here are some pics (sorry for the poor quality and plastic reflections):
POR 15 Self-Etching Primer
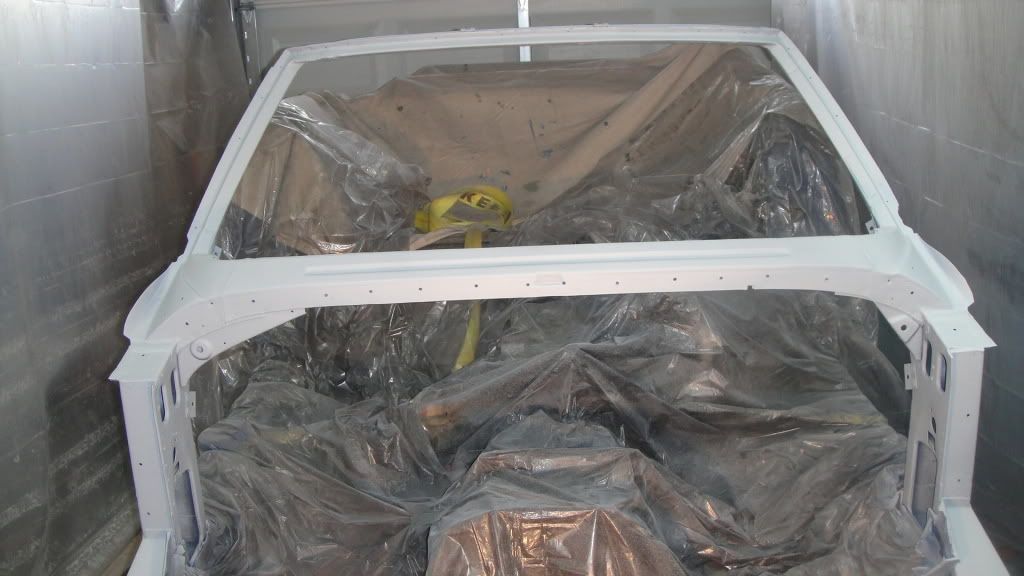
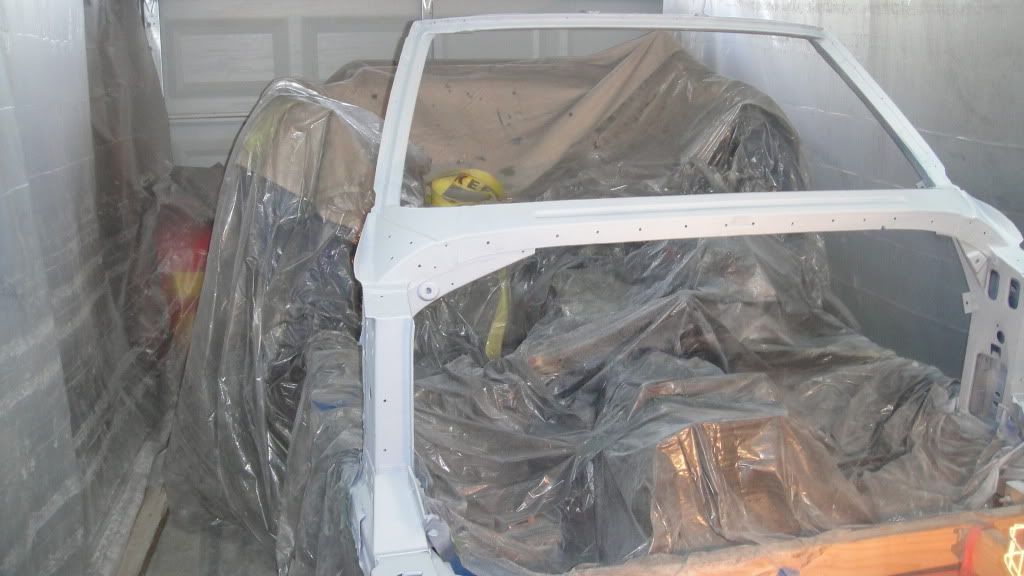
Eastwood 2K Semi:
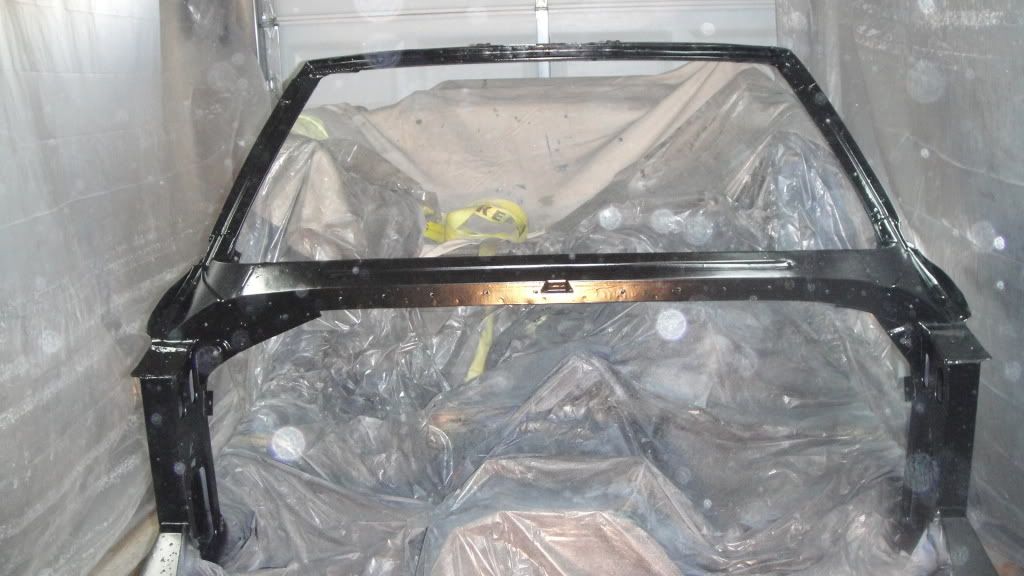
POR 15 Self-Etching Primer
Eastwood 2K Semi:
Pro


Joined: May 2011
Posts: 572
Likes: 1
From: Cooksville Maryland
DC Area Events Coordinator
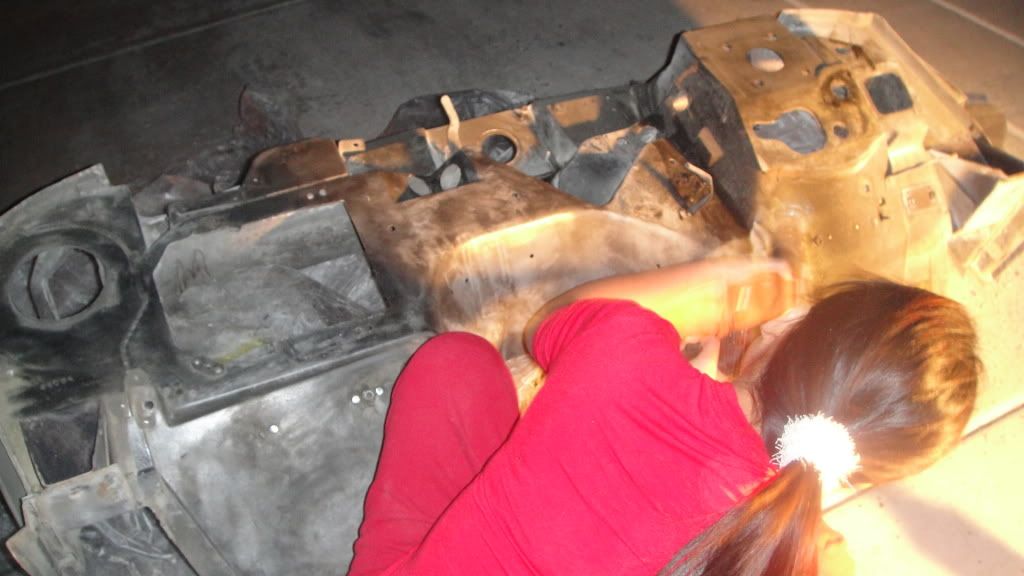
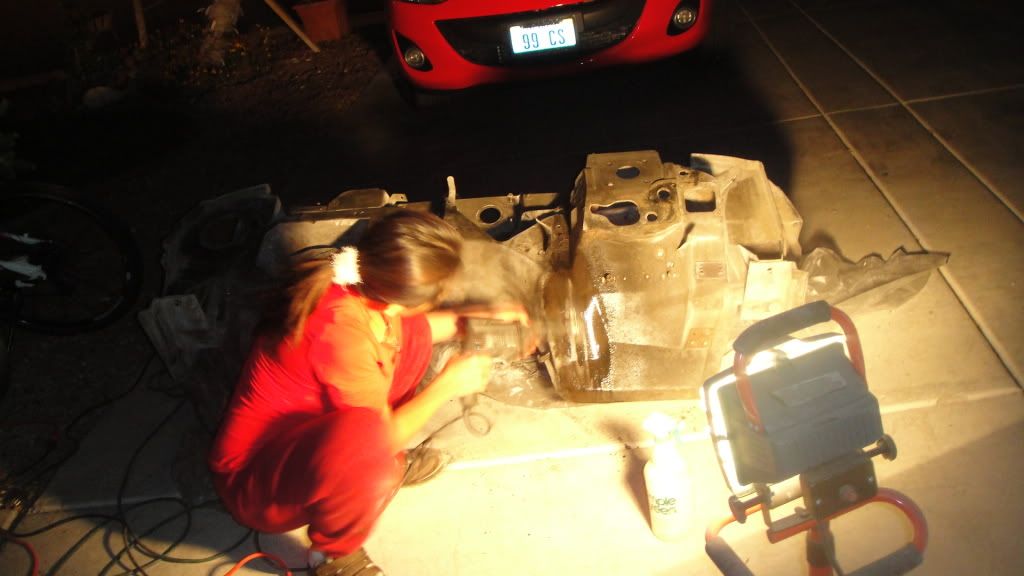
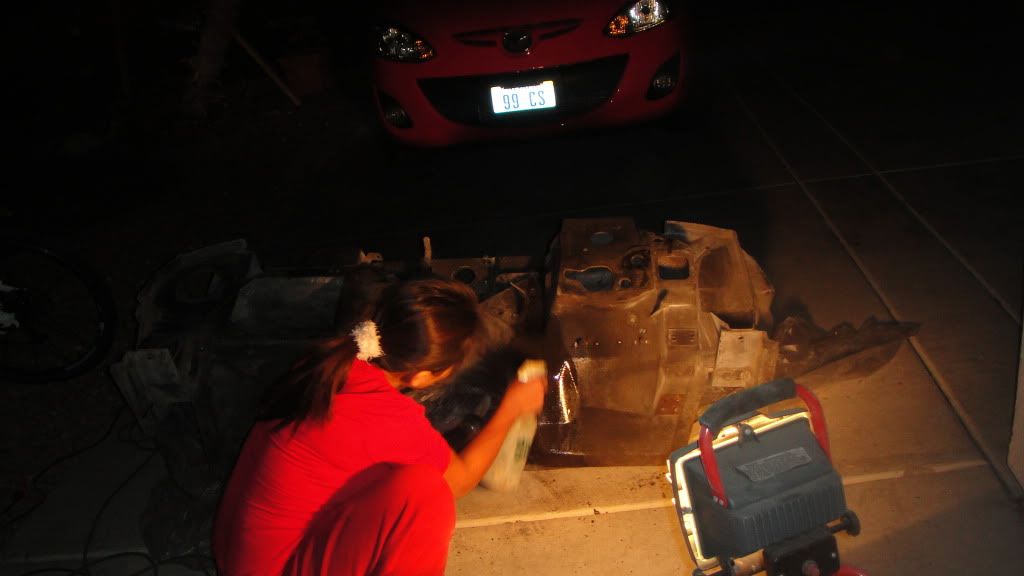
Gotta love them more when they are out there helping! My bride comes out quite often and just picks up parts that need to be cleaned! Very helpful in our Lotus restore when I couldn't get my thoughts strait on a major cut into the fiberglass. She cut the glass with the saw perfectly! RIght on the design lines and helped put a glass-see-through-engine port in!
I not only got the tie rods in, but the rest of the new power steering parts, and the alignment started.
Keep going! I can't imagine the extent that you are taking it. I am attempting to replace all old components with new, You have taken that to the uber-level!

I not only got the tie rods in, but the rest of the new power steering parts, and the alignment started.
Keep going! I can't imagine the extent that you are taking it. I am attempting to replace all old components with new, You have taken that to the uber-level!
Thread Starter
Drifting
Joined: Aug 2003
Posts: 1,868
Likes: 13
From: Mascoutah IL
Thanks much... Yepper, she comes out everyday and asks what she can help with... She's a magician on the grinder/wire wheel... And when I need some paint touch-up, she has a much steadier hand than I do... Enjoy the rest of the weekend...
Rogman
Rogman
Thread Starter
Drifting
Joined: Aug 2003
Posts: 1,868
Likes: 13
From: Mascoutah IL
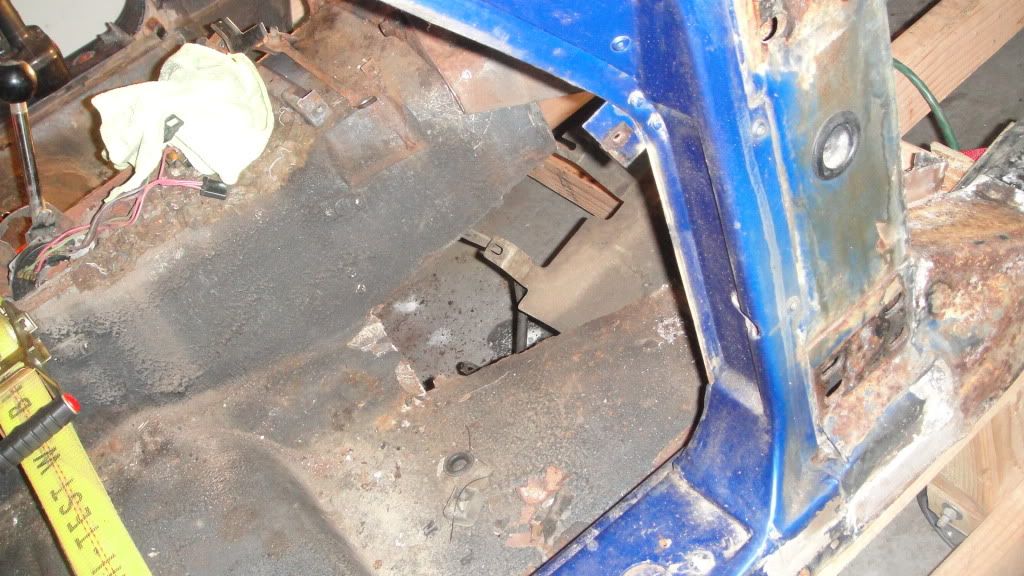
After several test fittings and a dry run for laying down the Fusor adhesive, I decided I didn't like some of the small imperfections on the firewall and layed some glass and filler... Looks like tomorrow of Tuesday I'll be putting the firewall back on the birdcage...
Also, found something on the car as FRUSTRATING as putting the parking brakes on with the spindle pressed on:
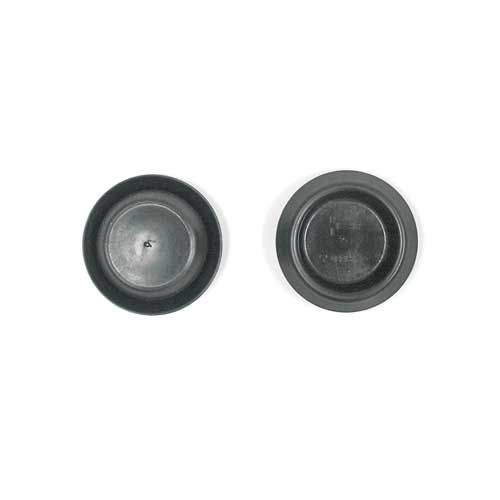
I would LOVE to know what specialty tool GM used to install the inside bolt on the top of this spring... I tried numerous different combinations of wrenches, swivels, distributor wrench, etc. to no avail... Ended up using a hole saw so I could get a swivel and impact on the last bolt... I cut it the hole the same size to accept a power window plug...
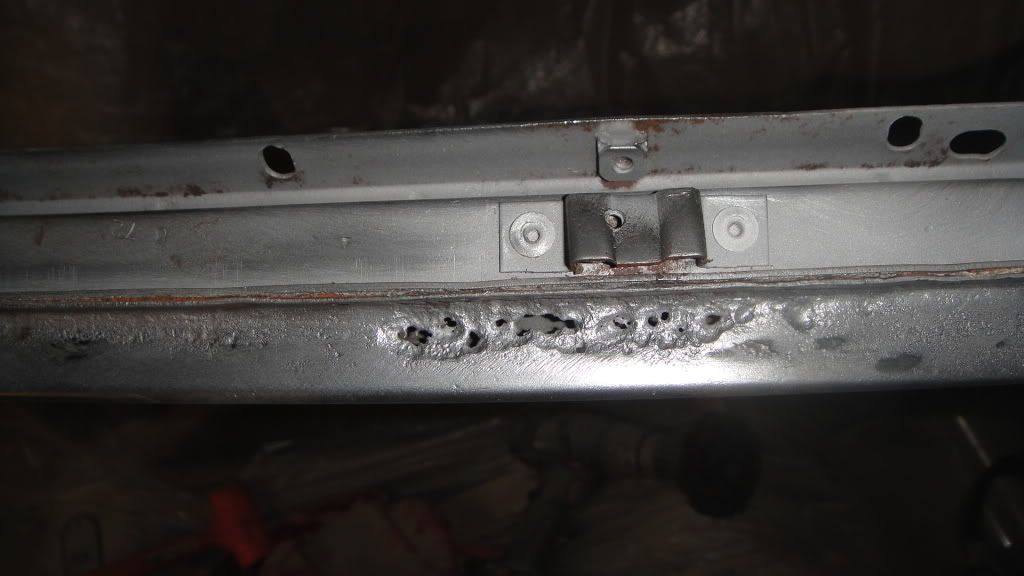
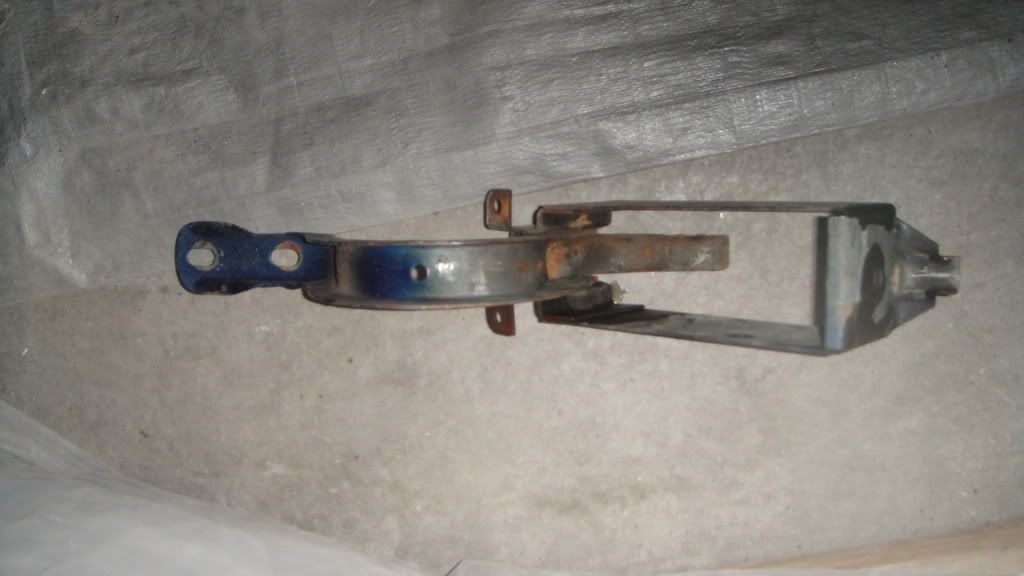
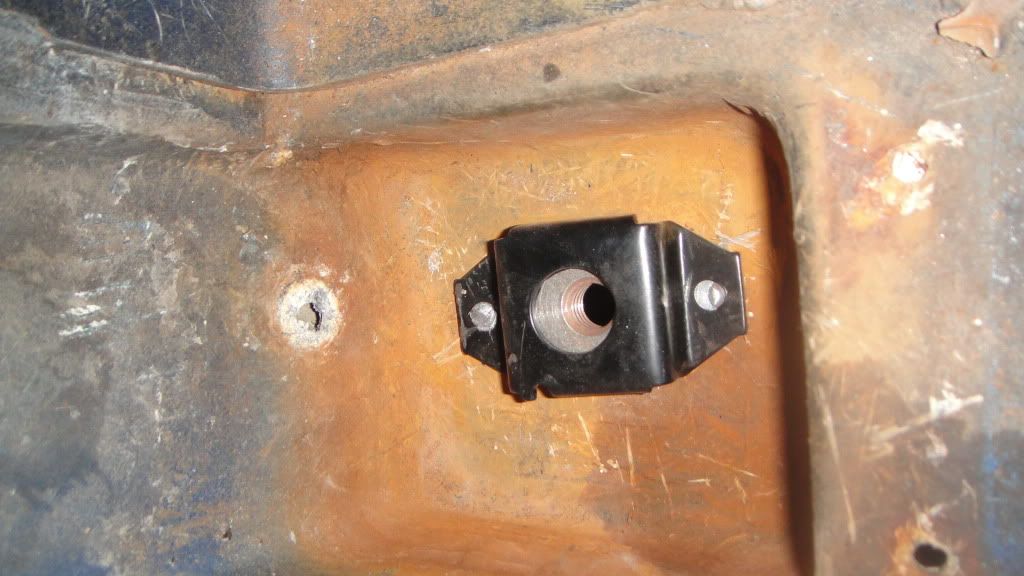
The main reason the pull the convertible latch hinge assemblies is that I need to repair the #4 body mount nut cage and square nut... The cage was completely gone and the nut was fused to the bolt... Only took 15 minutes to install this after spending several hours trying to get the hinge off... If anyone knows of a better way to get the hinge assembly off, please let me know...
After pictures (I'll take before and after pictures on the other side)...
Off all next week to get a bunch of little projects knocked out...
Thanks for looking,
Rogman
Also, found something on the car as FRUSTRATING as putting the parking brakes on with the spindle pressed on:
I would LOVE to know what specialty tool GM used to install the inside bolt on the top of this spring... I tried numerous different combinations of wrenches, swivels, distributor wrench, etc. to no avail... Ended up using a hole saw so I could get a swivel and impact on the last bolt... I cut it the hole the same size to accept a power window plug...
The main reason the pull the convertible latch hinge assemblies is that I need to repair the #4 body mount nut cage and square nut... The cage was completely gone and the nut was fused to the bolt... Only took 15 minutes to install this after spending several hours trying to get the hinge off... If anyone knows of a better way to get the hinge assembly off, please let me know...
After pictures (I'll take before and after pictures on the other side)...
Off all next week to get a bunch of little projects knocked out...
Thanks for looking,
Rogman

Drifting
Joined: Mar 2011
Posts: 1,886
Likes: 9
Gotta love them more when they are out there helping! My bride comes out quite often and just picks up parts that need to be cleaned! Very helpful in our Lotus restore when I couldn't get my thoughts strait on a major cut into the fiberglass. She cut the glass with the saw perfectly! RIght on the design lines and helped put a glass-see-through-engine port in!
I not only got the tie rods in, but the rest of the new power steering parts, and the alignment started.
Keep going! I can't imagine the extent that you are taking it. I am attempting to replace all old components with new, You have taken that to the uber-level!
I not only got the tie rods in, but the rest of the new power steering parts, and the alignment started.
Keep going! I can't imagine the extent that you are taking it. I am attempting to replace all old components with new, You have taken that to the uber-level!