


1971 Journey

Thread Starter
Melting Slicks


Joined: Apr 2010
Posts: 2,795
Likes: 1,196
From: Canberra Australia
2025 C3 of the Year Finalist - Modified
Originally Posted by DOC
Very mild Cam. Not far off stock.
I was not after a wild cam, wanted it to idle and run smooth from low revs but have good torque low and mid.
The extra cubes will help as well :-)
Thread Starter
Melting Slicks
Joined: Apr 2010
Posts: 2,795
Likes: 1,196
From: Canberra Australia
2025 C3 of the Year Finalist - Modified
Thanks River
I am trusting Terry to get it correct as I am no expert in this area.
He was comfortable I will be happy with the choice of components with a good low to mid torque band.
If I had better heads, like what Jethro is getting I think I could have had a more aggressive cam.
From the specs it looks like mine is between a Comp Cams 260h and 268h
There are as many opinions as there is web users on this issue and I welcome them all ... :-)
I read this from Chevy Performance and it seemed to make sense.
http://www.chevyhiperformance.com/te...m/viewall.html
If I look at that I am at the bottom of the degree for a 383 they recommend (214) but I dont have the better heads or diff ratio they are assuming for the build. My cam has more lift than the one they recommend for the 350 build though with stock heads.
So its done now so the seat of the pants meter will be the judge once I get it all back together.
Remember my aims were, reliable, good drive-ability and some improvements in torque and power (balanced more to torque than power at it wont live in high revs)
I only went to the 383 as the cost was minimal in the scheme of things, would have been happy with a rebuilt 350.
Thread Starter
Melting Slicks
Joined: Apr 2010
Posts: 2,795
Likes: 1,196
From: Canberra Australia
2025 C3 of the Year Finalist - Modified
Have not done much this weekend on the Vette, spent some time on my son's HJ ute fitting a Petronix Ignitor and 40k Coil as well as wiring it for 12v at the coil with a relay.
However I have mocked a few things up to check fit and alignment.
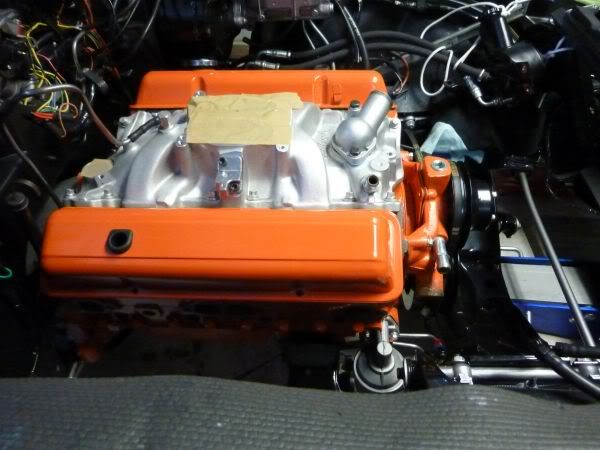
However I have mocked a few things up to check fit and alignment.
Last edited by CraigH; Apr 10, 2023 at 04:31 AM.
Thread Starter
Melting Slicks
Joined: Apr 2010
Posts: 2,795
Likes: 1,196
From: Canberra Australia
2025 C3 of the Year Finalist - Modified
Feel like I have been getting nothing done, travel all week so decided to do something this morning.
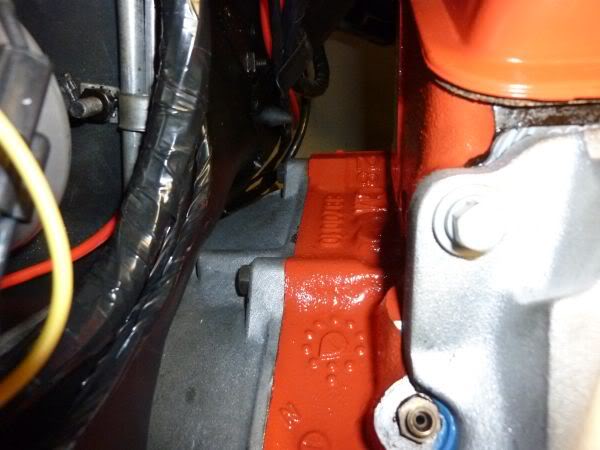
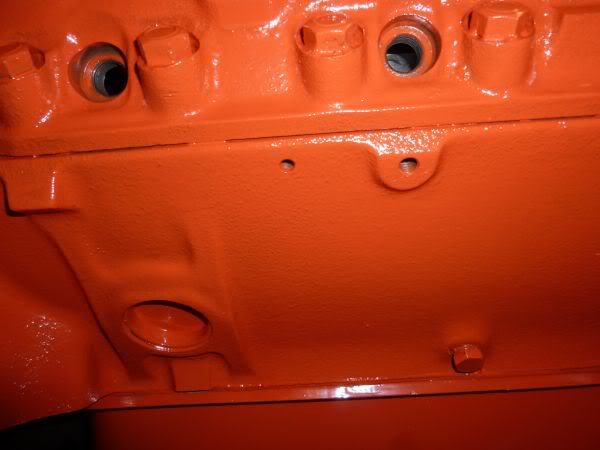
Put a final coat of paint on the block.
When it dries I will clean up the gasket areas.
Will also wet sand the sump as it has some runs and blemishes in it from when it was sprayed, mask it all up and give it another spray coat as well.
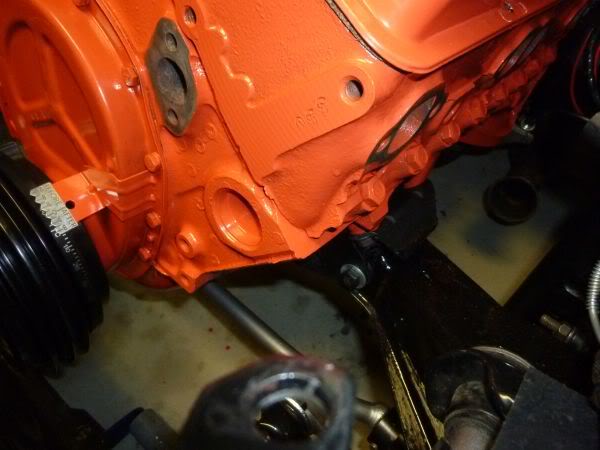
Put a final coat of paint on the block.
When it dries I will clean up the gasket areas.
Will also wet sand the sump as it has some runs and blemishes in it from when it was sprayed, mask it all up and give it another spray coat as well.
Last edited by CraigH; Apr 10, 2023 at 04:31 AM.
Thread Starter
Melting Slicks
Joined: Apr 2010
Posts: 2,795
Likes: 1,196
From: Canberra Australia
2025 C3 of the Year Finalist - Modified
Originally Posted by shipy59
so did your engine builder go through any cam break in procedure with you???use 20/50 for older engine oil with crane or simular oil addative(zinc) I used moreys but like stp/wynns also. I still firmly believe that the first 15mins are the be all and end all of a motor. Take it instantly up to 1500 rpm(3 full turns on idle screw before starting) and leave it to sing for the 15 mins,timing can be out a few degrees wont matter(can play if its long way out but keep revs up).
big thing is to get all the cam/lifter burnishing done instantly and not have a lifter not rotate due to lack of revs. have seen guys on net use old rocker covers with the top cut out so they can see all pushrods turning and if not grab pushrod and twist it around to start rotation.
good luck and keep revs up :o
That is something I have given a lot of thought into.
The cam comes with a break in lube additive that I will add to the Penrite Classic Lite oil that already has Z D D P in it.
The builder says start it up let it idle then drive it without letting it load or stress varying the revs.
Lots of web sits say get it towards 2000 revs and hold it there for 10-15 minutes.
A guy who works for me was an engine builder for years and tells me to follow what the builder has said as that's what he would have done. he believes the other methods (rev to 2000 etc) are all hangovers from a time past and don't really make sense any more.
To be honest i am not sure what to do !!!!
Thread Starter
Melting Slicks
Joined: Apr 2010
Posts: 2,795
Likes: 1,196
From: Canberra Australia
2025 C3 of the Year Finalist - Modified
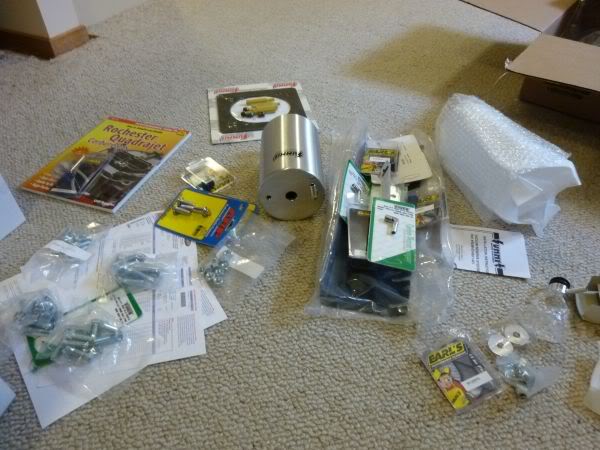
Did some wet sanding of the sump and will give it a final coat soon but had a package turn up from Summit.
Some new bits and pieces.
Some new bits and pieces.
Last edited by CraigH; Apr 10, 2023 at 04:31 AM.
Thread Starter
Melting Slicks
Joined: Apr 2010
Posts: 2,795
Likes: 1,196
From: Canberra Australia
2025 C3 of the Year Finalist - Modified
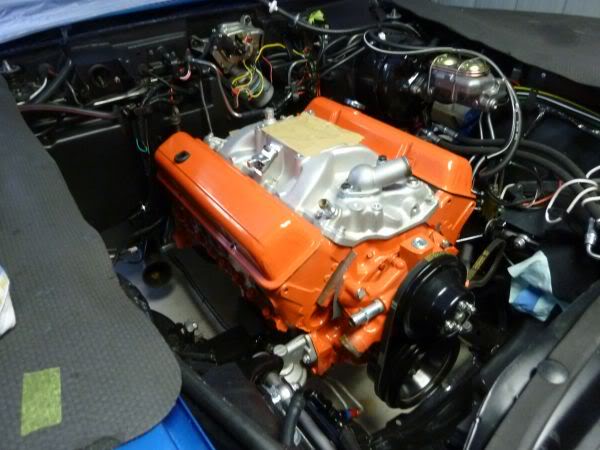
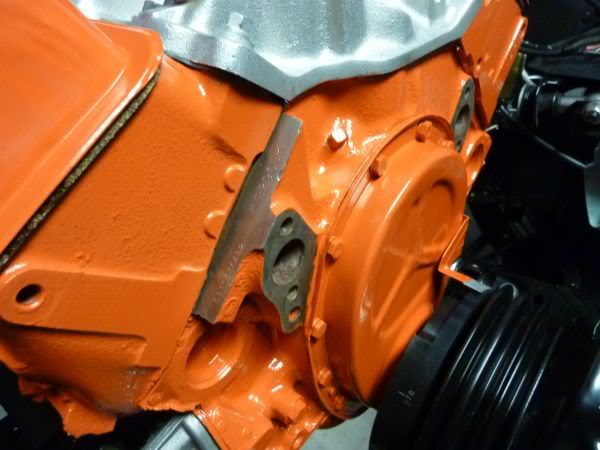
Feel like I have done nothing for weeks but I did manage to prepare and respray the sump.
So engine is fairly well ready to just fit all the accessories back on.
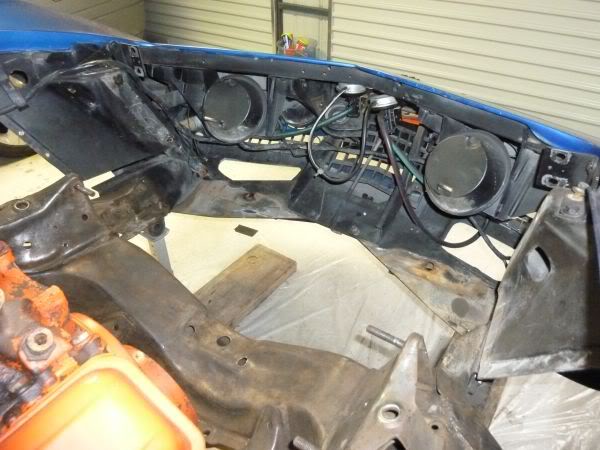
Pushed it outside and gave the engine bay a wash out first.
So engine is fairly well ready to just fit all the accessories back on.
Pushed it outside and gave the engine bay a wash out first.
Last edited by CraigH; Apr 10, 2023 at 10:44 PM.
Thread Starter
Melting Slicks
Joined: Apr 2010
Posts: 2,795
Likes: 1,196
From: Canberra Australia
2025 C3 of the Year Finalist - Modified
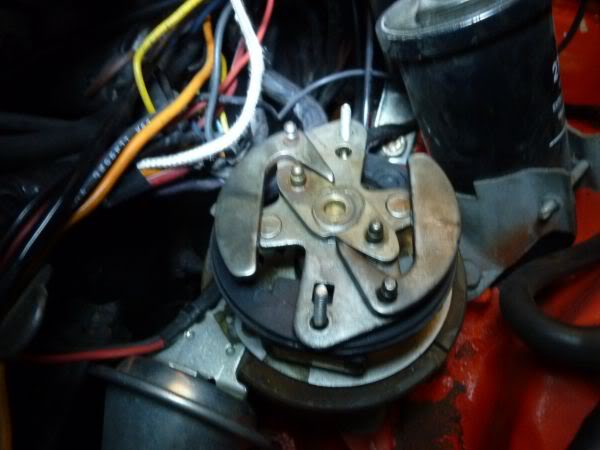
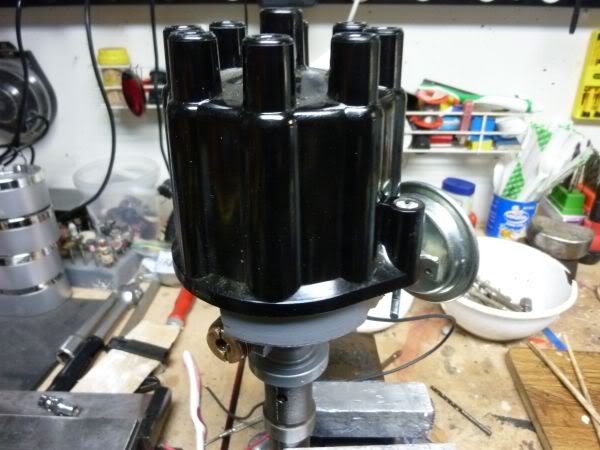
This morning I shimmed the distributor to get rid of the end play.
Starting point was around .025" endplay.
Hold distributor in vice.
Knock out the roll pin
Remove gear off bottom and add shims.
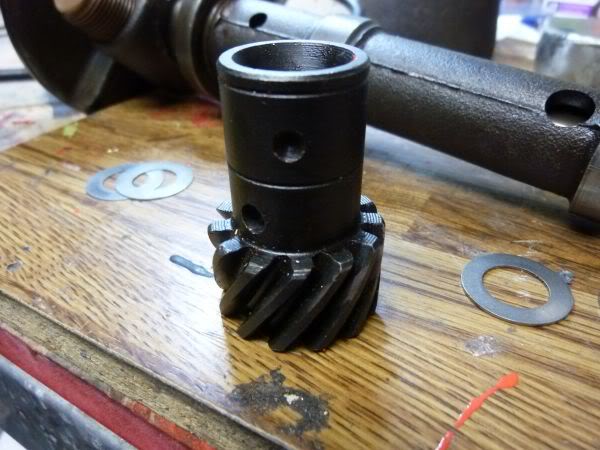
Measure how much play is present. I got it down to .013. Needed some different shims to get it better. Kit had 5 shims but only 2 sizes. .010 is meant to be about perfect.
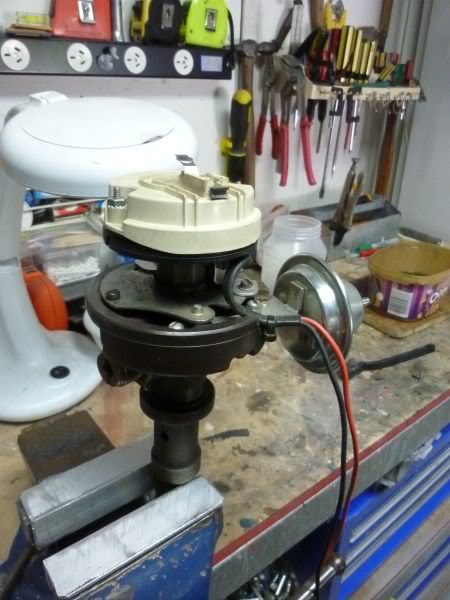
The other thing to keep in mind (as reminded by Shipy59 way back in my thread) is the orientation of the bottom gear. The dimple needs to line up with the rotor pointer.
Why does it matter, well there is an uneven number of teeth on the gear so it places the orientation out by about 13 degrees. Makes it sit in the proper place and clear shielding etc etc, does not stop it from being timed properly. Mine was on wrong way when I took it out and I always had to fight the tach drive when I advanced it to its limit. Now with 13 degrees more movement it should be a bit easier.
Starting point was around .025" endplay.
Hold distributor in vice.
Knock out the roll pin
Remove gear off bottom and add shims.
Measure how much play is present. I got it down to .013. Needed some different shims to get it better. Kit had 5 shims but only 2 sizes. .010 is meant to be about perfect.
The other thing to keep in mind (as reminded by Shipy59 way back in my thread) is the orientation of the bottom gear. The dimple needs to line up with the rotor pointer.
Why does it matter, well there is an uneven number of teeth on the gear so it places the orientation out by about 13 degrees. Makes it sit in the proper place and clear shielding etc etc, does not stop it from being timed properly. Mine was on wrong way when I took it out and I always had to fight the tach drive when I advanced it to its limit. Now with 13 degrees more movement it should be a bit easier.
Last edited by CraigH; Apr 10, 2023 at 04:31 AM.
Corvette Stories
The Best of Corvette for Corvette Enthusiasts

Top 10 Most Expensive Corvettes Ever Sold on Bring A Trailer
Brett Foote
10 Things Every Corvette Owner Needs (2026 Edition)
Michael S. Palmer
8 Most "Only Corvette Owners Understand" Quirks and Problems
Pouria Savadkouei
10 Reasons the C6 Z06 is Still A Performance Benchmark After 20 Years
Joe Kucinski
How Much Horsepower Every Corvette Engine "LOST" in 1972
Joe Kucinski
Top 10 DOs and DON'Ts for Protecting Your Convertible Top!
Michael S. Palmer
Top 10 Most Explosive Corvettes Ever Made: Power-to-Weight Ratio Ranked!
Joe Kucinski
150 hp to 1,250 hp: Every Corvette Generation Compared by the Specs That Matter
Joe Kucinski
8 Coolest Corvette Pace Cars (and Replicas) of All Time
Verdad Gallardo
Thread Starter
Melting Slicks
Joined: Apr 2010
Posts: 2,795
Likes: 1,196
From: Canberra Australia
2025 C3 of the Year Finalist - Modified
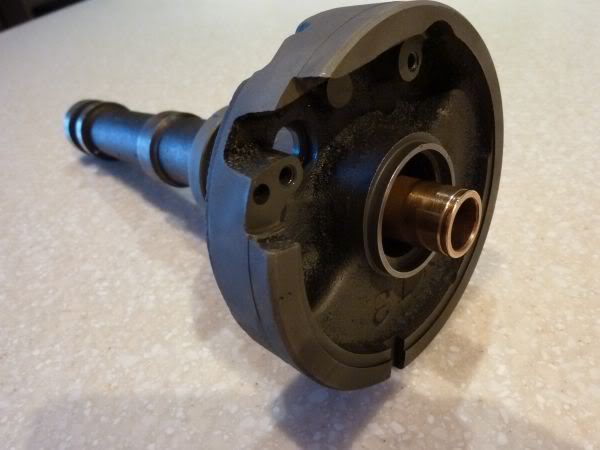
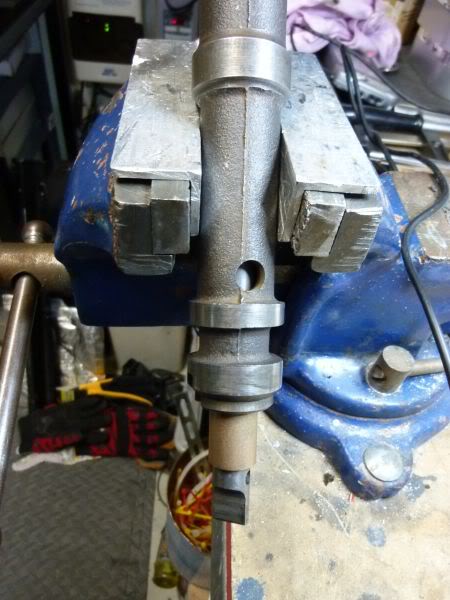
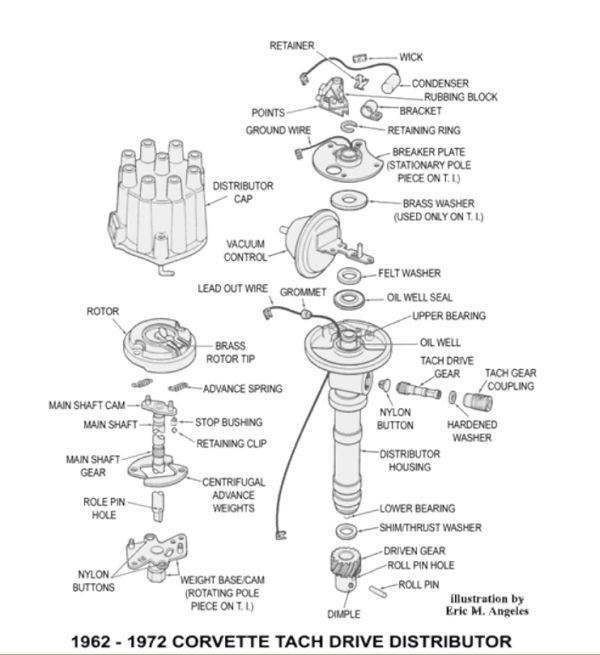
Ok I have decided to strip the distributor it completely and repack the topend with bearing grease and gauze with oil.
What tool to I need to remove the brass tack drive assembly to allow the shaft to come out ?
What tool to I need to remove the brass tack drive assembly to allow the shaft to come out ?
Thread Starter
Melting Slicks
Joined: Apr 2010
Posts: 2,795
Likes: 1,196
From: Canberra Australia
2025 C3 of the Year Finalist - Modified
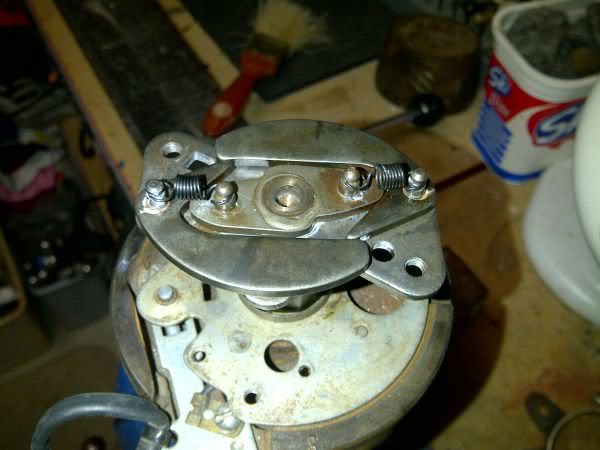
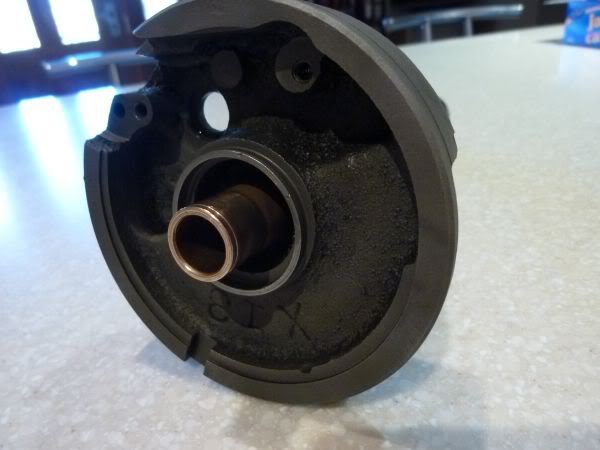
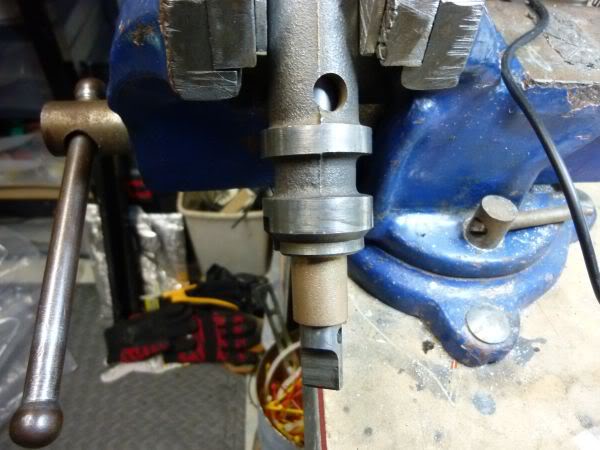
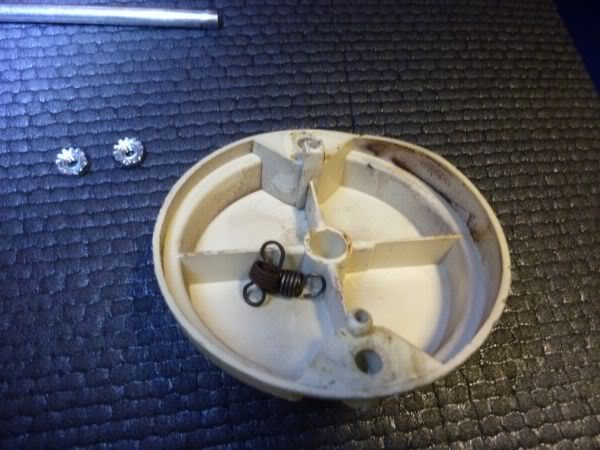
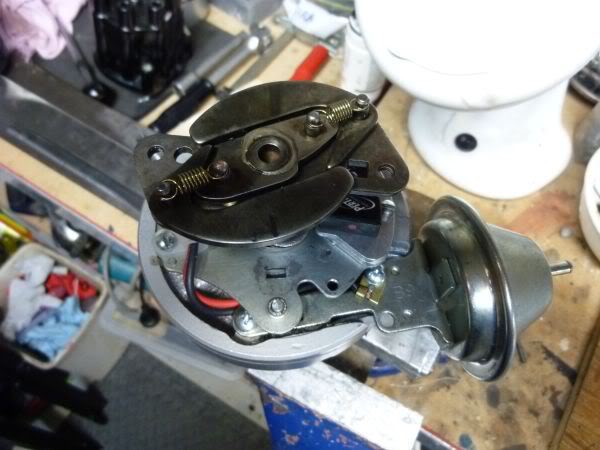
Got it all apart, some penetrating oil and a tap with the hammer and it came loose.

The gear drive mechanism.
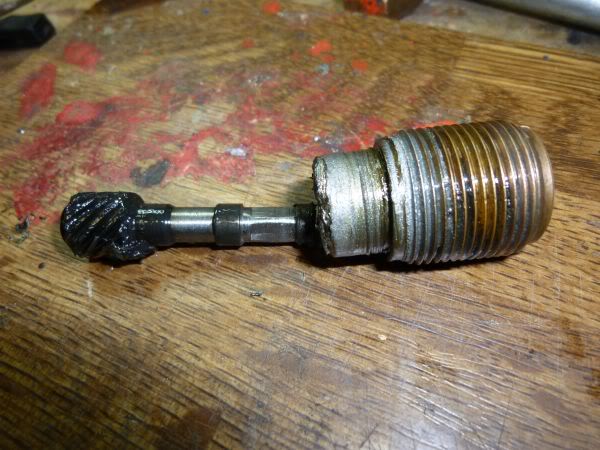
Glad I did it as the grease well under the points plate was dry and crumbly. Originally I think they used something like a sawdust with oil in it. The bush has a hole to allow it to get on shaft.
All out and washed off.
The gear drive mechanism.
Glad I did it as the grease well under the points plate was dry and crumbly. Originally I think they used something like a sawdust with oil in it. The bush has a hole to allow it to get on shaft.
All out and washed off.
Last edited by CraigH; Apr 10, 2023 at 04:30 AM.
Thread Starter
Melting Slicks
Joined: Apr 2010
Posts: 2,795
Likes: 1,196
From: Canberra Australia
2025 C3 of the Year Finalist - Modified
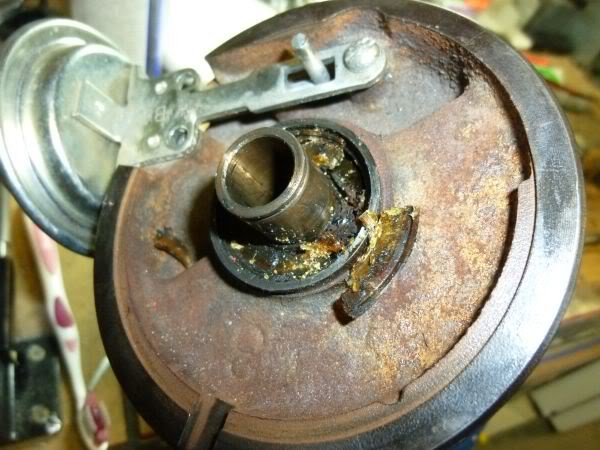
Originally Posted by Bazzas77
wasnt it an oil soaked piece of sponge material originally used in there ?
i cant see that surface rust being left there too long either :-x
i cant see that surface rust being left there too long either :-x
Thats whats in Lars's documents.
He suggests gauze soaked in oil rather than grease.
And yes that rust will have to go :-).
I found a washer on top of the top bearing that I think should not have been there. May have been to lower end float (wrong way).
If would result in rotor being higher than normal.
Have posted question NCRS to see if there was a washer there ever.
Thread Starter
Melting Slicks
Joined: Apr 2010
Posts: 2,795
Likes: 1,196
From: Canberra Australia
2025 C3 of the Year Finalist - Modified
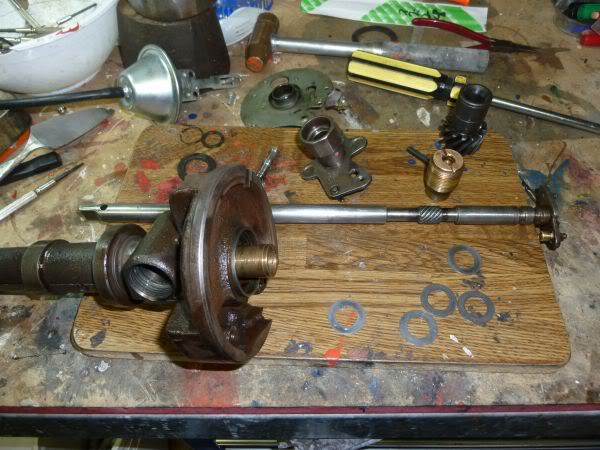
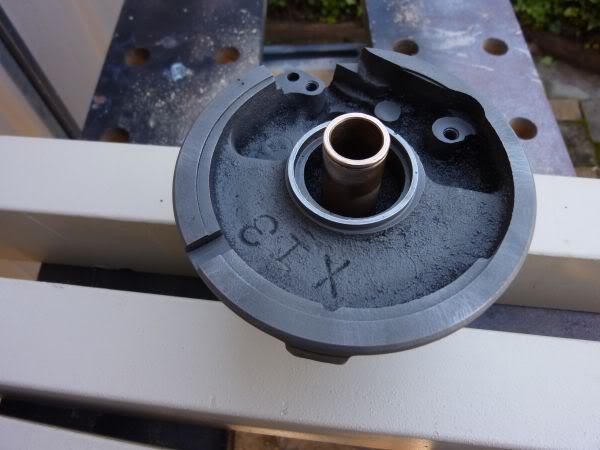
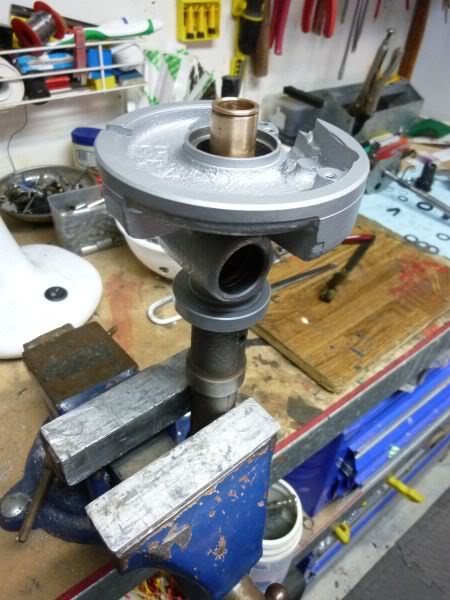
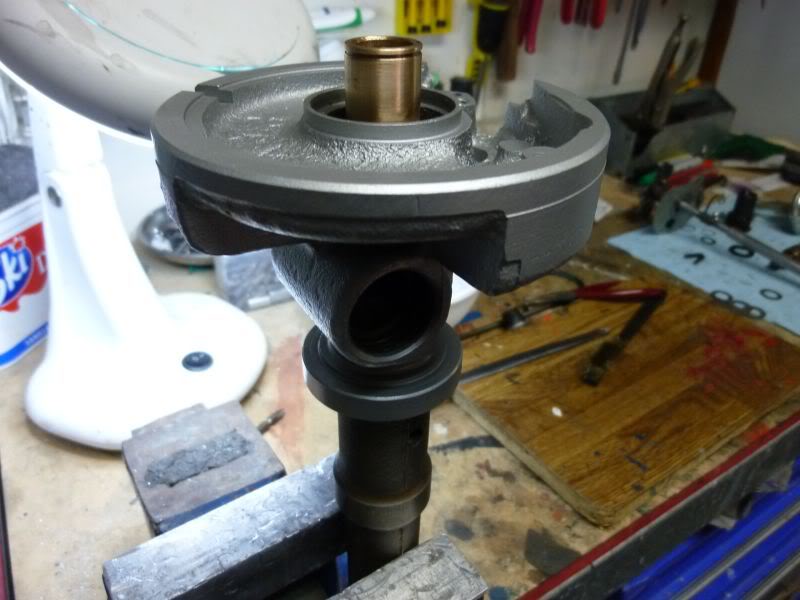
After all clean i checked for any sideways movement in the top and bottom bushes.
Top is fine but bottom had a little.
Cut through the lower bush on both sides with a hacksaw and tapped it out with an aluminum rod.
Placed new bush in a few mm to test and seems to be nice and snug with no movement.
Just need to go and get it pressed into place properly. or should i just buy a press and do it myself ? Could come in handy :-)
Last edited by CraigH; Apr 10, 2023 at 04:30 AM.
Thread Starter
Melting Slicks
Joined: Apr 2010
Posts: 2,795
Likes: 1,196
From: Canberra Australia
2025 C3 of the Year Finalist - Modified
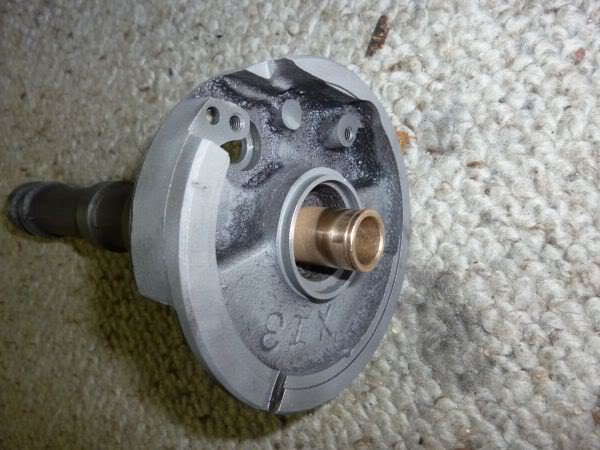
Distributor has new lower bush and has been painted ready to be re assembled.
Last edited by CraigH; Apr 10, 2023 at 04:30 AM.
Thread Starter
Melting Slicks
Joined: Apr 2010
Posts: 2,795
Likes: 1,196
From: Canberra Australia
2025 C3 of the Year Finalist - Modified
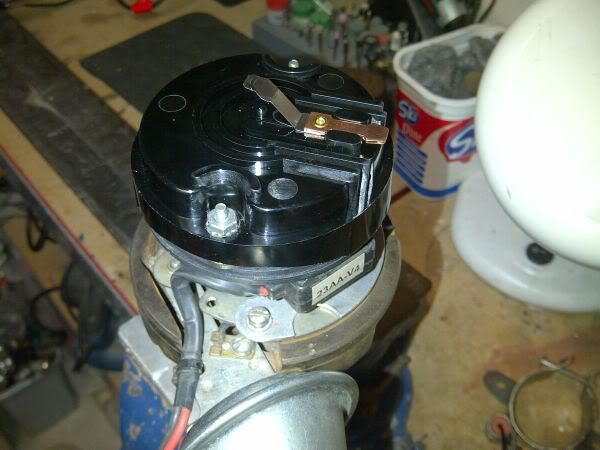
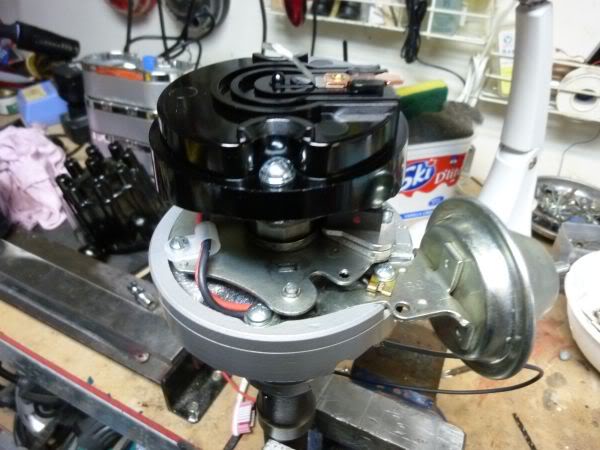
Distributor is back together just need to wait for a tach drive cross shaft washer to arrive as mine was missing it.
First fill the grease well with new grease and place plastic cap on.
Then fit felt ring.
Soak ring with oil.
Fit plate and retaining clip.
Grease and fit shaft, adding shims at base to get .010" end play. Fit tack drive cross shaft.
Fit advance weights and springs.
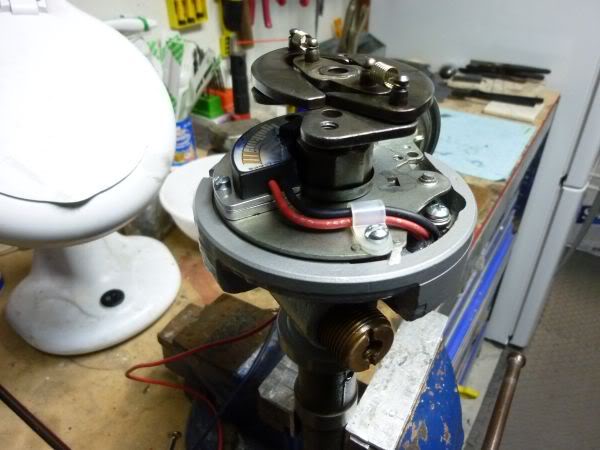
Fit rotor and cap.
First fill the grease well with new grease and place plastic cap on.
Then fit felt ring.
Soak ring with oil.
Fit plate and retaining clip.
Grease and fit shaft, adding shims at base to get .010" end play. Fit tack drive cross shaft.
Fit advance weights and springs.
Fit rotor and cap.
Last edited by CraigH; Apr 10, 2023 at 04:30 AM.
Thread Starter
Melting Slicks
Joined: Apr 2010
Posts: 2,795
Likes: 1,196
From: Canberra Australia
2025 C3 of the Year Finalist - Modified
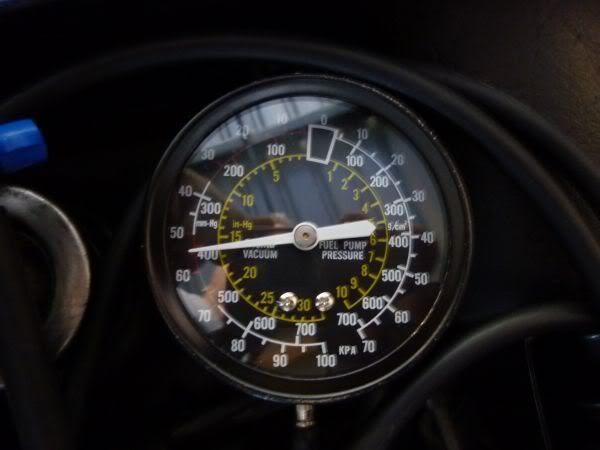
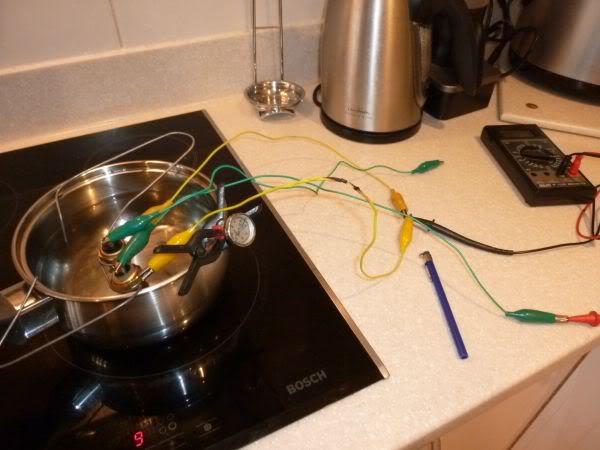
Tested the temperature senders Glenn got from the US while he was there.
The WT203-Z is on the money delivering the correct ohms resistance to correctly operate the C3 gauge.
The WT203-Z is on the money delivering the correct ohms resistance to correctly operate the C3 gauge.
Last edited by CraigH; Apr 10, 2023 at 04:30 AM.
Thread Starter
Melting Slicks
Joined: Apr 2010
Posts: 2,795
Likes: 1,196
From: Canberra Australia
2025 C3 of the Year Finalist - Modified
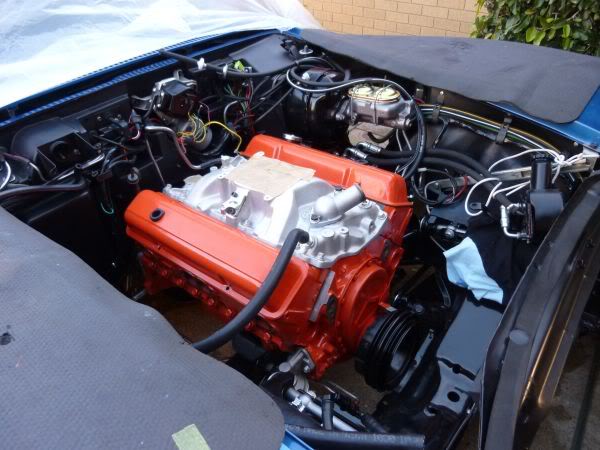
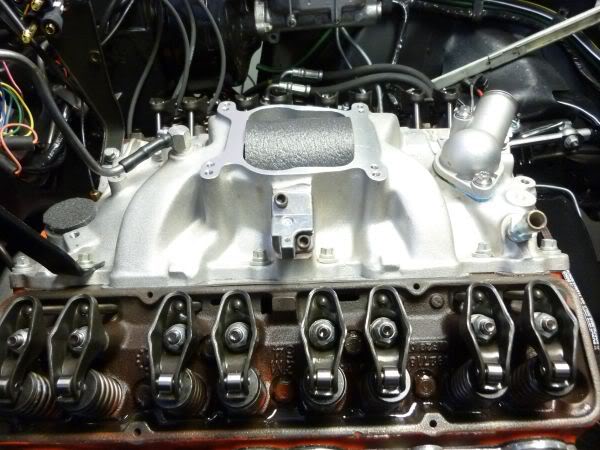
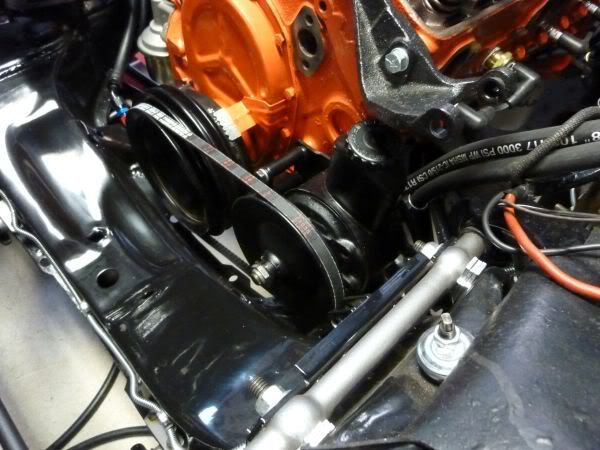
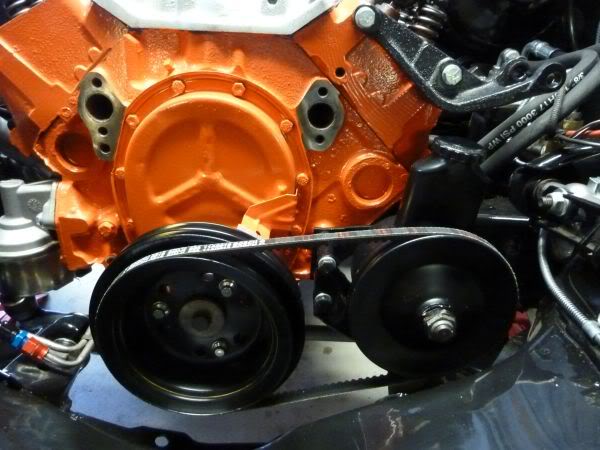
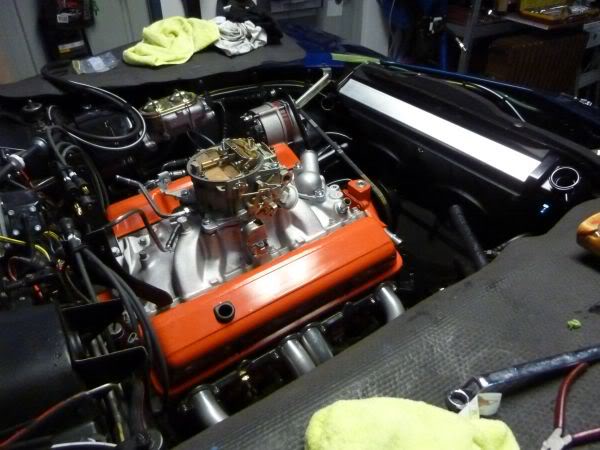
Spent some time this morning putting the engine externals back on.
I spun up the oil pump using a primer rod and battery drill to ensure I had oil flow to each rocker.
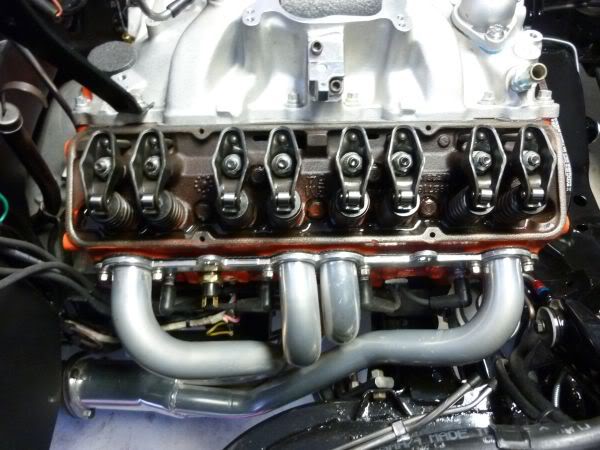

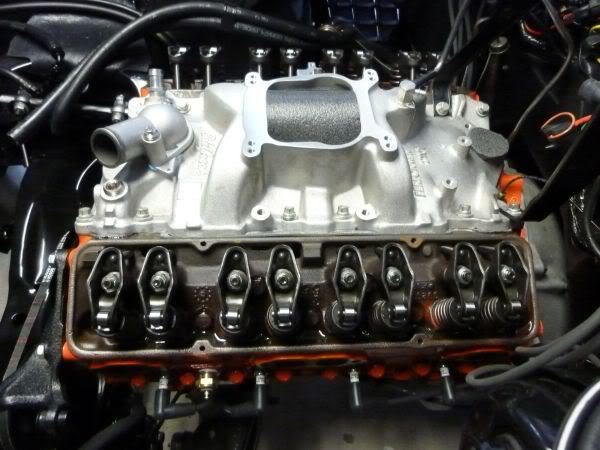
By using a 915mm length power steering belt you can get better access to the dip stick. The reproduction and originals are too short and foul with the alternator brackets.
I spun up the oil pump using a primer rod and battery drill to ensure I had oil flow to each rocker.
By using a 915mm length power steering belt you can get better access to the dip stick. The reproduction and originals are too short and foul with the alternator brackets.
Last edited by CraigH; Apr 10, 2023 at 04:29 AM.
Thread Starter
Melting Slicks
Joined: Apr 2010
Posts: 2,795
Likes: 1,196
From: Canberra Australia
2025 C3 of the Year Finalist - Modified
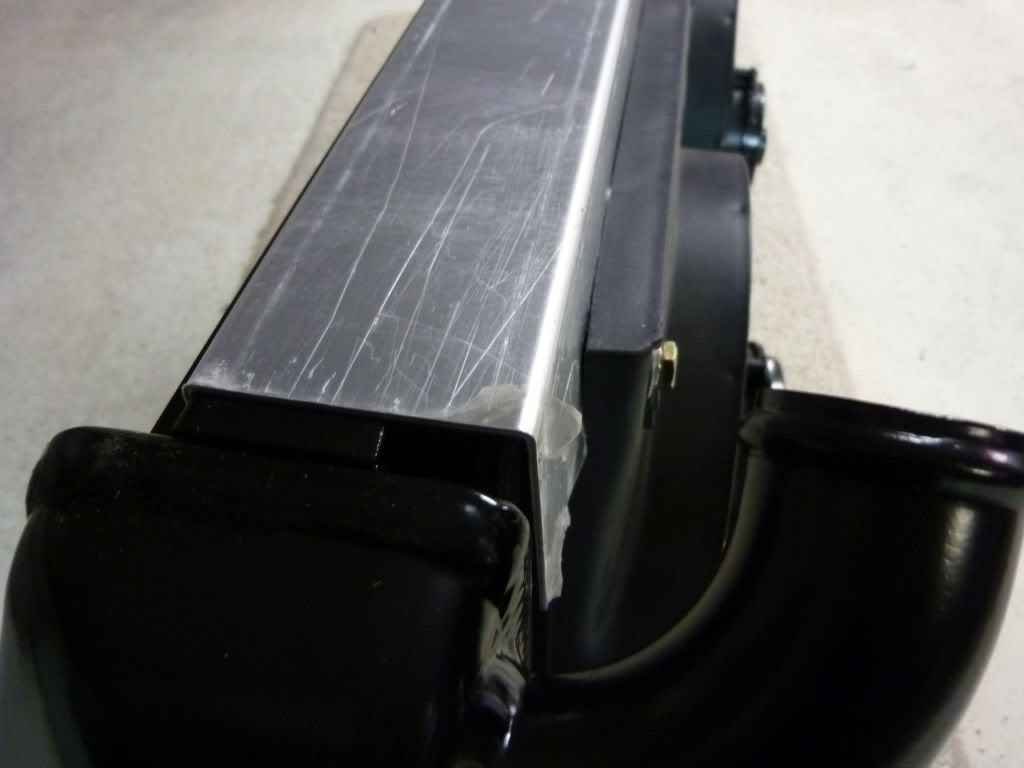
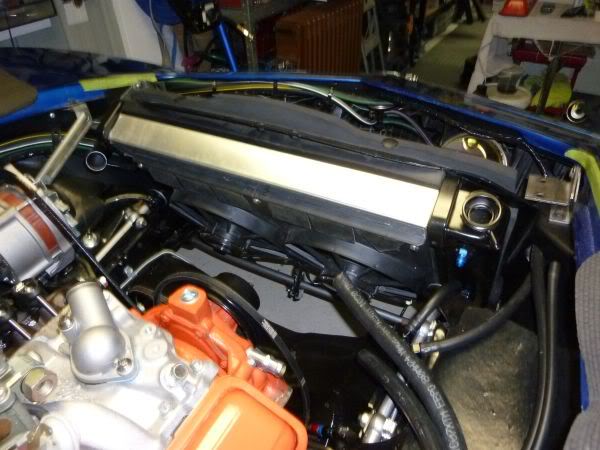
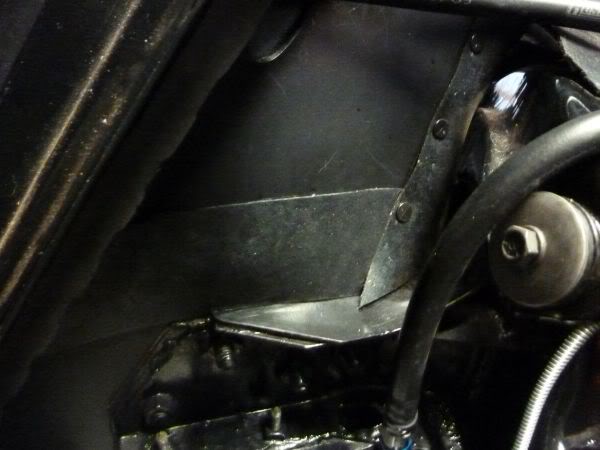
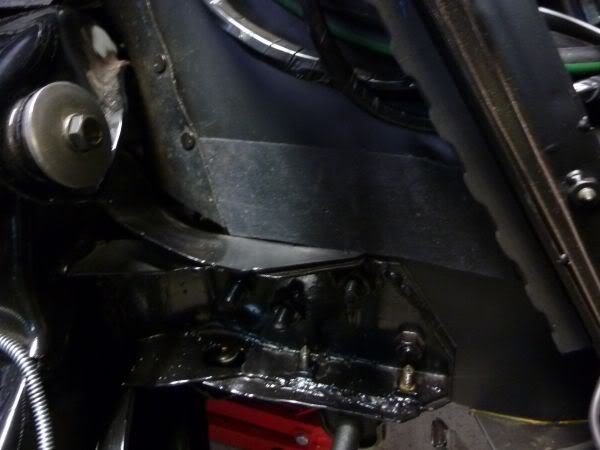
DeWitts radiator has different shaped top and bottom brackets to my previous one.
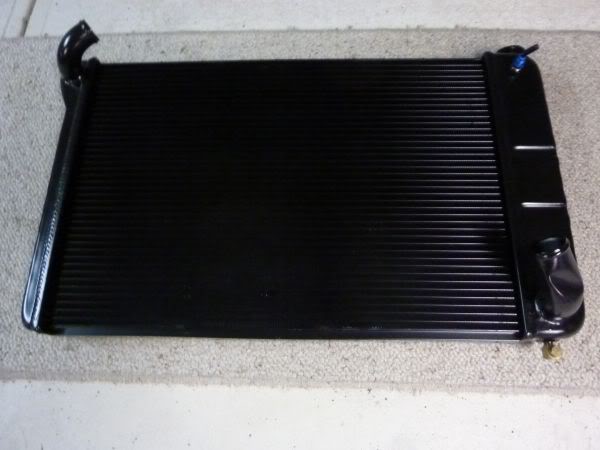
So I needed to get some new brackets bent up.
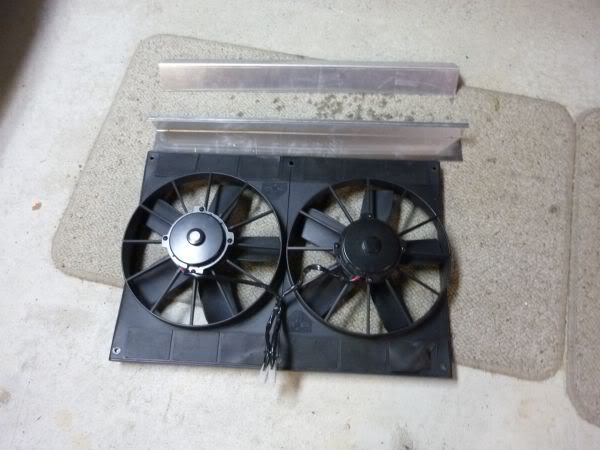
The aim was not to need any mounting bolts so they needed to wrap around the top and bottom.
Using threaded plates behind the bracket to take the bolts.
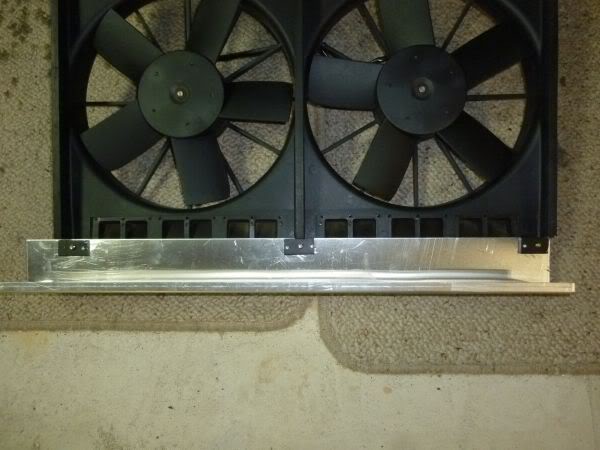
Nice tight fit.
So I needed to get some new brackets bent up.
The aim was not to need any mounting bolts so they needed to wrap around the top and bottom.
Using threaded plates behind the bracket to take the bolts.
Nice tight fit.
Last edited by CraigH; Apr 10, 2023 at 04:29 AM.
Thread Starter
Melting Slicks
Joined: Apr 2010
Posts: 2,795
Likes: 1,196
From: Canberra Australia
2025 C3 of the Year Finalist - Modified
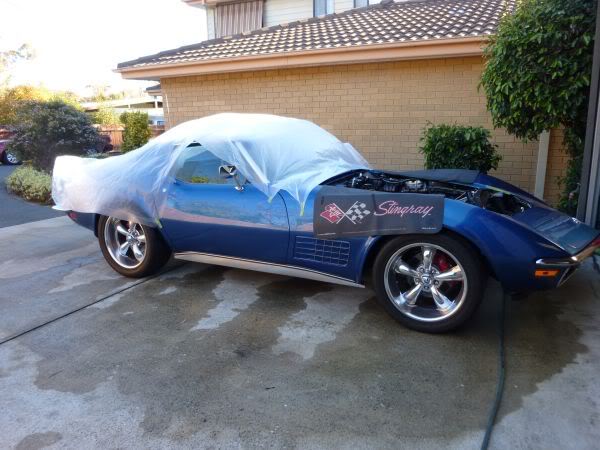
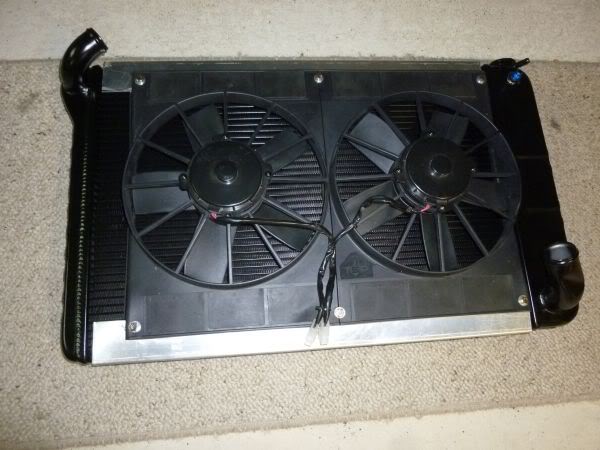
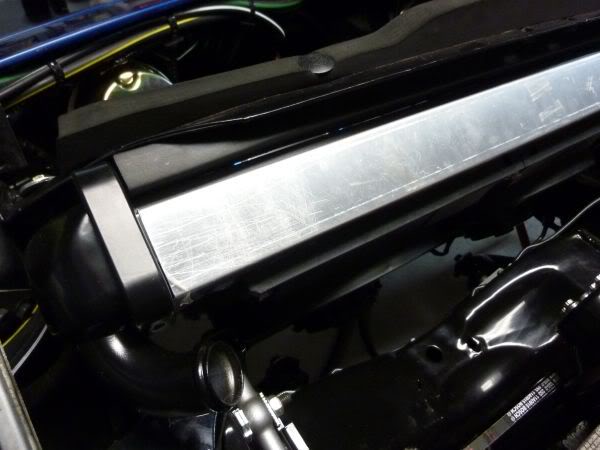
Just need to pull it back out, take the plastic wrap off and prep and paint it black.
Radiator is aluminum painted black.
Radiator is aluminum painted black.
Thread Starter
Melting Slicks
Joined: Apr 2010
Posts: 2,795
Likes: 1,196
From: Canberra Australia
2025 C3 of the Year Finalist - Modified
August 2012
Made 2 seals for the lower fender to stop road dust getting in.
Reproductions did not fit well enough so cut larger ones.
Made 2 seals for the lower fender to stop road dust getting in.
Reproductions did not fit well enough so cut larger ones.
Last edited by CraigH; Apr 10, 2023 at 10:46 PM.