


1971 Journey

Thread Starter
Melting Slicks


Joined: Apr 2010
Posts: 2,795
Likes: 1,196
From: Canberra Australia
2025 C3 of the Year Finalist - Modified
Craig,
Just got done reading the whole thread. You do great work and I've bookmarked and subscribed to the thread to ensure I don't miss any updates. I'm still disassembling my '71 for a body off resto (my first ever) and I know I'll be referring to your posts for help in the future.
Happy Vette'ing,
Paul
Just got done reading the whole thread. You do great work and I've bookmarked and subscribed to the thread to ensure I don't miss any updates. I'm still disassembling my '71 for a body off resto (my first ever) and I know I'll be referring to your posts for help in the future.
Happy Vette'ing,
Paul
Looking forward to your thread as well.
Craig
Thread Starter
Melting Slicks
Joined: Apr 2010
Posts: 2,795
Likes: 1,196
From: Canberra Australia
2025 C3 of the Year Finalist - Modified
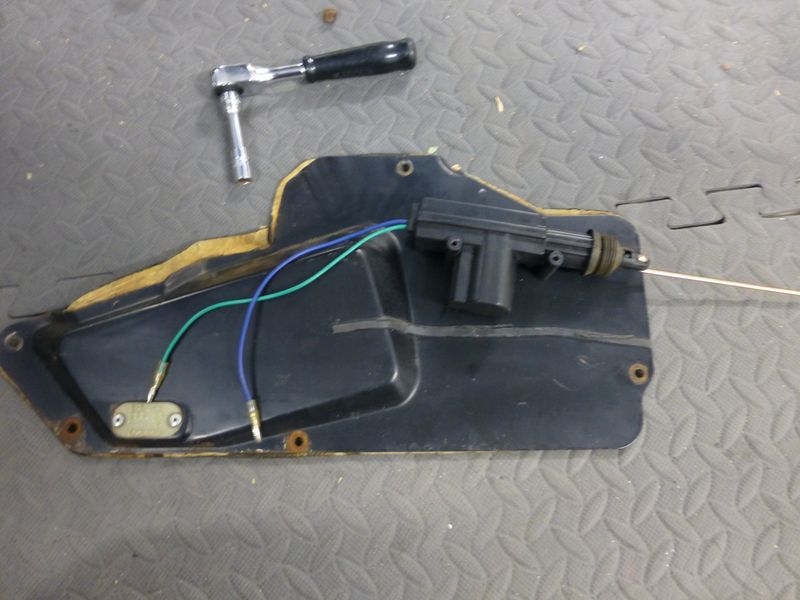
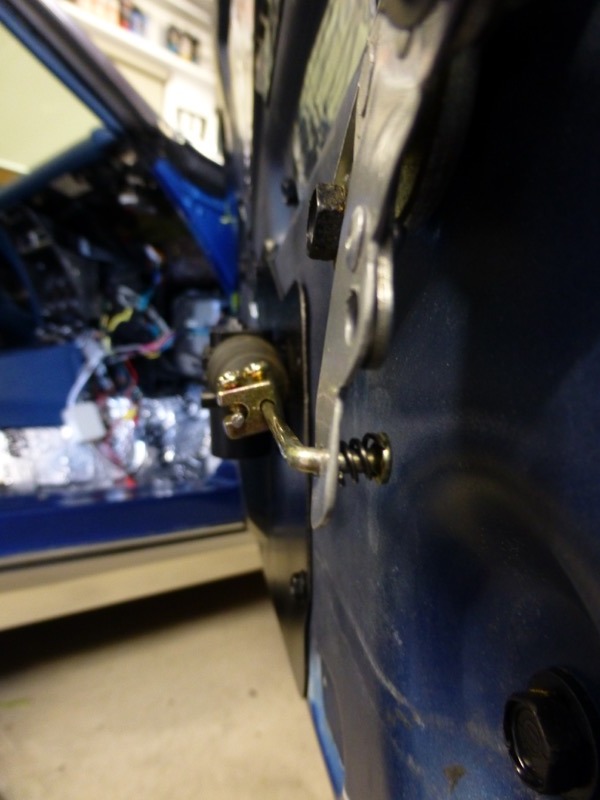
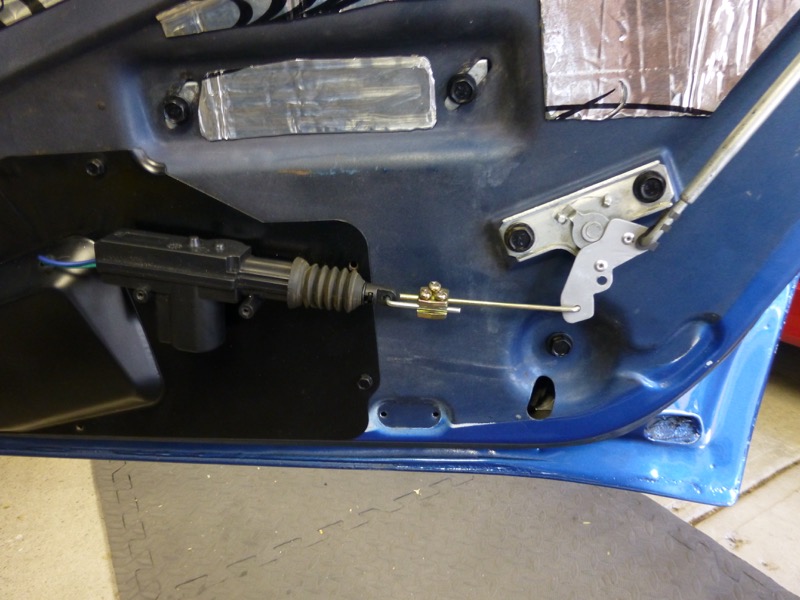
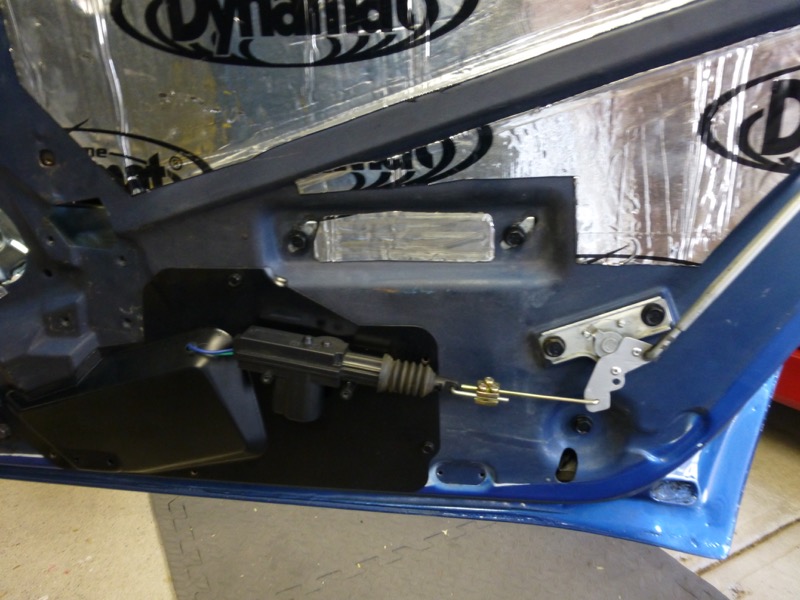
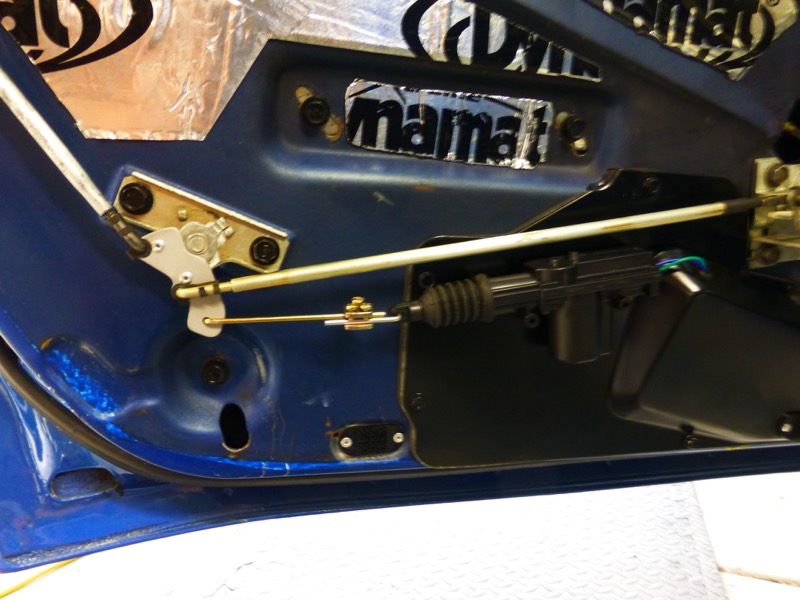
Started to work out how to do central locking in the 71.
I already have the control module mounted and ran wires to the drivers door when I reworked the regulators etc.
Now time for the passenger door to be resfreshed so first work out where to mount things.
Decided the easiest way would be to add to the existing lower lever mechanism.
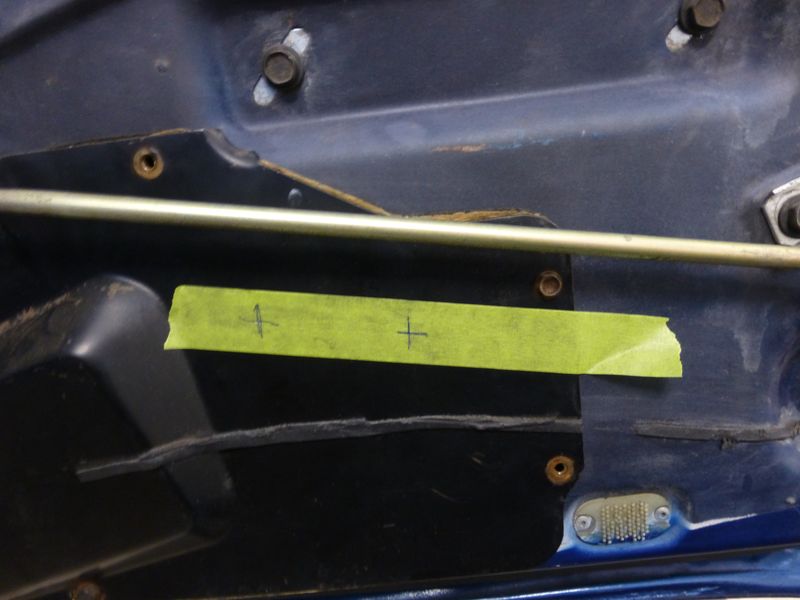
So I mocked up an overlay.
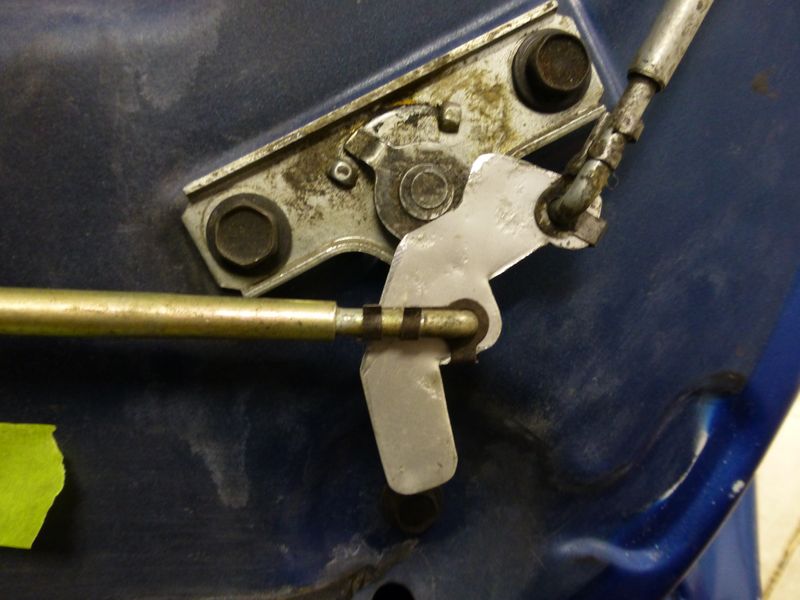
Took a few tries to get it correct.
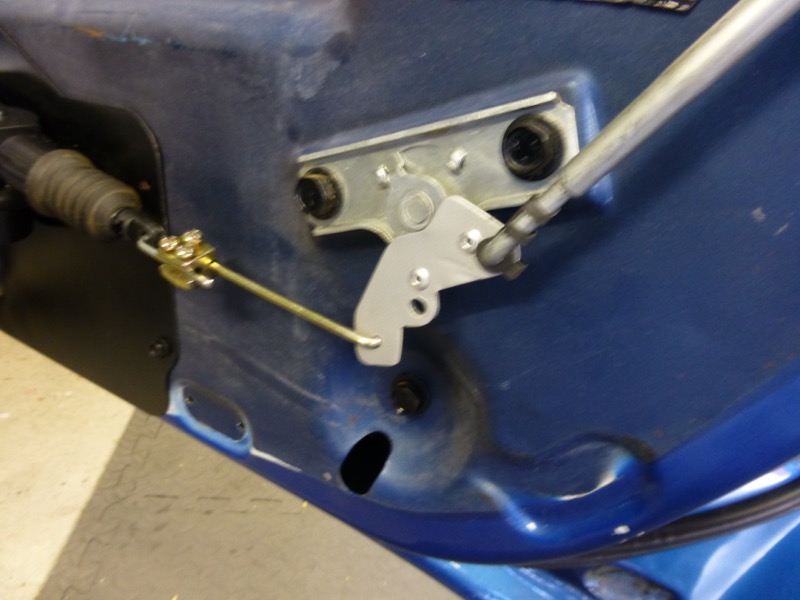
Mount actuator parallel to existing rod.

Some adjusting and it works well.

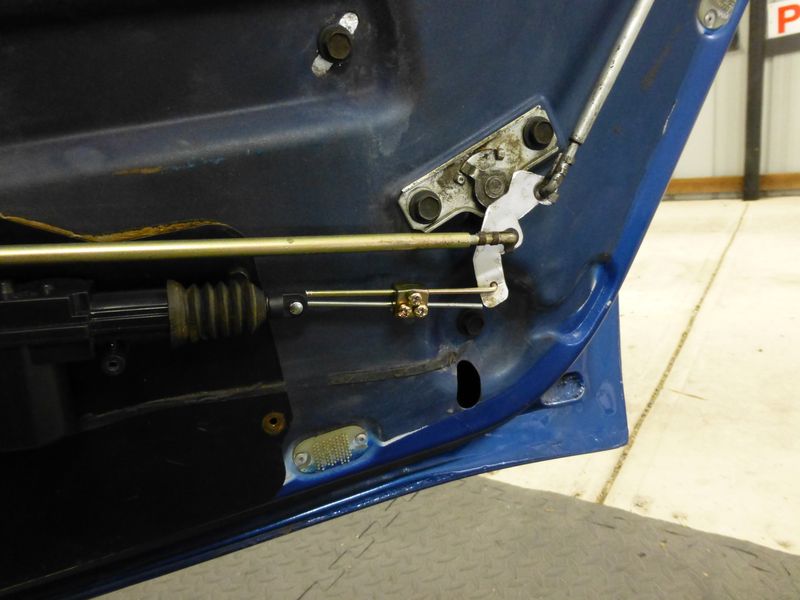
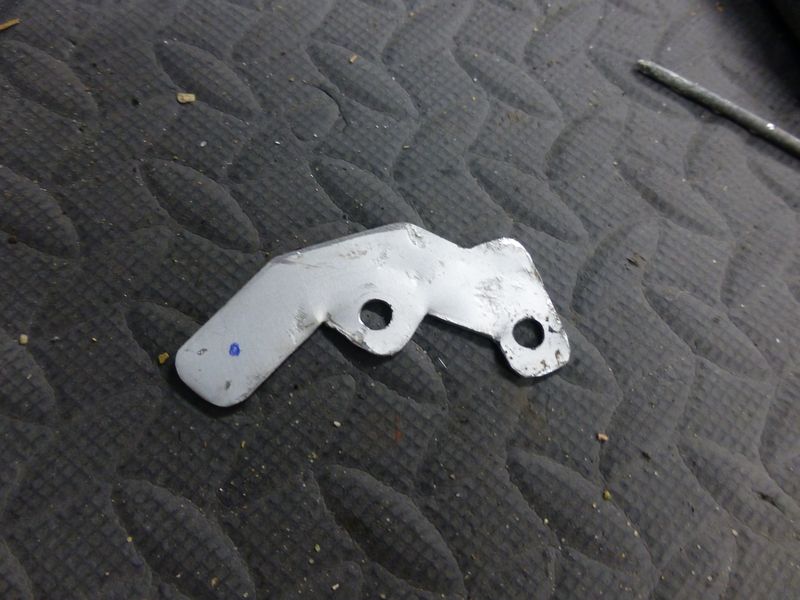
Now take it apart and make a neater one using this as a template.
Also need to drill and rivet the overlay to the existing lever to reduce any extra movement in the linkages.
I already have the control module mounted and ran wires to the drivers door when I reworked the regulators etc.
Now time for the passenger door to be resfreshed so first work out where to mount things.
Decided the easiest way would be to add to the existing lower lever mechanism.
So I mocked up an overlay.
Took a few tries to get it correct.
Mount actuator parallel to existing rod.
Some adjusting and it works well.
Now take it apart and make a neater one using this as a template.
Also need to drill and rivet the overlay to the existing lever to reduce any extra movement in the linkages.
Last edited by CraigH; Apr 10, 2023 at 05:06 AM.
Safety Car


Joined: Feb 2012
Posts: 4,705
Likes: 983
From: Orlando FL
Thread Starter
Melting Slicks
Joined: Apr 2010
Posts: 2,795
Likes: 1,196
From: Canberra Australia
2025 C3 of the Year Finalist - Modified
Craig... I`m playing with an idea to make the astro vent flaps on my 71 coupe electric ( I already have electric headlight & wiper door), so would you please tell me what your door lock module is out of, and how much travel does it have? I think it only needs to go a couple inches for what I want it to do. THANKS!
It comes with standard door actuators that move about 5/8" however looking around I see you can get some heavy duty ones that have a little more movement.
Thread Starter
Melting Slicks
Joined: Apr 2010
Posts: 2,795
Likes: 1,196
From: Canberra Australia
2025 C3 of the Year Finalist - Modified
I have previously replaced my C3 Retro Radio with an Antique Automobile Radio and have been fairly happy.
Page 33

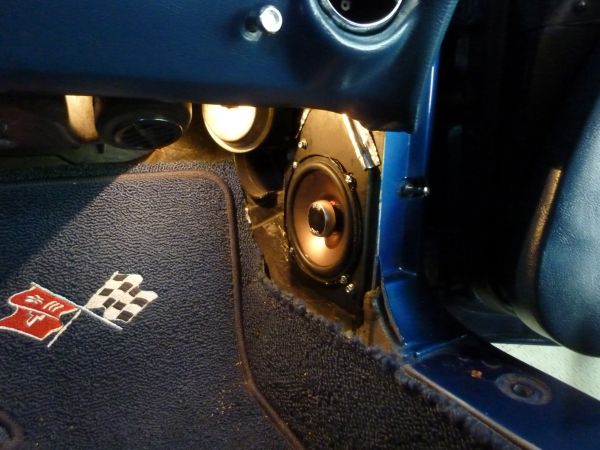
Have tried different speakers while experimenting but now have plate speakers in the dash with capacitors to minimise bass distortion and 5.25" in the kick panels. The inbuilt 45x45 amp is actually reasonably good and produces a clean sound (clean enough for inside the noise Vette anyway)
Page 2
Page 31
However it just needed a bit more bass to round out the sound.
So, I have been looking how to add a bit more bass without loosing any real space or taking the look of the interior away from stock. Like the kick panel speakers I don't want them to be seen at all.
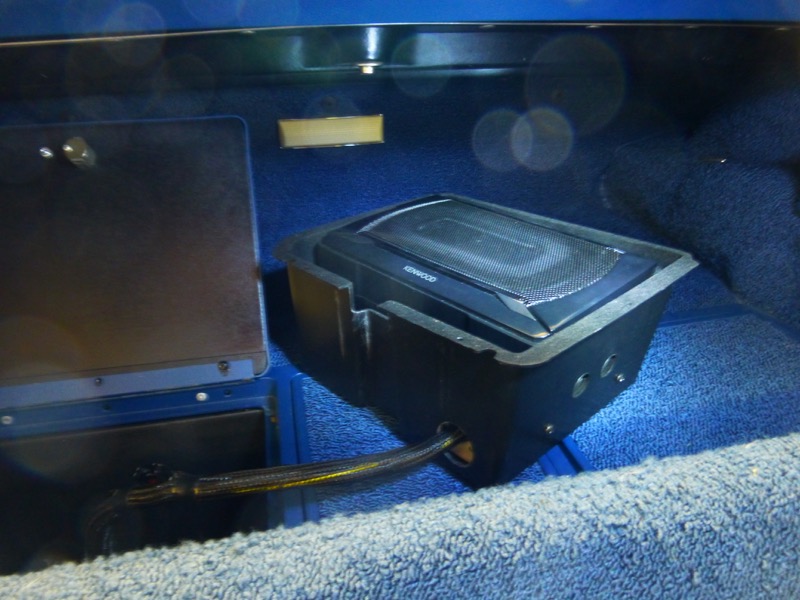
I purchased an all in one sub box a while back but was unable to work out how to hide it so the project went on the back burner.
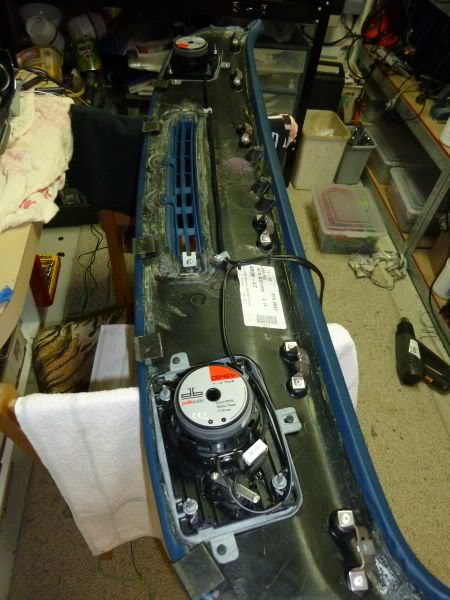
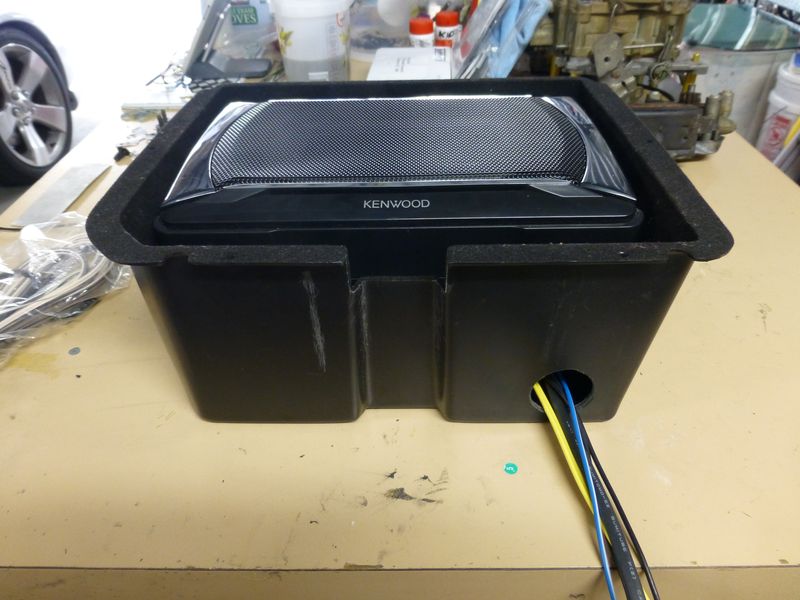
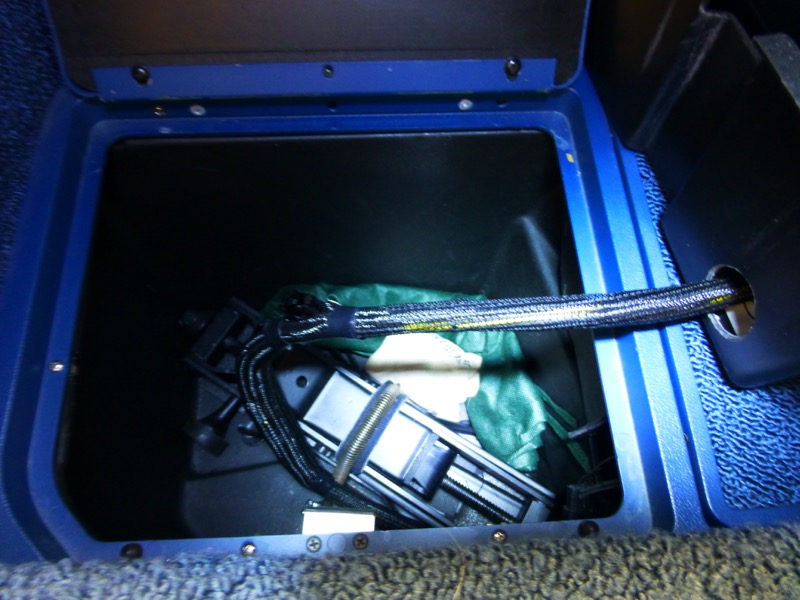
However last week while looking through eBay I found the Kenwood KSC-SW11 that looked compact but had reasonable reviews and looked like it could go under the seat.
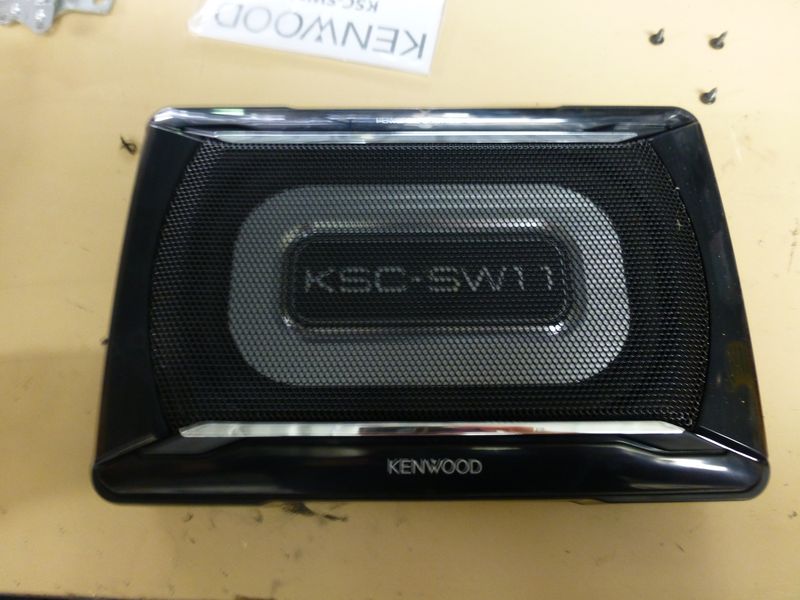
In fact it does fit under the seat but the clearance to seat spings is not enough for my liking so that option was gone.
Till I looked at the storage box behind the passenger seat.
The Kenwood unit is exactly the right size for the box. It won't go all the way in but sat about right, so i made some craftwood supports and fitted them to the storage box.
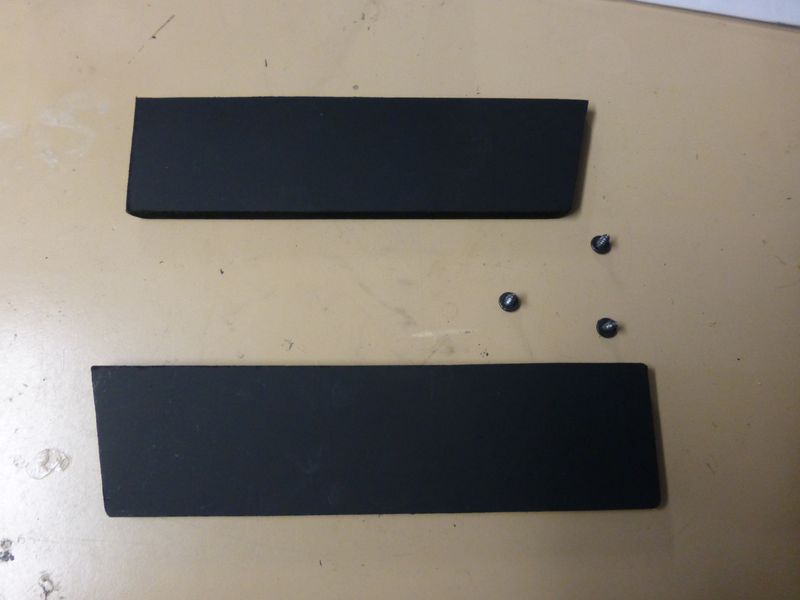
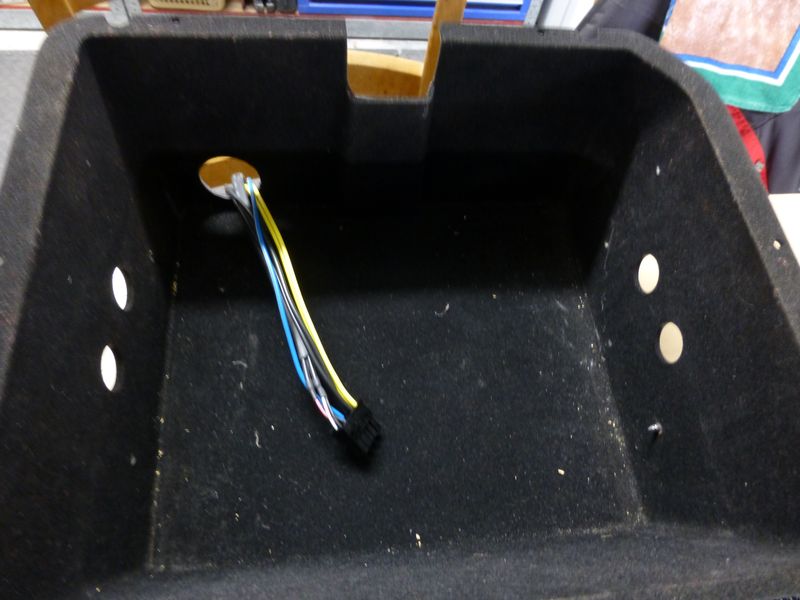
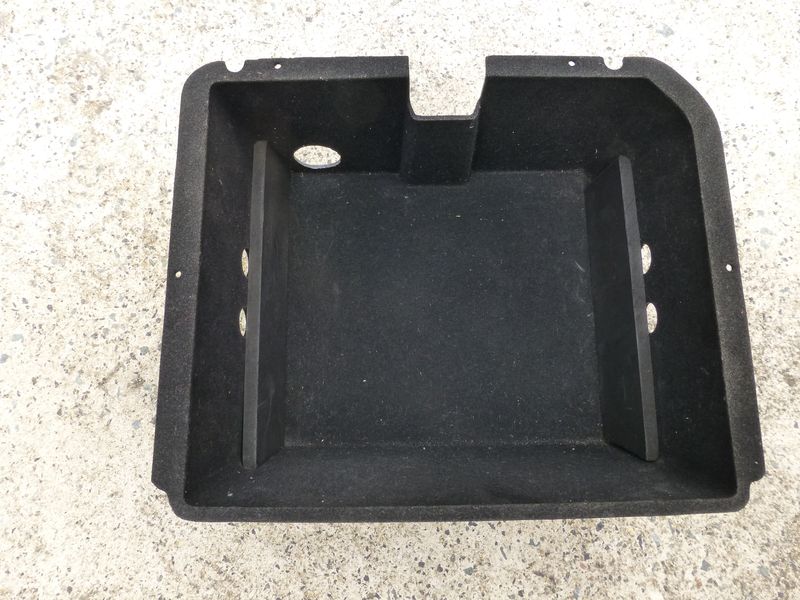
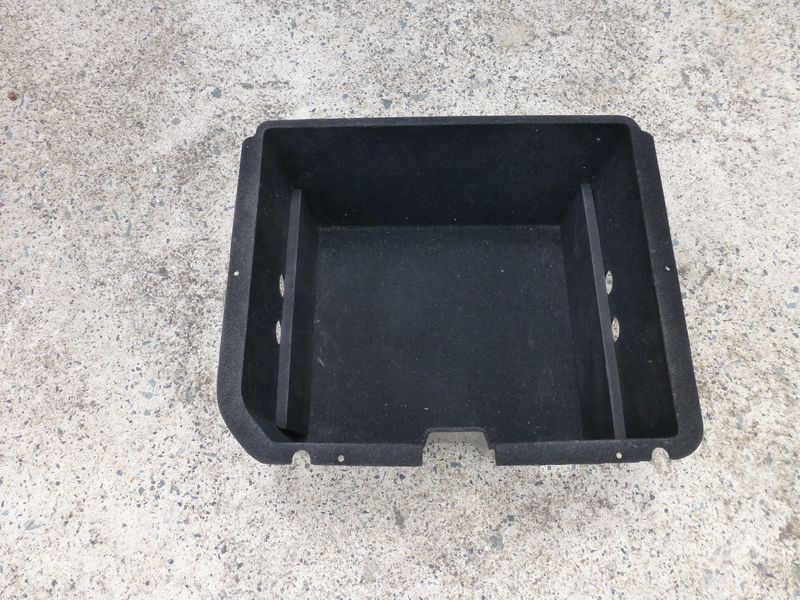
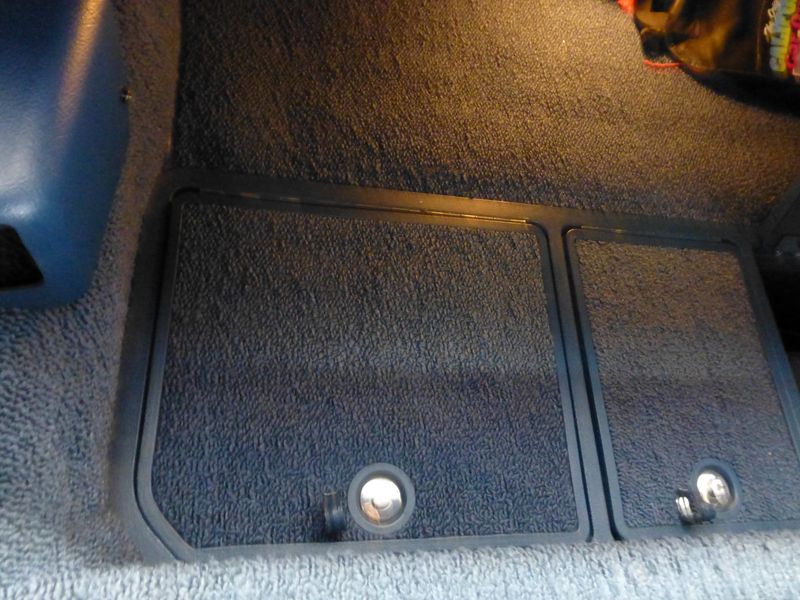
The box fits perfectly now and allows the lid to close. Wiring is easy and it can be lifted out from its tight fit to get to items below it in the storage box or even unplugged if not needed.

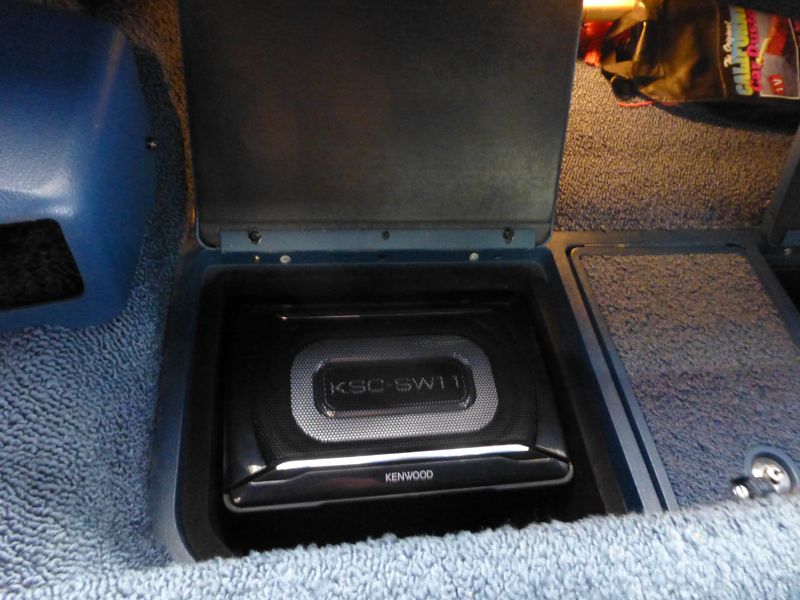
And how does it sound.
Excellent, rounds out the sound perfectly.
Now keep in mind I am not after true bass boom, just a full sound in the car.
If I wanted heavy bass i would need a proper sub box etc.
This is just a nice clean system that can be heard while driving and offers clean well rounded sound.
Page 33
Have tried different speakers while experimenting but now have plate speakers in the dash with capacitors to minimise bass distortion and 5.25" in the kick panels. The inbuilt 45x45 amp is actually reasonably good and produces a clean sound (clean enough for inside the noise Vette anyway)
Page 2
Page 31
However it just needed a bit more bass to round out the sound.
So, I have been looking how to add a bit more bass without loosing any real space or taking the look of the interior away from stock. Like the kick panel speakers I don't want them to be seen at all.
I purchased an all in one sub box a while back but was unable to work out how to hide it so the project went on the back burner.
However last week while looking through eBay I found the Kenwood KSC-SW11 that looked compact but had reasonable reviews and looked like it could go under the seat.
In fact it does fit under the seat but the clearance to seat spings is not enough for my liking so that option was gone.
Till I looked at the storage box behind the passenger seat.
The Kenwood unit is exactly the right size for the box. It won't go all the way in but sat about right, so i made some craftwood supports and fitted them to the storage box.
The box fits perfectly now and allows the lid to close. Wiring is easy and it can be lifted out from its tight fit to get to items below it in the storage box or even unplugged if not needed.
And how does it sound.
Excellent, rounds out the sound perfectly.
Now keep in mind I am not after true bass boom, just a full sound in the car.
If I wanted heavy bass i would need a proper sub box etc.
This is just a nice clean system that can be heard while driving and offers clean well rounded sound.
Last edited by CraigH; Apr 10, 2023 at 05:06 AM.
Thread Starter
Melting Slicks
Joined: Apr 2010
Posts: 2,795
Likes: 1,196
From: Canberra Australia
2025 C3 of the Year Finalist - Modified
Did some work on my door glass to see if I could remove some of the vertical scratches in it.
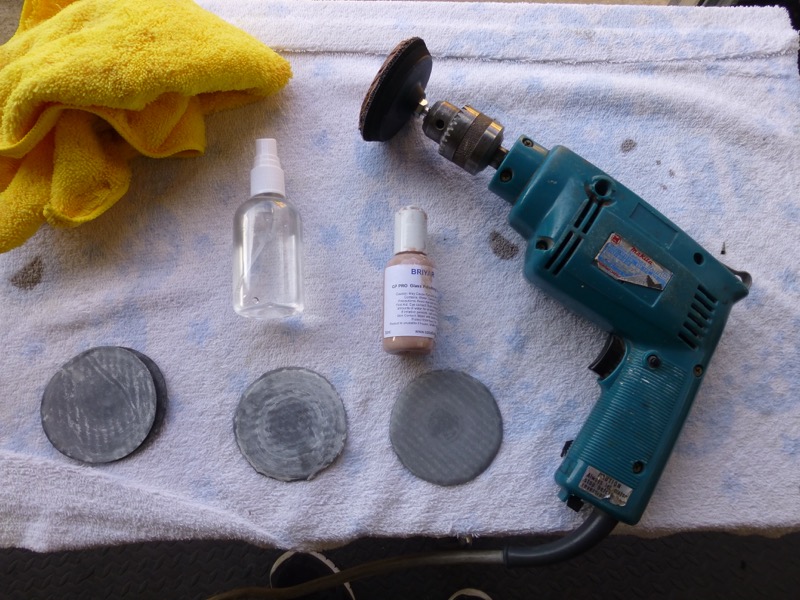
Fine emery in different grades then polishing paste.
You can see the cloudy look of the glass after using the paper.
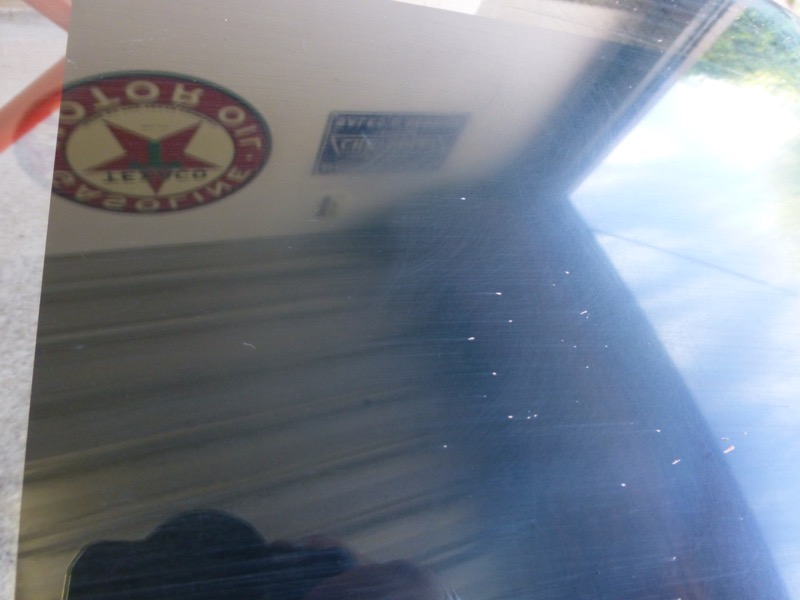
Finished glass looks a lot better but won't know for sure till its back in and i have real light through it.
May have to rework some sections later.
Fine emery in different grades then polishing paste.
You can see the cloudy look of the glass after using the paper.
Finished glass looks a lot better but won't know for sure till its back in and i have real light through it.
May have to rework some sections later.
Last edited by CraigH; Apr 10, 2023 at 05:06 AM.
Thread Starter
Melting Slicks
Joined: Apr 2010
Posts: 2,795
Likes: 1,196
From: Canberra Australia
2025 C3 of the Year Finalist - Modified
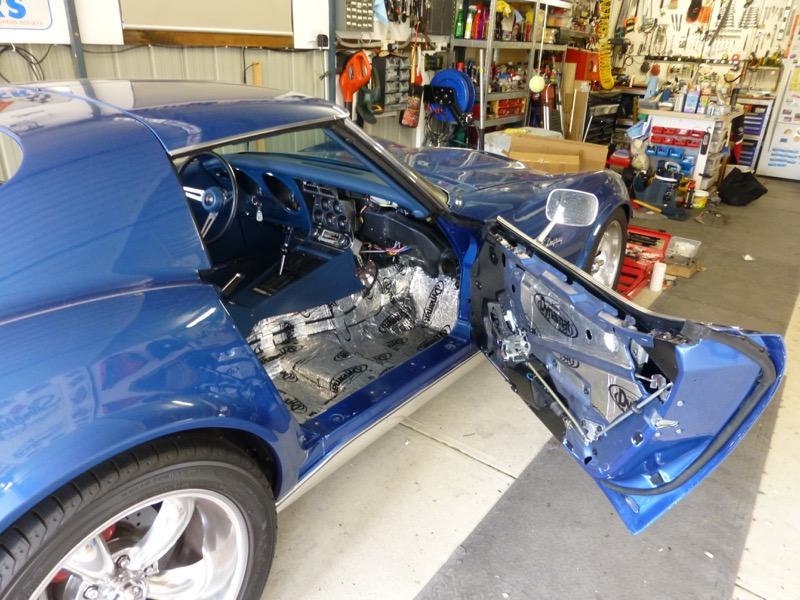
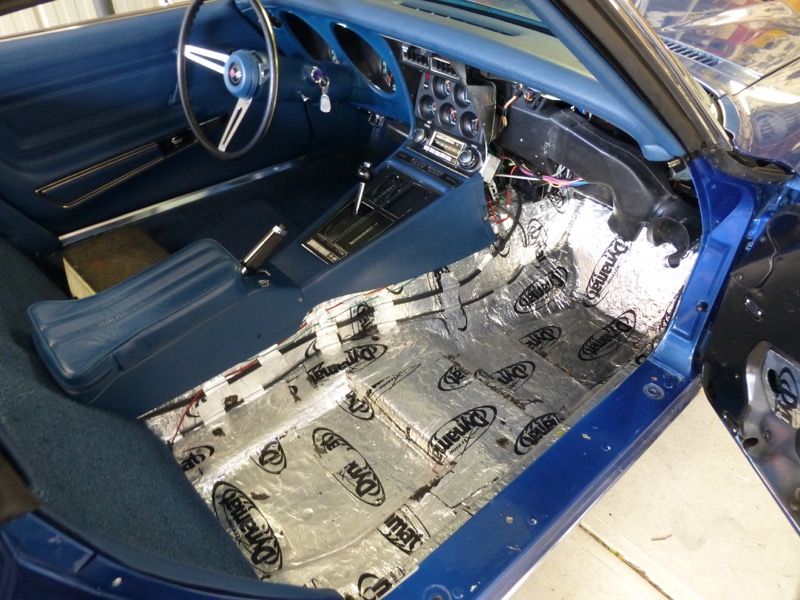
Door is almost ready for glass.
Dynamat inside and some on the outer skin, new motor and regulator, power door locks.
Just need hook and loop tabs to be riveted on and will be almost there.
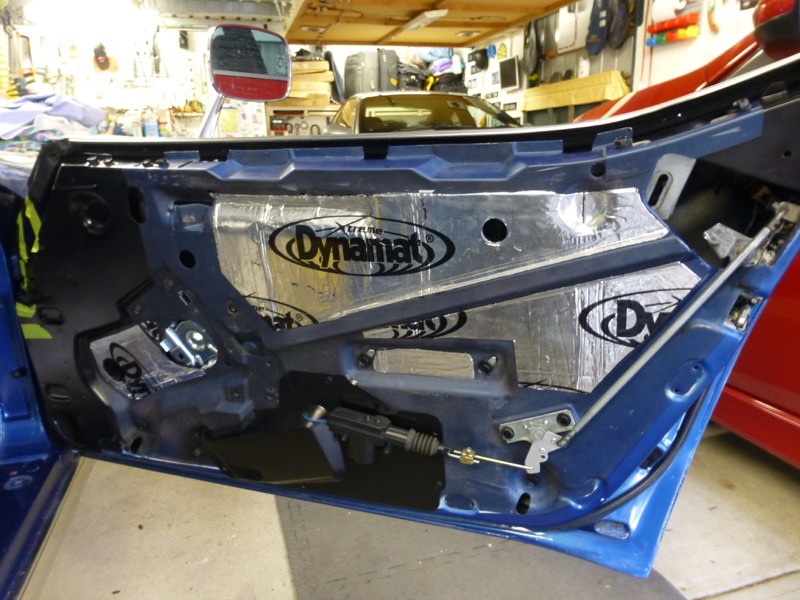
Dynamat inside and some on the outer skin, new motor and regulator, power door locks.
Just need hook and loop tabs to be riveted on and will be almost there.
Last edited by CraigH; Apr 10, 2023 at 05:05 AM.
Race Director


Joined: Oct 2008
Posts: 19,230
Likes: 1,672
From: Long Island
LOOKS AWSOM , I just started my 1971, lots of issues or adventures as they say. I want to make it a good looking, reliable daily driver. Love the thread and great work. I'm spending most of the money on the drive train and motor with a 5 speed. 
Re-did the rear completely as you did. Now working on the front end. Adding Borgeson power steering as a few cars here have it and love it.
I like the power door locks and may try it after I get the car running.
Thanks for a great thread...
DO YOU HAVE A SHOT OF THE INSIDE OF THE PASSENGER FENDER WELL BY THE WIPPER DOOR. The nose on the car was replaced in 1988 and you can see the fan cage. I don't want to pull the wiper door on the 72 unless I have to,
thanks
Last edited by BLUE1972; Mar 2, 2015 at 07:32 PM. Reason: added question
Corvette Stories
The Best of Corvette for Corvette Enthusiasts

Top 10 Most Expensive Corvettes Ever Sold on Bring A Trailer
Brett Foote
10 Things Every Corvette Owner Needs (2026 Edition)
Michael S. Palmer
8 Most "Only Corvette Owners Understand" Quirks and Problems
Pouria Savadkouei
10 Reasons the C6 Z06 is Still A Performance Benchmark After 20 Years
Joe Kucinski
How Much Horsepower Every Corvette Engine "LOST" in 1972
Joe Kucinski
Top 10 DOs and DON'Ts for Protecting Your Convertible Top!
Michael S. Palmer
Top 10 Most Explosive Corvettes Ever Made: Power-to-Weight Ratio Ranked!
Joe Kucinski
150 hp to 1,250 hp: Every Corvette Generation Compared by the Specs That Matter
Joe Kucinski
8 Coolest Corvette Pace Cars (and Replicas) of All Time
Verdad Gallardo
Thread Starter
Melting Slicks
Joined: Apr 2010
Posts: 2,795
Likes: 1,196
From: Canberra Australia
2025 C3 of the Year Finalist - Modified
LOOKS AWSOM , I just started my 1971, lots of issues or adventures as they say. I want to make it a good looking, reliable daily driver. Love the thread and great work. I'm spending most of the money on the drive train and motor with a 5 speed.
Re-did the rear completely as you did. Now working on the front end. Adding Borgeson power steering as a few cars here have it and love it.
I like the power door locks and may try it after I get the car running.
Thanks for a great thread...
DO YOU HAVE A SHOT OF THE INSIDE OF THE PASSENGER FENDER WELL BY THE WIPPER DOOR. The nose on the car was replaced in 1988 and you can see the fan cage. I don't want to pull the wiper door on the 72 unless I have to,
thanks
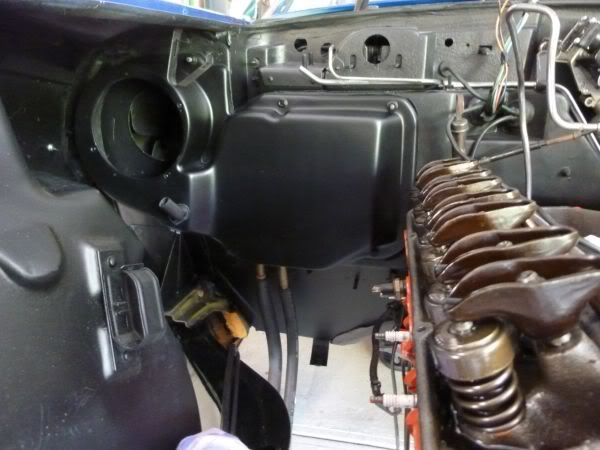
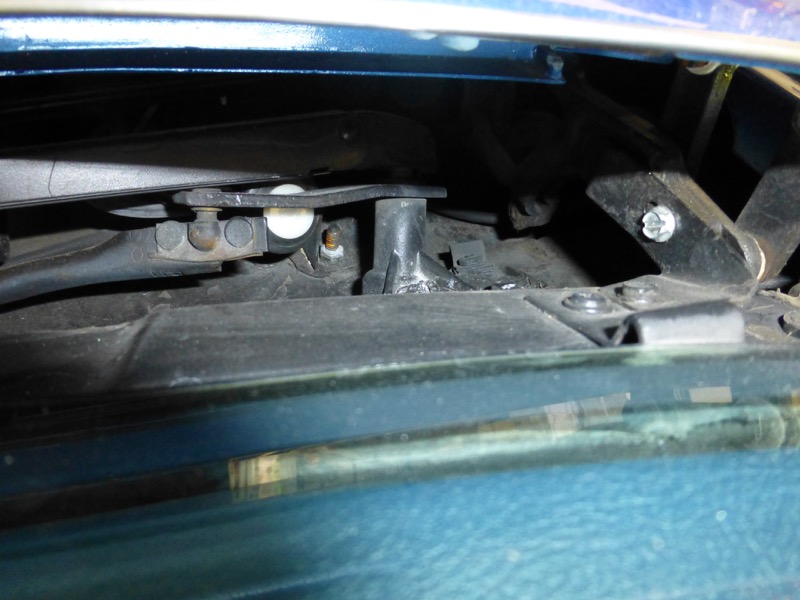
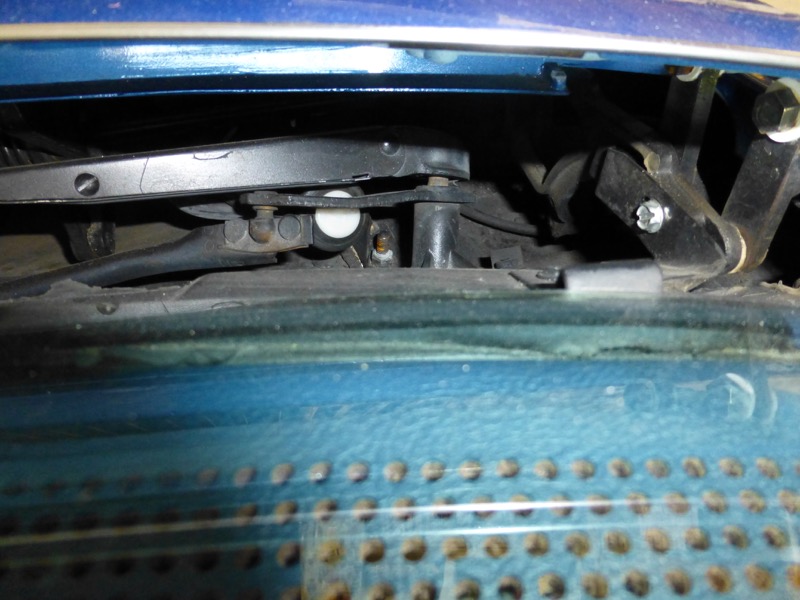
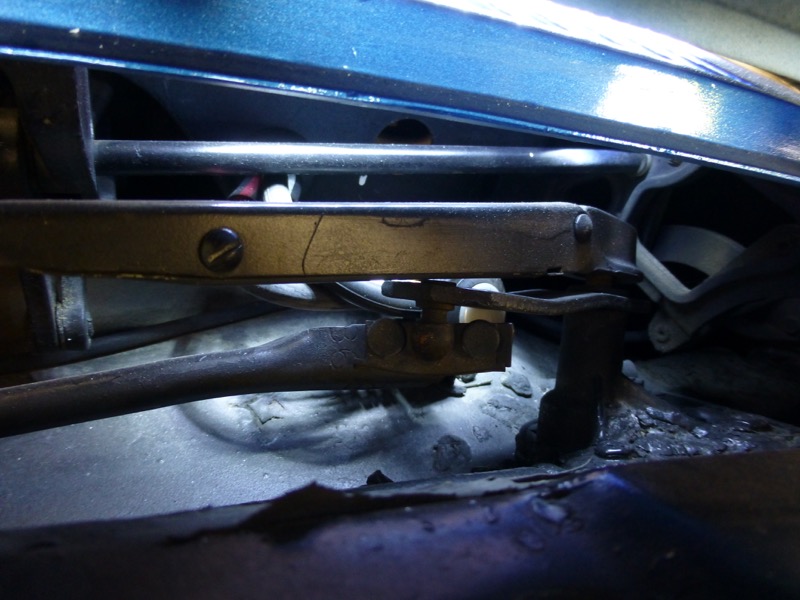
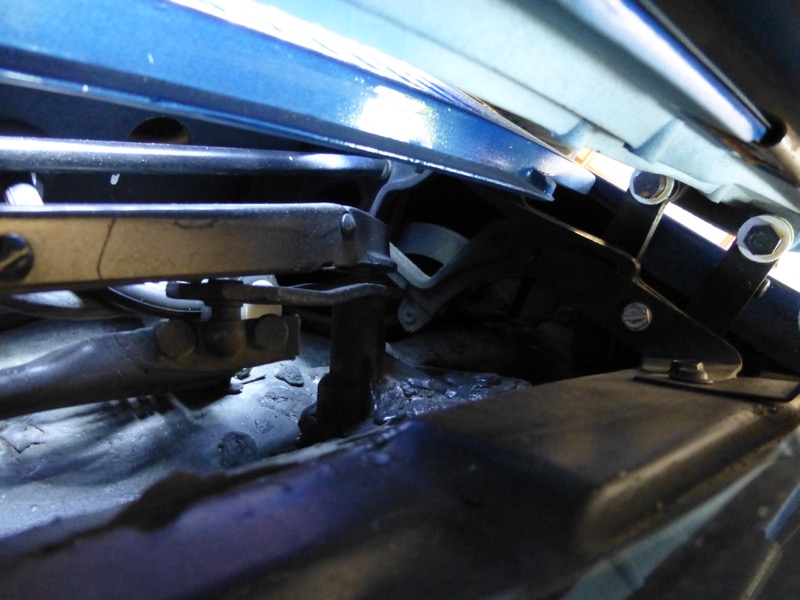
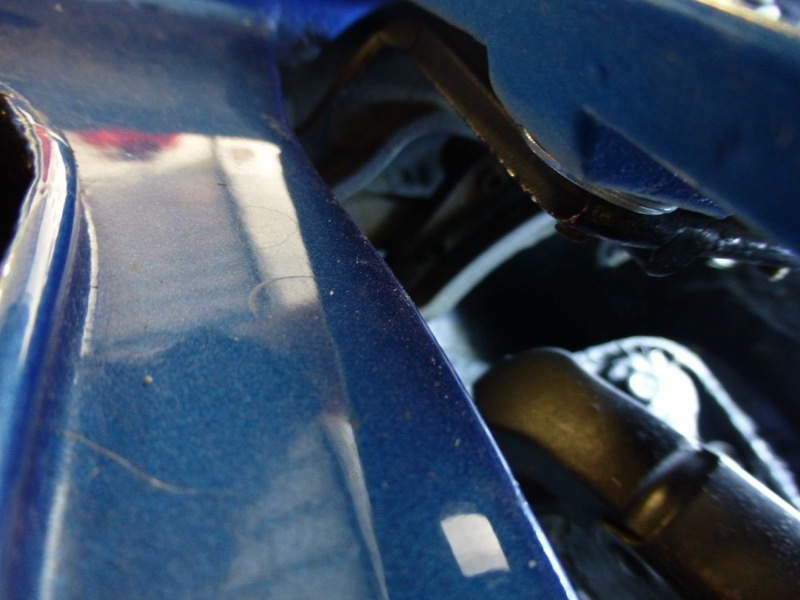
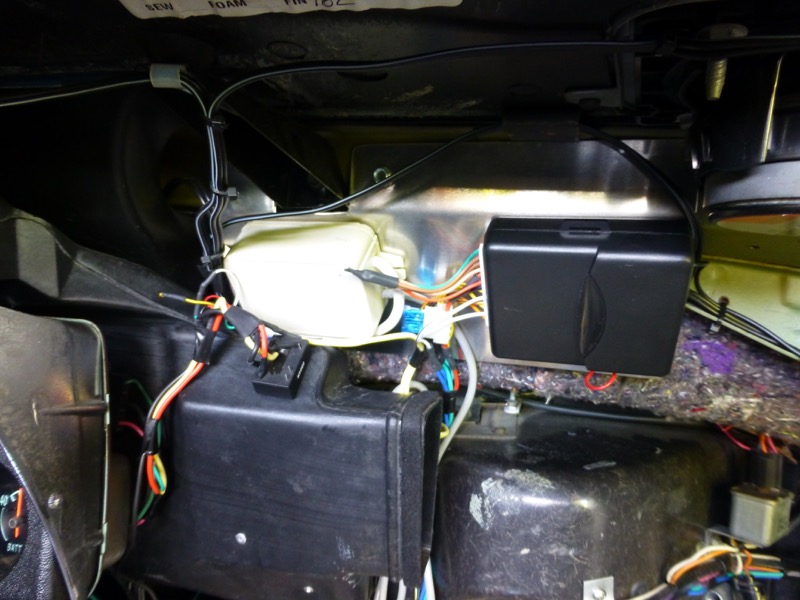
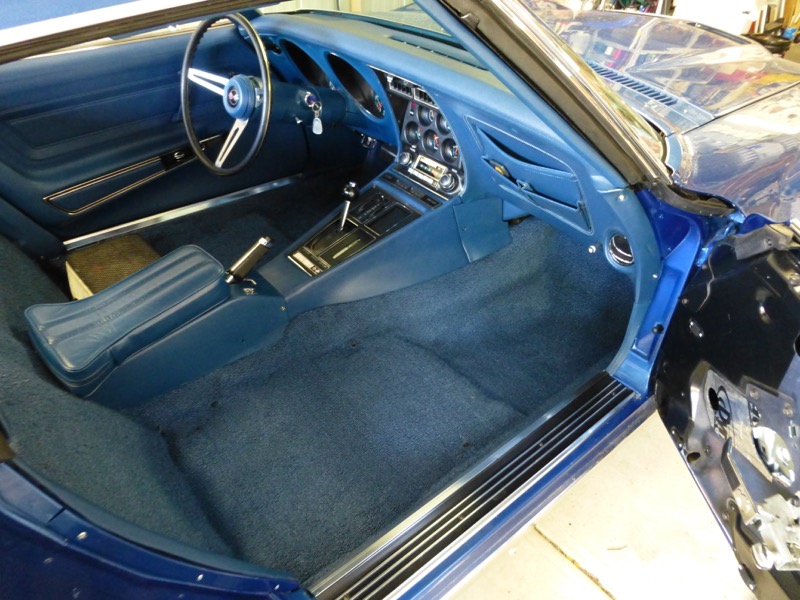
Is this what you wanted.
https://www.corvetteforum.com/forums...ourney-17.html
If I have it wrong am happy to take some shots if you can tell me where and from what angle etc.
Last edited by CraigH; Apr 10, 2023 at 05:05 AM.
Race Director
Joined: Oct 2008
Posts: 19,230
Likes: 1,672
From: Long Island
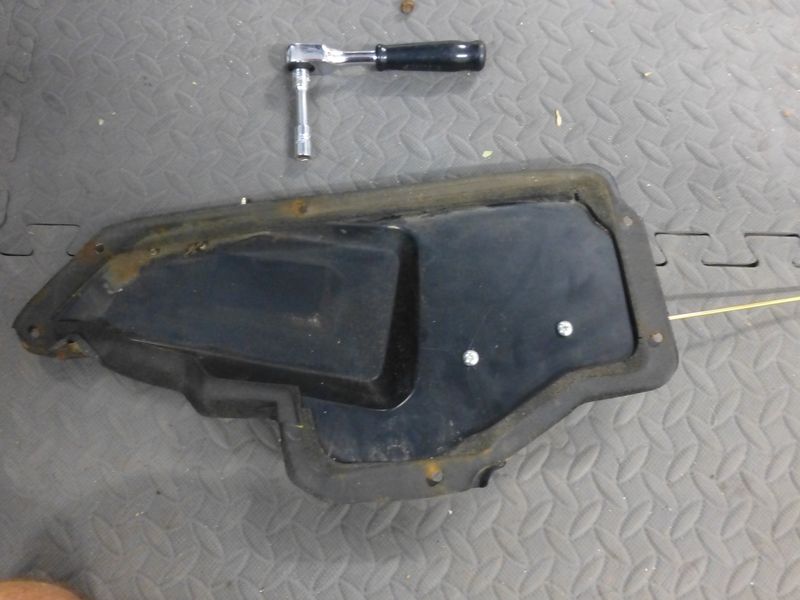
That shot really helped, I am doing the a/c delete cover also, as soon as the front end is back together, As I want to install the vintage air in a year or so if funding works. I did not disassemble it yet.
The other question is - looking from inside the area for the wipers, by the right passenger wiper swivel post, along the fender under the wiper door I can see the heater fan blades. It looks like something is missing - like a screen or plate.
The previous owner and his mechanic did all the repairs themselves, don't ask - 2 ball joints literally fell apart when the bolts were removed.
I normally use my 72 as a guide - all original, but due to the weather it's not possible + removing 50 year old screws ?
Thanks again for the help.
Thread Starter
Melting Slicks
Joined: Apr 2010
Posts: 2,795
Likes: 1,196
From: Canberra Australia
2025 C3 of the Year Finalist - Modified
That shot really helped, I am doing the a/c delete cover also, as soon as the front end is back together, As I want to install the vintage air in a year or so if funding works. I did not disassemble it yet.
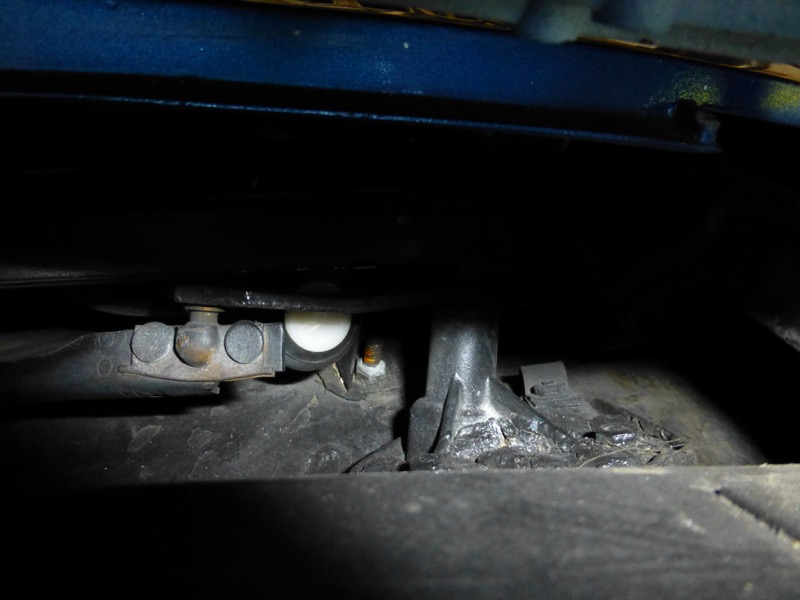
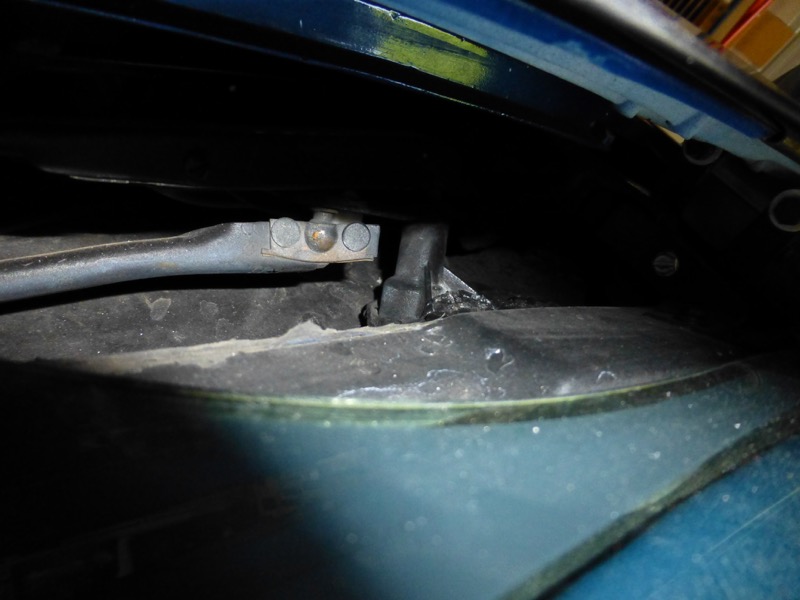
The other question is - looking from inside the area for the wipers, by the right passenger wiper swivel post, along the fender under the wiper door I can see the heater fan blades. It looks like something is missing - like a screen or plate.
The previous owner and his mechanic did all the repairs themselves, don't ask - 2 ball joints literally fell apart when the bolts were removed.
I normally use my 72 as a guide - all original, but due to the weather it's not possible + removing 50 year old screws ?
Thanks again for the help.
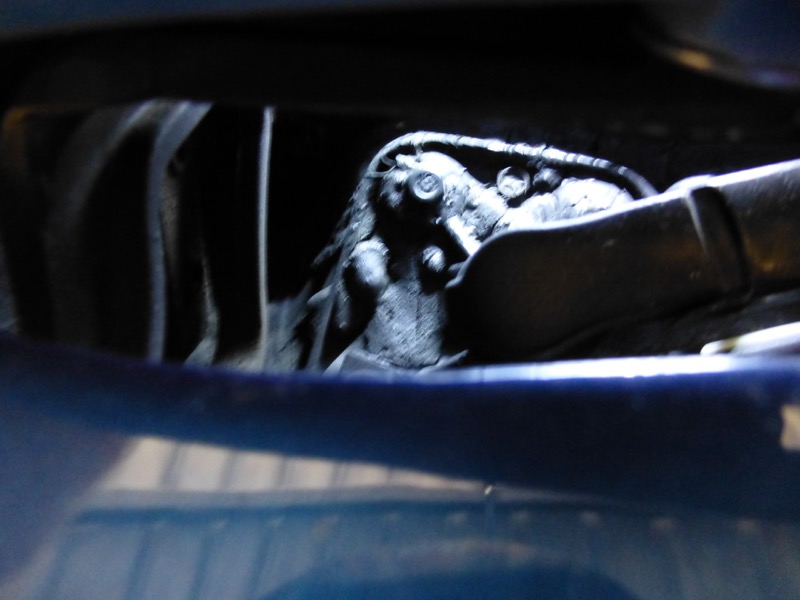
I can't see the fan cage.

Last edited by CraigH; Apr 10, 2023 at 05:05 AM.
Thread Starter
Melting Slicks
Joined: Apr 2010
Posts: 2,795
Likes: 1,196
From: Canberra Australia
2025 C3 of the Year Finalist - Modified
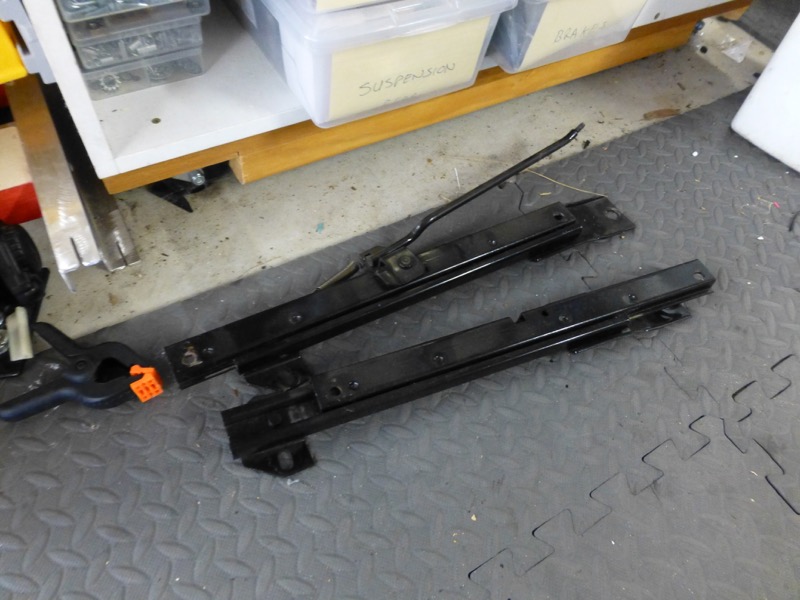
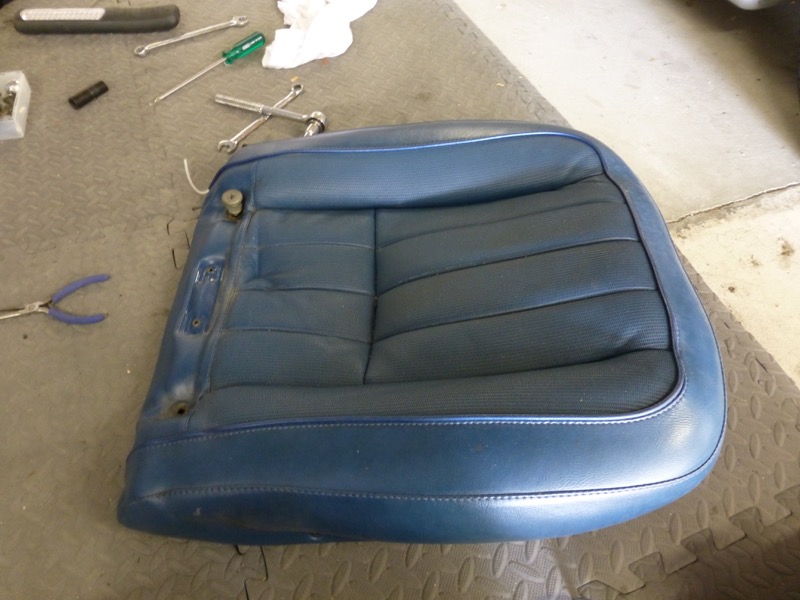
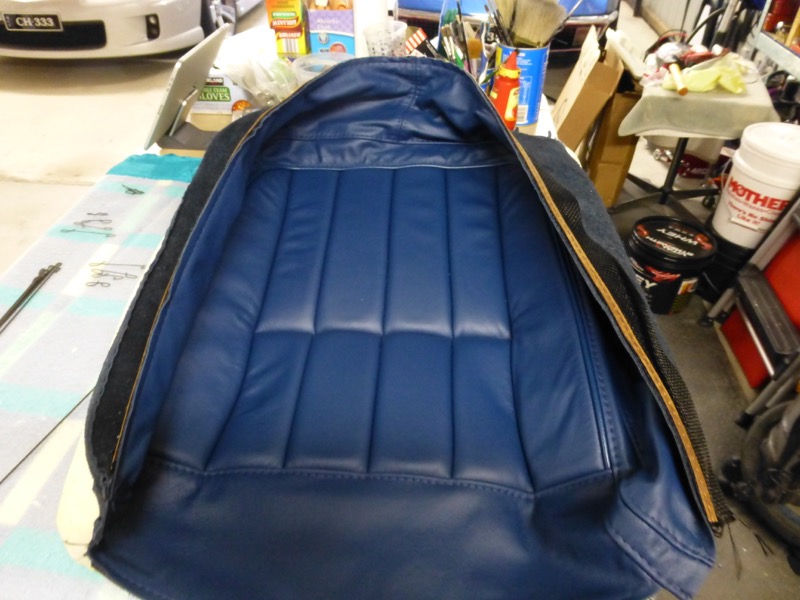
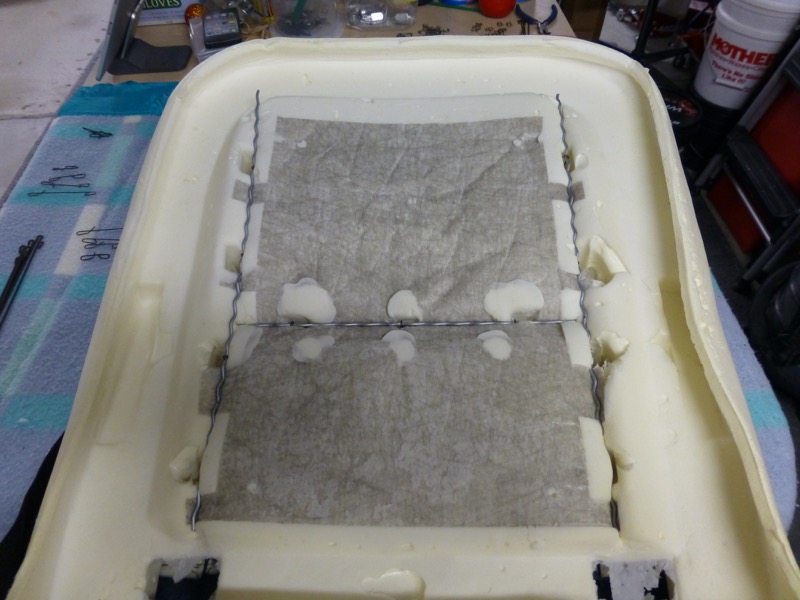
I decided to recover my seats. Have had the Corvette America covers sitting there for a while as i got them in a Willcox sale a few years back.
First step is to strip them down.
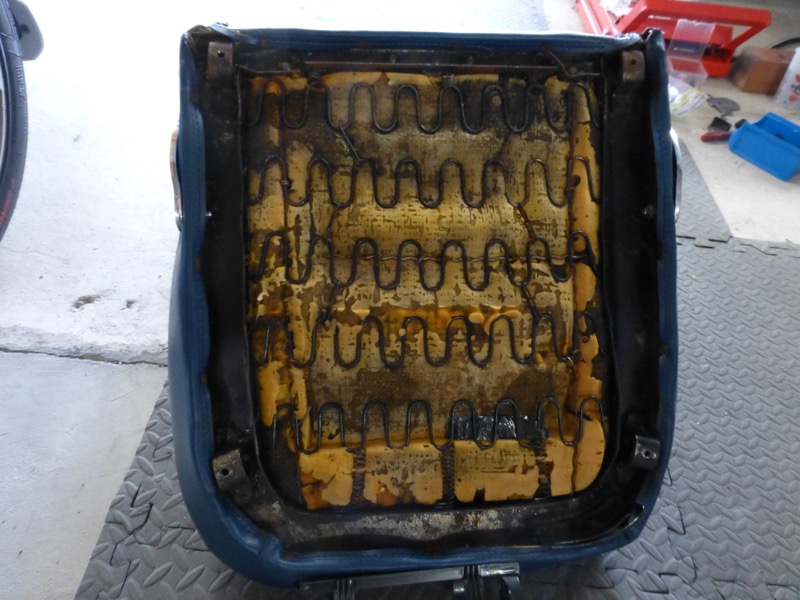
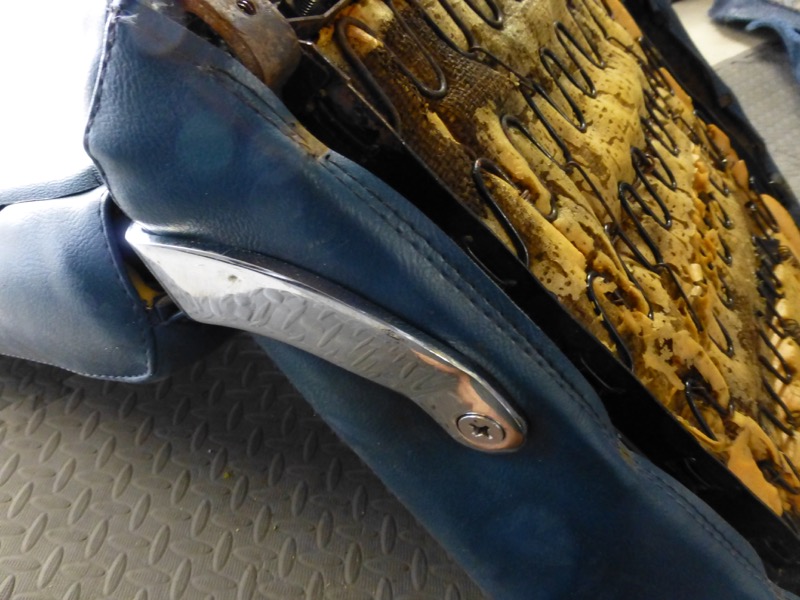
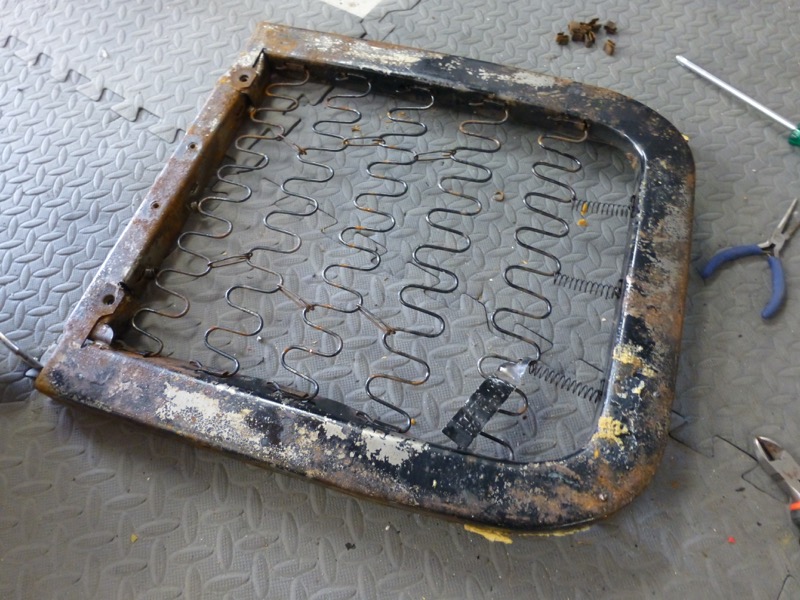
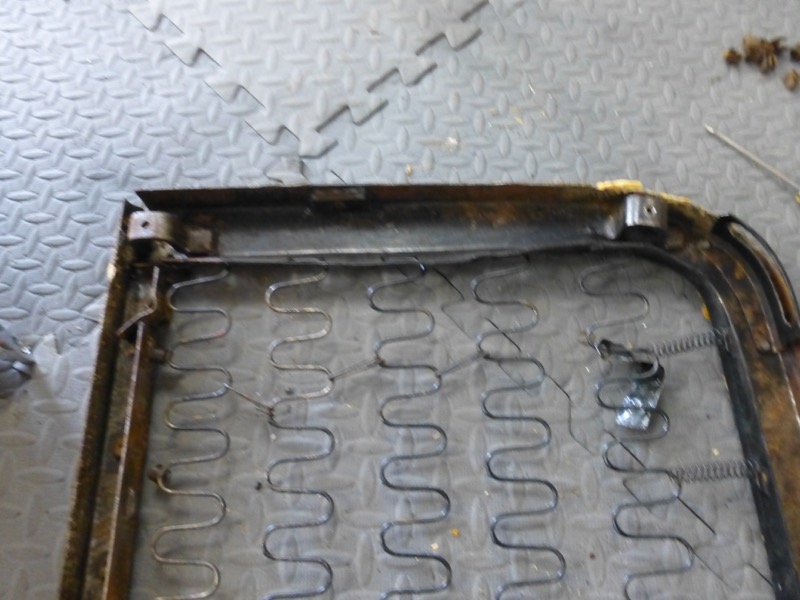
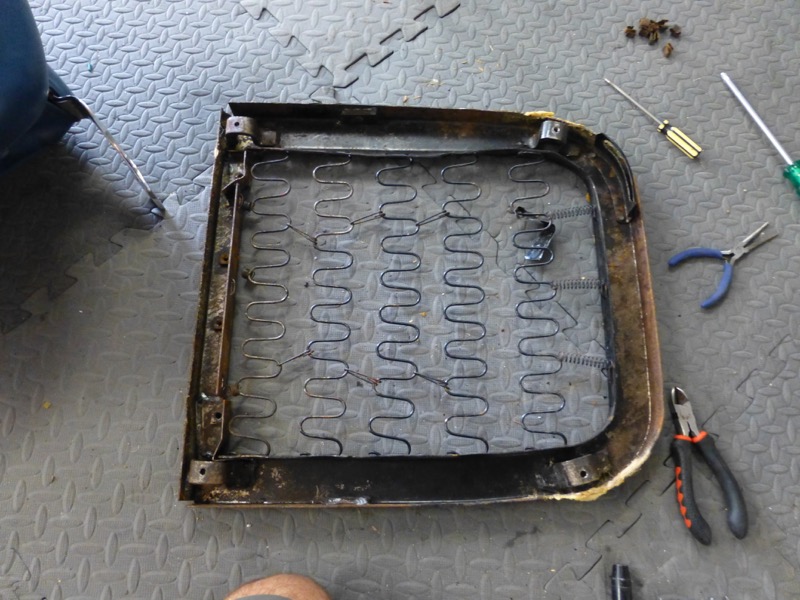
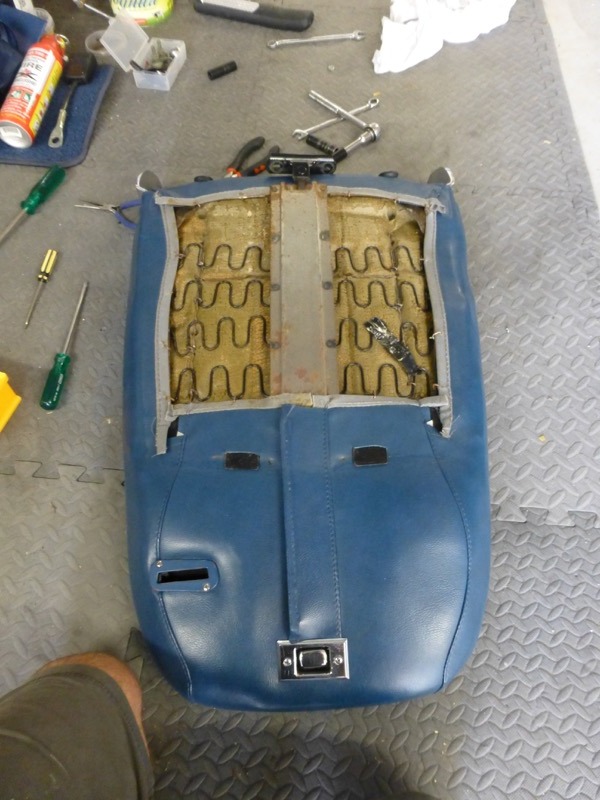
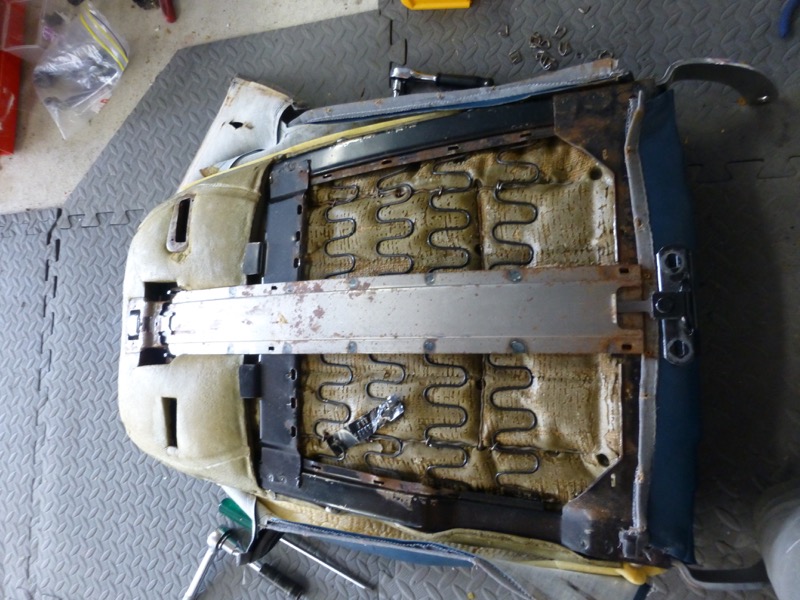
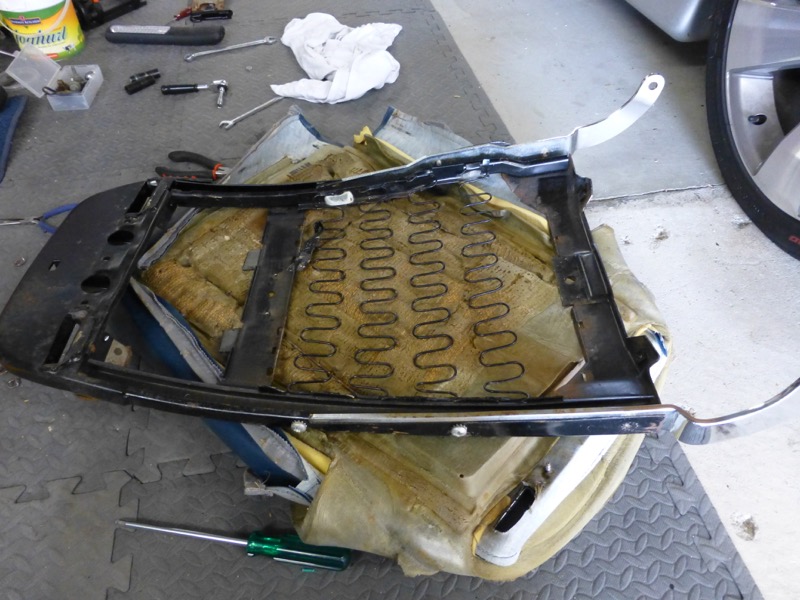
Some minor surface rust before and after restored.
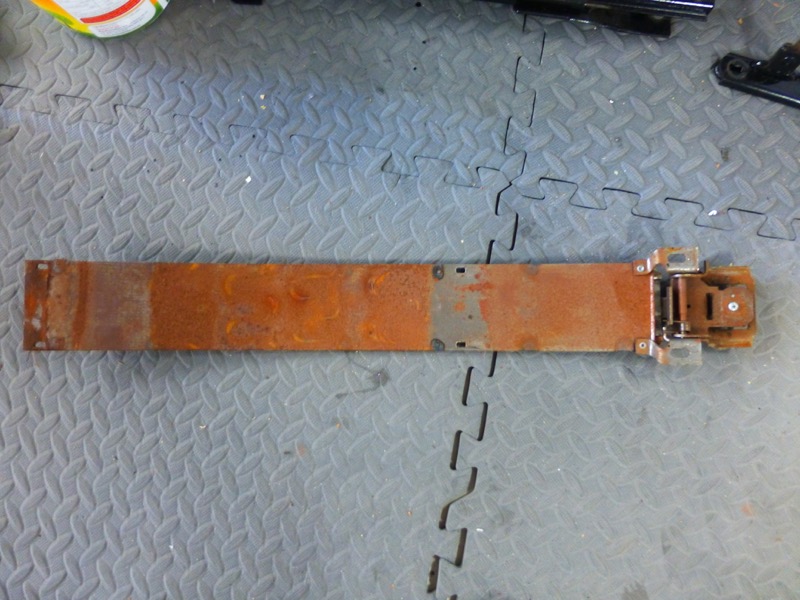
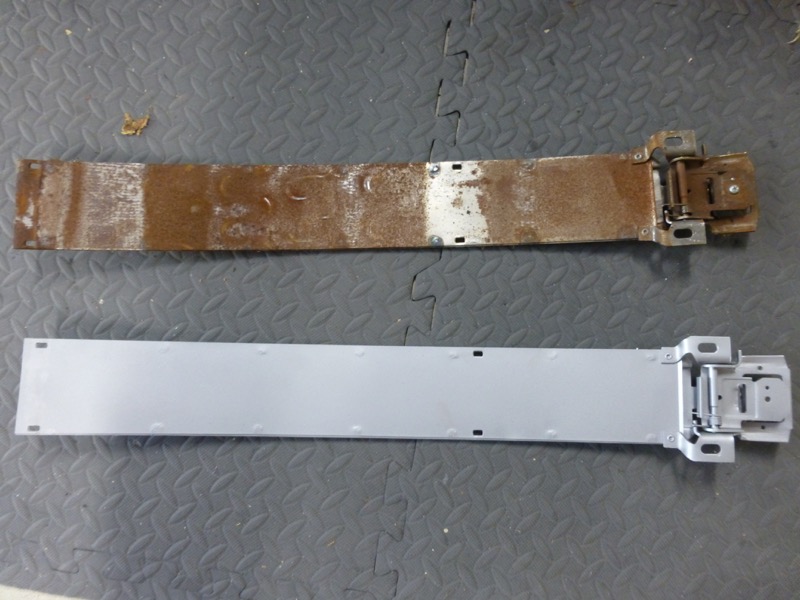
Frames off to be media blasted.
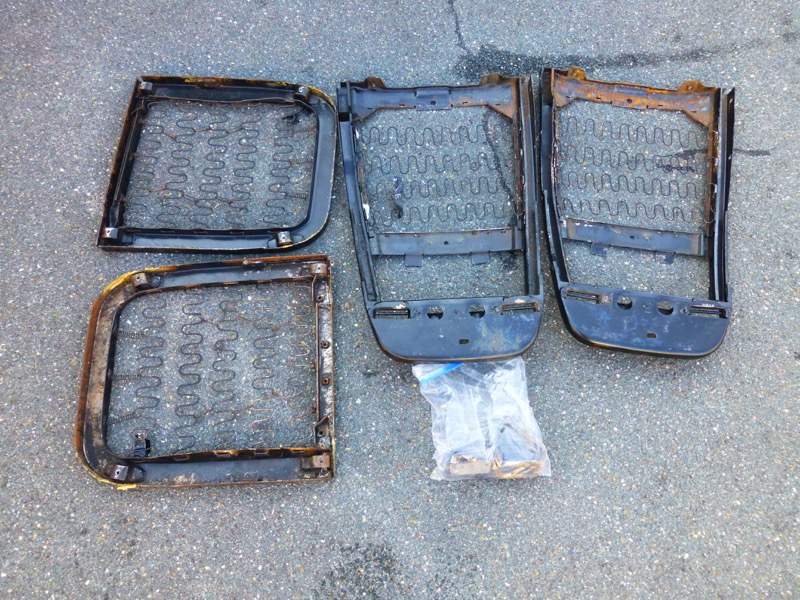
First step is to strip them down.
Some minor surface rust before and after restored.
Frames off to be media blasted.
Last edited by CraigH; Apr 10, 2023 at 05:05 AM.

Thread Starter
Melting Slicks
Joined: Apr 2010
Posts: 2,795
Likes: 1,196
From: Canberra Australia
2025 C3 of the Year Finalist - Modified
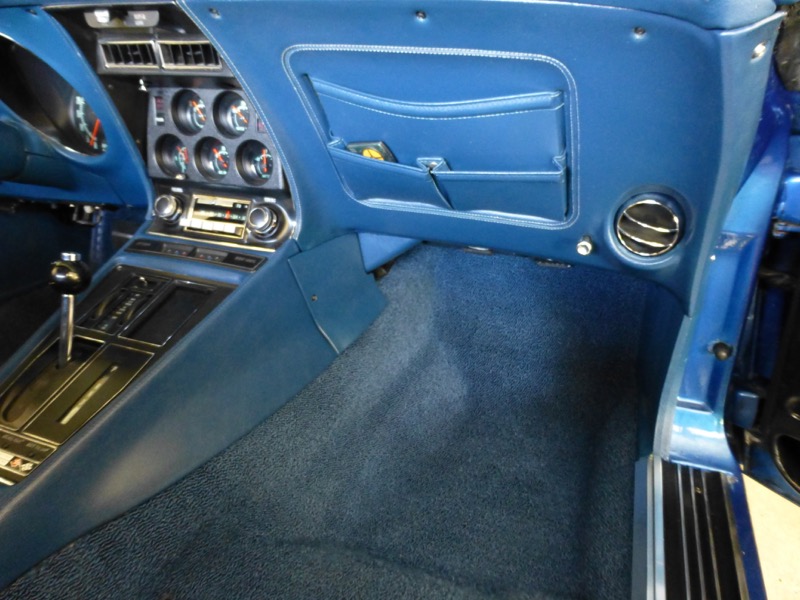
While I am finishing off small projects I tidied up the hidden sub wiring.
Put the right side dash back in after mounting the central locking and fan controller module to an aluminium plate (Am waiting for the version 2 of the controller - Ralph has been very busy:-)
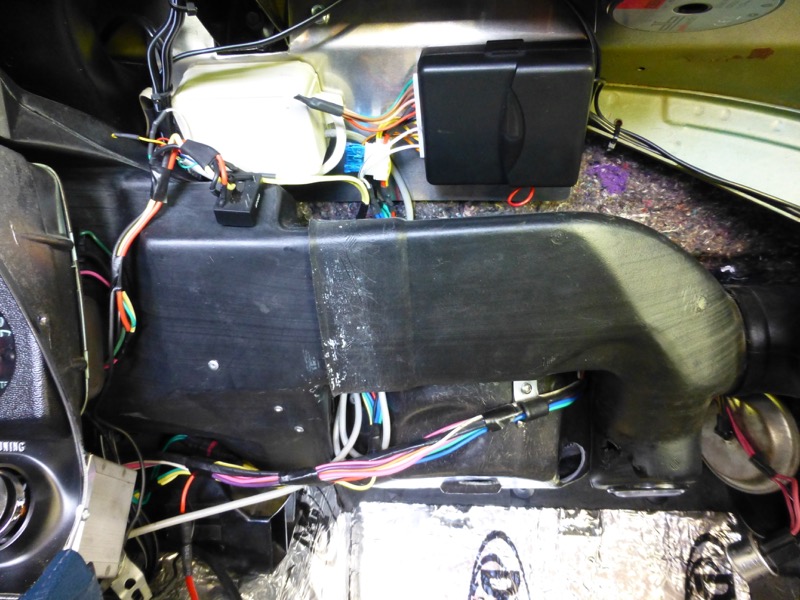
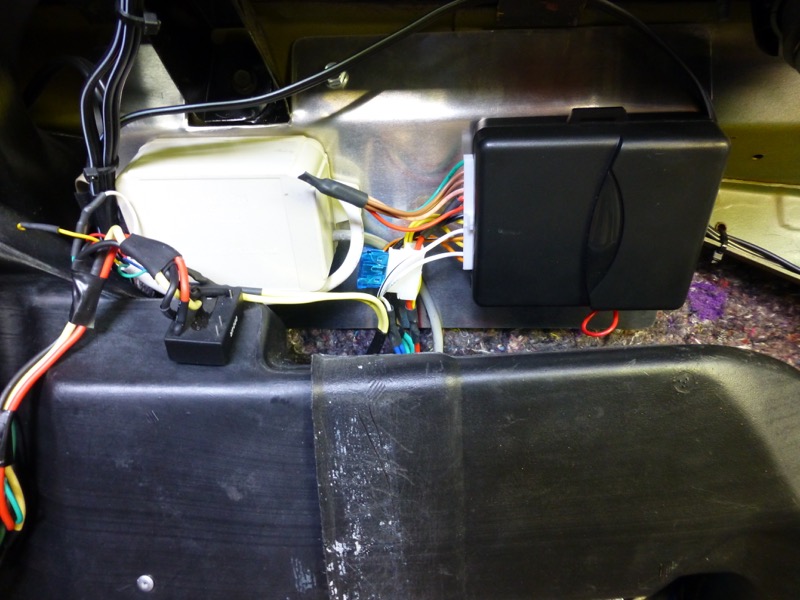
Put the right side dash back in after mounting the central locking and fan controller module to an aluminium plate (Am waiting for the version 2 of the controller - Ralph has been very busy:-)
Last edited by CraigH; Apr 10, 2023 at 05:04 AM.
Thread Starter
Melting Slicks
Joined: Apr 2010
Posts: 2,795
Likes: 1,196
From: Canberra Australia
2025 C3 of the Year Finalist - Modified
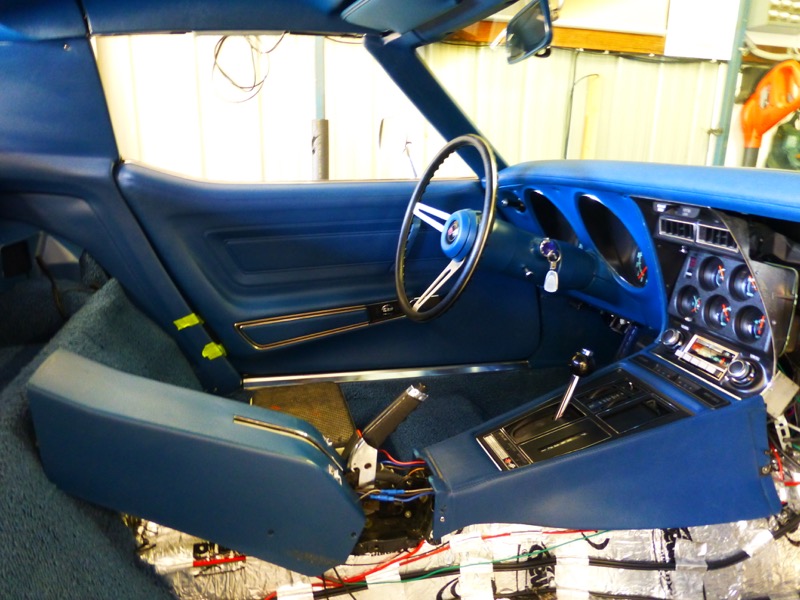
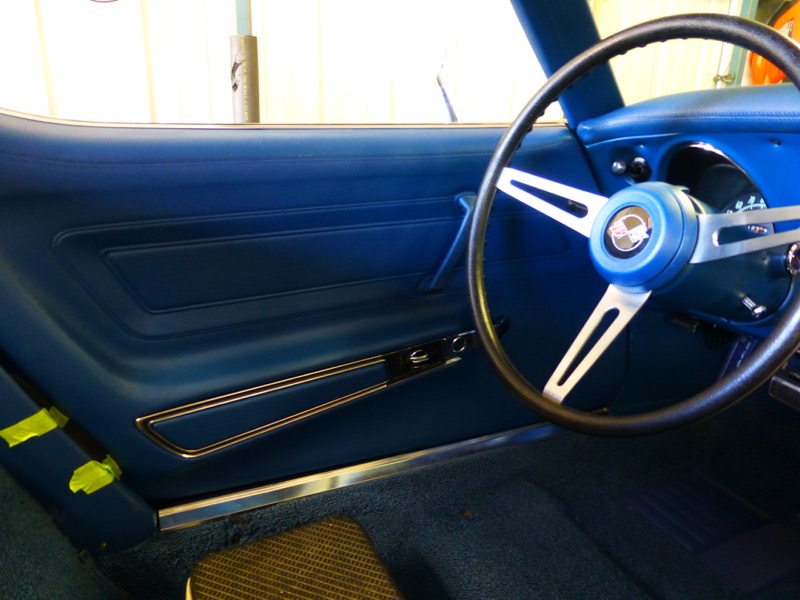
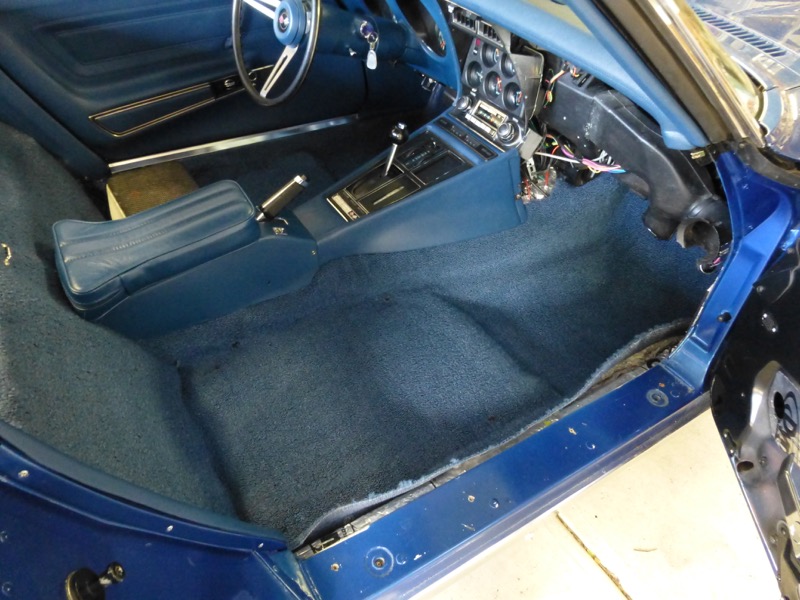
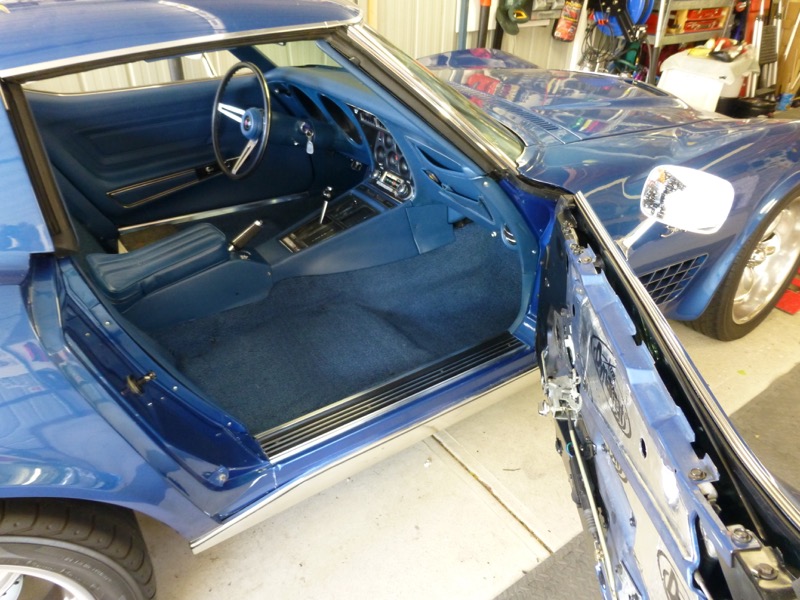
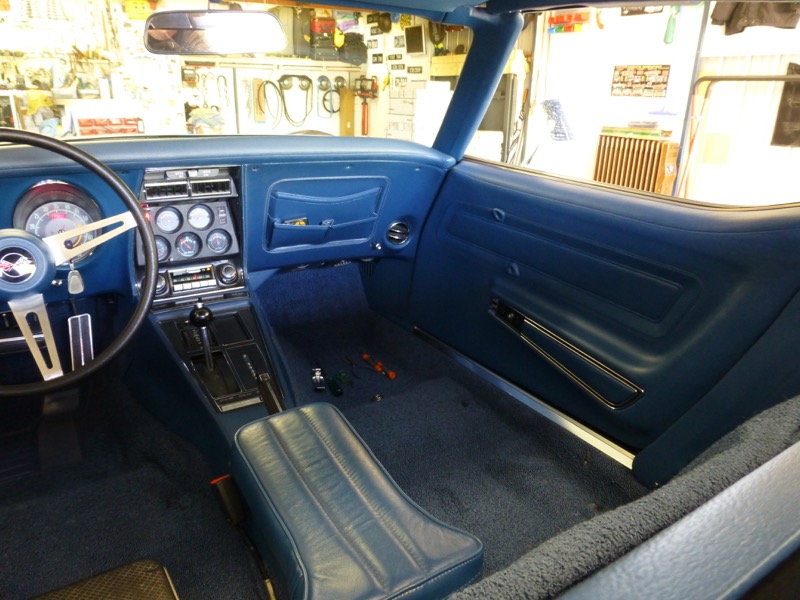
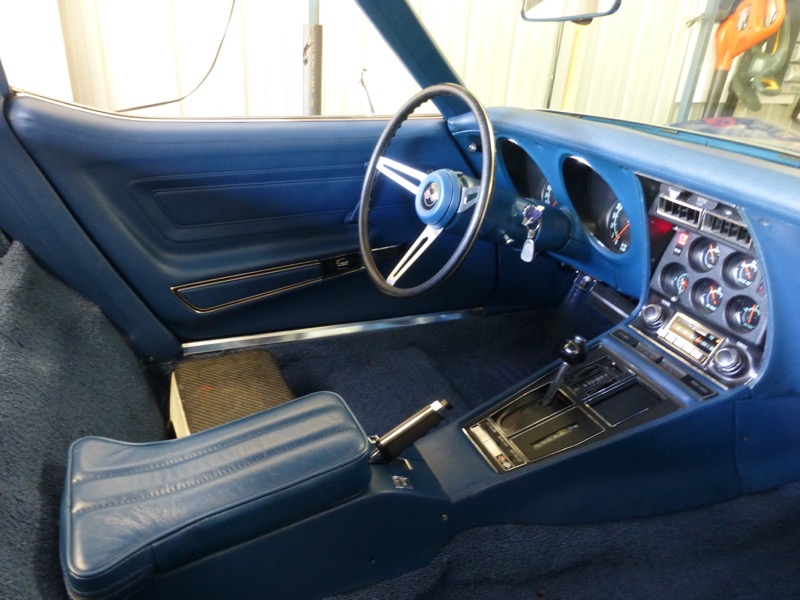
Passenger side started back together.
Almost done but the new door panels I think need to see some heat before they will fully come in tight on the velcro pads.
Have fitted them up but will revisit it later.


Almost done but the new door panels I think need to see some heat before they will fully come in tight on the velcro pads.
Have fitted them up but will revisit it later.
Last edited by CraigH; Apr 10, 2023 at 05:04 AM.

Safety Car

Joined: Jun 2013
Posts: 4,399
Likes: 793


r


Race Director
Joined: Oct 2008
Posts: 19,230
Likes: 1,672
From: Long Island
It helped, thank you
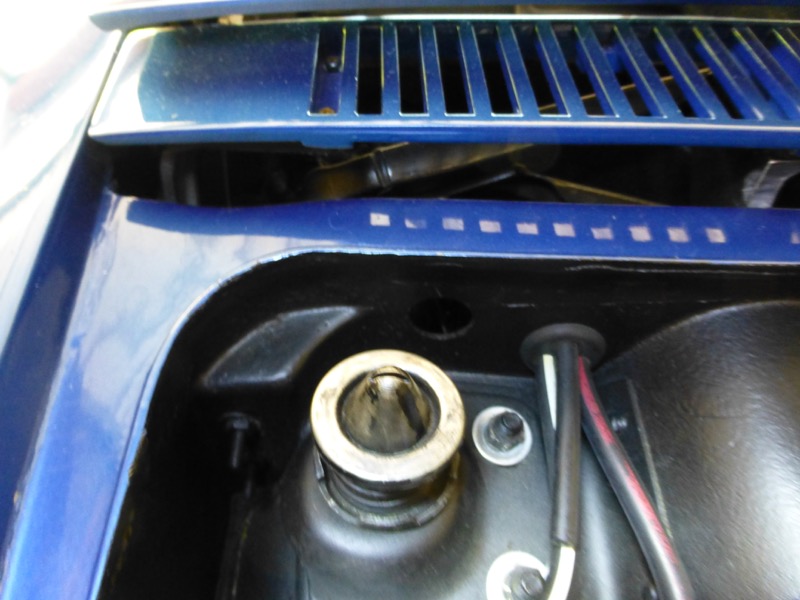
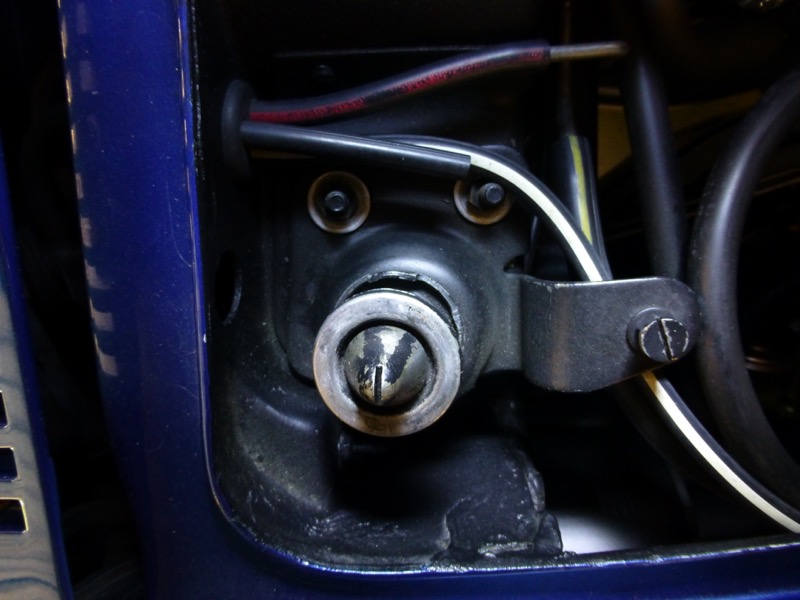
I was able to see a 73 today, there is a screen at the end of both wiper tray, channel ends to block leaves etc. When I pulled the A/C heater box it was 3/4 full of leaves and debris.
Ordering the A/C delete box today. Thanks for the pictures, you car looks great.
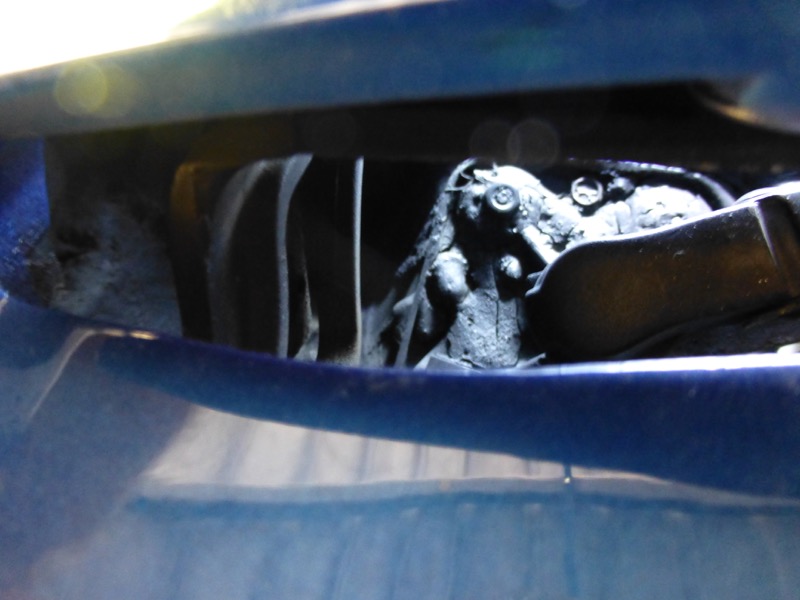
Here is a shot of mine, I am going to make a "leaf guard" for the ends of the wiper tray. This should keep leaves and debris out of the blower.
Hope to have mine together for the summer...
Thanks' again
I was able to see a 73 today, there is a screen at the end of both wiper tray, channel ends to block leaves etc. When I pulled the A/C heater box it was 3/4 full of leaves and debris.
Ordering the A/C delete box today. Thanks for the pictures, you car looks great.
Here is a shot of mine, I am going to make a "leaf guard" for the ends of the wiper tray. This should keep leaves and debris out of the blower.
Hope to have mine together for the summer...
Thanks' again
Thread Starter
Melting Slicks
Joined: Apr 2010
Posts: 2,795
Likes: 1,196
From: Canberra Australia
2025 C3 of the Year Finalist - Modified
It helped, thank you
I was able to see a 73 today, there is a screen at the end of both wiper tray, channel ends to block leaves etc. When I pulled the A/C heater box it was 3/4 full of leaves and debris.
Ordering the A/C delete box today. Thanks for the pictures, you car looks great.
Here is a shot of mine, I am going to make a "leaf guard" for the ends of the wiper tray. This should keep leaves and debris out of the blower.
Hope to have mine together for the summer...
Thanks' again
Thread Starter
Melting Slicks
Joined: Apr 2010
Posts: 2,795
Likes: 1,196
From: Canberra Australia
2025 C3 of the Year Finalist - Modified
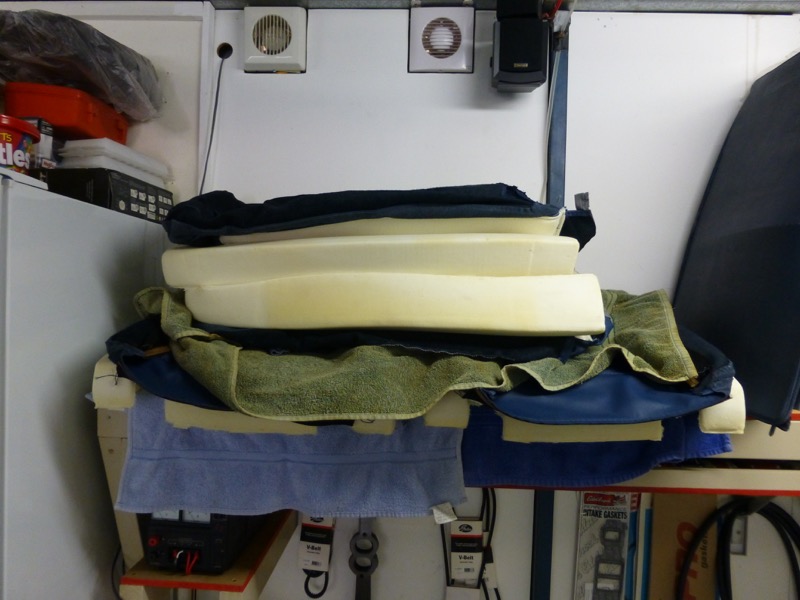
While waiting for the frames to come back from media blasting Matt and I watched the Corvette America seat cover fitting videos and prepared the covers on the foam.
Clean soft area to work
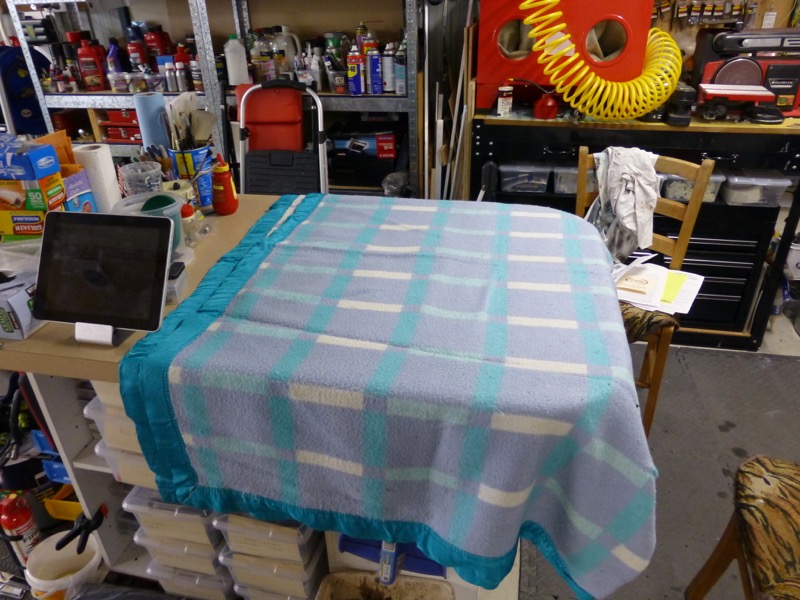
Start inserting wires adding joiner clips etc.
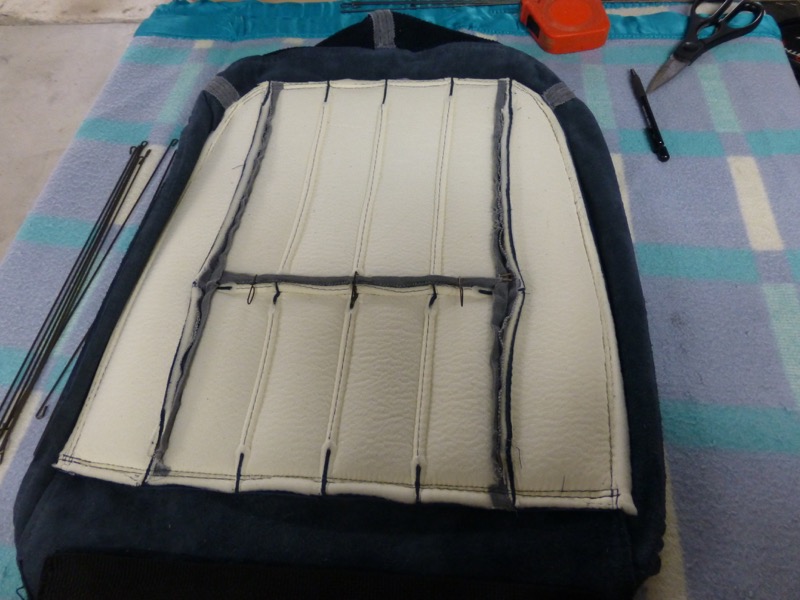
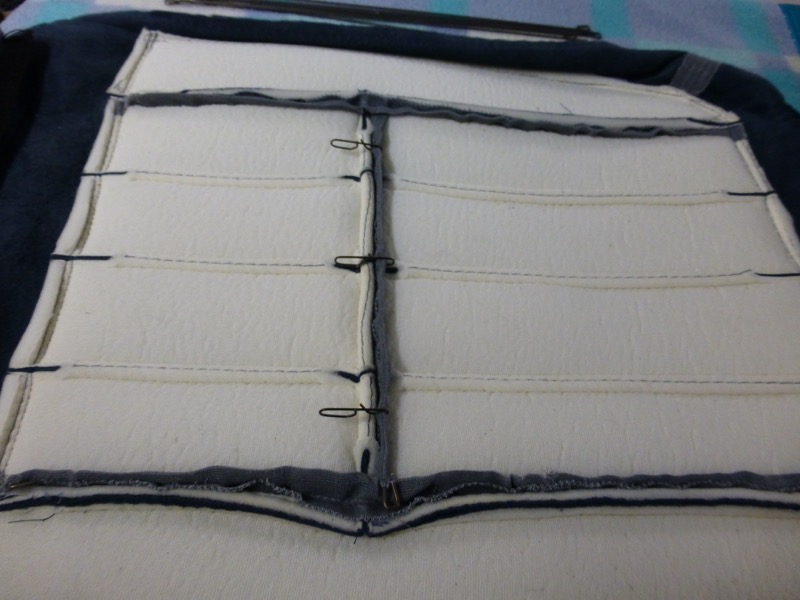
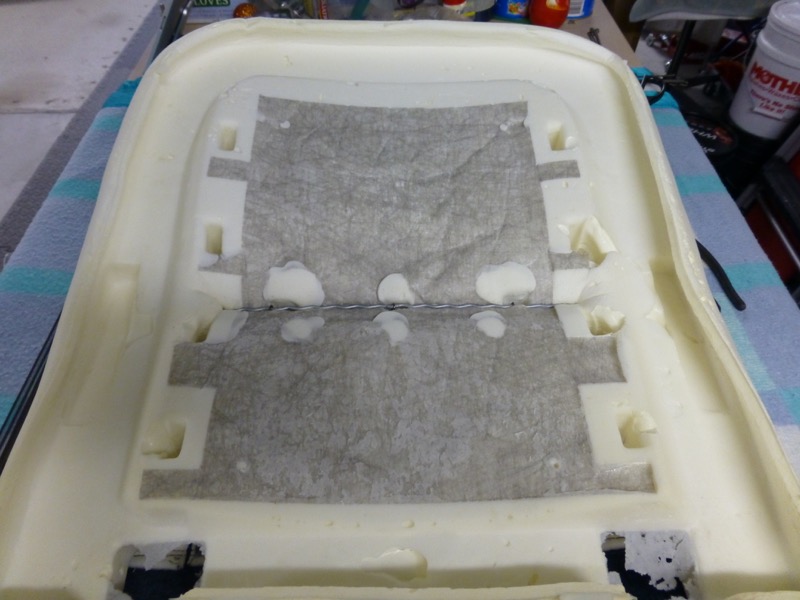
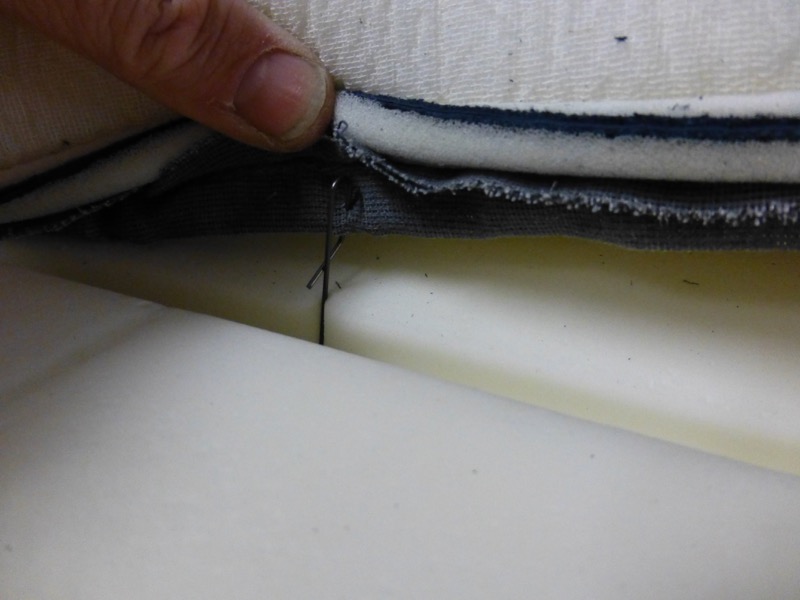

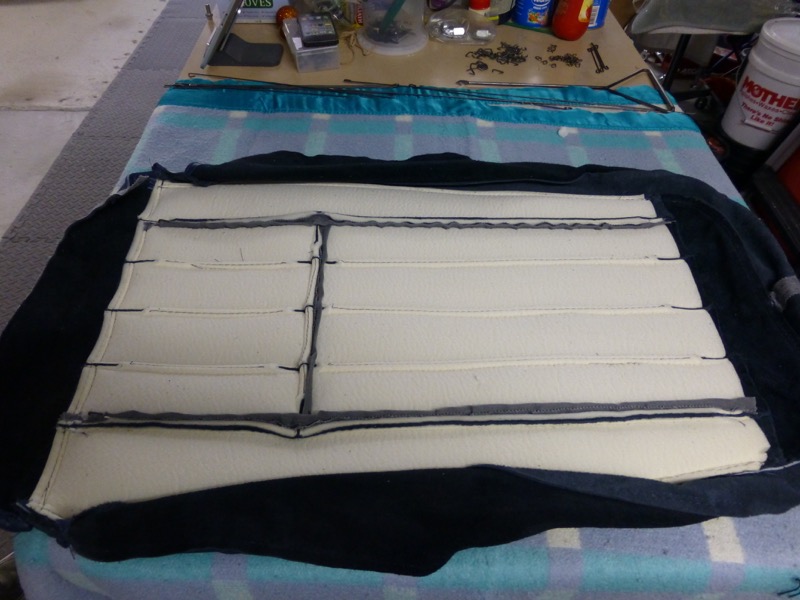
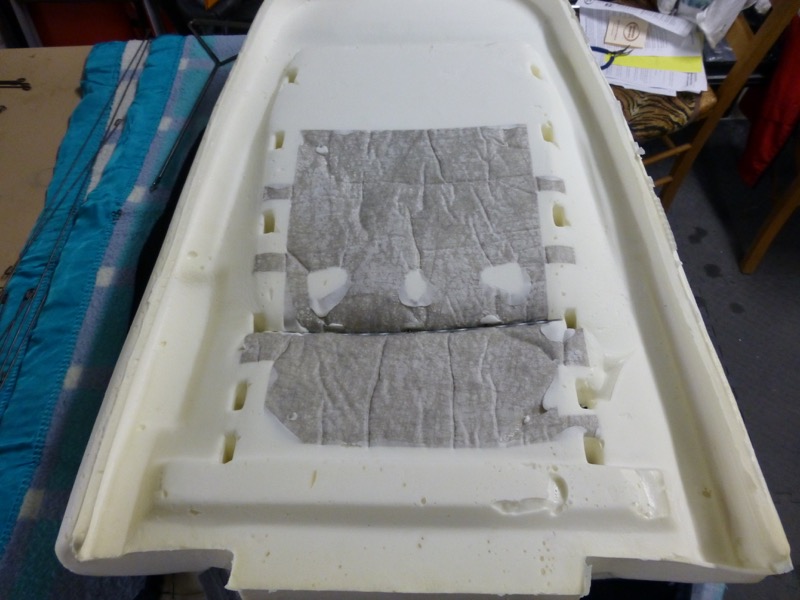
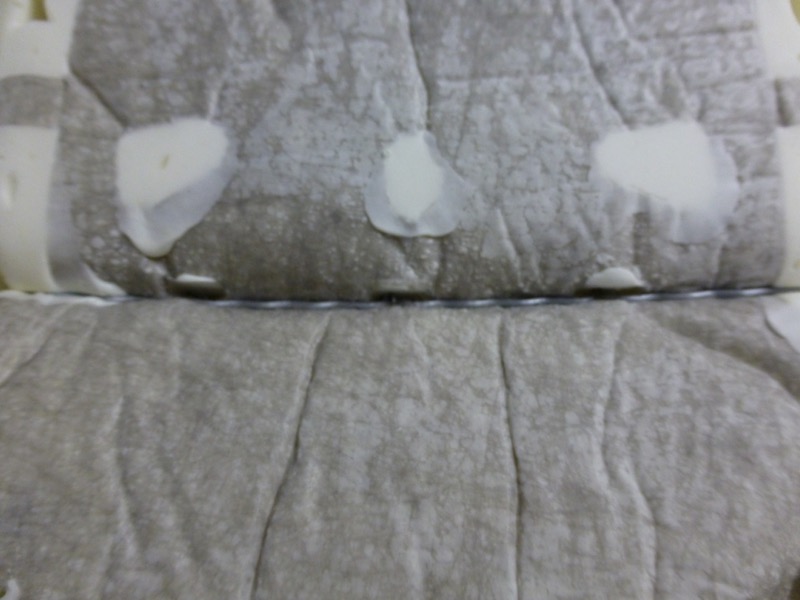
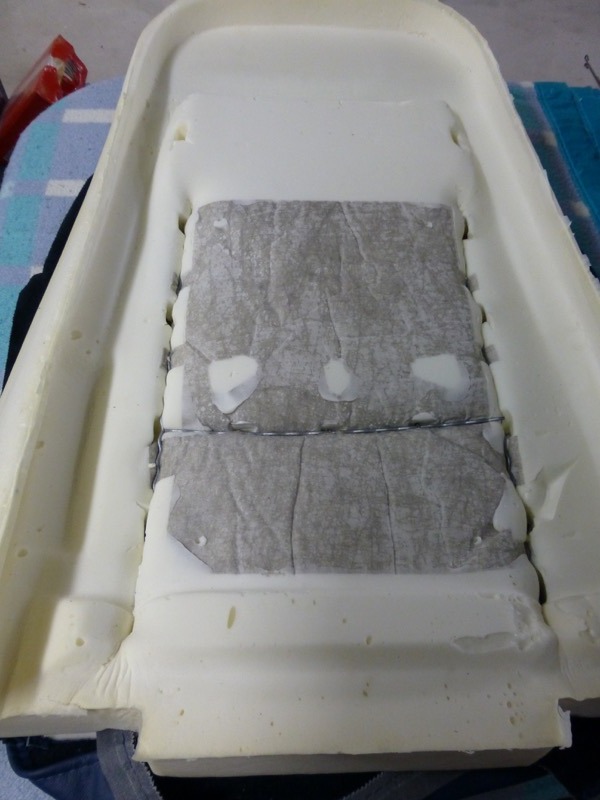
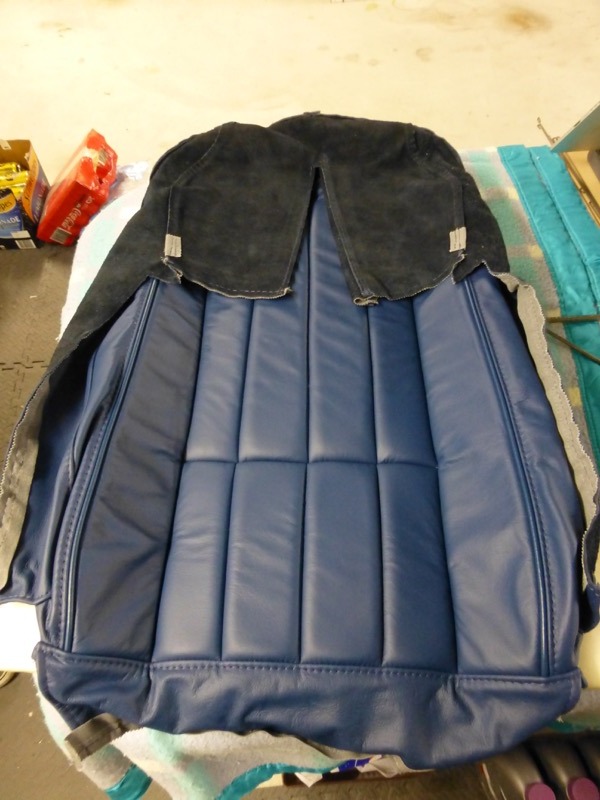
Set aside till the next step.
Clean soft area to work
Start inserting wires adding joiner clips etc.
Set aside till the next step.
Last edited by CraigH; Apr 10, 2023 at 05:04 AM.