


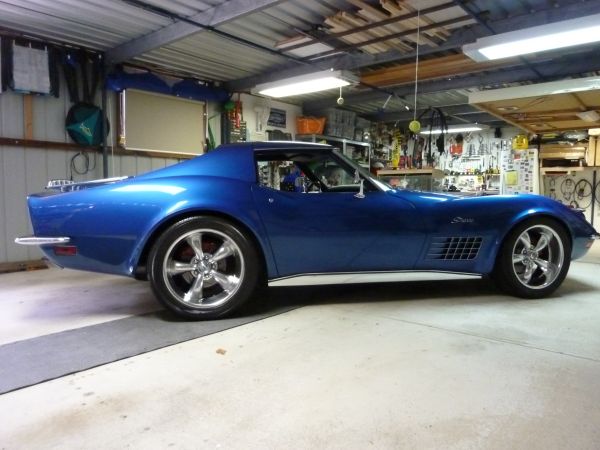

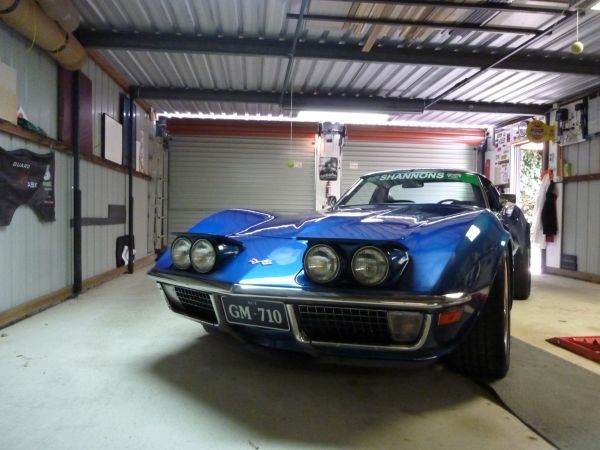
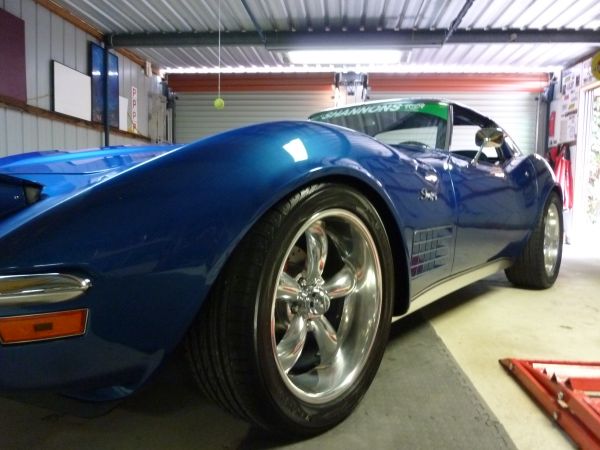

1971 Journey

Thread Starter
Melting Slicks


Joined: Apr 2010
Posts: 2,795
Likes: 1,196
From: Canberra Australia
2025 C3 of the Year Finalist - Modified
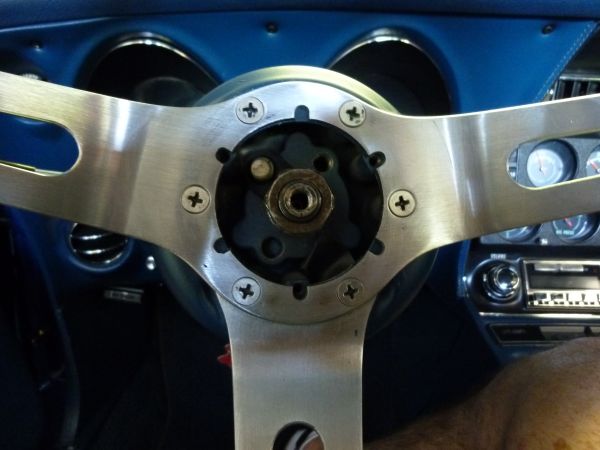
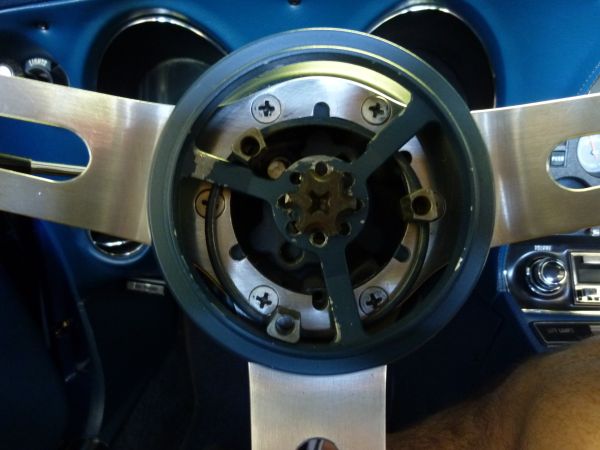
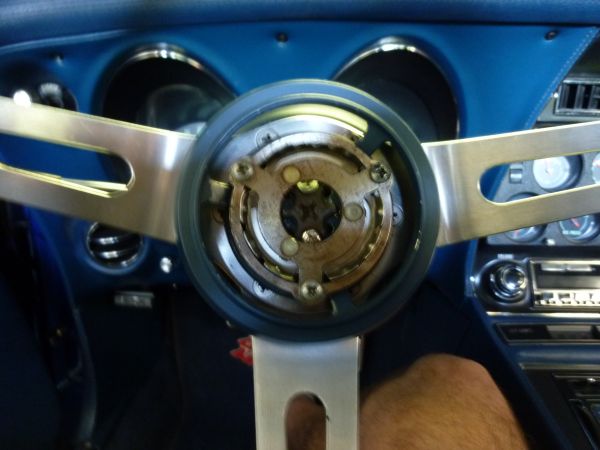
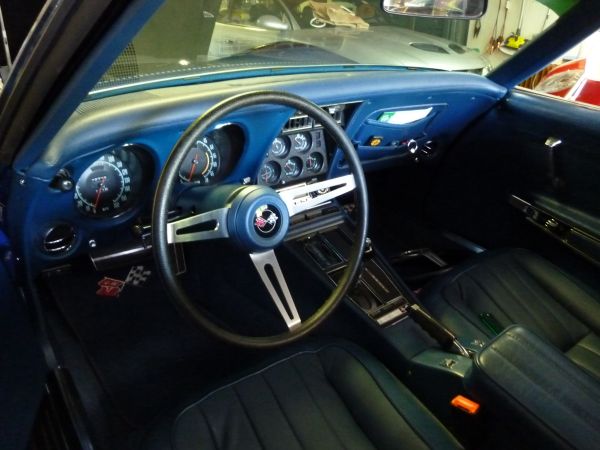
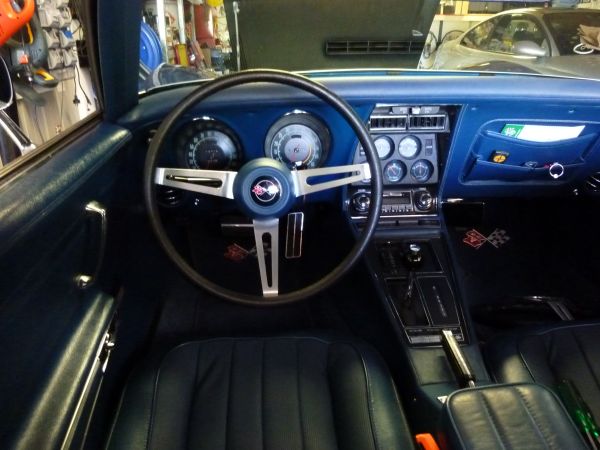
Decided to revert back to the original steering wheel for the more classic and correct interior look.
I know a couple of people have asked about what was involved so....
First remove the horn cap by pulling it away from wheel.

This exposed the 3 bolts to remove the horn ring.
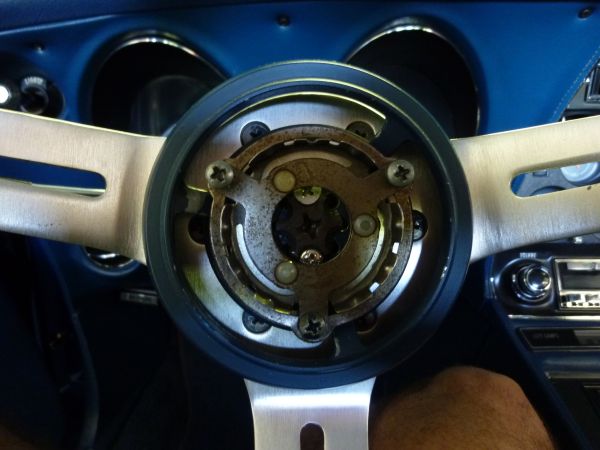
Once its off it will expose the telescopic wheel control.

BTW - Disconnect the horn unless you want it to go off a few times during this part.
Once the 2 lock bolts are removed the large bolt in the middle can be removed.
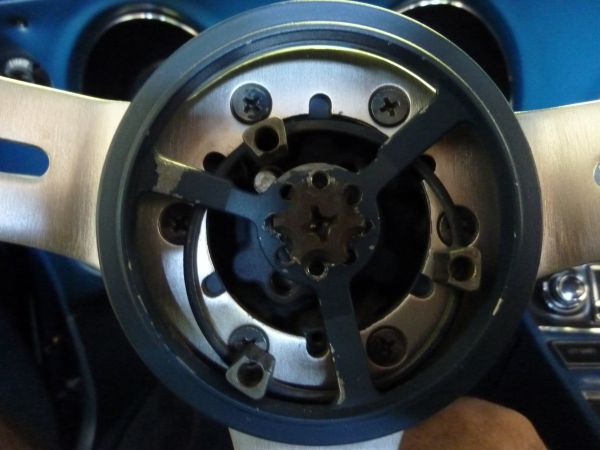
Then all you have is the bolts that hold the wheel on.
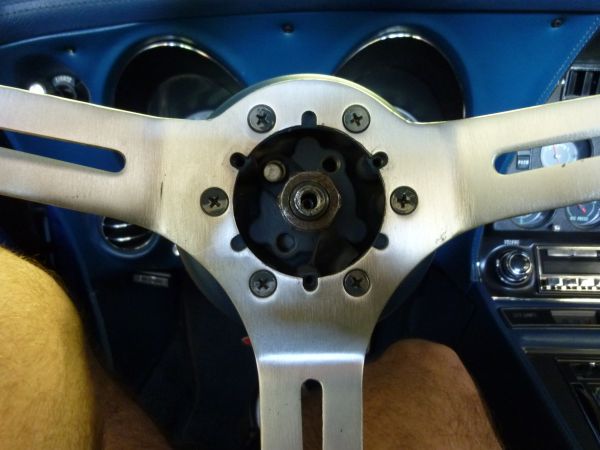
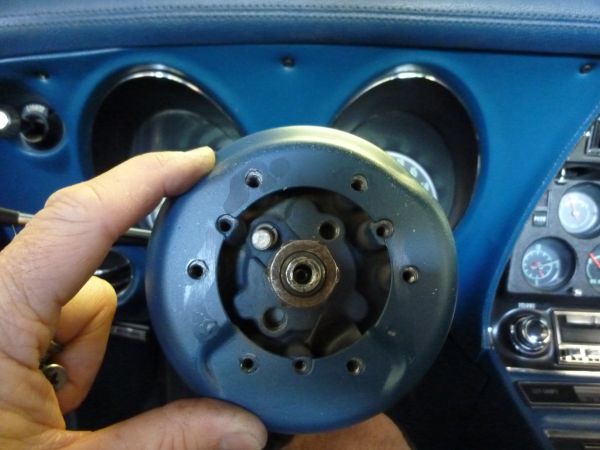
Just reverse the steps to fit the new wheel.
Just be careful with the horn ring as it has a tab that needs to be on top of the spring loaded horn contact in the column to allow the circuit to complete.
I know a couple of people have asked about what was involved so....
First remove the horn cap by pulling it away from wheel.
This exposed the 3 bolts to remove the horn ring.
Once its off it will expose the telescopic wheel control.
BTW - Disconnect the horn unless you want it to go off a few times during this part.
Once the 2 lock bolts are removed the large bolt in the middle can be removed.
Then all you have is the bolts that hold the wheel on.
Just reverse the steps to fit the new wheel.
Just be careful with the horn ring as it has a tab that needs to be on top of the spring loaded horn contact in the column to allow the circuit to complete.
Last edited by CraigH; Apr 10, 2023 at 04:45 AM.
Thread Starter
Melting Slicks
Joined: Apr 2010
Posts: 2,795
Likes: 1,196
From: Canberra Australia
2025 C3 of the Year Finalist - Modified
For the first time we decided to go through judging at the Summernats and see what it was like.
After we did the Super Cruise we drove it in, was not that clean after a day of driving and sitting outside .......
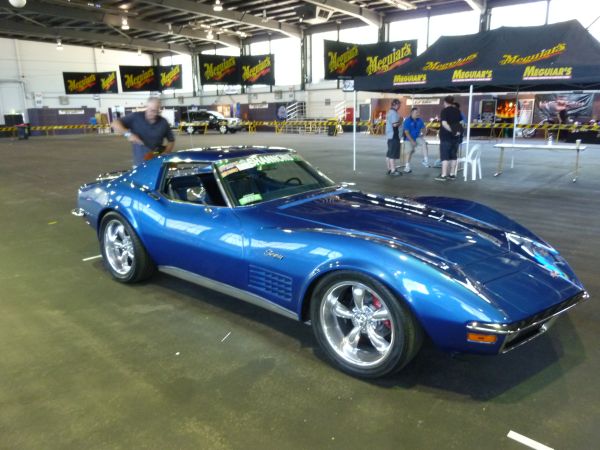
Was fairly painless, Street Class, checked out engine bay, paint, interior and overall theme for the car.
Just another 1700 people in the same class :-(
After we did the Super Cruise we drove it in, was not that clean after a day of driving and sitting outside .......
Was fairly painless, Street Class, checked out engine bay, paint, interior and overall theme for the car.
Just another 1700 people in the same class :-(
Last edited by CraigH; Apr 10, 2023 at 04:45 AM.
Thread Starter
Melting Slicks
Joined: Apr 2010
Posts: 2,795
Likes: 1,196
From: Canberra Australia
2025 C3 of the Year Finalist - Modified
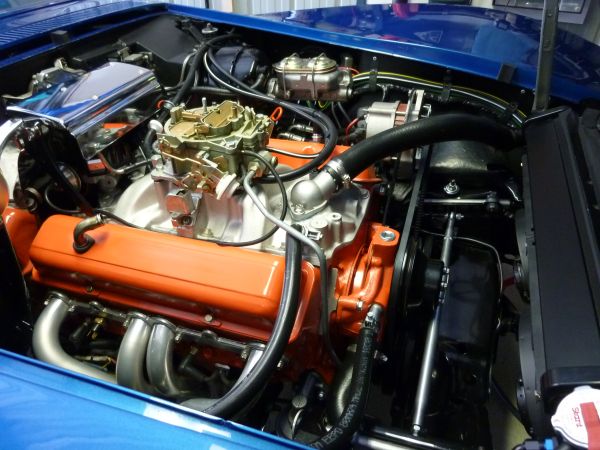
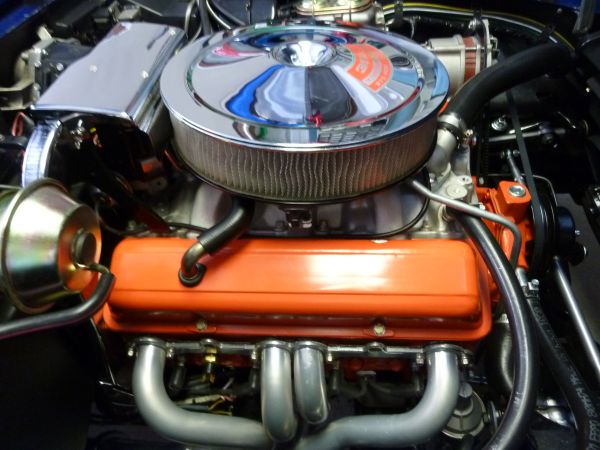
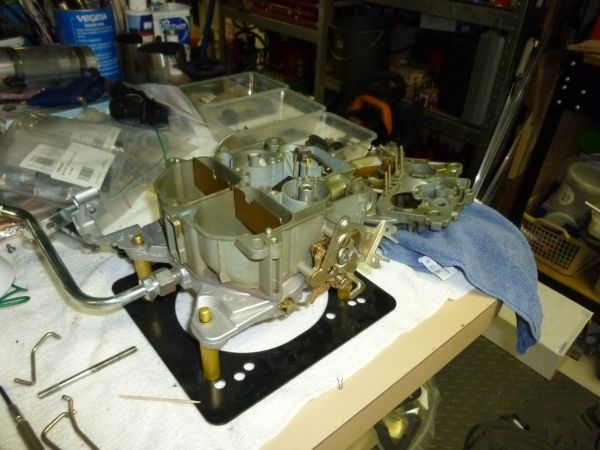
Had what seemed like a sticky accelerator cable yesterday and today but....
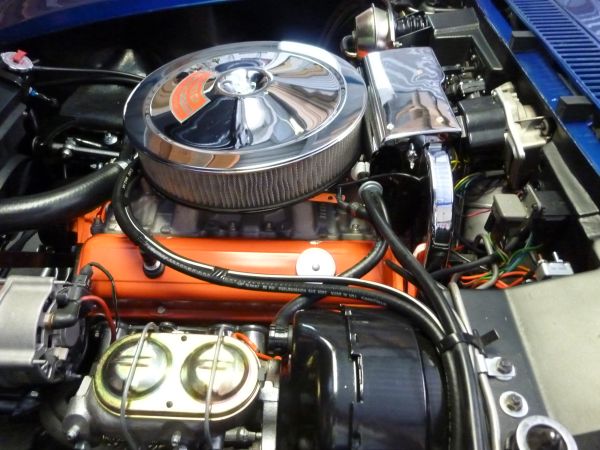
When I got home tonight I did some checking and it was the accelerator pump sticking. So top of carb needs to come off.
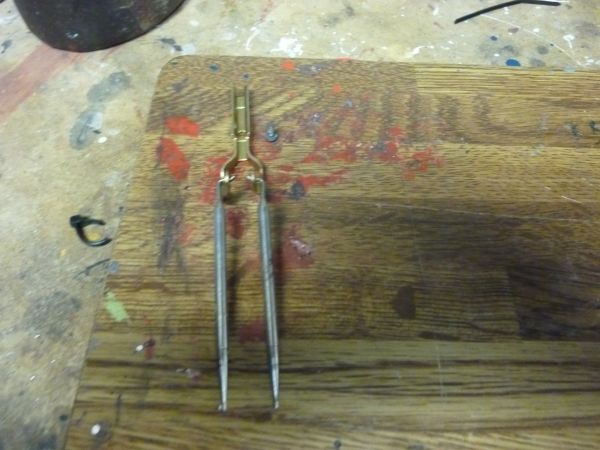
Had already pushed the accelerator pump pivot roll pin in so I could remove the bar.
First removed the secondary metering rods.
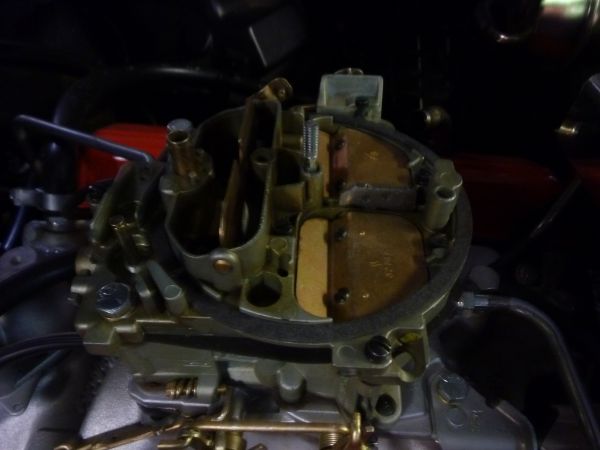
Then the 9 flat head bolts that hold teh top on.
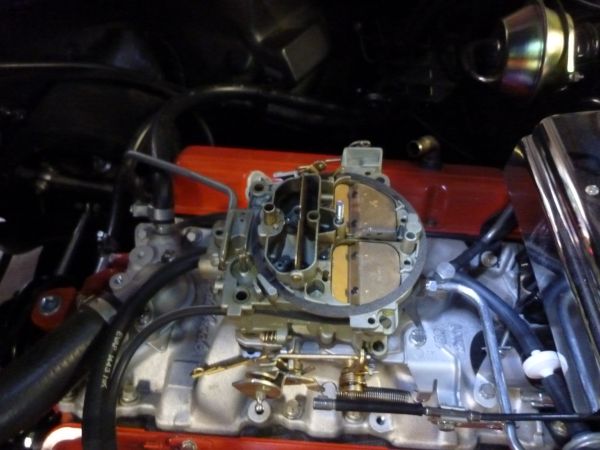
Take off the choke assembly.
Top off
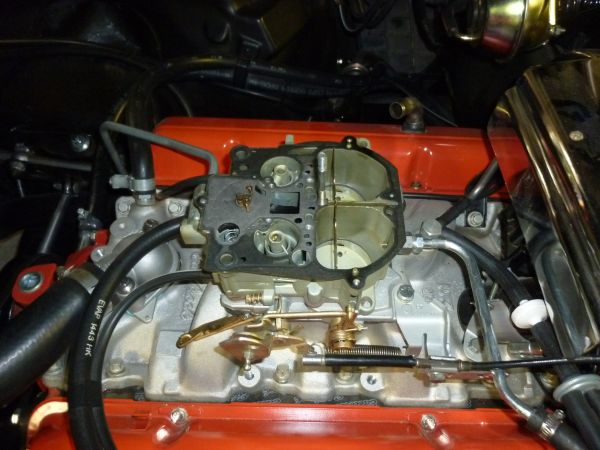
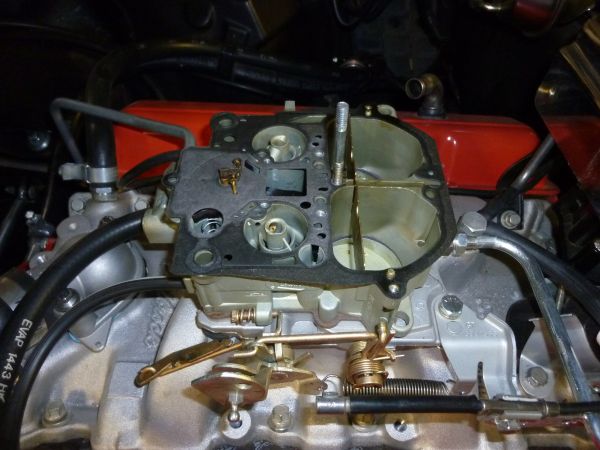
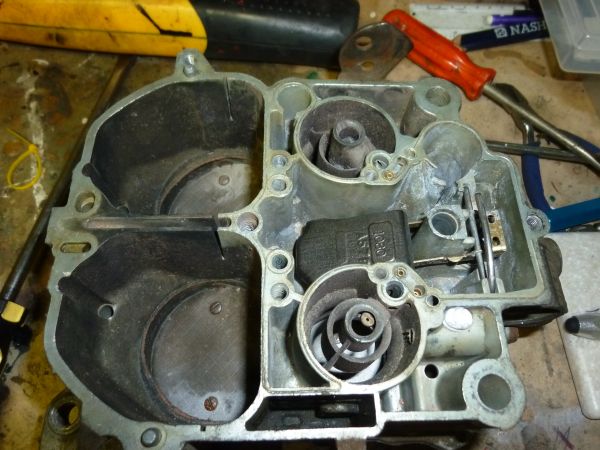
Hmm this is the accelerator pump.
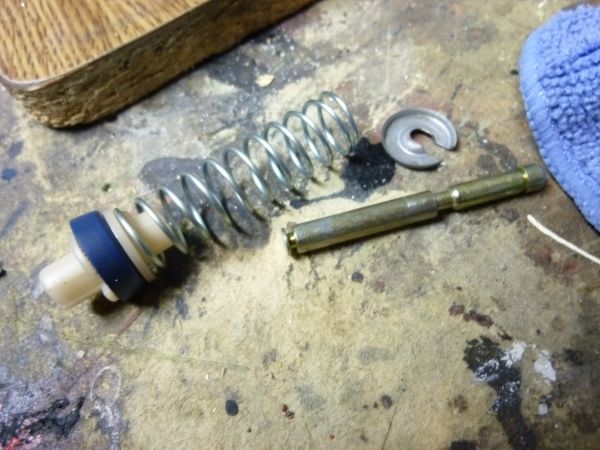
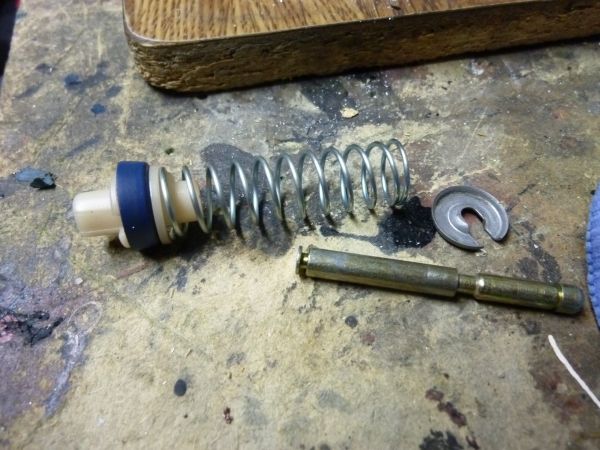
Has popped off the shaft completely.
If I put it back on it wont slide smoothly on its shaft so checked my parts and I have new cups etc but no new shaft.
Will have to order one.
When I got home tonight I did some checking and it was the accelerator pump sticking. So top of carb needs to come off.
Had already pushed the accelerator pump pivot roll pin in so I could remove the bar.
First removed the secondary metering rods.
Then the 9 flat head bolts that hold teh top on.
Take off the choke assembly.
Top off
Hmm this is the accelerator pump.
Has popped off the shaft completely.
If I put it back on it wont slide smoothly on its shaft so checked my parts and I have new cups etc but no new shaft.
Will have to order one.
Last edited by CraigH; Apr 10, 2023 at 04:43 AM.
Thread Starter
Melting Slicks
Joined: Apr 2010
Posts: 2,795
Likes: 1,196
From: Canberra Australia
2025 C3 of the Year Finalist - Modified
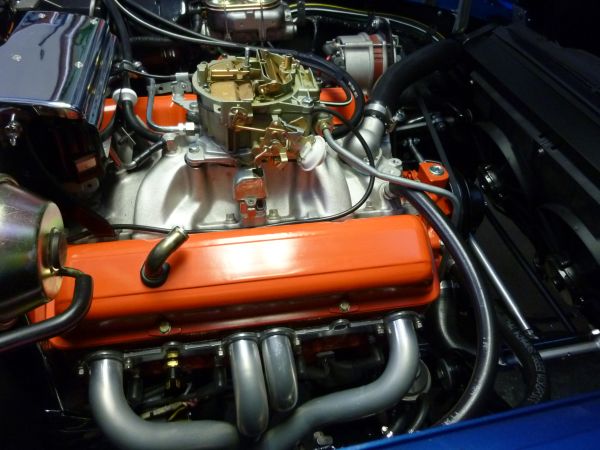
While I had the carb off I checked the float level and had a poke around.
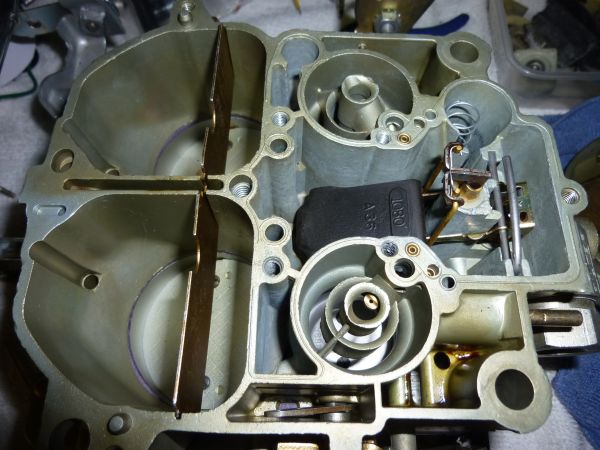
Luckily a have a couple of other Quadrajets including this junker that I can try things out on first.
Will probably need to increase the main jets once I get some A/F readings out of the car.
Have a new accelerator pump mailed yesterday from Sydney.
While I am in the US in a few weeks I will get a selection of main jets, rods etc, so I can have a play later in the year.
Last edited by CraigH; Apr 10, 2023 at 04:43 AM.
Thread Starter
Melting Slicks
Joined: Apr 2010
Posts: 2,795
Likes: 1,196
From: Canberra Australia
2025 C3 of the Year Finalist - Modified
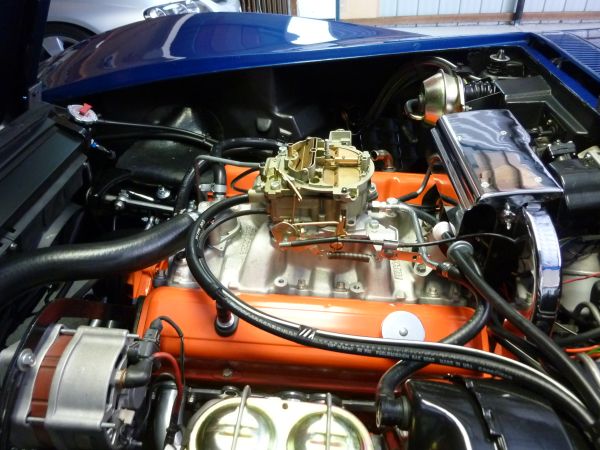
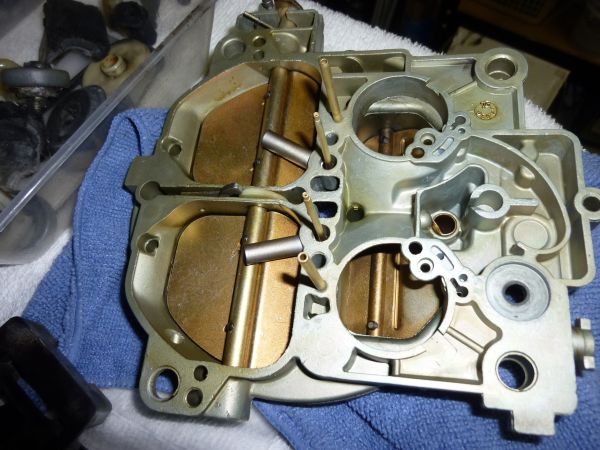
Carb all back together yesterday and went for a test run, all great.
In fact it must have been sticking and playing up for a while before seperating as it feels stronger than before on initial acceleration.
Feel much more confident now to strip down the Quad and change jets, rods etc.
Carb builder advised for the 383 change I start by going from 74 to 76 jets.
That caters for WOT but to maintain cruise and light throttle fairly similar to now I would need to increase rods from 44 to 47 and work back to richen that.
Corvette Stories
The Best of Corvette for Corvette Enthusiasts

Top 10 Most Expensive Corvettes Ever Sold on Bring A Trailer
Brett Foote
10 Things Every Corvette Owner Needs (2026 Edition)
Michael S. Palmer
8 Most "Only Corvette Owners Understand" Quirks and Problems
Pouria Savadkouei
10 Reasons the C6 Z06 is Still A Performance Benchmark After 20 Years
Joe Kucinski
How Much Horsepower Every Corvette Engine "LOST" in 1972
Joe Kucinski
Top 10 DOs and DON'Ts for Protecting Your Convertible Top!
Michael S. Palmer
Top 10 Most Explosive Corvettes Ever Made: Power-to-Weight Ratio Ranked!
Joe Kucinski
150 hp to 1,250 hp: Every Corvette Generation Compared by the Specs That Matter
Joe Kucinski
8 Coolest Corvette Pace Cars (and Replicas) of All Time
Verdad Gallardo
Thread Starter
Melting Slicks
Joined: Apr 2010
Posts: 2,795
Likes: 1,196
From: Canberra Australia
2025 C3 of the Year Finalist - Modified
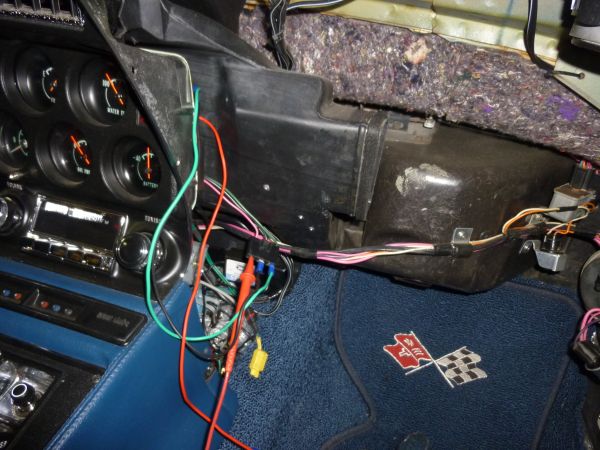
Have a second major revision of the Themo Fan control software for the Vette.

Works fairly well, easy to set up and use.
- Press and hold Fan button 1 to set on point for fan 1 and Fan 2 on will be set 10 degree hotter.
- Press fan 1 or 2 to force on either fan. (Manual mode)
- Press and hold Fan 2 button then you can increase or decrease the gap between fan 1 and Fan 2 on points.
-Dual Press 1-2 o 2-1 allows you to then move fan off points up or down for either fan.
Uses the standard temp sender in the vette so no new sender
However and there is always a "but" the on and off points have not 100% matched to what I thought was being set.
Did a fair bit of testing and came up with the answer.
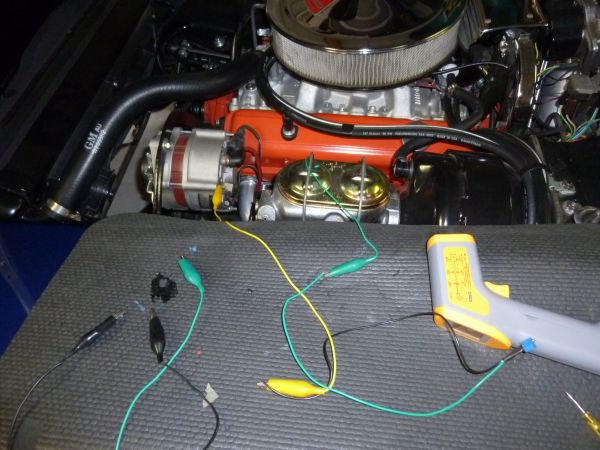
Used a Pot to simulate the sender in tests as well as real engine temperature.
Our module turns on and off at exactly the points we set but....the voltage in a vette is not well regulated so when we set the"on"point we look at a voltage flow through the senders resistance.
However any drain in the vette, brakes, lights, fans etc etc causes a fluctuation in the voltage available, even when the alternator is pegged at 14 volts.
So what that means is at temp of 195 with full volts we may be 7.04 volts but 195 with lights on is 6.5 volts.
So the answer is to peg the voltage used in the temp gauge circuit at exactly 12 volts and not let it change.
We will be testing some low drop regulators and DC-DC convertors to do the job.
Works fairly well, easy to set up and use.
- Press and hold Fan button 1 to set on point for fan 1 and Fan 2 on will be set 10 degree hotter.
- Press fan 1 or 2 to force on either fan. (Manual mode)
- Press and hold Fan 2 button then you can increase or decrease the gap between fan 1 and Fan 2 on points.
-Dual Press 1-2 o 2-1 allows you to then move fan off points up or down for either fan.
Uses the standard temp sender in the vette so no new sender
However and there is always a "but" the on and off points have not 100% matched to what I thought was being set.
Did a fair bit of testing and came up with the answer.
Used a Pot to simulate the sender in tests as well as real engine temperature.
Our module turns on and off at exactly the points we set but....the voltage in a vette is not well regulated so when we set the"on"point we look at a voltage flow through the senders resistance.
However any drain in the vette, brakes, lights, fans etc etc causes a fluctuation in the voltage available, even when the alternator is pegged at 14 volts.
So what that means is at temp of 195 with full volts we may be 7.04 volts but 195 with lights on is 6.5 volts.
So the answer is to peg the voltage used in the temp gauge circuit at exactly 12 volts and not let it change.
We will be testing some low drop regulators and DC-DC convertors to do the job.
Last edited by CraigH; Apr 10, 2023 at 04:43 AM.
Thread Starter
Melting Slicks
Joined: Apr 2010
Posts: 2,795
Likes: 1,196
From: Canberra Australia
2025 C3 of the Year Finalist - Modified
Second part of this testing is to get the best sender for the job and to ensure our controller works with any sender (which it does :-)
That means one that closest matches the original ACDelco ones from 1971.
Easier said than done as most are not correct and that included the ones from Paragon.
I know as I have at least half a dozen I purchsed to do tests on.
Ernie (Willcox Corvette) and Roger (C3 Forum) have done a lot of testing as well and we need to match this to be correct.
The consensus seems to be that the BWD WT203 from Orielly Auto parts, does about 83 ohms at boiling.
So if your vette always reads low or high for that matter it is possible its just the wrong sender.
You can match the sender to the gauge my replacing the 90 ohm resistor on the back with a variable one to calibrate it.
Have an orginal that is being shipped at present as well as a more obscure 3rd party one that may be close so will see if they are better than the WT203.
Last edited by CraigH; Apr 10, 2023 at 10:54 PM.
Thread Starter
Melting Slicks
Joined: Apr 2010
Posts: 2,795
Likes: 1,196
From: Canberra Australia
2025 C3 of the Year Finalist - Modified
Back to my thermatic fan control module.
We have now managed to overcome the prolems with the temperature gauge circuit.
Of course these are only problems if you want an accurate signal from the sender for other purposes like I do.
The stock gauge is heavily buffered so it will never react to the voltage fluctuations.
But new analog to digital circuits etc need a better reference voltage point.
We tried just creating an average temperature change over time to remove the fluctuations but that was still not good enough.
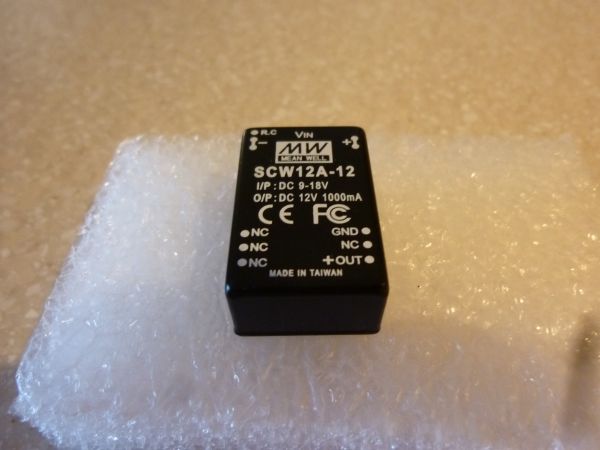
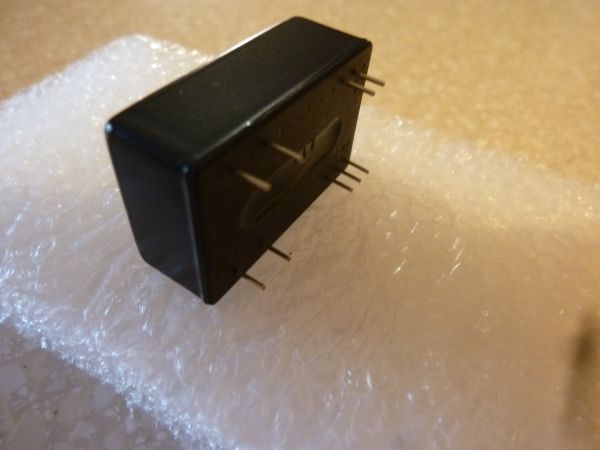
So the working solution was to put a small DC- DC volatge regulator in the power circuit running the gauge.
Our readings are then totally consistant and provide a much much better base to control the fans in a consistant manner.
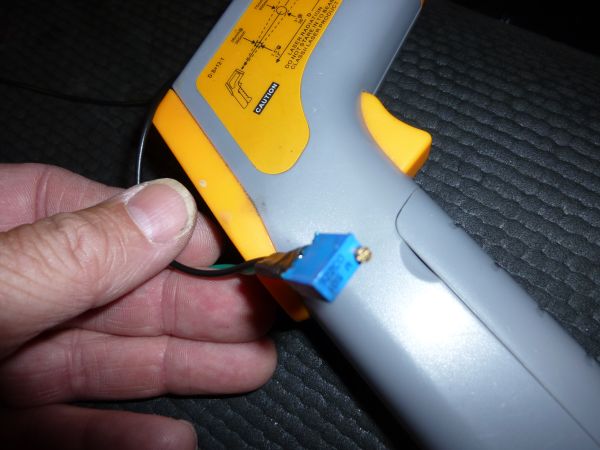
What this little $8 unit does is keep the power wire used by the gauge at exactly 12 volts. Does not matter if the alternator is giving 14.5+ volts or as little a 9 volts. It will always deliver 12 volts to the gauge circuit.
Have wired it in just near the gauge cluster.
Have now driven the Vette with this for more than a month in some very high temperatures and the operations seems to now be faily flawless.
Just need to tweek a few of the default settings and possibly build a new control module for the ash tray and will be done.
We have now managed to overcome the prolems with the temperature gauge circuit.
Of course these are only problems if you want an accurate signal from the sender for other purposes like I do.
The stock gauge is heavily buffered so it will never react to the voltage fluctuations.
But new analog to digital circuits etc need a better reference voltage point.
We tried just creating an average temperature change over time to remove the fluctuations but that was still not good enough.
So the working solution was to put a small DC- DC volatge regulator in the power circuit running the gauge.
Our readings are then totally consistant and provide a much much better base to control the fans in a consistant manner.
What this little $8 unit does is keep the power wire used by the gauge at exactly 12 volts. Does not matter if the alternator is giving 14.5+ volts or as little a 9 volts. It will always deliver 12 volts to the gauge circuit.
Have wired it in just near the gauge cluster.
Have now driven the Vette with this for more than a month in some very high temperatures and the operations seems to now be faily flawless.
Just need to tweek a few of the default settings and possibly build a new control module for the ash tray and will be done.
Last edited by CraigH; Apr 10, 2023 at 04:43 AM.


Thread Starter
Melting Slicks
Joined: Apr 2010
Posts: 2,795
Likes: 1,196
From: Canberra Australia
2025 C3 of the Year Finalist - Modified
Thanks for your comments.
Has taken me a while but the thread is now up to the present.
Have to say I enjoy documenting what I do. And its only because of others who have done it in the past that I have had the confidence to undertake this project or resolve various issues myself.
Has taken me a while but the thread is now up to the present.
Have to say I enjoy documenting what I do. And its only because of others who have done it in the past that I have had the confidence to undertake this project or resolve various issues myself.
Thread Starter
Melting Slicks
Joined: Apr 2010
Posts: 2,795
Likes: 1,196
From: Canberra Australia
2025 C3 of the Year Finalist - Modified
To make it easier to navigate through a long build thread like this I have created an index on Page 1 with links to each page.
Hopefully that will make it easier to find things.
Hopefully that will make it easier to find things.

Advanced

Joined: Nov 2012
Posts: 87
Likes: 0
From: Cincinnati Ohio
Craig,
Love the car and color. I just purchased a 72 three weeks ago and I'm ready to dive in a make some adjustments before the nice weather gets here. I do have a question for you on your project. How much Dyna mat did you use and was it worth putting it down? My wife would like road noise to be a little quieter.
Thanks
Rob
Thread Starter
Melting Slicks
Joined: Apr 2010
Posts: 2,795
Likes: 1,196
From: Canberra Australia
2025 C3 of the Year Finalist - Modified
Craig,
Love the car and color. I just purchased a 72 three weeks ago and I'm ready to dive in a make some adjustments before the nice weather gets here. I do have a question for you on your project. How much Dyna mat did you use and was it worth putting it down? My wife would like road noise to be a little quieter.
Thanks
Rob
Love the car and color. I just purchased a 72 three weeks ago and I'm ready to dive in a make some adjustments before the nice weather gets here. I do have a question for you on your project. How much Dyna mat did you use and was it worth putting it down? My wife would like road noise to be a little quieter.
Thanks
Rob
In my opinion the Dynamat had a very good effect at removing resonance, vibration and noise through the body.
Dont under estimate how much of that there is in a Vette.
I will probably end up using close to 2 large boxes by the time I finish the doors etc.
Craig
Advanced
Joined: Nov 2012
Posts: 87
Likes: 0
From: Cincinnati Ohio
Sounds like I will be ordering some today. I noticed that there are different packages and trying to figure out which one would be best. Heres what I am looking at.
http://www.dynamatstore.com/index.ph...t_detail&p=107
I'm not sure if this is the same stuff that you used.
Also, what did solution did you use to prep the floor?
Thanks
http://www.dynamatstore.com/index.ph...t_detail&p=107
I'm not sure if this is the same stuff that you used.
Also, what did solution did you use to prep the floor?
Thanks
Last edited by mariobro; Mar 12, 2013 at 07:32 AM.
Thread Starter
Melting Slicks
Joined: Apr 2010
Posts: 2,795
Likes: 1,196
From: Canberra Australia
2025 C3 of the Year Finalist - Modified
Sounds like I will be ordering some today. I noticed that there are different packages and trying to figure out which one would be best. Heres what I am looking at.
http://www.dynamatstore.com/index.ph...t_detail&p=107
I'm not sure if this is the same stuff that you used.
Also, what did solution did you use to prep the floor?
Thanks
http://www.dynamatstore.com/index.ph...t_detail&p=107
I'm not sure if this is the same stuff that you used.
Also, what did solution did you use to prep the floor?
Thanks
For preparation I scrapped off any glue etc then cleaned the surface with wax and grease remover.
Craig
Thread Starter
Melting Slicks
Joined: Apr 2010
Posts: 2,795
Likes: 1,196
From: Canberra Australia
2025 C3 of the Year Finalist - Modified
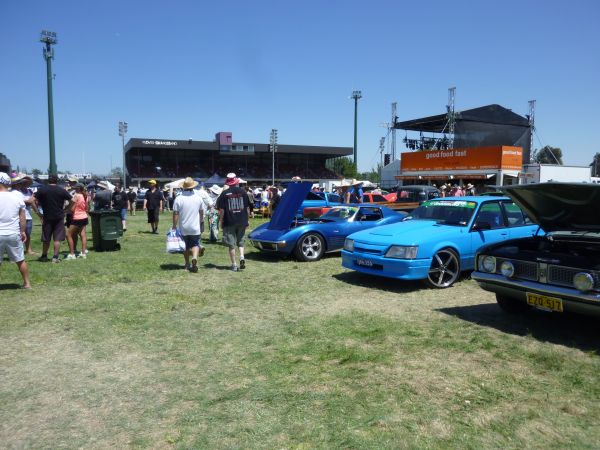
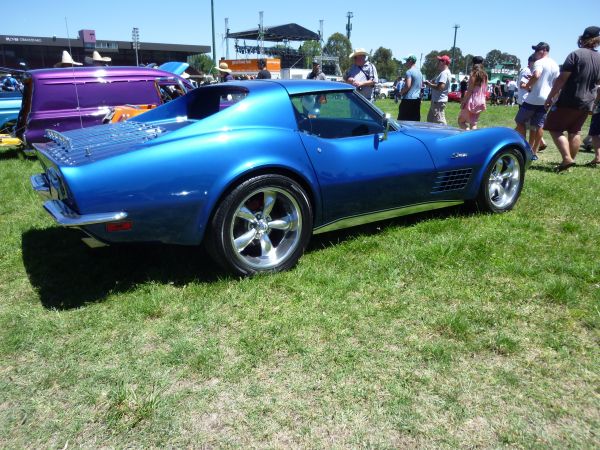
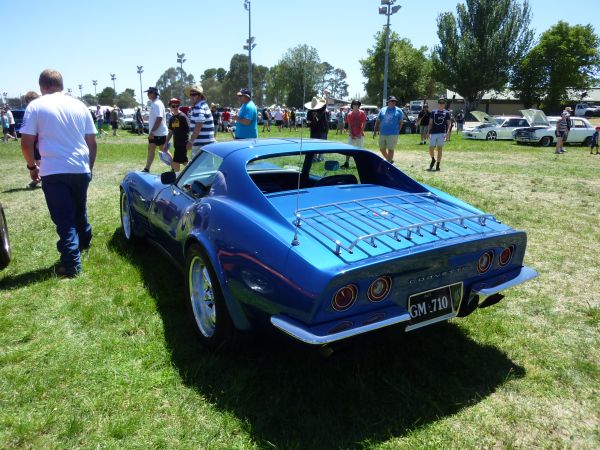
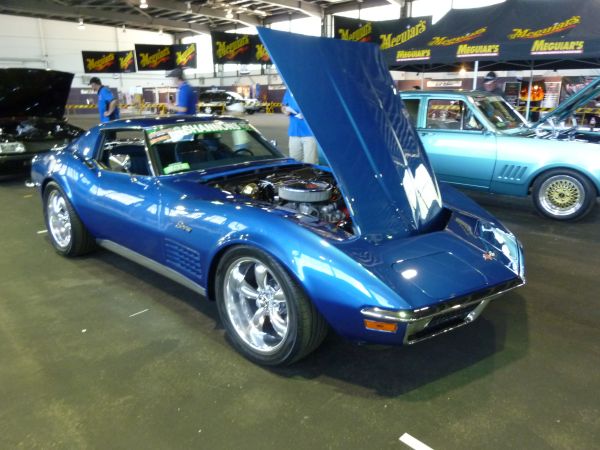
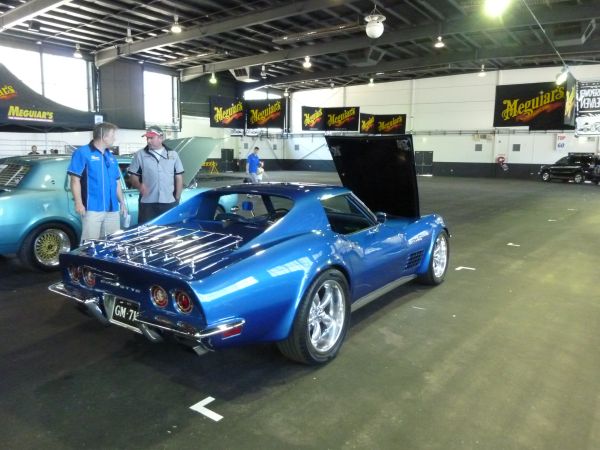
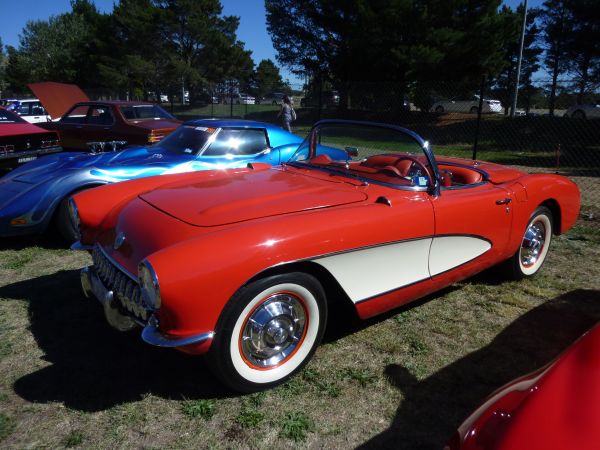
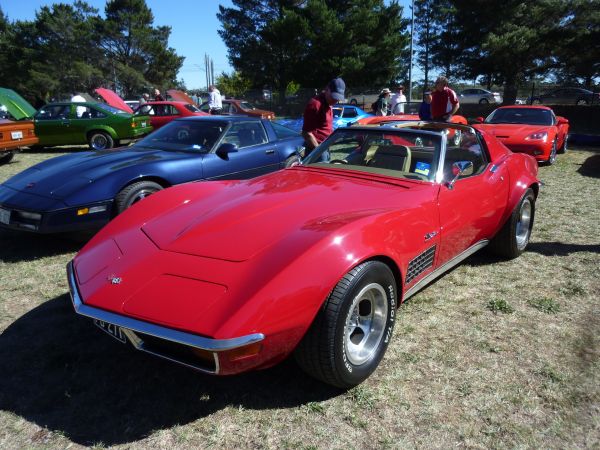
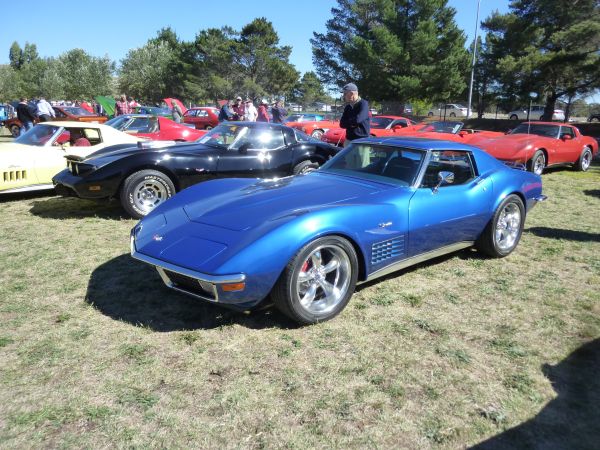
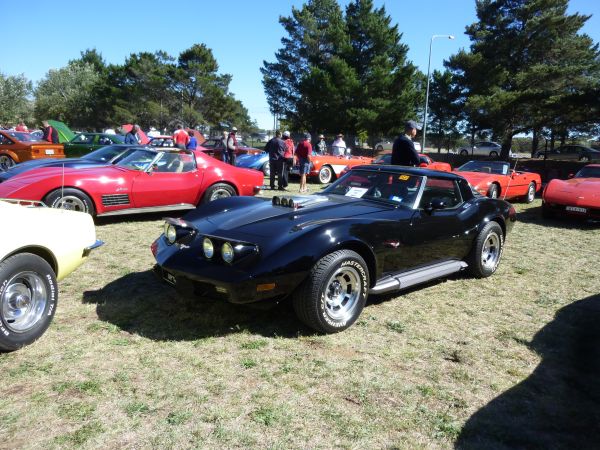
Today we had the Wheels 2013 Car Show in Canberra.
Lots of different clubs resprisented and a good turn out of local Corvettes.
Lots of different clubs resprisented and a good turn out of local Corvettes.
Last edited by CraigH; Apr 10, 2023 at 04:42 AM.
