


1971 Journey

Thread Starter
Melting Slicks


Joined: Apr 2010
Posts: 2,795
Likes: 1,196
From: Canberra Australia
2025 C3 of the Year Finalist - Modified
December 2010
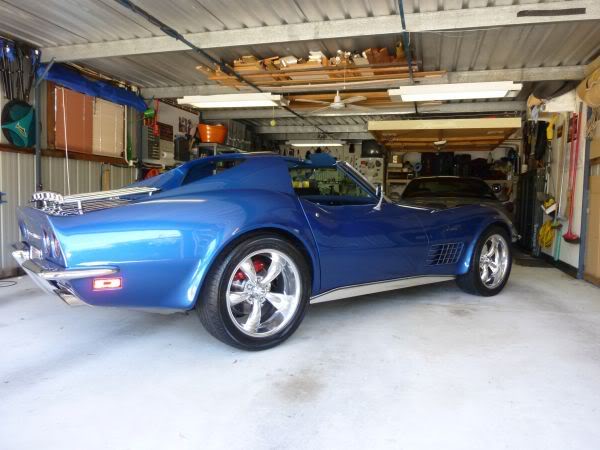
Decided to test fit the finished T Top and make sure it fitted clean with no binds, rubs etc.
Fitted fine without the trim so installed trim and tried again.
Ouch
I forgot I had some temporary screws holding in the rear trim.
And it took me a few attempts to understand why it would not go down.
After a bit of sanding it is ok but will need a repaint. :evil: :evil: :evil:
Last edited by CraigH; Apr 9, 2023 at 08:23 PM.
Thread Starter
Melting Slicks
Joined: Apr 2010
Posts: 2,795
Likes: 1,196
From: Canberra Australia
2025 C3 of the Year Finalist - Modified
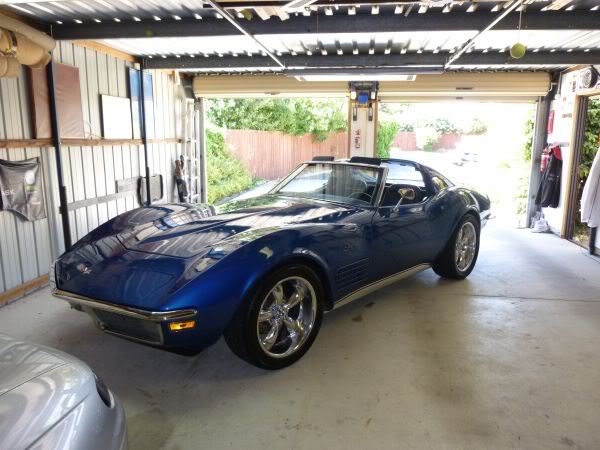
Take 2 on fitting the t tops.
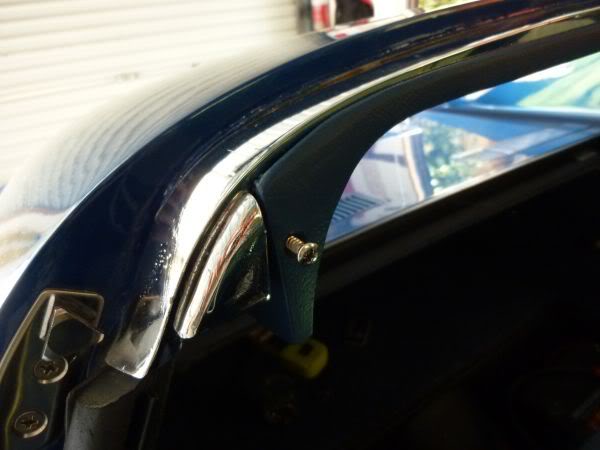
I spent some time adjusting all fittings that hold them in and found that on some I needed a slight tilt (by using washers back or front) to get the tongue to lock properly.

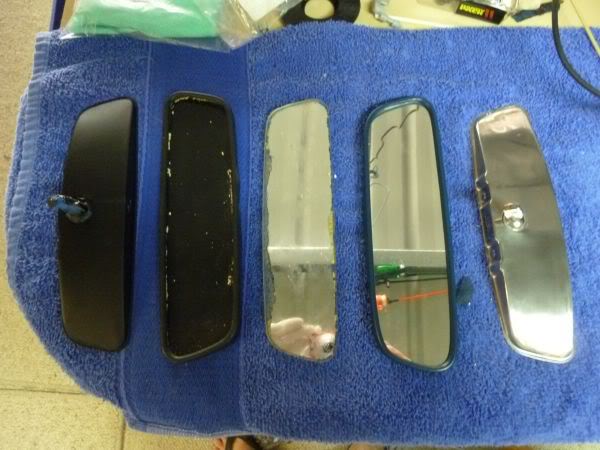
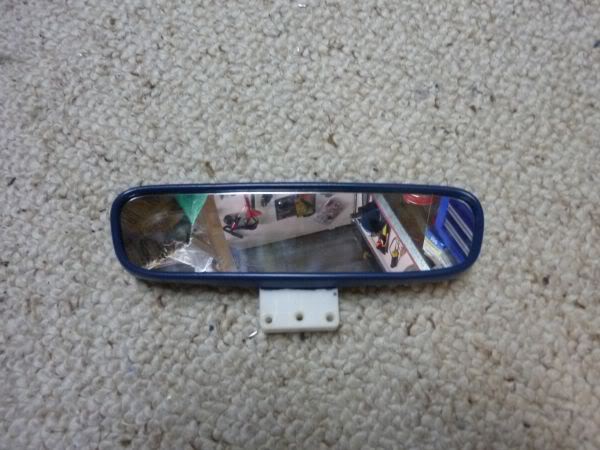
While I had paint in the gun I decided to also do the mirror.
My 71 had a black rear view mirror which was used 72 onwards but must have come in late in 71.
When I ordered a new one for 71 I got a stainless one with grey plastic outer edge.
So I dismantled the original and the new and refinished both (need new glass for old one).
Now I will probably go with the blue edged stainless one to match my interior.
I spent some time adjusting all fittings that hold them in and found that on some I needed a slight tilt (by using washers back or front) to get the tongue to lock properly.
While I had paint in the gun I decided to also do the mirror.
My 71 had a black rear view mirror which was used 72 onwards but must have come in late in 71.
When I ordered a new one for 71 I got a stainless one with grey plastic outer edge.
So I dismantled the original and the new and refinished both (need new glass for old one).
Now I will probably go with the blue edged stainless one to match my interior.
Last edited by CraigH; Apr 9, 2023 at 08:22 PM.
Thread Starter
Melting Slicks
Joined: Apr 2010
Posts: 2,795
Likes: 1,196
From: Canberra Australia
2025 C3 of the Year Finalist - Modified
Originally Posted by XR_Strider_GuY
Amazing work there Craig. I am very slack when it comes to posting things I have repaired. Usually I am keen as mustard to do it and just get on with it. Then maybe take a pic in the end.
This work in progress you are doing is fab. Keep up the good work. :o :o :o
So do you have a detailed plan from when you got the Stingray or do you tackle whatever you see fit that needs fixing?
This work in progress you are doing is fab. Keep up the good work. :o :o :o
So do you have a detailed plan from when you got the Stingray or do you tackle whatever you see fit that needs fixing?
My initial plan was to do some minor interior fix up (Console etc) then sit back but that went by the way side very quickly.
I planned to refresh the interior and along the way other things have popped up.
Also my idea of a refresh got a bit bigger.
I should have most of interior done by 4 January with just a few things remaining to do after the Summernats (repaint column etc)
Then I will pick off projects like.
. new coilover front suspension.
. clean refresh and detail rear suspension
. frame clean up
. underbody clean up.
. engine bay detail
. electric fans
. new headers and exhaust
. repaint the side grills
. remove front bar and better align grills etc.
. the list in my mind goes on
Will probably do multiple at once abut I wont have the deadline like I do at present so may be a bit more sedate.
Possibly I will spend more time driving the vette rather than working on it :-)
Last edited by CraigH; Nov 8, 2017 at 03:20 AM.
Thread Starter
Melting Slicks
Joined: Apr 2010
Posts: 2,795
Likes: 1,196
From: Canberra Australia
2025 C3 of the Year Finalist - Modified
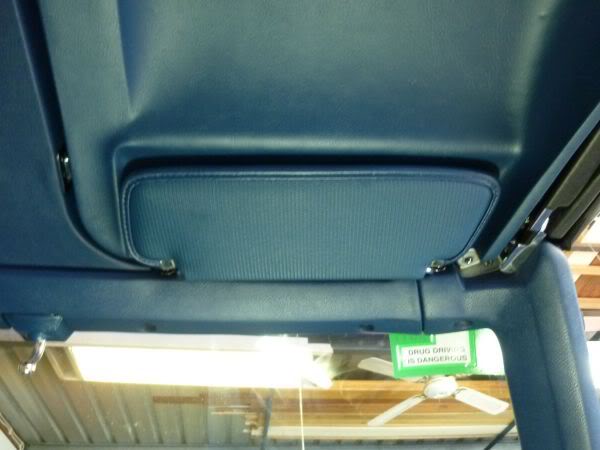
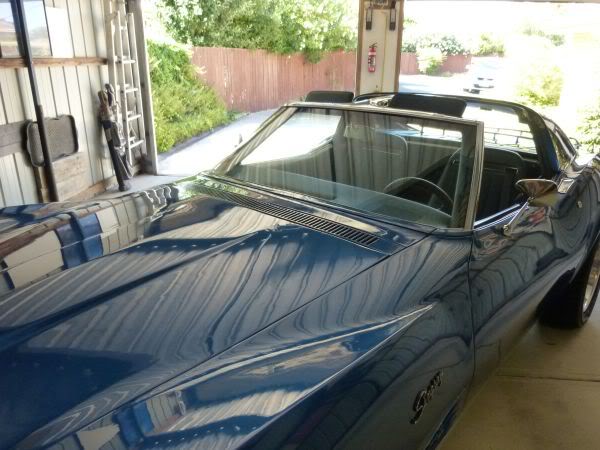
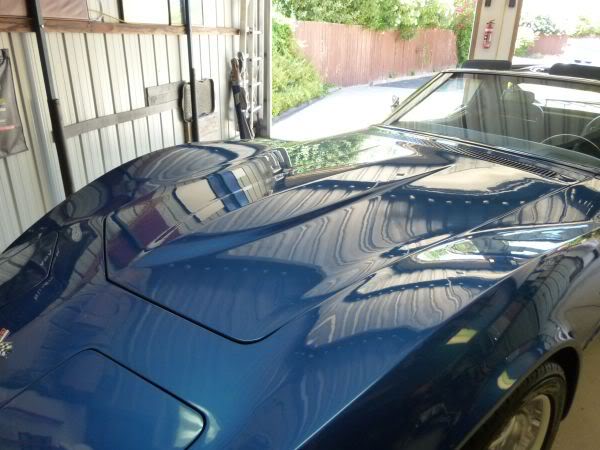
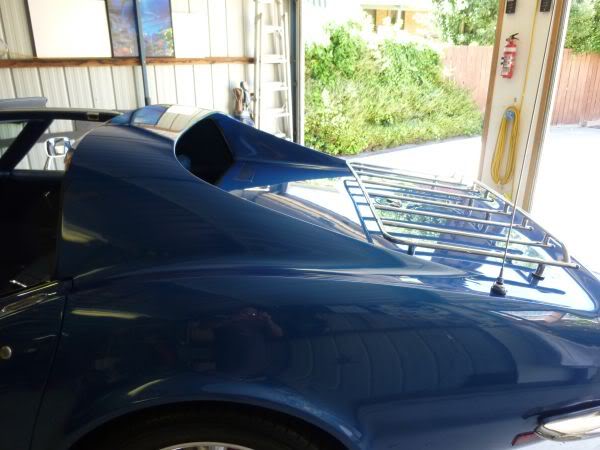
Adjusted the tops so I have an even gap in the middle.
One side sticks out a little more than the other but overall a good fit.
One side sticks out a little more than the other but overall a good fit.
Last edited by CraigH; Apr 9, 2023 at 08:22 PM.
Thread Starter
Melting Slicks
Joined: Apr 2010
Posts: 2,795
Likes: 1,196
From: Canberra Australia
2025 C3 of the Year Finalist - Modified
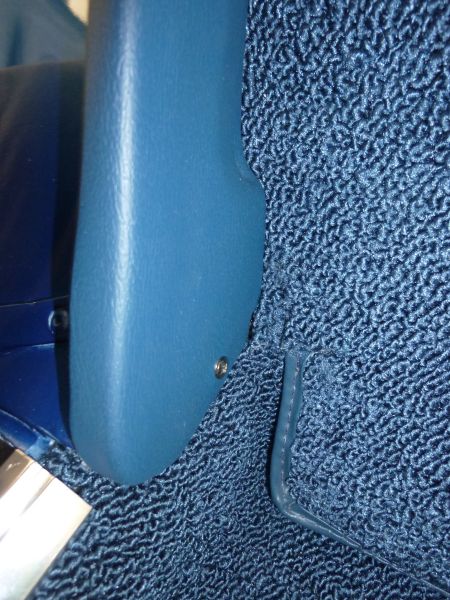
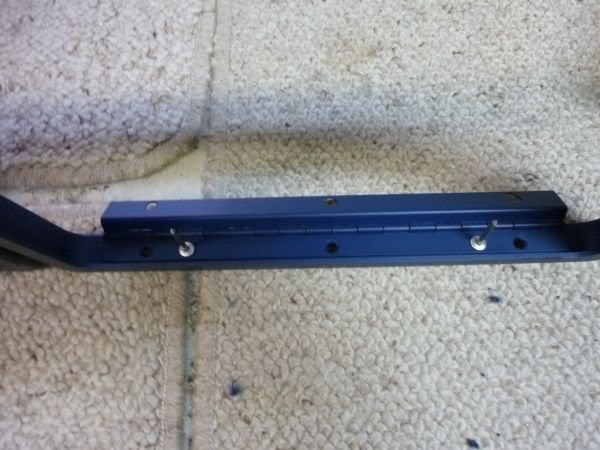
Put on the new sill plates then used a soldering iron to do all the seat and seat belt holes.
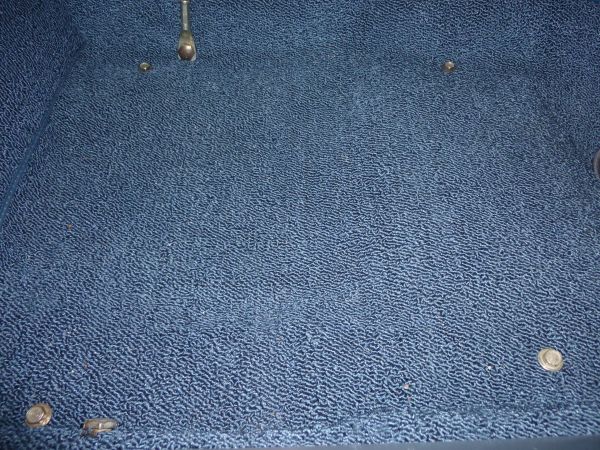
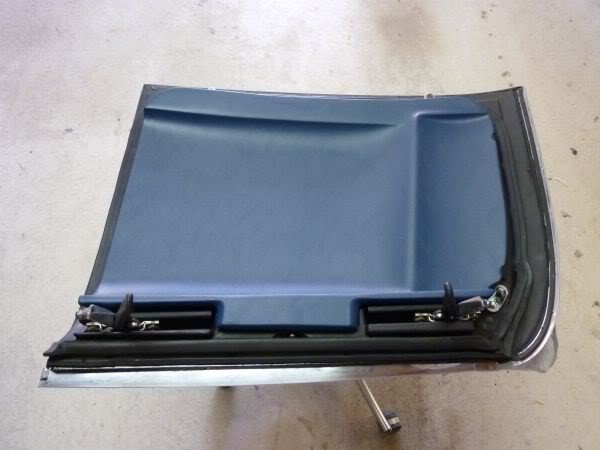
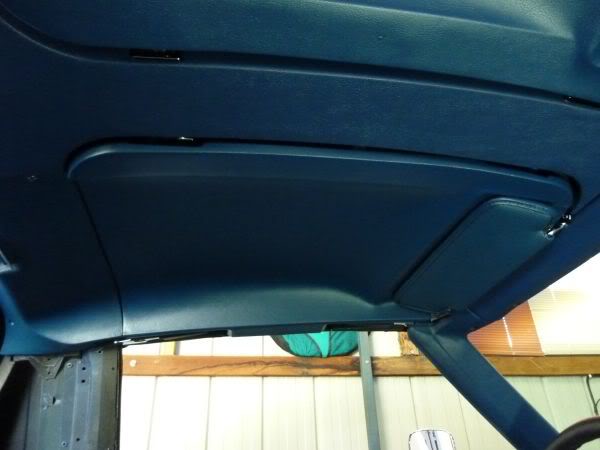
Started to do final rear trim assembly. ( I should probably not use the word final)
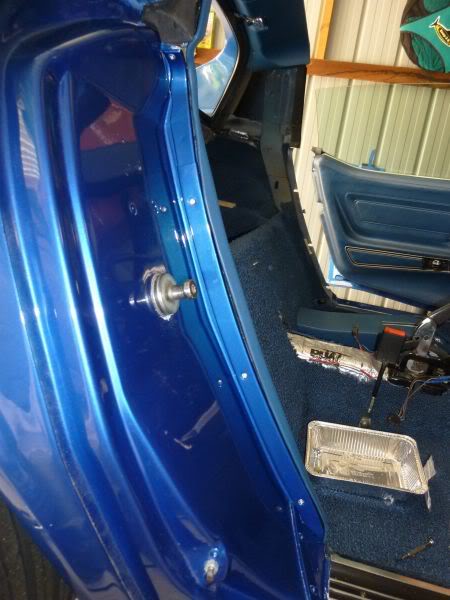
Top panels in
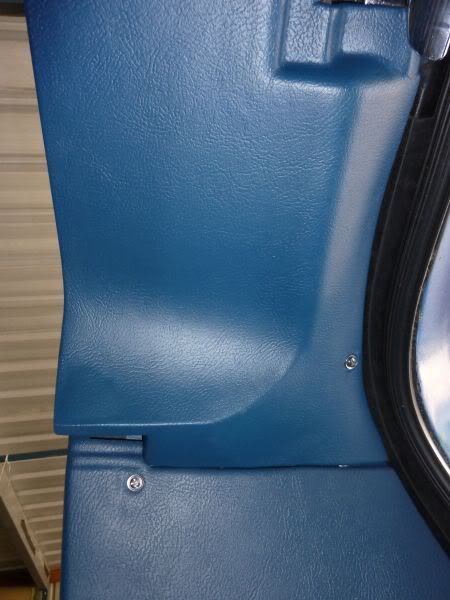
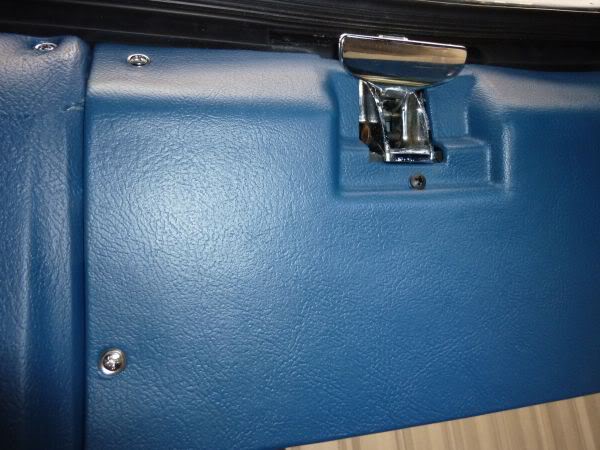
Repeat the same on the other side and then bottom window trim.
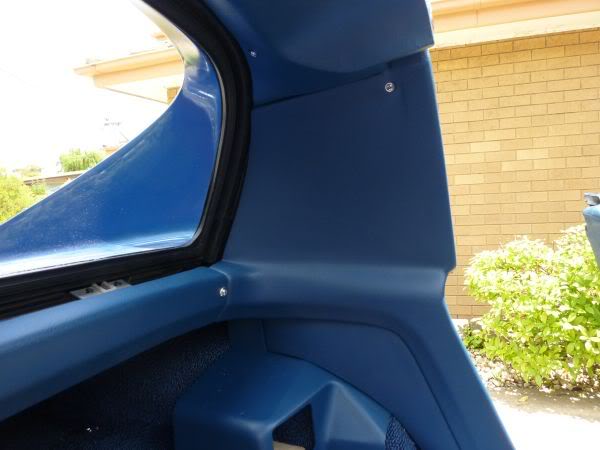
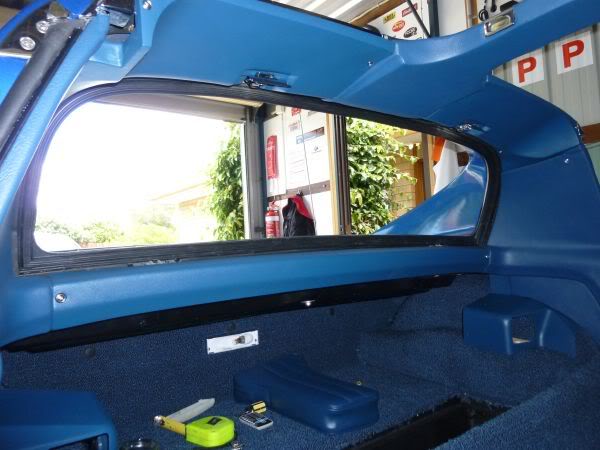
Its amazing how one side can be so different from the other. The drivers side trim never fitted well and it was because a few of the brackets were in the wrong position. A little adjustment and a few new mounting holes and its much closer.
Started to do final rear trim assembly. ( I should probably not use the word final)
Top panels in
Repeat the same on the other side and then bottom window trim.
Its amazing how one side can be so different from the other. The drivers side trim never fitted well and it was because a few of the brackets were in the wrong position. A little adjustment and a few new mounting holes and its much closer.
Last edited by CraigH; Apr 9, 2023 at 08:22 PM.
Thread Starter
Melting Slicks
Joined: Apr 2010
Posts: 2,795
Likes: 1,196
From: Canberra Australia
2025 C3 of the Year Finalist - Modified
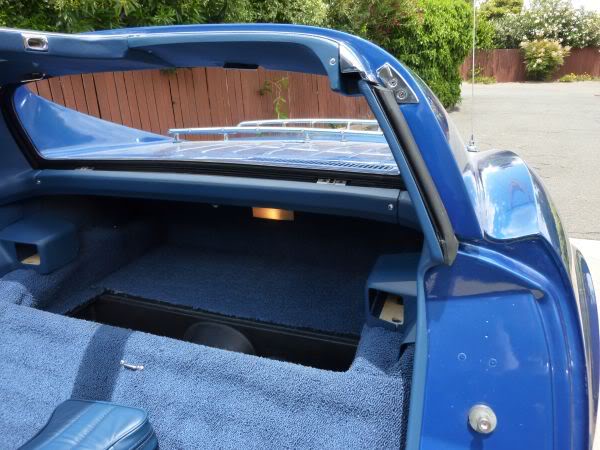
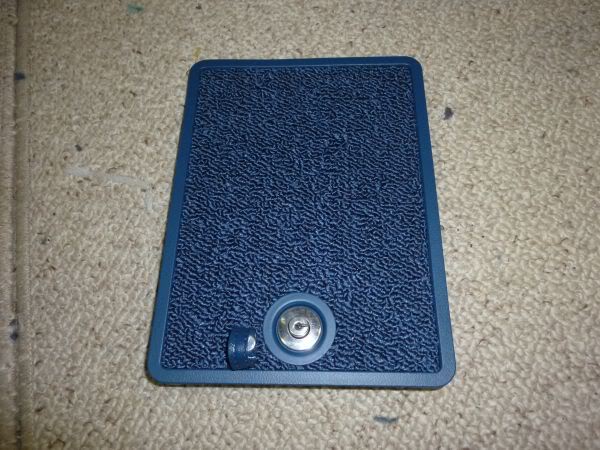
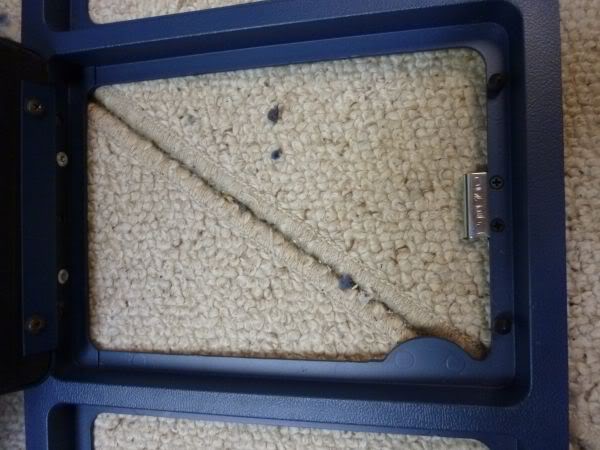
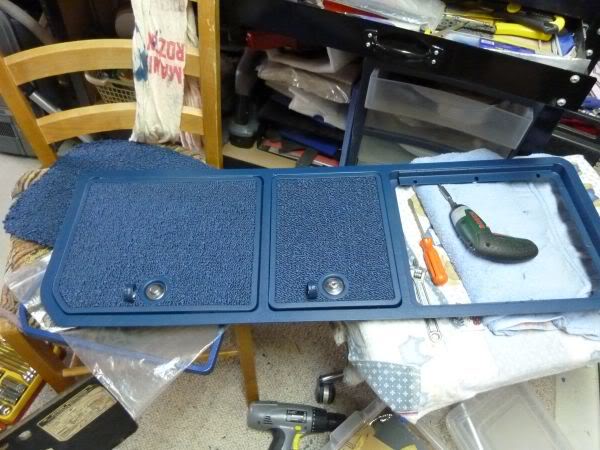
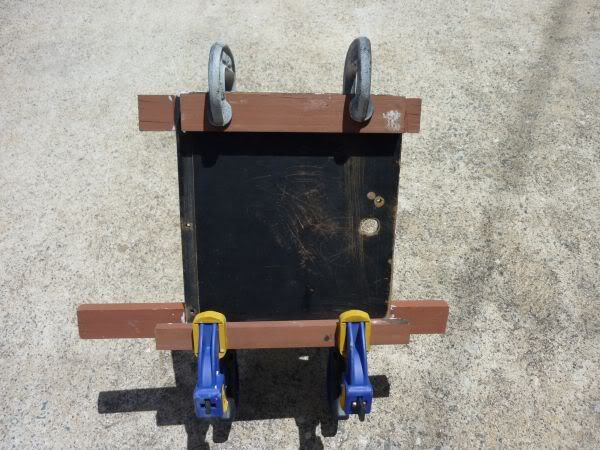
Started putting the storage compartment together.
Cut the carpet to fit the top of the new fiberboard doors.
Cut out the button holes.
Put on the pull tabs.
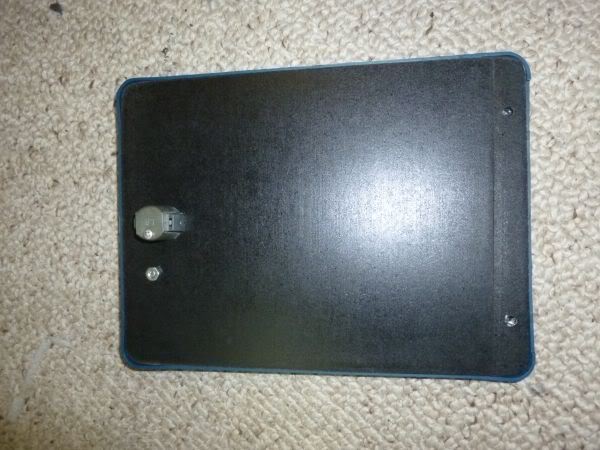
On the frame I fitted the hinges with rivets.
Fitted all the bump stops and latches.
And then the glove compartment light switch. About a 13mm hole.
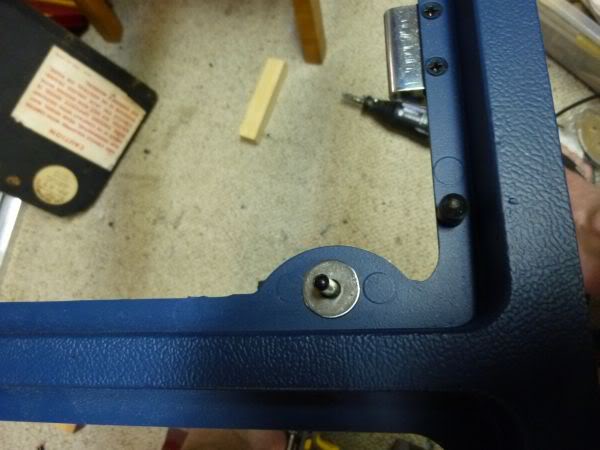
Fitted the doors to the frame.
Was not happy with how high the middle door sat so took it off and sanded down the hinge area a few mm's to get it to sit lower at the back.
Resprayed it black and put it back in.
The pack of new doors unfortunate had 2 passenger side doors and no drivers side so I started to repair the original as a stop gap till when I can get a replacement.
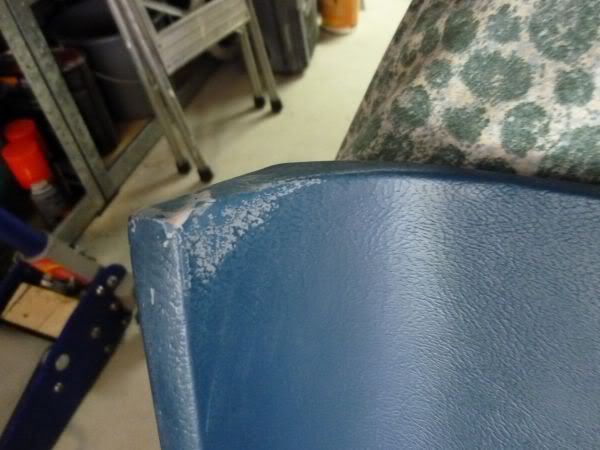
After trial fitting the frame I noticed a couple of spots that needed a touch up so I sanded them back and resprayed some of the blue paint.
While I had paint in gun I did the seat backs as well.


Cut the carpet to fit the top of the new fiberboard doors.
Cut out the button holes.
Put on the pull tabs.
On the frame I fitted the hinges with rivets.
Fitted all the bump stops and latches.
And then the glove compartment light switch. About a 13mm hole.
Fitted the doors to the frame.
Was not happy with how high the middle door sat so took it off and sanded down the hinge area a few mm's to get it to sit lower at the back.
Resprayed it black and put it back in.
The pack of new doors unfortunate had 2 passenger side doors and no drivers side so I started to repair the original as a stop gap till when I can get a replacement.
After trial fitting the frame I noticed a couple of spots that needed a touch up so I sanded them back and resprayed some of the blue paint.
While I had paint in gun I did the seat backs as well.
Last edited by CraigH; Apr 9, 2023 at 08:19 PM.
Thread Starter
Melting Slicks
Joined: Apr 2010
Posts: 2,795
Likes: 1,196
From: Canberra Australia
2025 C3 of the Year Finalist - Modified
Zip are sending a new set of storage doors.
The original one turned out fairly well anyway so it will do till they arrive.


Looking at where to mount a fire extinguisher at moment.
On front of passenger seat or in the rear storage box.
Doing a quick tidy up of the spark plug leads and reinstalling the under hood shielding.
Then I can move on to a full wash and polish and a quick detail.
The original one turned out fairly well anyway so it will do till they arrive.
Looking at where to mount a fire extinguisher at moment.
On front of passenger seat or in the rear storage box.
Doing a quick tidy up of the spark plug leads and reinstalling the under hood shielding.
Then I can move on to a full wash and polish and a quick detail.
Last edited by CraigH; Apr 9, 2023 at 08:19 PM.
Thread Starter
Melting Slicks
Joined: Apr 2010
Posts: 2,795
Likes: 1,196
From: Canberra Australia
2025 C3 of the Year Finalist - Modified
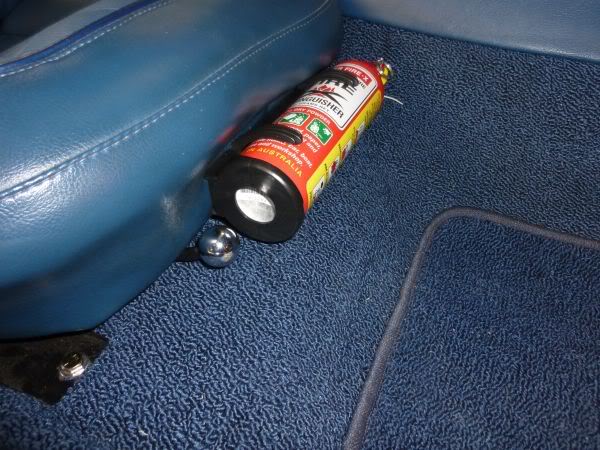
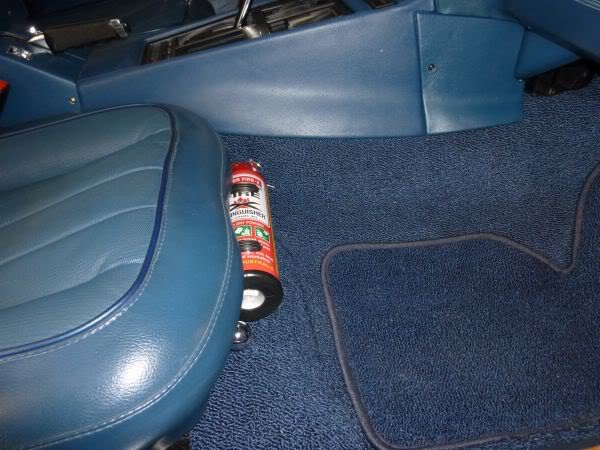
Fitted a small Fire Extinguisher to the front passenger seat.
Removed the belt clip from the front of seat and used the holes to mount the holder.
Removed the belt clip from the front of seat and used the holes to mount the holder.
Last edited by CraigH; Apr 9, 2023 at 08:19 PM.
Corvette Stories
The Best of Corvette for Corvette Enthusiasts

Top 10 Most Expensive Corvettes Ever Sold on Bring A Trailer
Brett Foote
10 Things Every Corvette Owner Needs (2026 Edition)
Michael S. Palmer
8 Most "Only Corvette Owners Understand" Quirks and Problems
Pouria Savadkouei
10 Reasons the C6 Z06 is Still A Performance Benchmark After 20 Years
Joe Kucinski
How Much Horsepower Every Corvette Engine "LOST" in 1972
Joe Kucinski
Top 10 DOs and DON'Ts for Protecting Your Convertible Top!
Michael S. Palmer
Top 10 Most Explosive Corvettes Ever Made: Power-to-Weight Ratio Ranked!
Joe Kucinski
150 hp to 1,250 hp: Every Corvette Generation Compared by the Specs That Matter
Joe Kucinski
8 Coolest Corvette Pace Cars (and Replicas) of All Time
Verdad Gallardo
Thread Starter
Melting Slicks
Joined: Apr 2010
Posts: 2,795
Likes: 1,196
From: Canberra Australia
2025 C3 of the Year Finalist - Modified
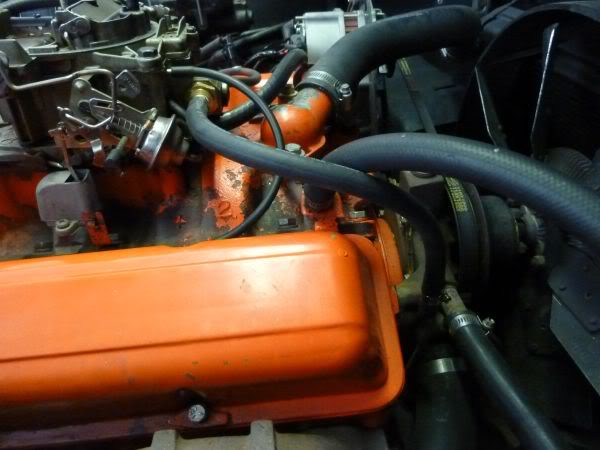
Re routed the spark plug leads.
The fronts go through clips then down behind the mounts and along the sump then up to meet the rear plug then up in the shielding to the distributor.
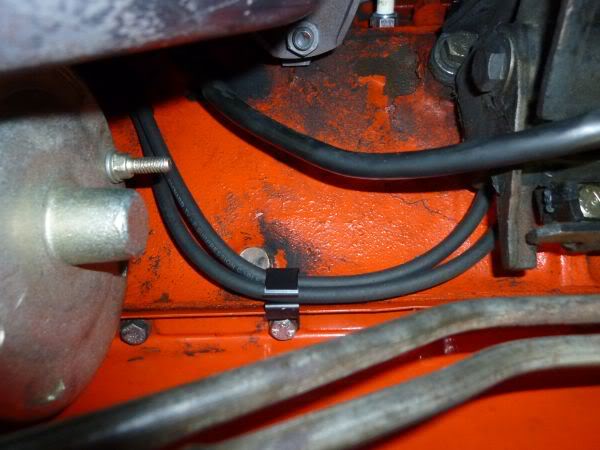
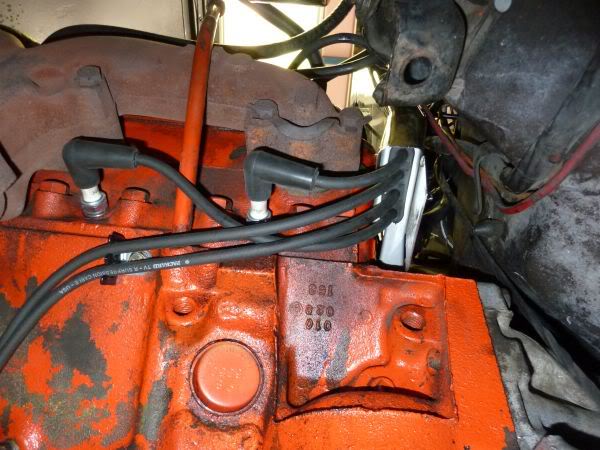

This is the same route as standard but without all the extra shielding and using different hold down clips. I want to ensure they stay away from whatever headers I use.
Will strip motor and repaint etc once I get that all sorted.
The fronts go through clips then down behind the mounts and along the sump then up to meet the rear plug then up in the shielding to the distributor.
This is the same route as standard but without all the extra shielding and using different hold down clips. I want to ensure they stay away from whatever headers I use.
Will strip motor and repaint etc once I get that all sorted.
Last edited by CraigH; Apr 9, 2023 at 08:19 PM.
Thread Starter
Melting Slicks
Joined: Apr 2010
Posts: 2,795
Likes: 1,196
From: Canberra Australia
2025 C3 of the Year Finalist - Modified
January 2011
Got up early today before it gets too hot (high 30's here today) and washed the vette and gave it a polish.

Got up early today before it gets too hot (high 30's here today) and washed the vette and gave it a polish.
Last edited by CraigH; Apr 9, 2023 at 08:18 PM.
Thread Starter
Melting Slicks
Joined: Apr 2010
Posts: 2,795
Likes: 1,196
From: Canberra Australia
2025 C3 of the Year Finalist - Modified
Originally Posted by YLLA 88
Hi Shipy59
I have a replacement factory metal fuel line for between the pump and the carb. Just have not got to it yet. The rubber part is fairly new but I want it gone as well. I will then be reliant on the filter in the carb unless I add one near the tank as well.
:-o
I have a replacement factory metal fuel line for between the pump and the carb. Just have not got to it yet. The rubber part is fairly new but I want it gone as well. I will then be reliant on the filter in the carb unless I add one near the tank as well.
:-o
Where did you end up getting them from Craig ?
I just ordered it from Willcox.
All this talk about not having rubber fuel lines got me thinking I should replace it now.
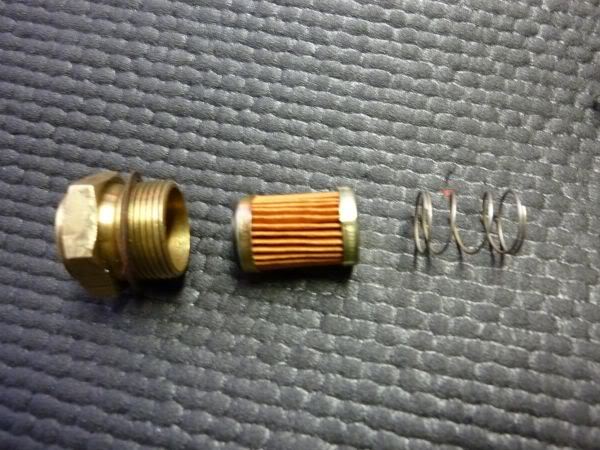
So I removed the fuel line and took the fuel inlet out of the quadrajet.
The old carb filter was a bit dirty but was missing its spring to hold it in place as well as the fuel flap inside it to stop returns.
So I grabbed my parts carb and pulled its fuel fitting to get a spring.
So with all the parts I went to put it back together then I ran into a problem.
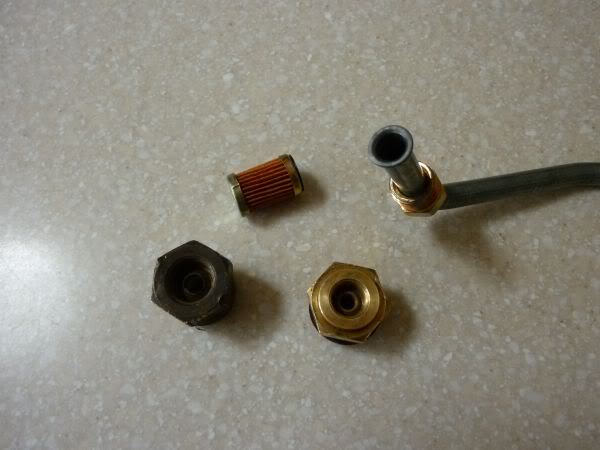
The fuel line looks to be 3/8" and the Fuel fitting in my Quadrajet is a smaller thread size.
The fuel fitting on my parts carb fits the fuel line but is too large for the carb :evil:
So it looks like the fittings are as follow.
3/8" fuel line
Fuel Fitting on spare carb 1" thread carb side and takes 3/8" line on other.
Fuel fitting on cars carb 7/8" thread carb side and does not take 3/8 line on other.
If anyone can confirm the threads I need etc please reply
May have to go back to rubbber hoses till I can find a new fuel fitting.
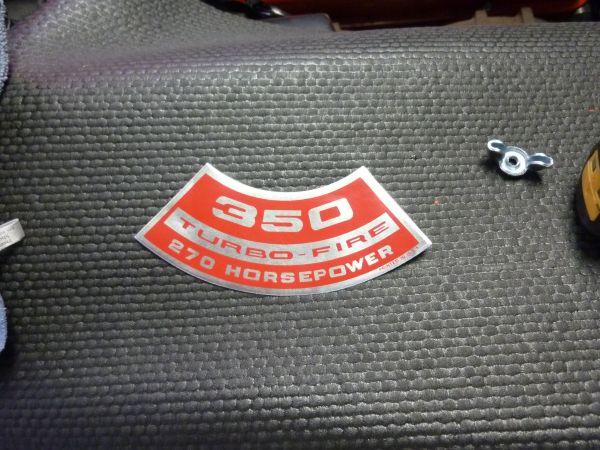
Did a bit of checking and the carb on my vette is 7041211 which is a 70's quadrajet used on GM trucks - Must have been replaced at some time.
Last edited by CraigH; Apr 9, 2023 at 08:18 PM.
Thread Starter
Melting Slicks
Joined: Apr 2010
Posts: 2,795
Likes: 1,196
From: Canberra Australia
2025 C3 of the Year Finalist - Modified
I think I have found the part I need.
Short 7/8 threads
Seals Bottom of nut - - Uses 3/8 fuel line fitting
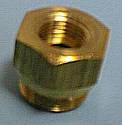
http://www.carburetion.com/quadrajet.asp
or here
http://quadrajetparts.com/inlet-fitt...ing-p-135.html

or I could get a correct carb for my 71 here......
http://cgi.ebay.com/ebaymotors/1971-...item3cac79851e
Short 7/8 threads
Seals Bottom of nut - - Uses 3/8 fuel line fitting
http://www.carburetion.com/quadrajet.asp
or here
http://quadrajetparts.com/inlet-fitt...ing-p-135.html
or I could get a correct carb for my 71 here......
http://cgi.ebay.com/ebaymotors/1971-...item3cac79851e
Last edited by CraigH; Nov 8, 2017 at 03:23 AM.
Thread Starter
Melting Slicks
Joined: Apr 2010
Posts: 2,795
Likes: 1,196
From: Canberra Australia
2025 C3 of the Year Finalist - Modified
If I compare the carb on my vette with what should be on it.
Carb # Application Main Jet Main Rod Spring Sec. Rod Jet Area Jet Area
7041211 CHEV 71 350 SERIES 10 TRUCK 74 42 7036019 BA 2.9154 3.7699
7041212 CHEV 71 Vette 350 A/T 74 44 7036019 AR 2.7803 3.7699
I have put in the new filter and the filter spring.
Put it back together with the barbed connector and removed the inline filter.
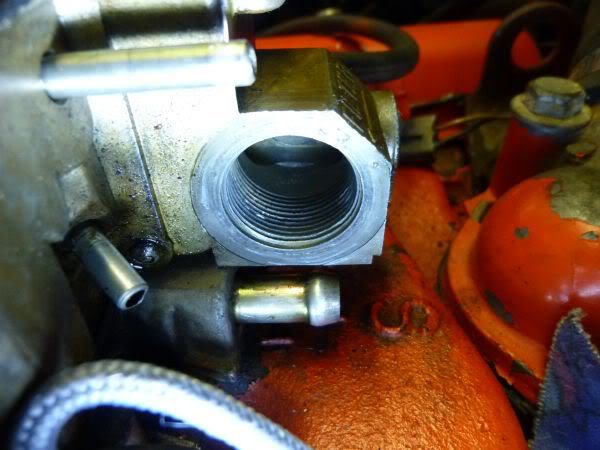
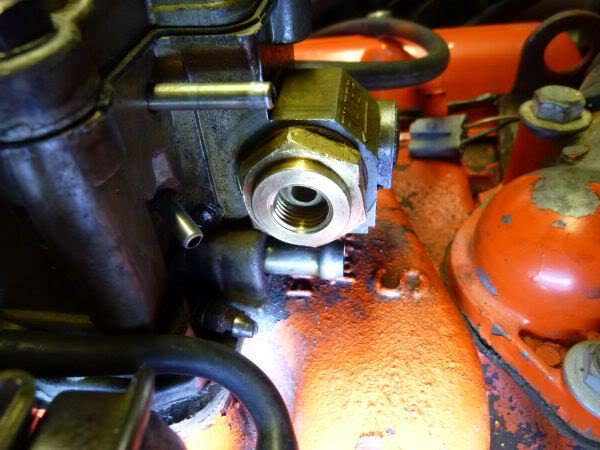
Will order that part above so I can go to the hard line.
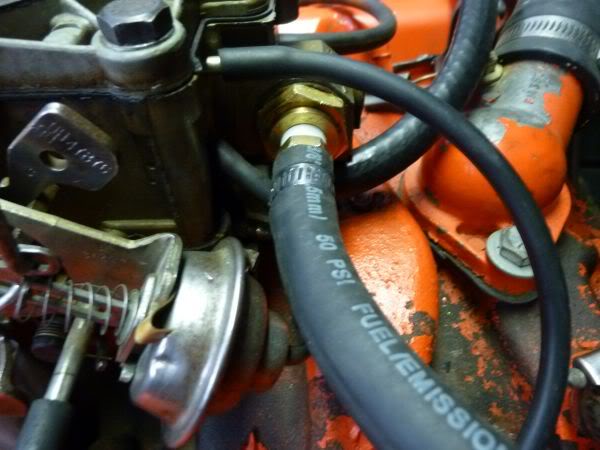
Will also add a filter below tank at the back to be sure.
Carb # Application Main Jet Main Rod Spring Sec. Rod Jet Area Jet Area
7041211 CHEV 71 350 SERIES 10 TRUCK 74 42 7036019 BA 2.9154 3.7699
7041212 CHEV 71 Vette 350 A/T 74 44 7036019 AR 2.7803 3.7699
I have put in the new filter and the filter spring.
Put it back together with the barbed connector and removed the inline filter.
Will order that part above so I can go to the hard line.
Will also add a filter below tank at the back to be sure.
Last edited by CraigH; Apr 9, 2023 at 08:17 PM.
Thread Starter
Melting Slicks
Joined: Apr 2010
Posts: 2,795
Likes: 1,196
From: Canberra Australia
2025 C3 of the Year Finalist - Modified
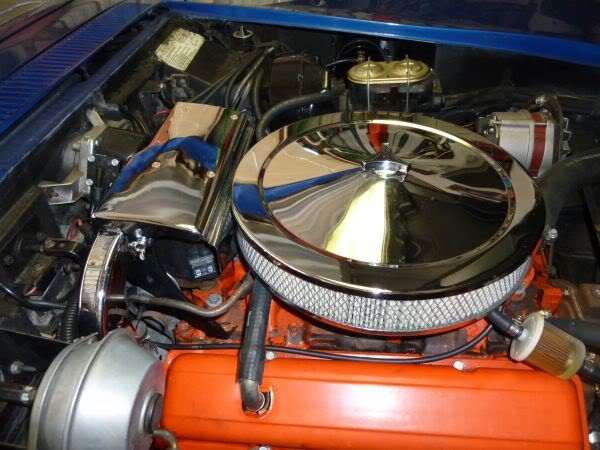
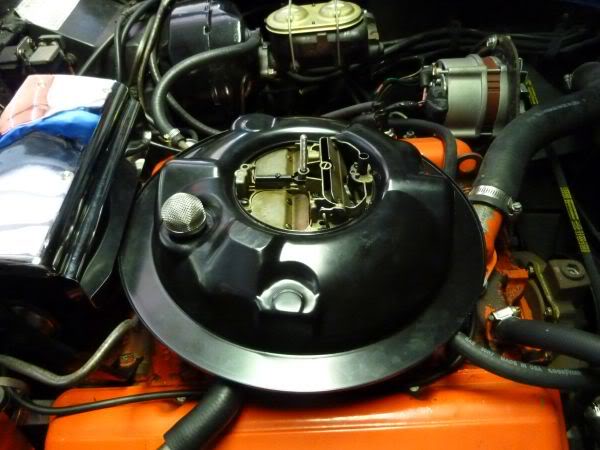
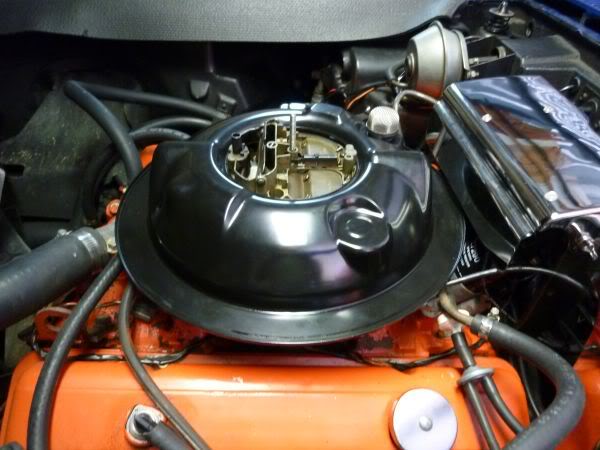
I was looking at the air cleaner and thought I may as well change it while I am doing some stuff under the bonnet rather than waiting till I do the full under bonnet clean up.
Was not a real GM part but fitted ok.
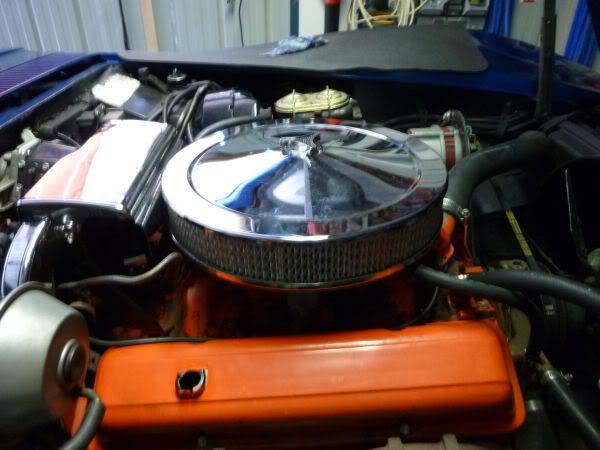
Was not a real GM part but fitted ok.
Last edited by CraigH; Apr 9, 2023 at 08:17 PM.
Thread Starter
Melting Slicks
Joined: Apr 2010
Posts: 2,795
Likes: 1,196
From: Canberra Australia
2025 C3 of the Year Finalist - Modified
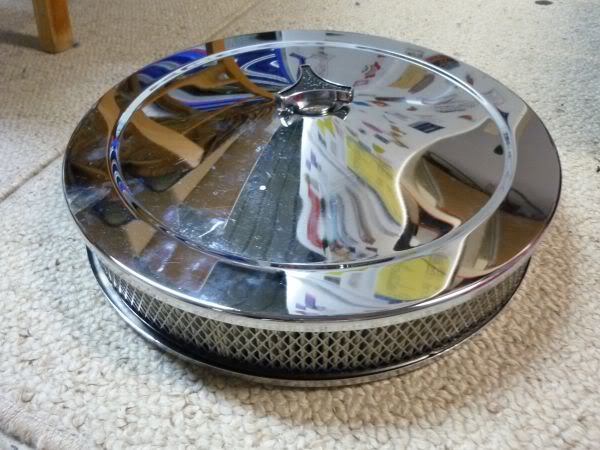
I had picked up a repo drop base unit for an LT1 with all the arrestors etc last year from a guy in Sydney who had never fitted it.
Way more drop than the aftermarket one.
And even with bigger cleaner still sits lower than old one.
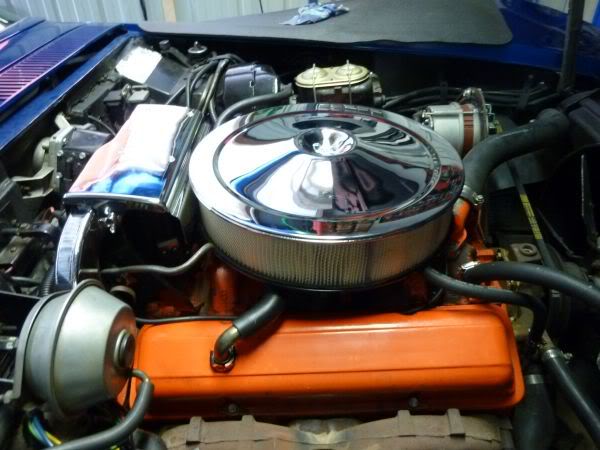
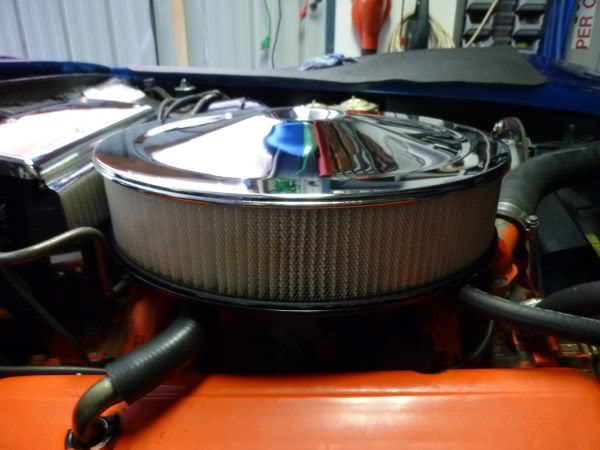
Just need to add my engine label and its done.
Way more drop than the aftermarket one.
And even with bigger cleaner still sits lower than old one.
Just need to add my engine label and its done.
Last edited by CraigH; Apr 9, 2023 at 08:16 PM.
Thread Starter
Melting Slicks
Joined: Apr 2010
Posts: 2,795
Likes: 1,196
From: Canberra Australia
2025 C3 of the Year Finalist - Modified
Went last night and did the Summernats early registration.
Sat in the line for a few hours on dirt and grass before getting to the front.
Got home and this morning I noticed.
I dont think the emblem was stolen - must have fallen off on one of the bumps while we were in the queue.
Wont be able to get a new one in next few day so will just be missing one for a while.
Was definitely on before I went as I took this picture before.
Last edited by CraigH; Apr 9, 2023 at 08:16 PM.
Thread Starter
Melting Slicks
Joined: Apr 2010
Posts: 2,795
Likes: 1,196
From: Canberra Australia
2025 C3 of the Year Finalist - Modified
A few nights back i spent some time trying to adjust the lower bumpers and grills.
There has always been a difference right left.
Managed to get it a lot better but I think I will need to strip it all down and possibly even cut one of the side fiberglass internal panels to get it 100%.
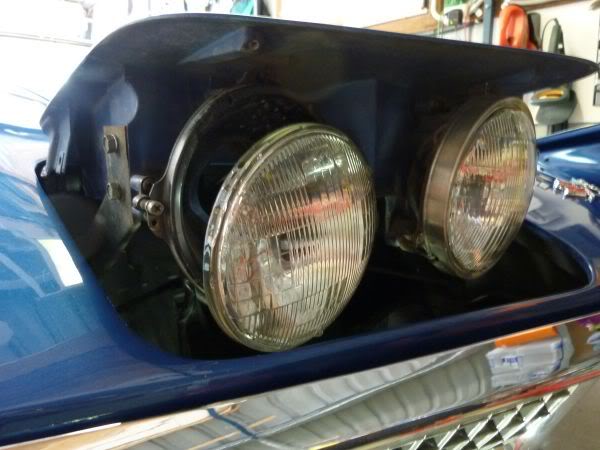
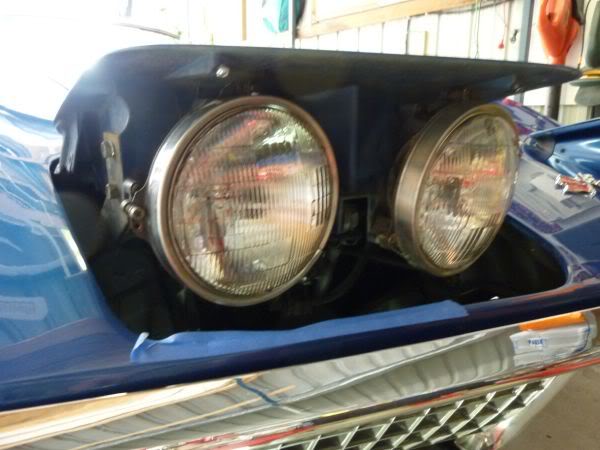
Dont have time for that now but I did notice a couple of my head lights were a bit loose.
So I stripped it down and found that the tabs on the light retainer rings had broken off or were missing on a number of them as well as the ring join.
Will order some new rings but as a temporary fix I drilled and riveted the tabs back on.

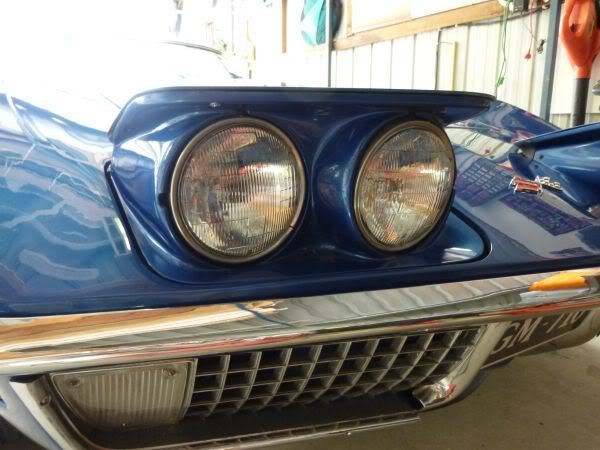
There has always been a difference right left.
Managed to get it a lot better but I think I will need to strip it all down and possibly even cut one of the side fiberglass internal panels to get it 100%.
Dont have time for that now but I did notice a couple of my head lights were a bit loose.
So I stripped it down and found that the tabs on the light retainer rings had broken off or were missing on a number of them as well as the ring join.
Will order some new rings but as a temporary fix I drilled and riveted the tabs back on.
Last edited by CraigH; Apr 9, 2023 at 08:16 PM.
Thread Starter
Melting Slicks
Joined: Apr 2010
Posts: 2,795
Likes: 1,196
From: Canberra Australia
2025 C3 of the Year Finalist - Modified
Got home from Summernats last night and noticed some drops of transmission fluid on the floor.
Put it up on the ramps and it was worse than I had thought. Lots of oil everywhere.
Cleaned it all up and checked all the pan bolts etc.
This morning i went down to my local transmission shop in the hope they could have a quick look (Tuggeranong Brake and Transmissions).
He said he could not fix anything today but if I came back at 9:00am he would have a quick look on the hoist.
Turns out the 2 bolts that hold the interlock linkage and the corner of the pan had previously been stripped.
They had been drilled out and re tapped to a bigger size....However they did not tap them all the way through so they were not fully getting tight.
After re tapping the holes and getting some new bolts washers etc he decided to pull the pan and check if the gasket had not been damaged.
Lucky we did as it had split between the 2 bolts.
New gasket in and filled with ATF and its all good again - in fact its better than before.
So much for a quick check for me...
Great guys Mark and Dave if you need some transmission or brake work in Canberra.
Back to the Summernats and a catch up with YLLA 88.
Thread Starter
Melting Slicks
Joined: Apr 2010
Posts: 2,795
Likes: 1,196
From: Canberra Australia
2025 C3 of the Year Finalist - Modified
Have been backing off a bit for last week or so determining what to do next.
There is a few more bits on the interior to do but my list looks a bit like this.
1) Speed Direct Coilover front springs and Bilstein Sports rear shocks.
2) Twin 11" radiator fans.
3) Flowtech headers and hew exhaust.
4) Borgeson steering box.
5) Rebuild Quadrajet (Runs fine but looks like it could be interesting)
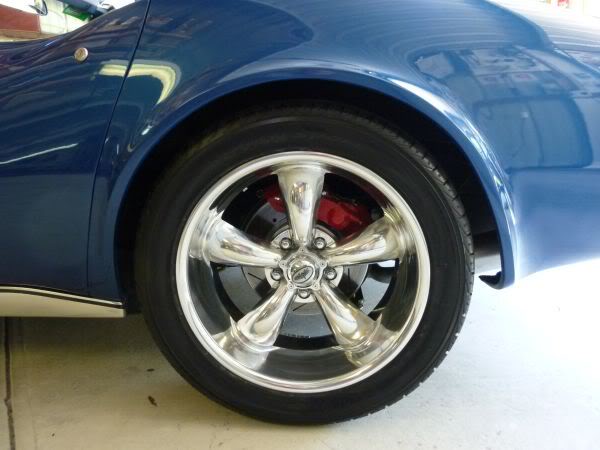
6) New cross drilled rotors for front.
and
1) Rebuild entire front suspension (can wait as its not bad)
2) underbody clean paint etc
3) Refurbish all vacuum parts and lines under hood.
4) Remove engine harness modify, repair re-wrap and put back.
5) Clean paint and detail engine bay
6) Paint underside of hood.
7) And And And ......................
Am liking the car all together and being able to drive it so I will pick things that can be done quickly for a while with less down time.
Like The Borgeson steering box coilovers and fans.


For a bit of therapy yesterday I pulled the console trim plate and heater controls out as I only had fan speed Low and Mid 2 and was missing Mid 1 and high.
Turned out to be a plug that was not seated properly but still took a bit to tear it down and check it.
There is a few more bits on the interior to do but my list looks a bit like this.
1) Speed Direct Coilover front springs and Bilstein Sports rear shocks.
2) Twin 11" radiator fans.
3) Flowtech headers and hew exhaust.
4) Borgeson steering box.
5) Rebuild Quadrajet (Runs fine but looks like it could be interesting)
6) New cross drilled rotors for front.
and
1) Rebuild entire front suspension (can wait as its not bad)
2) underbody clean paint etc
3) Refurbish all vacuum parts and lines under hood.
4) Remove engine harness modify, repair re-wrap and put back.
5) Clean paint and detail engine bay
6) Paint underside of hood.
7) And And And ......................
Am liking the car all together and being able to drive it so I will pick things that can be done quickly for a while with less down time.
Like The Borgeson steering box coilovers and fans.
For a bit of therapy yesterday I pulled the console trim plate and heater controls out as I only had fan speed Low and Mid 2 and was missing Mid 1 and high.
Turned out to be a plug that was not seated properly but still took a bit to tear it down and check it.
Last edited by CraigH; Apr 9, 2023 at 08:16 PM.
Thread Starter
Melting Slicks
Joined: Apr 2010
Posts: 2,795
Likes: 1,196
From: Canberra Australia
2025 C3 of the Year Finalist - Modified
Originally Posted by YLLA 88
Originally Posted by CraigH
Have been backing off a bit for last week or so determining what to do next.
There is a few more bits on the interior to do but my list looks a bit like this.
3) Flowtech headers and hew exhaust.
There is a few more bits on the interior to do but my list looks a bit like this.
3) Flowtech headers and hew exhaust.
I am actually now thinking these....
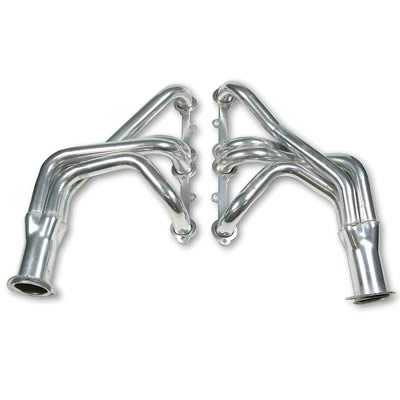
http://www.summitracing.com/parts/BIG-31106FLT/
After looking at lots of headers at the summernats as well as going through heaps of threads on the US C3 Forum I came across a few things.
Block huggers fit fine but can be very close to the plugs (Sandersons are very tight so they will be close).
The set that gets the best praise for easy fit, lots of clearance etc etc is Dynomax. Dynomax was bought out by Holley and they now sell them as Flowtech and get equally good reviews.
Dont hang as low as Hookers (Also Holley) and are only 1 5/8 primaries so fine for a fairly stock motor..
And for $265 from Summit its a bargain.....
Postage is not :-(
But by buying a few other things with it the postage gets spread. If I add shocks and the twin 11" SPAL fans and some AN fittings and some tools postage only went up by another $50.
Last edited by CraigH; Apr 9, 2023 at 08:15 PM.