


1971 Journey

Thread Starter
Melting Slicks


Joined: Apr 2010
Posts: 2,795
Likes: 1,196
From: Canberra Australia
2025 C3 of the Year Finalist - Modified
November 2010
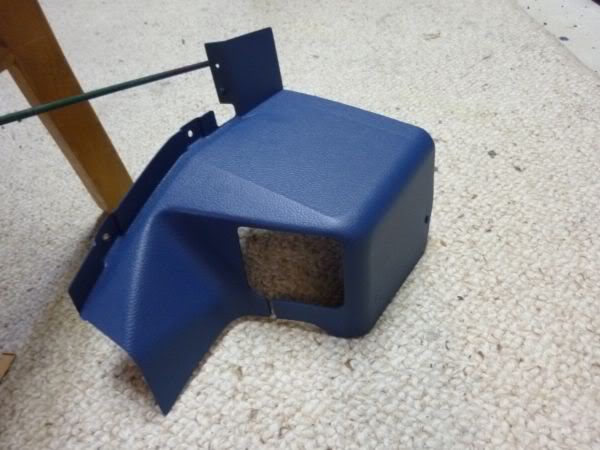
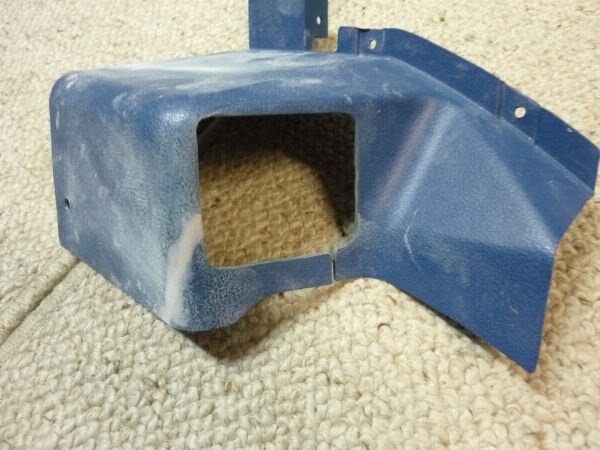
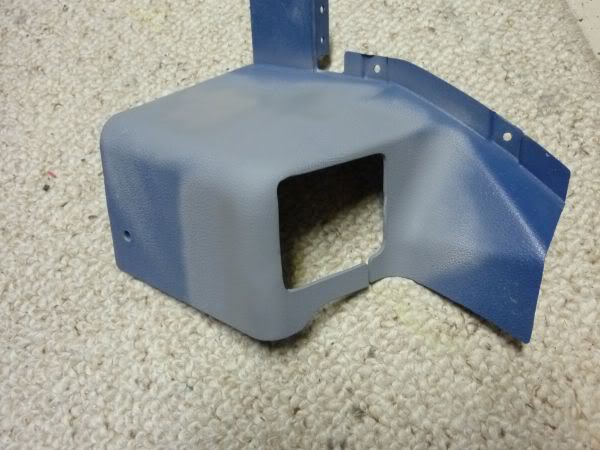
Final prep was to sand out any imperfections then clean with strong cleaner (simple Green) followed by soap and water then when dry
cleaned over with Prepsol.
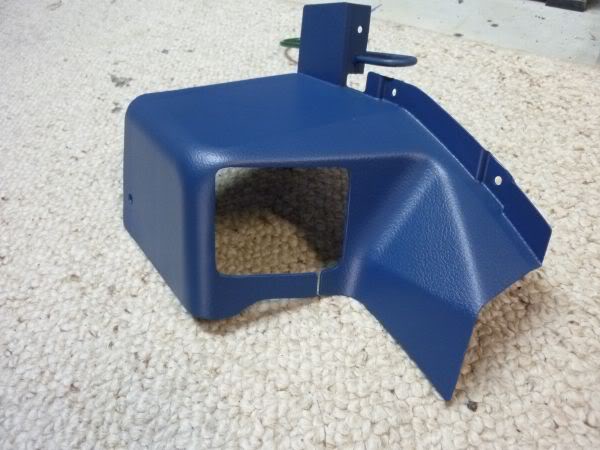
On the passenger kick panel I also filed smooth the area that is cut out for the the A/C recirculate solenoid. Probably not NCRS correct
but it looks much better.
Final prep was to sand out any imperfections then clean with strong cleaner (simple Green) followed by soap and water then when dry
cleaned over with Prepsol.
On the passenger kick panel I also filed smooth the area that is cut out for the the A/C recirculate solenoid. Probably not NCRS correct
but it looks much better.
Last edited by CraigH; Aug 21, 2025 at 04:12 AM.
Thread Starter
Melting Slicks
Joined: Apr 2010
Posts: 2,795
Likes: 1,196
From: Canberra Australia
2025 C3 of the Year Finalist - Modified
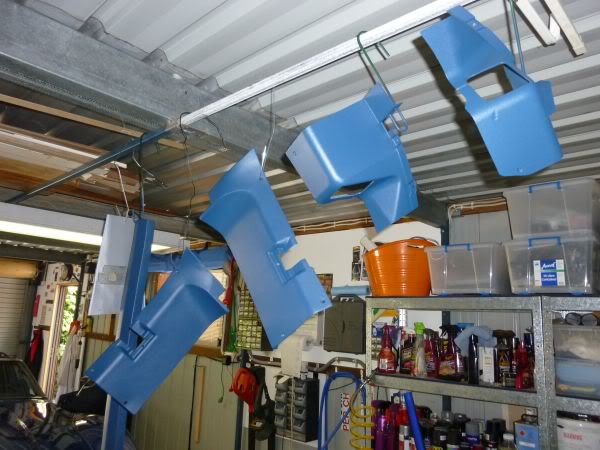
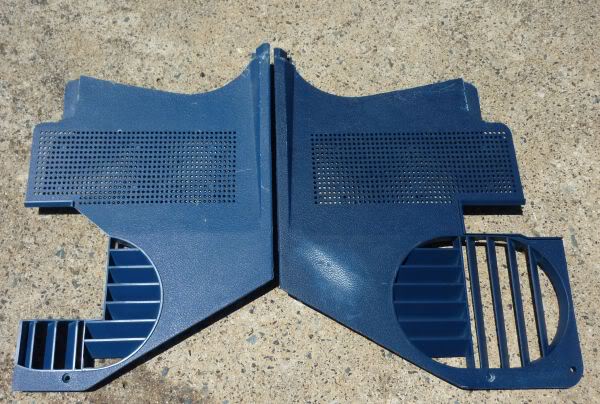
I am very happy with the colour match. Not perfect but so close.
[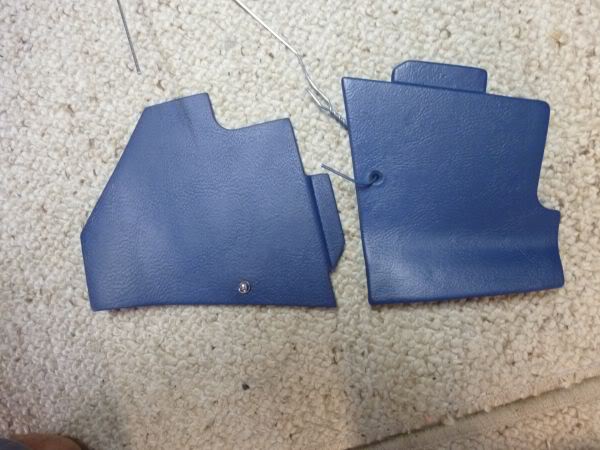
The ones on the right are the painted ones.
[
The ones on the right are the painted ones.
Last edited by CraigH; Apr 9, 2023 at 06:58 PM.
Thread Starter
Melting Slicks
Joined: Apr 2010
Posts: 2,795
Likes: 1,196
From: Canberra Australia
2025 C3 of the Year Finalist - Modified
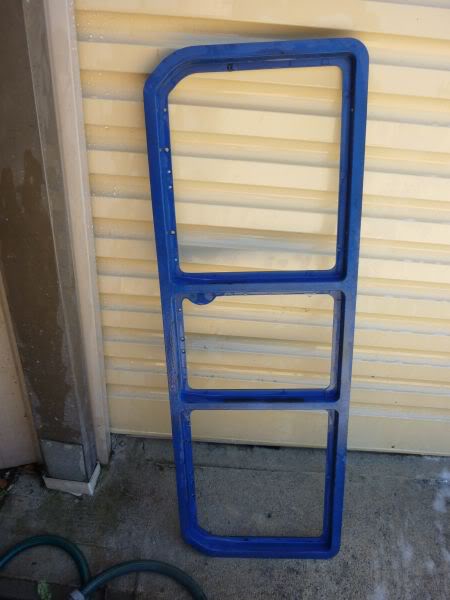
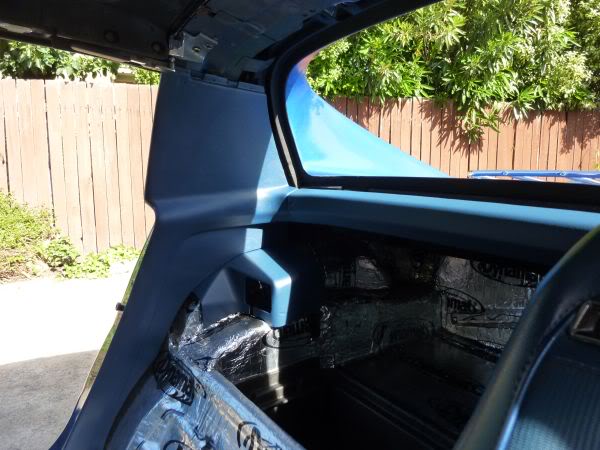
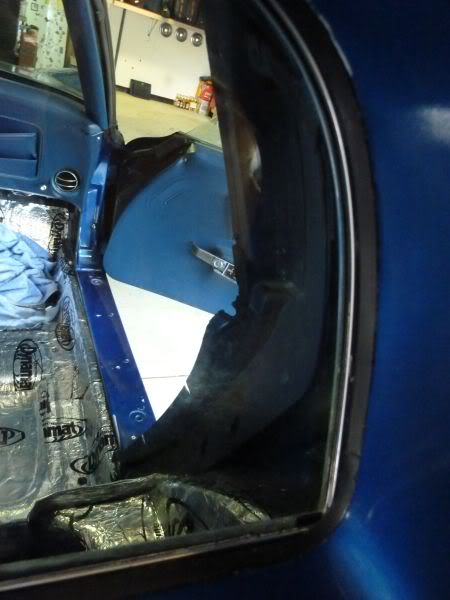
A Pillar weatherstrip finished.
Painted on 3M black weatherstrip glue to both items.
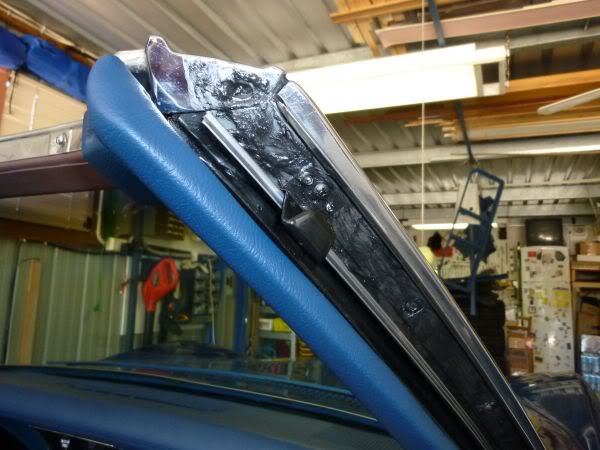
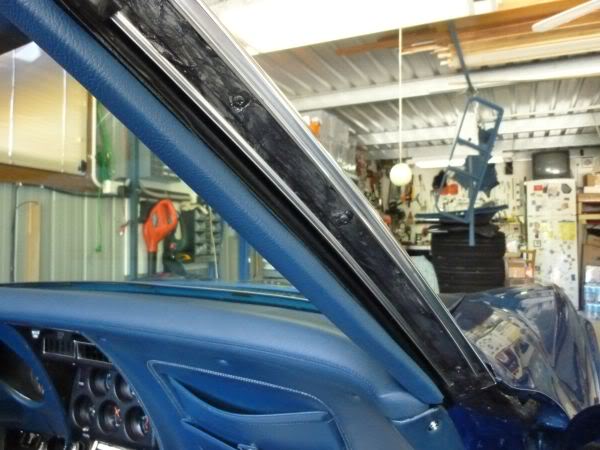
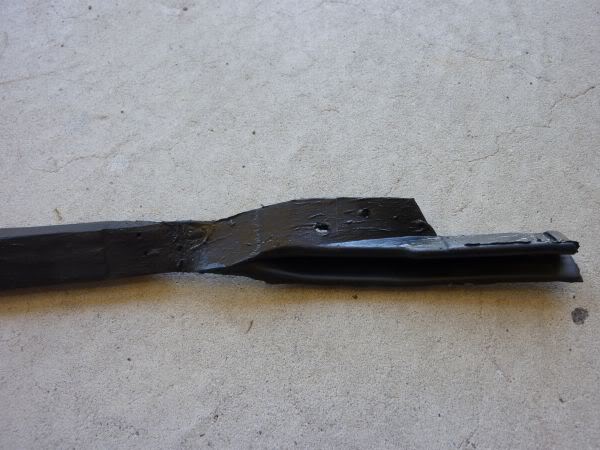
Then once tacky I ran a bead of glue down the middle of the pillar then pressed the weatherstrip into place.
Some masking tape in a few spots till dry and it sticks well.
Painted on 3M black weatherstrip glue to both items.
Then once tacky I ran a bead of glue down the middle of the pillar then pressed the weatherstrip into place.
Some masking tape in a few spots till dry and it sticks well.
Last edited by CraigH; Apr 9, 2023 at 07:04 PM.
Thread Starter
Melting Slicks
Joined: Apr 2010
Posts: 2,795
Likes: 1,196
From: Canberra Australia
2025 C3 of the Year Finalist - Modified
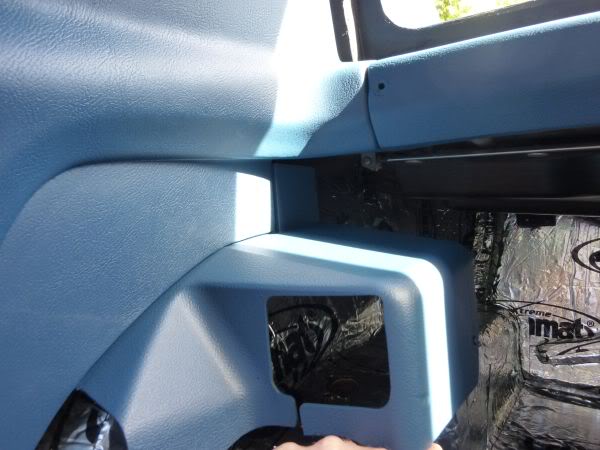
Had a look at the T Top trim and realized they needed a bit of work as well.
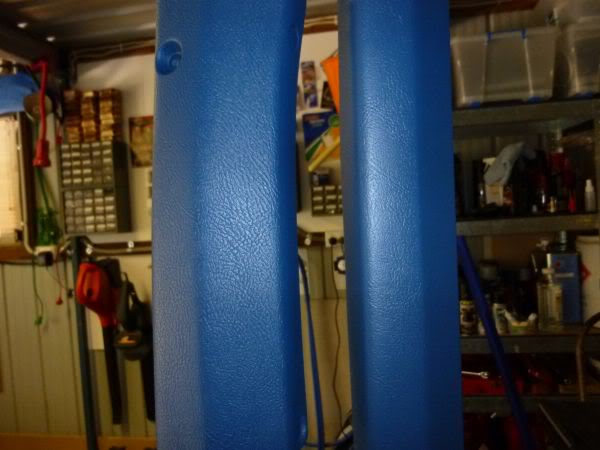
Also I noticed how close the lock down lever was to the A Pillar trim so i heated the trim up and moved it a bit out of the way.
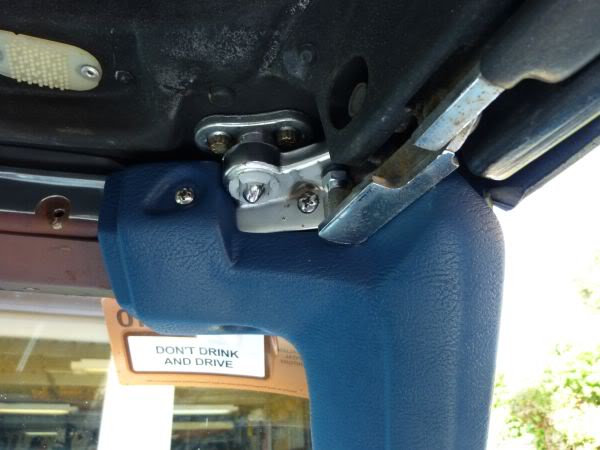
Still close so will need to be careful.
Now I know why so many of these have damaged top corners.
Also I noticed how close the lock down lever was to the A Pillar trim so i heated the trim up and moved it a bit out of the way.
Still close so will need to be careful.
Now I know why so many of these have damaged top corners.
Last edited by CraigH; Apr 9, 2023 at 07:05 PM.
Thread Starter
Melting Slicks
Joined: Apr 2010
Posts: 2,795
Likes: 1,196
From: Canberra Australia
2025 C3 of the Year Finalist - Modified
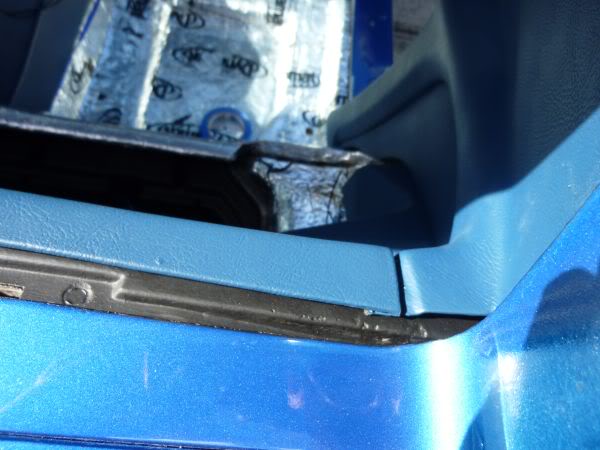
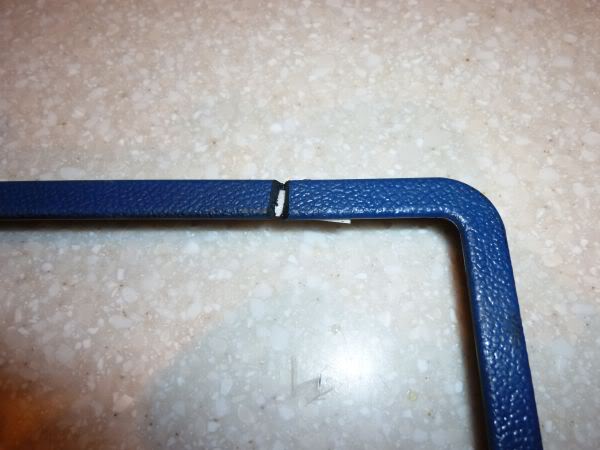
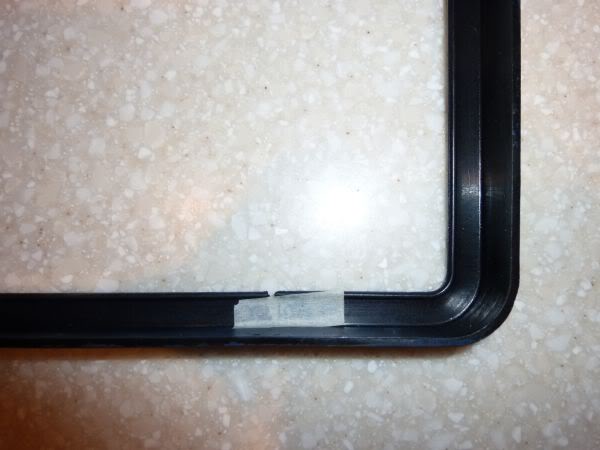
To fit the T Top center trim I first trial fitted the side panels and noticed that the reproduction center section was not a 100% fit with the original where they joined at the bottom of the radius section.
So a bit of a cut with the dremel and it now fits fine.
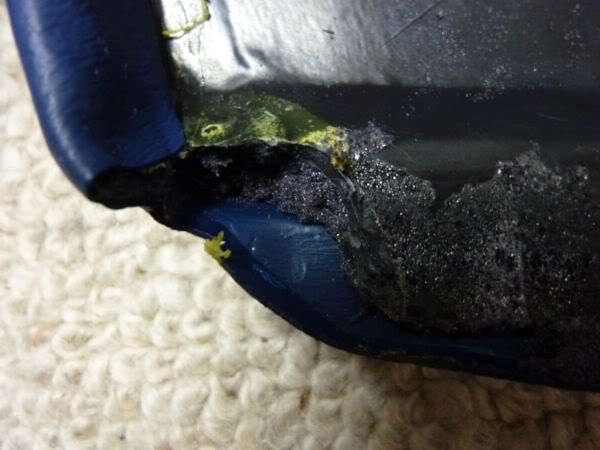
Would have been a real pain if I had put it in first.
So a bit of a cut with the dremel and it now fits fine.
Would have been a real pain if I had put it in first.
Last edited by CraigH; Apr 9, 2023 at 07:06 PM.
Thread Starter
Melting Slicks
Joined: Apr 2010
Posts: 2,795
Likes: 1,196
From: Canberra Australia
2025 C3 of the Year Finalist - Modified
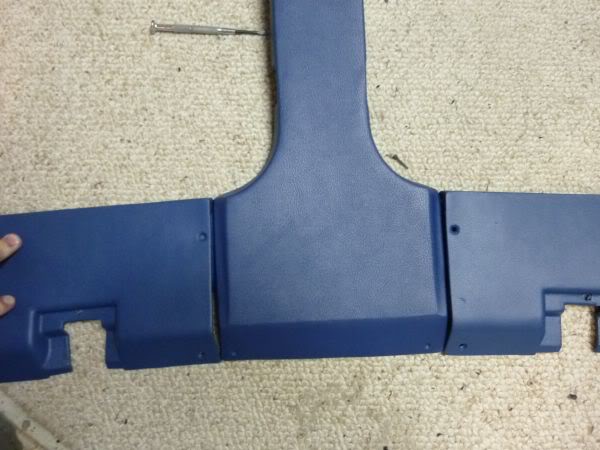
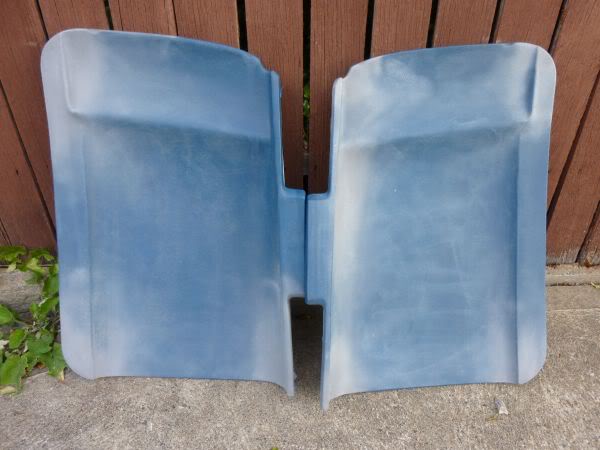
I wanted to see what the painted panels looked like in sunlight so I did a mock up of some of the rear panels.
The B pillar is a reproduction, the others are repaired and repainted originals.
The match is fairly good with just a slightly different sheen and a bit more grain on some parts but
The B pillar is a reproduction, the others are repaired and repainted originals.
The match is fairly good with just a slightly different sheen and a bit more grain on some parts but
Last edited by CraigH; Apr 9, 2023 at 07:07 PM.
Corvette Stories
The Best of Corvette for Corvette Enthusiasts

Top 10 Most Expensive Corvettes Ever Sold on Bring A Trailer
Brett Foote
10 Things Every Corvette Owner Needs (2026 Edition)
Michael S. Palmer
8 Most "Only Corvette Owners Understand" Quirks and Problems
Pouria Savadkouei
10 Reasons the C6 Z06 is Still A Performance Benchmark After 20 Years
Joe Kucinski
How Much Horsepower Every Corvette Engine "LOST" in 1972
Joe Kucinski
Top 10 DOs and DON'Ts for Protecting Your Convertible Top!
Michael S. Palmer
Top 10 Most Explosive Corvettes Ever Made: Power-to-Weight Ratio Ranked!
Joe Kucinski
150 hp to 1,250 hp: Every Corvette Generation Compared by the Specs That Matter
Joe Kucinski
8 Coolest Corvette Pace Cars (and Replicas) of All Time
Verdad Gallardo
Thread Starter
Melting Slicks
Joined: Apr 2010
Posts: 2,795
Likes: 1,196
From: Canberra Australia
2025 C3 of the Year Finalist - Modified
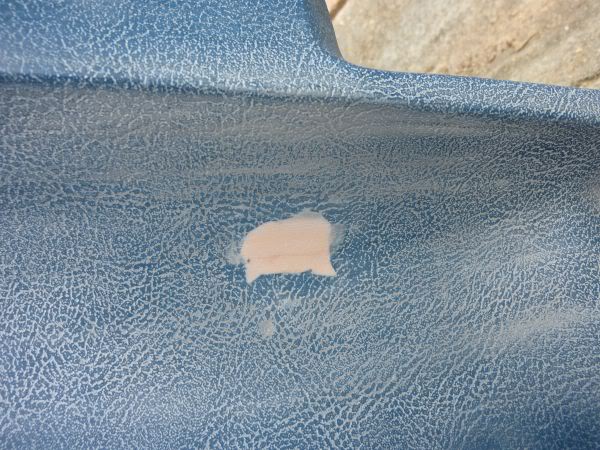
Tonight's project was the T Top trim covers.
Any broken or cracked areas were cut back and dug out a bit.
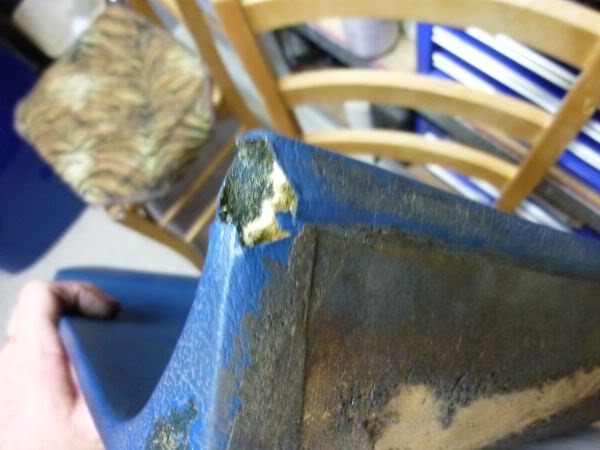

Then they were filled with body filler.
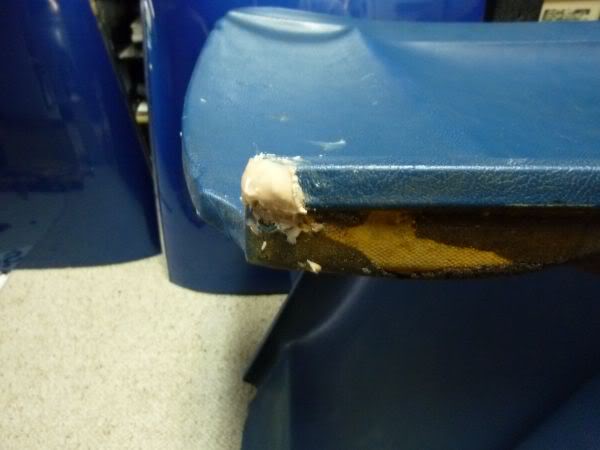
Sanded and shaped back to original.

Now just applied a few more spots where cracks were visible and should be ok to clean and prime in a day or so.
Any broken or cracked areas were cut back and dug out a bit.
Then they were filled with body filler.
Sanded and shaped back to original.
Now just applied a few more spots where cracks were visible and should be ok to clean and prime in a day or so.
Last edited by CraigH; Apr 9, 2023 at 07:07 PM.
Thread Starter
Melting Slicks
Joined: Apr 2010
Posts: 2,795
Likes: 1,196
From: Canberra Australia
2025 C3 of the Year Finalist - Modified
Put the rear window weatherstrip in.
What a painful and messy job.
Started by doing the two bottom corners.
Then the remainder of the bottom.
Worked up the sides and close to the window clips on both sides.
Finally the top.

Used lots of masking tape as I worked around.
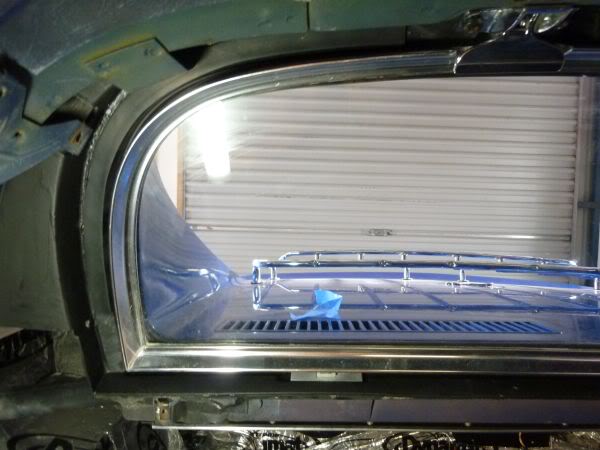
Window seal was by CRC through Wllcox and was a perfect fit.
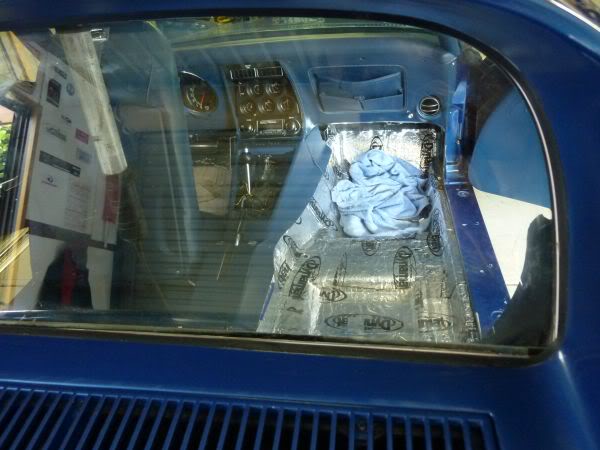
I read heaps of people talking about having to cut the weatherstrip and my previous one had a cut in it...but not this one.
What a painful and messy job.
Started by doing the two bottom corners.
Then the remainder of the bottom.
Worked up the sides and close to the window clips on both sides.
Finally the top.
Used lots of masking tape as I worked around.
Window seal was by CRC through Wllcox and was a perfect fit.
I read heaps of people talking about having to cut the weatherstrip and my previous one had a cut in it...but not this one.
Last edited by CraigH; Apr 9, 2023 at 07:51 PM.
Thread Starter
Melting Slicks
Joined: Apr 2010
Posts: 2,795
Likes: 1,196
From: Canberra Australia
2025 C3 of the Year Finalist - Modified
November 2010
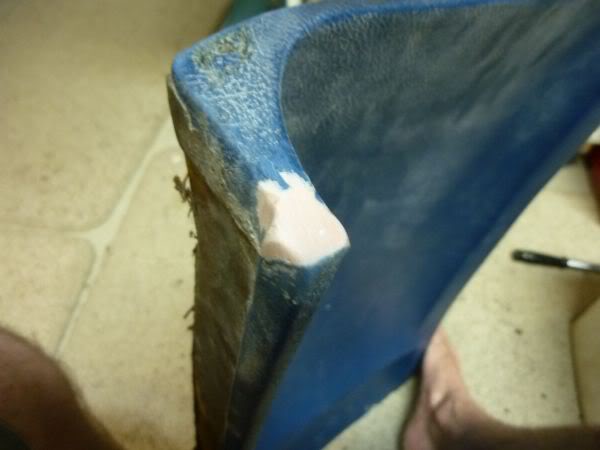
T Top pads are now ready for a spray with Royal Blue Vinyl paint.
Went over each pad carefully and found about 15 more cracks between them so cut each one out and bent the edges in.
Put masking tape around each area then applied filler to minimize getting it on the good surface.
Sanded back with tape in place then removed for final sand.
Had to rebuild each of the square corners.
Sprayed with vinyl primer.
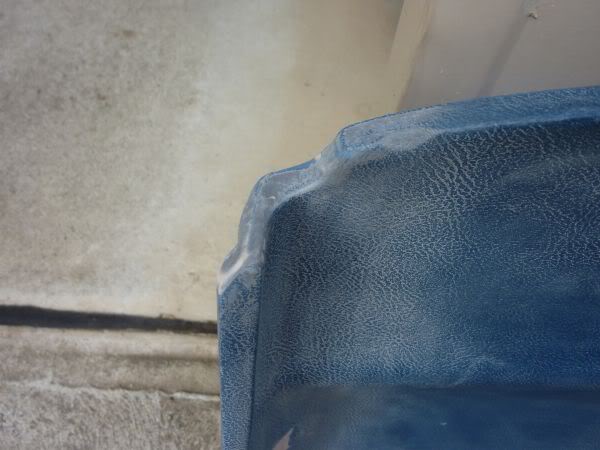
Ready for vinyl paint.
Will see how it stands up over time. Certainly worth trying.
T Top pads are now ready for a spray with Royal Blue Vinyl paint.
Went over each pad carefully and found about 15 more cracks between them so cut each one out and bent the edges in.
Put masking tape around each area then applied filler to minimize getting it on the good surface.
Sanded back with tape in place then removed for final sand.
Had to rebuild each of the square corners.
Sprayed with vinyl primer.
Ready for vinyl paint.
Will see how it stands up over time. Certainly worth trying.
Last edited by CraigH; Apr 9, 2023 at 08:05 PM.
Thread Starter
Melting Slicks
Joined: Apr 2010
Posts: 2,795
Likes: 1,196
From: Canberra Australia
2025 C3 of the Year Finalist - Modified
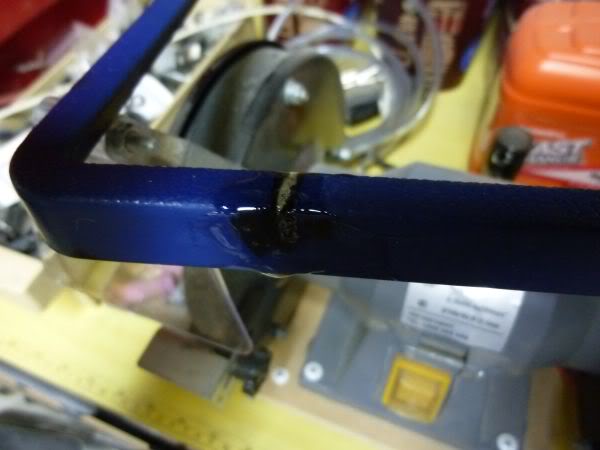
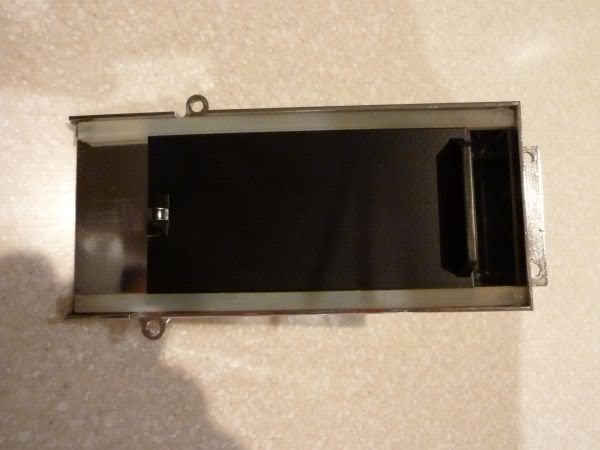
Not much free time today with other things going on but I did a bit of work on the storage lids.
Took them all apart and checked the frames.
One had a slight crack so I ground it out.
Then put some tape over the back.
And filled with epoxy.
Then moved on to the hinges.
Media blasted the paint off then straightened out some of the small twists etc.
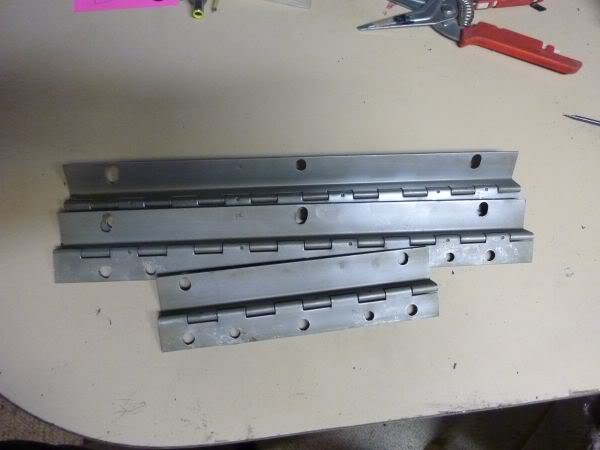
Ready for primer now.
Also media blasted the push button surrounds etc.
Am considering what to do with the lids.
The wood has split a bit from screws and it may be easier to just keep the originals and buy a new set.
Otherwise I can try filling with white glue then clamping them down and using some body filler to smooth out.
I know whats easier but...see how I feel about it tomorrow.
Took them all apart and checked the frames.
One had a slight crack so I ground it out.
Then put some tape over the back.
And filled with epoxy.
Then moved on to the hinges.
Media blasted the paint off then straightened out some of the small twists etc.
Ready for primer now.
Also media blasted the push button surrounds etc.
Am considering what to do with the lids.
The wood has split a bit from screws and it may be easier to just keep the originals and buy a new set.
Otherwise I can try filling with white glue then clamping them down and using some body filler to smooth out.
I know whats easier but...see how I feel about it tomorrow.
Last edited by CraigH; Apr 9, 2023 at 08:05 PM.
Thread Starter
Melting Slicks
Joined: Apr 2010
Posts: 2,795
Likes: 1,196
From: Canberra Australia
2025 C3 of the Year Finalist - Modified
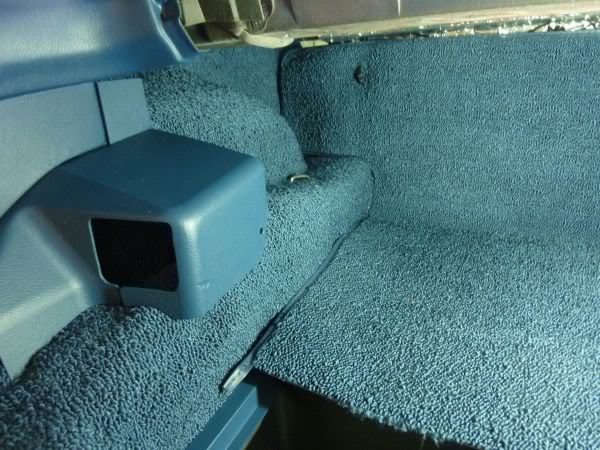
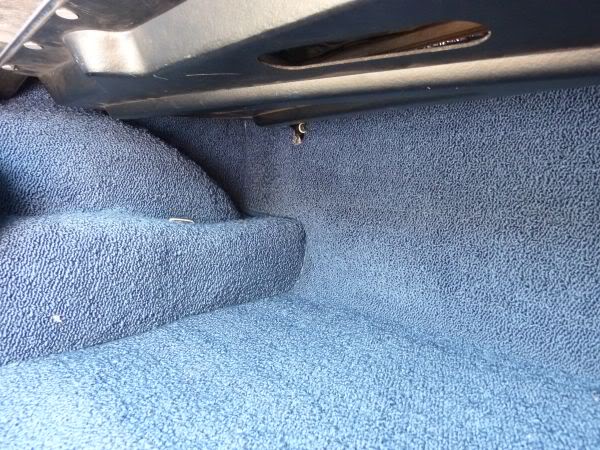
Started to test fit and the rear carpets.
Stopped raining yesterday afternoon.
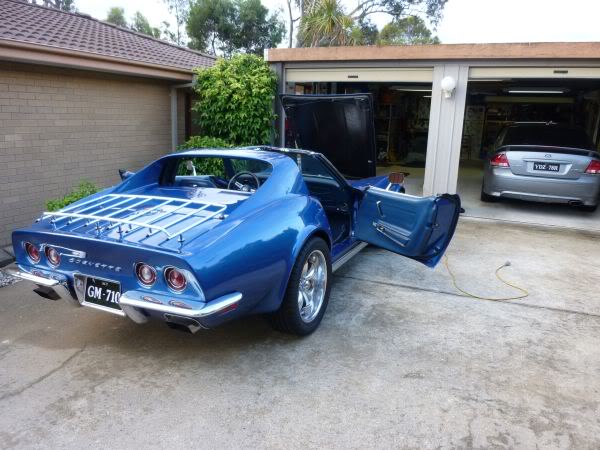
Carpet is a set I got from Stockinteriors.com earlier in the year.
Nicely made with all the backing in place.
I dont want to use any glue so it needs to be helped into position (the piece of wood is bolted to the re-tractor fittings).
I will however use some double sided carpet tape to hold parts down
I did not go with the 71 Royal blue as I thought it was too dark so I choose a blue that was closer to the trim colour.
Stopped raining yesterday afternoon.
Carpet is a set I got from Stockinteriors.com earlier in the year.
Nicely made with all the backing in place.
I dont want to use any glue so it needs to be helped into position (the piece of wood is bolted to the re-tractor fittings).
I will however use some double sided carpet tape to hold parts down
I did not go with the 71 Royal blue as I thought it was too dark so I choose a blue that was closer to the trim colour.
Last edited by CraigH; Apr 9, 2023 at 08:05 PM.
Thread Starter
Melting Slicks
Joined: Apr 2010
Posts: 2,795
Likes: 1,196
From: Canberra Australia
2025 C3 of the Year Finalist - Modified
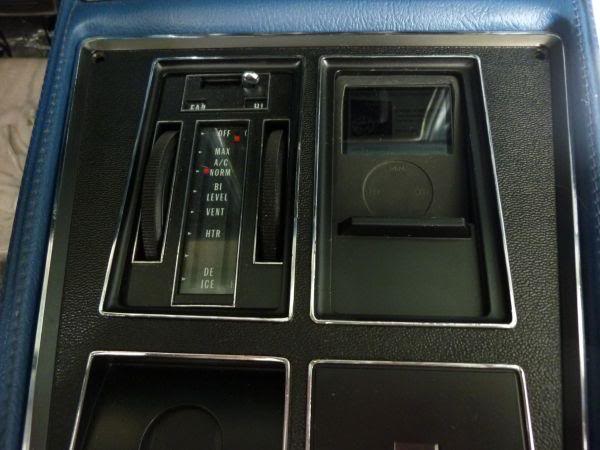
Got a package from Zip today with a couple of console parts I needed.
The small clip that goes on the ashtray door and gives it some tension so it does not flop open.
So to reassemble the console.
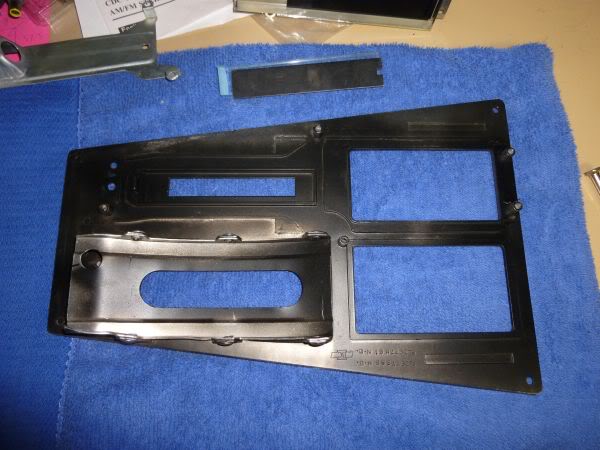
Put the shift indicator and cover in.
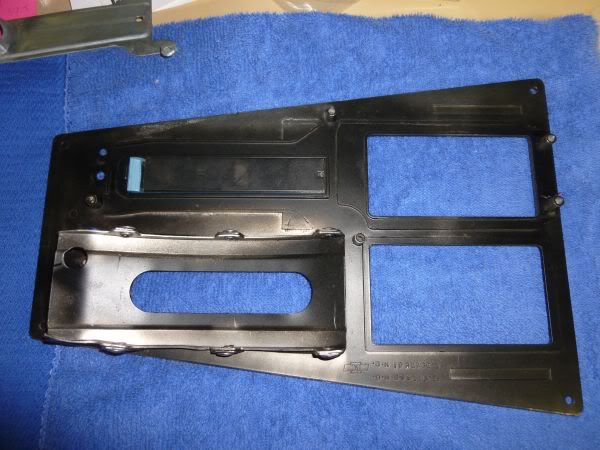
Then the shift indicator light cover.
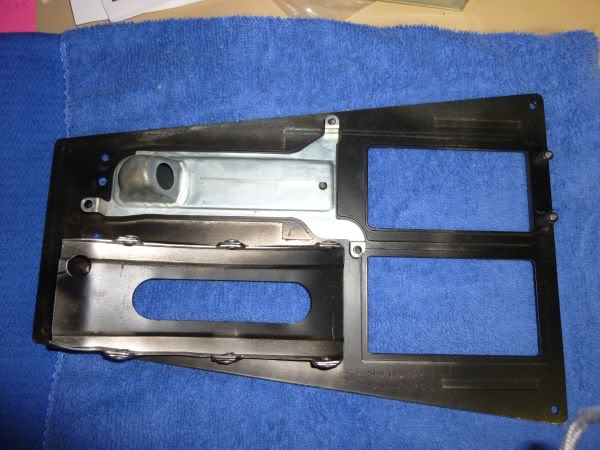
The ashtray with its sliders etc.
Took a few times to adjust the tension on the ashtray door between "It does not open" to "too loose".
Looks good

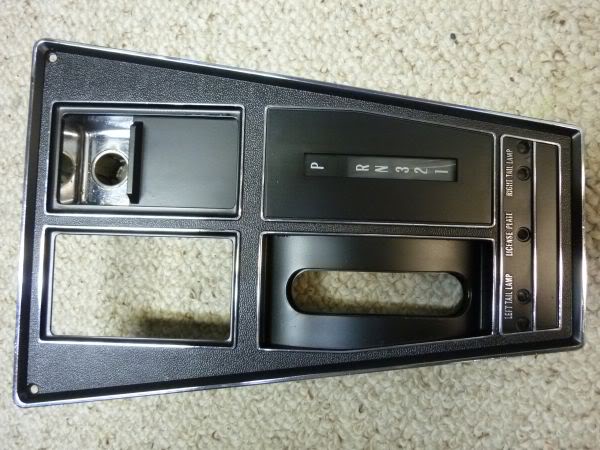
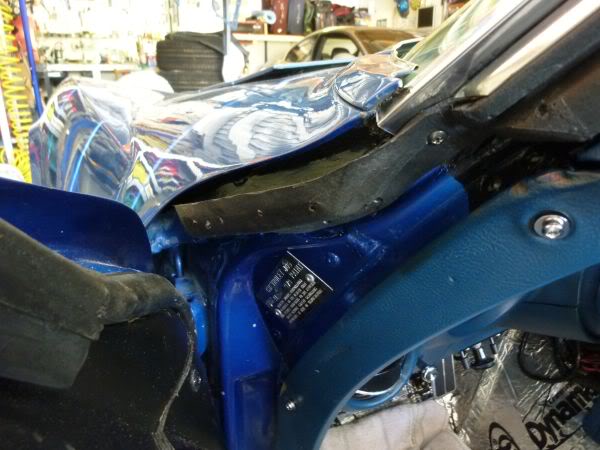
Add the engine spec plate.
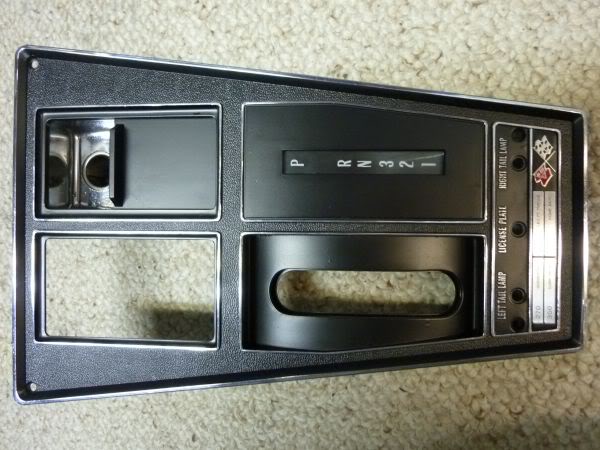
And finally the shift slide seals with the notched section towards the center of console.
The small clip that goes on the ashtray door and gives it some tension so it does not flop open.
So to reassemble the console.
Put the shift indicator and cover in.
Then the shift indicator light cover.
The ashtray with its sliders etc.
Took a few times to adjust the tension on the ashtray door between "It does not open" to "too loose".
Looks good
Add the engine spec plate.
And finally the shift slide seals with the notched section towards the center of console.
Last edited by CraigH; Apr 9, 2023 at 08:04 PM.
Thread Starter
Melting Slicks
Joined: Apr 2010
Posts: 2,795
Likes: 1,196
From: Canberra Australia
2025 C3 of the Year Finalist - Modified
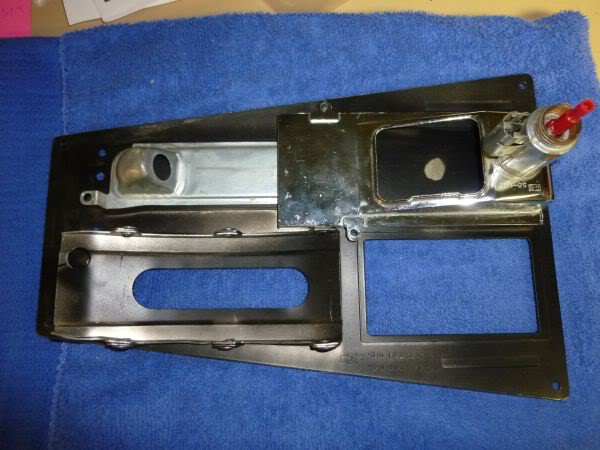
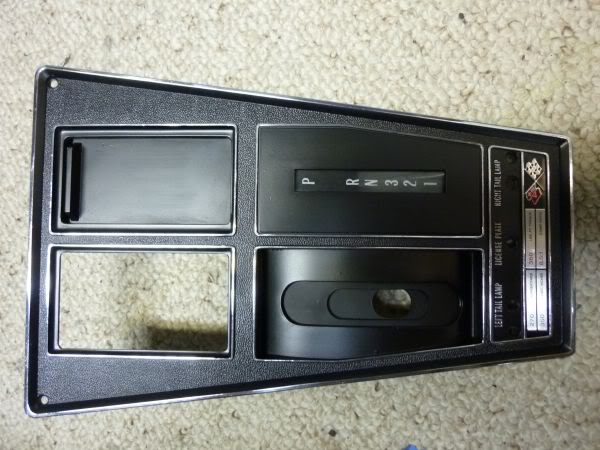
This is how the ipod is being mounted.
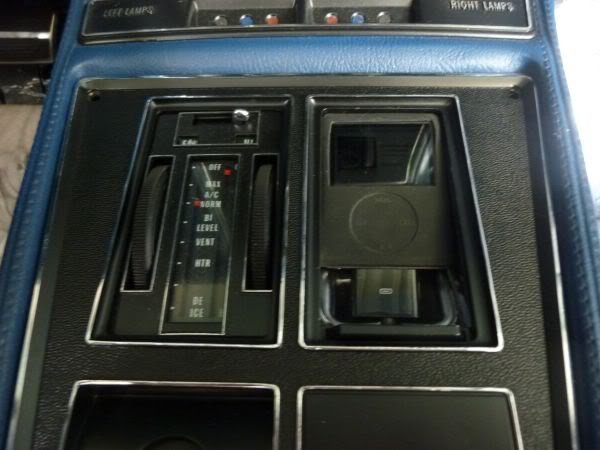
Notched the ashtray to allow the cable to pass through. Easy to remove if needed.
Ash Tray door covers it up if needed.
Lighter is still able to be used. Not that it will likely ever be used but I have repaired it and it works fine.
Notched the ashtray to allow the cable to pass through. Easy to remove if needed.
Ash Tray door covers it up if needed.
Lighter is still able to be used. Not that it will likely ever be used but I have repaired it and it works fine.
Last edited by CraigH; Apr 9, 2023 at 08:04 PM.
Thread Starter
Melting Slicks
Joined: Apr 2010
Posts: 2,795
Likes: 1,196
From: Canberra Australia
2025 C3 of the Year Finalist - Modified
December 2010
Tried the carpet tape out but it was not very successful as most of the carpet is backed with underlay.
So given I did not want to use any glue I ended up using tape at each edge as well as things like the footman's loops and the trim parts to keep it all in place.
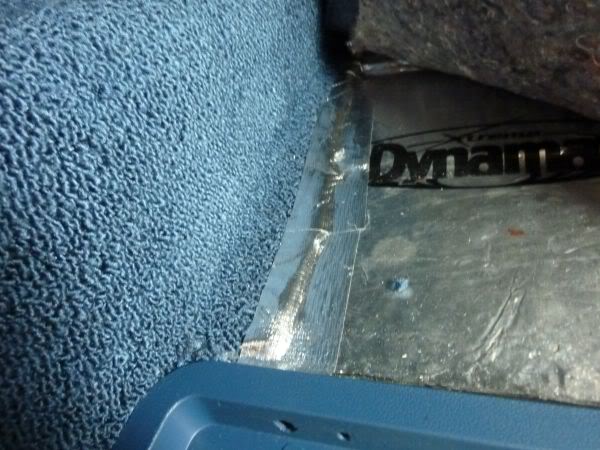
Tried the carpet tape out but it was not very successful as most of the carpet is backed with underlay.
So given I did not want to use any glue I ended up using tape at each edge as well as things like the footman's loops and the trim parts to keep it all in place.
Last edited by CraigH; Apr 9, 2023 at 08:04 PM.
Thread Starter
Melting Slicks
Joined: Apr 2010
Posts: 2,795
Likes: 1,196
From: Canberra Australia
2025 C3 of the Year Finalist - Modified
I had removed the brackets that hold the spark plug wires and SS shielding in place to repaint them.
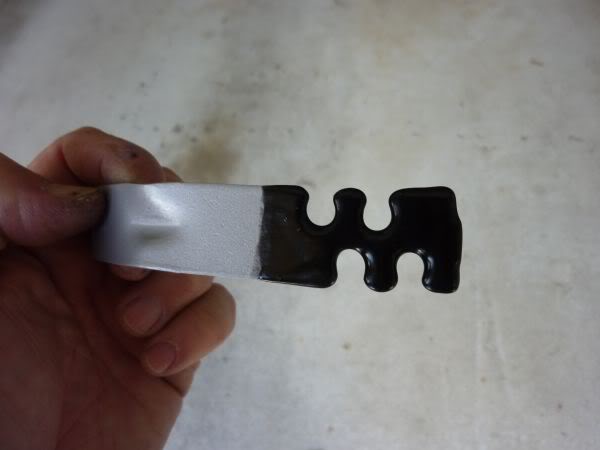
After a coat of paint I needed to replace the rubber/plastic covering that was used on them so I got a product called PlastiDip
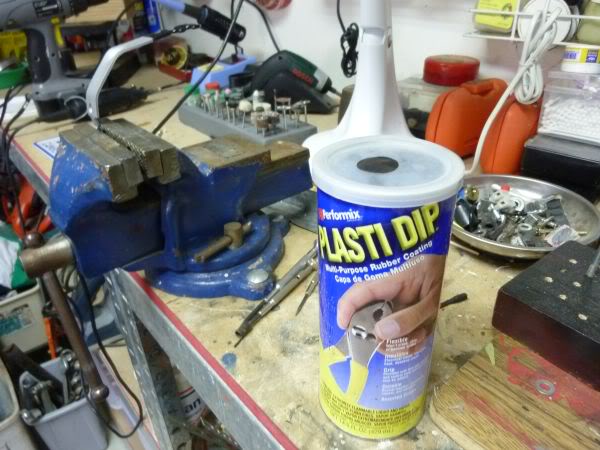
You dunk the item in and.
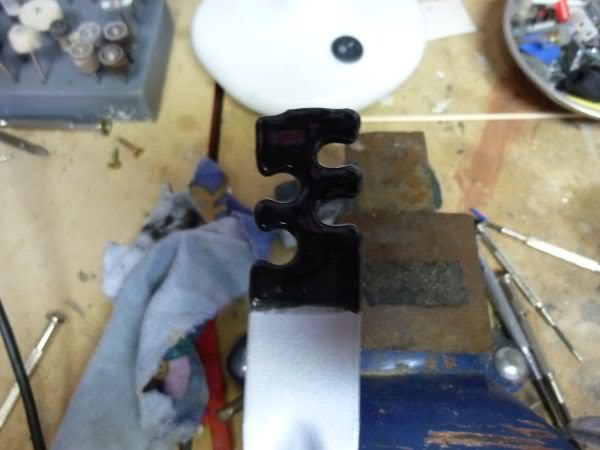
After 3 goes and drying it looks kike the original.
After a coat of paint I needed to replace the rubber/plastic covering that was used on them so I got a product called PlastiDip
You dunk the item in and.
After 3 goes and drying it looks kike the original.
Last edited by CraigH; Apr 9, 2023 at 08:04 PM.
Thread Starter
Melting Slicks
Joined: Apr 2010
Posts: 2,795
Likes: 1,196
From: Canberra Australia
2025 C3 of the Year Finalist - Modified
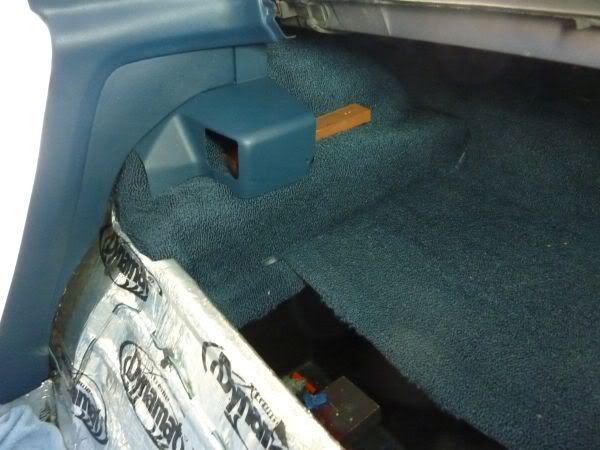
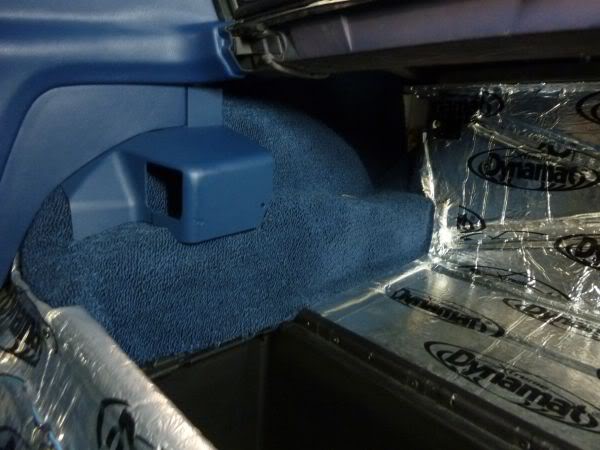
I cant finish the rear carpets till I get my new aerial leads but I have trial fitted the center piece and tested that the shelf still operated properly.
I need to cut the 3 holes for the carpet plugs and then trim where it touches the storage frame.
I need to cut the 3 holes for the carpet plugs and then trim where it touches the storage frame.
Last edited by CraigH; Apr 9, 2023 at 08:03 PM.
Thread Starter
Melting Slicks
Joined: Apr 2010
Posts: 2,795
Likes: 1,196
From: Canberra Australia
2025 C3 of the Year Finalist - Modified
Glen
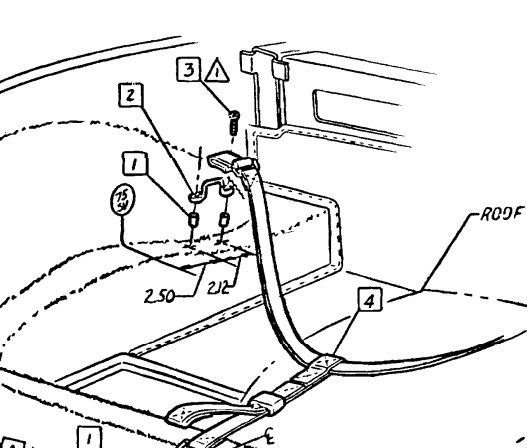
This is what the seat belt bottom looks like.
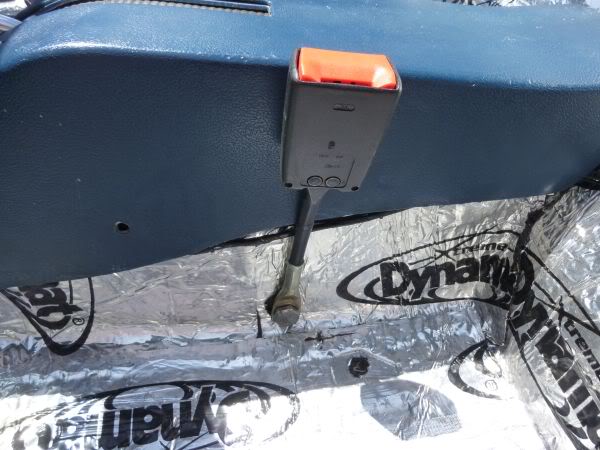
230mm from center of bolt hole to the top means its mostly hidden with just enough poking over the seat. The original ones put in were a lot longer and did not look as good.
This is what the seat belt bottom looks like.
230mm from center of bolt hole to the top means its mostly hidden with just enough poking over the seat. The original ones put in were a lot longer and did not look as good.
Last edited by CraigH; Apr 9, 2023 at 08:01 PM.
Thread Starter
Melting Slicks
Joined: Apr 2010
Posts: 2,795
Likes: 1,196
From: Canberra Australia
2025 C3 of the Year Finalist - Modified
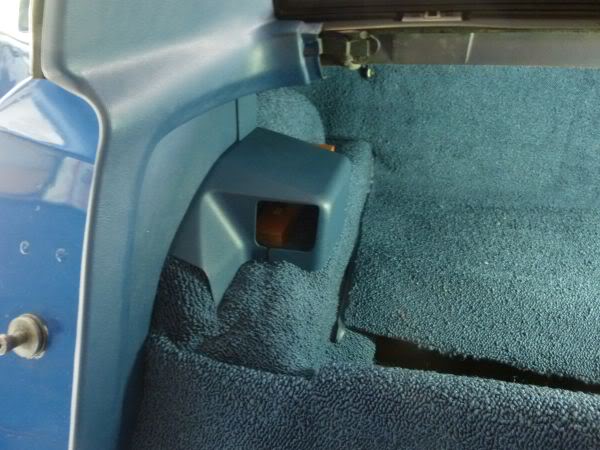
Spent a heap of time getting the saddle brackets to sit nice with carpet under them etc this afternoon.
They are threaded into the frame with some small spacers
However the spacers were going into the hole through the fiberglass so I placed some washers under them so they stood up properly and fitted the bracket flush with the carpet. So the spacer holds bracket out the same distance as the underlay without squashing or twisting the carpet.
Left side finished now and right just needs some trimming and to be tapped down.
Last edited by CraigH; Apr 9, 2023 at 08:01 PM.