


Small Garage Restoration

Instructor

Joined: Apr 2013
Posts: 146
Likes: 0
Quote: LS4 Pilot.
"LOL...my doctors office examination room is NOT that freakin clean"...
Hahah, I laughted at LS4 pilots comment.
I quite often give consultations in my garage, wife got a bit funny when she realized I was specializing in gynecology. hehe.
"LOL...my doctors office examination room is NOT that freakin clean"...
Hahah, I laughted at LS4 pilots comment.
I quite often give consultations in my garage, wife got a bit funny when she realized I was specializing in gynecology. hehe.

Thread Starter
Racer
Joined: Oct 2007
Posts: 420
Likes: 4
From: Ft Myers Fl
Removed the steering column today. No issues. Removed the two nuts connecting the column to the flexible connector down by the steering box. Then, went to remove the firewall cover/braket only to discover I don't have one installed. Nothing was holding the column to the firewall and the seal was obviously pretty open. Removed the cover under the steering wheel/dash and the air duct for the AC. Two bolts holding the column to the dash were removed and the assembly was pulled through. Cake. Anyone have an extra firewall steering column sheild/cover laying around?
Put together my 2 Ton Engine Lift, bought it from Pep Boys for $199 and bought 4 800lb tie down straps from Harbor Freight. Thought about renting the lift but I'll be needing it off and on and it folds up. If it really gets in the way I'll take it to the storage unit. Would have cost more to rent it multiple times.
Tested both sides of the car by lifting the body a few inches using my floor jack w/ a 10" section of 4x4. The body appears to be free. I think I'll do a slow test lift this weekend at some point just to make sure everything is disconnected. If good, I want to put the wheels back on and lower the car onto 4 wheel dollies.
Need to build the body dolly but that's a job for next week ... the daughter needs flooring and trim work done this weekend. Need to decide if I'm building the long version (w/ the front end support) or the shorter version.
Thread Starter
Racer
Joined: Oct 2007
Posts: 420
Likes: 4
From: Ft Myers Fl
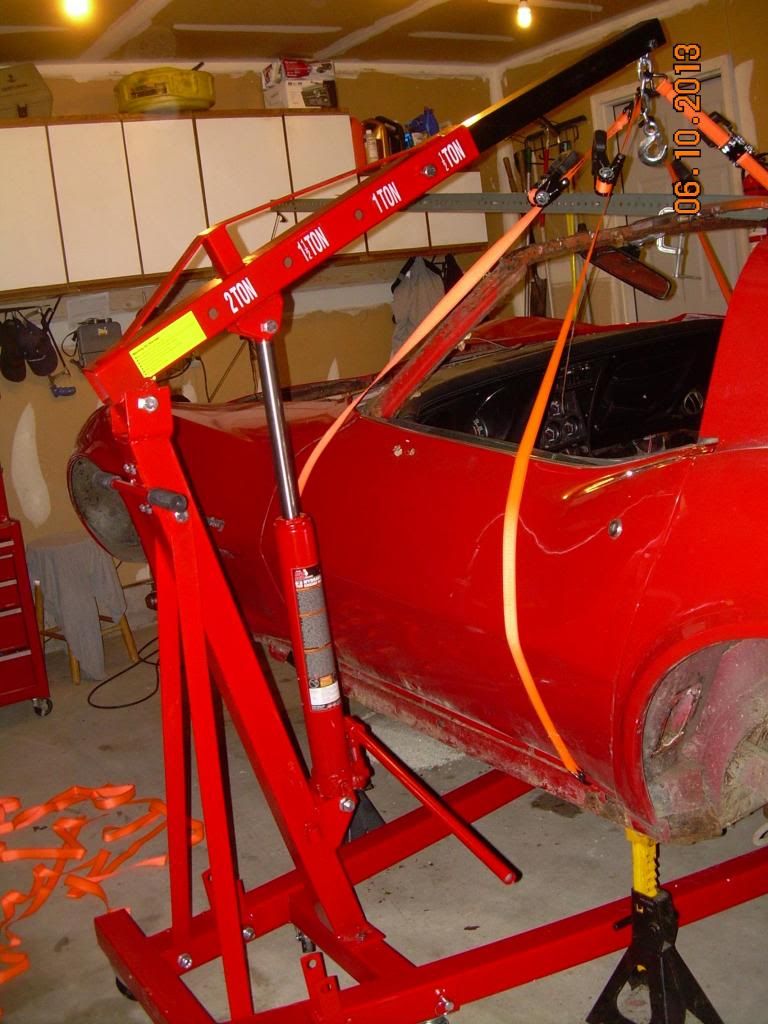
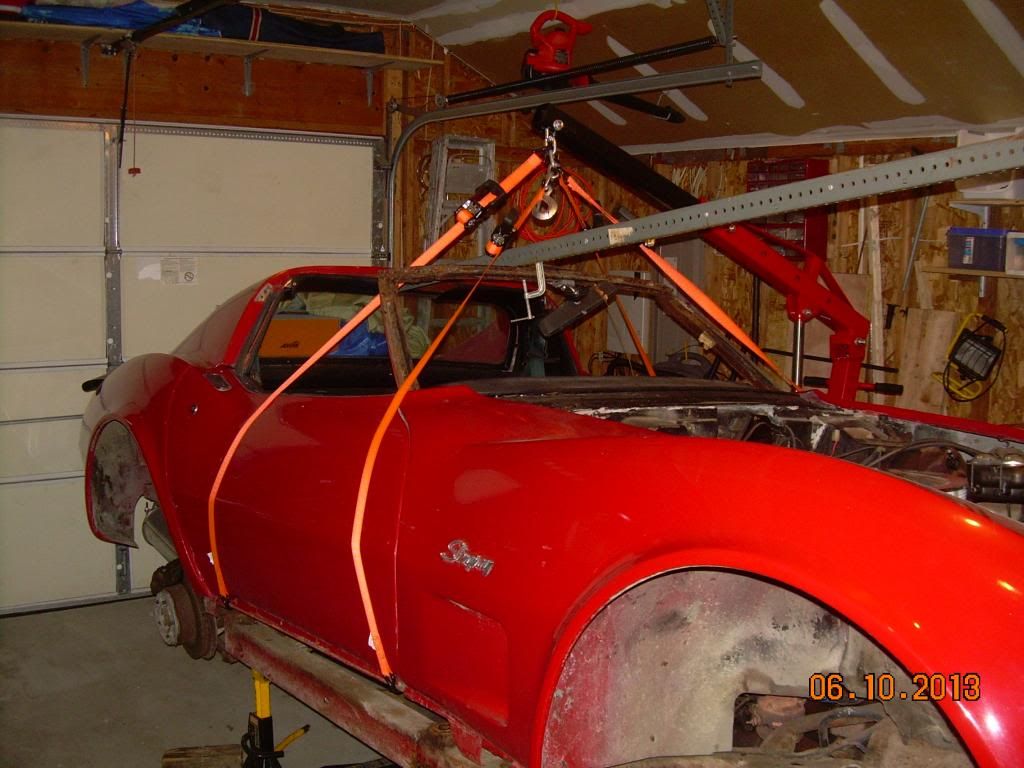
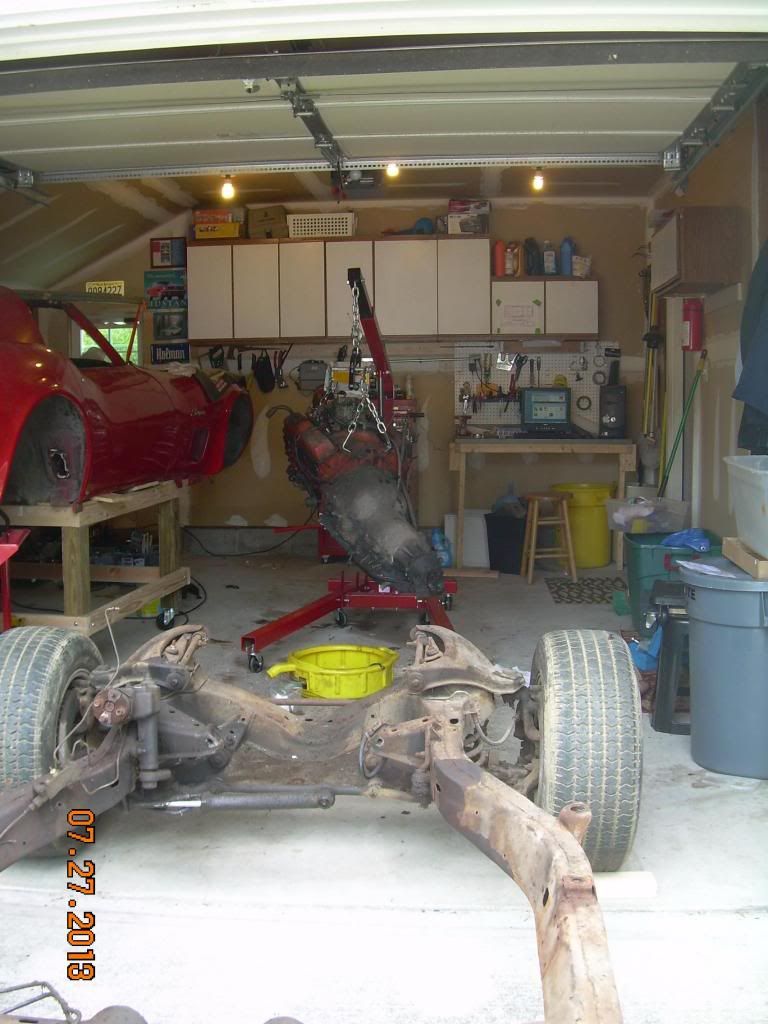
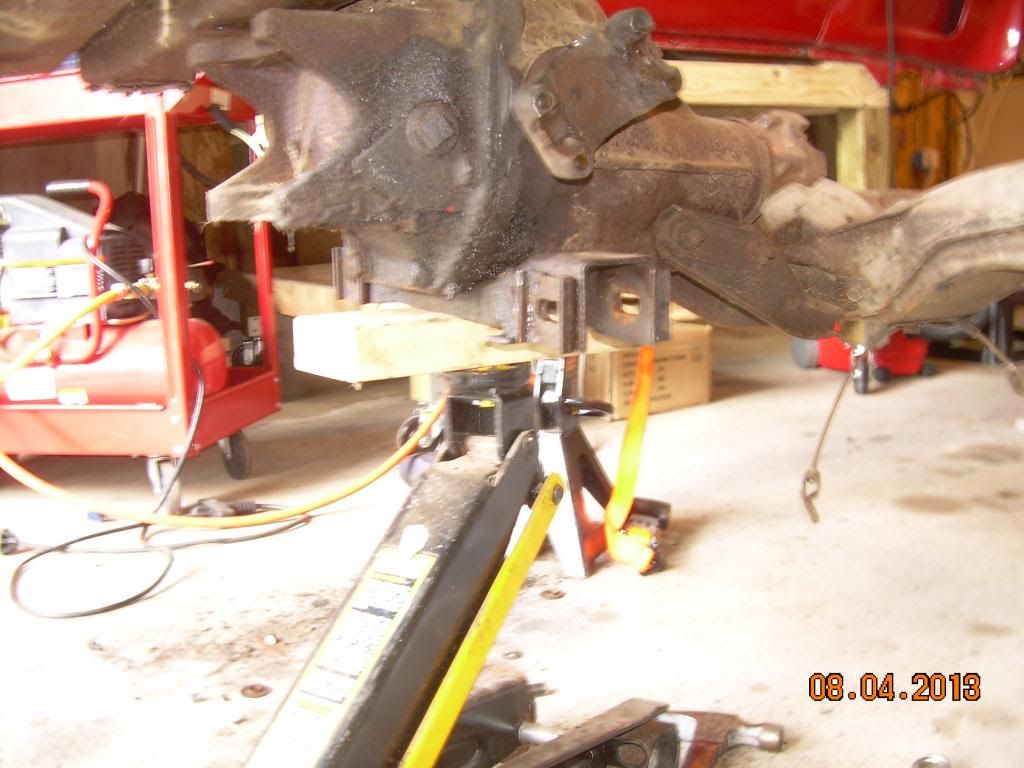
Time to build the dolly and get the car back on the wheels...here are some pictures of my trial body lift. The 2-ton "Big Red" lift had no problem. I'm using straps from Harbor Freight rated at 800lbs each. The straps get very tight but seem to hold the weight just fine.
I suspect I'll build the dolly on the drivers side of the car and move the lift to the passenger side. I'll lift the body and then roll the chassis out of the garage until I get the body on the dolly. I should have room once I relocate my work bench.
Here are some pics ...
I suspect I'll build the dolly on the drivers side of the car and move the lift to the passenger side. I'll lift the body and then roll the chassis out of the garage until I get the body on the dolly. I should have room once I relocate my work bench.
Here are some pics ...


Drifting


Joined: Aug 2010
Posts: 1,626
Likes: 140
From: Kanuckistan
2022 C3 of the Year Finalist - Modified

Thread Starter
Racer
Joined: Oct 2007
Posts: 420
Likes: 4
From: Ft Myers Fl
Been a while since my last update but I've made some progress. First, I installed a small window in the back of my garage so I could run an AC during the summer...it's been hot and humid in south jersey so far.
Build the dolly for the body and I thought it went great. Until today when I tried to put the body on it. The plans only allow for a 5" height from the floor to the lower rails. My cherry picker's long legs are 7.5" off the floor ... I never thought to check. So, with the body suspended in mid air I rebuild the bottom of the dolly. While I was at it, I cut 5" off of the height of the dolly because my "Big Red" engine lift just wouldn't clear the dolly. The 5"s made all the difference.
So, here is a picture from the last couple of weeks of work ...
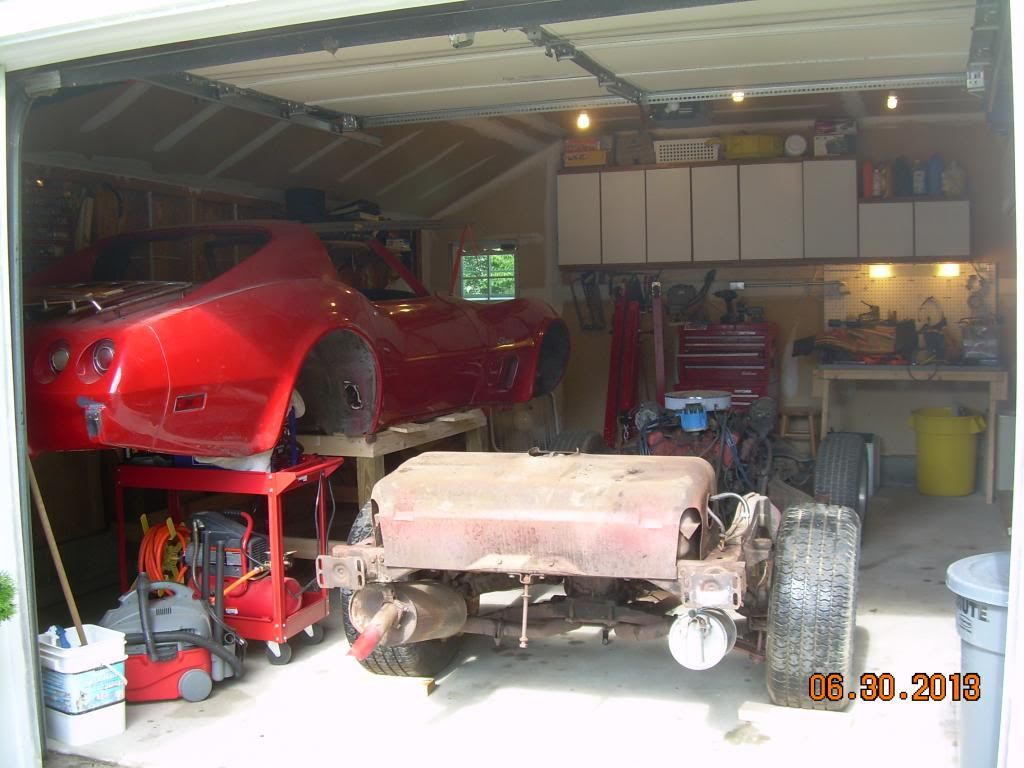

Thread Starter
Racer
Joined: Oct 2007
Posts: 420
Likes: 4
From: Ft Myers Fl
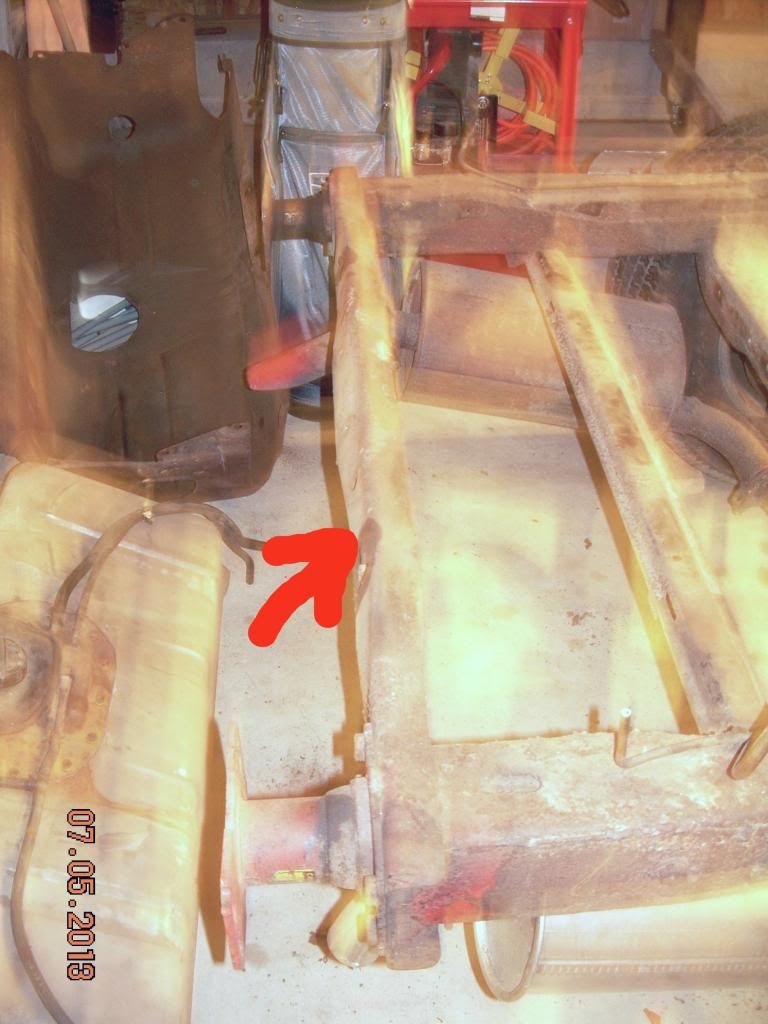
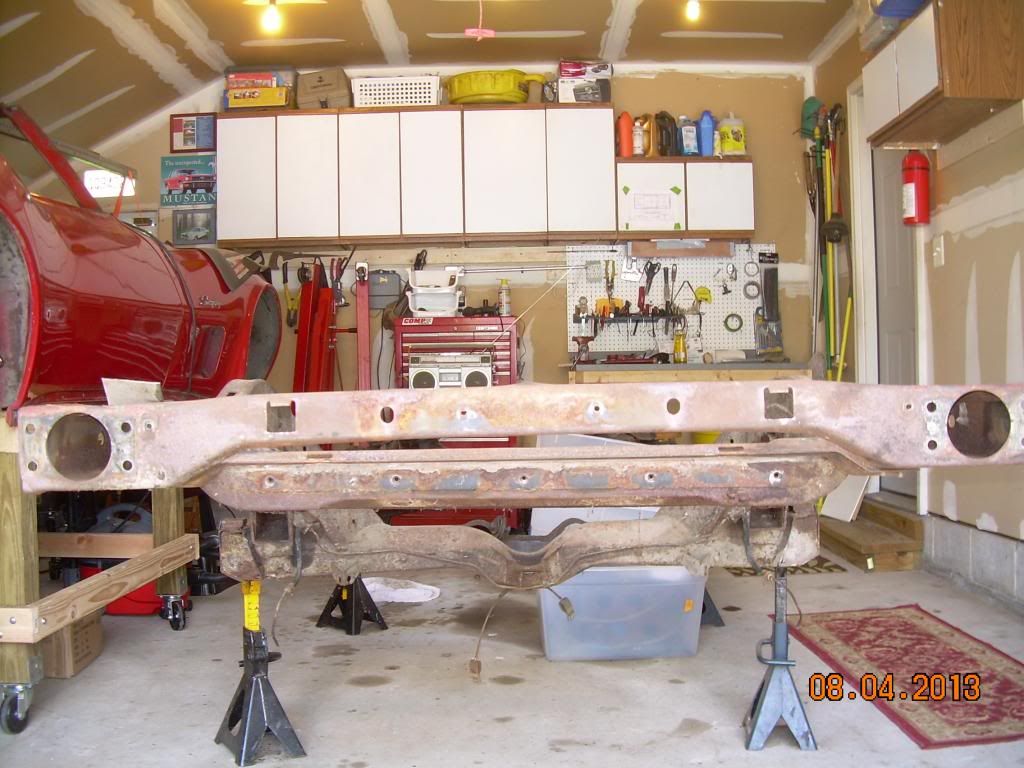
Update: I removed the gas tank and lines today. Other than dirt and surface rust, the tank, shield and frame appears OK (so far). The rear cross brace is bent up but repairable...here's a picture of it. Also, I was surprised to see that the fuel feed line, return and the other line on the left side of the car are all copper ... is that original?

Corvette Stories
The Best of Corvette for Corvette Enthusiasts

Every 2027 Corvette Engine Explained
Joe Kucinski
Designer Imagines A Corvette That Looks More Like a Corvette Than the Corvette
Verdad Gallardo
10 Ugly Corvettes That We Still Kinda Love
Joe Kucinski
Top 10 Most Expensive Corvettes Ever Sold on Bring A Trailer
Brett Foote
10 Things Every Corvette Owner Needs (2026 Edition)
Michael S. Palmer
8 Most "Only Corvette Owners Understand" Quirks and Problems
Pouria Savadkouei
10 Reasons the C6 Z06 is Still A Performance Benchmark After 20 Years
Joe Kucinski
How Much Horsepower Every Corvette Engine "LOST" in 1972
Joe Kucinski
Top 10 DOs and DON'Ts for Protecting Your Convertible Top!
Michael S. Palmer
Thread Starter
Racer
Joined: Oct 2007
Posts: 420
Likes: 4
From: Ft Myers Fl
Drive and axle shafts removed today. I thought that the axle shafts would be tougher than they were. I didn't have to move the camber out to loosen them; just raising the rear end created enough slack for them to fall out after all the u-joint bolts and braces were removed from both sides. Piece of cake. All of the u-joints appear healthy but I'll take a close look ... they do seem old.

Team Owner


Joined: Sep 2006
Posts: 31,301
Likes: 4,389
From: Westminster Maryland
Hi b,
The pictures show you're making nice progress. Are you doing a good job of bagging and labeling small parts and fasteners?... that critical at this time.
The brake and fuel lines were ALL tinned Bundy steel originally. The copper lines you're seeing were probably used as replacements since they're so much softer and easier to install with the body on the frame.
Good Luck!
Regards,
Alan
Thread Starter
Racer
Joined: Oct 2007
Posts: 420
Likes: 4
From: Ft Myers Fl
Oh yea, I'm writing a label on paper and then putting each small set of nuts/bolts/washers in a sealed sandwich bag. These all go into a small storage bin until full and then each bin will be labeled with the major parts they are used for.
Thanks for the answer to the copper line question, I thought so ... copper didn't seem correct.
Next step, move to the front and remove the engine and transmission while I can still wheel the car around. Should be the easiest engine I've ever taken out. I'll pull off the fan, covers, accessories first...oh yea...and pick up a harbor freight engine stand.
Thread Starter
Racer
Joined: Oct 2007
Posts: 420
Likes: 4
From: Ft Myers Fl
Started to dismantle the engine accessories and exhaust manifold today. No problems but here are a few interesting pictures.
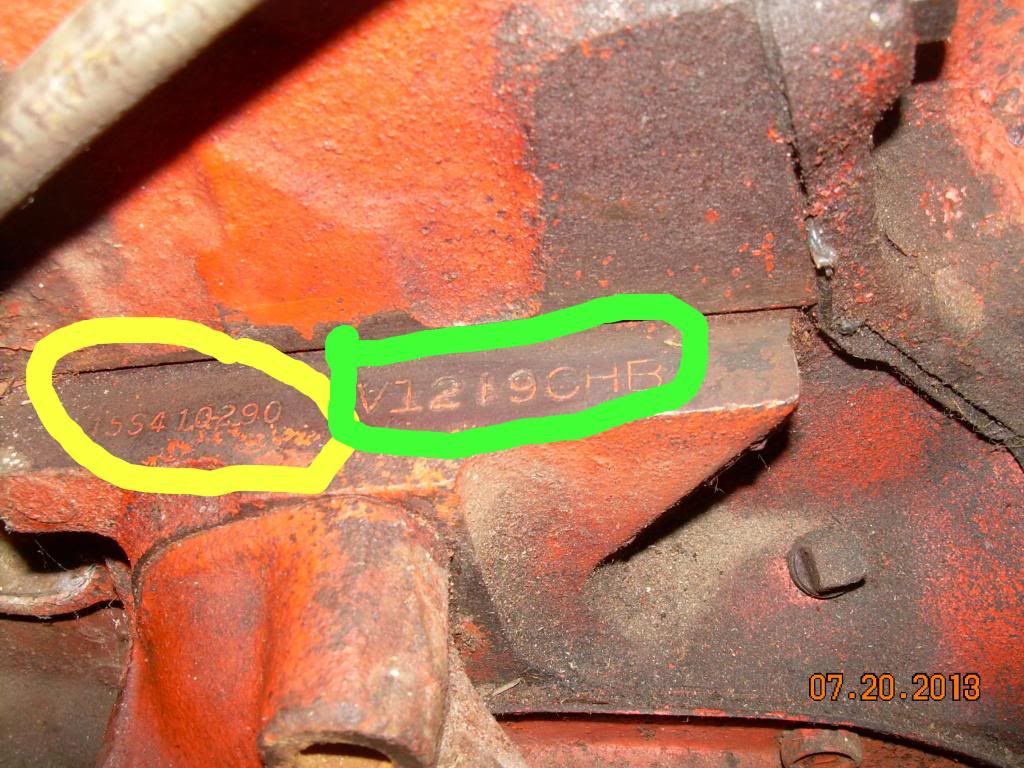
Here's a picture of the engine block stamping. The yellow circled part shows that it's a Chevy engine (starts with a 1) and the serial number (410290) matches my VIN so I know it's the original engine. The green circled part shows that its a L48 350/Automatic combination (CHB), a small block built at the Flint Plant (V) and it was built December 19th. I assume that was at the end of 1974.
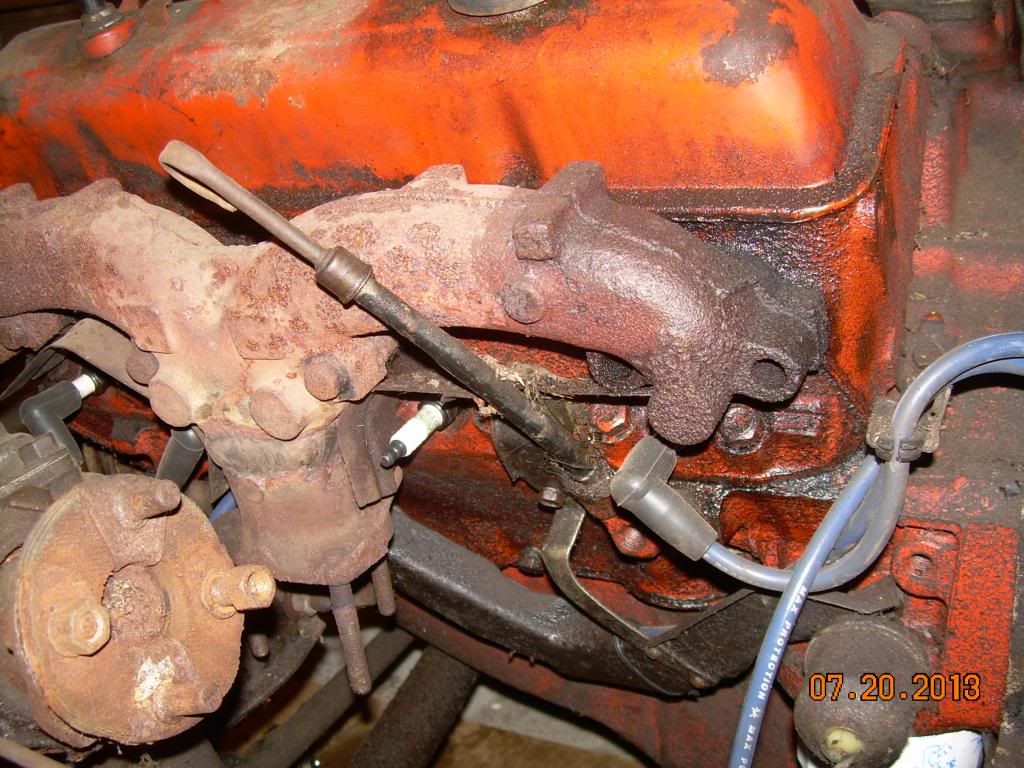
Here's a picture of the left side exhaust manifold ... no bolts in the rear two holes. I figured someone had snapped them of in the head but the good news is that they are just missing. Also, one rear bolt on the right side was missing and neither side had a gasket installed. I'm only guessing that someone had put the manifolds back on after talking off headers. The engine does not appear to have been disassembled otherwise.
Anyhow, manifolds, alternator, power steering pump, fan/pulley, AC Compressor, brackets, plugs, wires and water pump are all off ... getting closer to pulling the engine and no real problems so far.
Other than some nuts used for spacers for the alternator and the missing manifold bolts, I'm missing the right rear spark plug heat shield. That was not installed...no big deal.
Here's a picture of the engine block stamping. The yellow circled part shows that it's a Chevy engine (starts with a 1) and the serial number (410290) matches my VIN so I know it's the original engine. The green circled part shows that its a L48 350/Automatic combination (CHB), a small block built at the Flint Plant (V) and it was built December 19th. I assume that was at the end of 1974.

Here's a picture of the left side exhaust manifold ... no bolts in the rear two holes. I figured someone had snapped them of in the head but the good news is that they are just missing. Also, one rear bolt on the right side was missing and neither side had a gasket installed. I'm only guessing that someone had put the manifolds back on after talking off headers. The engine does not appear to have been disassembled otherwise.

Anyhow, manifolds, alternator, power steering pump, fan/pulley, AC Compressor, brackets, plugs, wires and water pump are all off ... getting closer to pulling the engine and no real problems so far.
Other than some nuts used for spacers for the alternator and the missing manifold bolts, I'm missing the right rear spark plug heat shield. That was not installed...no big deal.
Thread Starter
Racer
Joined: Oct 2007
Posts: 420
Likes: 4
From: Ft Myers Fl
I decided to check the compression in the cylinders while the engine is still on the frame. At first, I used a set of jumper cables to the starter but they didn't supply enough "juice". So, with an old set of battery cables I had laying around I managed to get the numbers. Of course the engine was cold so the numbers are a little low. I probably have some ring wear, the original engine has about 100K on it.
1-130, 3-125, 5-140, 7-127
2-151, 4-121, 6-150, 8-130.
Not horrible. I squirted some oil into #4 and tried again, 145 w/ the oil. Need a ring job. Anyhow, the engine is a on the list of things to do but at least I have a baseline set of compression numbers.
Managed to pull the damper w/o any problems and removed the valve covers for a look ... no sludge at all. It may be that someone took care of the engine at least. I hope to pull the engine and trans this weekend and separate them.
Melting Slicks

Joined: Jul 2009
Posts: 2,091
Likes: 40
[QUOTE=bwinterstine;1584457169]Started to dismantle the engine accessories and exhaust manifold today. No problems but here are a few interesting pictures.
Here's a picture of the engine block stamping. The yellow circled part shows that it's a Chevy engine (starts with a 1) and the serial number (410290) matches my VIN so I know it's the original engine. The green circled part shows that its a L48 350/Automatic combination (CHB), a small block built at the Flint Plant (V) and it was built December 19th. I assume that was at the end of 74.
engine would have been built during Dec 1973 and installed In a 74 model year corvette either late Dec or early months in 1974
Thread Starter
Racer
Joined: Oct 2007
Posts: 420
Likes: 4
From: Ft Myers Fl
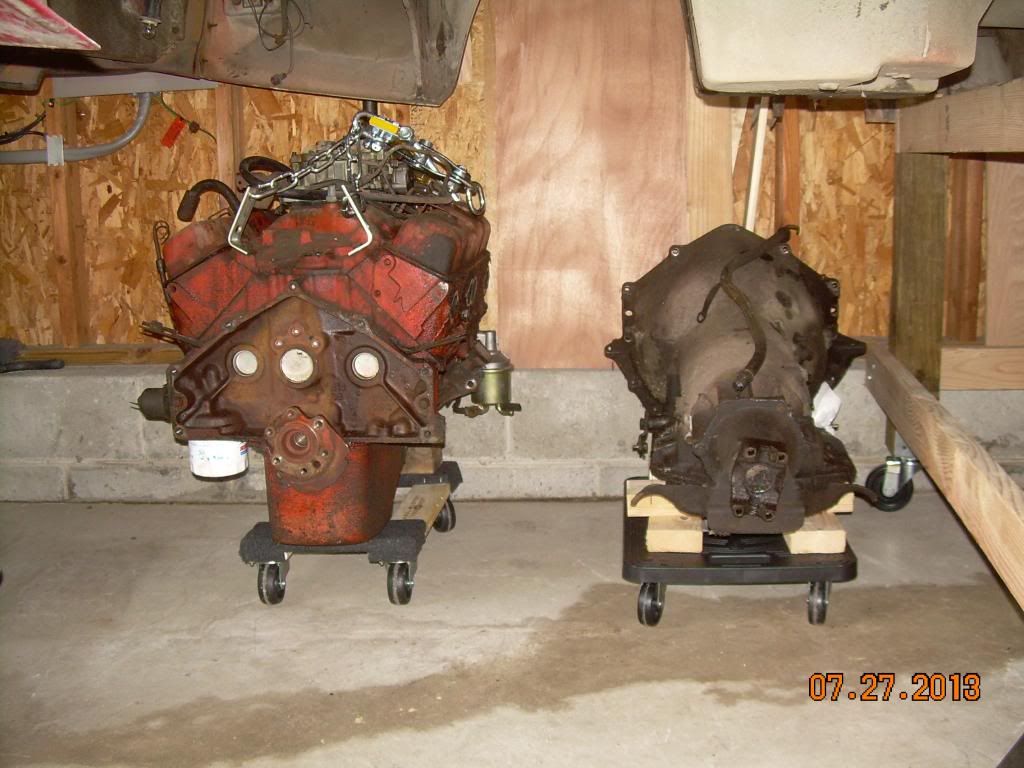
Good day today, got the engine and trans pulled as a unit and then separated them onto Harbor Freight dollies until I work on them. They are stored under the body. The frame is getting lighter every week. Here are some pictures...


Thread Starter
Racer
Joined: Oct 2007
Posts: 420
Likes: 4
From: Ft Myers Fl
Here's a reason to tear a car down completely when you are not sure of it's history ... take a look at this flex plate to converter bolt. As you know, there are only 3 of them, one was tightened about 10 ft lbs, the other two were like this...


Thread Starter
Racer
Joined: Oct 2007
Posts: 420
Likes: 4
From: Ft Myers Fl
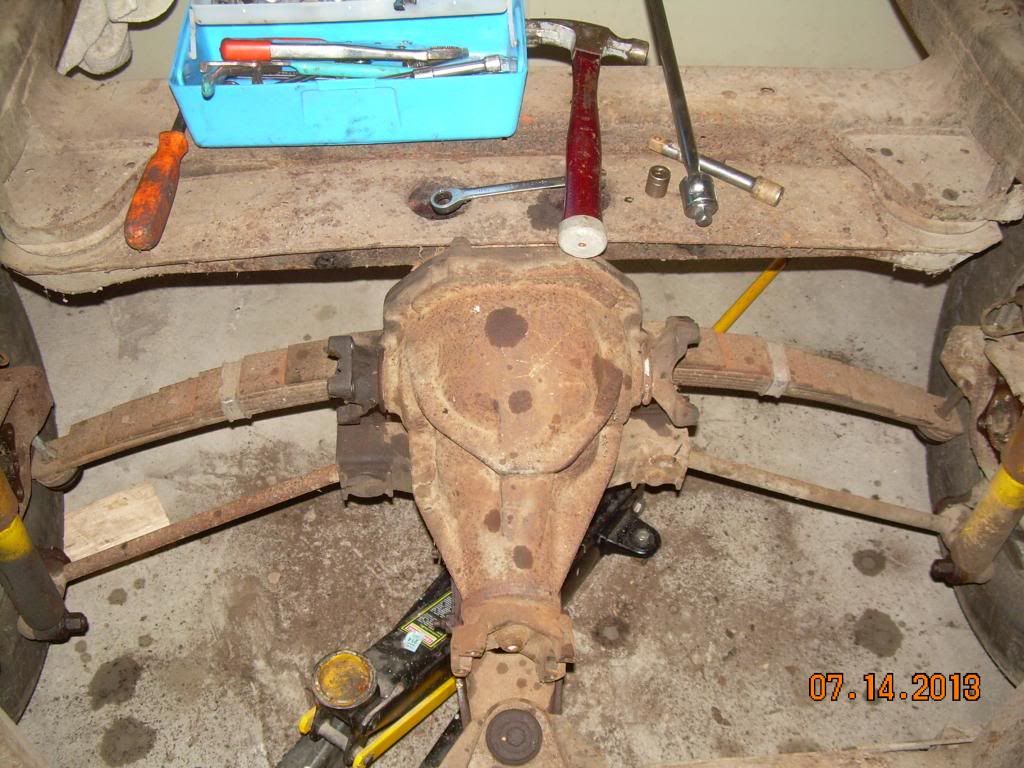
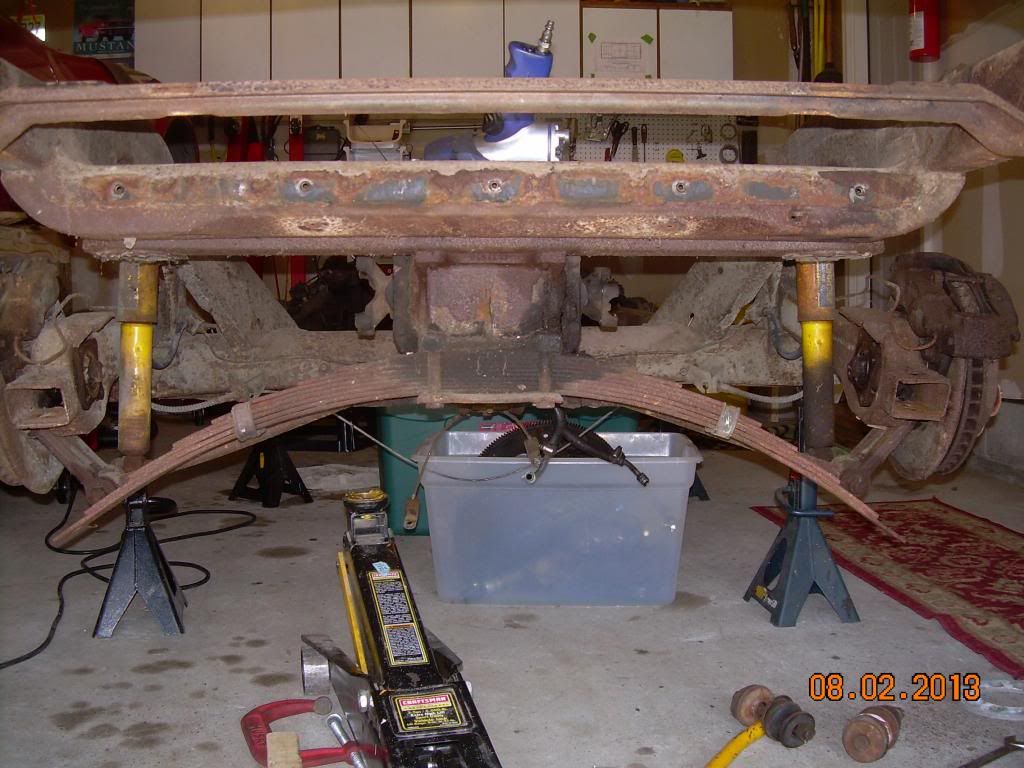
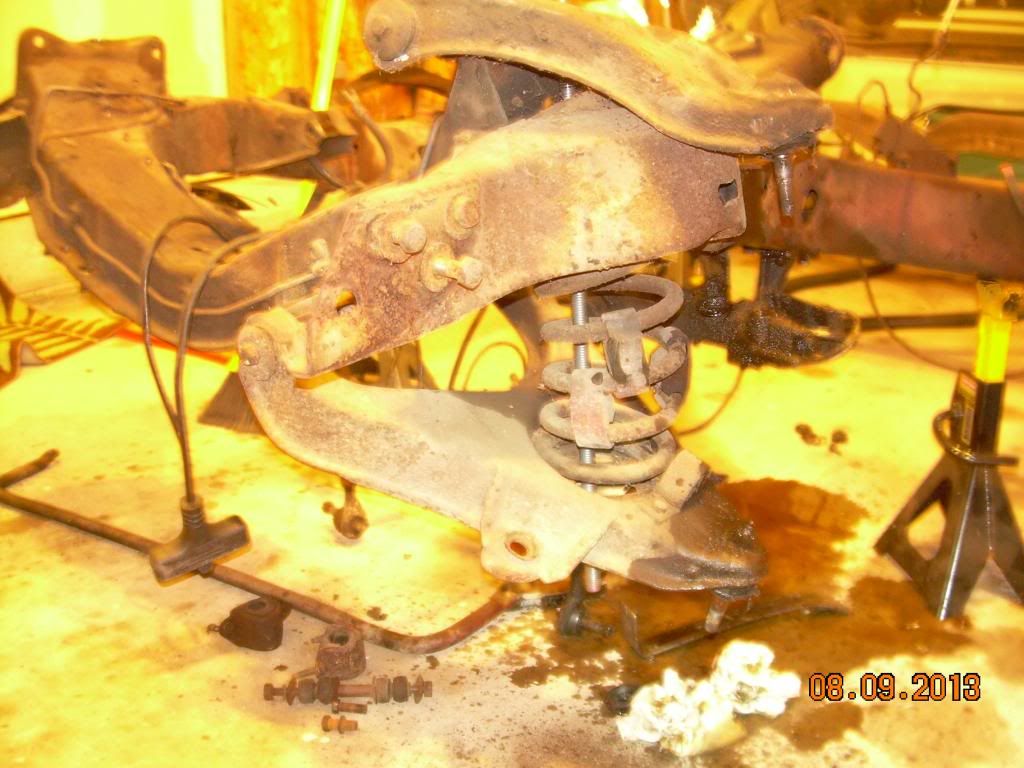
Over the past few days I was able to remove the rear suspension. I took the parts off in this order: Leaf Spring, brake calipers, trailing arms, strut rods and then the differential.
My trailing arm shims were rusted bad but I was able to remove the right side trailing arm bolt without much of a problem. The left side bolt was, and still is, frozen in the trailing arm bushing. I had to cut out the left side with a sawzall. Not hard though. I found it easier to use an 8" blade as the 6" was a little too short to reach.
The only other part I struggle with were the strut rods. Their bushings were both frozen to the camber mount bolt. A good soaking with PB plaster and tapping them back an forth with a hammer broke them free and I got them out. I can tell that parts of this car have not been dismantled since the factory. Even though the shim were rusted (see the picture below) some old GM stickers were will between them.
I still have to remove the Diff Carrier cross member and the gas tank cross member but they should be no problem.
Here are some pictures ...


Thread Starter
Racer
Joined: Oct 2007
Posts: 420
Likes: 4
From: Ft Myers Fl
I decided to check the horizontal straightness of the frame today. I used a plumb-bob to mark the four corners of the frame to the garage floor and then I measured the diagonals. Both diagonals were exactly 151 15/16 inches. This is a GOOD SIGN; the frame appears to be straight.
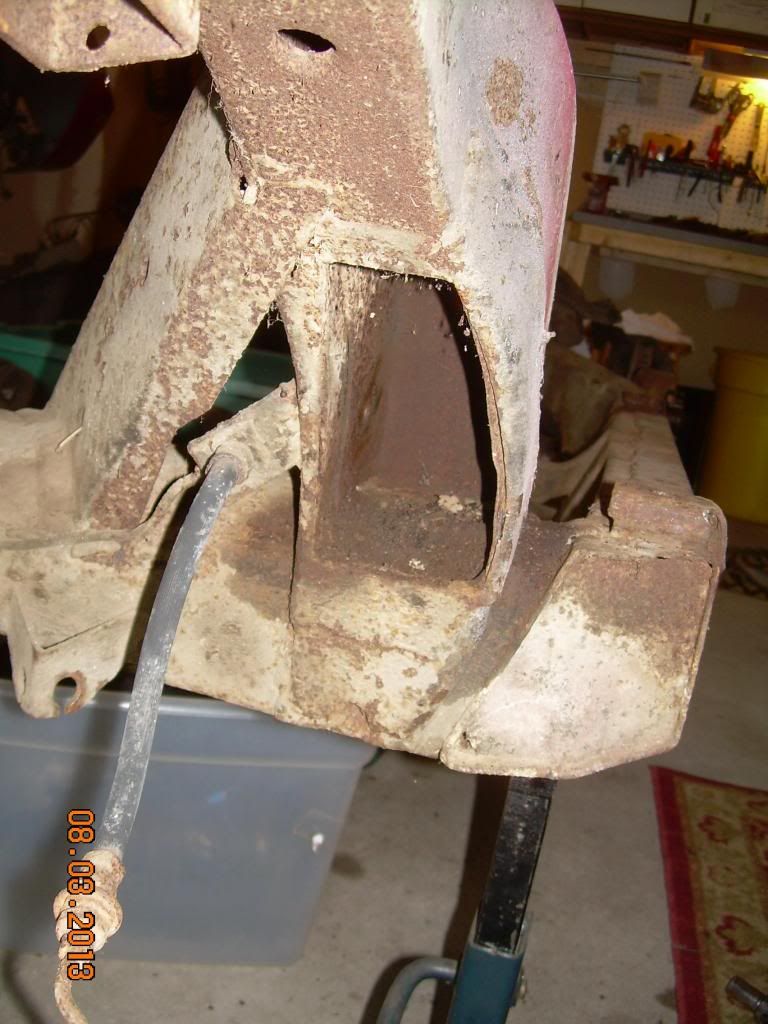
I also went to some of the typical areas that weaken due to rust, e.g. around the TA mounting points, the corner reinforcing plate near the rear of the main frame and behind the main frame where the rear extension begins. ALL SOLID with only surface rust and grime.
Both rear body mount extensions are thin and I'll probably repair them by welding in new metal on the top portion. All other mounts are good.
My plan is to have the frame sand blasted and then take a close look at all the welds. I wanted to do a quick but good check of the frame for square. Didn't want to waste money on a badly bent frame.
Thread Starter
Racer
Joined: Oct 2007
Posts: 420
Likes: 4
From: Ft Myers Fl
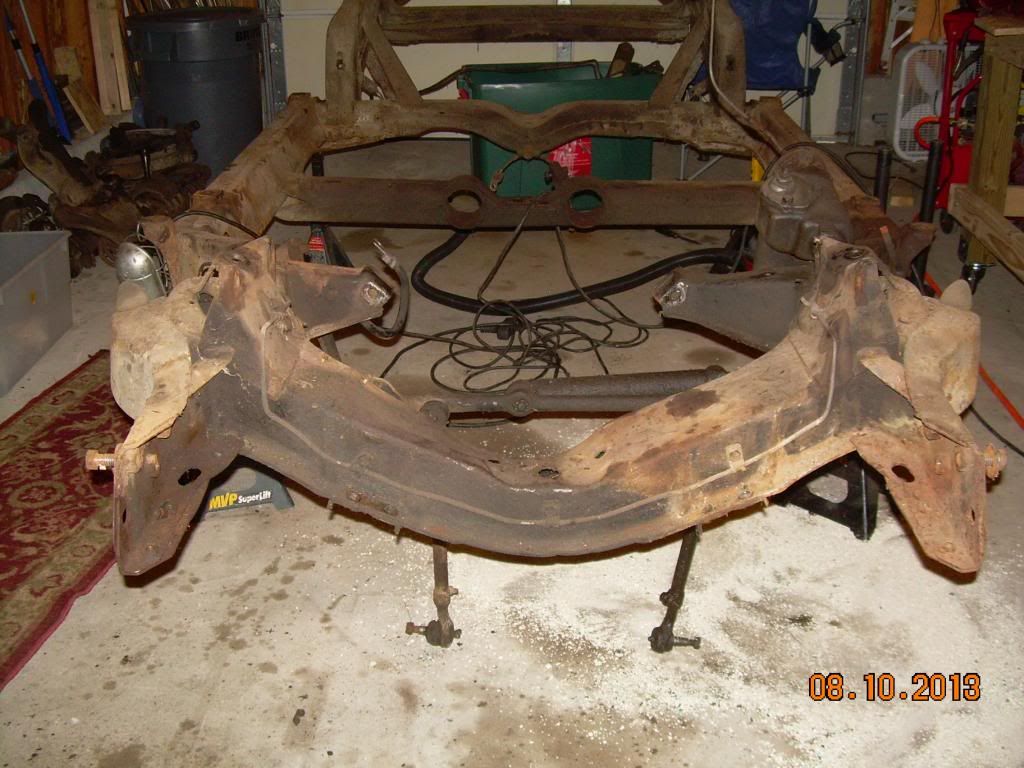
Spent 4 hours yesterday removing the front control arms; including the time to run to Lowes and pick up a 5/8"x2ft threaded rod, a couple heavy washers, two nuts and 3 steel bearing plates, 3x3 with 5/8" hole already drilled. The setup cost me about $10.00.
I inserted the treaded rod through the shock hole in the top control arm and used the bearing plates under the lower control arm. Worked perfect to take the spring tension off the arms.
Anyhow, no real problems. The control arms appeared to have been undisturbed from the factory install. The shims still had the caulking gunk on them ... I think the factory did that.
Someone (bubba again) had replaced or reinstalled the left side spindle ... neither ball joint had cotter pins installed. Nice!
By next week I hope to have the frame at the sand blasting shop. They are going to pick it up and sand blast it for $250.00-$300.00.
Couple more pics ...

