When you click on links to various merchants on this site and make a purchase, this can result in this site earning a commission. Affiliate programs and affiliations include, but are not limited to, the eBay Partner Network.
So my restoration continues. So far I have been able to save all the original components of the car except the lap seat belts, and she is looking good if I do say so myself!! Almost everything is original to the car.
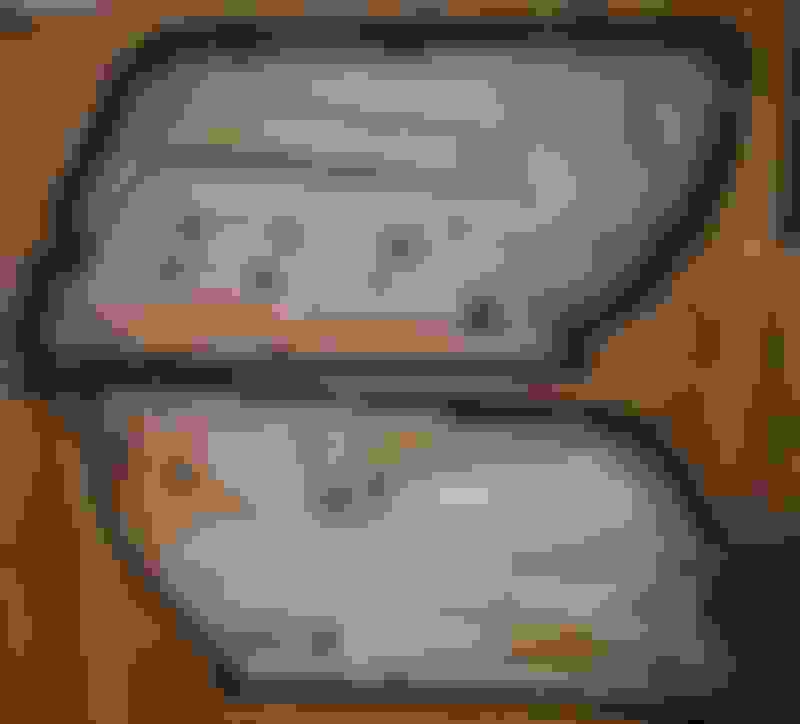
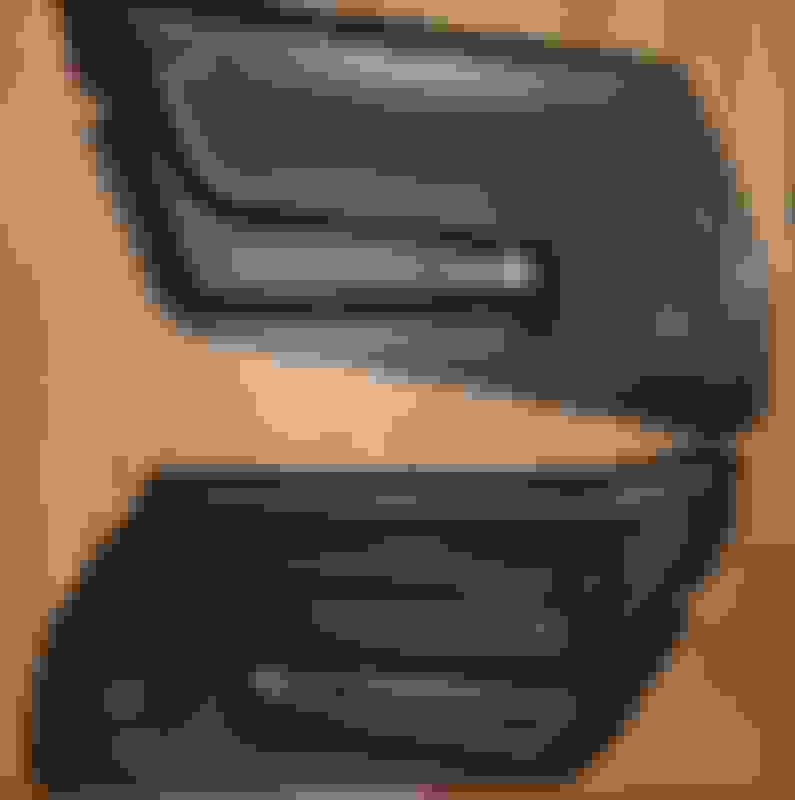
So on to the door panels. It looks like the passengers is original and dated to the car. It has two exposed chrome screws in the upper corners holding the panel to the door. The passengers side seems to be different but not a repro and has no date stamp. There are no holes in vinyl skins in the corners for the chrome screws. However on the back you can see the brass grommets in place for the screw supports.
Here are some photos:
So here is some questions, First is the drivers panela GM manufactured? Could it be the original panel that came with the coupe? Probably not because where are the screw holes. Could the original been reskinned years ago?
I have looked all over the internet and have seen both panels with screws in the corners and without, which is correct as it came from GM assembly line?
Where the panels manufactured without the holes in place and then punctured on assembly? Seems odd since the grommets are in a specific local?
With regards to the window crank and lock ****, do you put the c clip in place and then force them in place? I know that the door lock has a spline that needs to be aligned. seems a little violent to have to force them on, but I have never done it before so maybe the clips give easily
Thanks greatly for all the assistance in putting her back as she came!!!! Ike
Last edited by general ike; Apr 10, 2017 at 10:12 PM.
Yes, you just push the window cranks and lock ***** back on with the clips in place. You can usually line them up with a little pressure before pushing them all the way on.
Sorry - don't know the answer to your other door panel questions, other than the Corvette America repro door panels on my '73 have plastic backing material rather than the fiberboard that yours are made of.
2025 c3 ('74-'82) of the Year Finalist - Unmodified
2019 C3 of Year Finalist (appearance mods)
Hi general Ike,
Your door panels look original but someone smarter may have the correct answer.
The replacement panels that I bought several years ago are black plastic on the back side and they came without holes on the TOP front and back and I did not make any holes in mine.
The two door pull screws and the lower attachments hold the panel in place very well.
I personally feel that the TOP front and rear screws look like Bubba installed them.
Also, those TOP screws dig into the panel.
Dub, a forum member, has a trick he will share with you to keep those two screws from pulling into the panel if you decide to use those screws.
Here's a picture I took earlier today.
Last edited by Peterbuilt; Apr 11, 2017 at 12:21 AM.
Reason: forgot the pics.
Hi gi,
Like the view from above VERY much!!!
The 70-72 door panels were typically installed using two screws; one at the top front of the panel and one at the top rear.
The fastener used was a chrome cross-recess oval-head screw. Various (3?) types of finishing washers were used during that period to prevent the fastener head from penetrating the vinyl skin.
Cupped and flat finishing washers are seen.
I think part of the cause of fasteners pulling through the vinyl door panel is that the top of the door panels isn't properly installed OVER the upper flanges of the steel door frame.
If done properly the screws are needed to only hold the panel in place. But if installed improperly the screws are used to PULL the panel into place which puts undo pressure on the vinyl skin and fiberboard.
Regards,
Alan
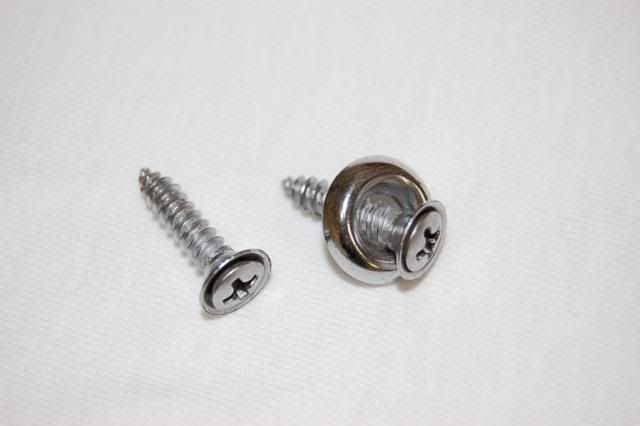
Screws from a 71. One with a ferrel and one with a ferrel and 'cupped' type finishing washer.
Thanks all for the clarifications!!!!!!! I do like to keep and restore things as they were originally but its tempting not to punch holes in the panel. I must admit I agree, it does look amateurish.
I guess it will depend on how best I can possibly fill in and repair the one panel's two punctures. If I can make that look good I think I will leave the screws out, if I cannot then I will put the screws in on both.
I forgot to ask, when dying these panels will the stitching pick up the dye? I think they look nice "in the white", but I cannot think of a way to protect them from the dye. Any thoughts???
Alan I like that photo's angle as well. I was too lazy and should have got the ladder out and got higher up to take it. I think it would look even nicer. Will do that next time. These cars photograph beautifully!!! Ike
Hi Ike,
Unusual views of the car are always interesting.
The 2 screws on the door panels are in keeping with the MANY other exposed screws through out the interior.
If done correctly they're very typical of the way interiors were assembled 50 years ago.
We've become used to today's interiors which typically have no exposed screws.
I don't mind the screws at all� I just don't like to see them puncturing the part they're intended to attach.
Regards,
Alan
Here is a pic of the passenger door on the "489MILER"
a untouched original door panel if you enlarge the pic you will see the two screws
left/right top
I suspect they ARE the original panels. They do look like they have been "worked on" by a PO or hired shop. I do not believe they have been re-skinned, as the stitching looks to be 'original' factory type.
I could not tell for sure from the photo of the insides of the panels, but if the screw hole configurations are correct on the cardboard backing, the factory MAY have just omitted installation of the top screws on that one panel. It can (and has) happened, I'm sure. Since the panel fits OVER the lip of the door, it would not have been an obvious customer issue that the original owner might have complained about.
Last edited by 7T1vette; Apr 11, 2017 at 10:11 AM.
I suspect they ARE the original panels. They do look like they have been "worked on" by a PO or hired shop. I do not believe they have been re-skinned, as the stitching looks to be 'original' factory type.
I could not tell for sure from the photo of the insides of the panels, but if the screw hole configurations are correct on the cardboard backing, the factory MAY have just omitted installation of the top screws on that one panel. It can (and has) happened, I'm sure. Since the panel fits OVER the lip of the door, it would not have been an obvious customer issue that the original owner might have complained about.
"They do look like they have been "worked on" by a PO or hired shop" "This the Real-Deal" just like it left the Factory
i may have wiped the panel with a dry rag 35+ years ago
........................................ ....... tom "489-MILER"
Last edited by MISTERZ06; Apr 11, 2017 at 09:51 PM.
"They do look like they have been "worked on" by a PO or hired shop" "This the Real-Deal" just like it left the Factory
i may have wiped the panel with a dry rag 35+ years ago
........................................ ....... tom "489-MILER"
Hi Tom,
If you don't mind me asking, what are the marks (from) showing on your center console and woodgrain insert?
.........Also a tip for the OP who asked about how to install the clip that holds the window crank handle on. Make sure the clip is installed in the slot on the handle so that the ends face the handle. That way, you'll always know to insert the removal tool as shown in my photo below, and make clip removal a cinch. Instead of spinning the tool around the **** trying to find and release the clip. By the way I think this new style tool is much easier to work with than the old school clip removal tools (also shown below) we used to use......
Tooch
Last edited by Tooch1; Apr 11, 2017 at 11:15 AM.
Reason: Added info.
That is the tool I used and the kit I have has a thinner longer version that I used made removing the lock **** much easier.
Of course you are correct Alan, the screws are part of the cars look so I guess I am back to restoring the panels with the screws. Thanks again all!!!! Ike
Hi Tom,
If you don't mind me asking, what are the marks (from) showing on your center console and woodgrain insert?
.........Also a tip for the OP who asked about how to install the clip that holds the window crank handle on. Make sure the clip is installed in the slot on the handle so that the ends face the handle. That way, you'll always know to insert the removal tool as shown in my photo below, and make clip removal a cinch. Instead of spinning the tool around the **** trying to find and release the clip. By the way I think this new style tool is much easier to work with than the old school clip removal tools (also shown below) we used to use......
Tooch
HI Tooch1
good question - i went and looked at it - i wiped a small tiny section, and it looks like new - not sure what it/is - must be from sitting all these years - i do not want to clean it all off -want it to stay untouched
..................................... tom