


Starting conversion and build
Thread Starter
Burning Brakes


Joined: Feb 2014
Posts: 1,045
Likes: 226
From: Cape Neddick Maine
2020 C3 of the Year Finalist - Modified
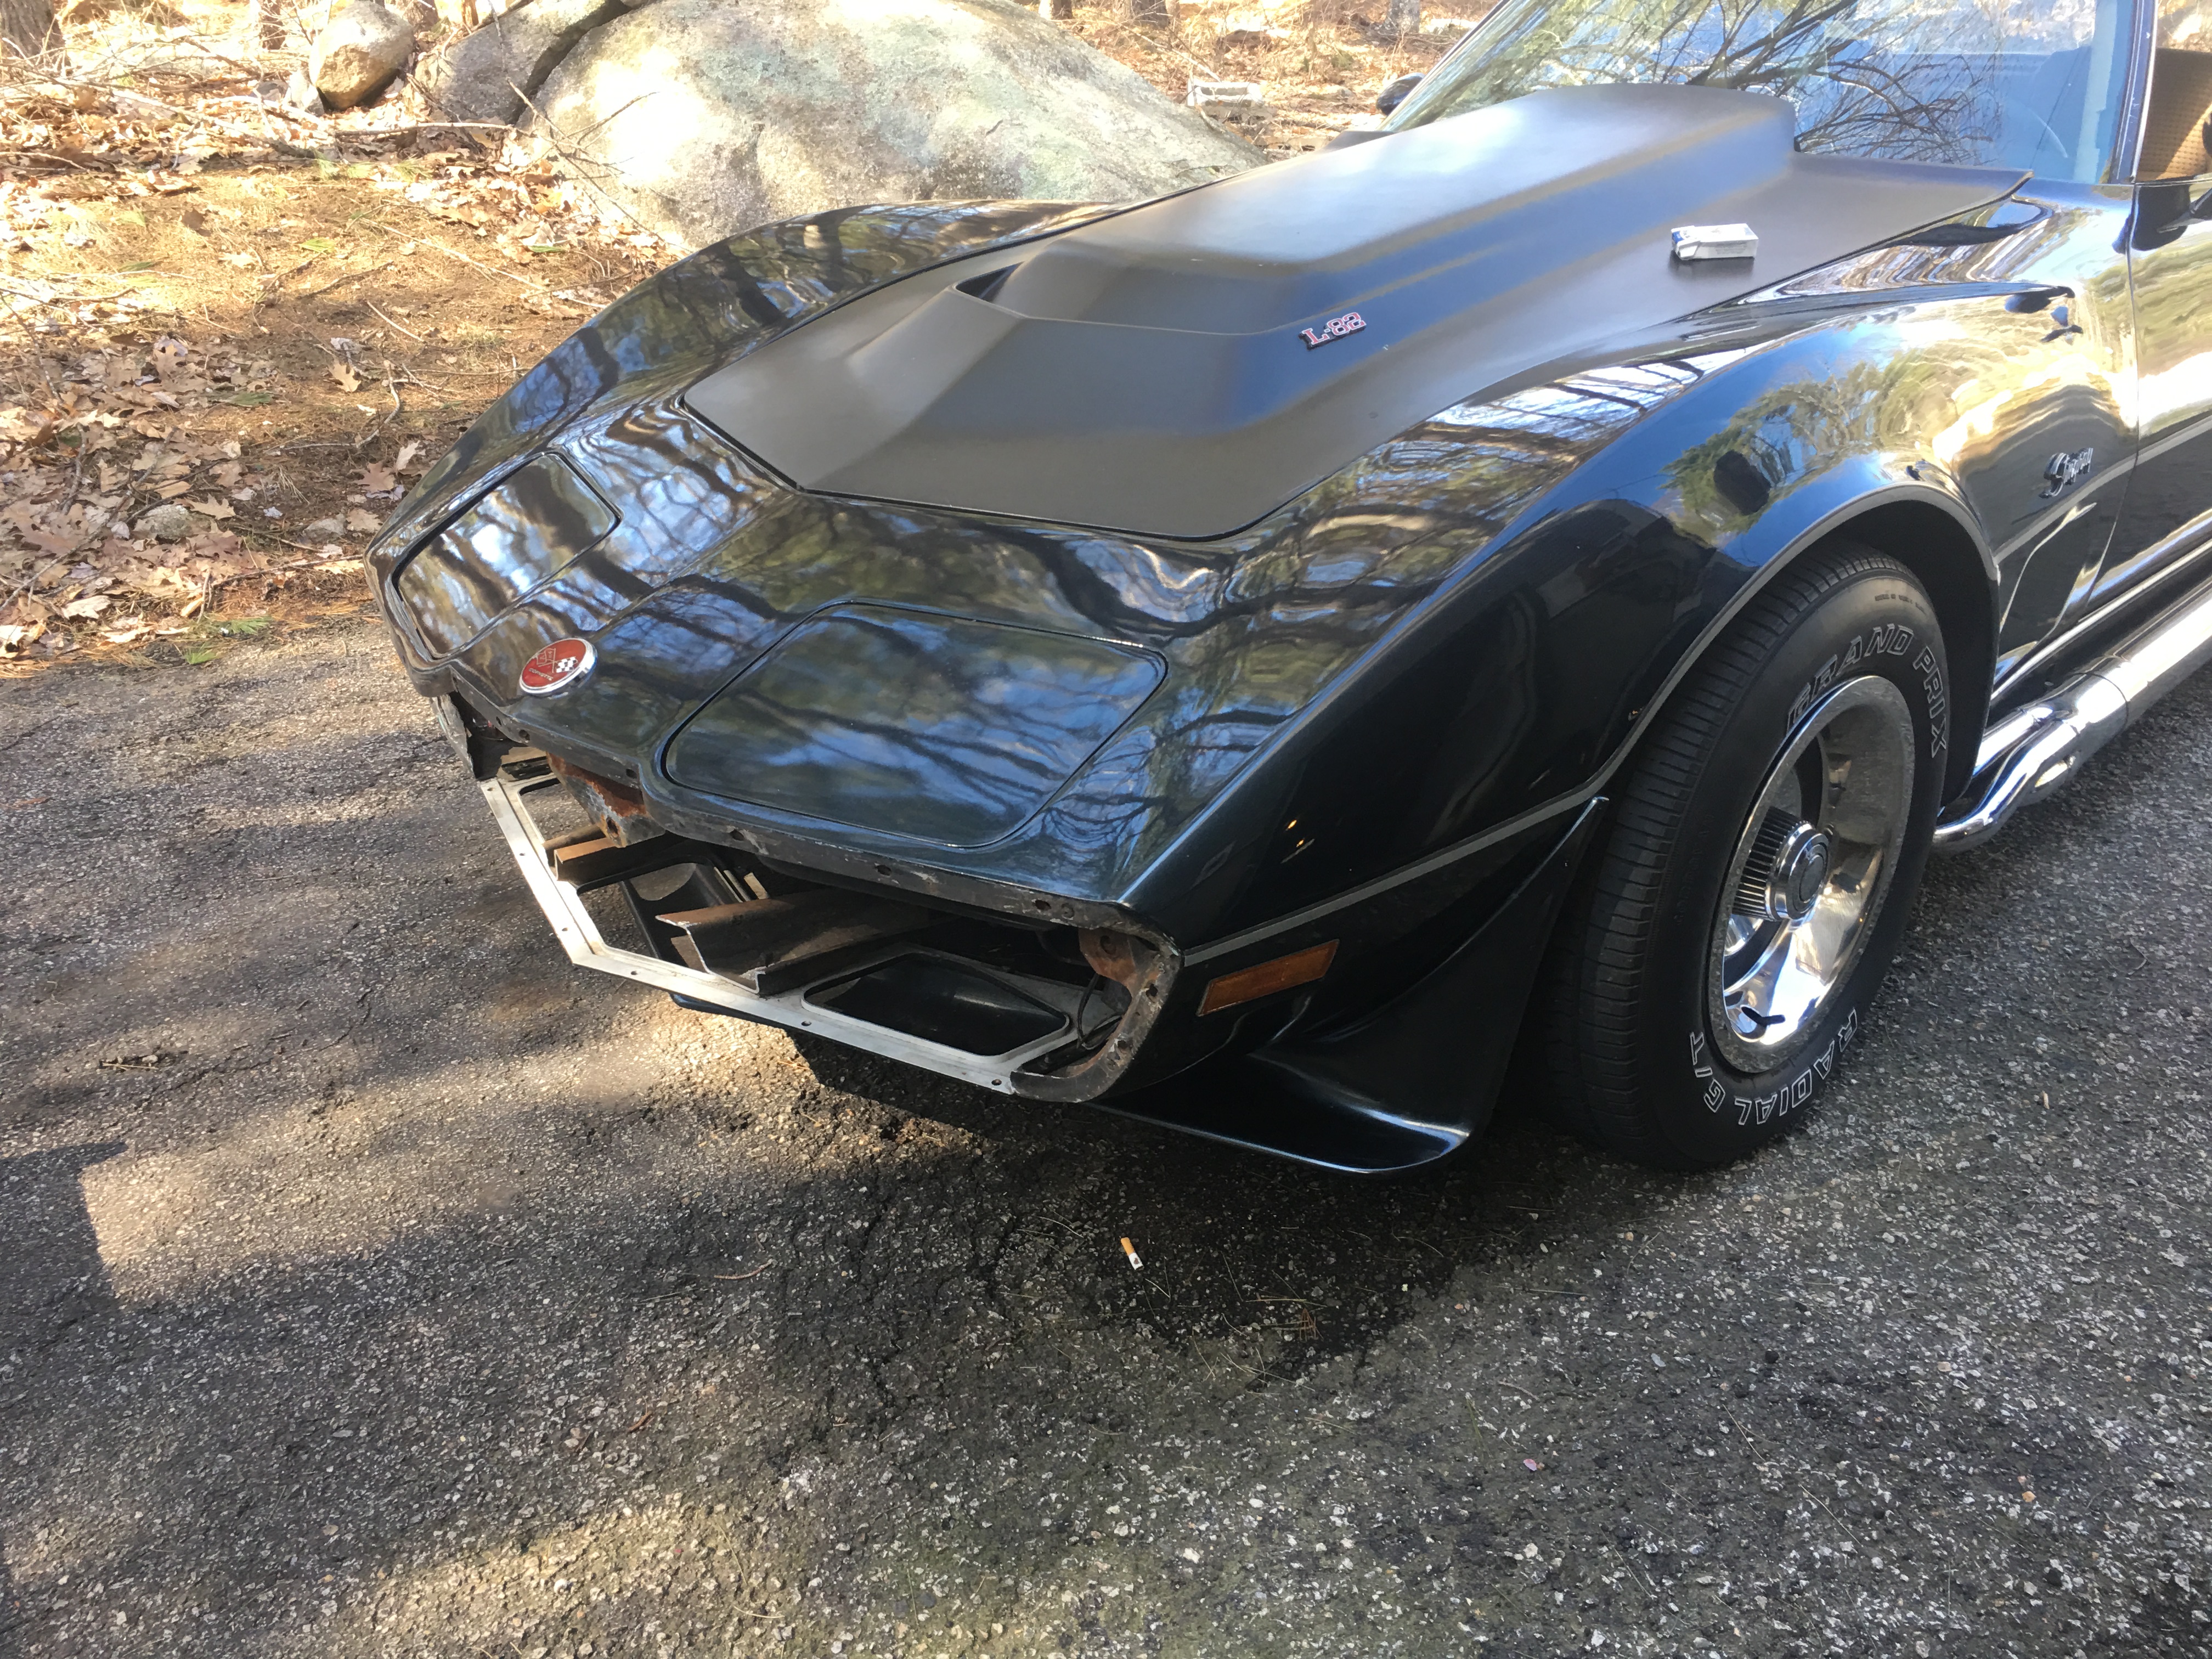
So I decided it was time to do some needed body conversions. It is also time to probably start a thread and hope you join along with the mess I am getting into. Some of the photos have been posted but here is what I am doing.
Thread Starter
Burning Brakes
Joined: Feb 2014
Posts: 1,045
Likes: 226
From: Cape Neddick Maine
2020 C3 of the Year Finalist - Modified
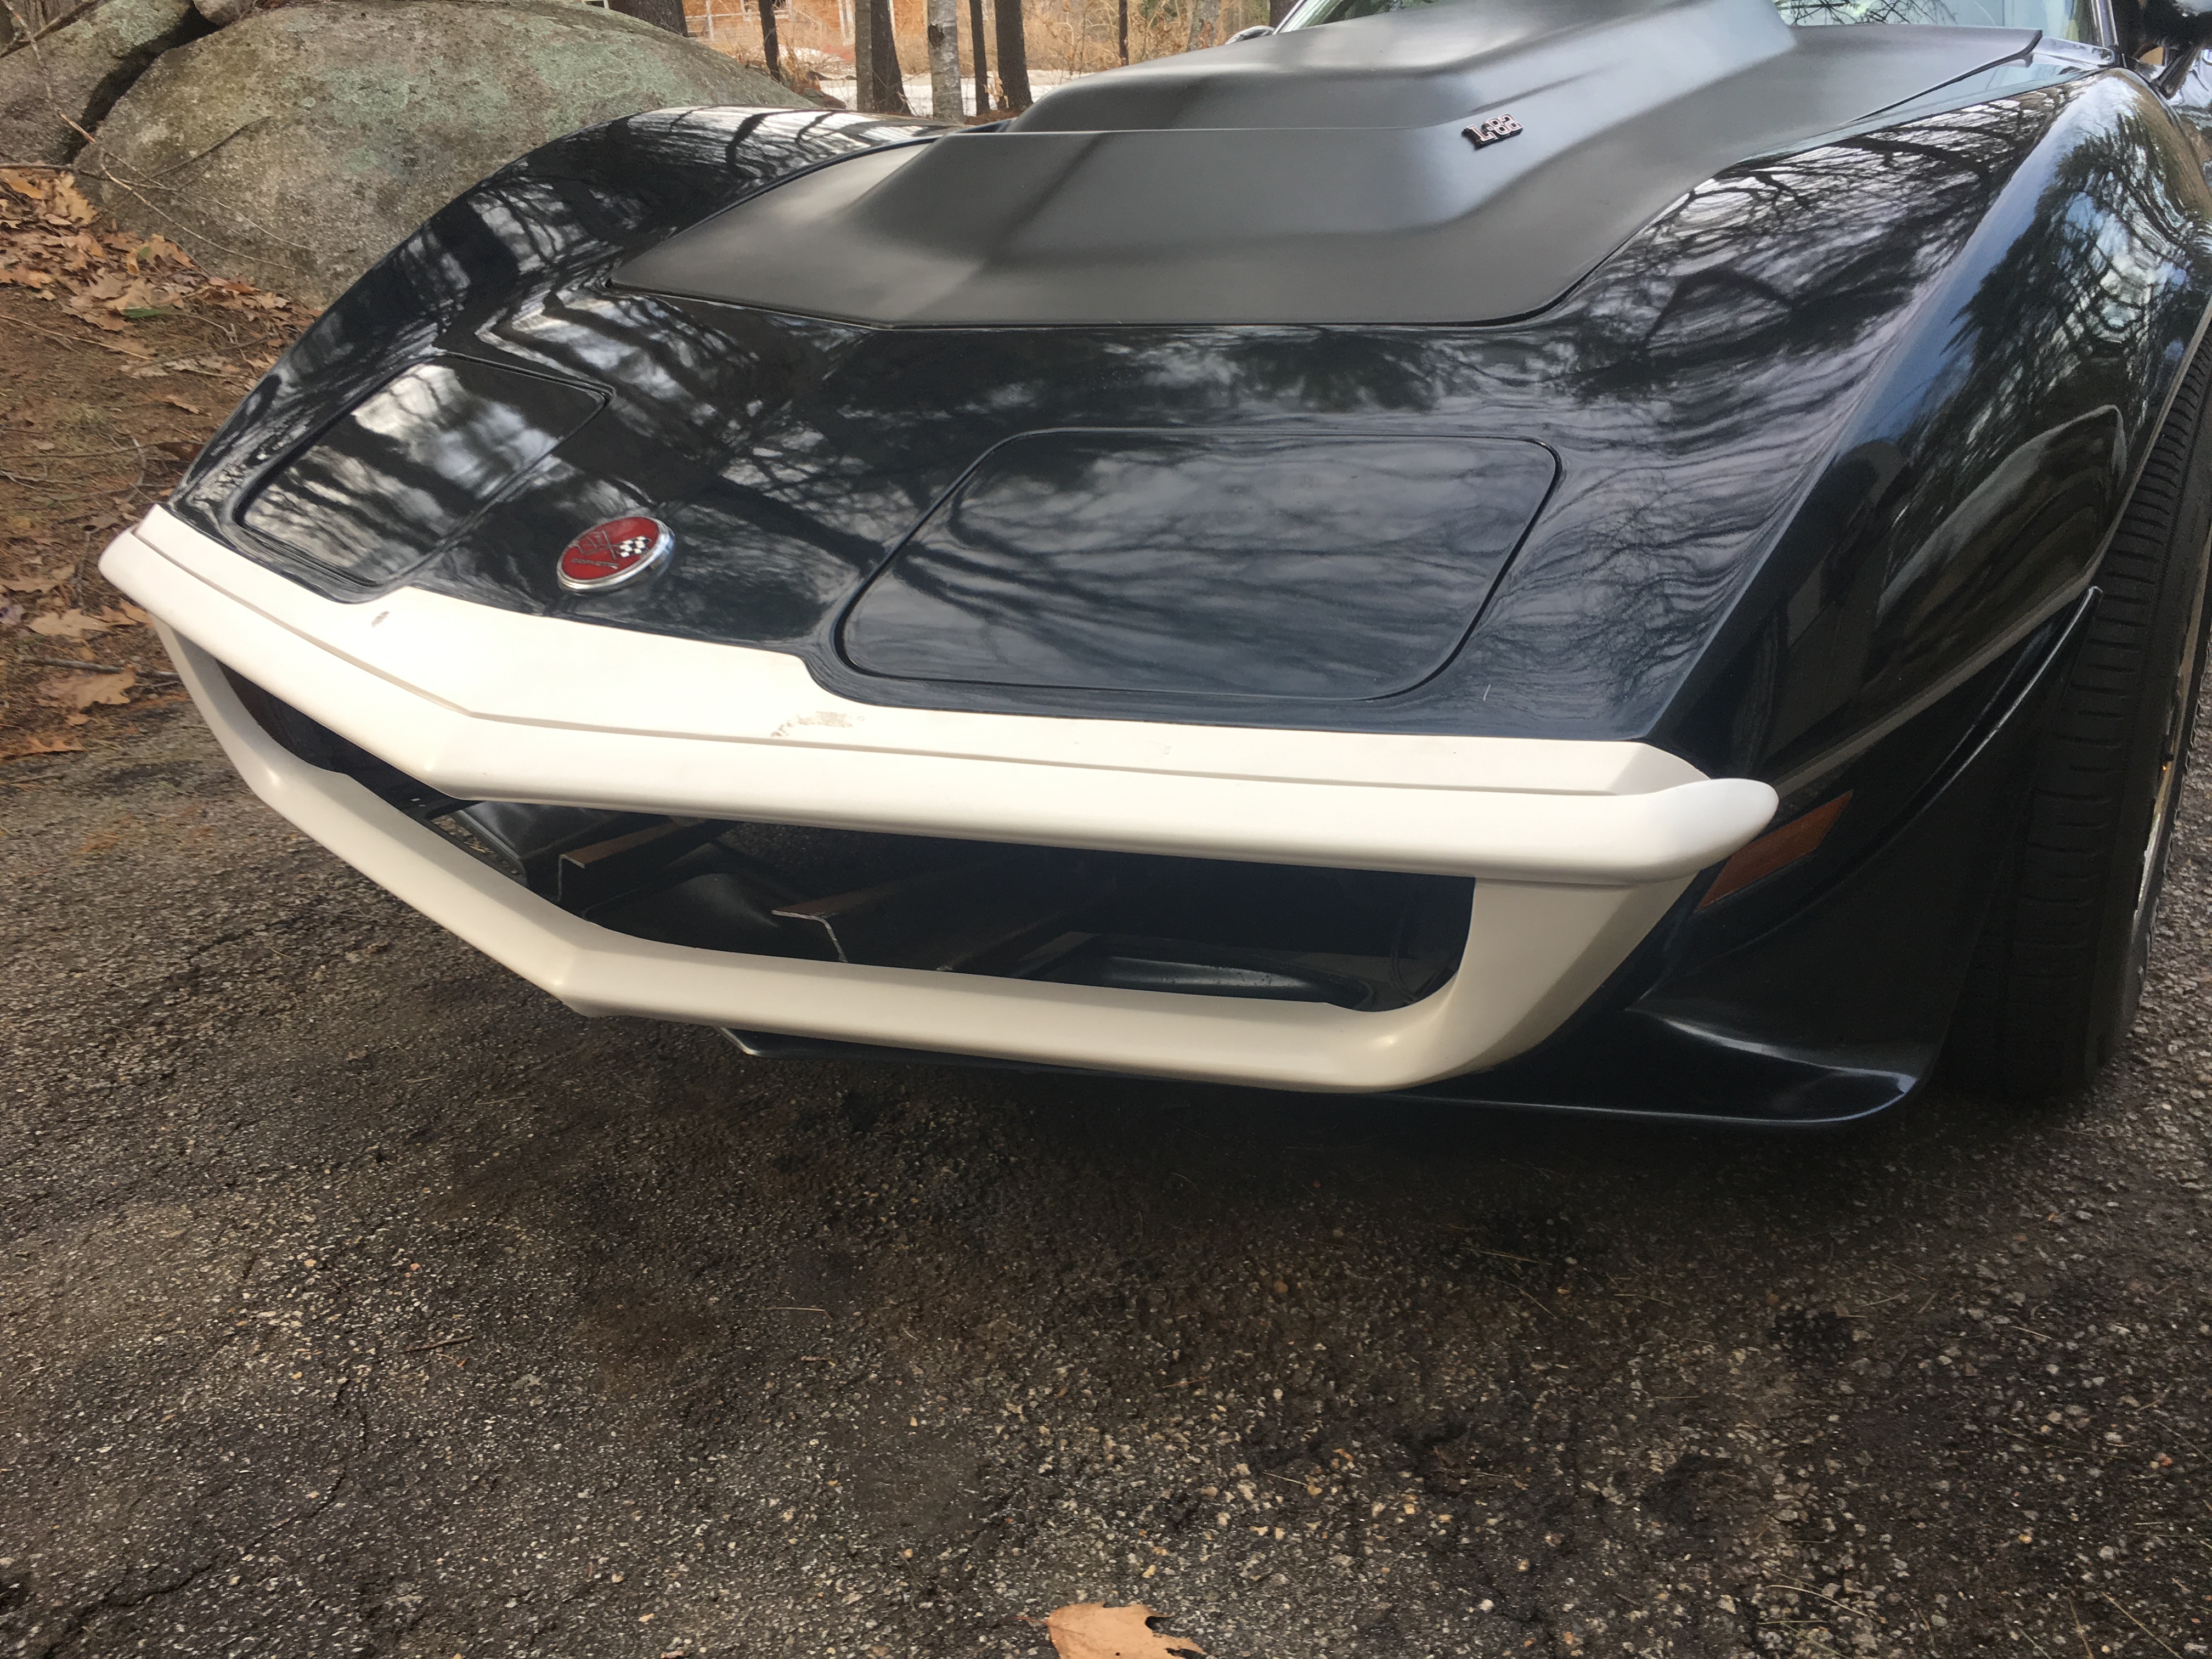
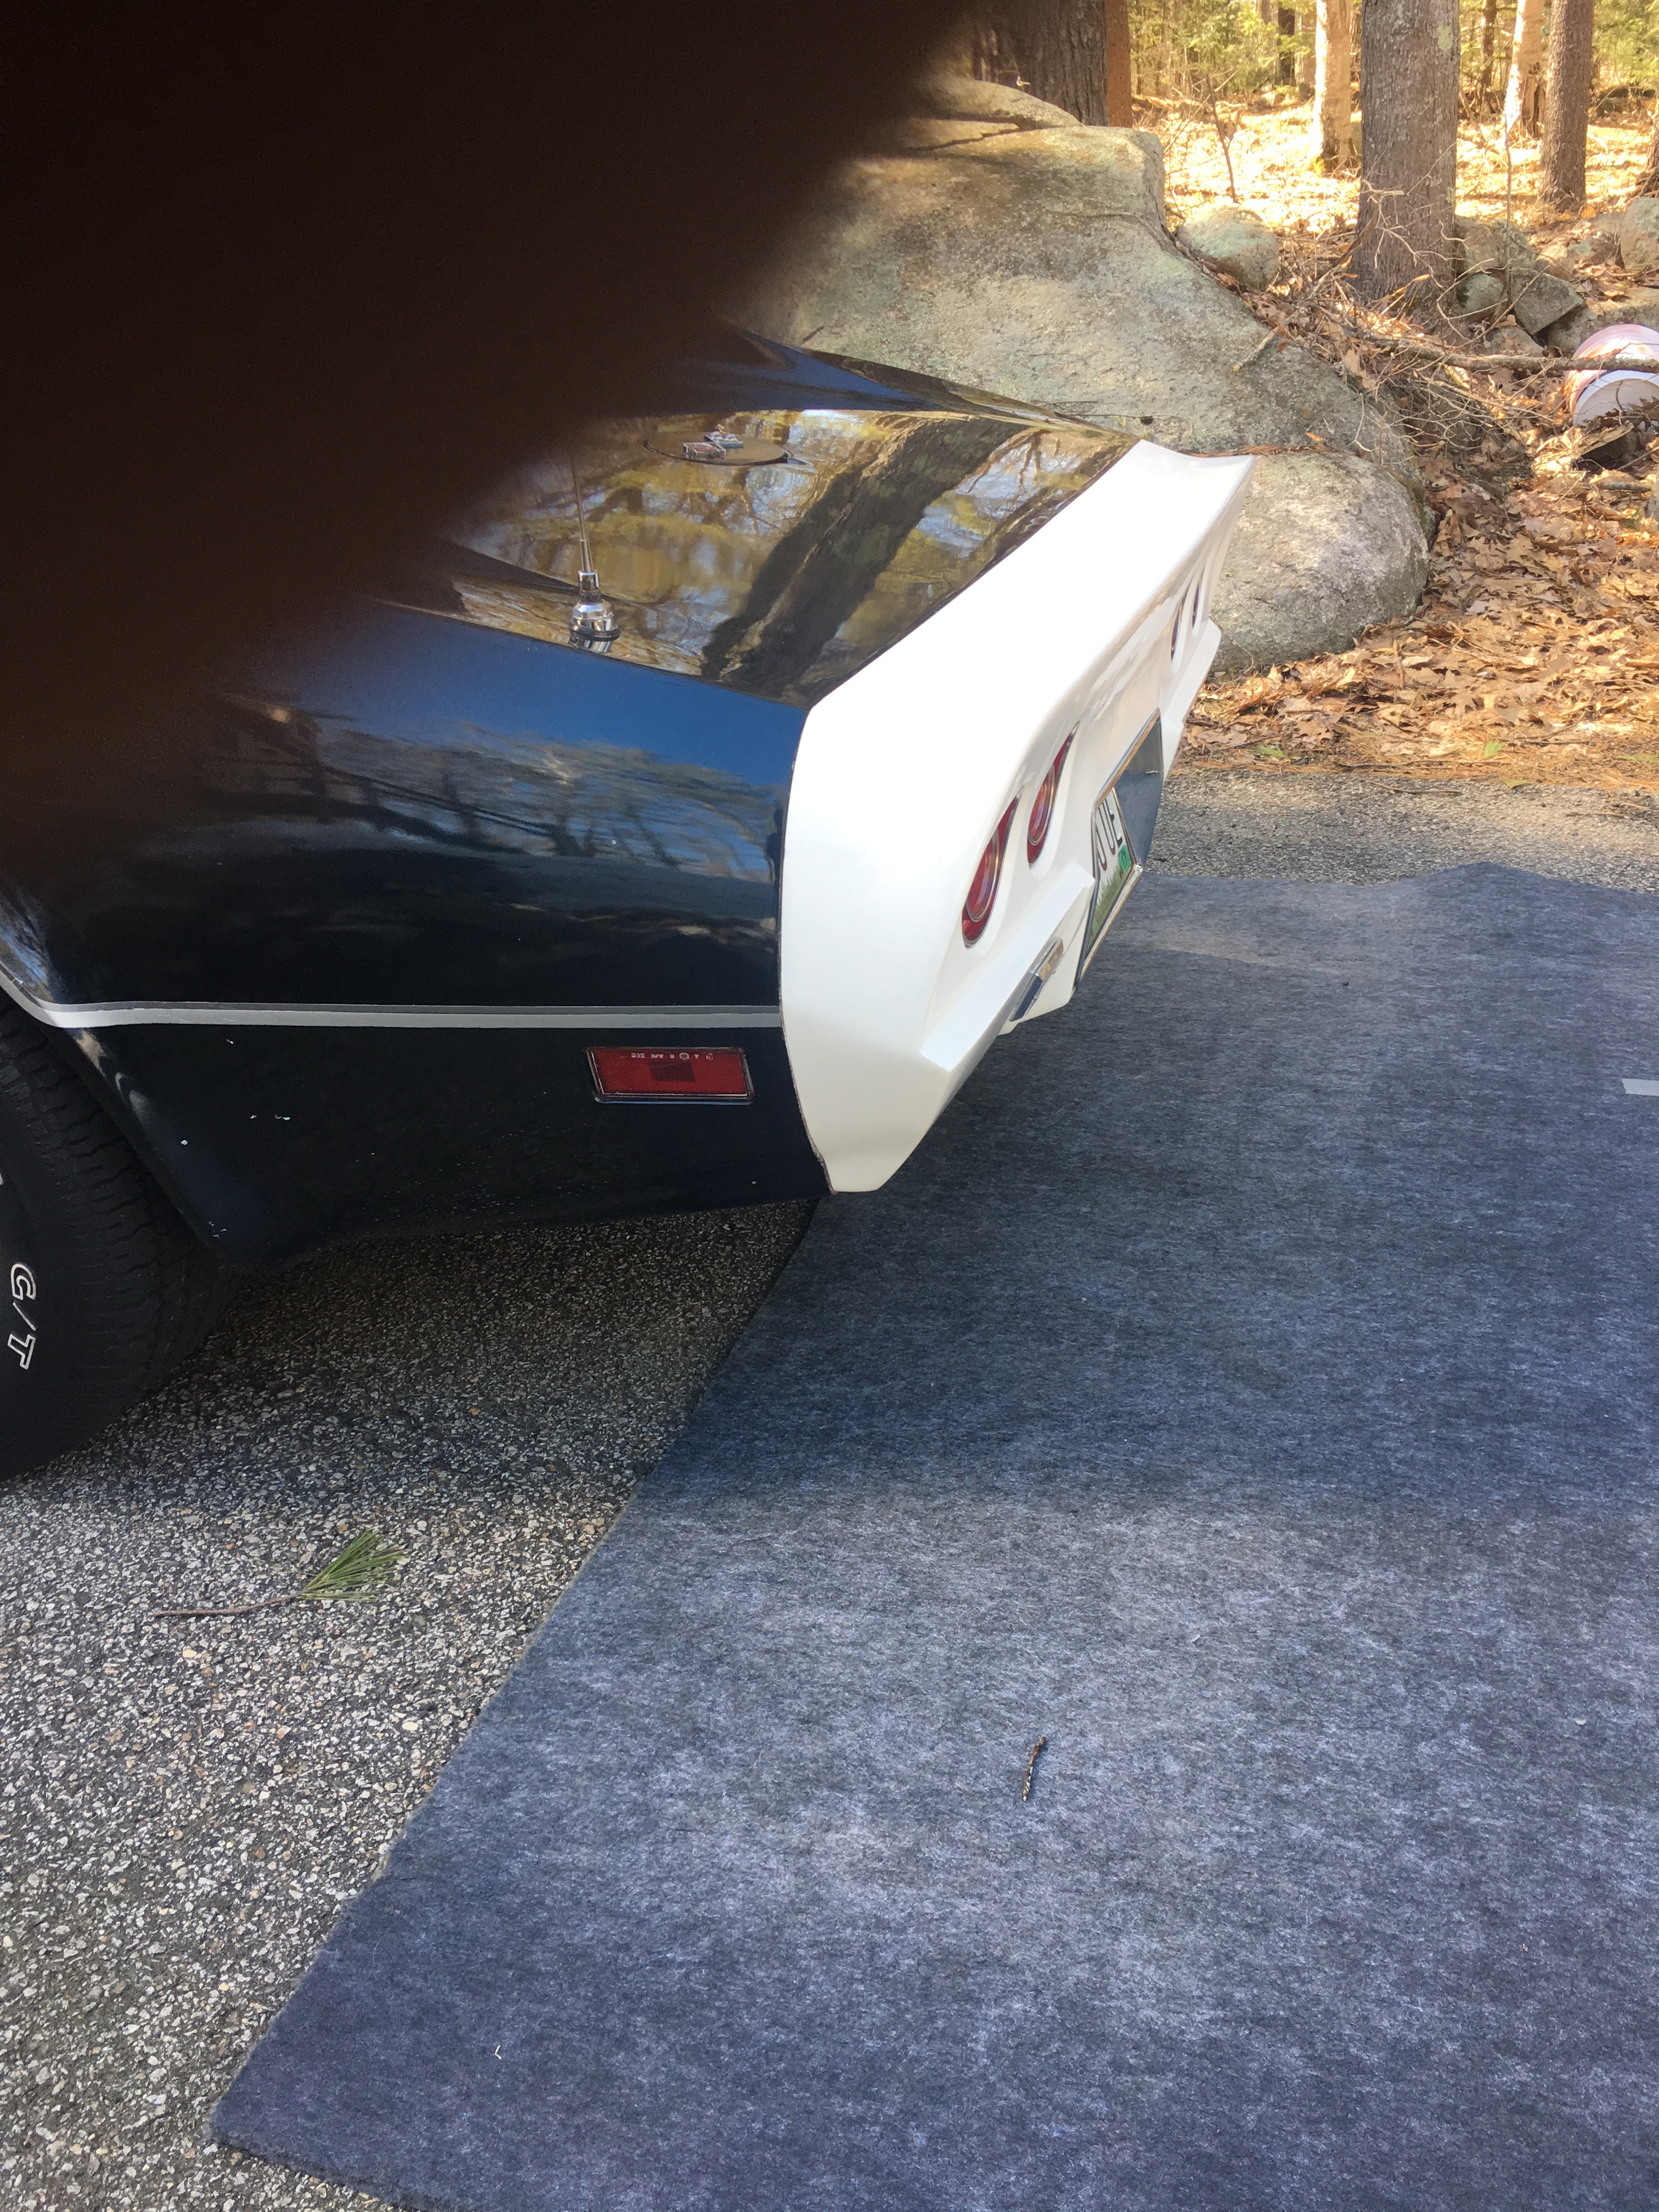
very pleased with the way these fit the body. I could actually have just left them as a bolt on but.... they are coming back off to be glued on. Next cutting the paint back and the gel coat on the and glassing in the seams for a one piece look. Not quite sure on how all the paint will look when finished my buddy is painting it for me and has some ideas with Candies, Pearls, Flakes, and Lace..... I told him I would be happy just to have the car so it looks good in one color but if he wanted to have fun go ahead. The side stripe is now gone too.
Thread Starter
Burning Brakes
Joined: Feb 2014
Posts: 1,045
Likes: 226
From: Cape Neddick Maine
2020 C3 of the Year Finalist - Modified
My hope is to show the direction I am going with this car as a true 70's style hotrod and not start any squabbles
Race Director


Joined: Mar 2003
Posts: 11,608
Likes: 780
From: Eustis ( Area 51 Bat Cave ) Fl
Squabbles from an opinion generating thread like this on the corvette forum?!
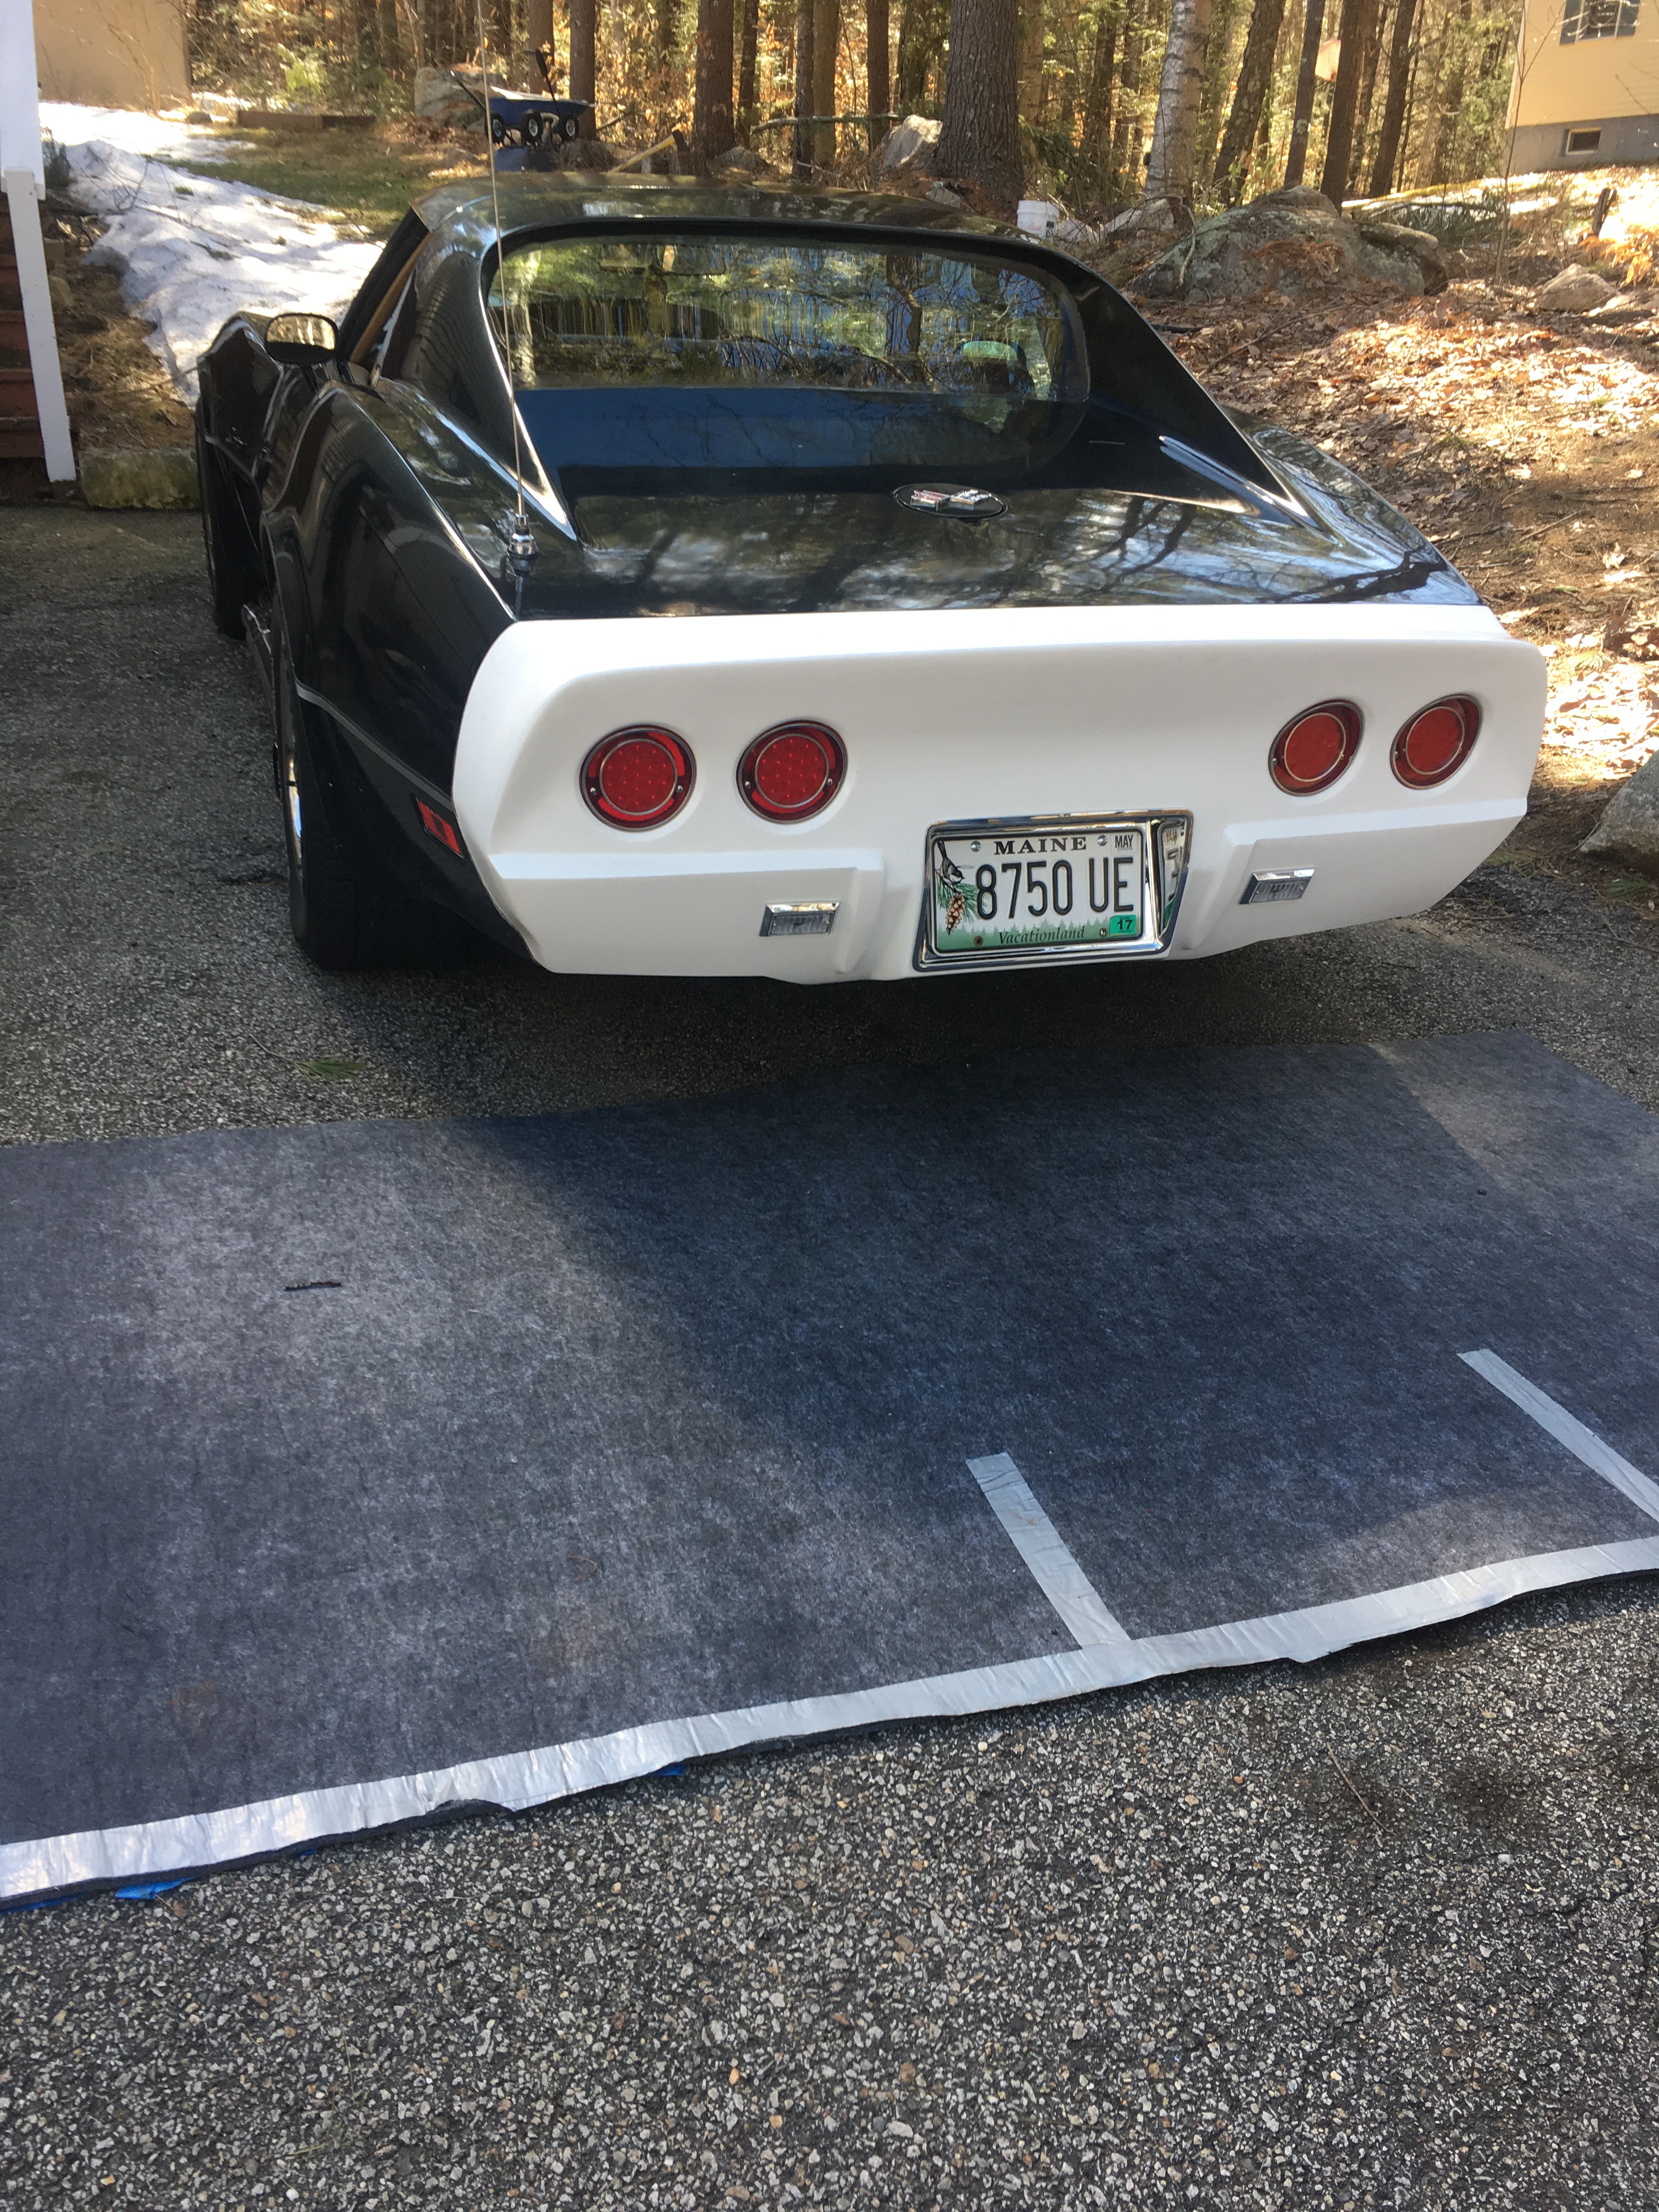
I was lucky to be along for some r&d on this conversion one thing i cant stop saying is i love that the rear stays true to the heart and soul and importantly fatory look of the ducktail and its classic shape, this type conversion has long been sought after.
A cool part is the option to glass in or a if builder desires it can be left simple bolted on..sweet.
I also will follow along as you do the glassing in and paint work, people will likely want you to build your car their way and give opinions not to do the old school paint tricks,
i will be one to go the other way to say if it suits you i hope you allow your buddy to do some old school magic,
I am guessing you will get some lectures on not to glass the parts in how it will crack or show a ghost, i am sorry some guys cant get it to work out for them but the simple fact of that is if done correctly it will not have any problems and doing it correcly isnt rocket science.
I love the fit and look and you will have a car that is going to generate a lot of conversations so get ready and hold on for the ride,
Corvette Stories
The Best of Corvette for Corvette Enthusiasts

Every 2027 Corvette Engine Explained
Joe Kucinski
Designer Imagines A Corvette That Looks More Like a Corvette Than the Corvette
Verdad Gallardo
10 Ugly Corvettes That We Still Kinda Love
Joe Kucinski
Top 10 Most Expensive Corvettes Ever Sold on Bring A Trailer
Brett Foote
10 Things Every Corvette Owner Needs (2026 Edition)
Michael S. Palmer
8 Most "Only Corvette Owners Understand" Quirks and Problems
Pouria Savadkouei
10 Reasons the C6 Z06 is Still A Performance Benchmark After 20 Years
Joe Kucinski
How Much Horsepower Every Corvette Engine "LOST" in 1972
Joe Kucinski
Top 10 DOs and DON'Ts for Protecting Your Convertible Top!
Michael S. Palmer


Thread Starter
Burning Brakes
Joined: Feb 2014
Posts: 1,045
Likes: 226
From: Cape Neddick Maine
2020 C3 of the Year Finalist - Modified
Installing these on my car was pretty straight forward. My car spent most of its life garaged and only has 80k original miles on it. The hardware all came out with ease.
Starting in the rear first I removed the vertical nuts that hold the bumper cover to the body and then the horizontal screws that held the cover along the top of the body.
Next I loosened up the bolts that are used for the bumper absorbers. There are 4 bolts on each side. I actually removed all the bolts then slid two uppers back in to keep from sliding out and hitting me in the head.
The Tail light sockets simply twist to remove and the license plate wire just unplugs.
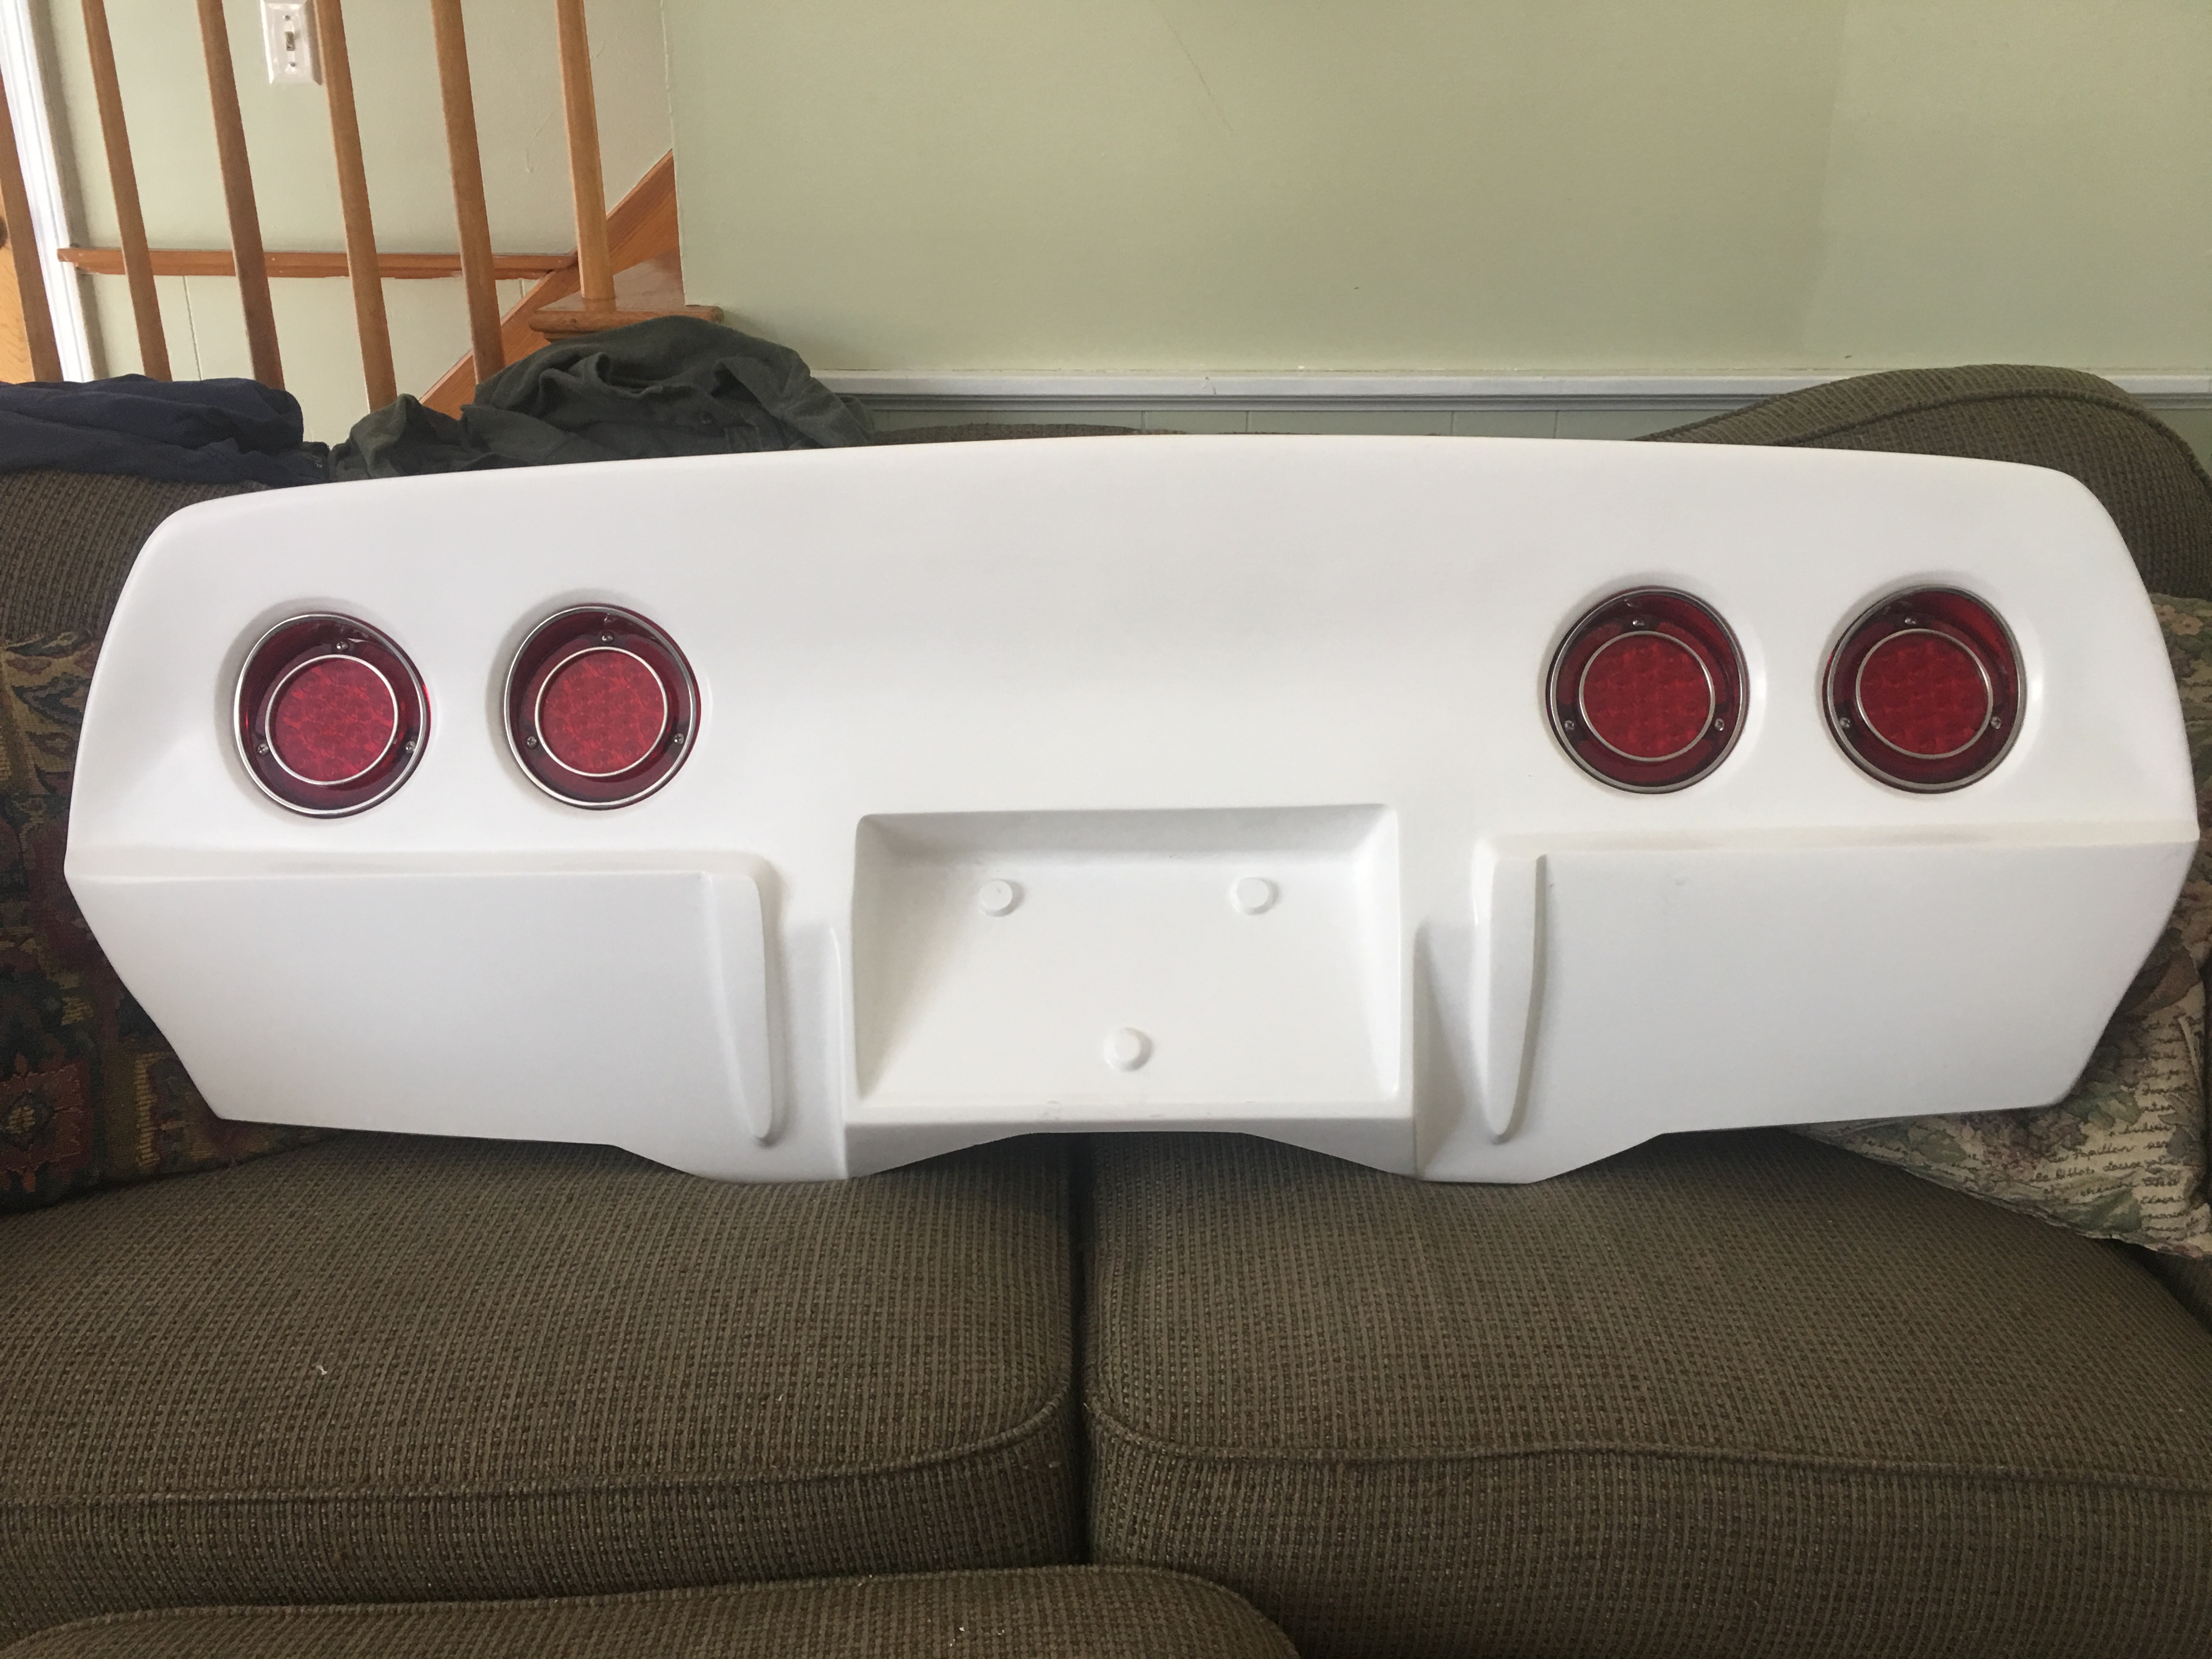
I wanted to keep with the '68 theme so I used 4 red tail lights. I was looking around for the metal cups to install the lenses into but found out most they must be made of gold due to the high prices I found...even for junk missing the studs. So I opted to go with LED lights and used the gaskets to seal them against the body. I used Stainless Steel hardware and once I had them installed where I wanted them I epoxied the nuts in place. The same for the license plate bezel and the '73 license plate light.
Now its time to mount the panel to the car. No holes are drilled to mount it but it was very easy to do. I used manila folders made an outline of the rear quarters and traced the body outline. I cutout along the outline and now taped that to the body. The mounting holes can now be marked from inside the rear quarter panel. Go back tape this to the new panel and now you have the hole location. I waited for my Daughter to come over did a trial fit and then went from under the car and marked the top holes. I was able to used the stock bumper mounting strips along the top and sides.
I don't use a spare carrier so if you decide to do this you may want to remove it. Another neat thing is the LED lights plug right into the stock harness I bought adapter harness' to plug into the 1156 backup lights and used Weather pack connections. No butt splices or half a$$ed looking wiring.
To answer a few comments and questions...Yes the stock impact bars are removed. Yes you can probably fab something up and I probably
will.
more to come I welcome all positive comments.
Starting in the rear first I removed the vertical nuts that hold the bumper cover to the body and then the horizontal screws that held the cover along the top of the body.
Next I loosened up the bolts that are used for the bumper absorbers. There are 4 bolts on each side. I actually removed all the bolts then slid two uppers back in to keep from sliding out and hitting me in the head.
The Tail light sockets simply twist to remove and the license plate wire just unplugs.
I wanted to keep with the '68 theme so I used 4 red tail lights. I was looking around for the metal cups to install the lenses into but found out most they must be made of gold due to the high prices I found...even for junk missing the studs. So I opted to go with LED lights and used the gaskets to seal them against the body. I used Stainless Steel hardware and once I had them installed where I wanted them I epoxied the nuts in place. The same for the license plate bezel and the '73 license plate light.
Now its time to mount the panel to the car. No holes are drilled to mount it but it was very easy to do. I used manila folders made an outline of the rear quarters and traced the body outline. I cutout along the outline and now taped that to the body. The mounting holes can now be marked from inside the rear quarter panel. Go back tape this to the new panel and now you have the hole location. I waited for my Daughter to come over did a trial fit and then went from under the car and marked the top holes. I was able to used the stock bumper mounting strips along the top and sides.
I don't use a spare carrier so if you decide to do this you may want to remove it. Another neat thing is the LED lights plug right into the stock harness I bought adapter harness' to plug into the 1156 backup lights and used Weather pack connections. No butt splices or half a$$ed looking wiring.
To answer a few comments and questions...Yes the stock impact bars are removed. Yes you can probably fab something up and I probably
will.
more to come I welcome all positive comments.
Thread Starter
Burning Brakes
Joined: Feb 2014
Posts: 1,045
Likes: 226
From: Cape Neddick Maine
2020 C3 of the Year Finalist - Modified
One other thing is you will need add two braces for the panel. GM used these that attached behind the license plate area and up to the frame.

Le Mans Master

Joined: May 2008
Posts: 9,063
Likes: 2,736
2022 C3 of the Year Finalist - Modified
I am curious about the front and how the center license plate area is dealt with....or is it all wide open? Kind cool looking wide open, but would need some type grille work.??
Thread Starter
Burning Brakes
Joined: Feb 2014
Posts: 1,045
Likes: 226
From: Cape Neddick Maine
2020 C3 of the Year Finalist - Modified
A center section is provided so you can make your own grill slats or keep the center open.
I will probably fab a complete custom grill from s/s bar stock and mount the directional lights behind it so to keep the front totally clean looking.
Thread Starter
Burning Brakes
Joined: Feb 2014
Posts: 1,045
Likes: 226
From: Cape Neddick Maine
2020 C3 of the Year Finalist - Modified
I am fortunate that I have a USA-1 plate on the front and only a rear plate and haven't had problems....Thanks I may have jinxed myself now.
Thread Starter
Burning Brakes
Joined: Feb 2014
Posts: 1,045
Likes: 226
From: Cape Neddick Maine
2020 C3 of the Year Finalist - Modified
